How to connect Google Service Account to Stape
With the help of a Google Service Account connected to Stape, you integrate server Google Tag Manager with BigQuery and Firestore. This blog post will show how to create a Google Service Account and connect it to your Stape container.
| Related: Server-side tracking GTM. |
What is Google Service Account, and what possibilities does it bring to sGTM?
Google Service Accounts can be used by applications to make authorized API calls. With the help of a Google Service Account connected to the sGTM container, it is possible to integrate BigQuery and Firestore with server GTM.
To create a Google Service account, you will need to have a Google Cloud Platform account and generate an Access Key. The service account JSON key file must be added to an sGTM container power-up in Stape to authenticate with these services.
Firestore is a database that can write/read or sync data. It can be used to enrich data sent using server-side tags. For example, with the help of user ID, you can extract additional user data from Firestore and send more user parameters to Facebook CAPI, which will increase the FB event match quality score.
To simplify integration, Google released the Firestore Lookup variable. With the help of this variable, you can extract specific values from the Firestore document. The only disadvantage is that Firestore is not a free service - check the price here.
Using server Google Tag Manager, it’s possible to write data directly to BigQuery from sGTM Tag or Client. Previously BigQuery integration was only available for 360 users. With the release of sGTM and GA4, all users can send data to BigQuery for free or cheaper than before. BigQuery is also not free - check its pricing here.
How to connect Google Service Account to Stape?
Step 1 | Activate the power-up
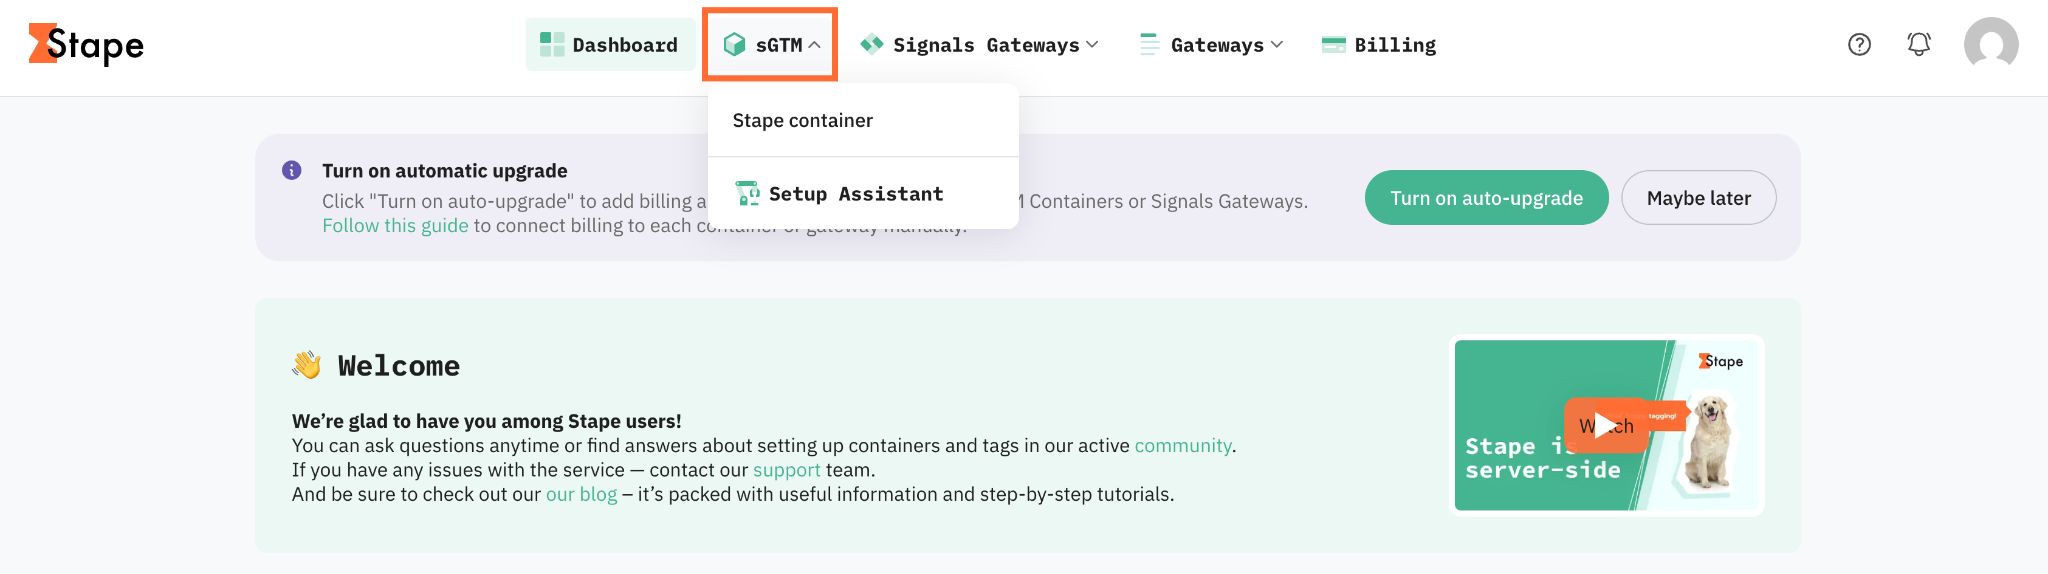
1. Log in to your Stape account and select your sGTM container from the dashboard.
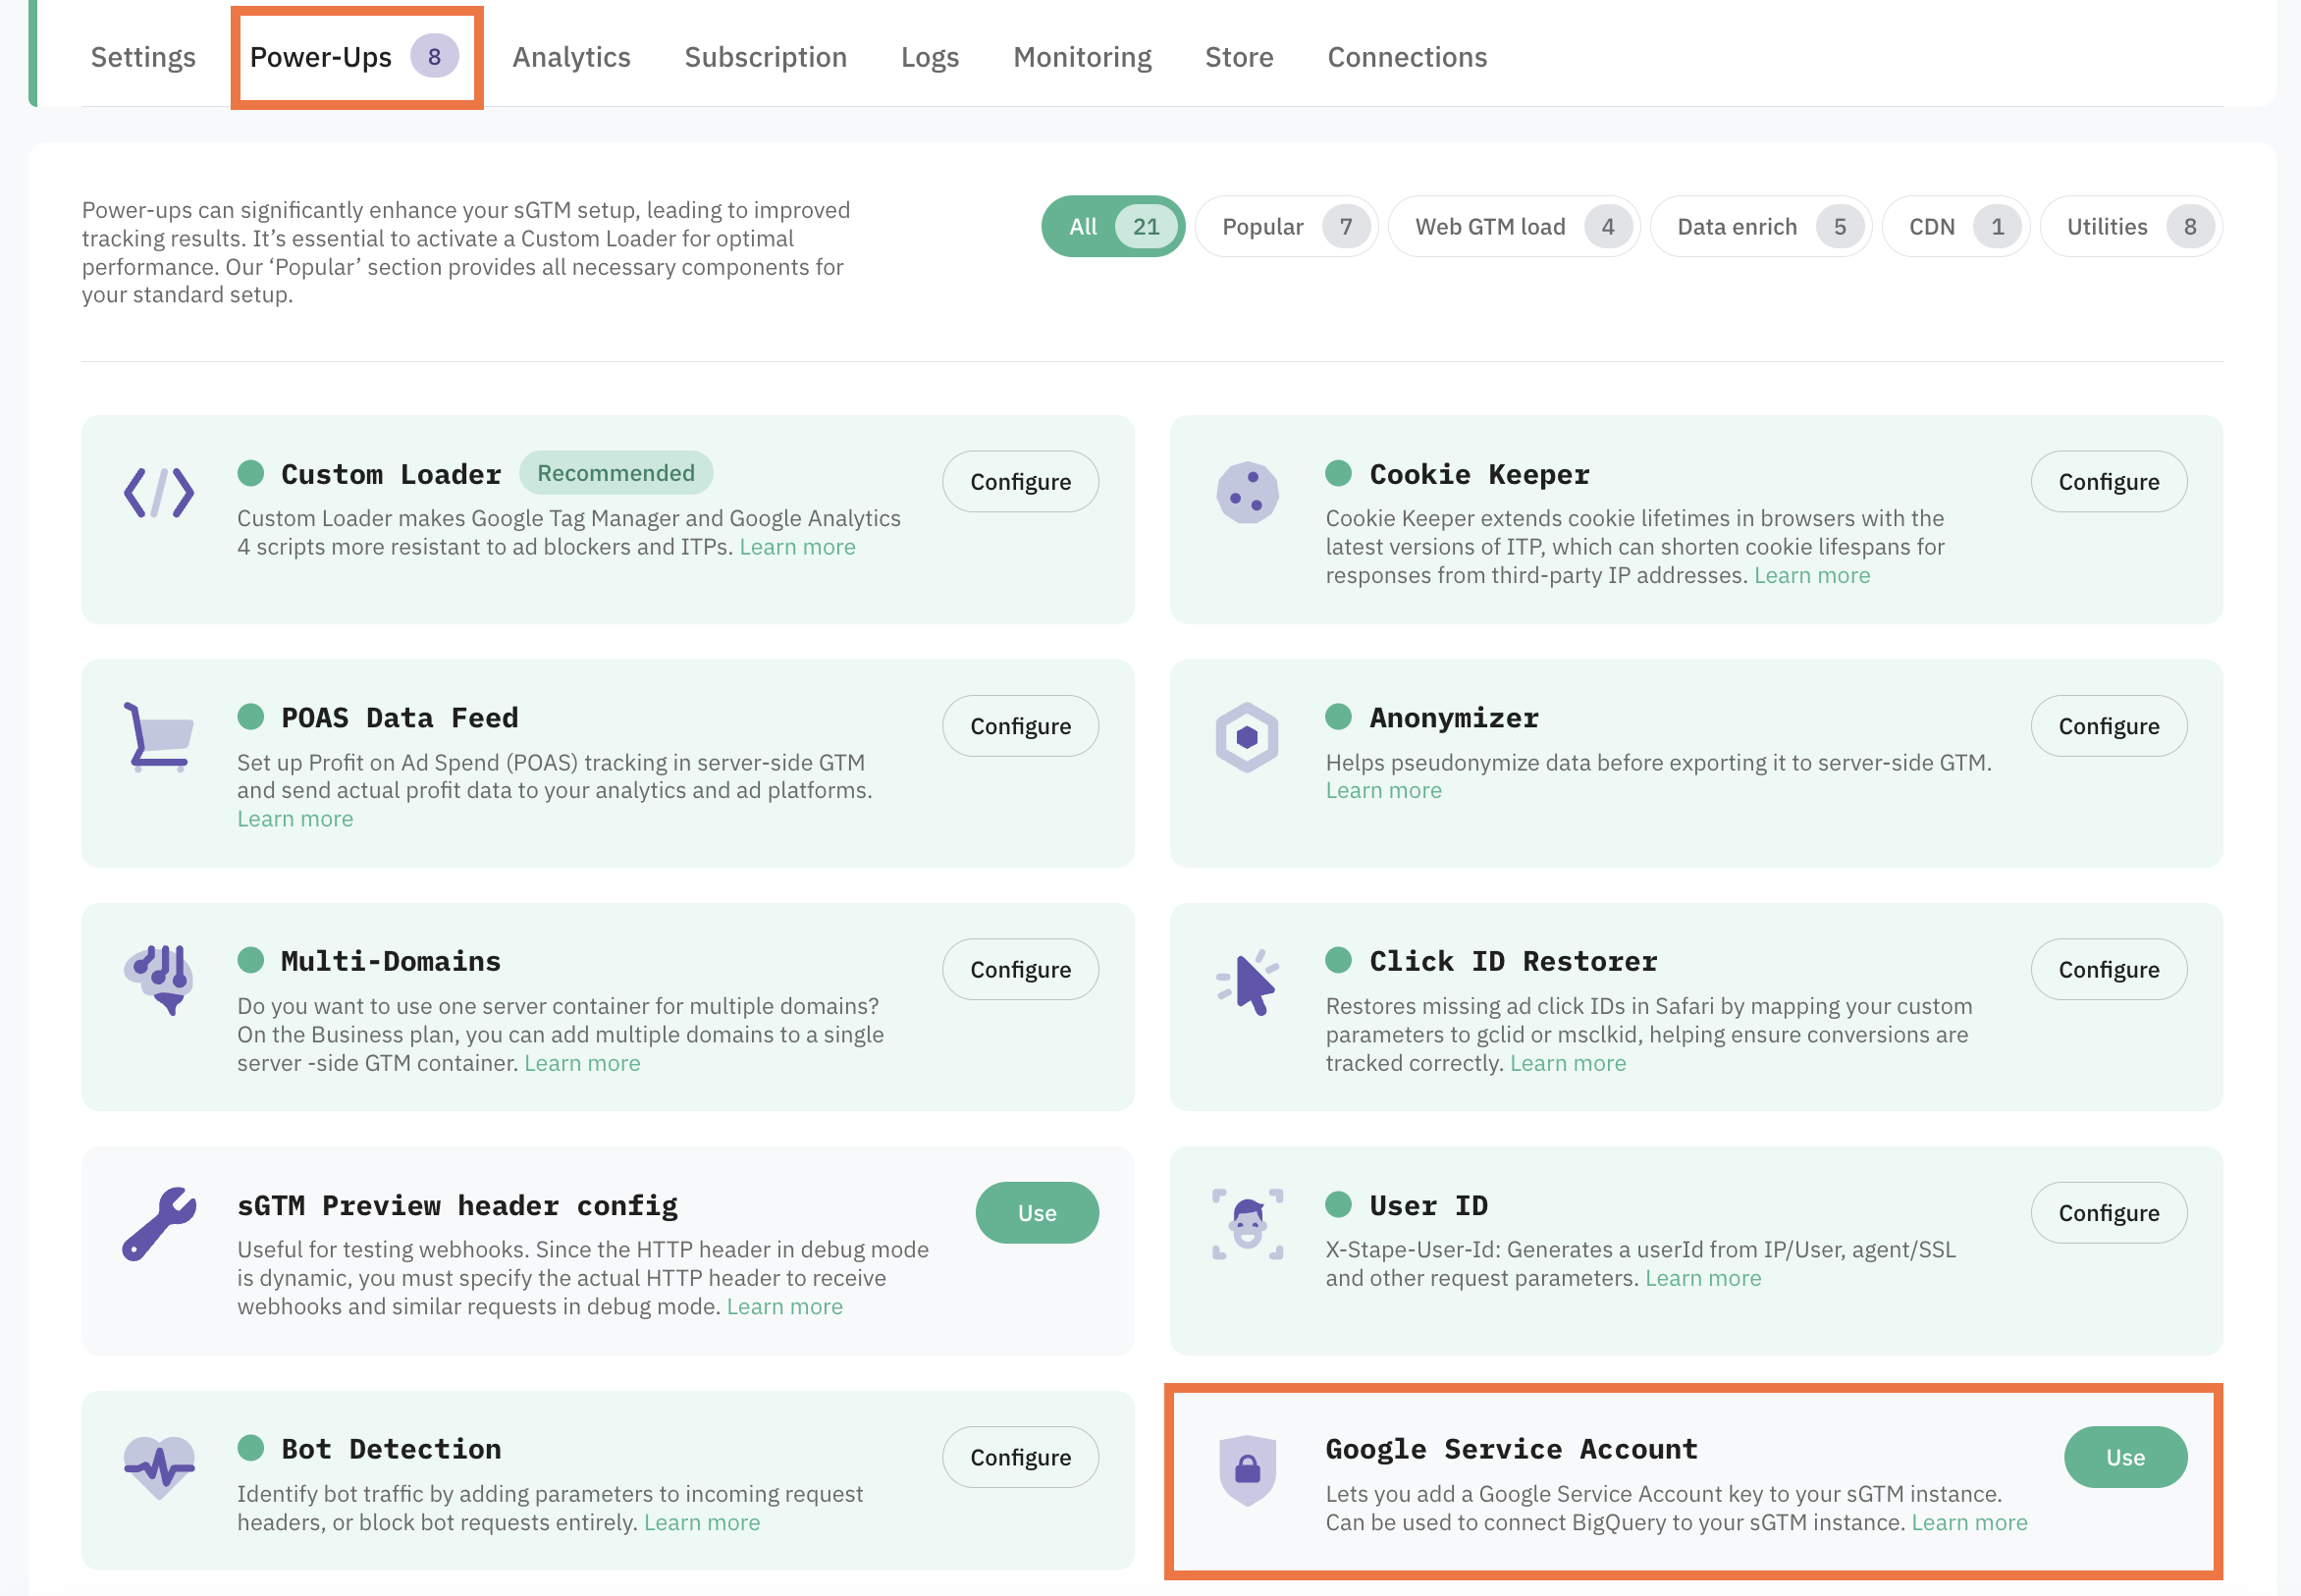
2. Go to Power-ups and click Use next to the Google Service Account panel.
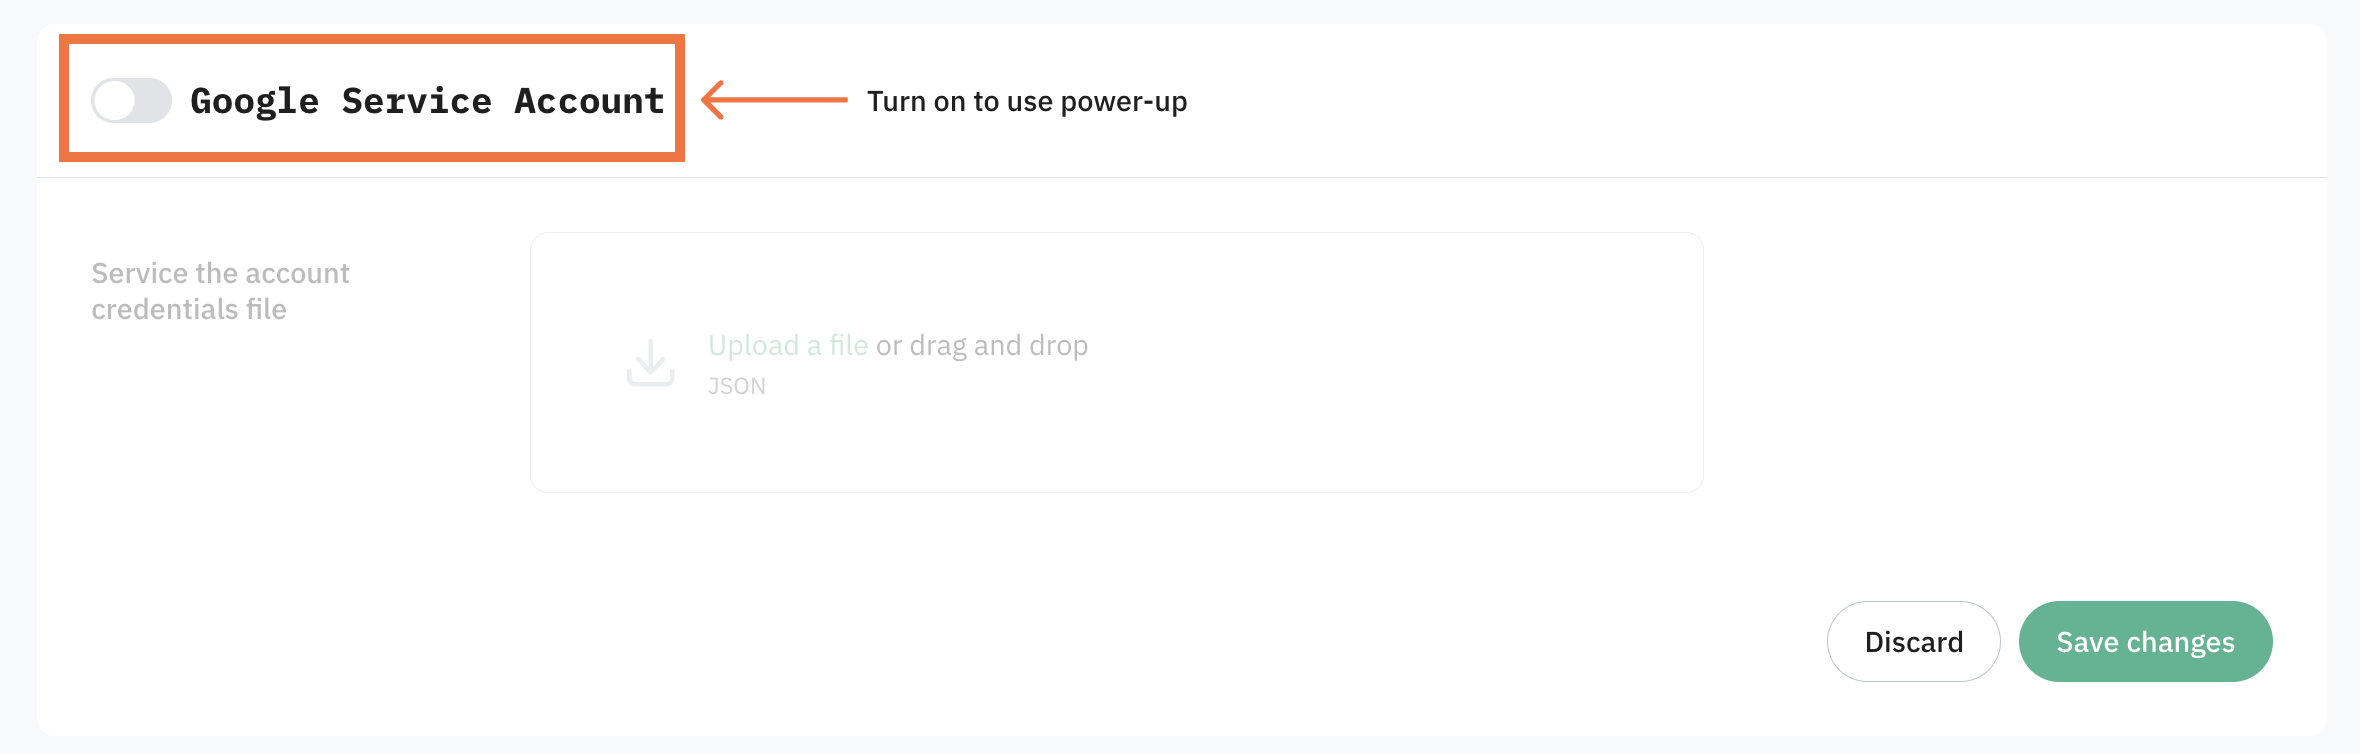
3. Toggle the Google Service Account switch to enable it.
Step 2 | Obtain the service account credentials file
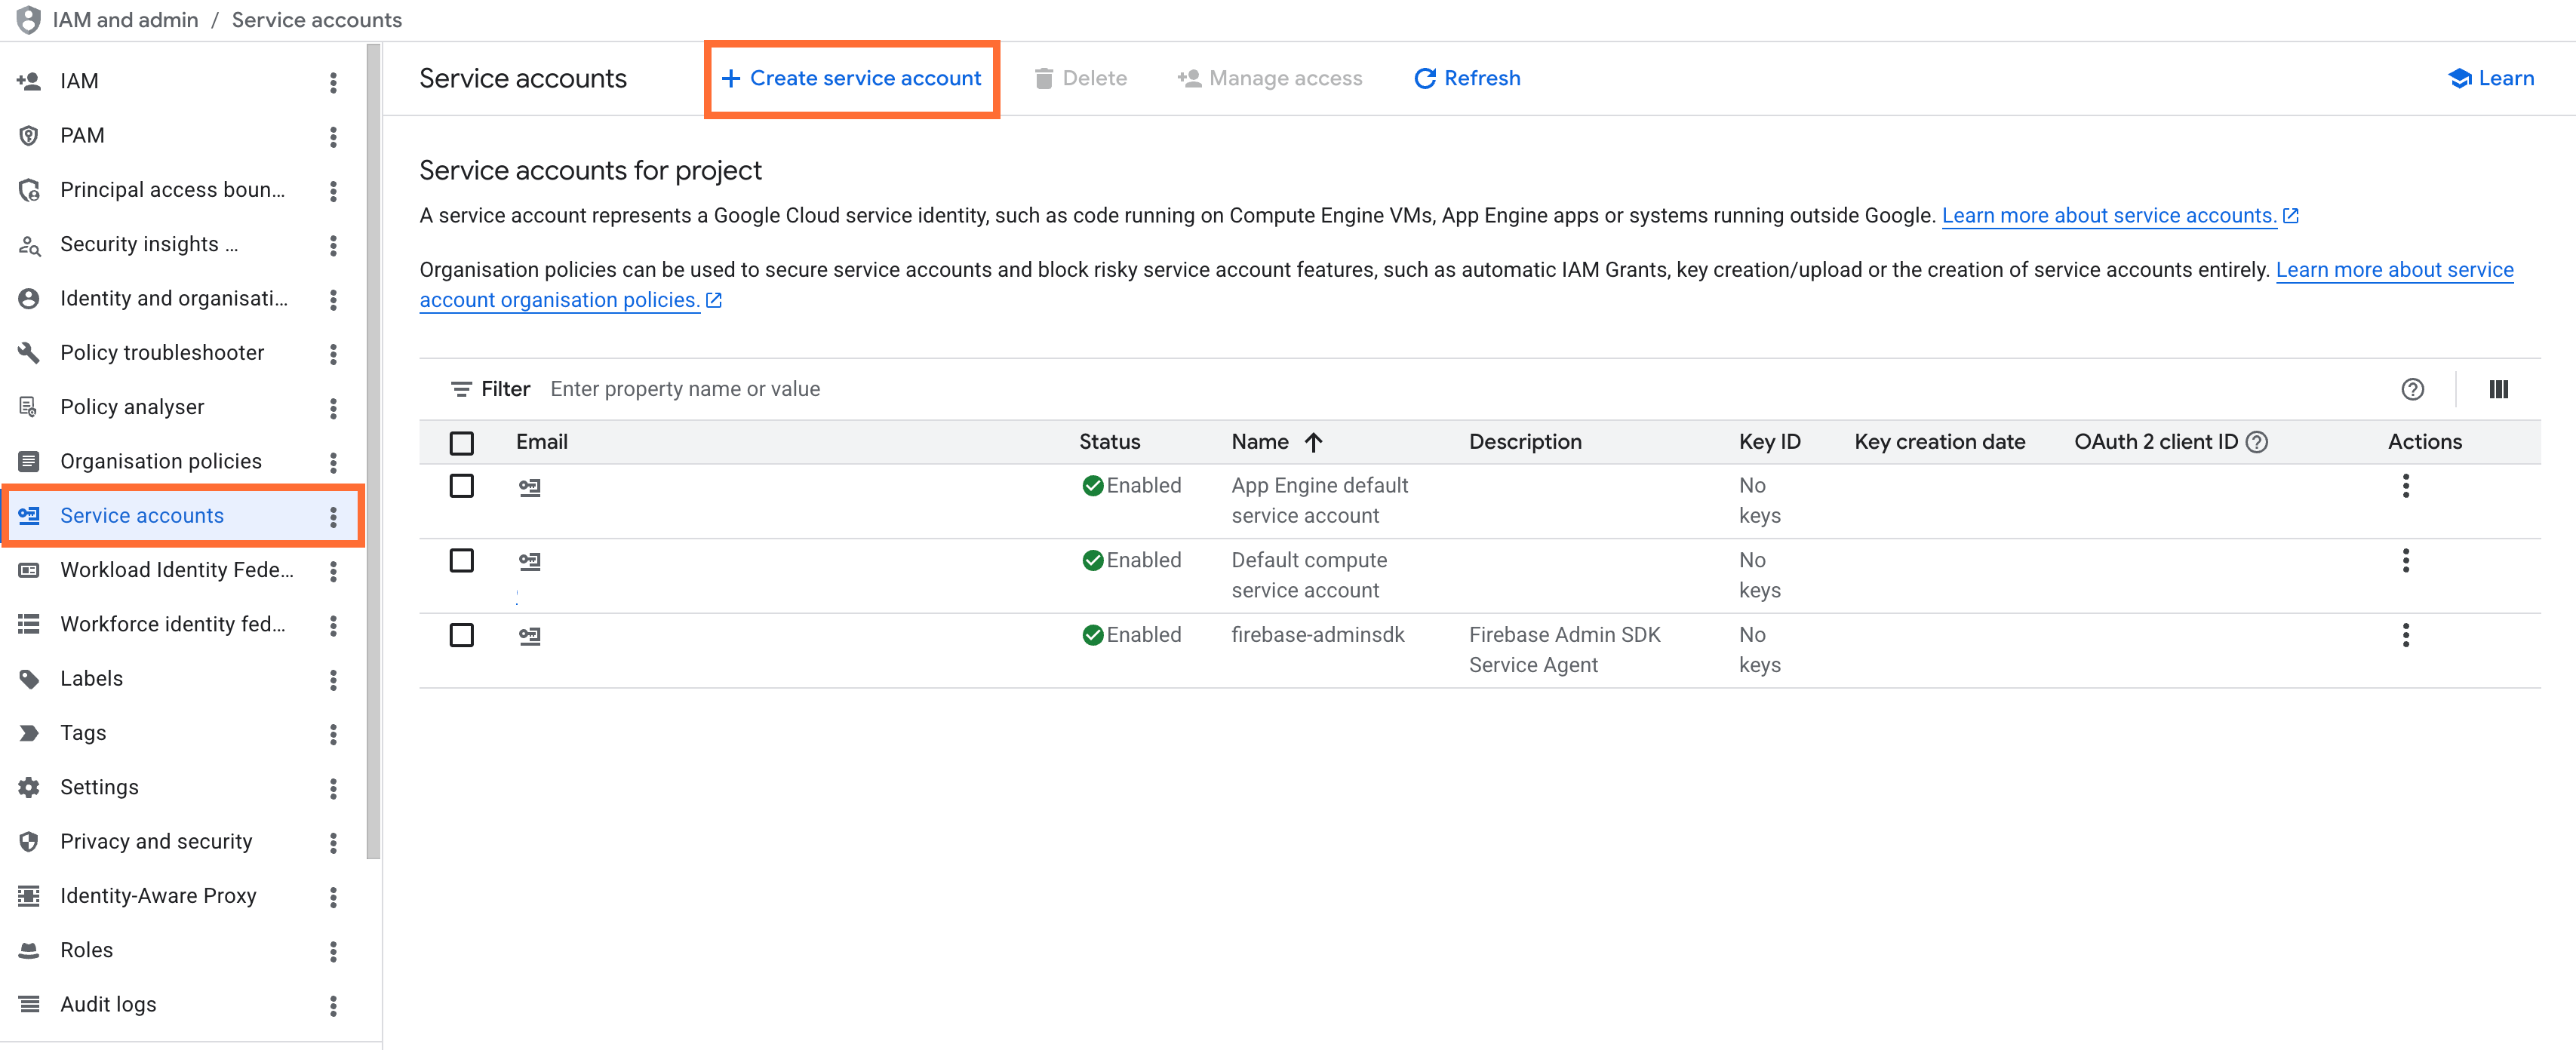
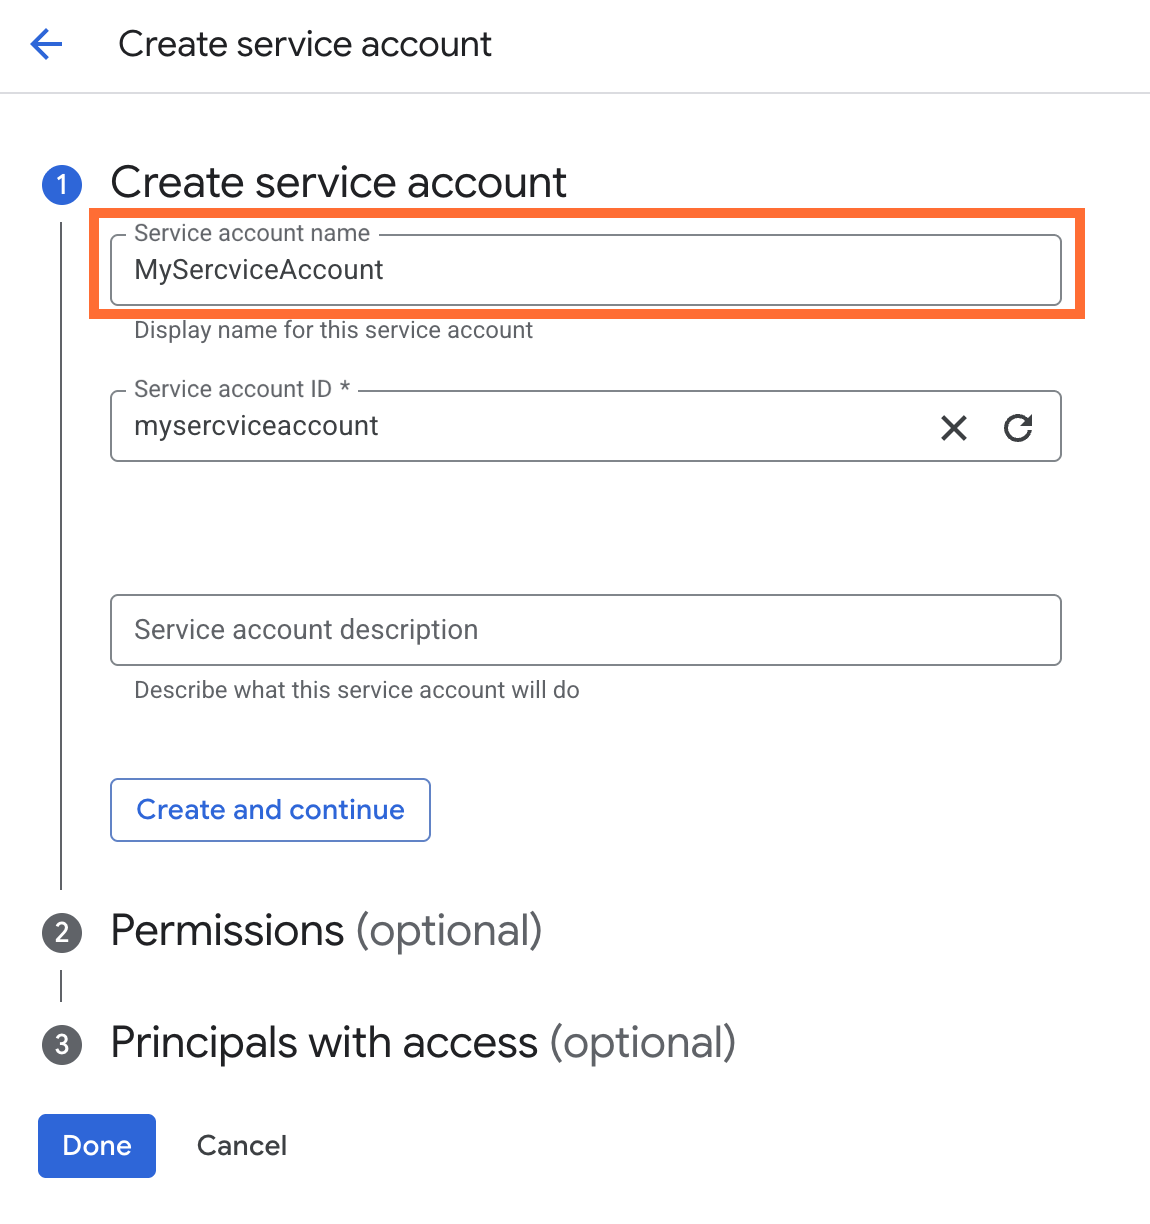
1. Open the Google Cloud Console and go to IAM & Admin → Service Accounts. Click Create service account.
2. Enter a name, and click Create and continue.
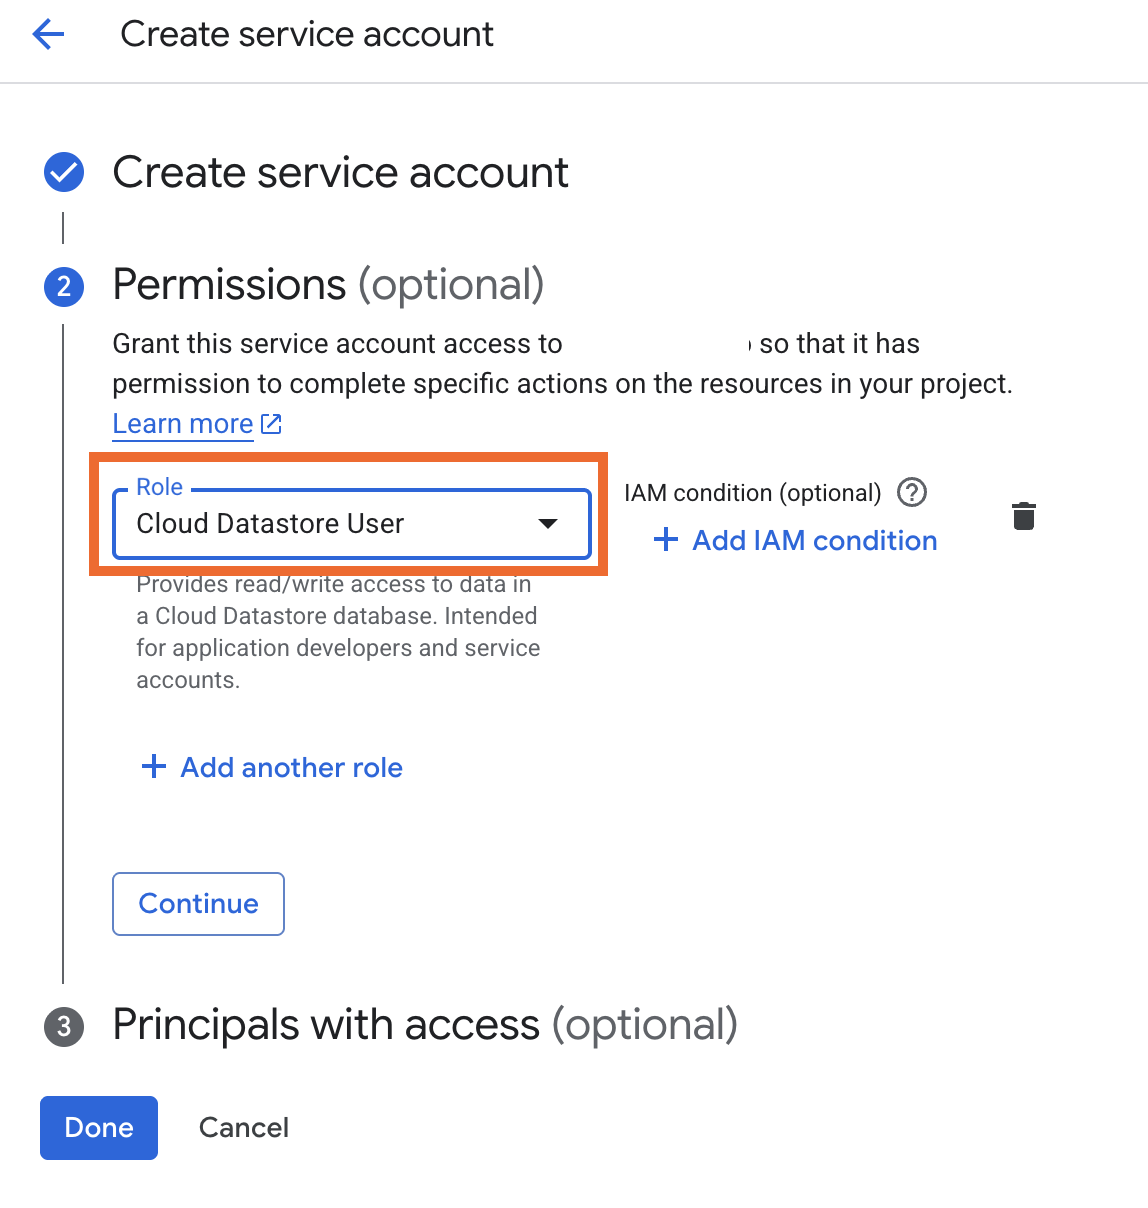
3. Assign the appropriate role:
- BigQuery Data Editor for BigQuery access
- Cloud Datastore User for Firestore access
- Both roles if you need access to both services
4. Click Continue and Done.
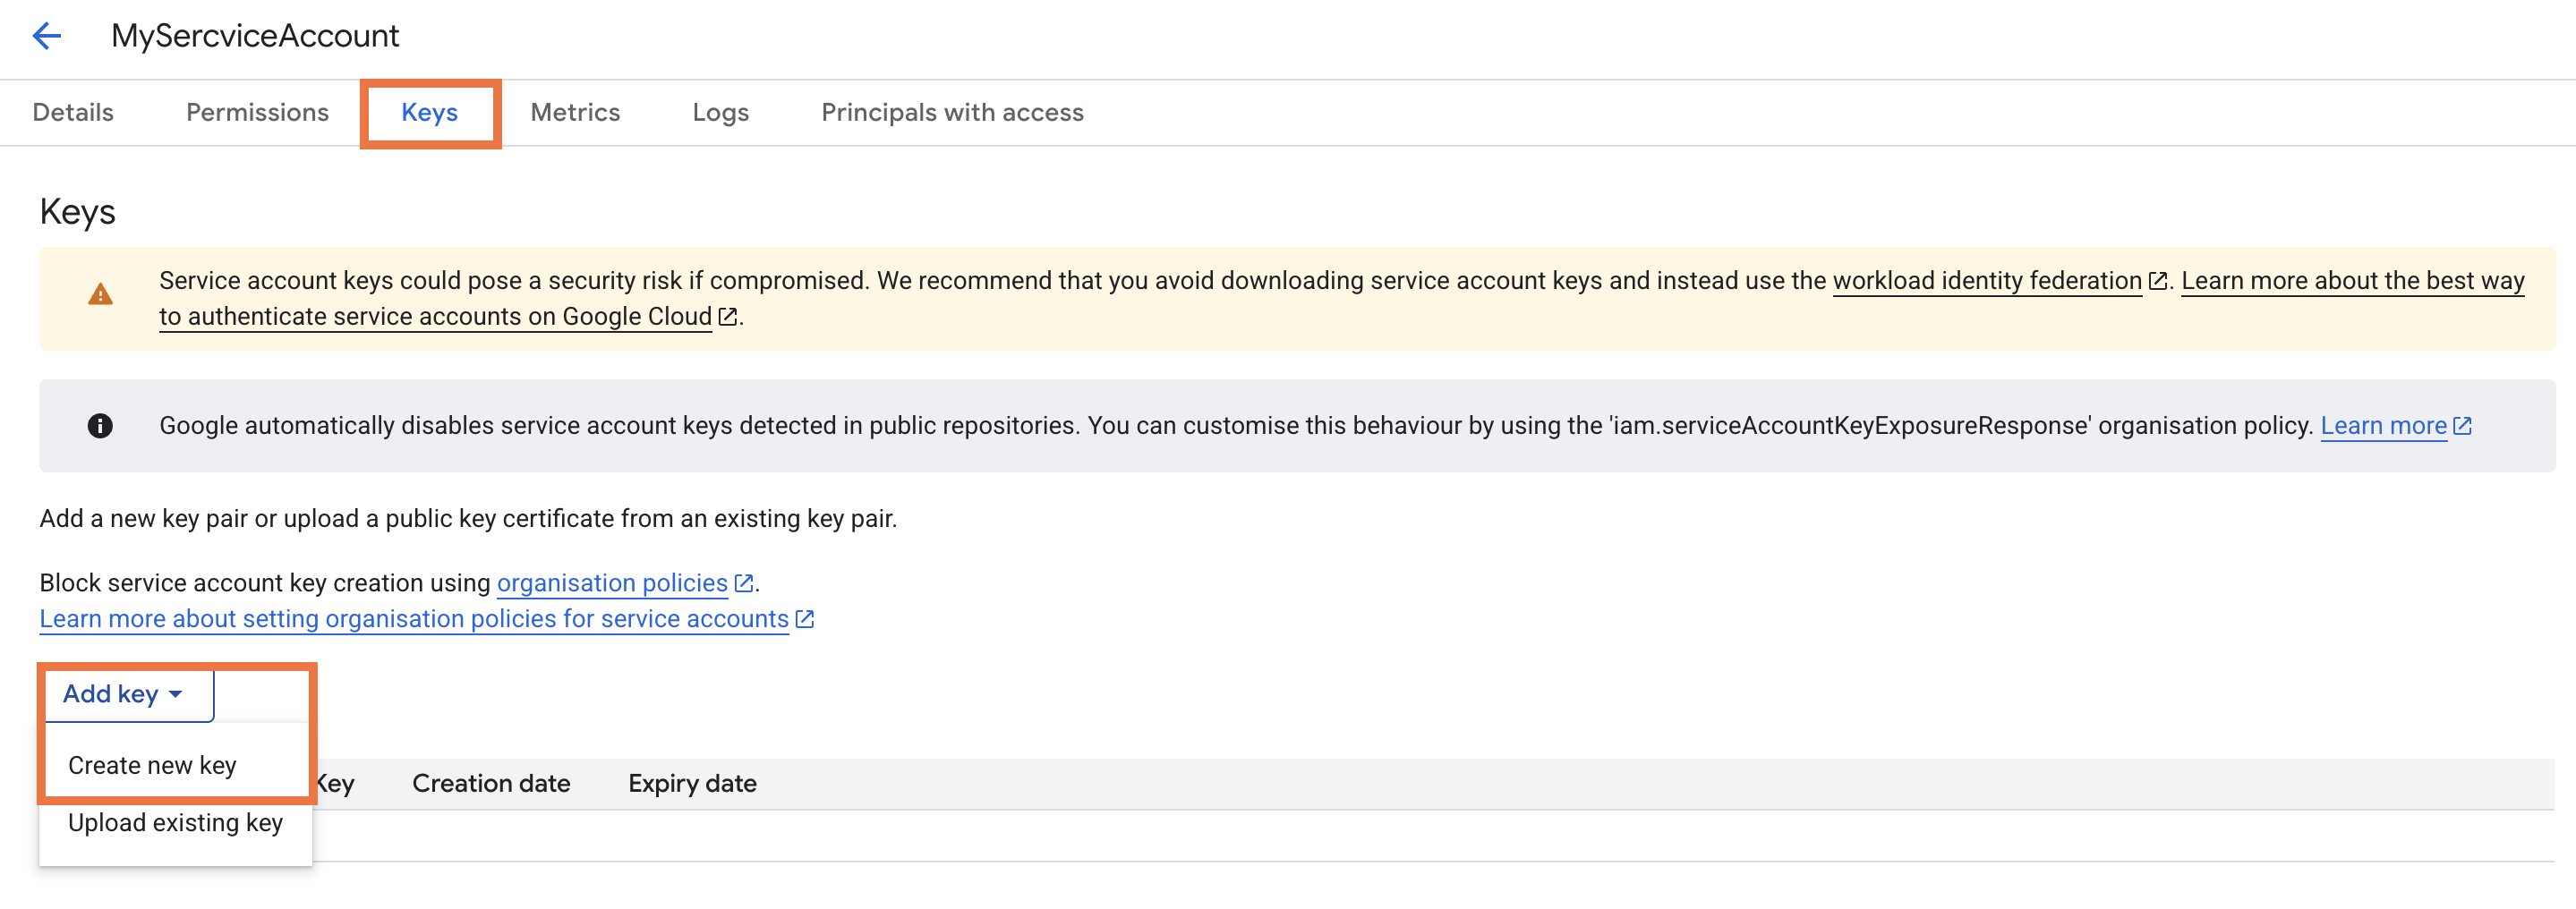
5. Click the newly created account, open the Keys tab, then click Add key → Create new key.
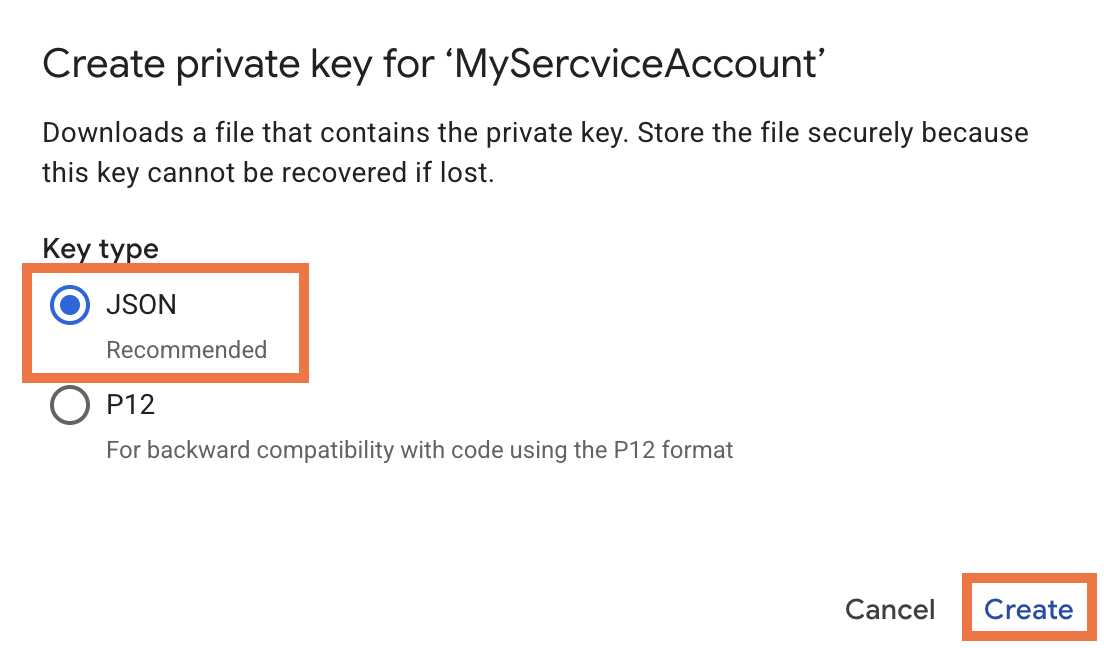
6. In the pop-up, select JSON and click Create. A JSON file will download to your computer.
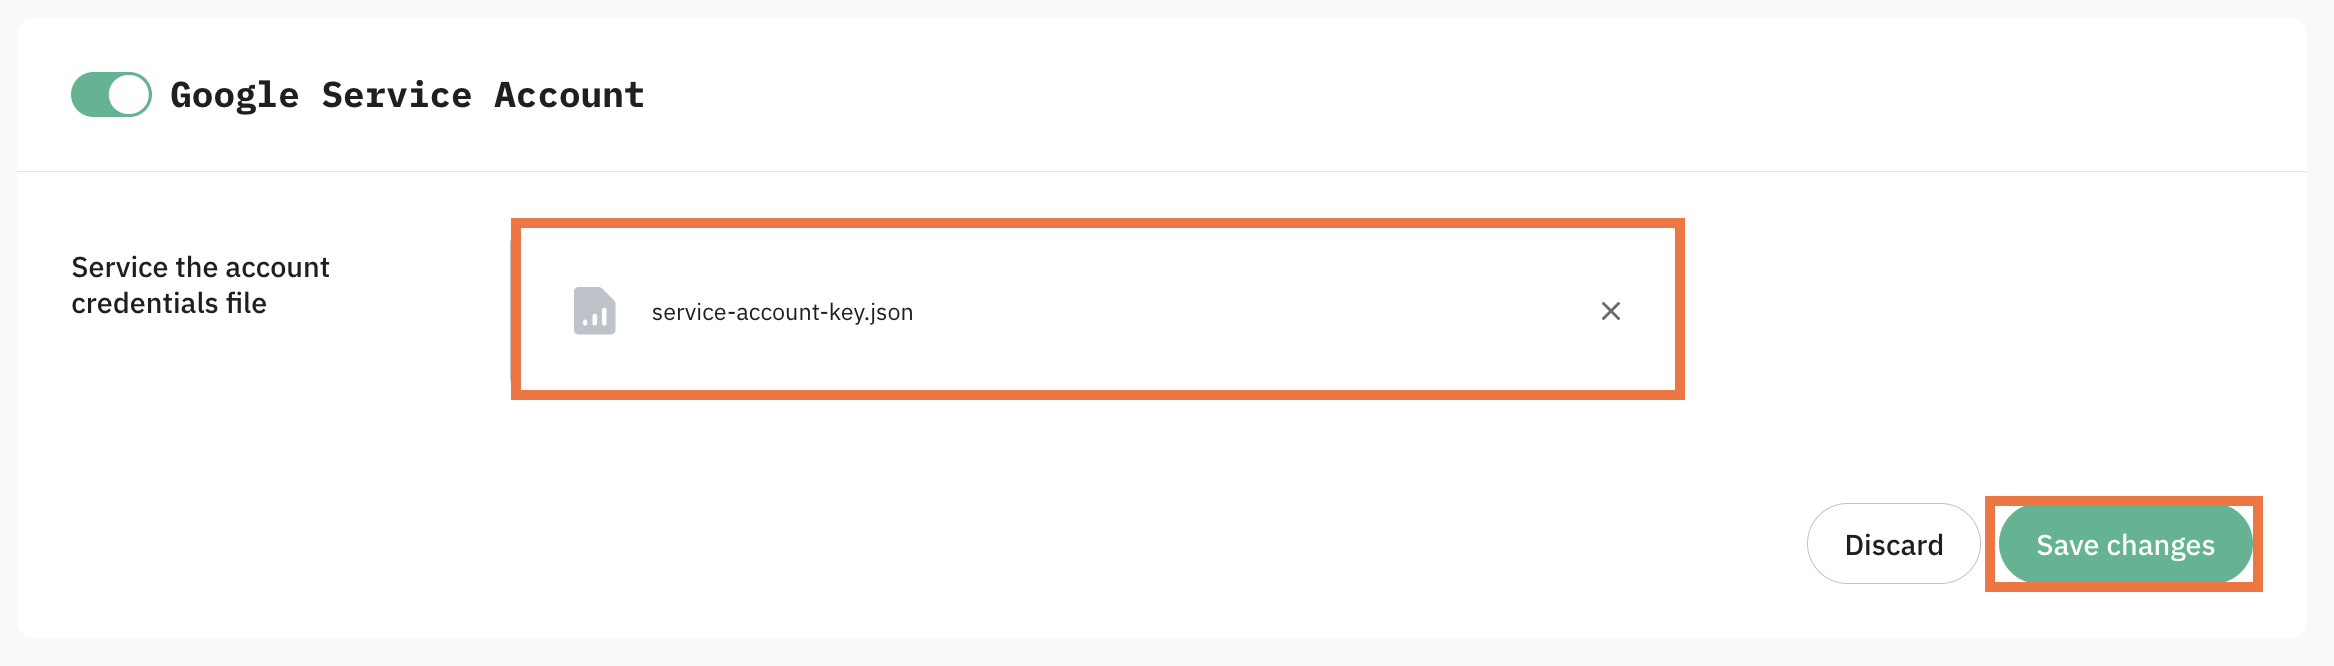
7. Back in Stape, click Select file and upload the JSON file you downloaded.
8. Click Save changes.
Step 3 | Set up Google Cloud Services
BigQuery setup
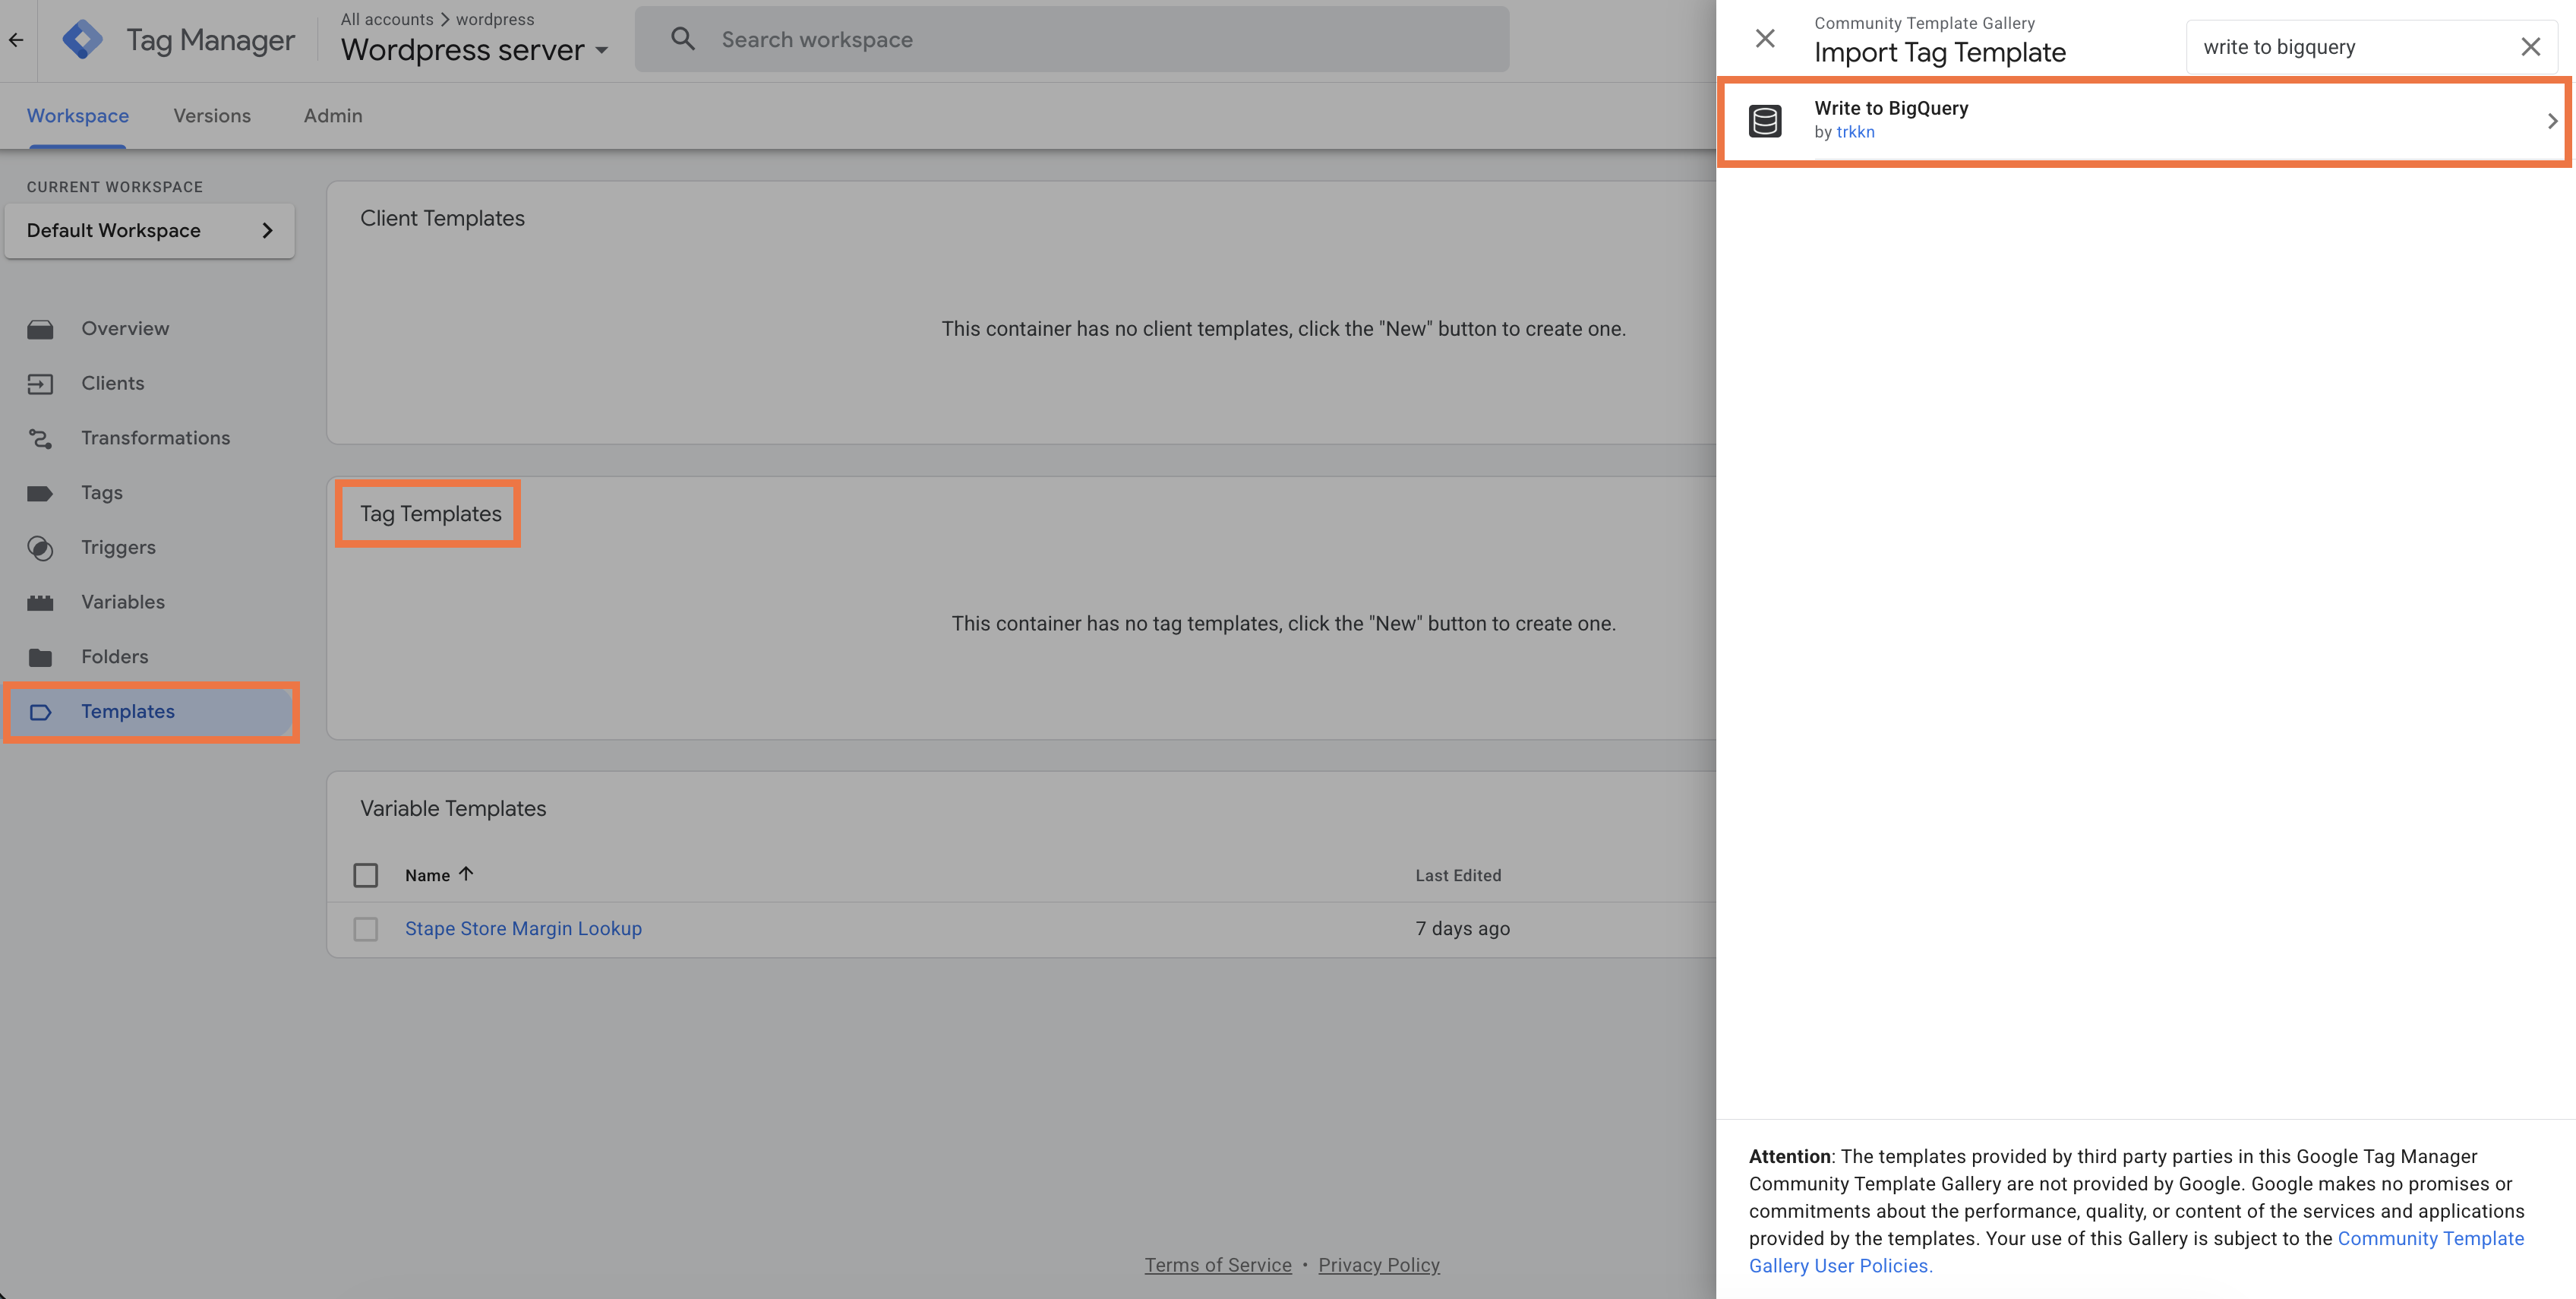
1. In your sGTM container, open Templates, click Search Gallery, and add the Write to BigQuery tag from the Template Gallery or import it from GitHub.
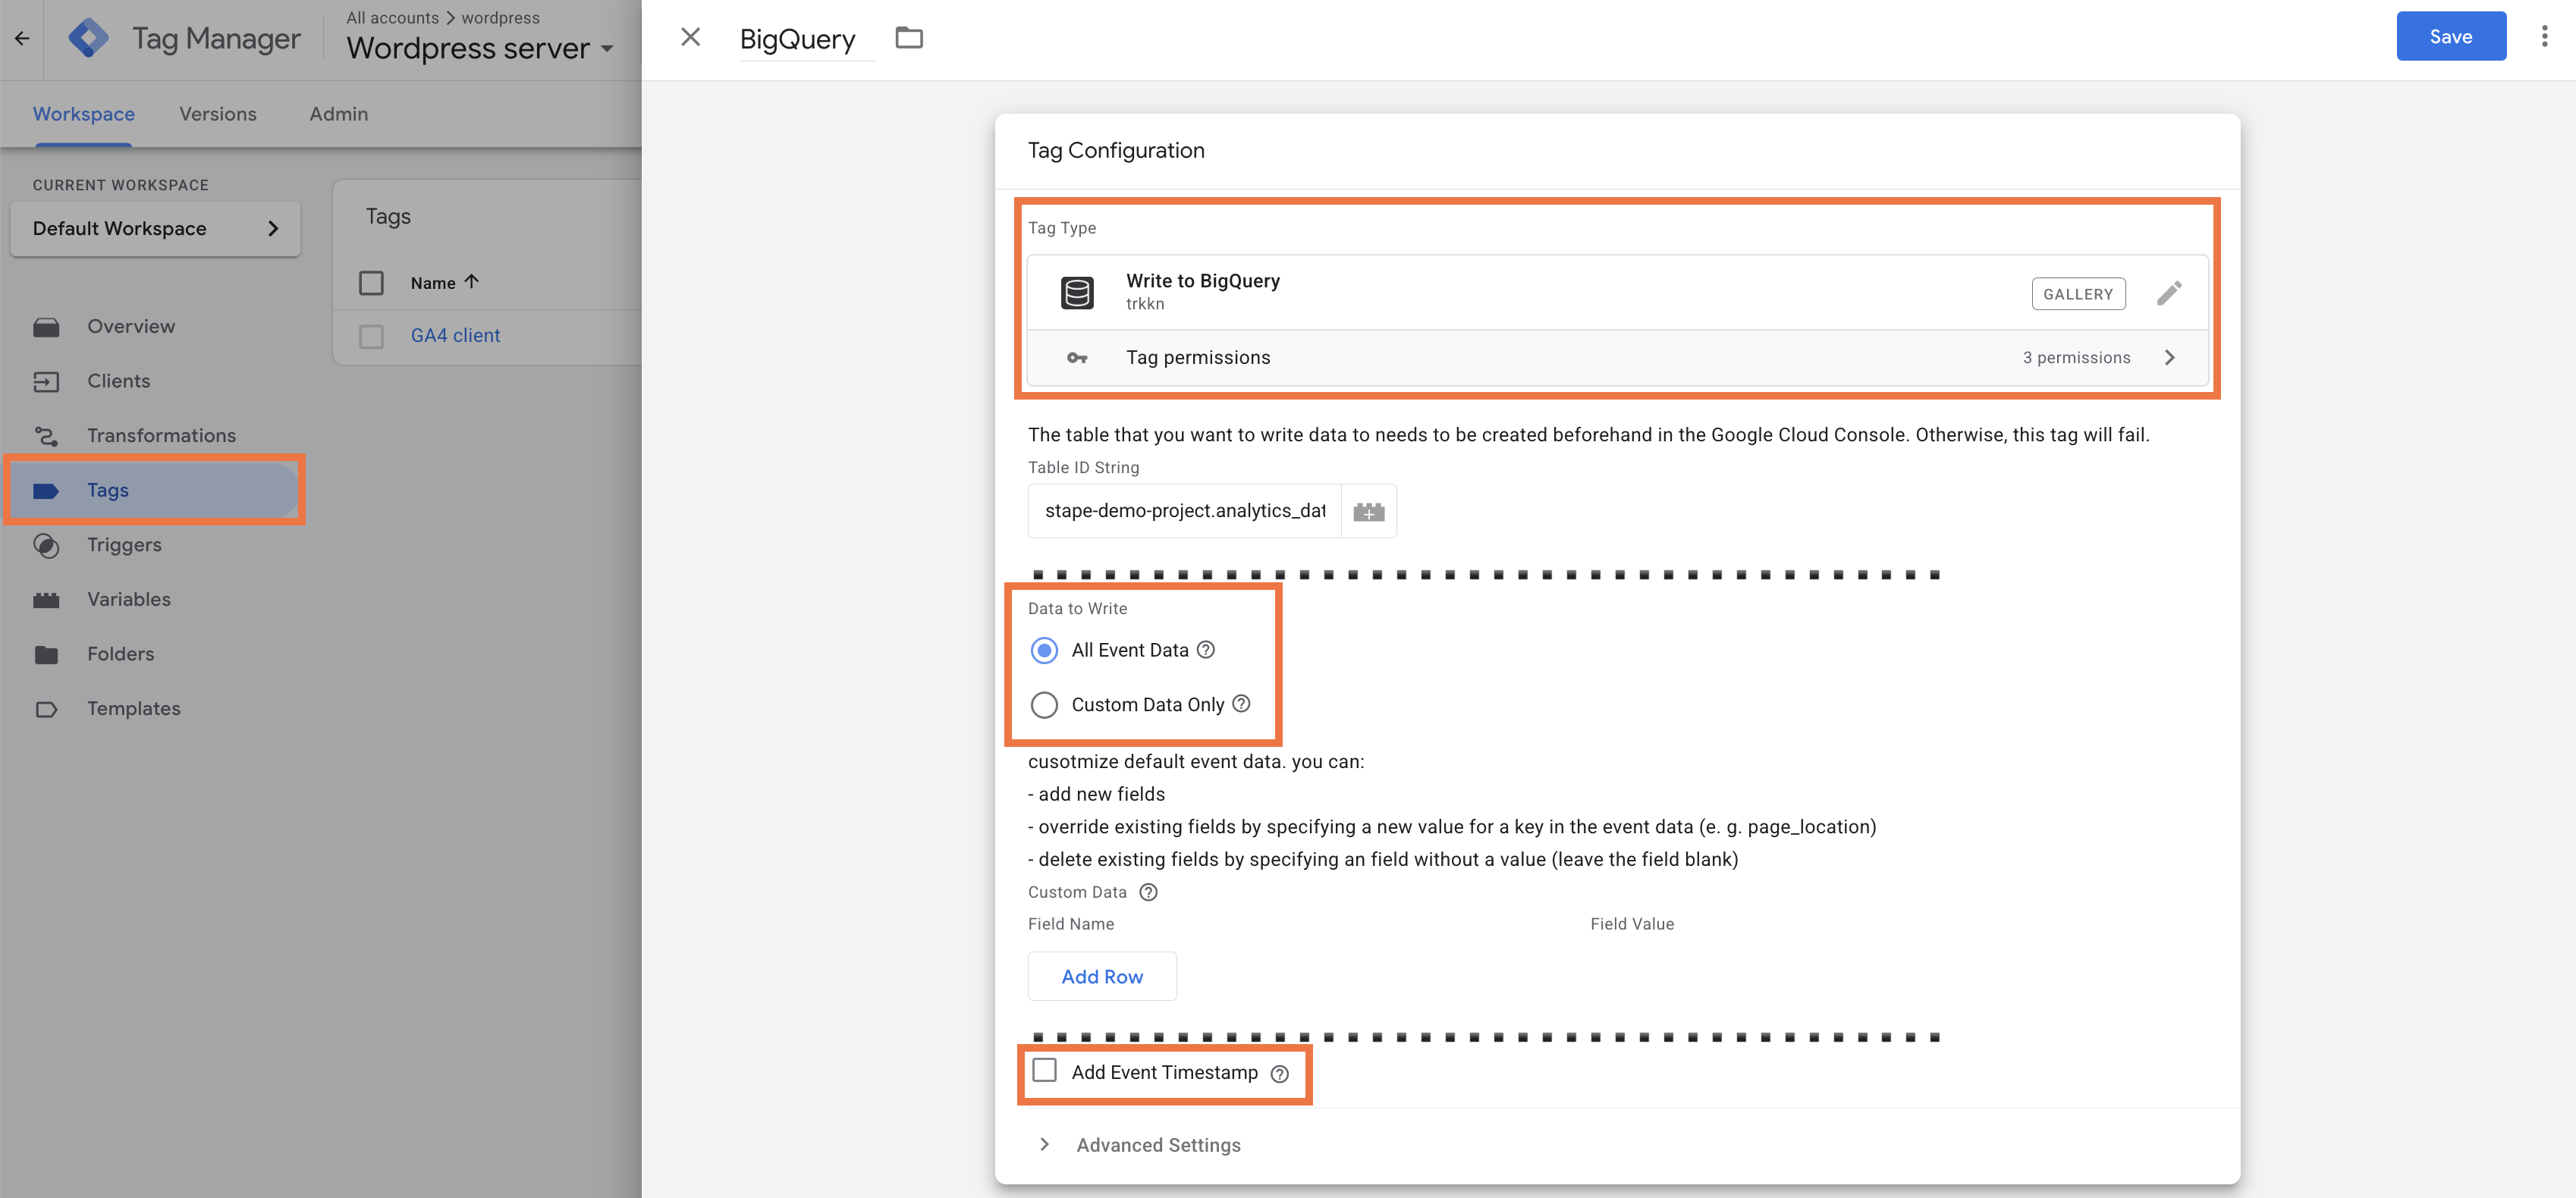
2. Create a new tag using that template and configure what data to write:
- All Event Data - writes all event data available in the sGTM event to your BigQuery table. Only fields matching your table schema will be accepted, others are discarded.
- Custom Data Only - writes only the specific fields you define, with no default event data included.
Optionally enable Add Event Timestamp to include a millisecond timestamp. The target BigQuery column must be of the INTEGER type.
3. Set your trigger and save the tag.
Firestore setup
1. Open Firebase, click Create project, and select the same project you used for the service account.
2. Follow the Firebase instructions to create a database. Choose a Cloud Firestore location that matches your sGTM server location. You can check your server location in your Stape container settings. When selecting a starting mode, choose Production.
3. Click Start a collection and define the collection path you'll use in your tag (e.g. purchase).
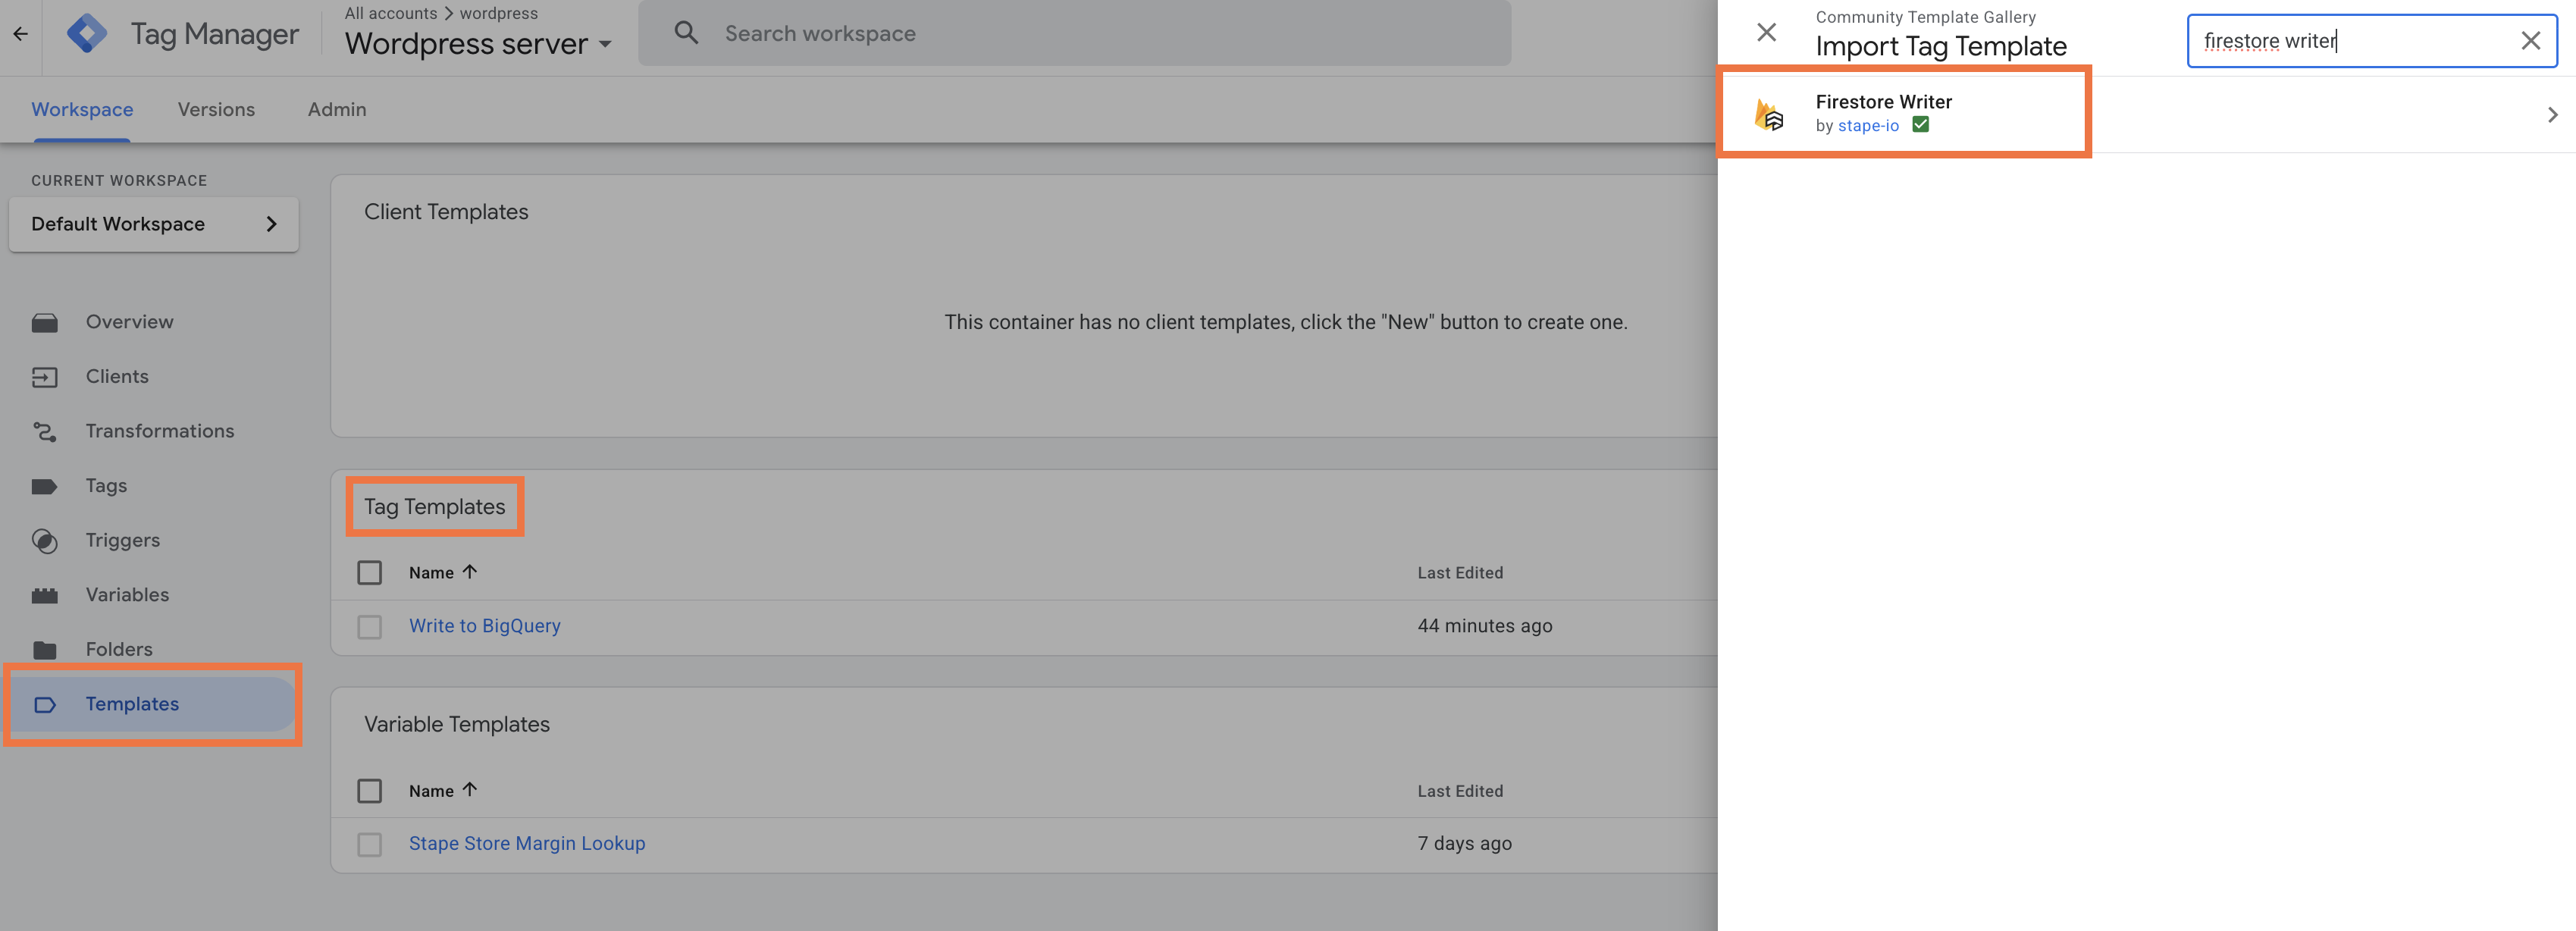
4. In your sGTM container, open Templates, click Search Gallery, and add the Firestore Writer tag from the Template Gallery.
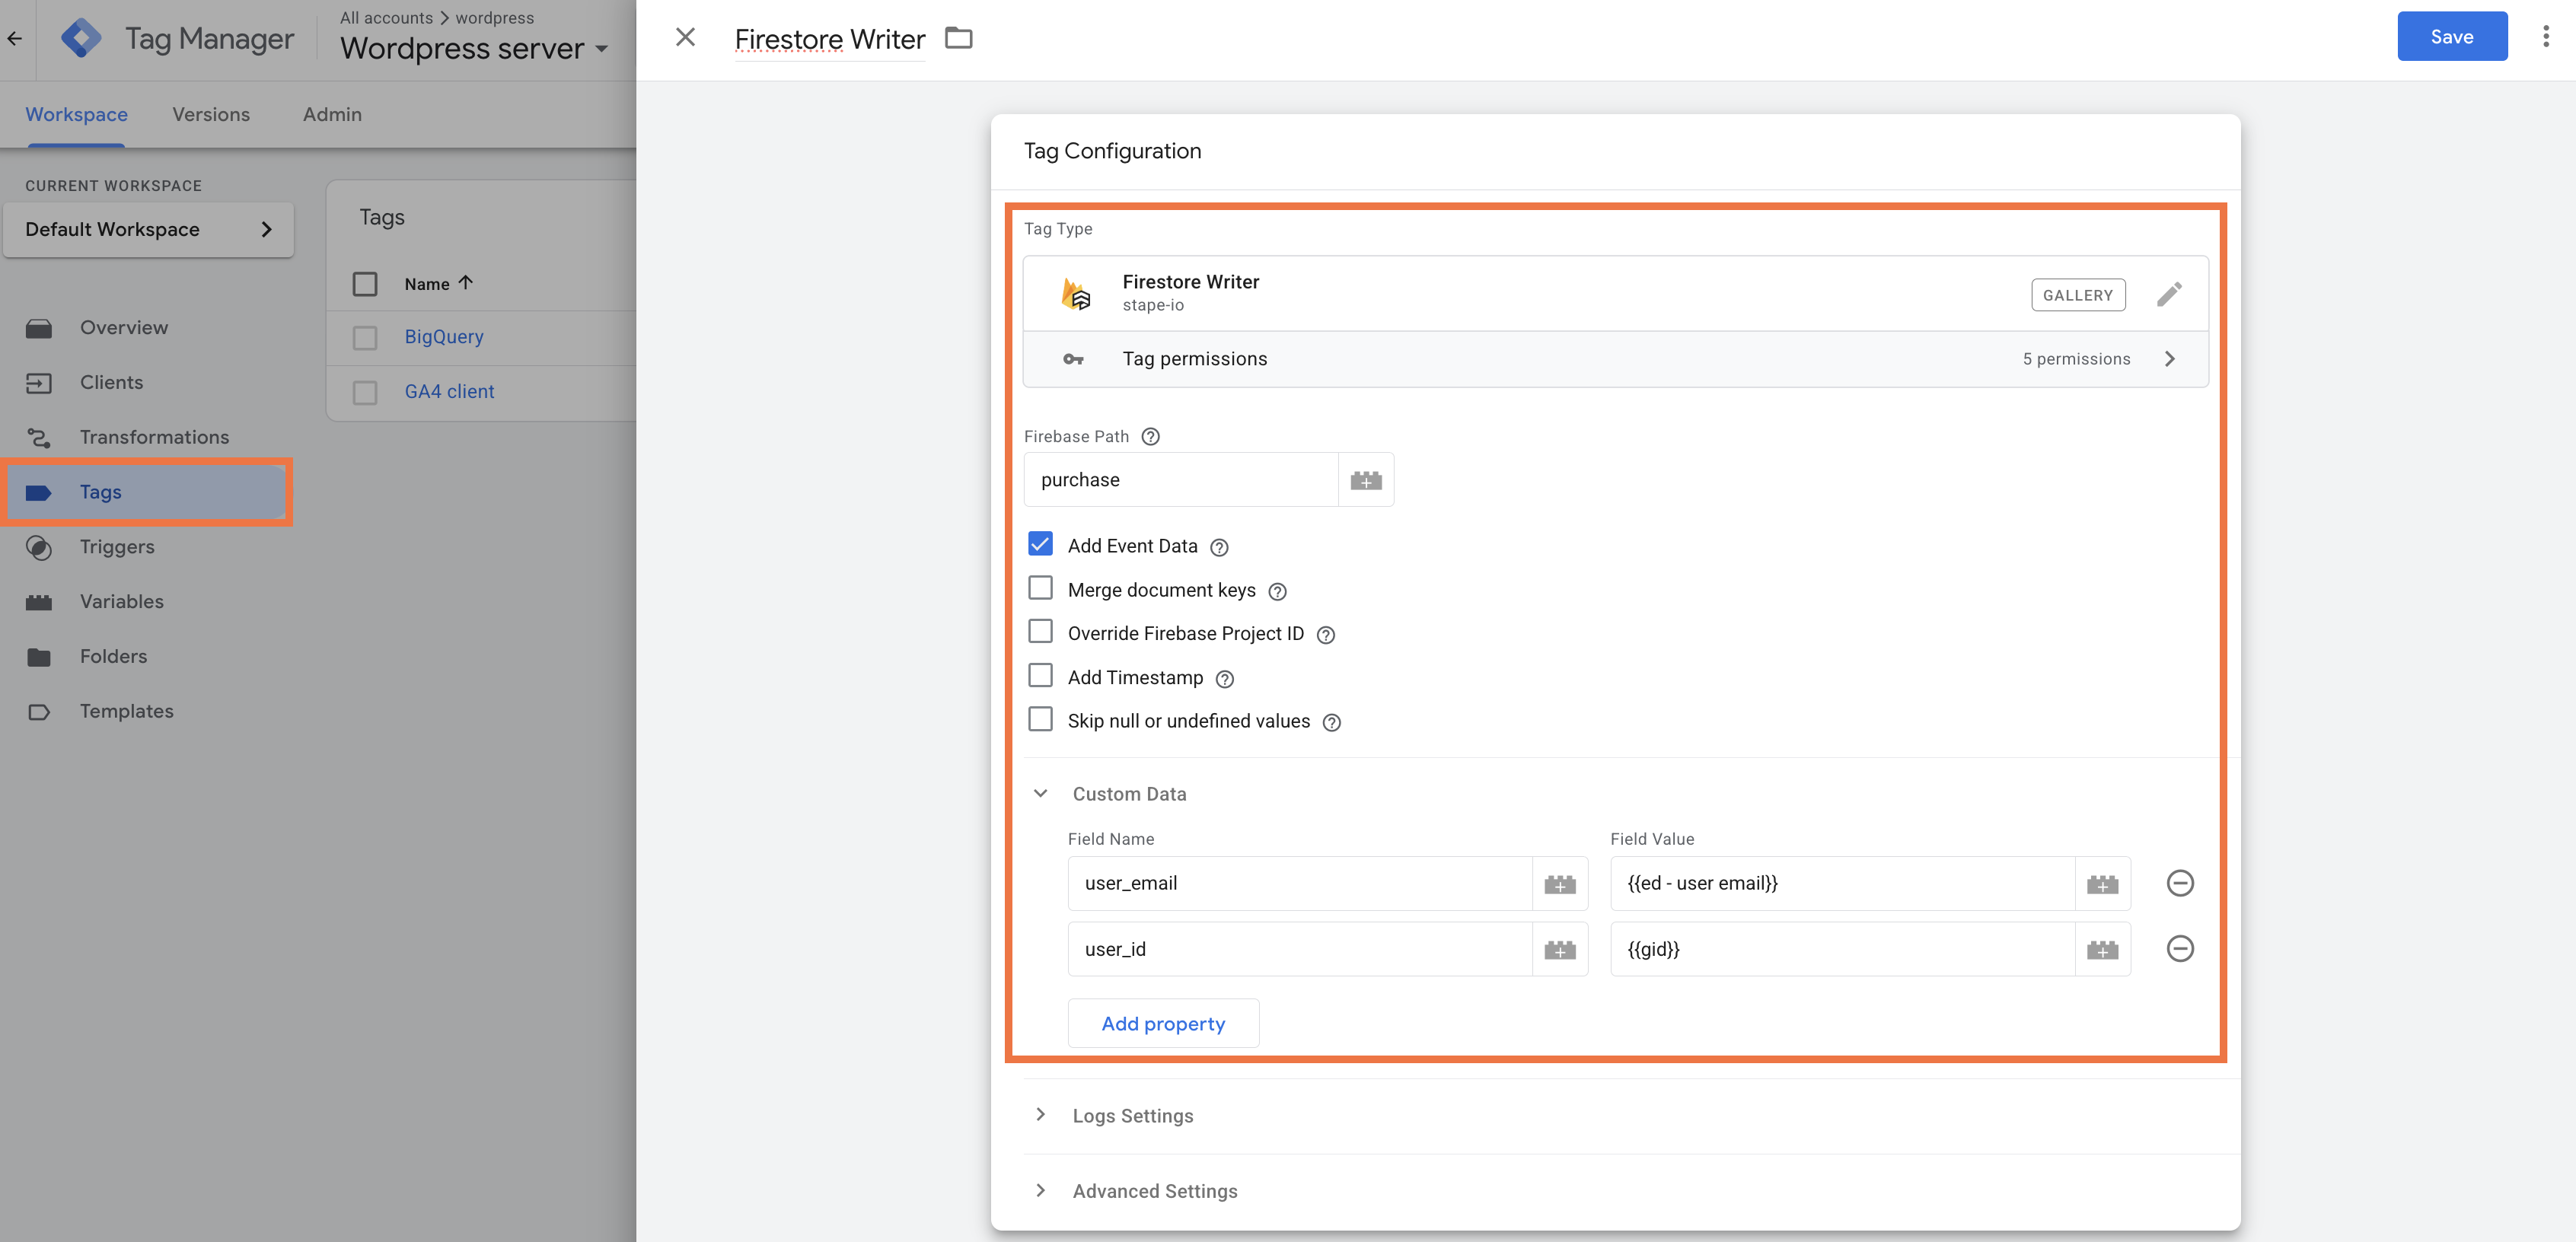
5. Create a new tag using that template and configure it:
- Firebase Path - path to your Firestore collection or document. Mustn’t start or end with a '/'. If you point to a collection, a document with a random ID will be created automatically.
- Add Event Data - sends all sGTM event data to the Firestore document. Custom Data fields override Event Data fields where they overlap.
- Merge document keys - merges incoming data with the existing document instead of overwriting it entirely.
- Override Firebase Project ID - by default, the tag reads the project ID from the
GOOGLE_CLOUD_PROJECTenvironment variable, which is automatically set when your sGTM container runs on Google Cloud. Enable this option only if you need to use a Firebase project that is different from the one your container is running on. - Skip null or undefined values - allows skipping items from
customDataListwith undefined or null values. - Add Timestamp - adds a millisecond timestamp to the document.
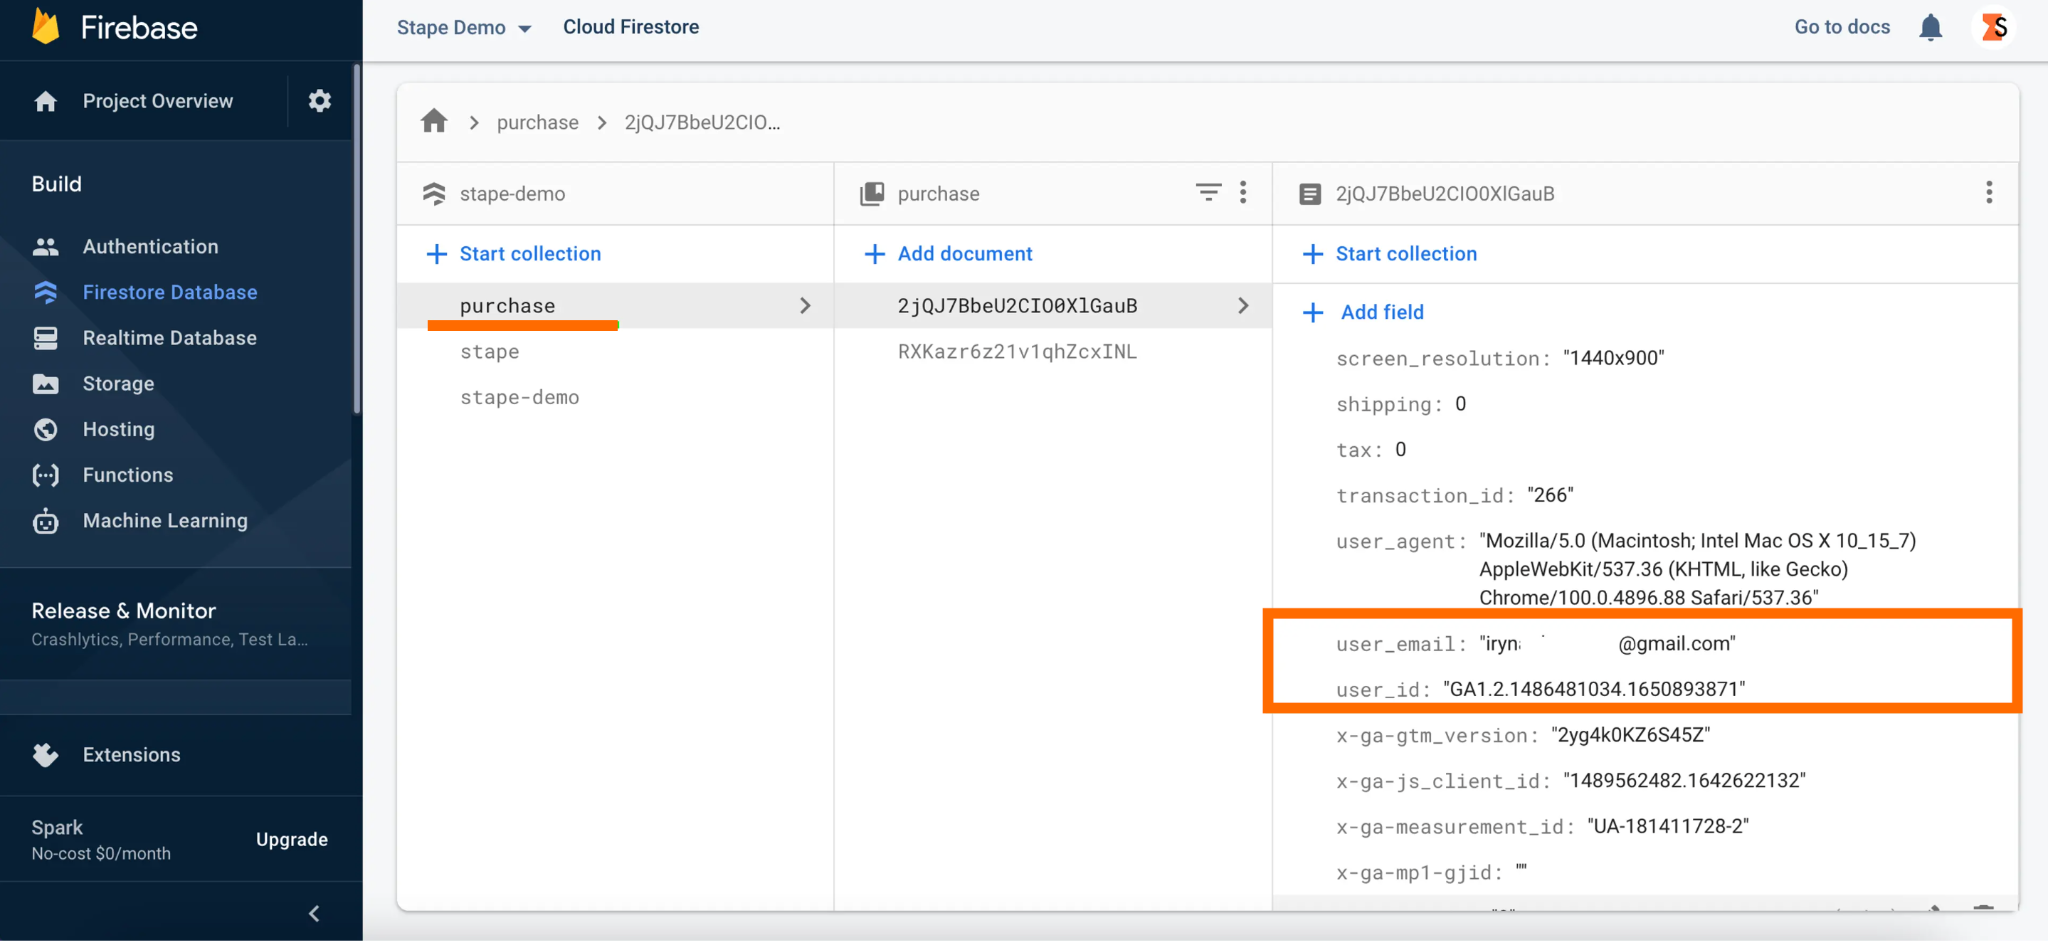
Use Custom Data to add or override specific fields, such as user_email or user_id. If sending user data to production, make sure to hash it before writing.
6. Set your trigger and save the tag.
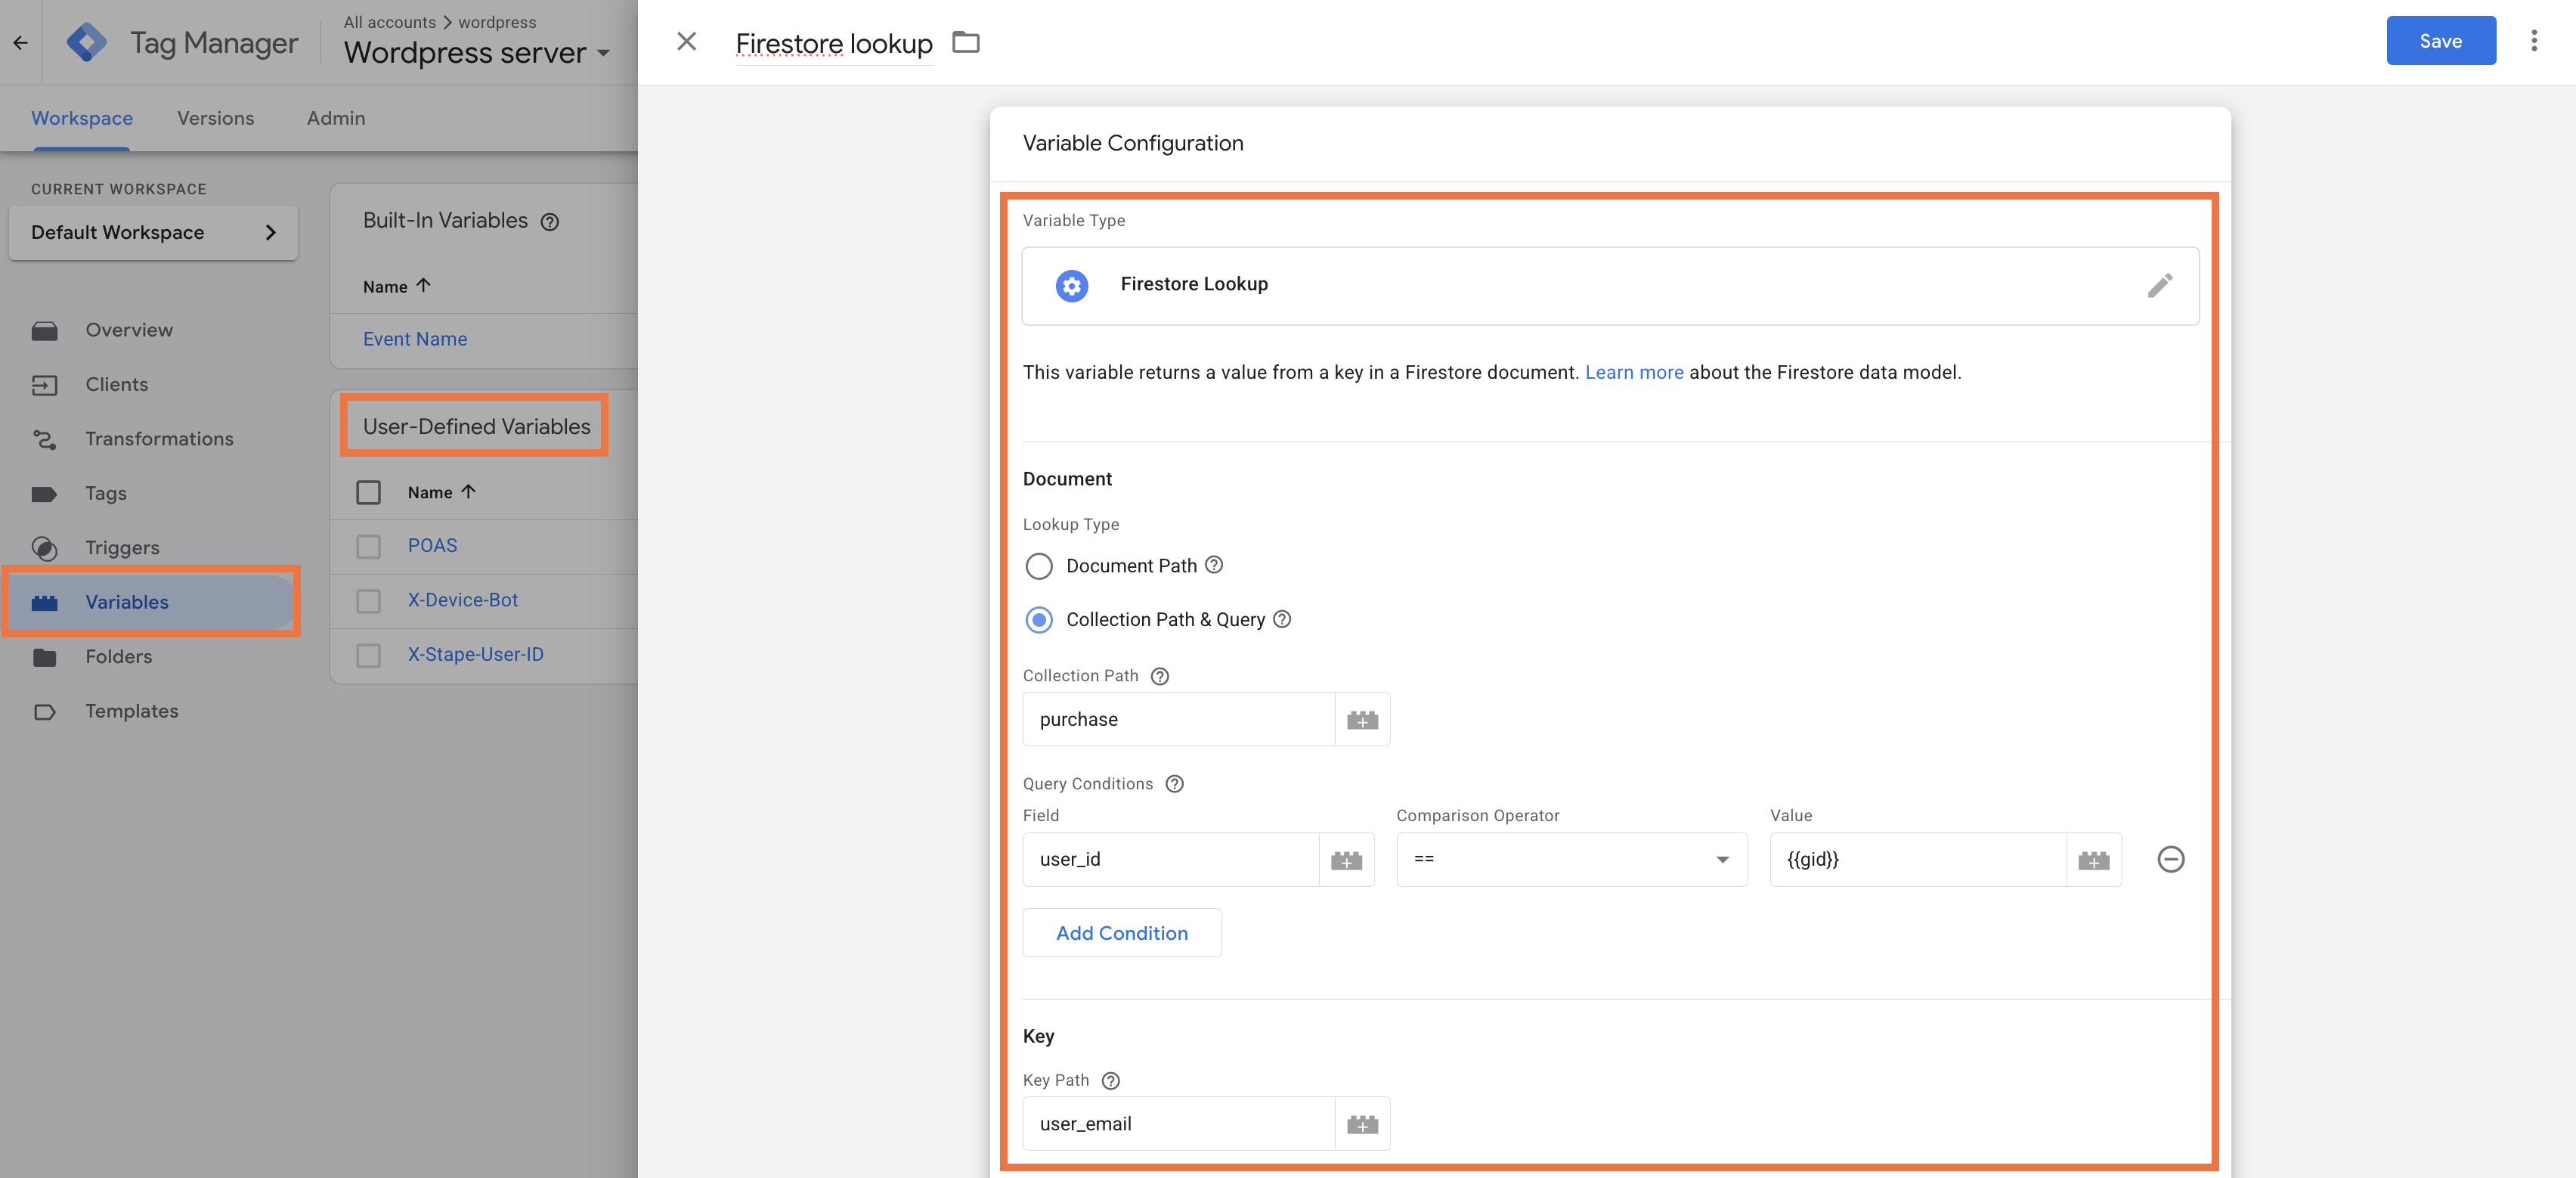
7. To read data back from Firestore, create a Firestore Lookup variable in sGTM.
8. Set your Collection Path and define a query condition (e.g. match user_id in Firestore against a _gid variable in sGTM) to retrieve stored values and use them in other tags.
Testing
Verify the connection is working by triggering a test event through your sGTM container and checking that data lands in the expected destination:
- BigQuery: Navigate to your dataset in the BigQuery console and confirm a new row appears after the test event fires. See Explore BigQuery in the Google Cloud console for instructions on browsing table data.
- Firestore: Open your Firestore database in the Cloud Console and check that the relevant document was created or updated. See Use Firestore Studio for instructions on viewing and filtering documents.
Need help with setting up server-side tagging?
All it takes is a few simple questions. Click Get A Quote, fill-up the form, and we will send you a quote.

Comments