DNS configuration for custom domain for server-side tracking
Uliana Lesiv
AuthorDNS record configuration is an essential part of setting up server-side tracking. If you have just created a custom domain (or haven’t created one yet) that you are about to use for tracking, this article is for you.
We will describe what DNS is and why it is important to add DNS records. That's an end-to-end guide where you find how to configure DNS records for custom domain, check if the DNS record is verified and troubleshoot problems (if there are such).
What is DNS?
Domain Name System (DNS) is a kind of middle-man between the user’s request and the browser.
When you want to visit a website, you may enter its domain name directly (www.example.com) or reach any website’s page via search in your browser. You access information through domain names while your browser uses internet protocol (IP) addresses to find the right domain. Let’s say you speak different languages. DNS translates domain names to IPs so the browser can load the correct website’s page.
Why is it important to configure DNS for server-side tracking?
To enable first-party cookies for server-side tracking, you’ve probably already set up a custom domain in sGTM (if not, check out our guide on custom domain implementation on sGTM container). Using this custom domain for tracking requires adding a DNS record.
So, why does it matter?
It helps to bypass ad blockers. The DNS record helps to set up data redirection to your custom domain name by adding it to the URL. So when ad blockers scan the URL, sending data to a custom domain will ensure that no data will be missed as the custom domain doesn’t contain parts that point out it is used for data collection.
| Read more about trends in third-party cookies and how server-side can help you adapt to the world without them. |
Another point is custom domain verification. Adding a DNS record is required to do it.
Before starting
Make sure you have a custom domain for server-side tracking
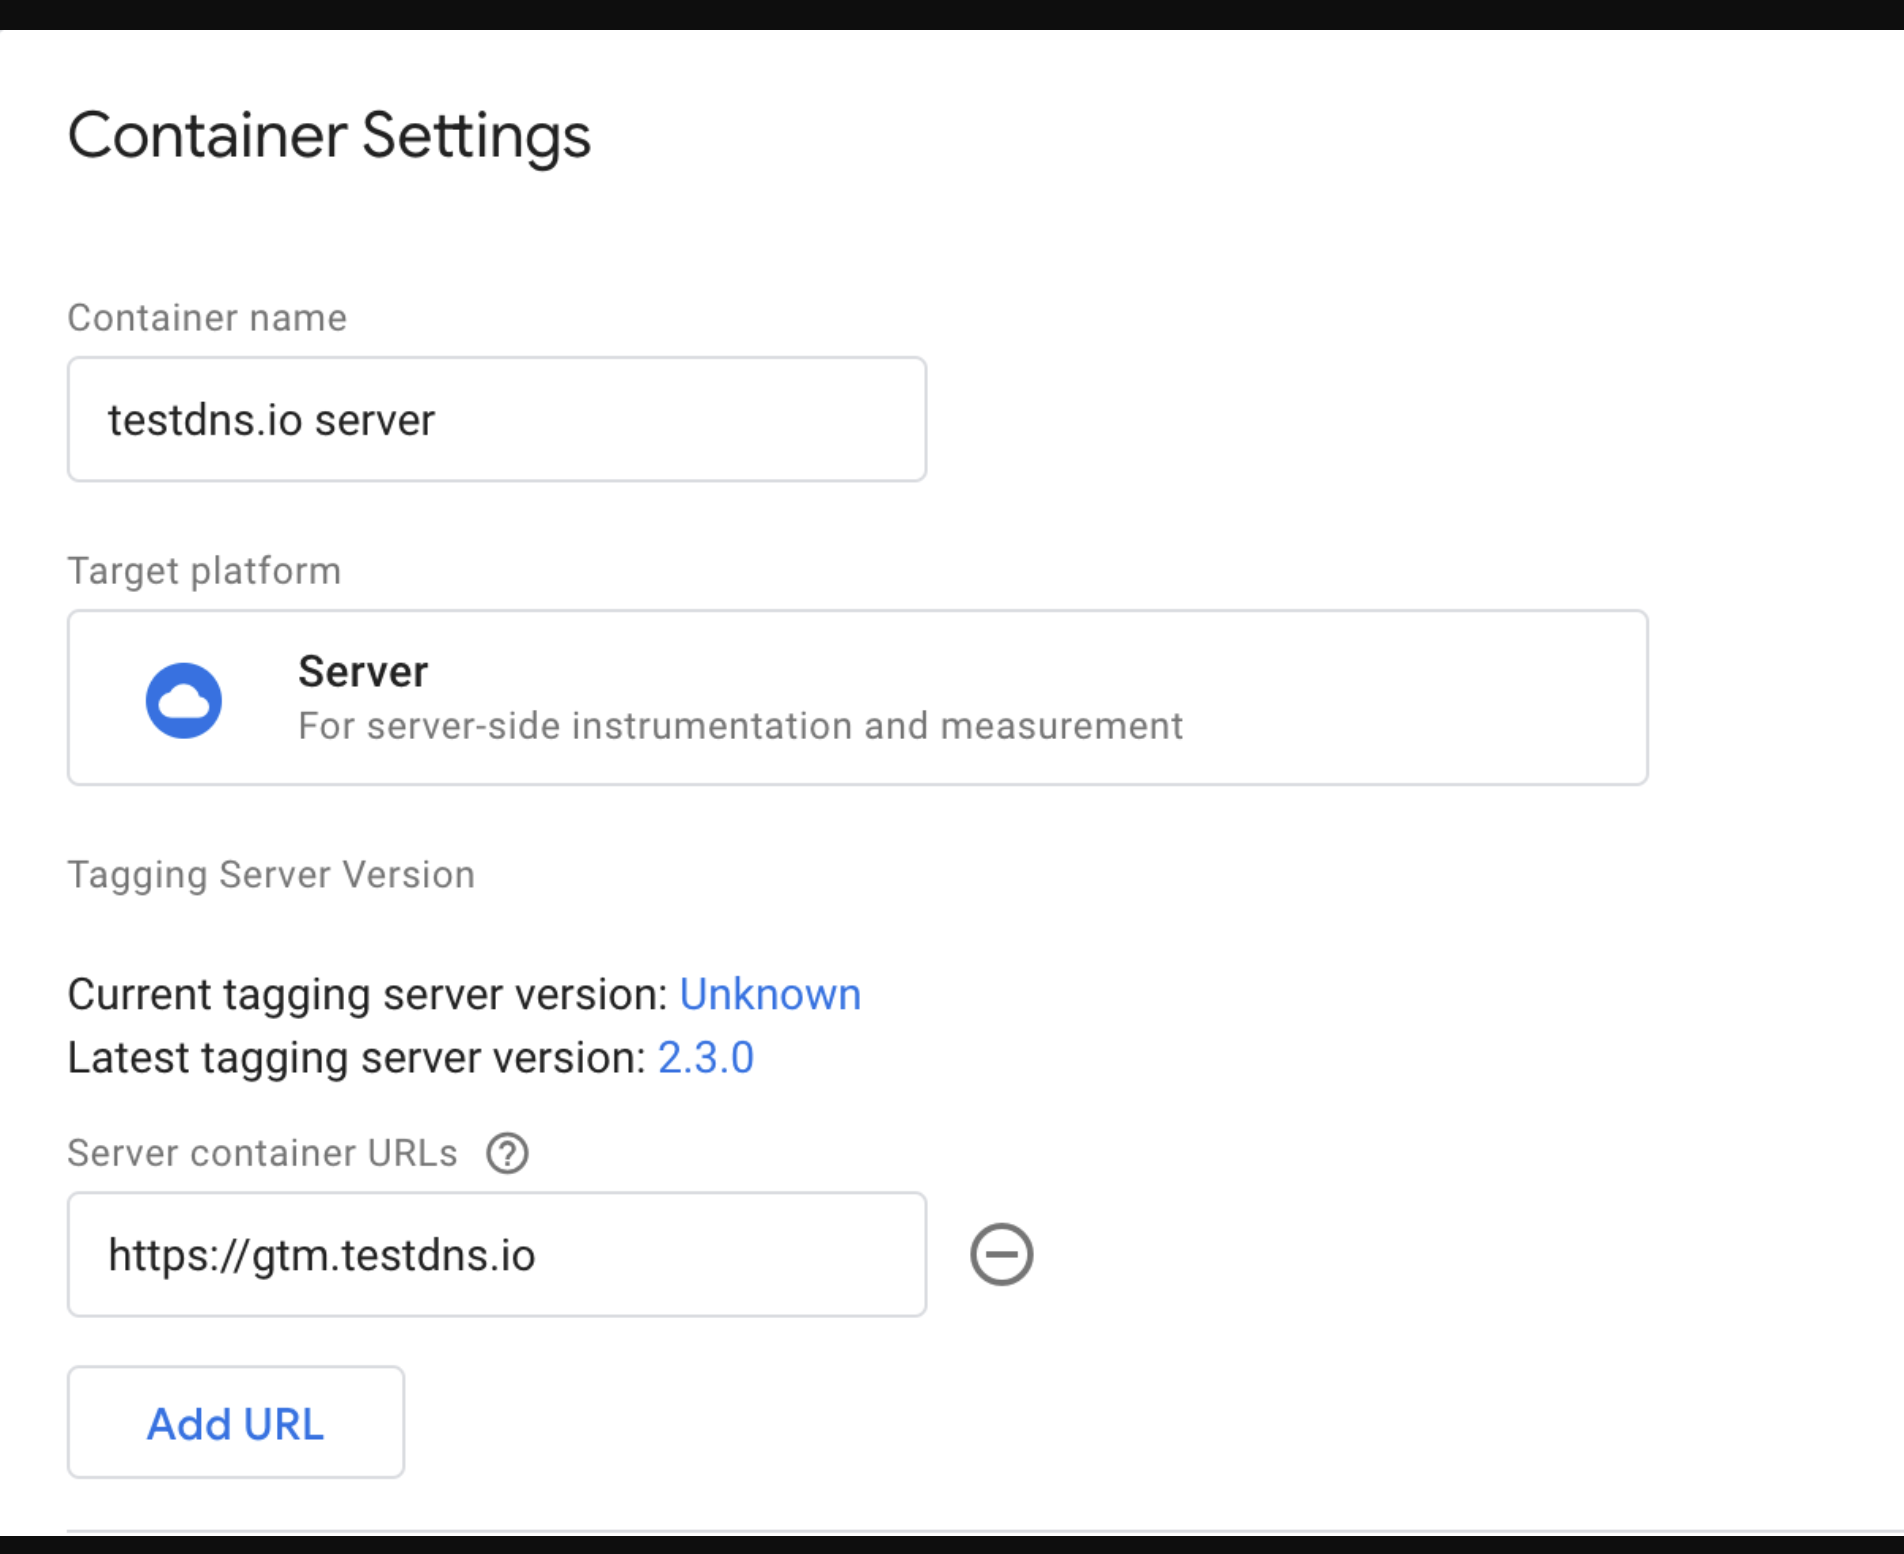
To check it, go to your sGTM container → Admin → Container Settings and see your Tagging server URL; if it includes one of the following formats, you added a custom domain:
example.com/sgtm
sgtm.example.com
wjzsdfvom.us.stape.io
| Check out our article on creating a custom domain to find more about its benefits and a step-by-step guide on how to do it if you don’t have a custom domain yet. |
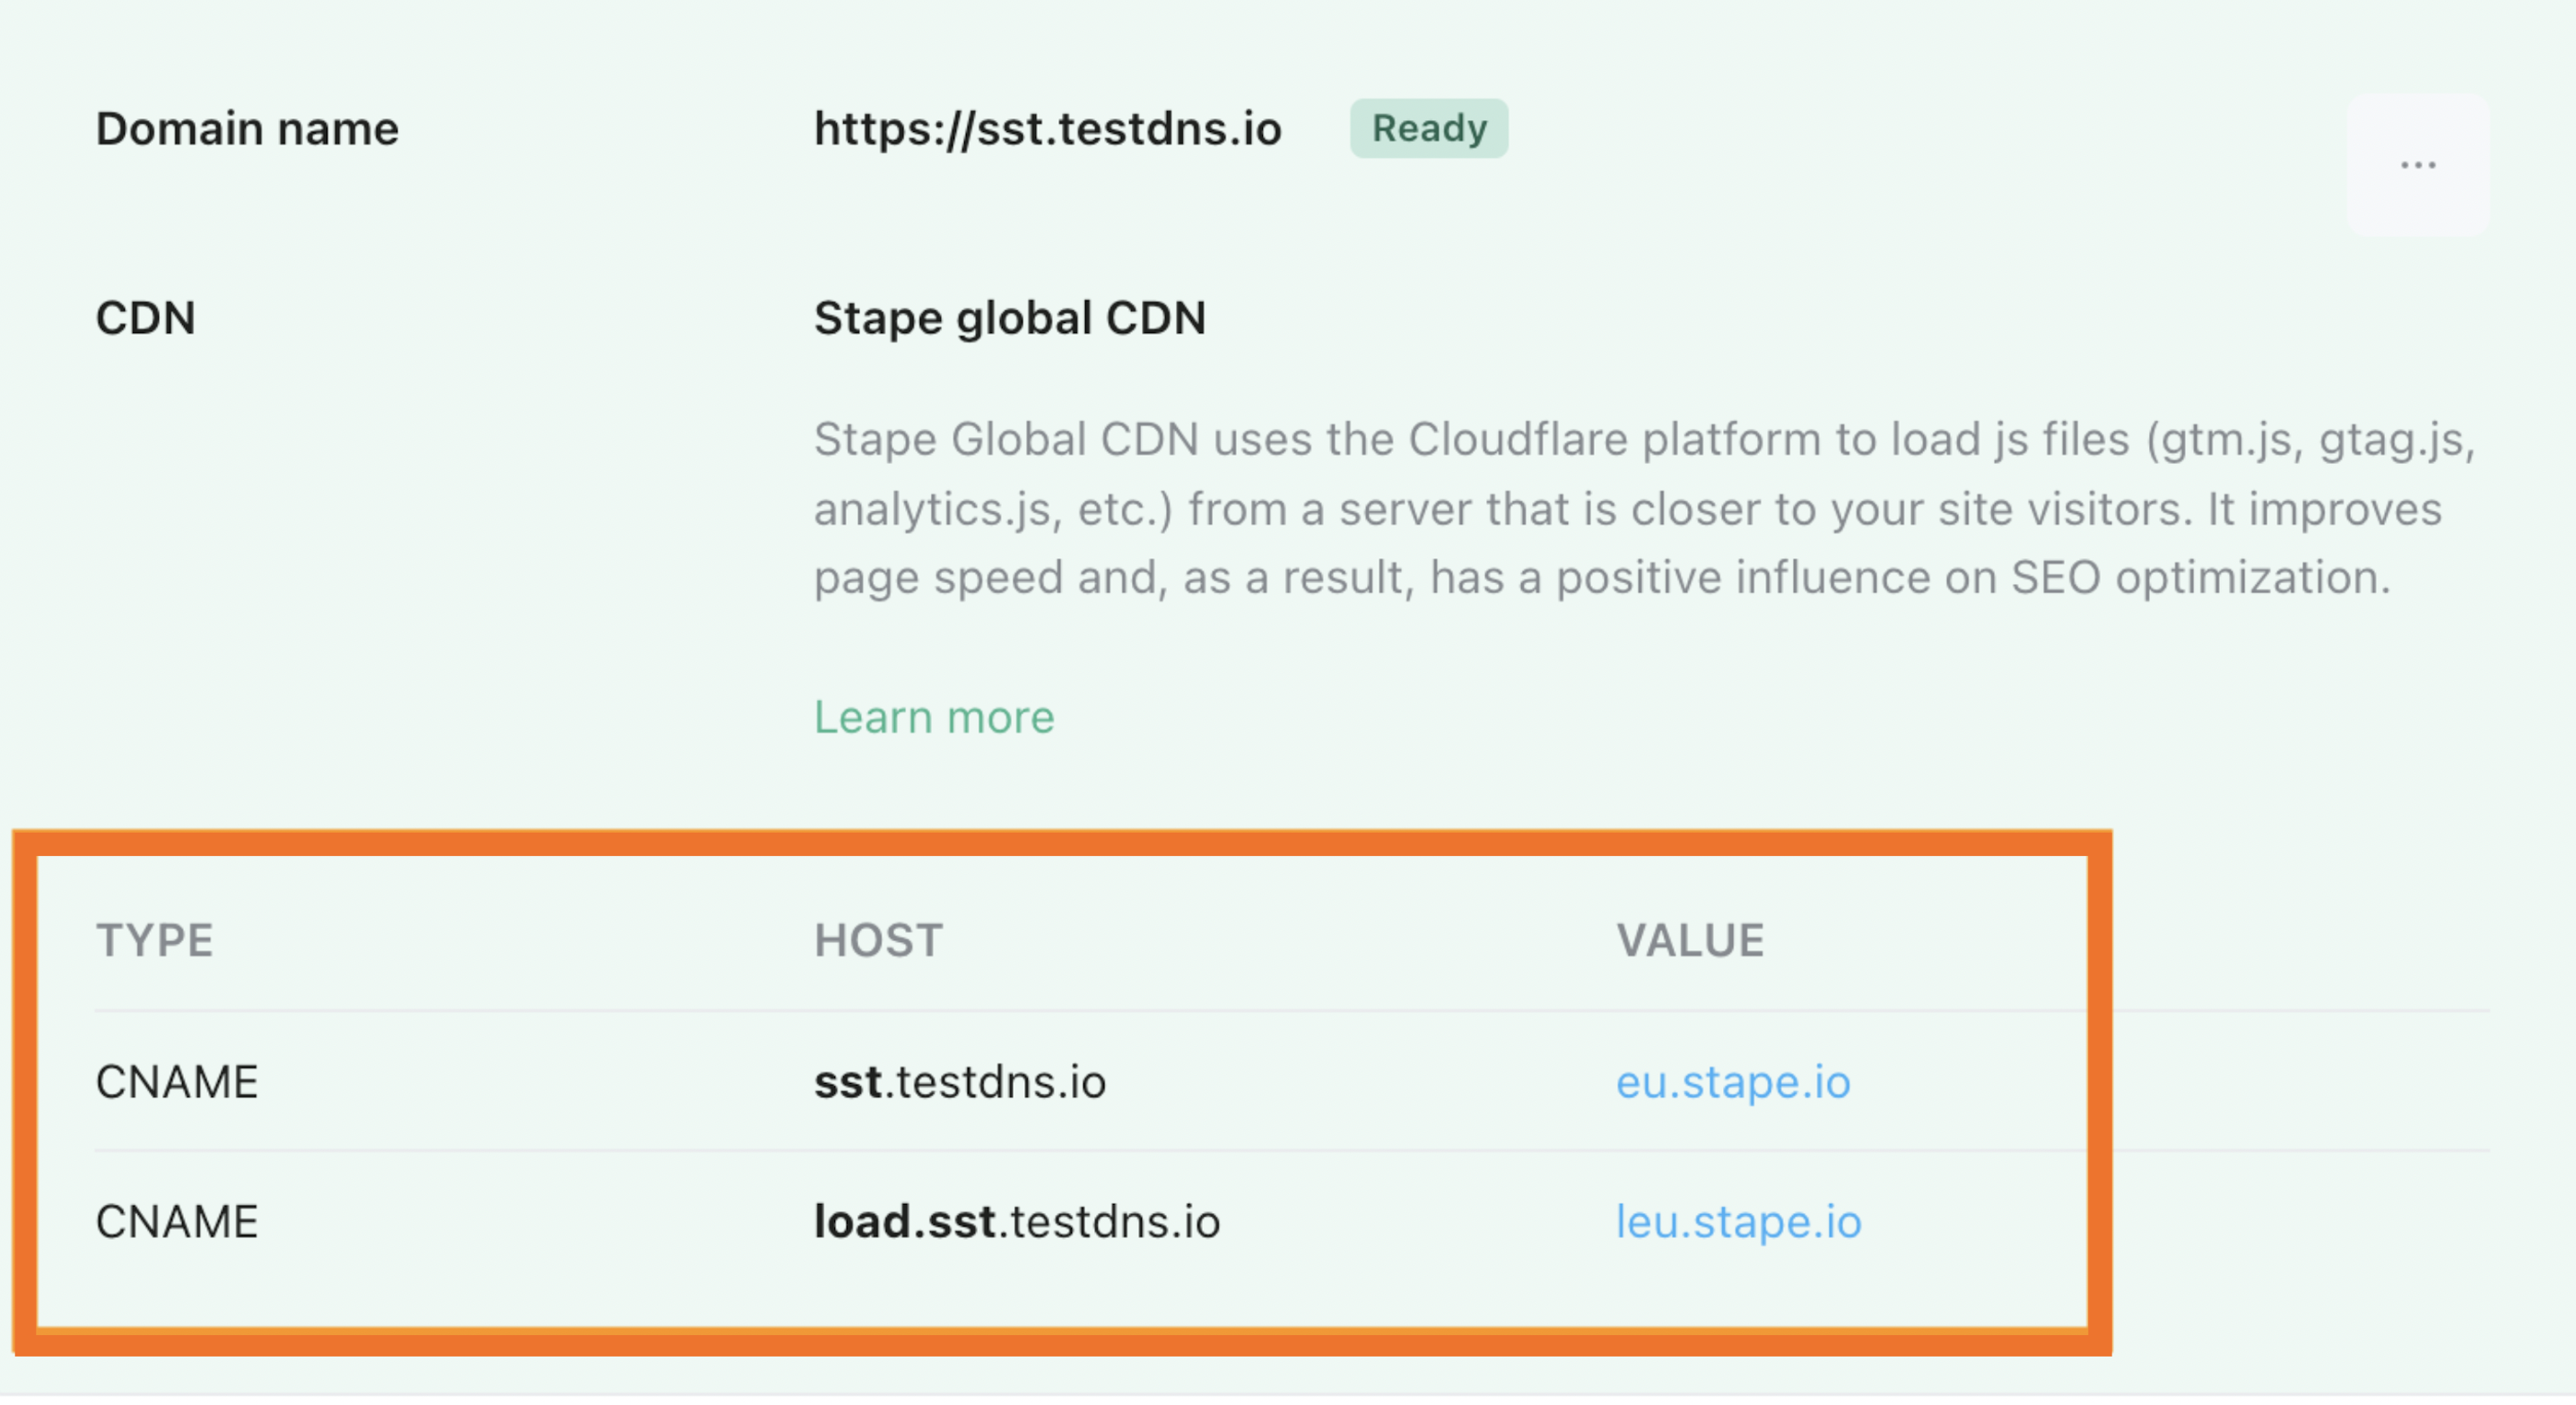
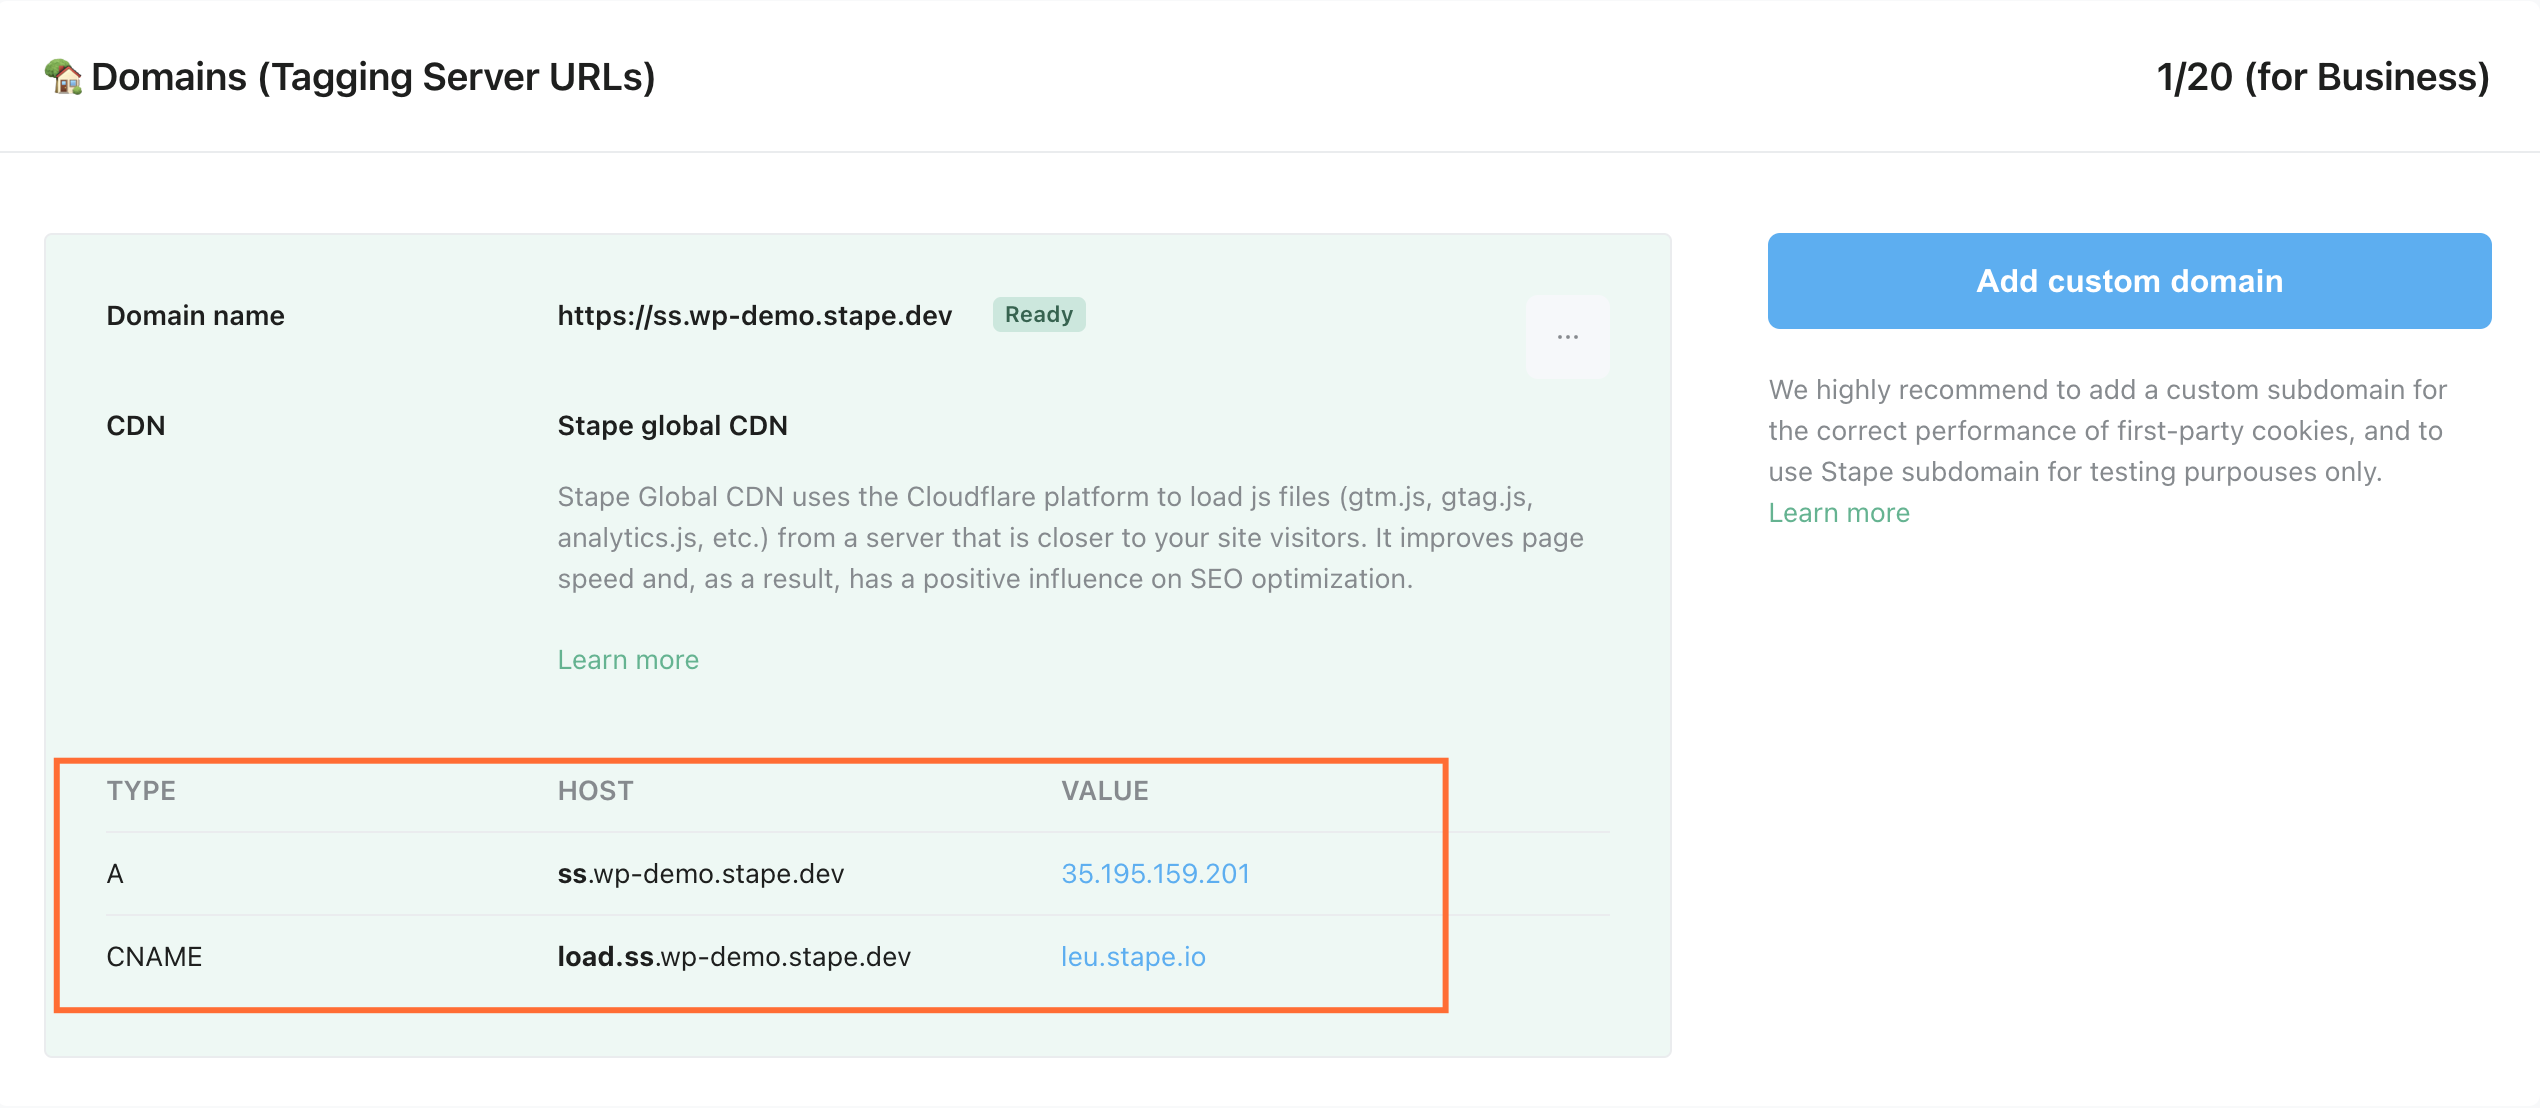
See the details required to create a DNS record
Go to Stape Admin → open container → Settings → Domains (Tagging Server URLs).
You will need data from columns Type, Host, and Value to create a DNS recording.
Check your hosting provider
Ensure you know what hosting provider you have. Your hosting provider manages all the DNS records, and you should add a record on the provider's side. If you need clarification on your domain/web hosting provider, use Sitechecker to figure it out.
Below, we provide guidelines to configure DNS for the most popular providers; jump to the needed section directly by clicking on your provider:
DNS configuration for top providers
GoDaddy
1. Log in to your GoDaddy Domain Portfolio.
2. Choose your domain and access Domain Settings → click the DNS tab → Add New Record.
3. Then, add the data required to create a DNS record.
4. Click “Save” to add a new DNS record.
| Check GoDaddy’s step-by-step instructions on adding DNS records for a more detailed guide. |
Shopify
1. Go to Shopify admin.
2. Select your domain → Domain settings → Edit DNS settings → Add custom record.
3. Add data required to create a DNS record.
4. Click “Confirm”.
| Find out more info on configuring DNS records on Shopify here. |
Wix
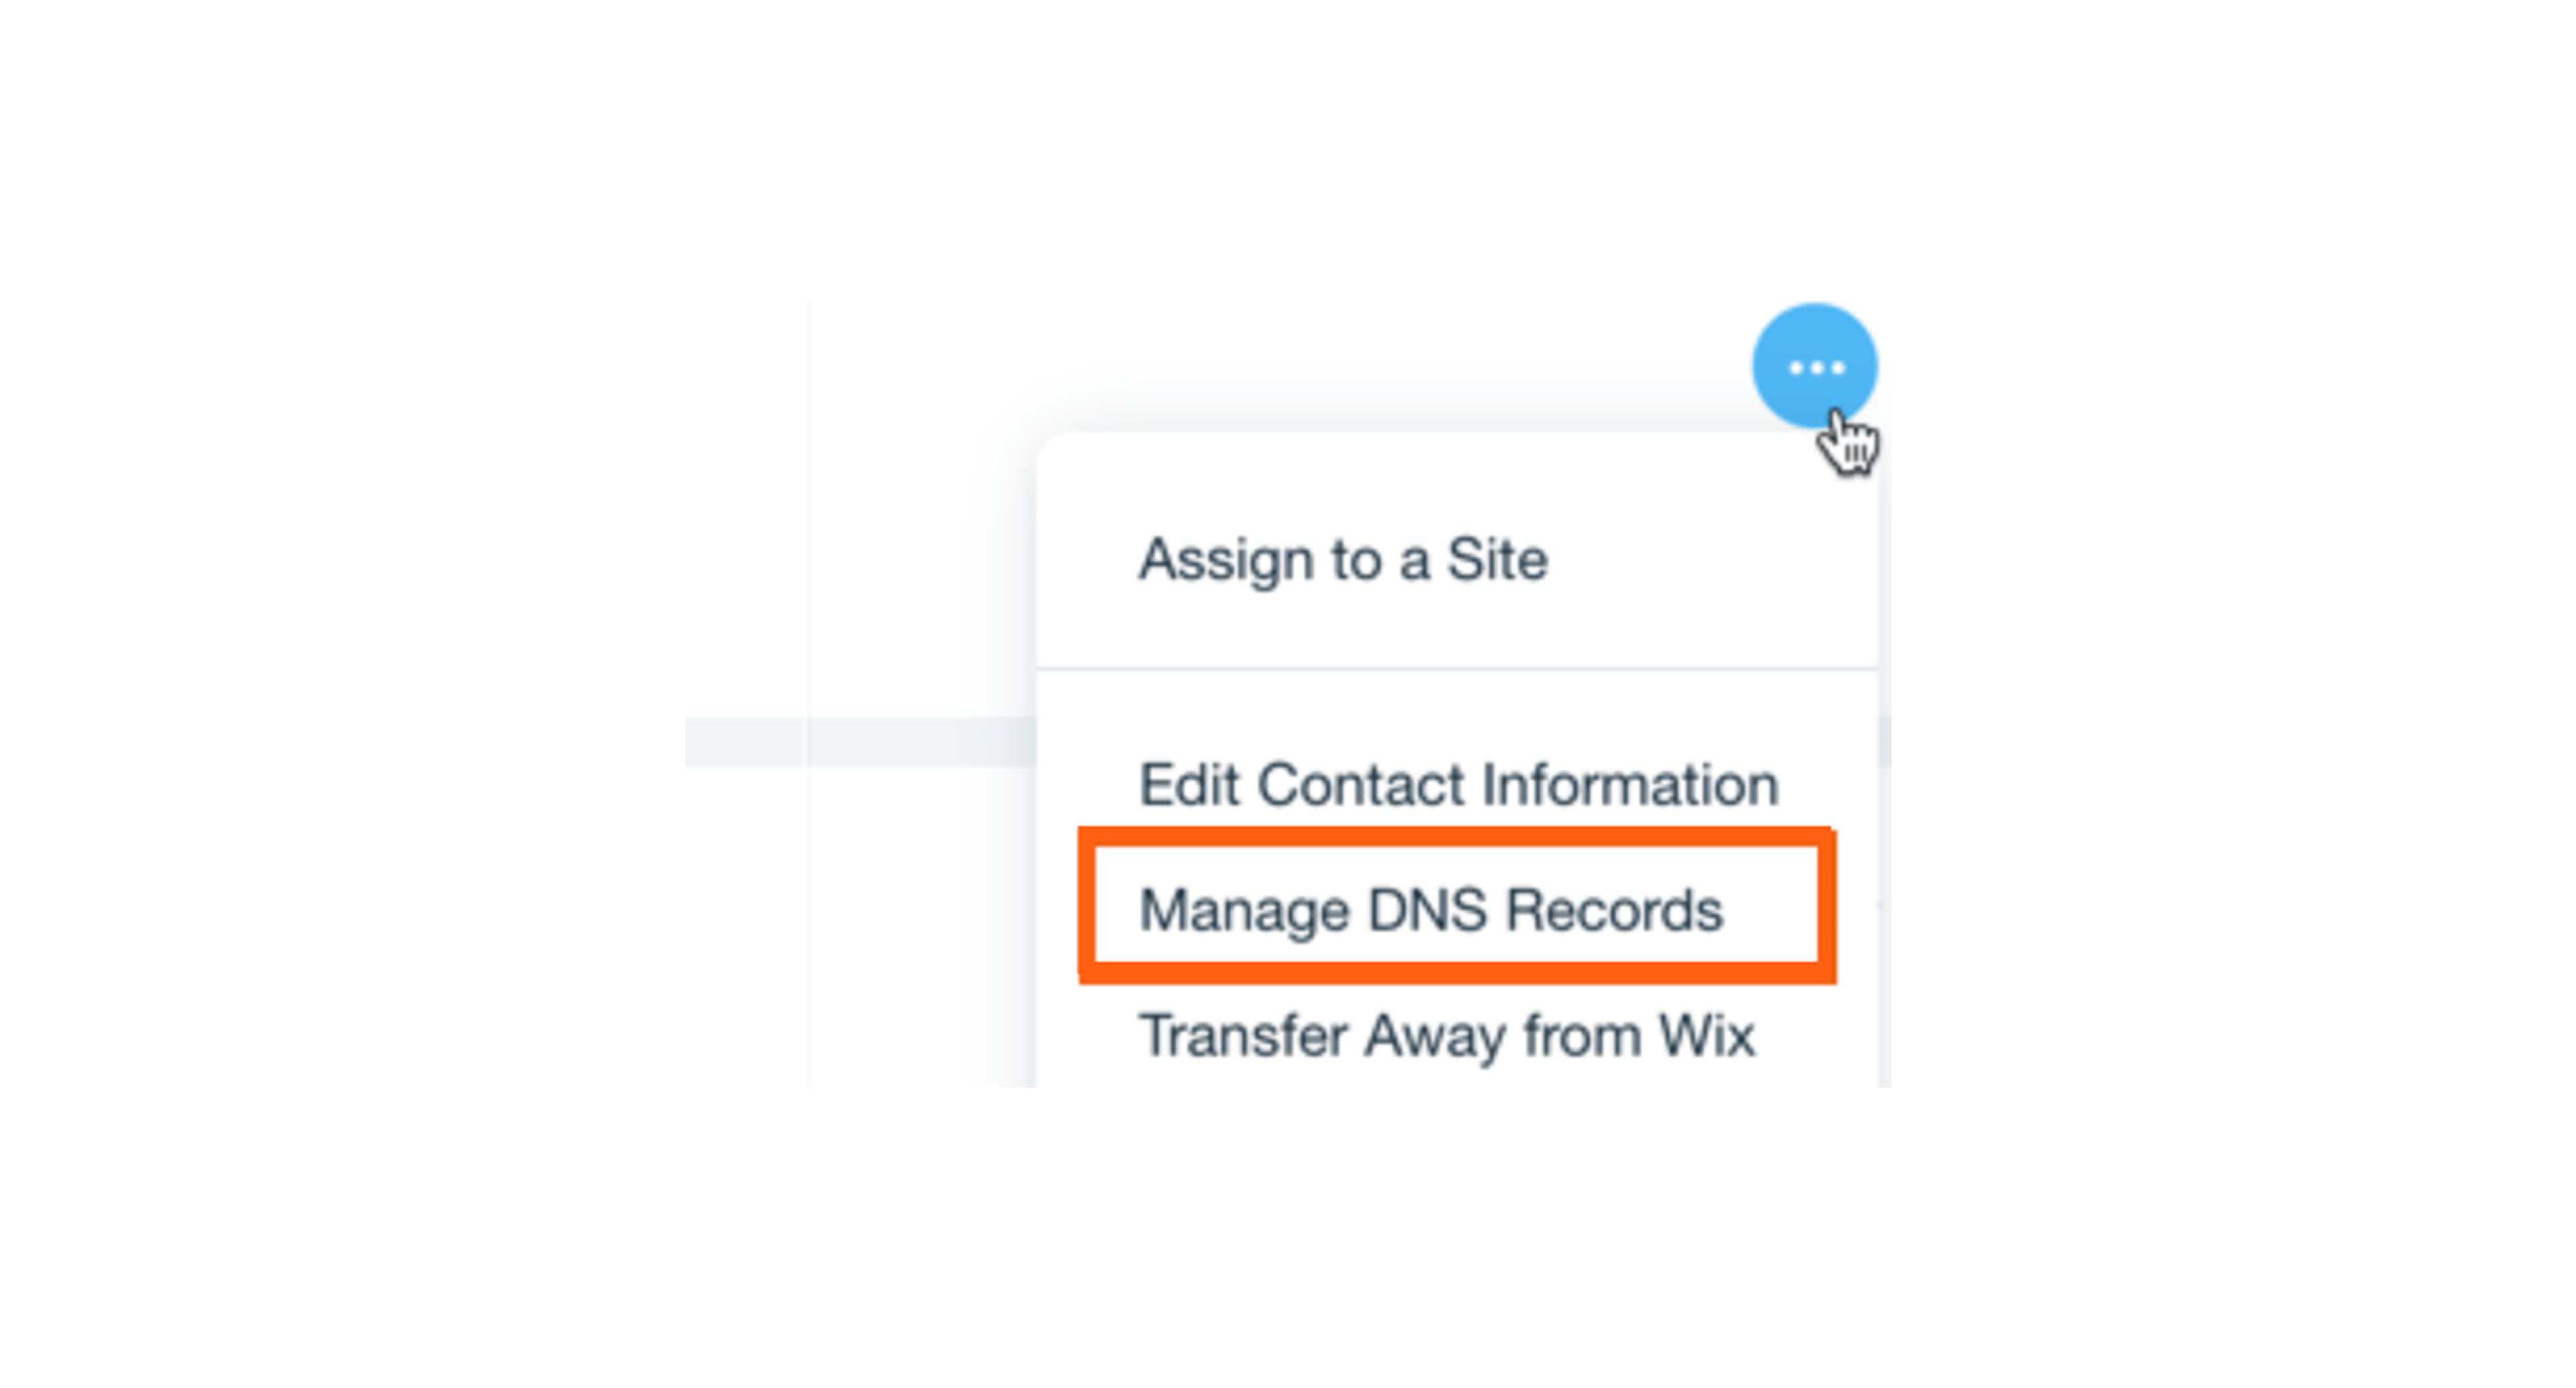
1. Log in to your Wix account and go to Domains.
2. Click three dots (Domain Actions) → Manage DNS Records → enter record type (A, CNAME, TXT) → Add Record.
3. Enter all the data required.
4. Click Save and then click Save Changes in a pop-up window.
| For more details, please check Wix’s guide on configuring DNS records. |
Cloudflare
1. Log in to the Cloudflare dashboard.
2. On the account home page next to your domain name click three dots and select “Configure DNS”.
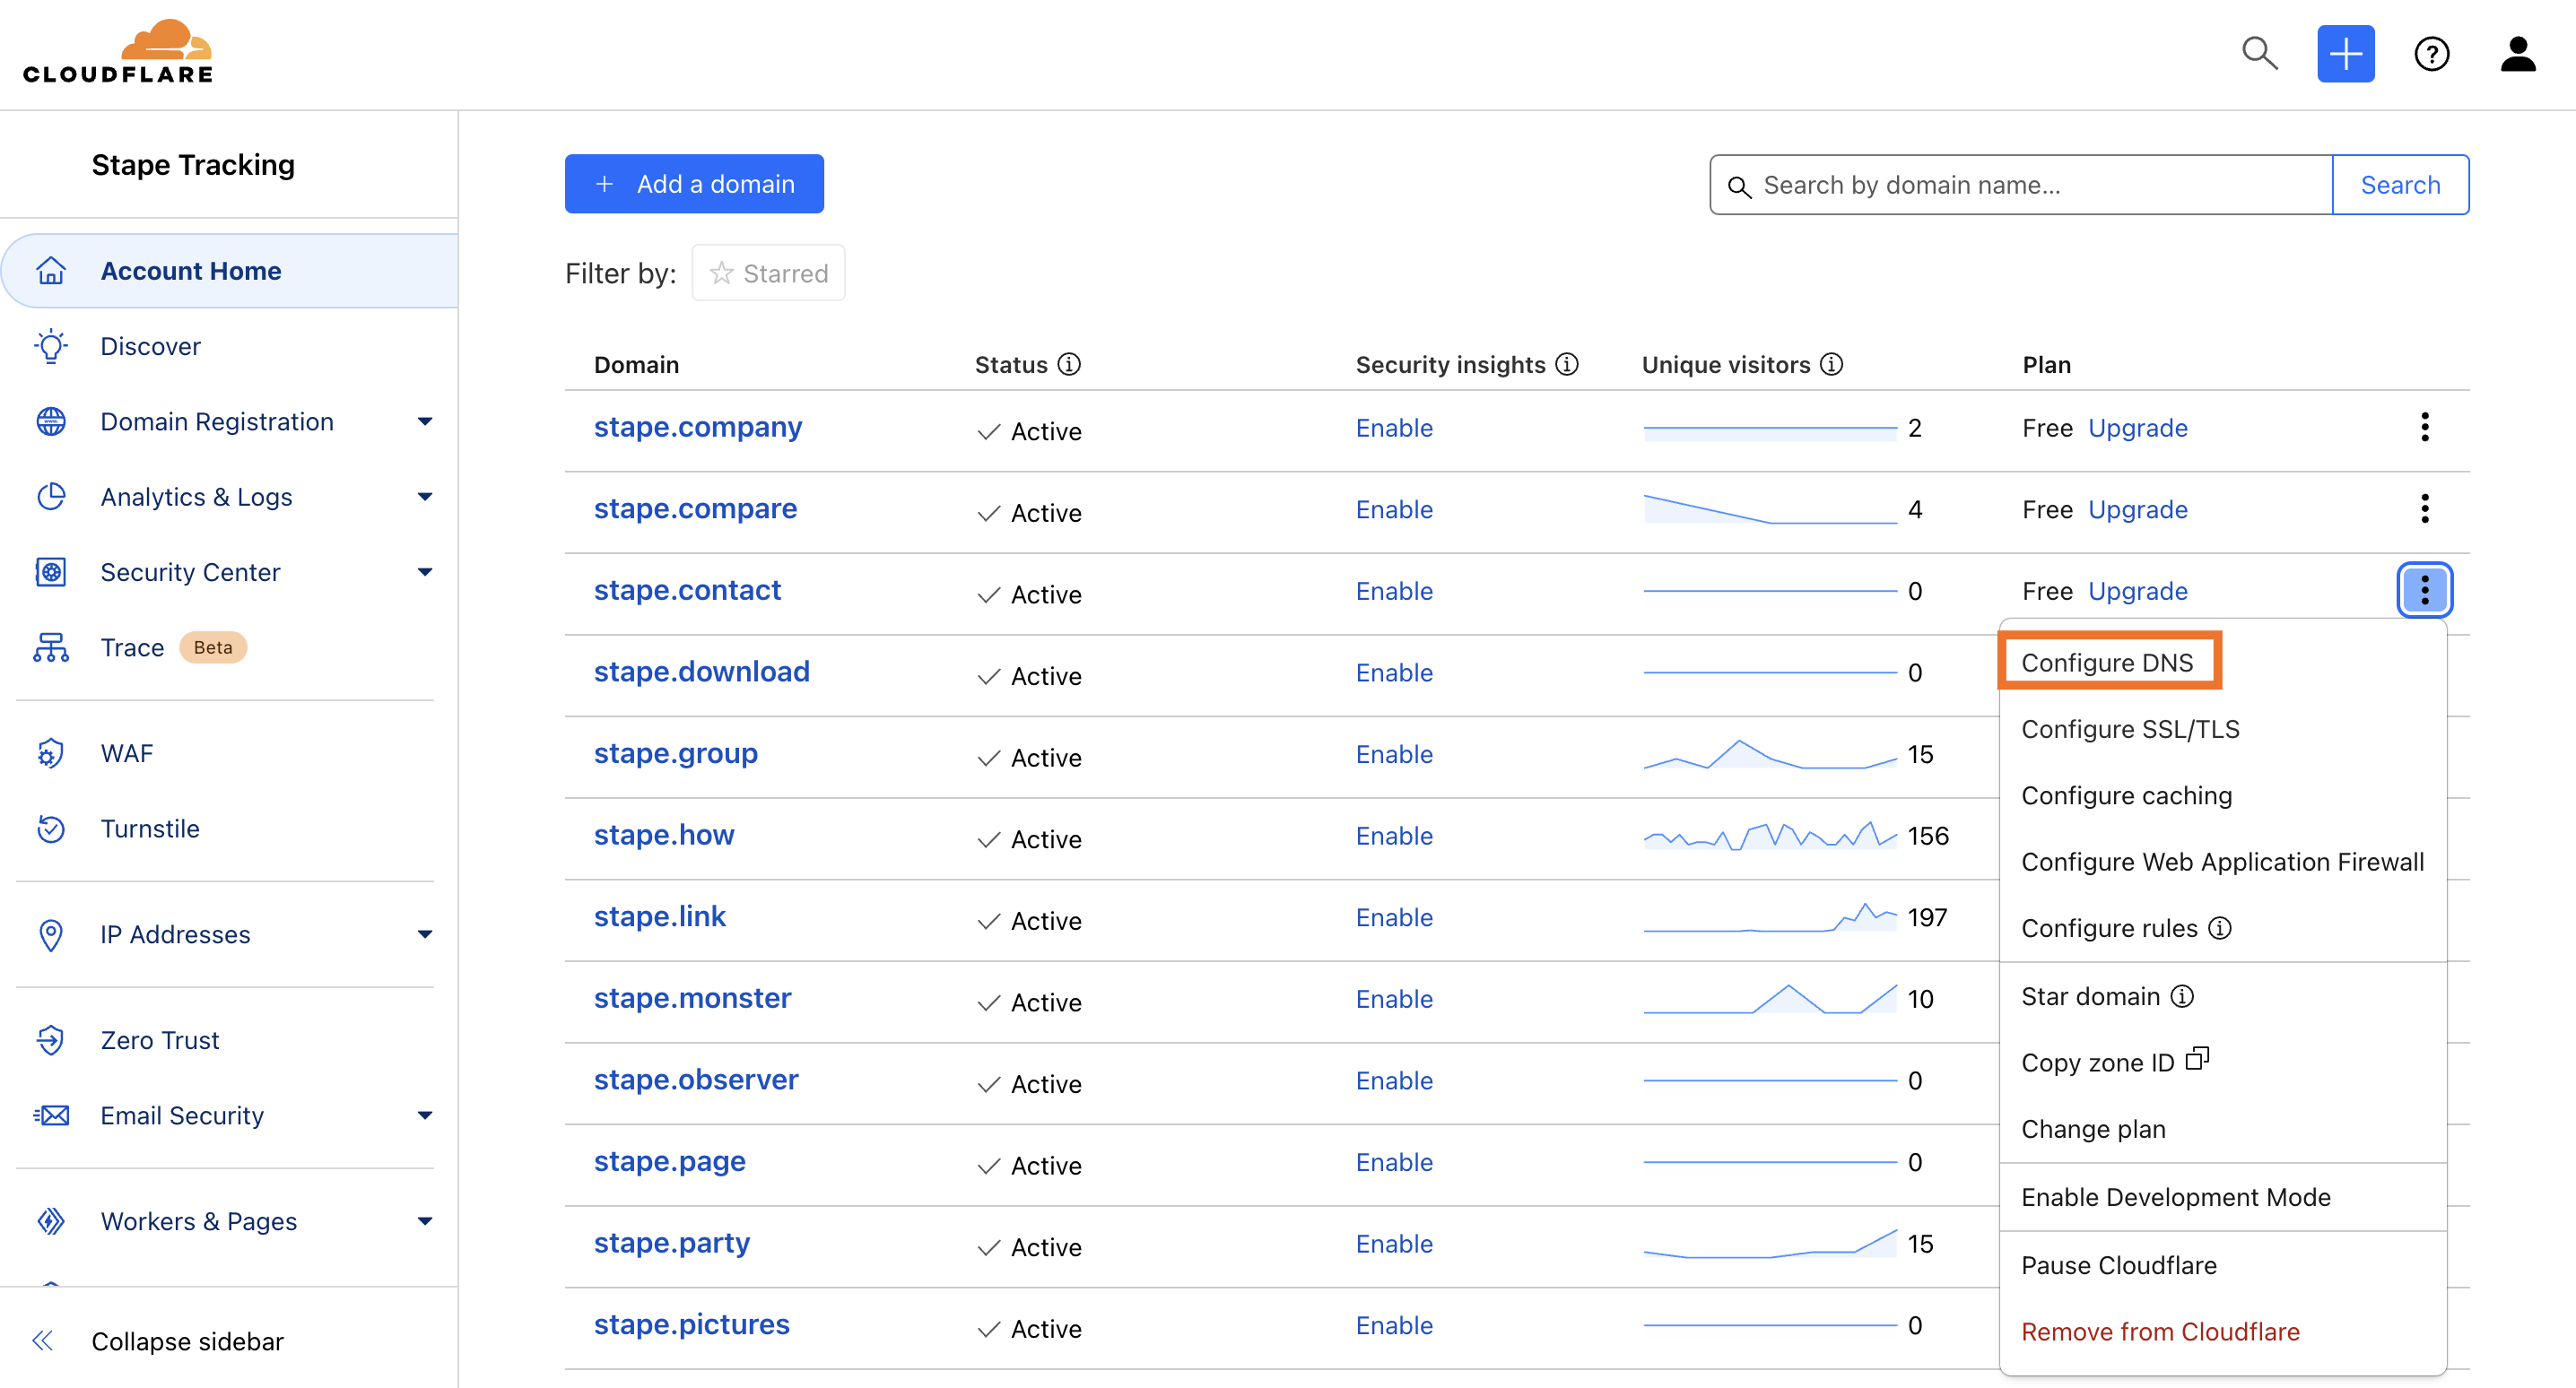
3. Click “Add record”.
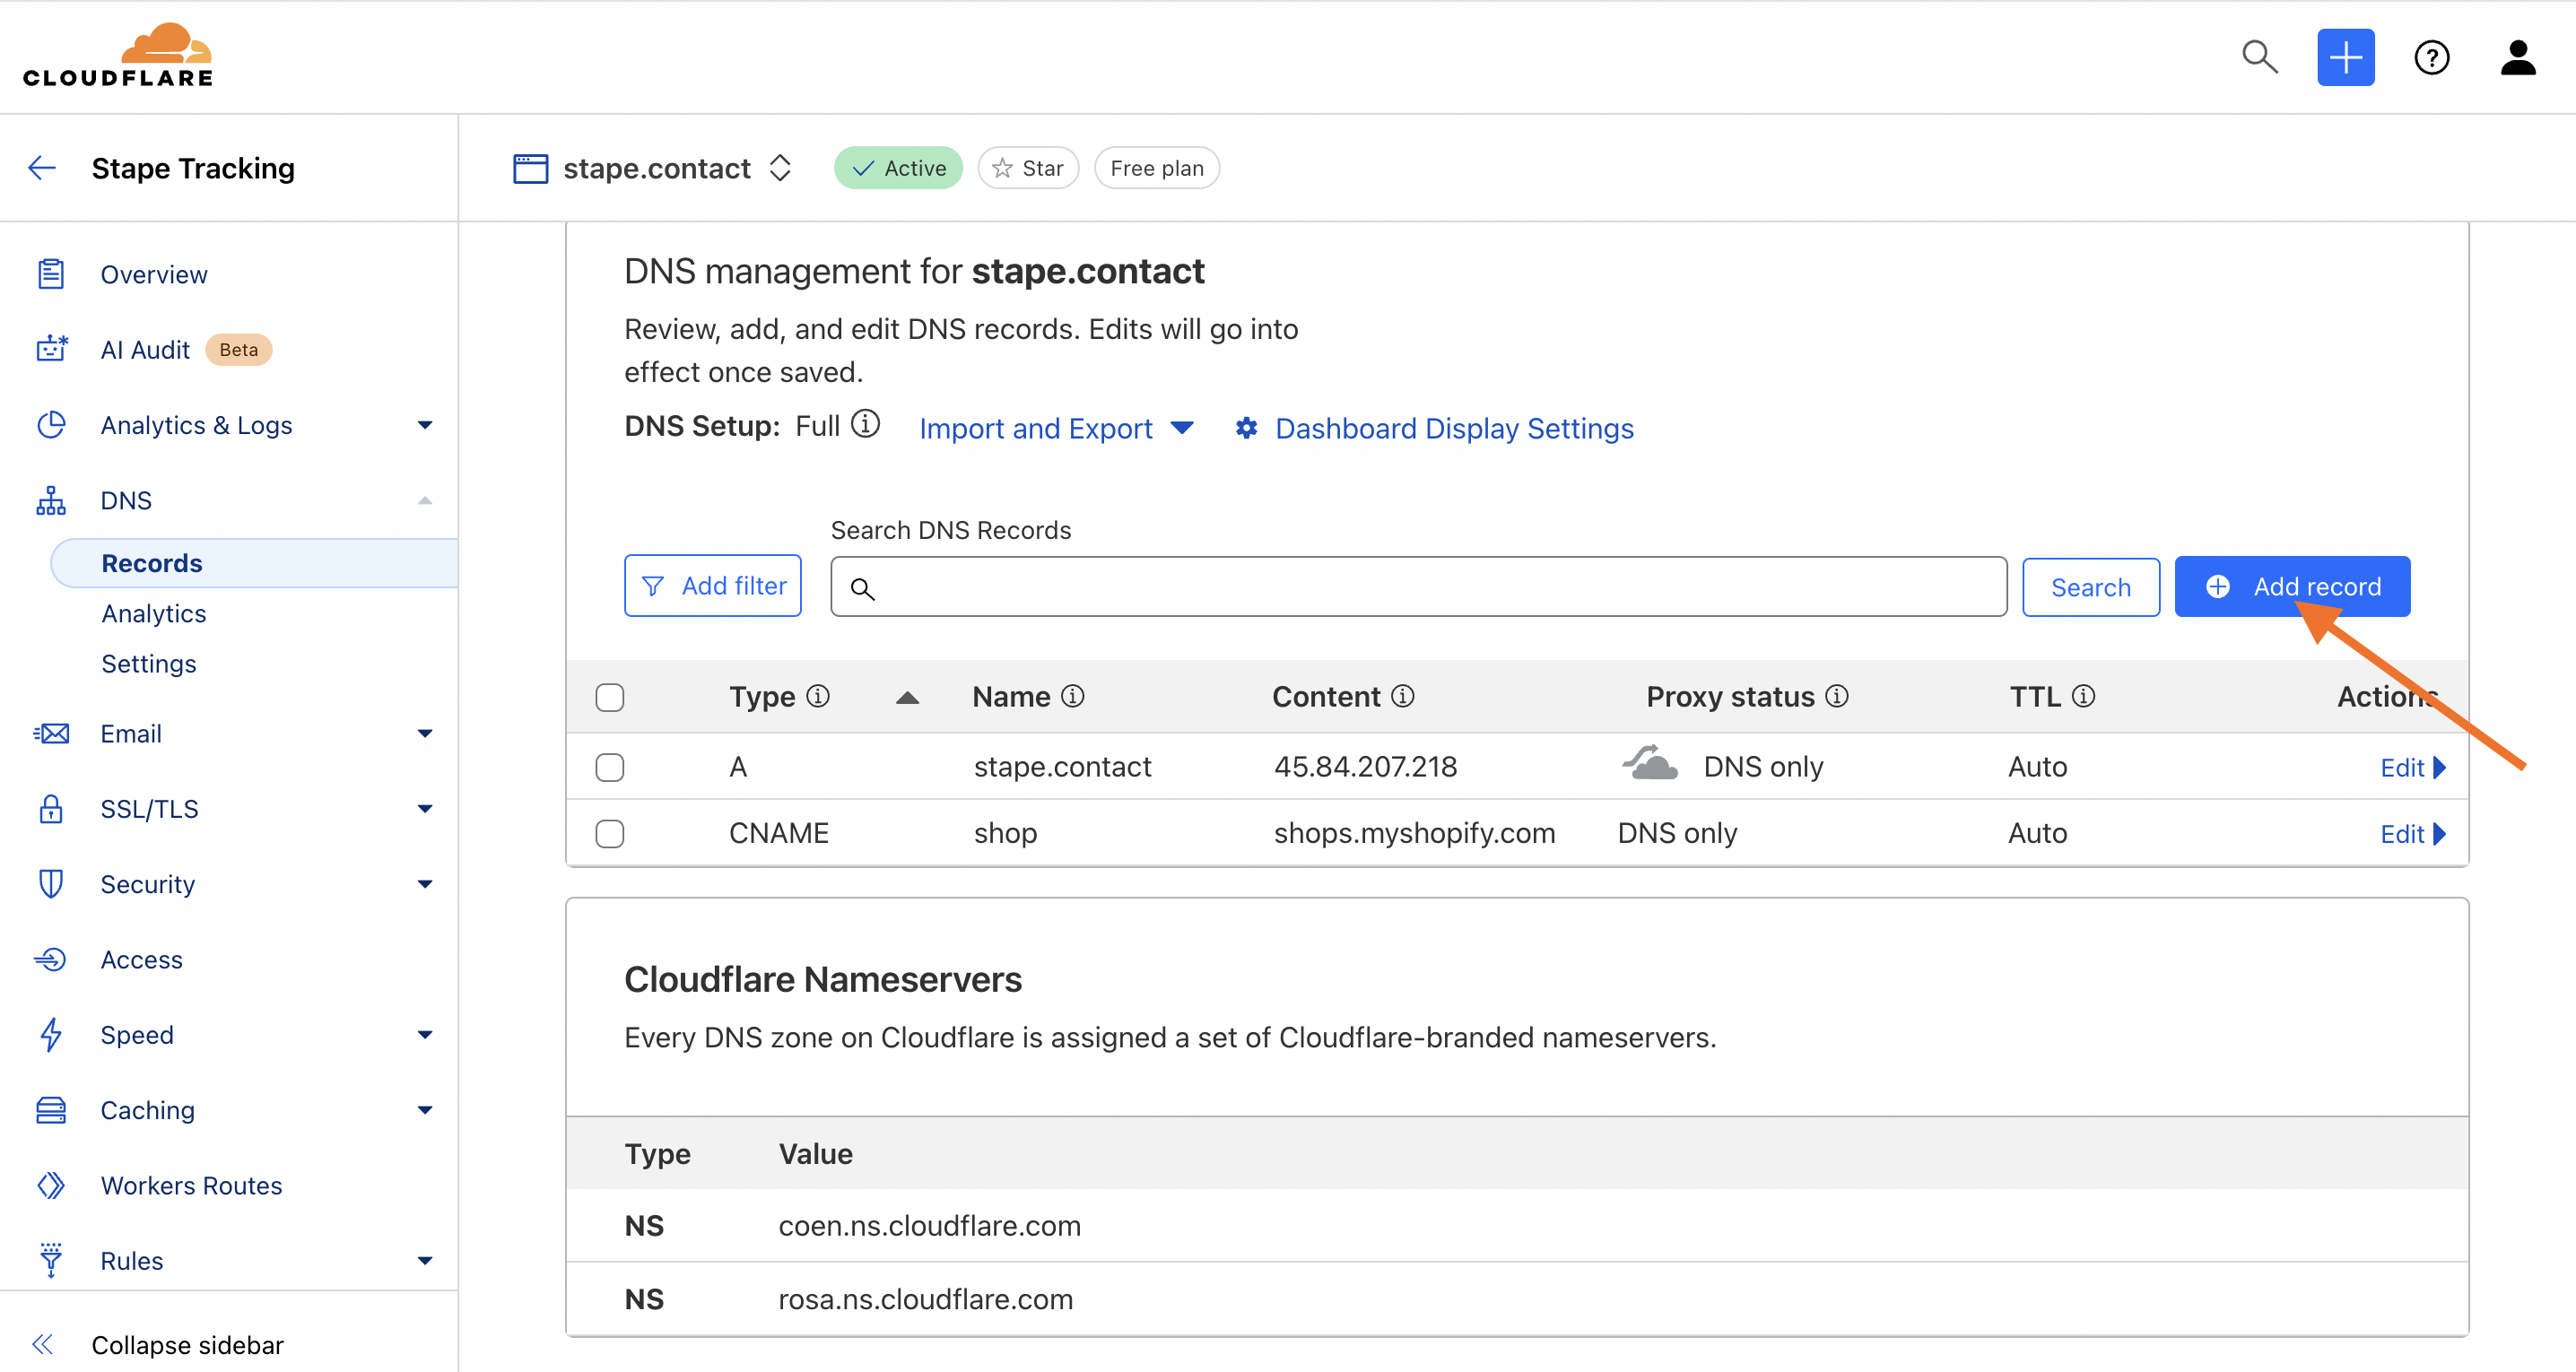
4. Enter the type of record and add all the data for DNS from your Stape account.
Here is an example of a DNS record:


5. Click “Save”.
| Read detailed instructions about creating DNS records on Cloudflare. |
DigitalOcean
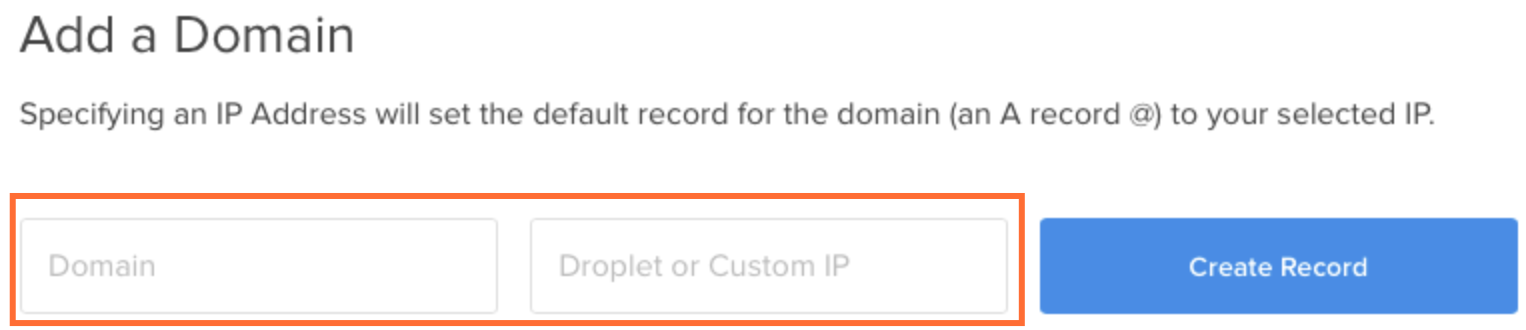
1. Log in to your DigitalOcean account.
2. At the top of the page, click Networking → Domains.
3. Add your registered domain and IP address and click Create report.
4. Then, you will see the A record, or address record, for the domain and the name servers (NS records), which you will need to give your domain's registrar.
5. Click “Add record”.
| Find more information on adding DNS records in DigitalOcean’s documentation. |
Namecheap
1. Sign in to your Namecheap account.
2. Select “Domain List” on the left sidebar, and next to your domain name, click on “Manage”.
3. Go to the tab Advanced DNS → Host records section → click Add New Record.

4. Enter the type of record, host, and value that you can find in your Stape account.
5. Click “Save changes”.
| Find out more info in Namecheap’s guide on setting up DNS records. |
Domain.com
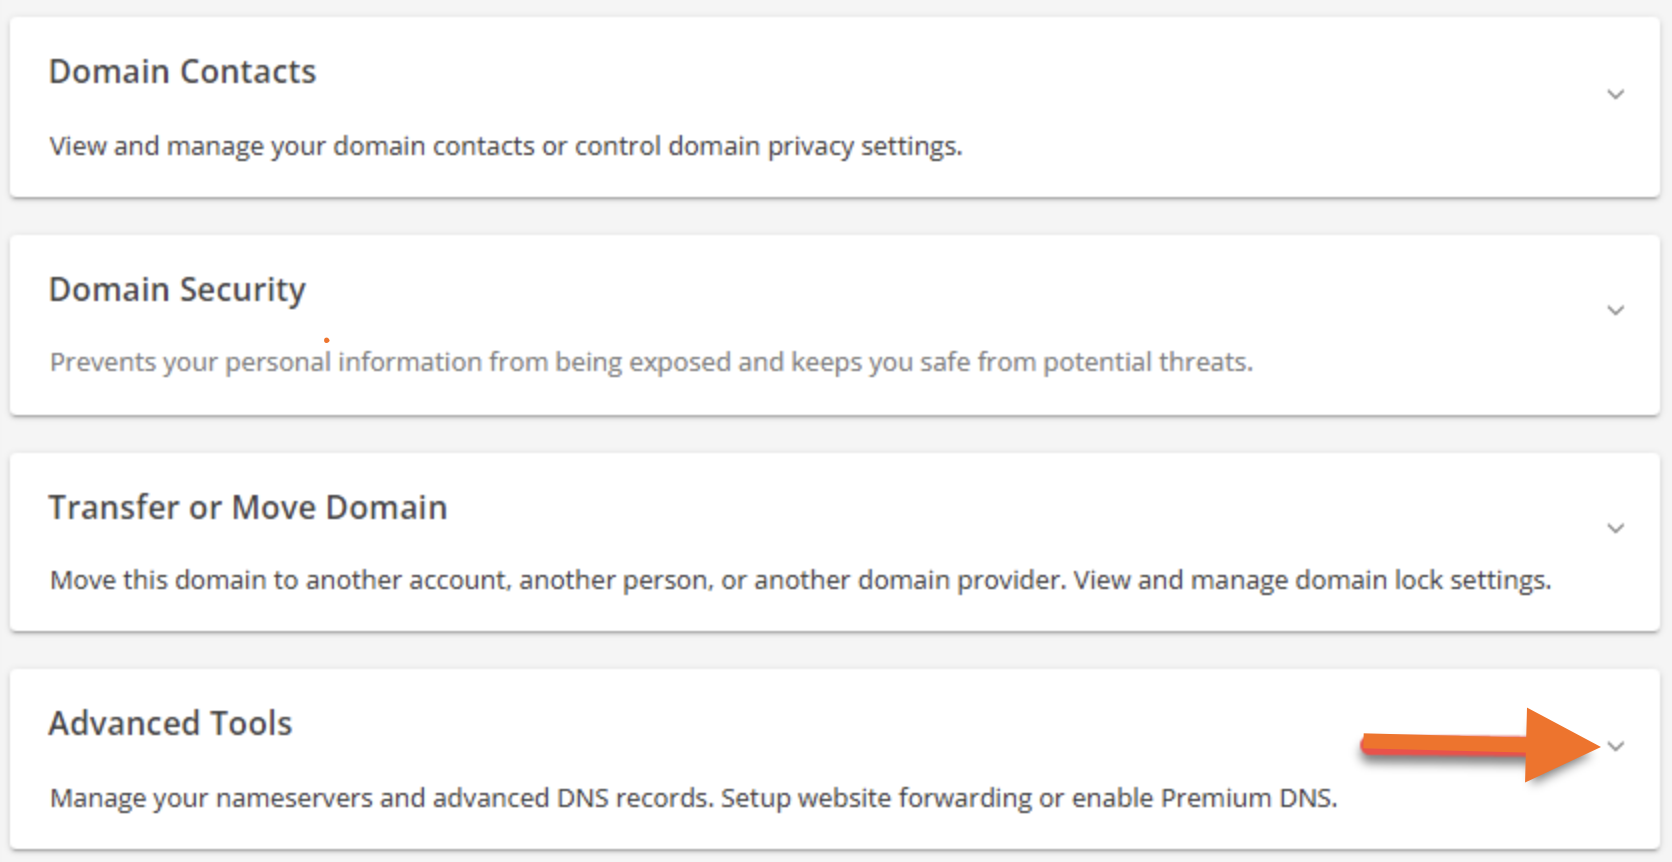
1. Log in to your Domain.com Account.
2. On the left-side menu, click Domains → Settings (next to your domain name) → Advanced Tools → dropdown menu → Manage.
3. Click "+ ADD RECORD" and fill in the required fields with data from your Stape account.
4. Click “ADD” to save changes.
| For more details on adding a DNS record, see Domain.com’s guide. |
Check DNS records
DNS record verification usually happens within a few hours after adding the record but may take up to 72 hours in some cases.
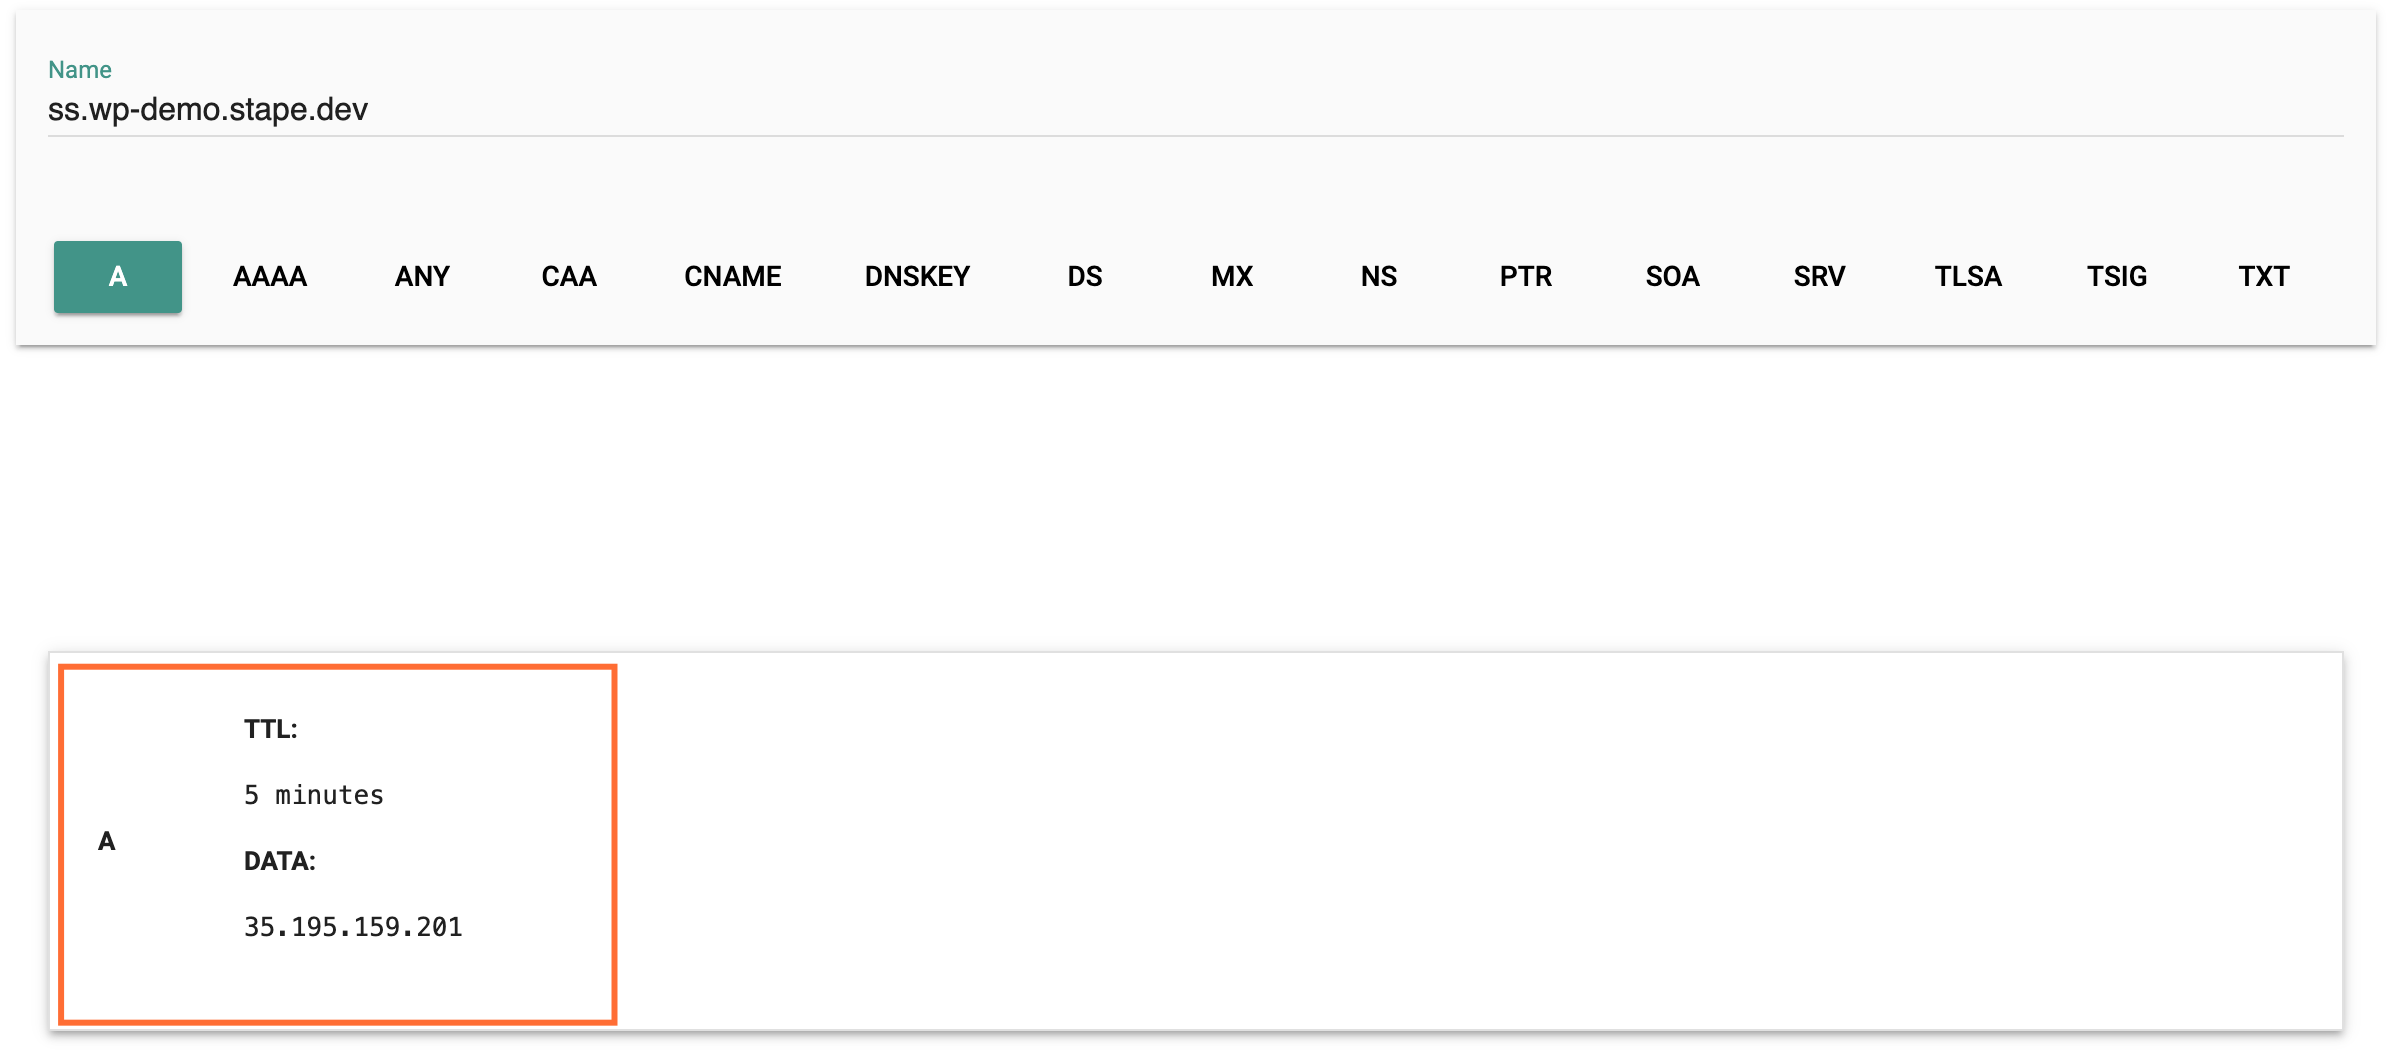
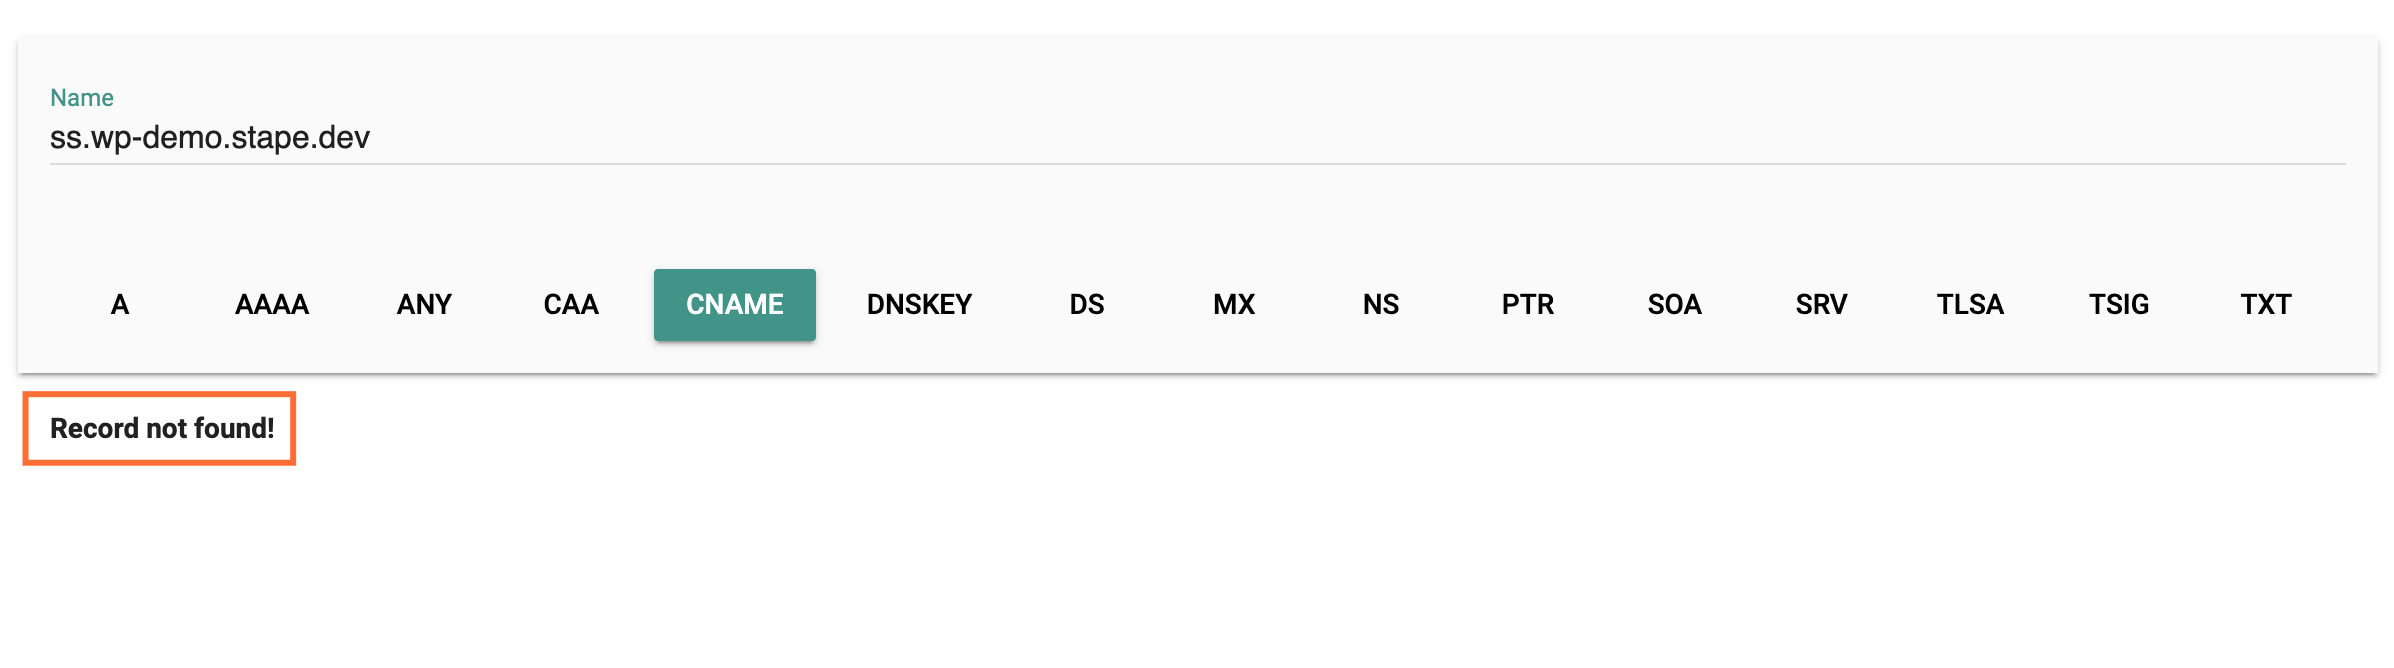
To check if your record is verified, use Dig (DNS lookup):
1. Enter the hostname (without https:// and other extra characters)
2. Choose the type of report (e.g., A, CNAME).
If the DNS record is verified, you will see TTL (Time to live) and Data on record, as shown in the screenshot below.
You will receive a “Record not found” message if the DNS record fails to verify (the screenshot below).
To fix your record, see the “Troubleshooting DNS record” section.
Troubleshooting DNS records for server-side tracking
Problems with DNS records verification can be caused by different reasons, among them:
1. Wrong DNS record
Values from your Stape container can mismatch the ones in the DNS record you added.
Solution: go to Stape Admin → open container → Settings → Domains (Tagging Server URLs) and compare with data you added to your DNS record on the hosting provider site. If needed, make changes to your DNS record.
2. DNS records are proxied
If you're not using the “Own CDN” option on Stape, ensure that proxying is disabled for the DNS records of your sGTM subdomain.
Here is an example of Cloudflare. This is how proxy status should look like:

Below is an example of how proxy status should not look like:

Solution: you need to disable proxying in the DNS record settings. On the example with Cloudflare, go to Cloudflare dashboard → DNS → Records → choose DNS record → Edit → toggle Proxy Status to Off.
Conclusion
Adding DNS records for your custom domain is crucial for server-side tracking. This helps bypass ad blockers’ harmful impact on data collection and allows you to verify the custom domain you created for server-side tracking.
DNS records configuration is made on the side of your hosting provider. The process doesn’t differ much from provider to provider, and adding a DNS record doesn’t take much time. You will have a verified record in a few hours (some cases may take up to 72 hours, but it isn’t a typical case). If not, see how you can fix it.
Switching to server-side?
Stape has lots of tags for server GTM! Click on Try for free to register and check them all.

Comments