How to configure consent management using GTM and Axeptio
Uliana Lesiv
AuthorIn this article, we'll walk you through the process of setting up consent management using Axeptio and Google Tag Manager (GTM). The configuration involves several key steps, which we'll explain in detail:
- Configuring the Axeptio cookie banner.
- Integrating Axeptio with the server GTM.
- Setting up the server-side GTM container, a custom domain, and a Custom Loader.
- Adding the Axeptio cookie banner to the website.
- Configuring the transport URL using the Axeptio CMP tag.
Client-side vs server-side Axeptio consent management
With the client-side method, the Axeptio script is loaded in the browser and is retrieved from the Axeptio domain. With server-side tracking, the scripts required for displaying the consent pop-up are loaded from your domain.
The client-side approach comes with several limitations. Ad blockers and browser restrictions can interfere with loading scripts from third-party domains. For example, browsers like Safari have a seven-day limit on cookie lifespans, which means users are repeatedly prompted for consent.
Managing consent on the server-side will eliminate these impacts. This method provides more control over the data collection process as well as lets you bypass ad blockers and browser limitations.
How server-side consent management works
Please note: using server-side tracking doesn't eliminate the need to request user consent for data collection.
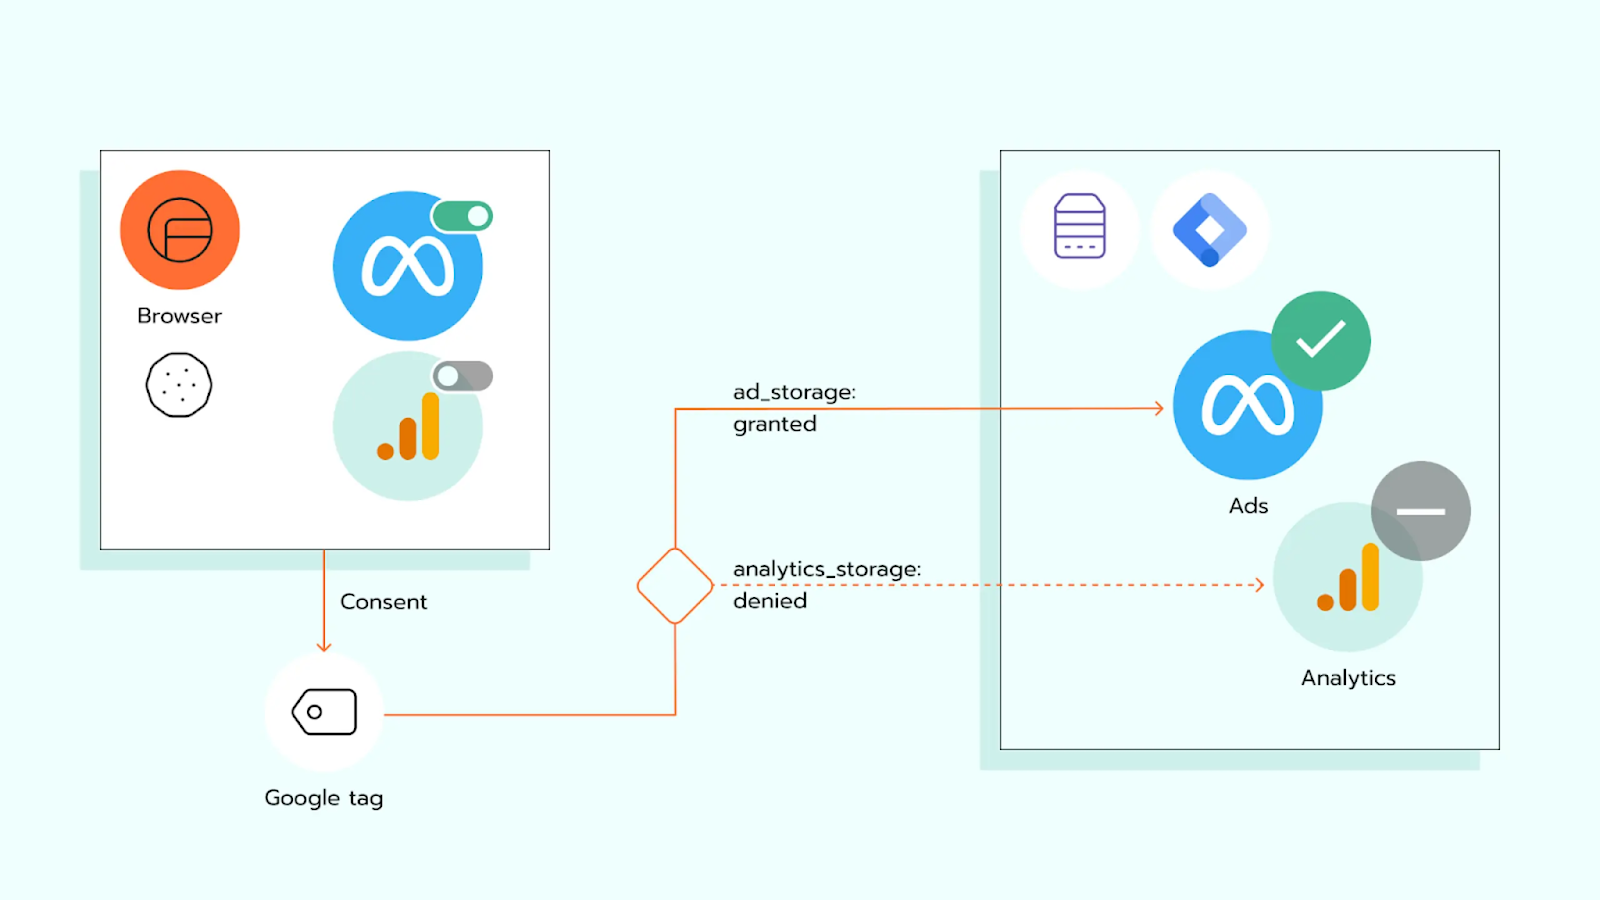
Consent management in server-side works the following way:
- The consent banner collects the user's consent preferences and passes them to a tag (such as the Google tag) that sends the consent status from the browser to the server GTM container.
- The Google tag includes a parameter that reflects the user's consent status, which is then forwarded to the server container.
- Inside the server GTM, tags respond based on the value of that consent parameter, determining how or whether they fire.
Before starting
To set up consent mode, you will need the following:
- Consent Management Platform (in this case, Axeptio CMP).
- Configured web and server GTM containers.
How to set up consent management using Axeptio and server GTM
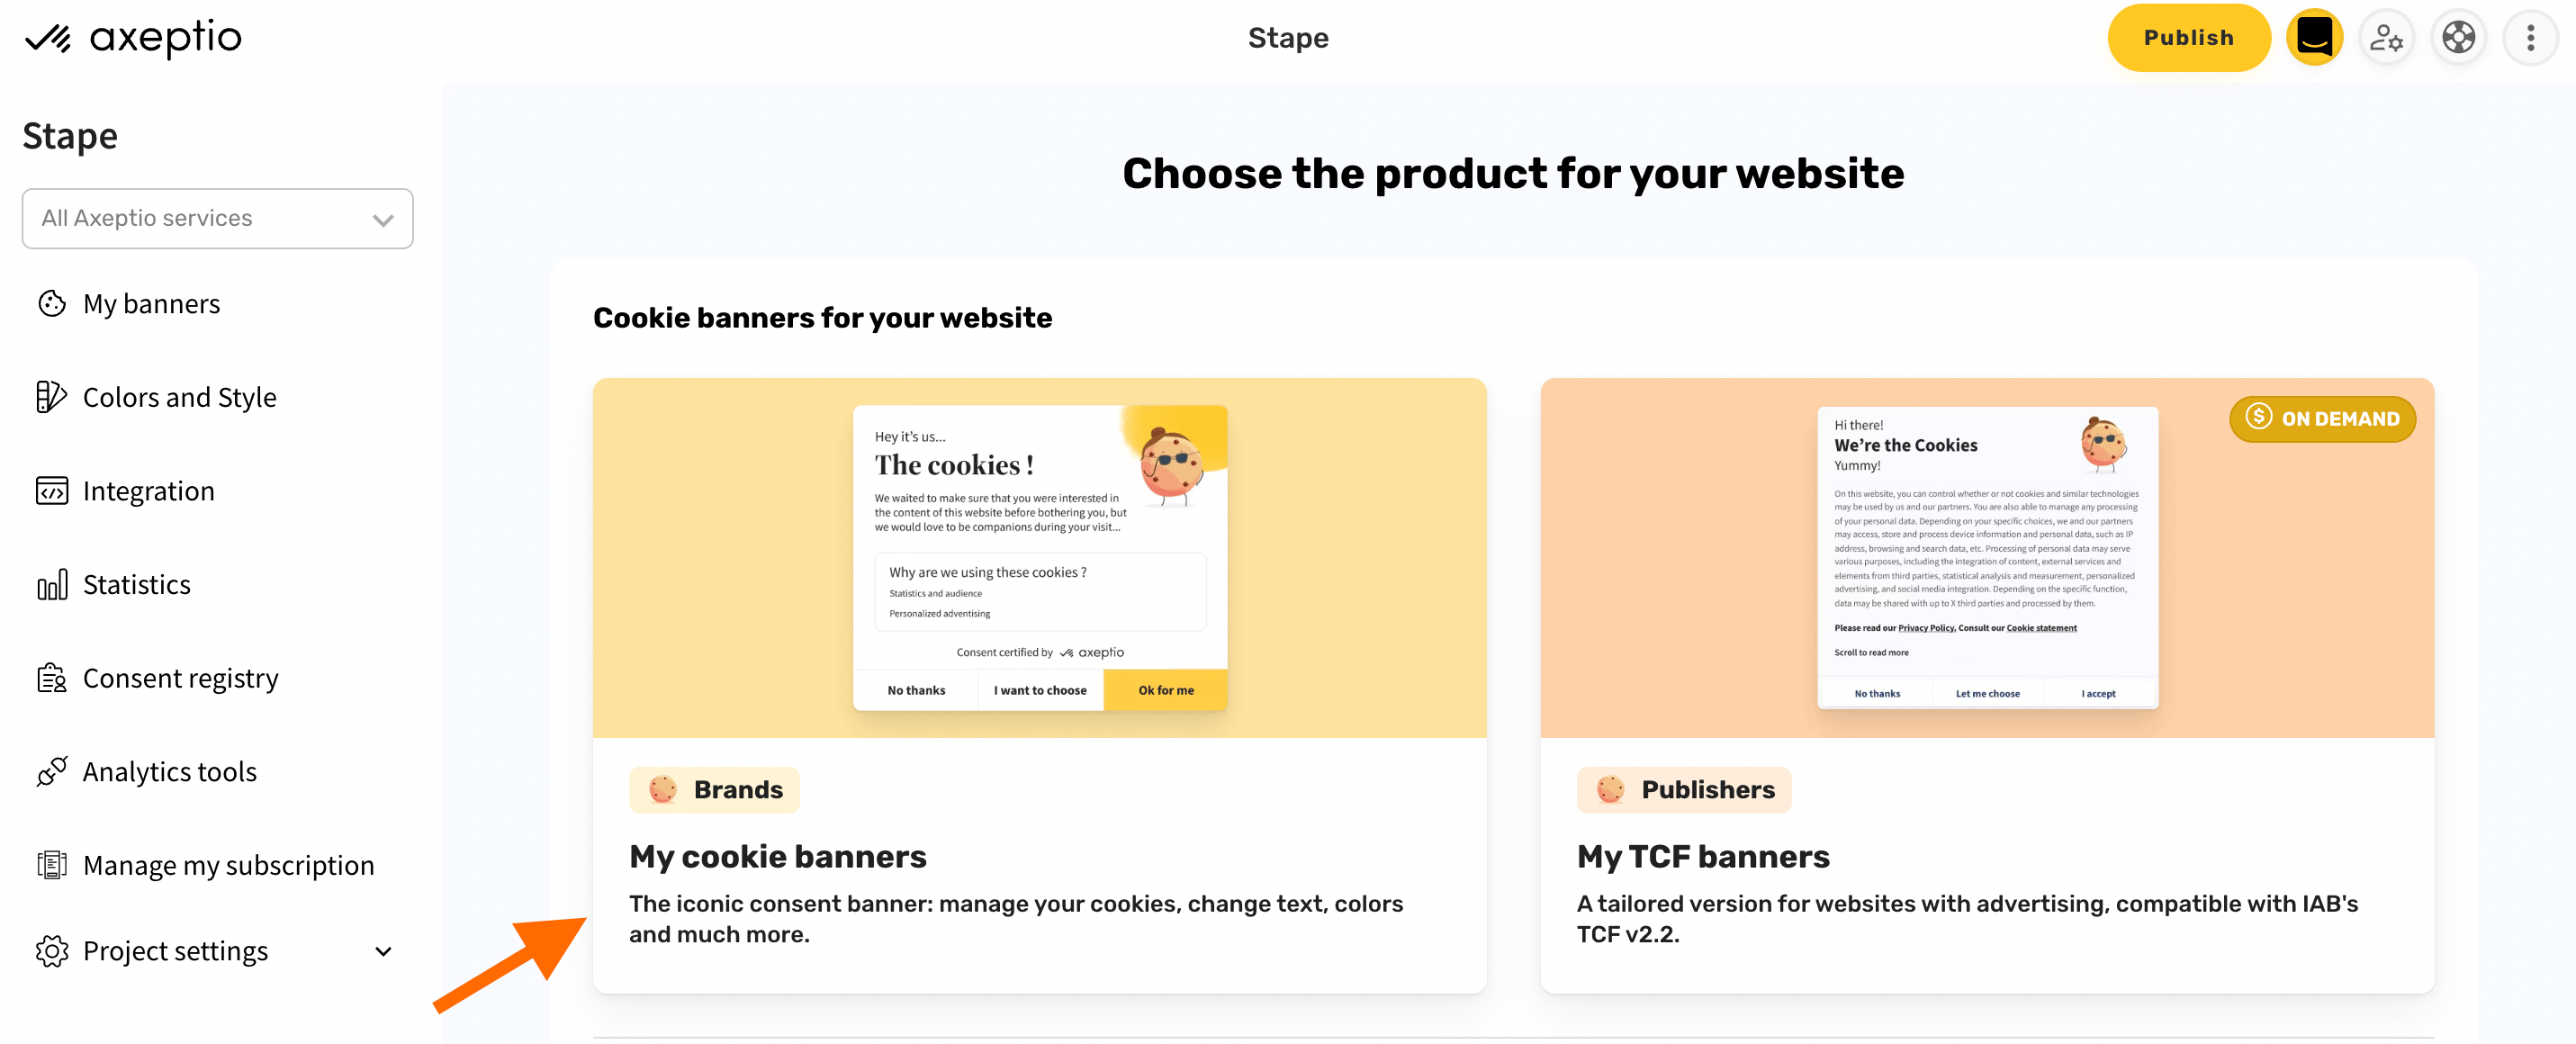
Step 1. Create Axeptio cookie banner
1.1 Go to your project → click on My cookie banners.
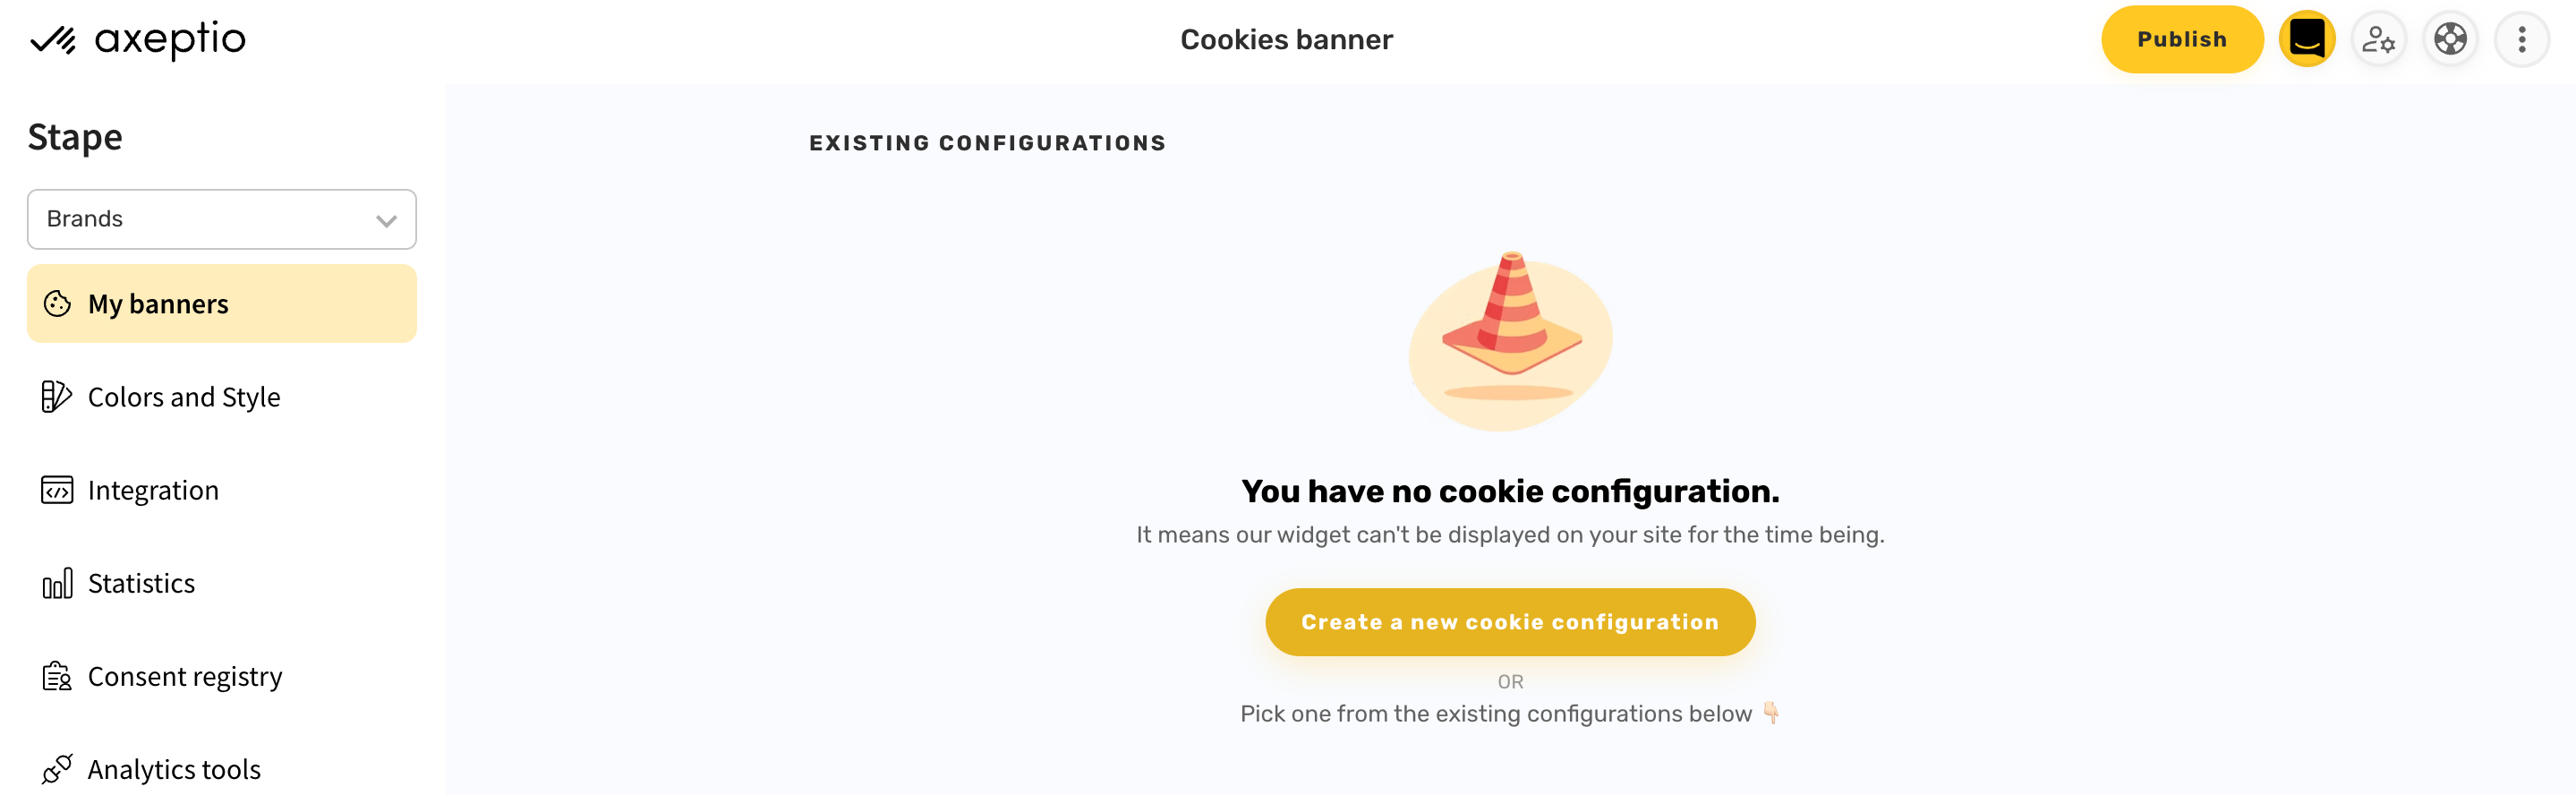
1.2 Click Create a new cookie configuration.
Consent Mode V2 in Axeptio
You can activate Consent Mode V2 in Axeptio by going to the section Banners → select the needed banner if you run multiple projects → enable Consent Mode V2.
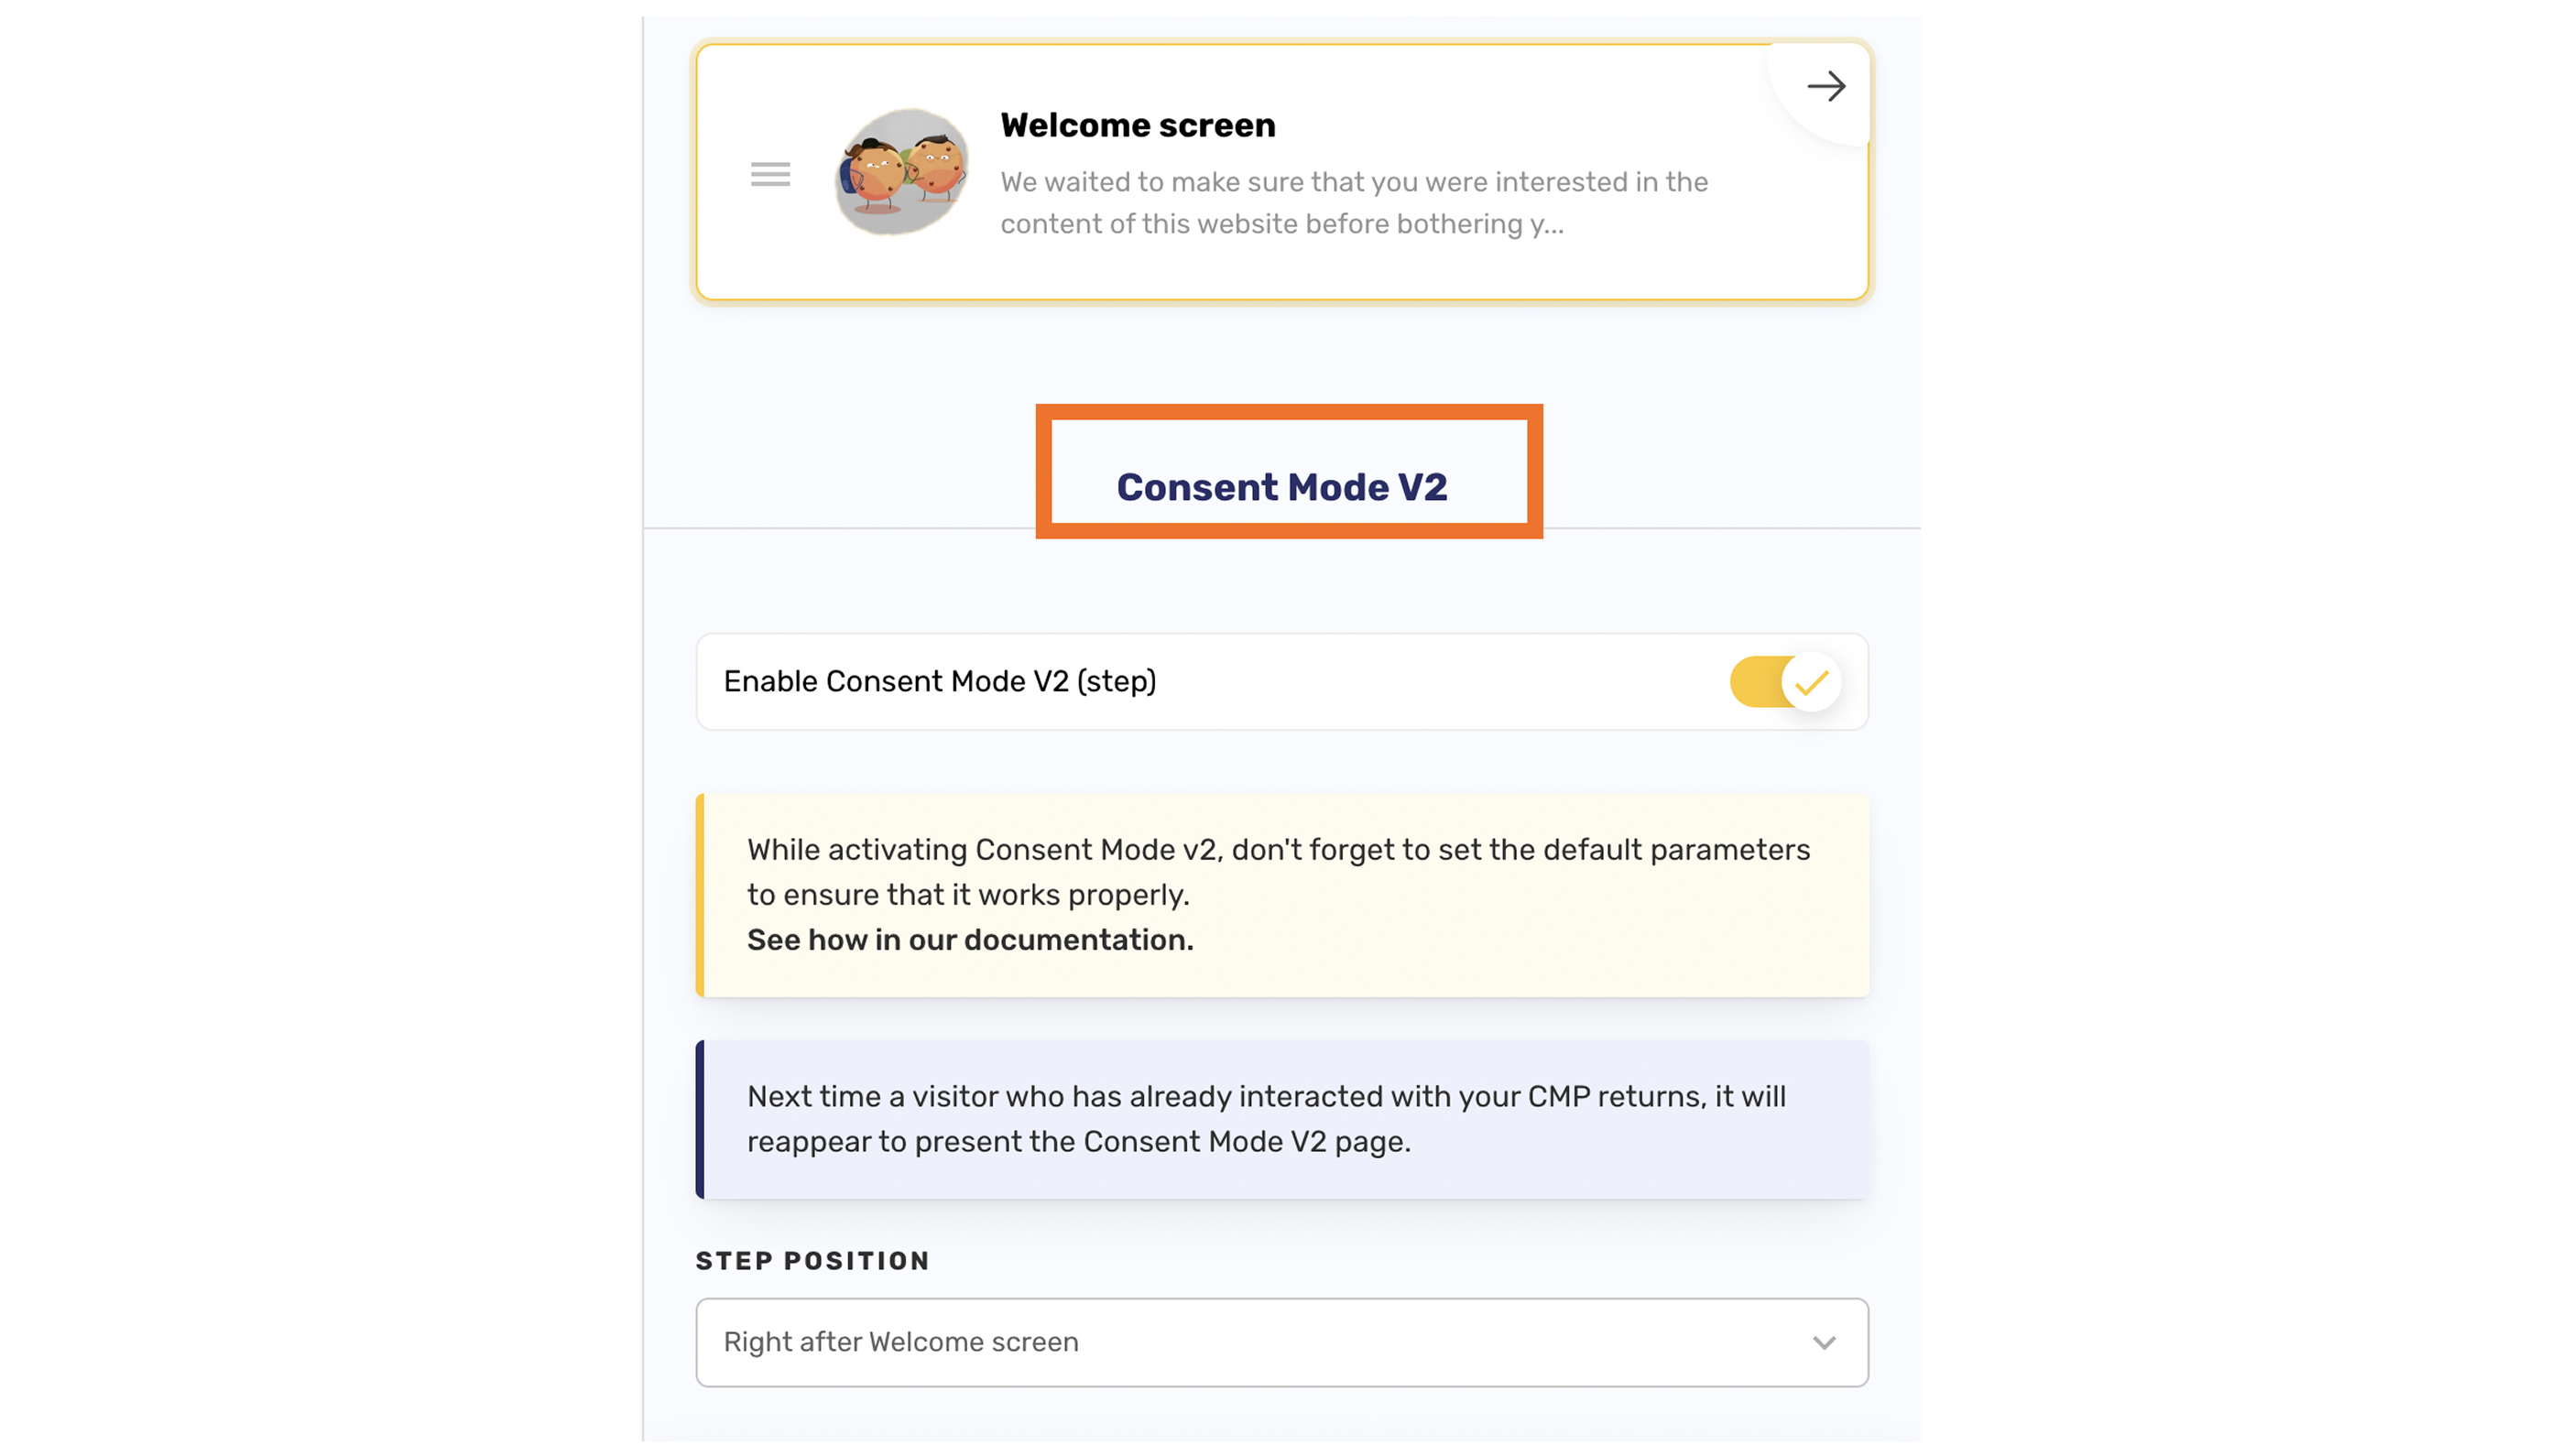
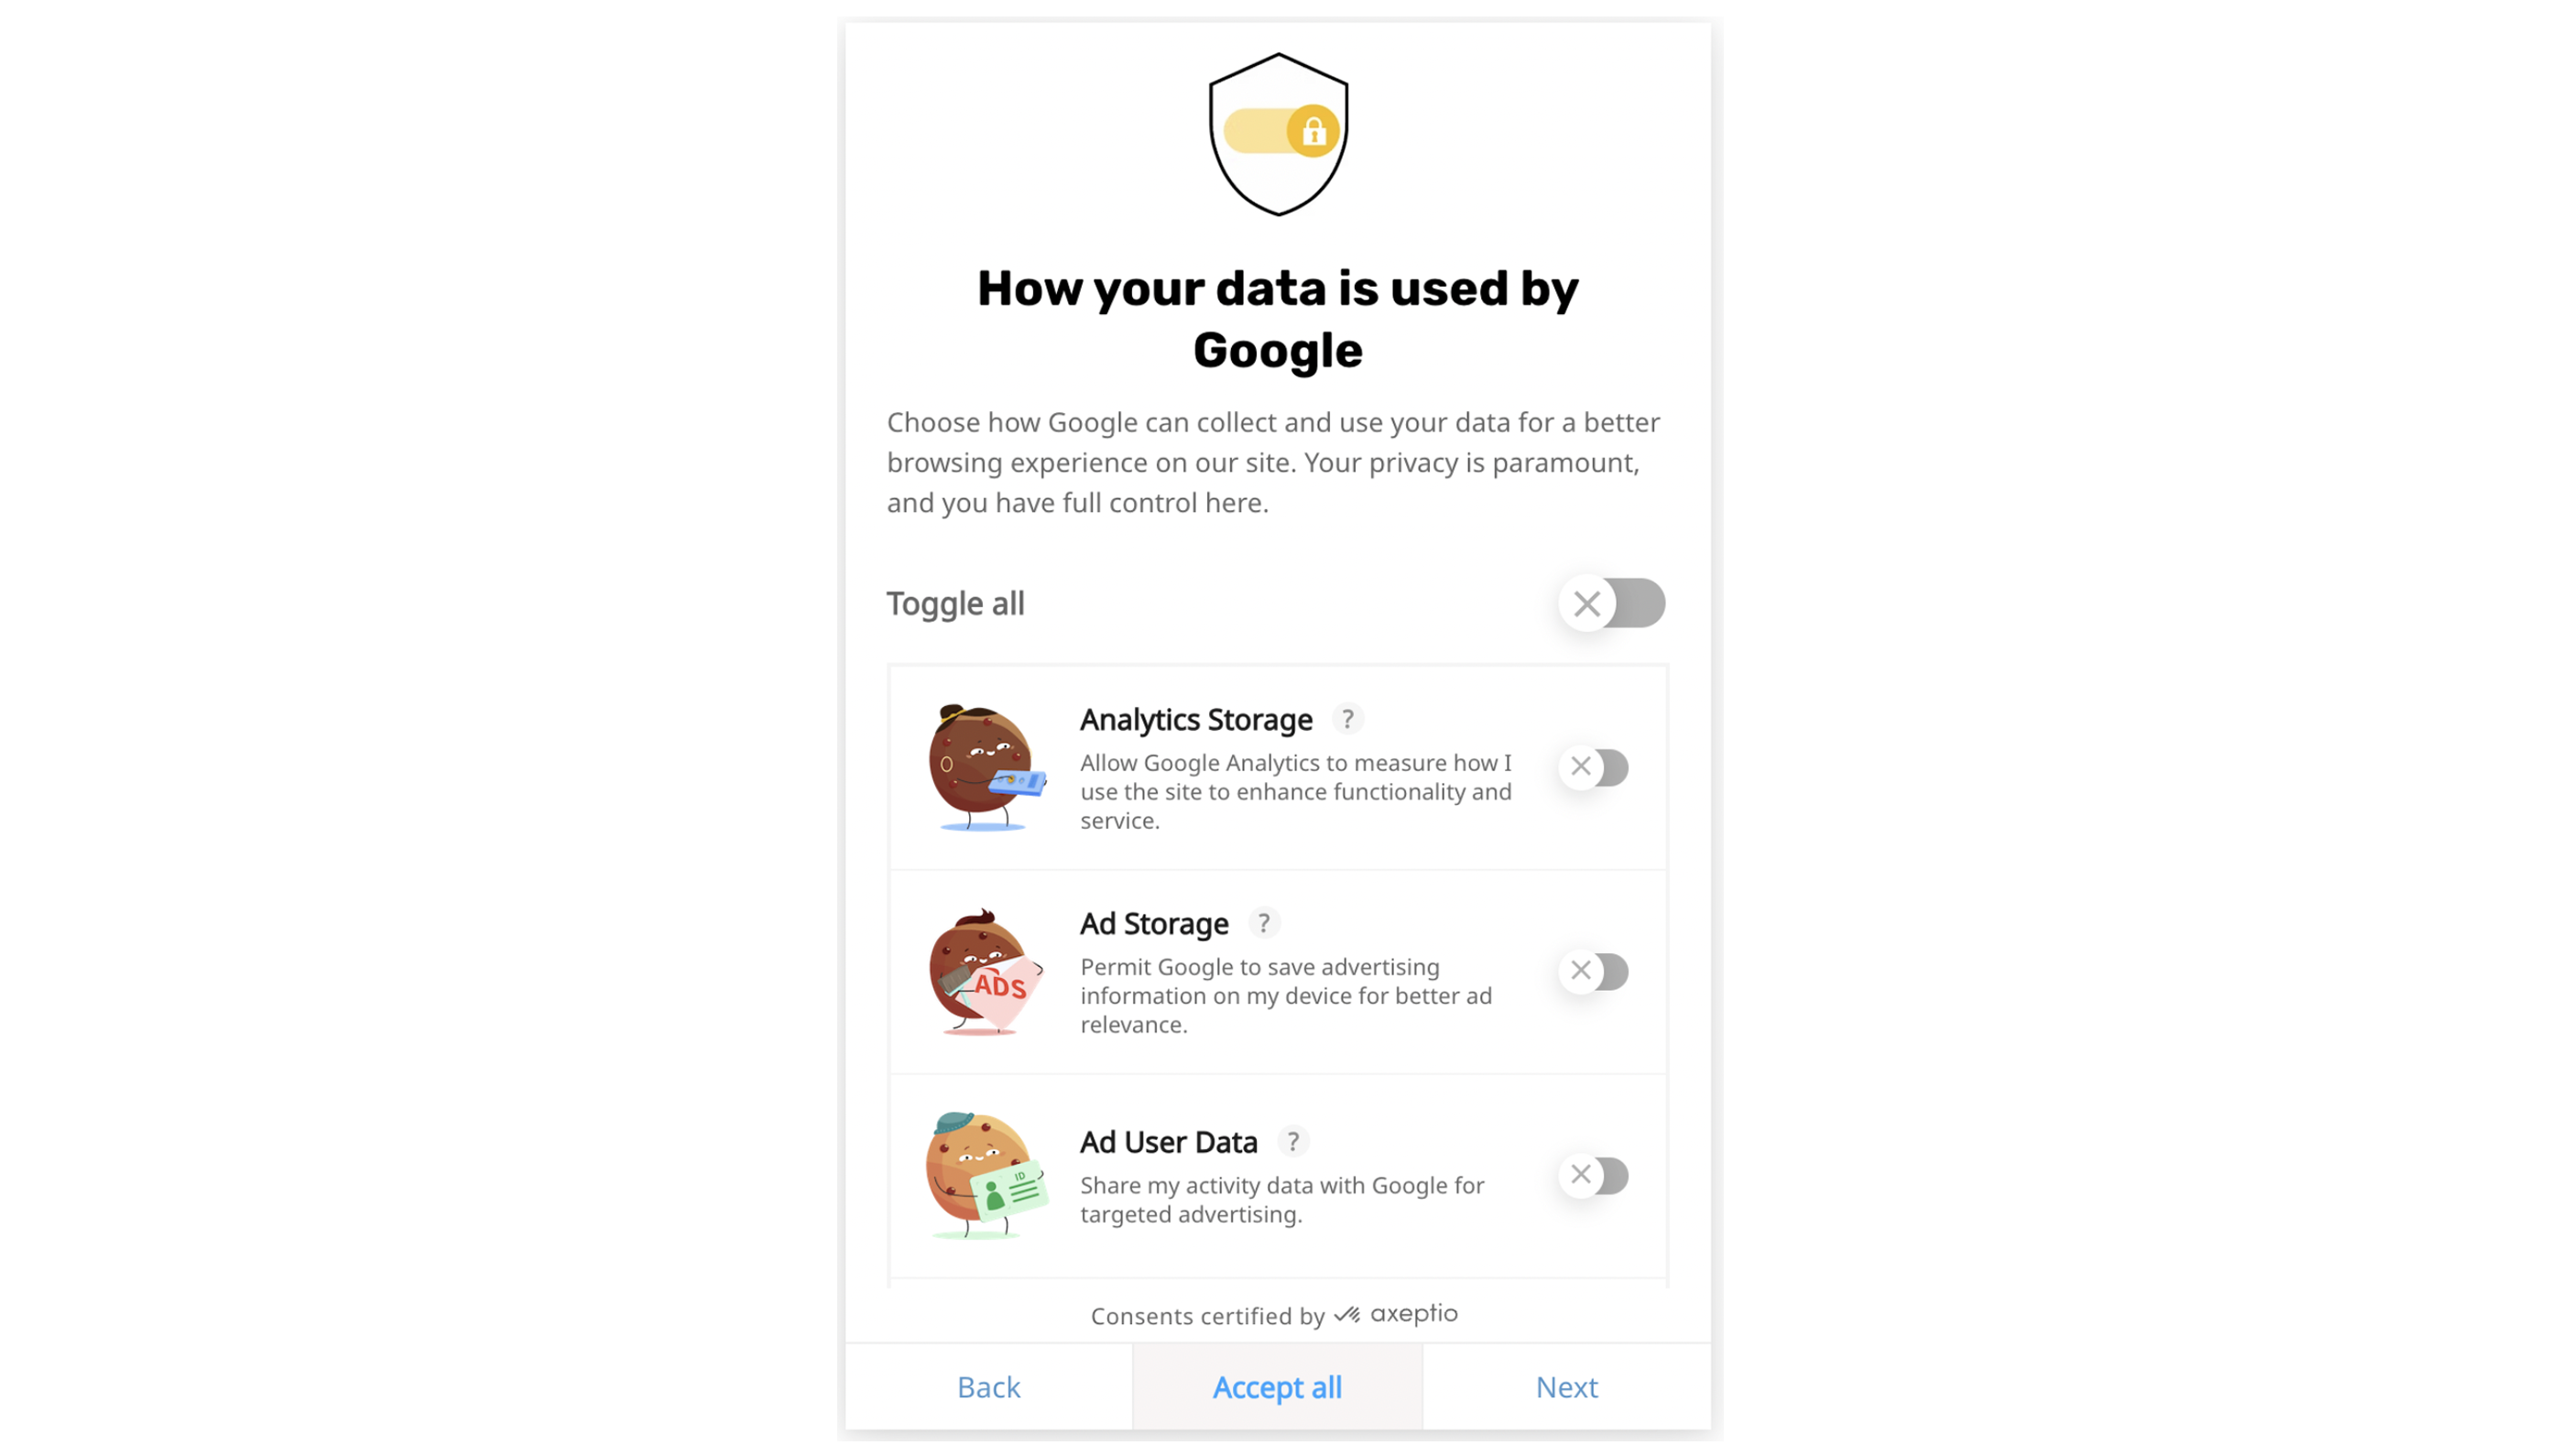
Activating this option will add a new screen to your widget, featuring the four parameters of Google's Consent Mode.
Publish the changes.
Step 2. Integrate Axeptio with server Google Tag Manager
Axeptio offers a few options to add the cookie banner to your website: using GTM, Axeptio script, or WordPress module. For the purpose of this article, we will consider the server GTM method.
2.1 Set up the Axeptio client
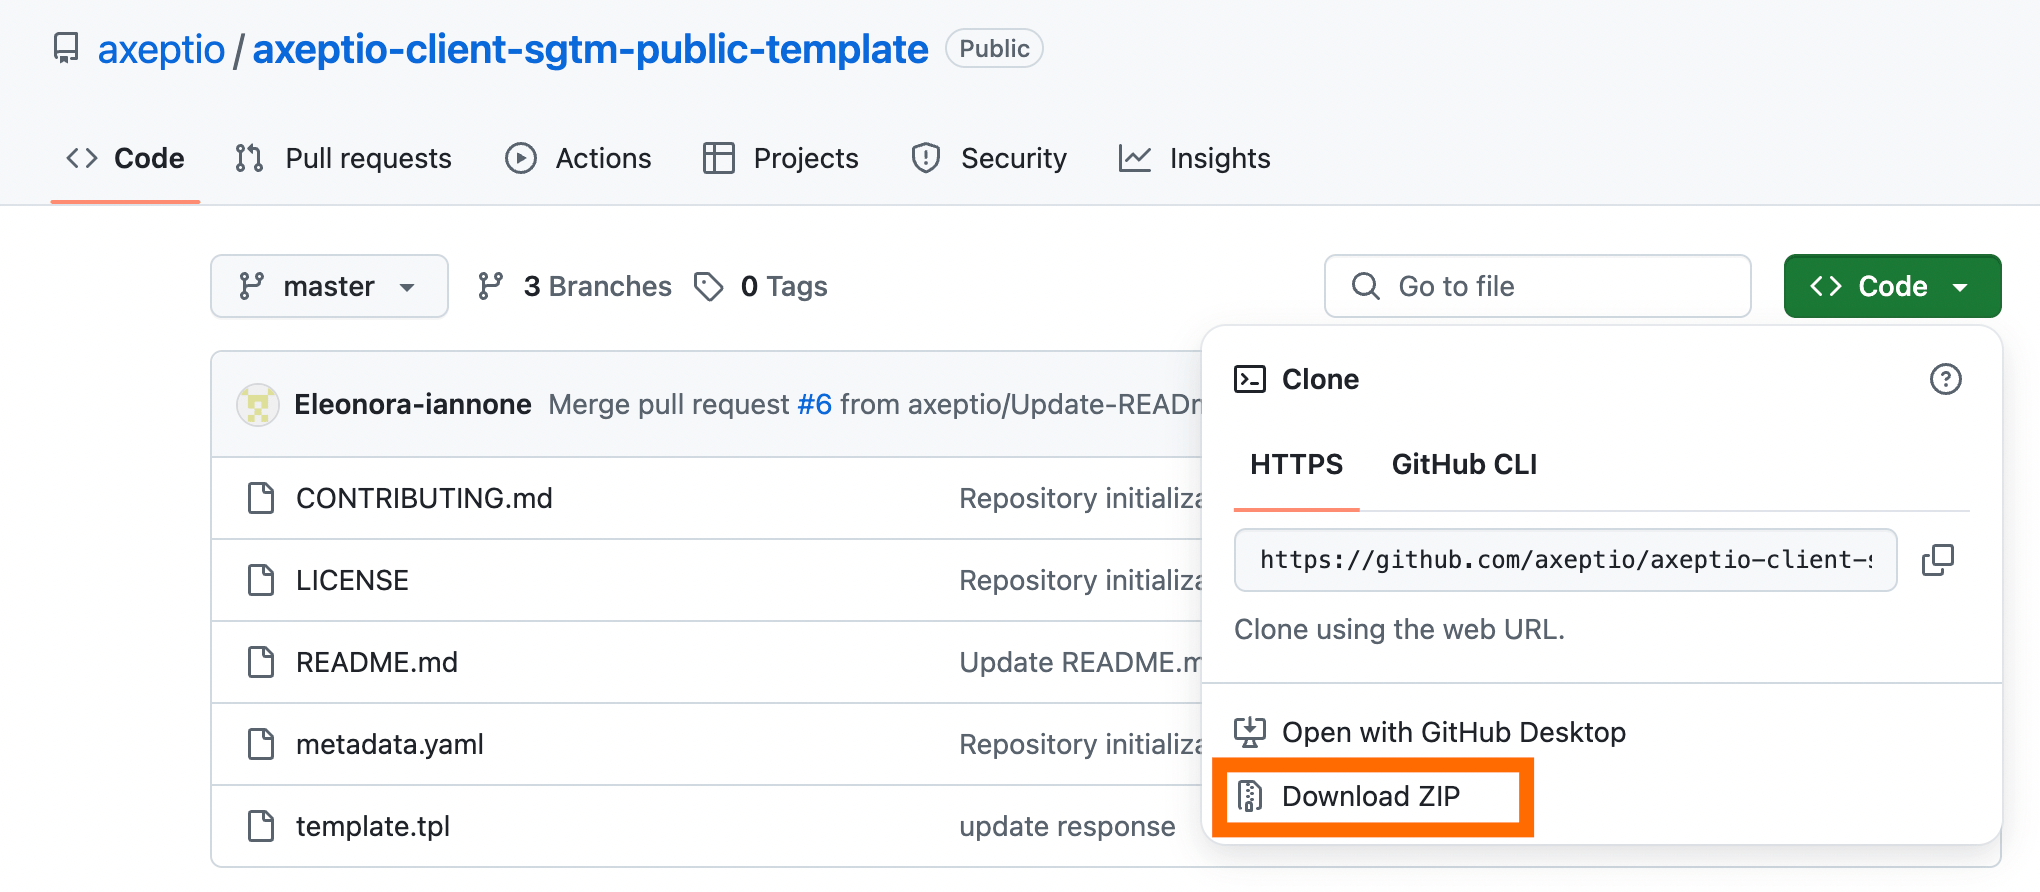
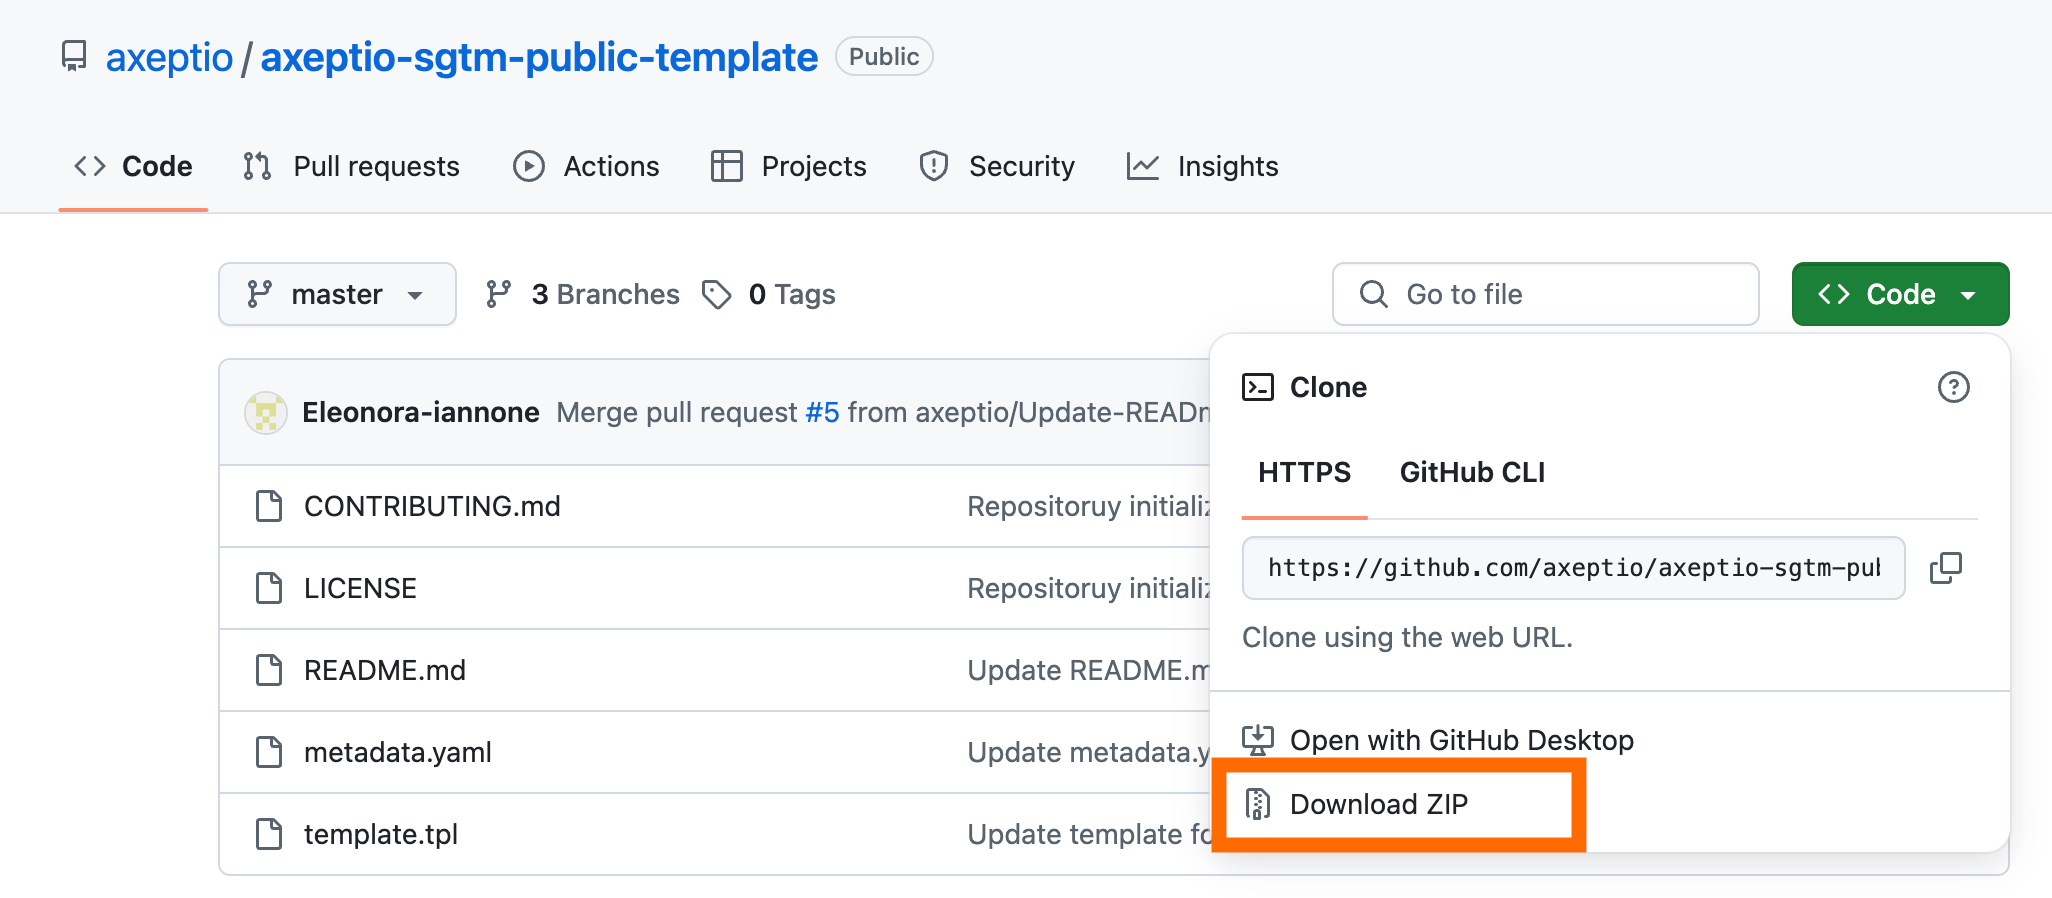
2.1.1 Download the Axeptio client from GitHub and unzip the file.
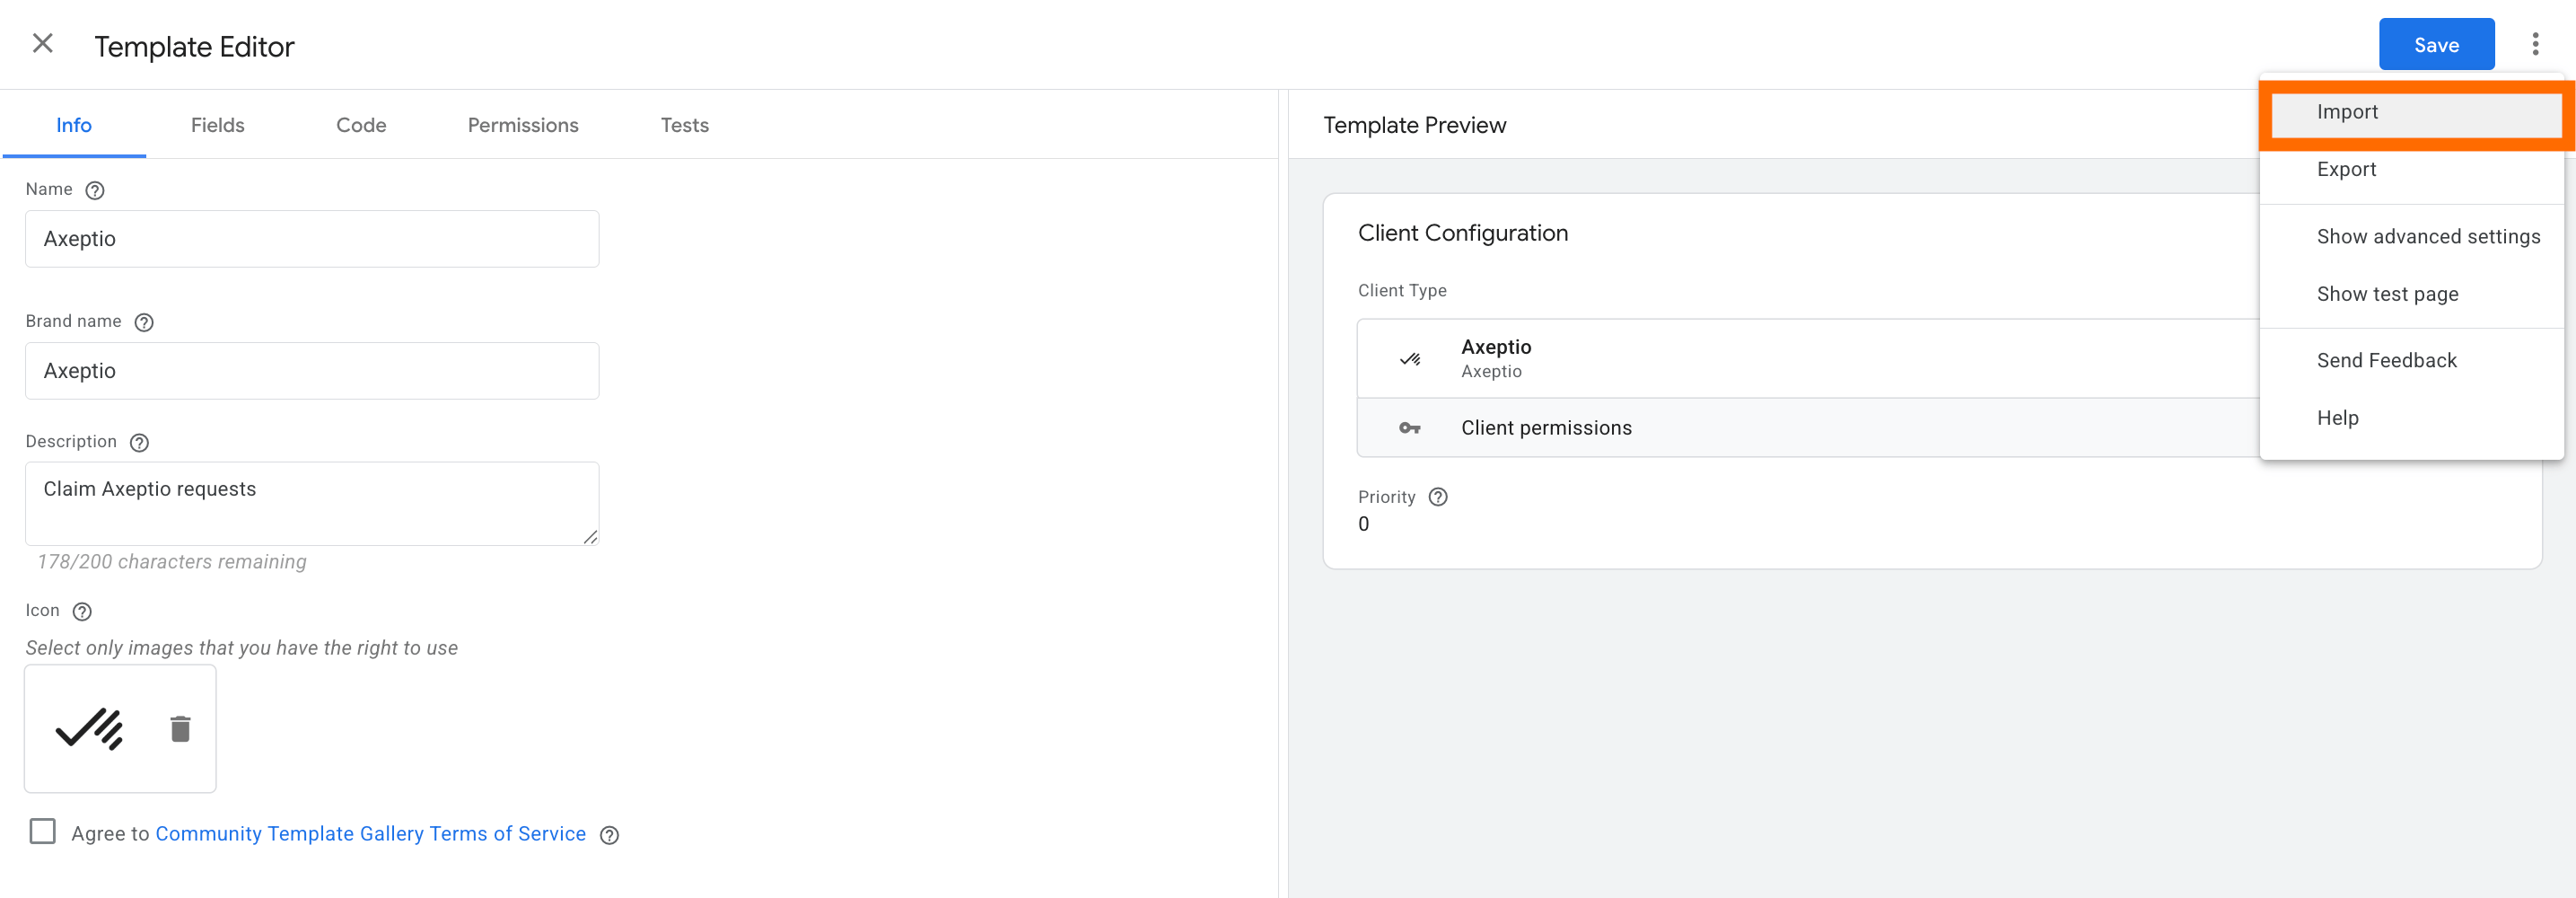
2.1.2 Create a new template in the Client Templates section and upload the file you downloaded from GitHub.
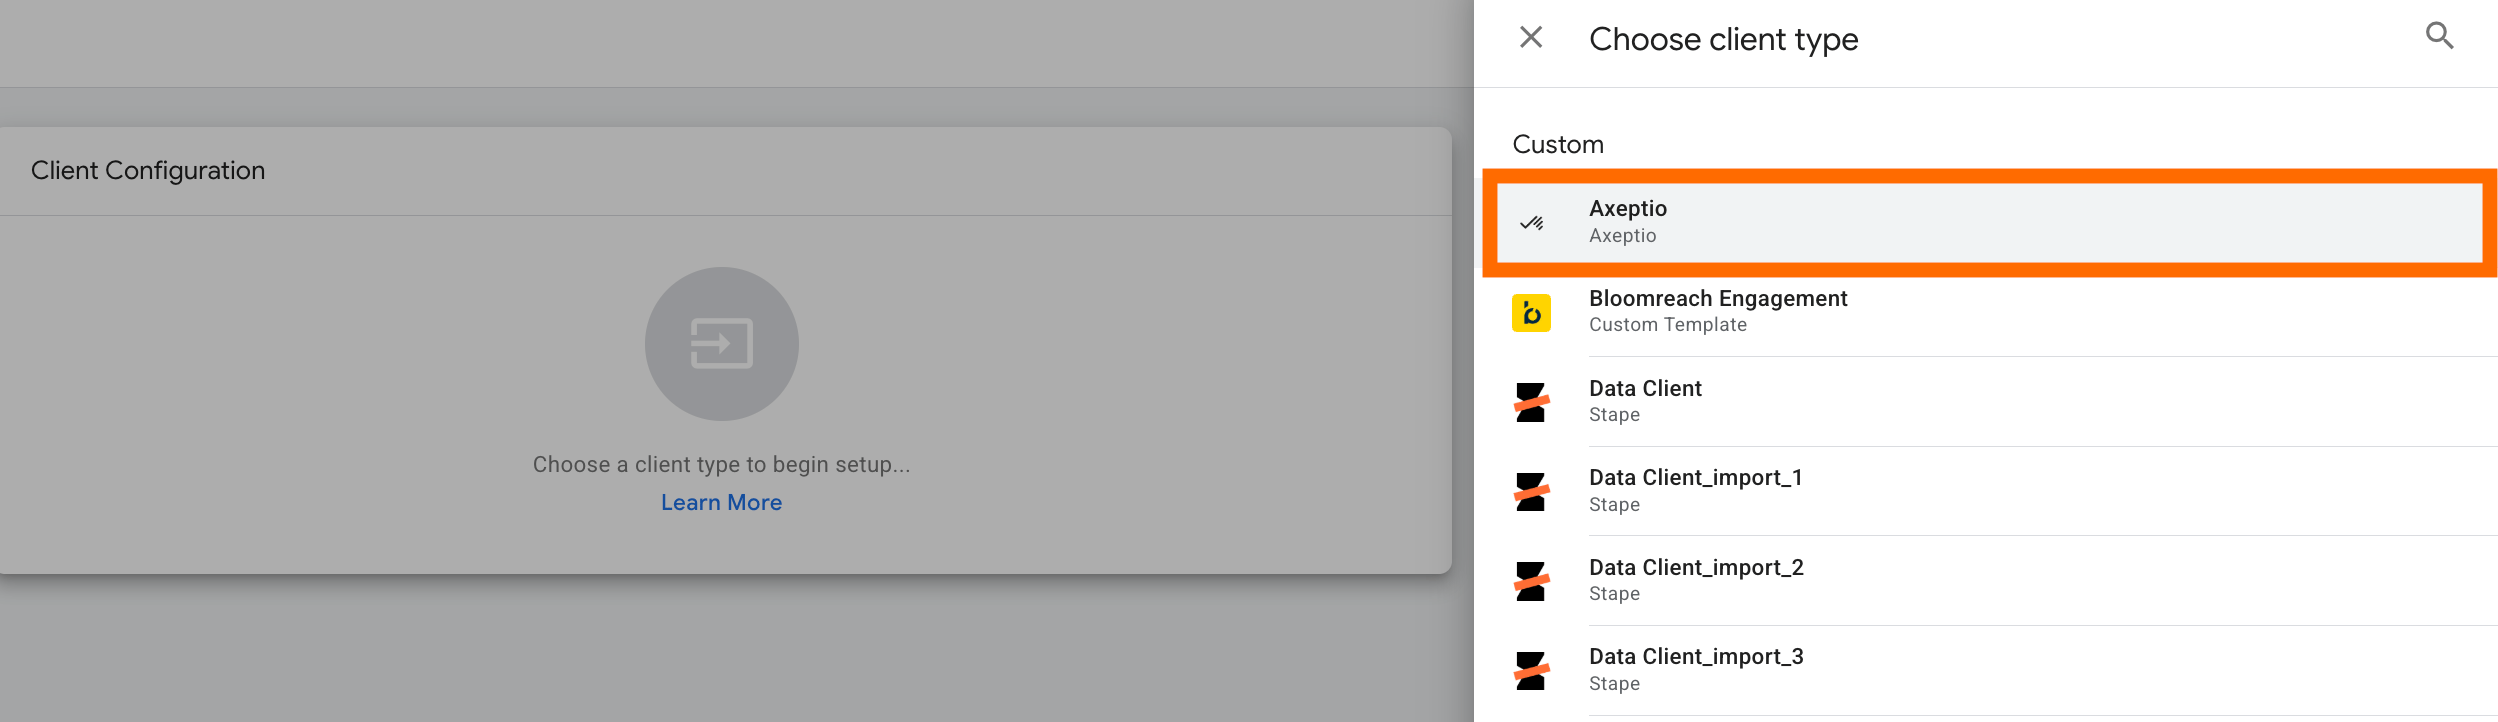
2.1.3 Create a new client and, as a client type, choose Axeptio and click Save.
2.2 Configure the Axeptio tag for the server GTM
2.2.1 Download the Axeptio tag from GitHub and unzip the folder.
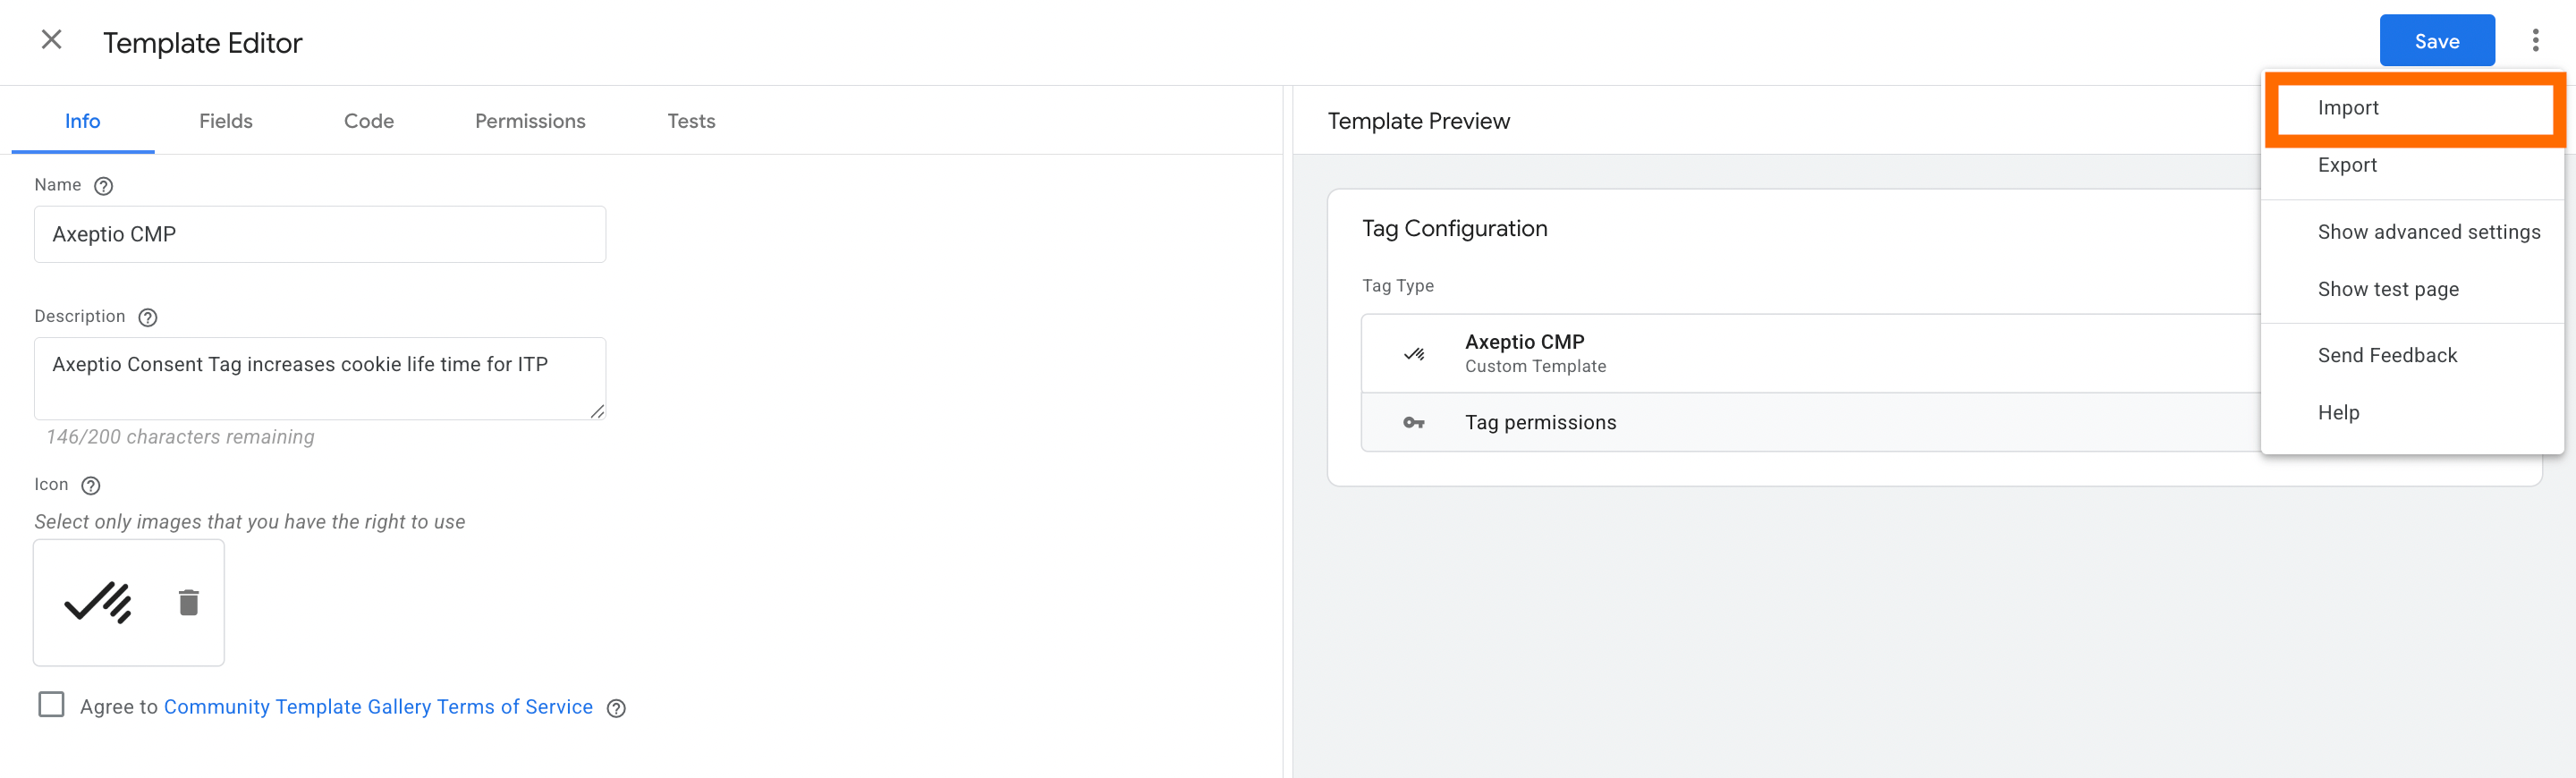
2.2.2 Import it in the Templates section.
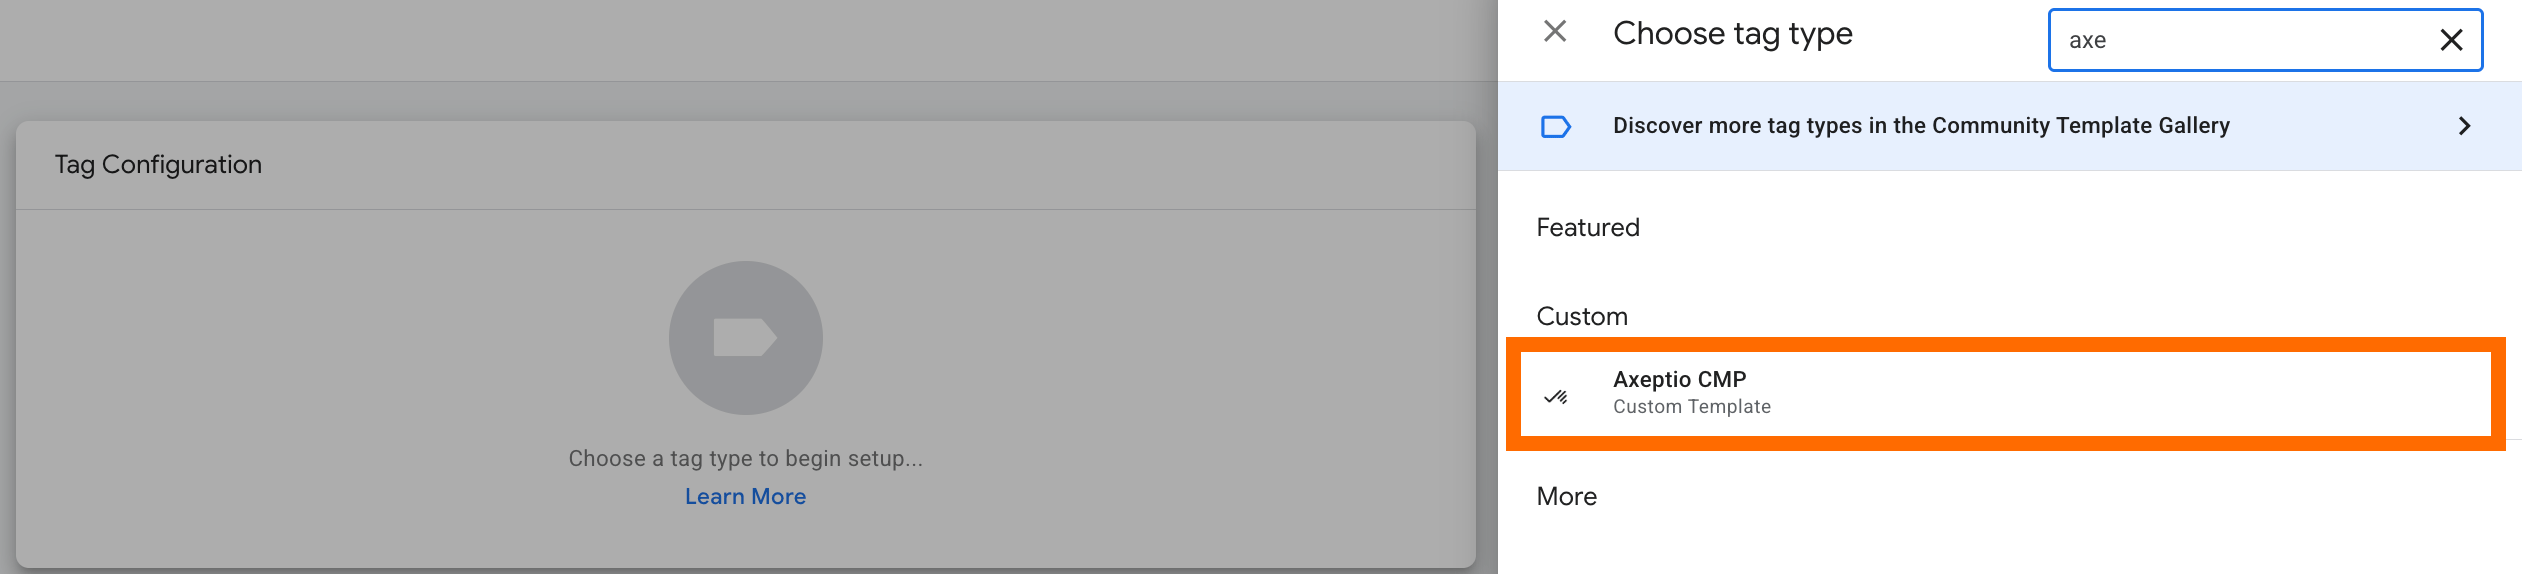
2.2.3 Go to the Tags section, create a new tag with Axeptio CMP tag type.
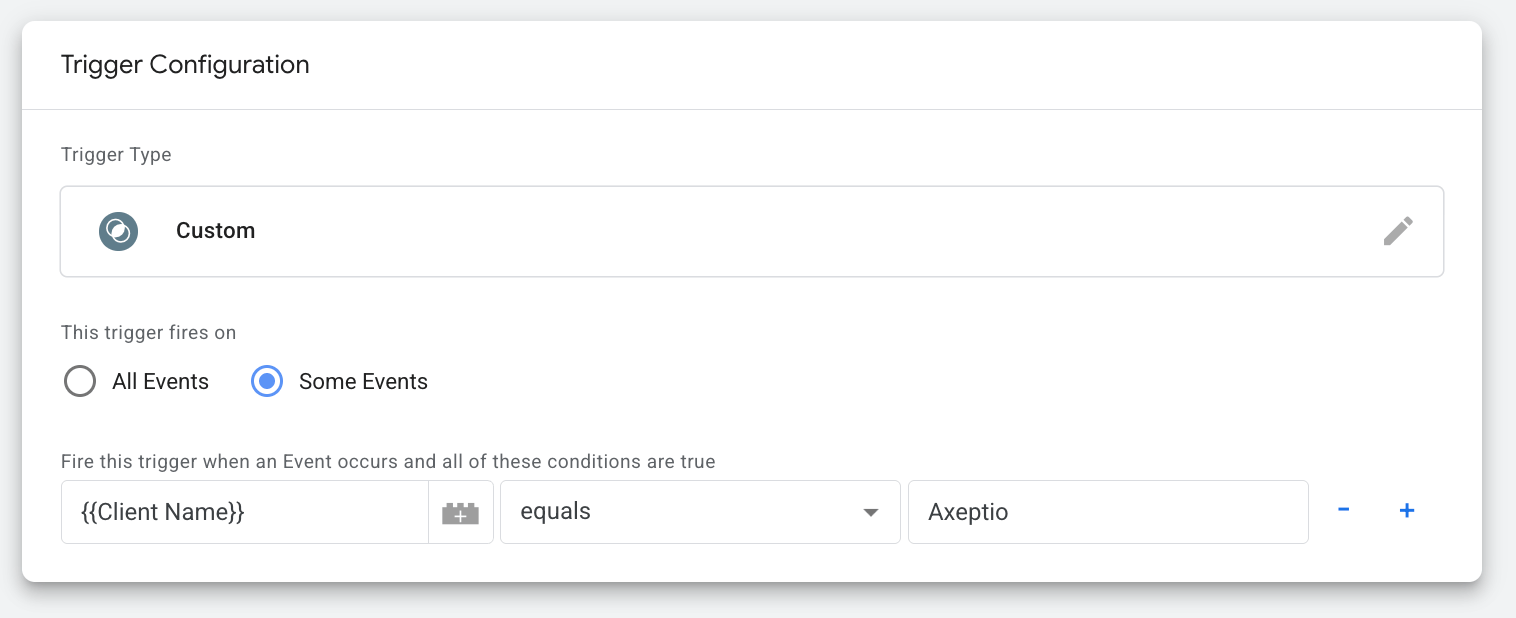
2.2.4 Add the trigger with the following configurations:
- Type: Custom
- This trigger fires on: Some Events
- Condition: Client Name equals Axeptio
Step 3. Set up a custom domain and Custom Loader
The steps below are aimed at lowering the impact of ad blockers and browser restrictions. The instructions below assume that you have already configured the server GTM container.
3.1 Set up a custom domain for your server GTM container on Stape
You can do it in Stape admin → choose your container → add custom domain. Check the detailed guide in our article on custom domain configuration.
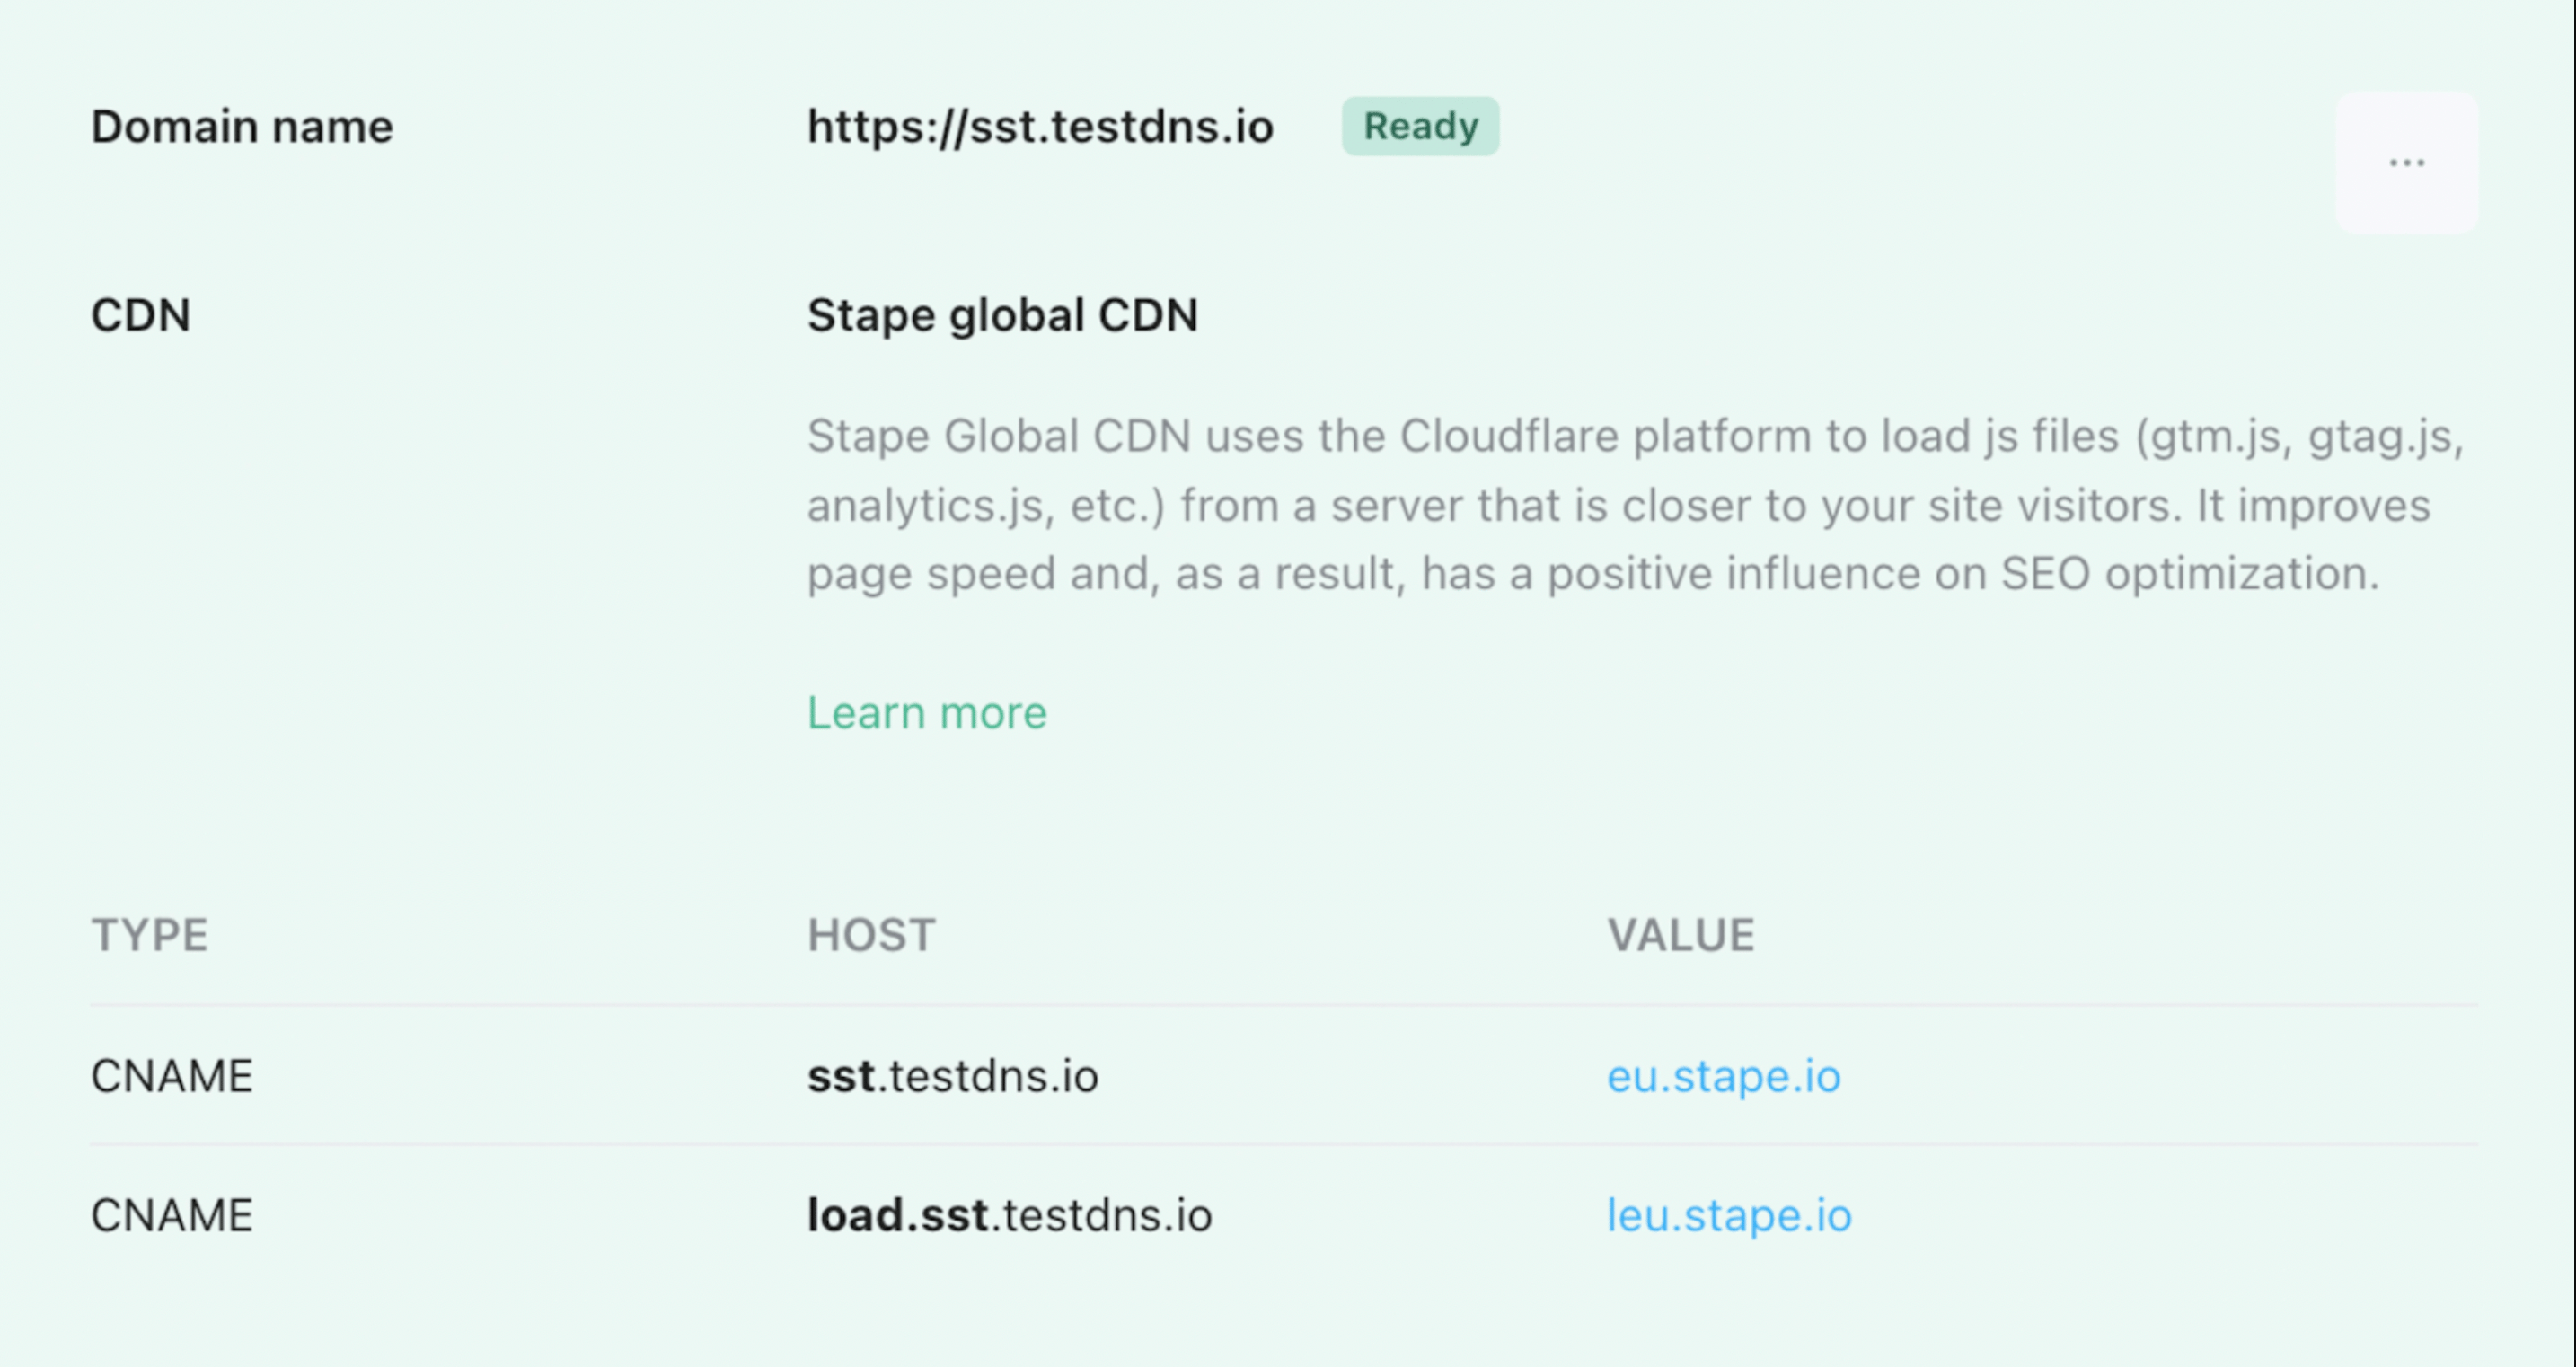
3.2 Add DNS record
After adding the custom domain, set up the DNS record provided in the Stape container admin. Please note that domain verification may take up to 72 hours.
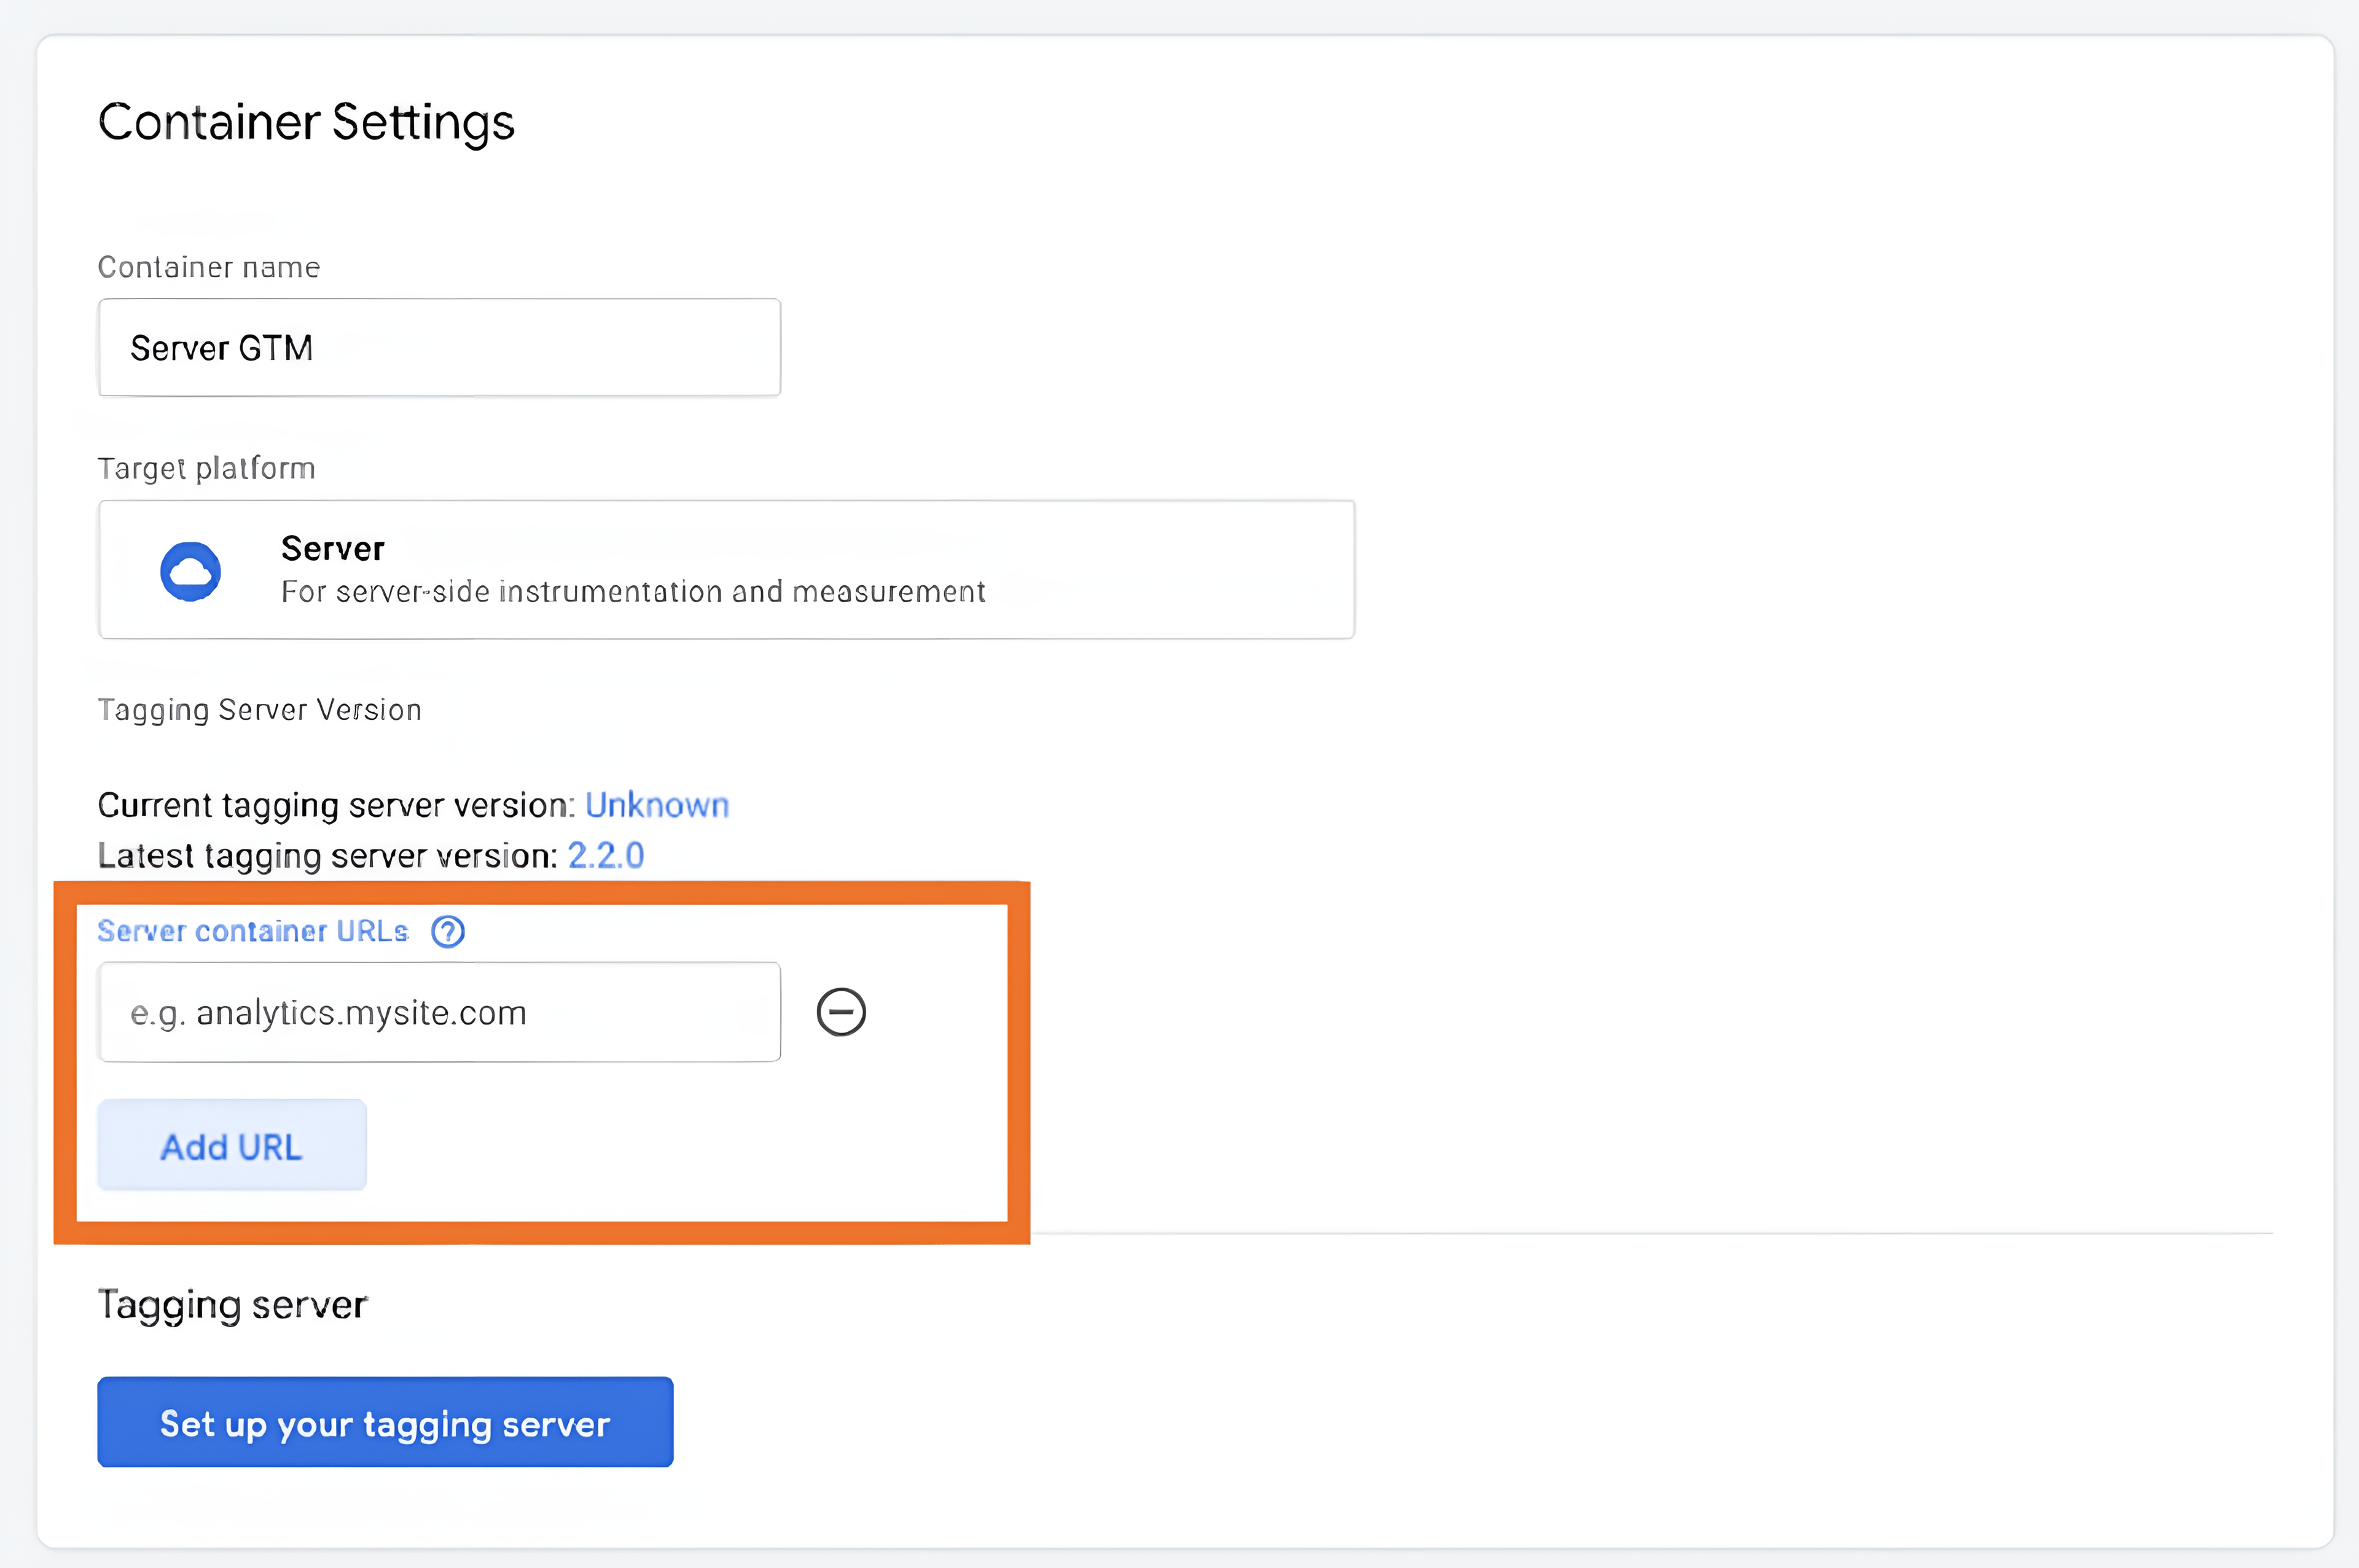
3.3 Add custom domain in the server GTM
After configuring the custom domain and adding the DNS record, go to the server GTM container settings and add a custom domain.
3.4 Add Custom Loader
Activate the Custom Loader power-up and update the GTM script on your website.

Step 4. Add the Axeptio cookie banner and configure the transport URL using the Axeptio tag for web GTM
Axeptio offers a few options to add the cookie banner to your website: using GTM, Axeptio script, or CMS modules. For the purpose of this article, we will consider the GTM method.
4.1 Add Axeptio CMP tag from GTM template gallery
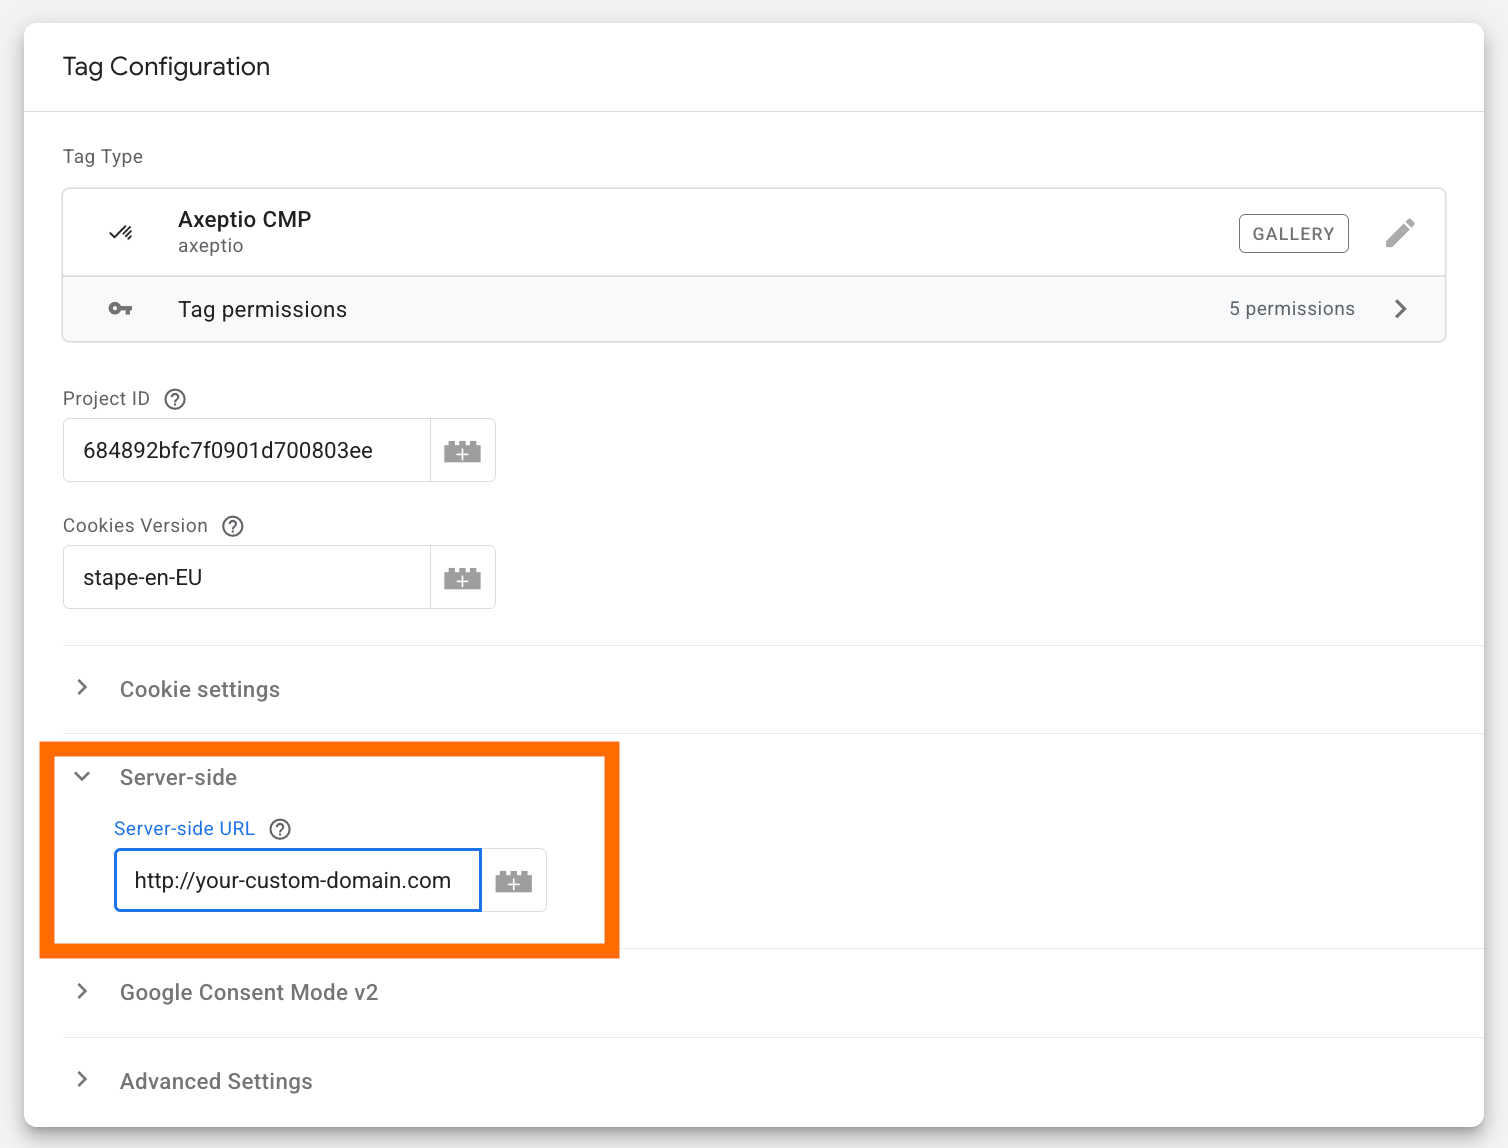
Create a new tag with Axeptio CMP configuration type.

4.2 Configure the tag
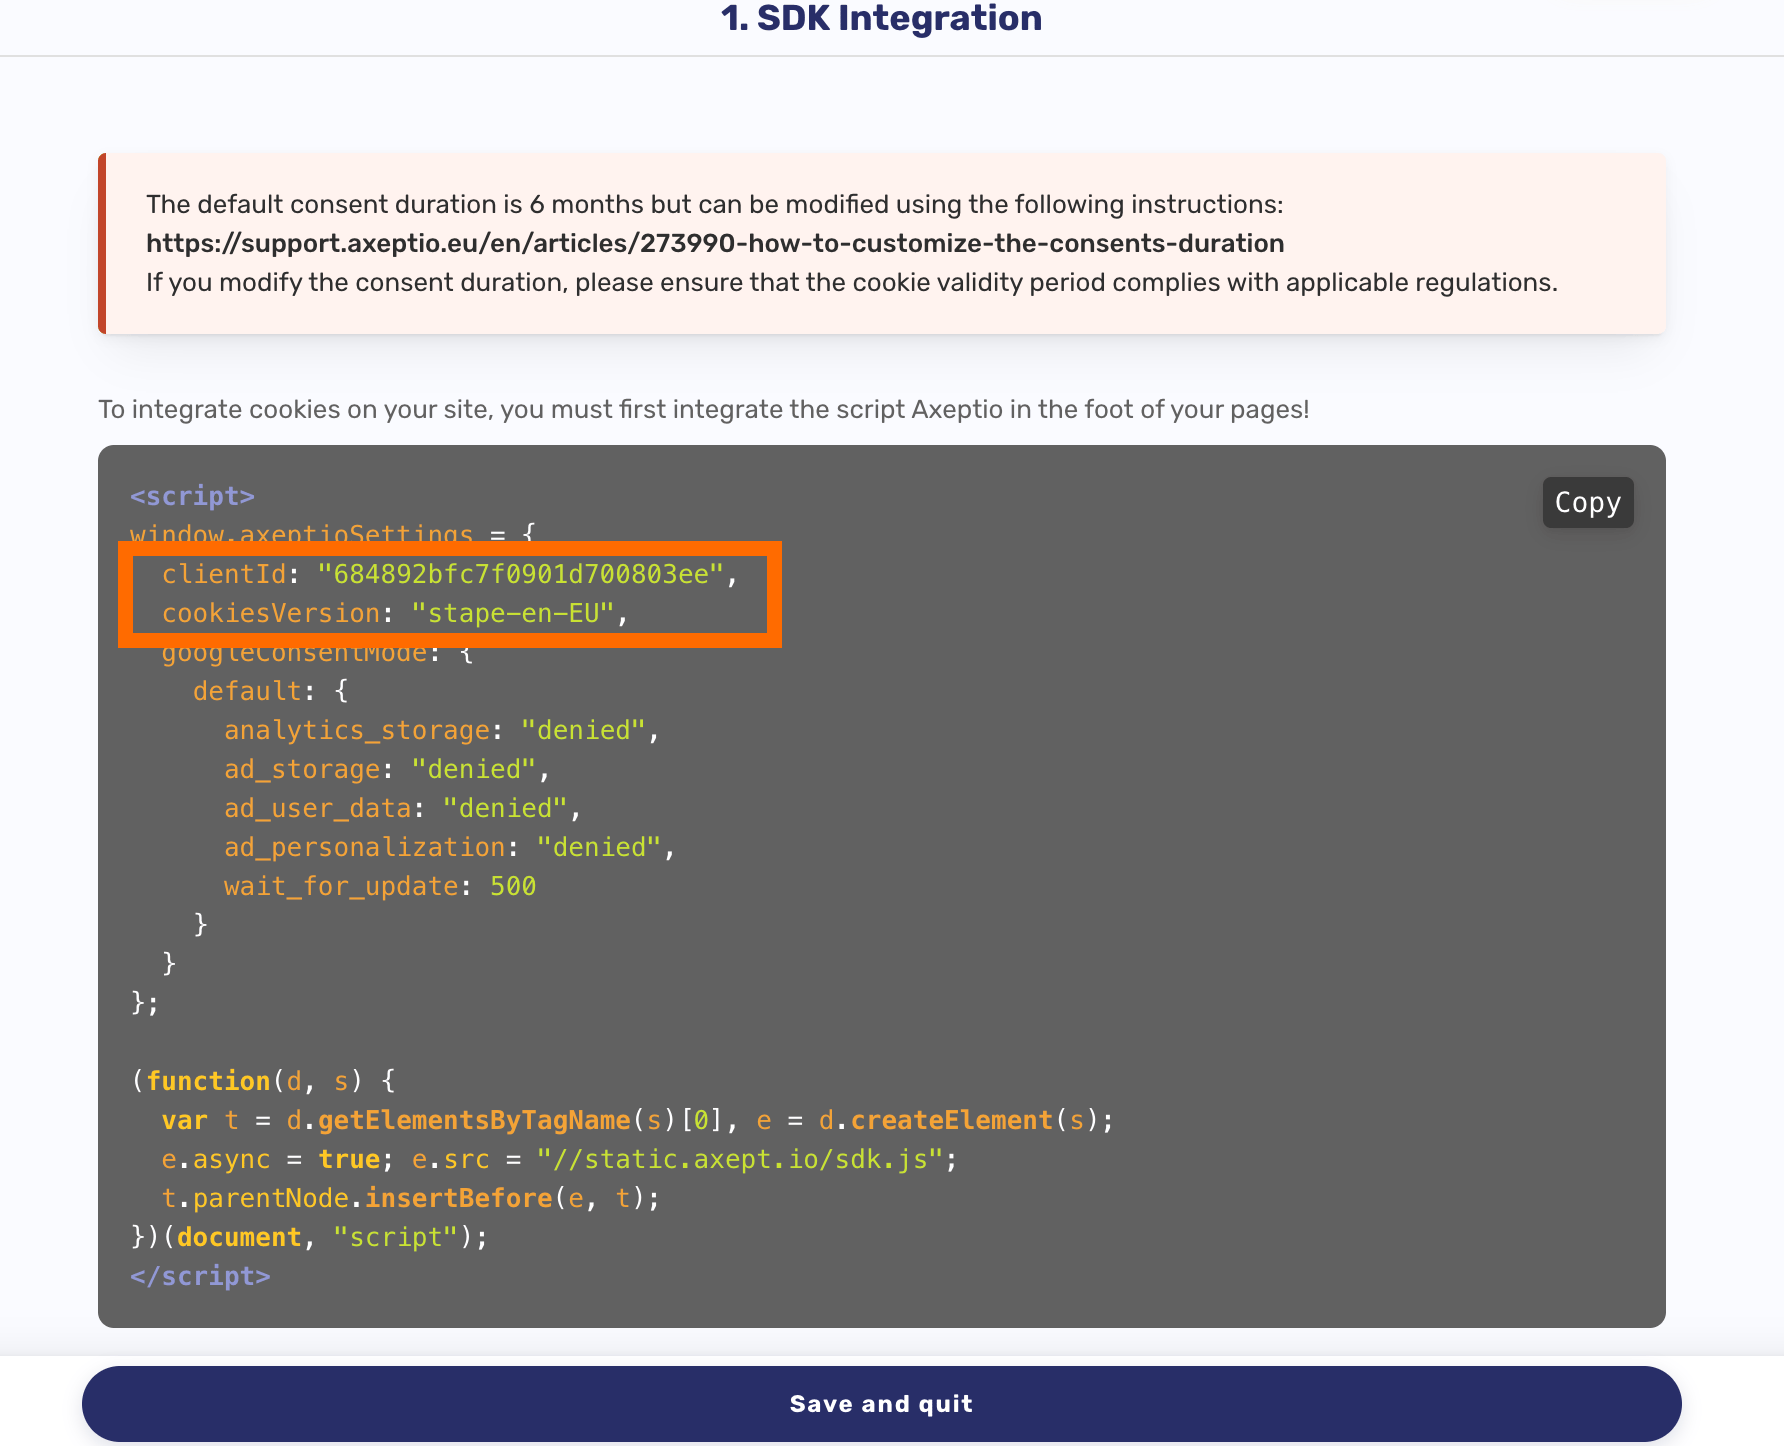
- Add Project ID
- Add Cookies Version
Both can be found in the My banners section → existing configurations → integration on your website.
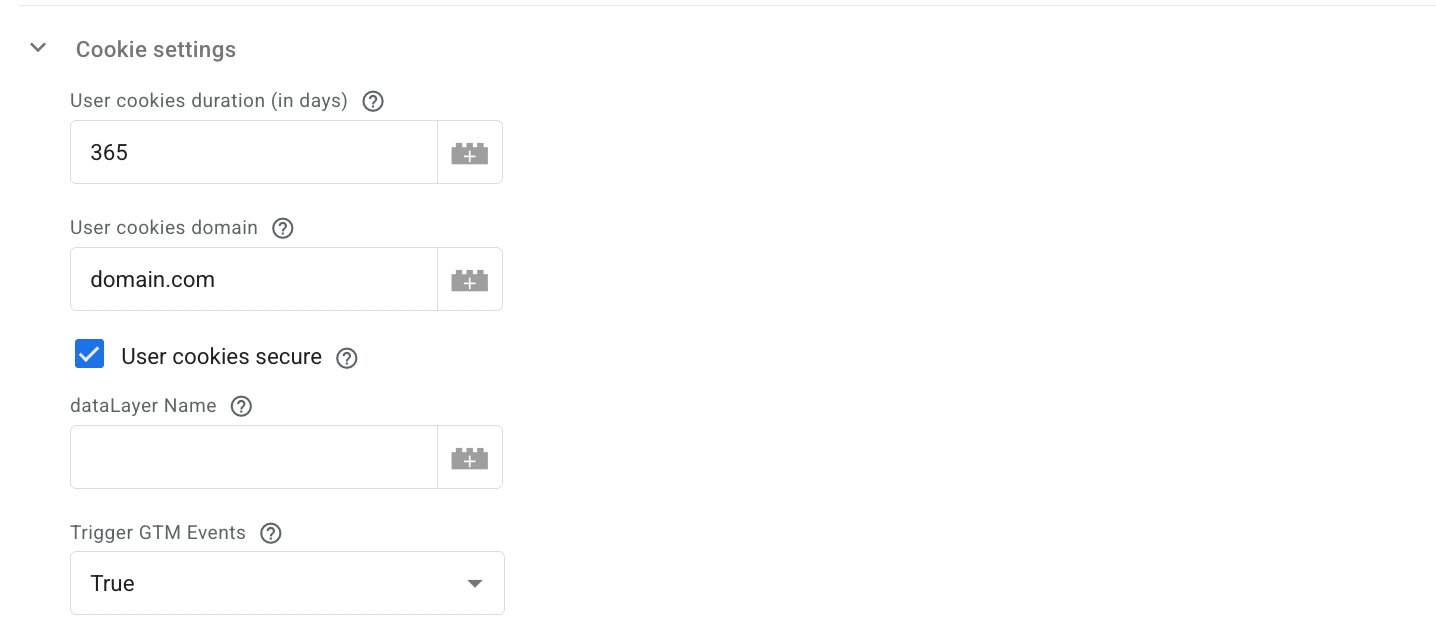
- In the Cookie settings section, add your domain name.
- Add server-side URL (your custom domain) in the tag configuration.
- Activate the support of Google Consent Mode V2 if you enabled it in Axeptio. Here you can define the default settings for each parameter (analytics_storage, ad_storage, ad_user_data, depersonalization). For more details on setting up Google Consent Mode V2 in Axeptio tag, please refer to their documentation.
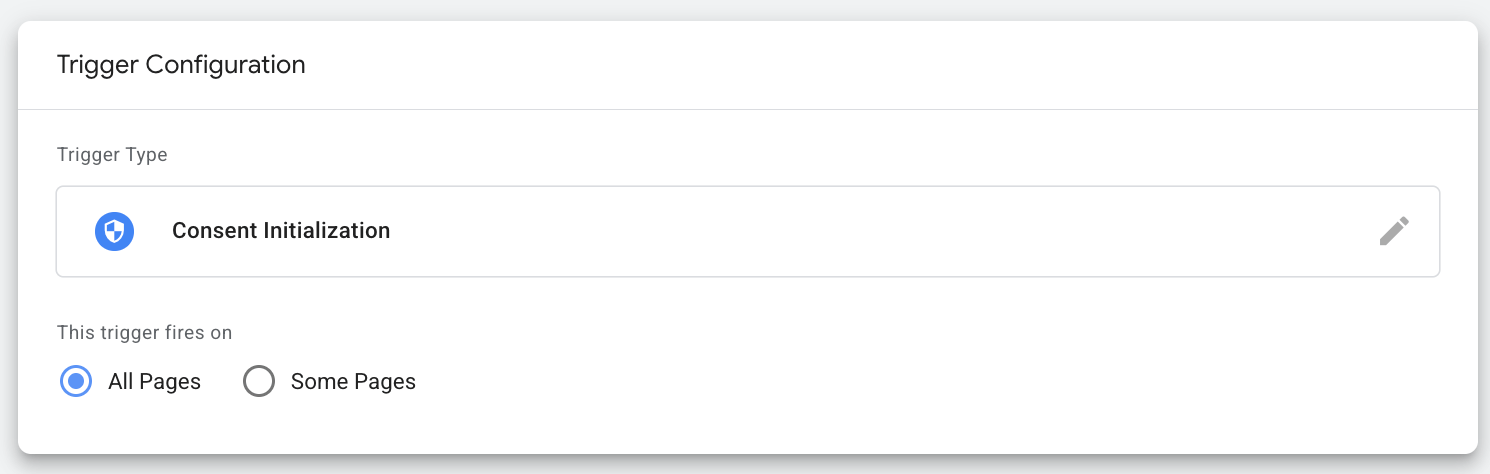
- Add a trigger for the tag: Consent Initialization - All Pages.
4.3 Include the postConsentUrl parameter in your Axeptio SDK configuration and assign it the URL of your server-side infrastructure
This ensures that consent requests are routed through your own systems instead of third-party URLs.
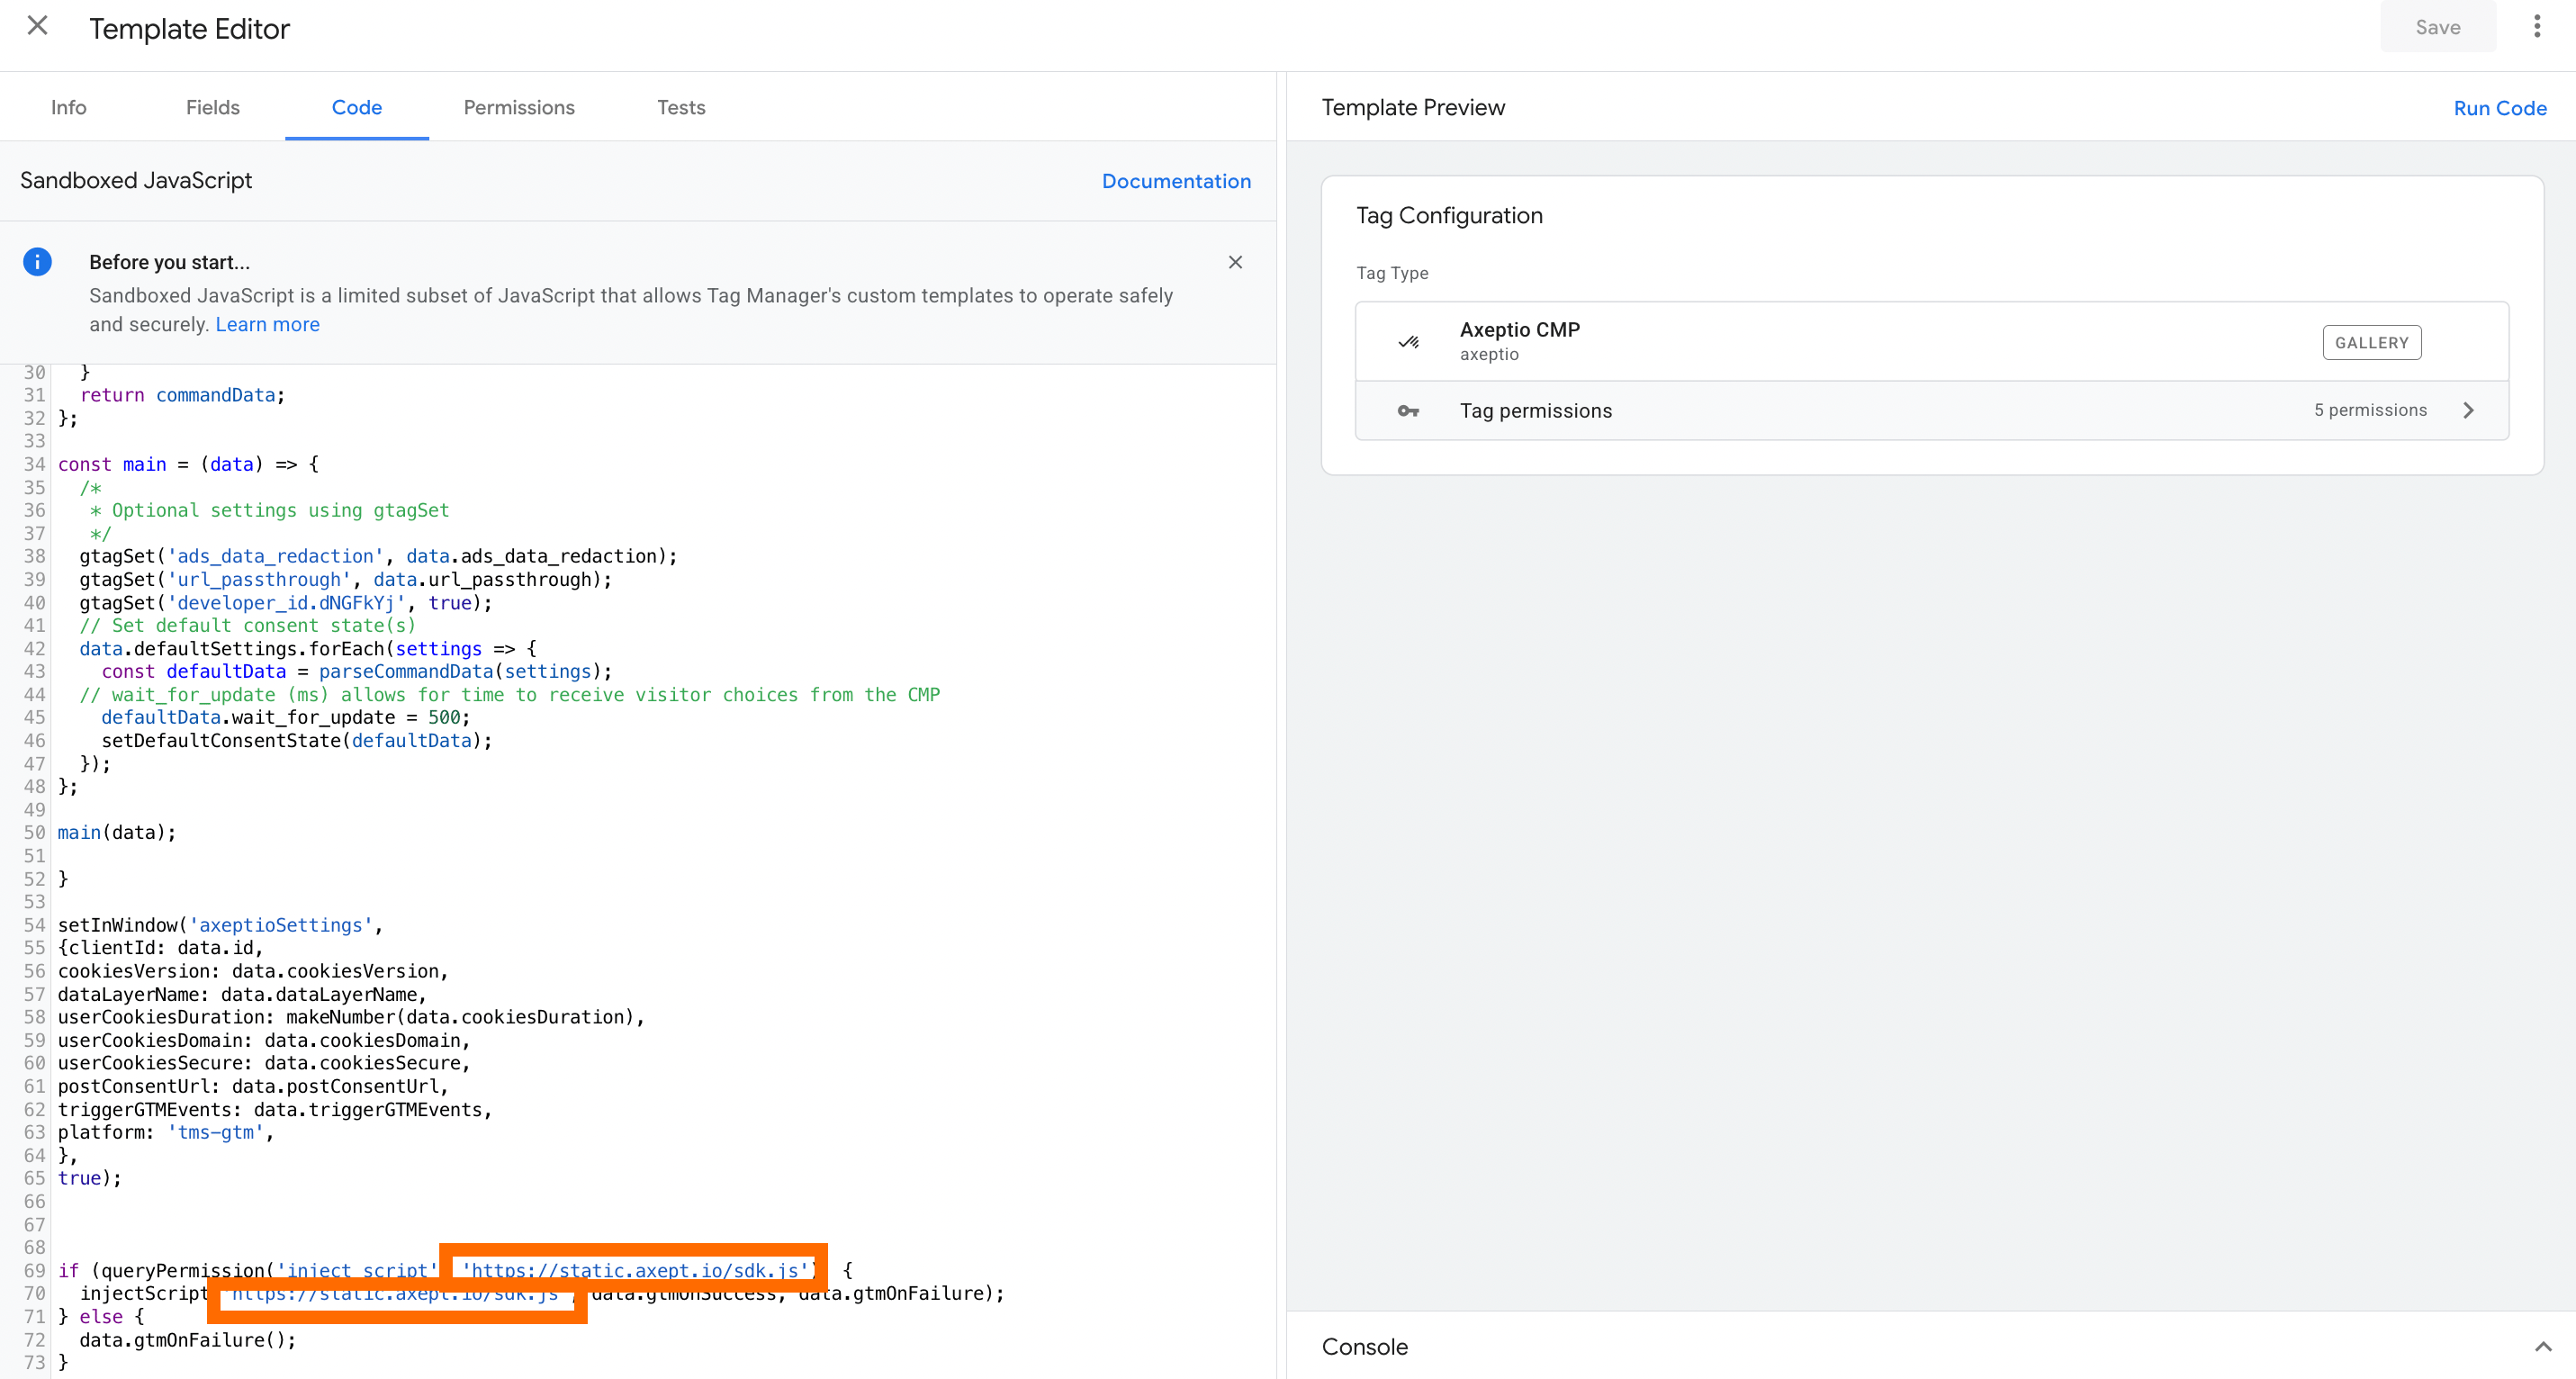
- Go to the Template section in the web GTM container → open Axeptio CMP tag → Permission tab → add your custom domain in Allowed URL match patterns.
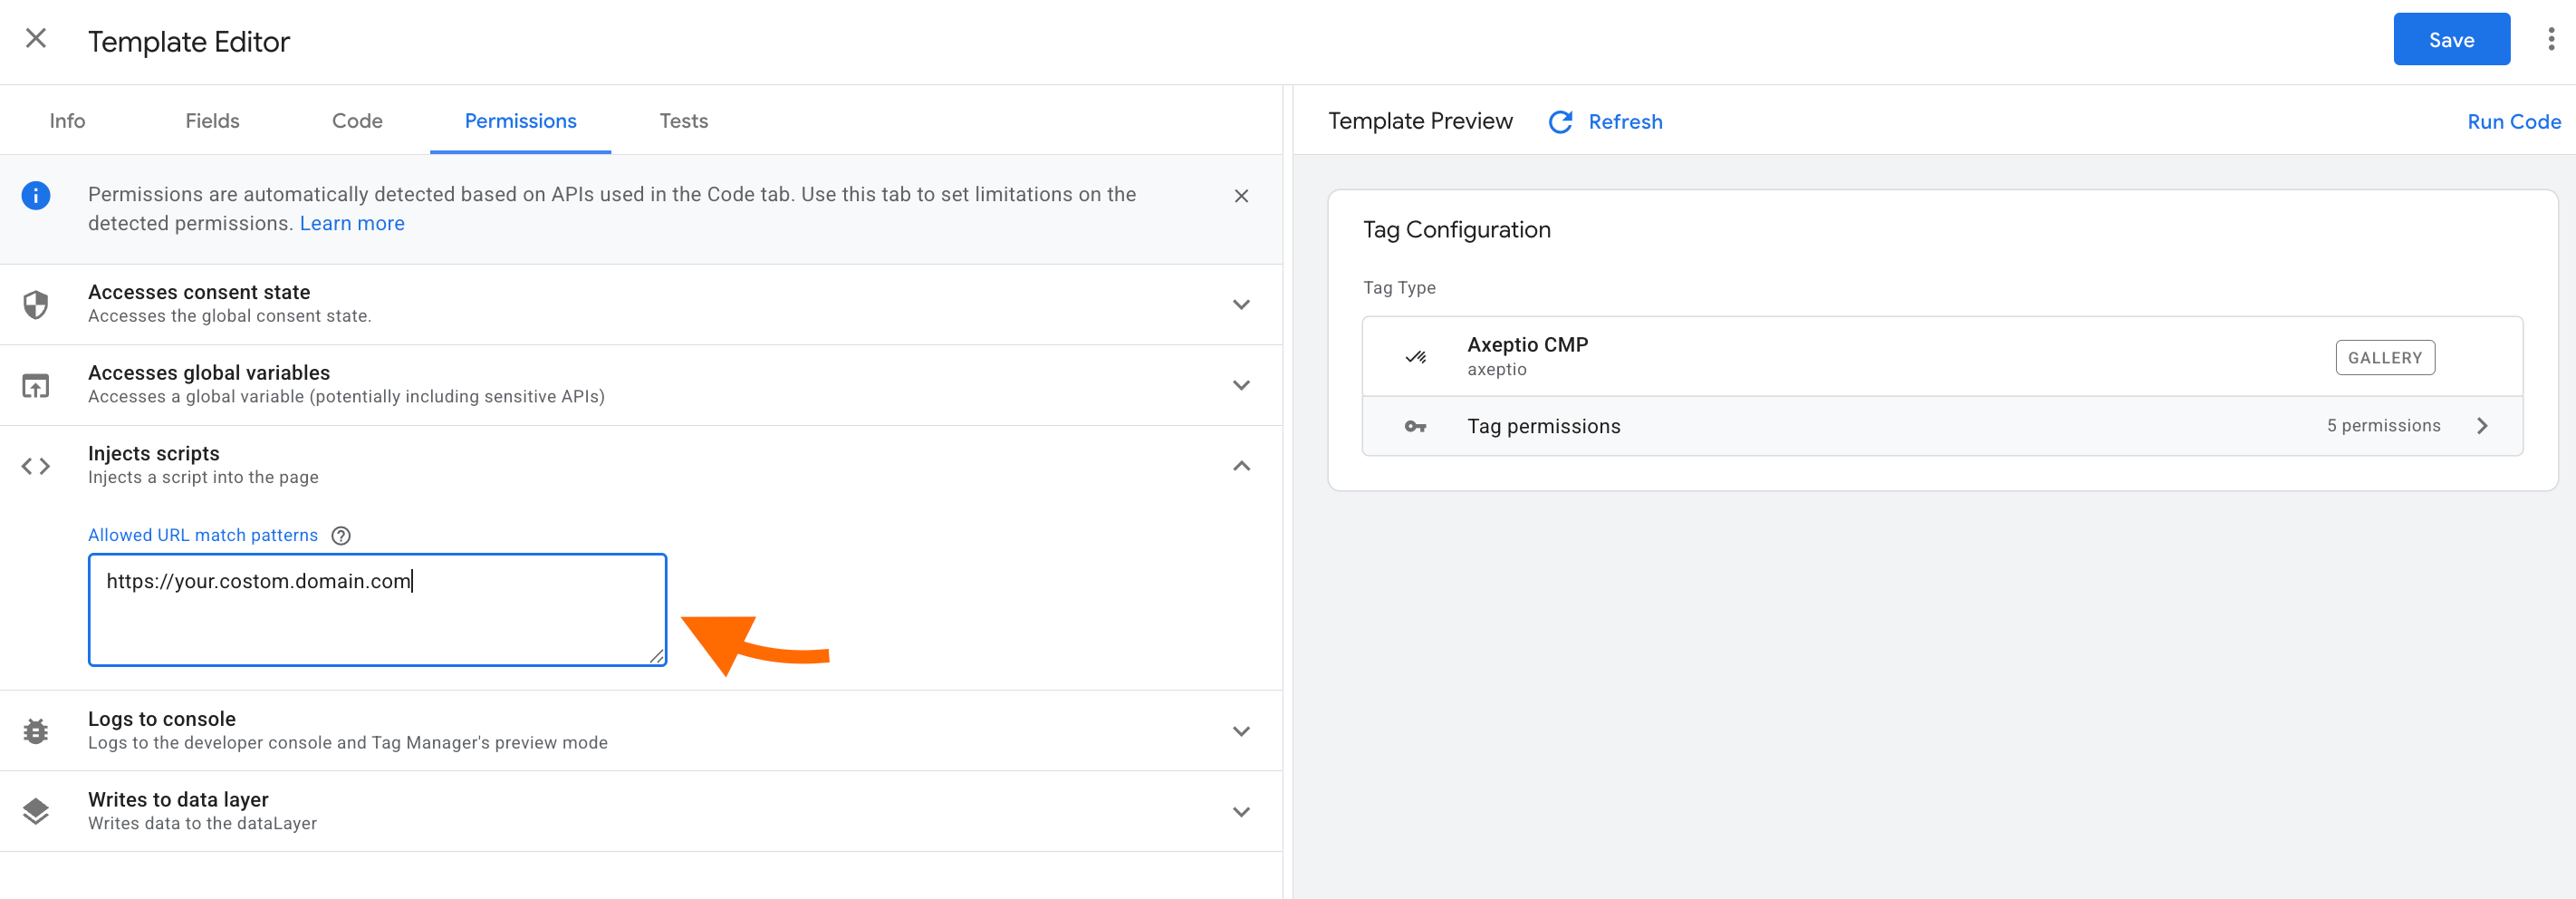
- Switch to the Code tab, replace https://static.axept.io/sdk.js with your custom URL. Save changes.
Conclusion
Implementing server-side consent management with Axeptio is a privacy-compliant solution that helps bypass the limitations of client-side tracking. By routing scripts and consent interactions through your own domain, you gain greater control over data collection and lower the impact of ad blockers and browser restrictions on the data.

Comments