Apr 9, 2025
Google Tag, configuration and event settings variables in web GTM
Written by
Ivanna Holubovska
Updated Nov 18, 2026 comments
If you're using Google Analytics 4 to understand your website's performance, these Google Tag Manager variables are worth knowing. In September 2023, Google released two settings variables that streamline how you configure Google Analytics 4 through Google Tag Manager. Configuration Settings Variable and Event Settings Variable offer improved flexibility and efficiency. They work with the Google Tag, which replaced the Google Analytics 4 configuration tag.
This article will describe how to use Google Tag, Configuration Settings Variable and Event Settings Variable when you configure Google Tag Manager for Google Analytics 4 using the web GTM container, and how to send data to a server container.
What is the Google Tag?
You can add the Google Tag (gtag.js) to your website. Once in place, it acts as a channel for various Google products and services. Think of it as a multi-purpose tool in your digital toolkit. Instead of juggling multiple tags for different Google accounts, you can add this single tag across your entire website. This one tag can then be connected to various destinations, including Google Analytics, Google Ads, Floodlight, and Google Merchant Center.
The most obvious advantage is that you'll significantly reduce the number of tags you must manage. Instead of a different tag for each Google product you use, you'll only need to deal with one! This is especially helpful if you're not tech-savvy or if you simply want to streamline your website's code for better performance.
Google Tag replaces the Google Analytics 4 configuration tag and is a critical data source for your Google Ads account.
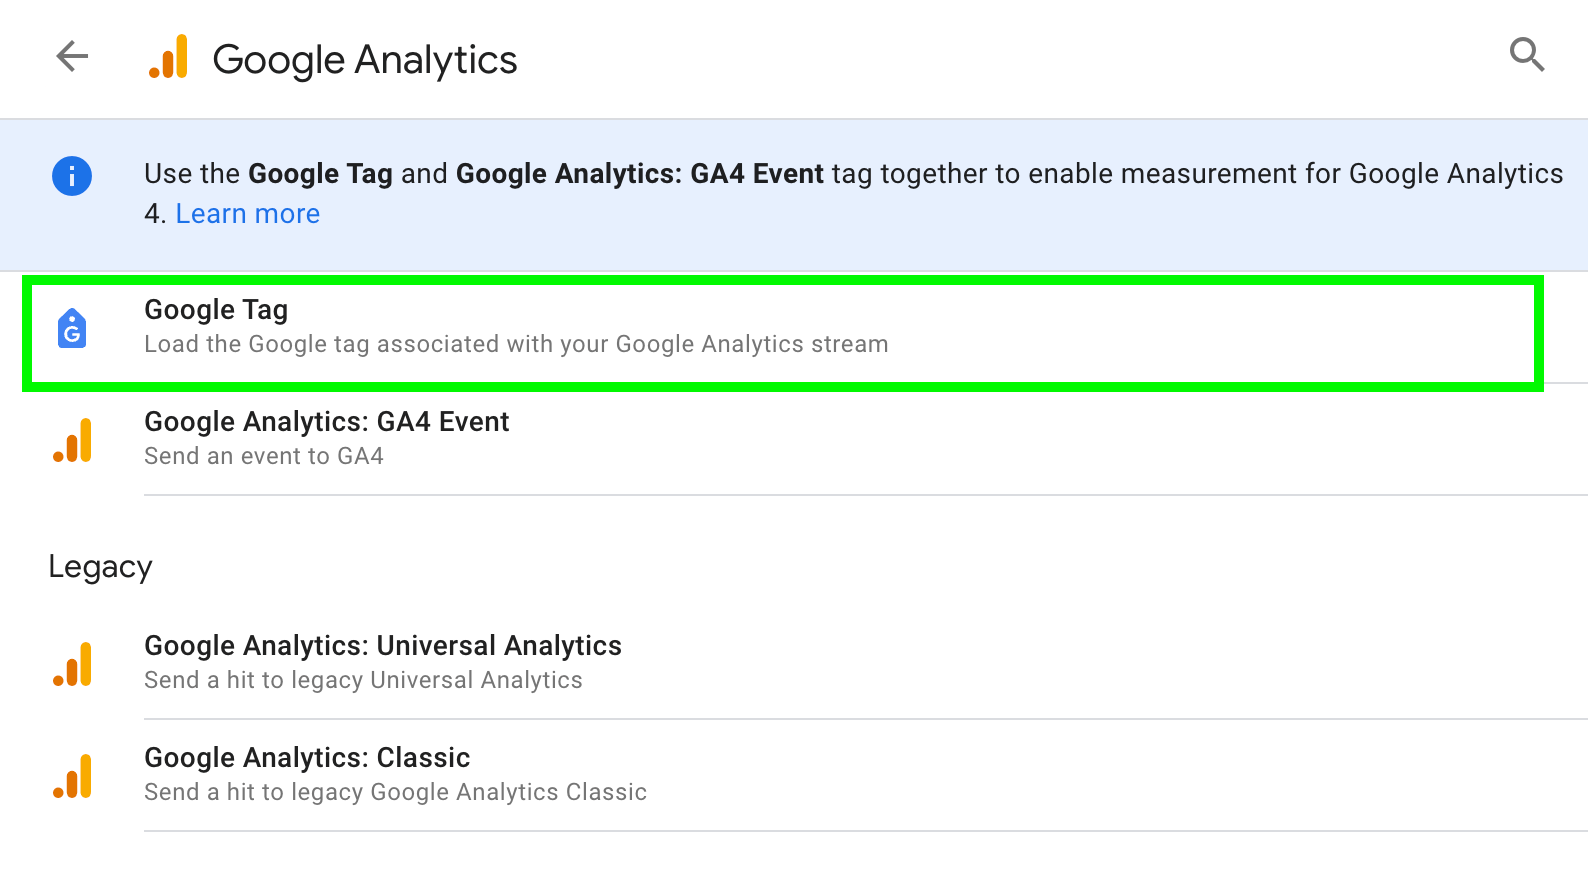
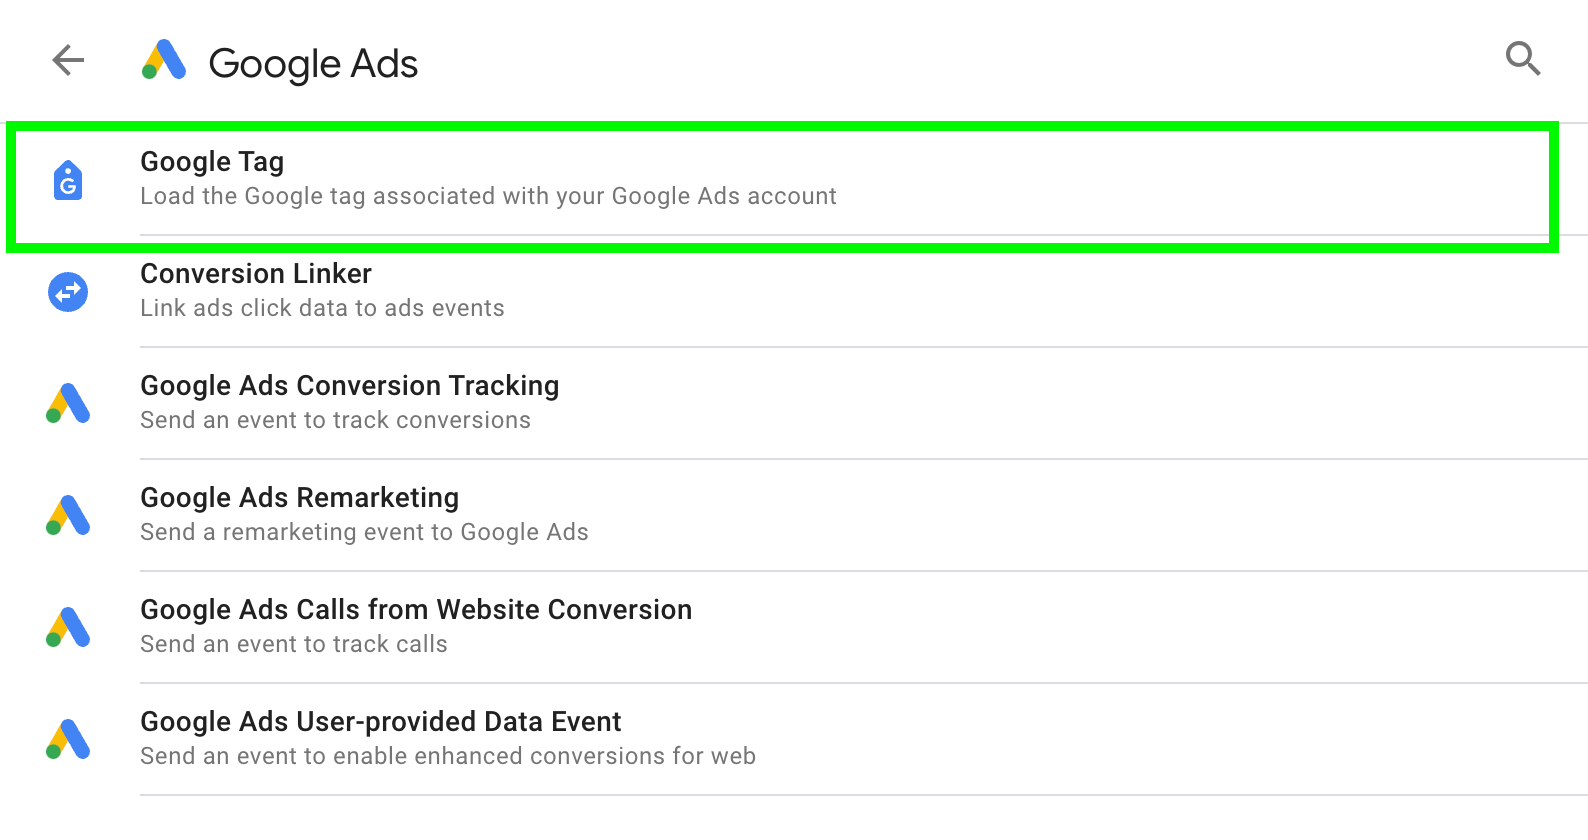
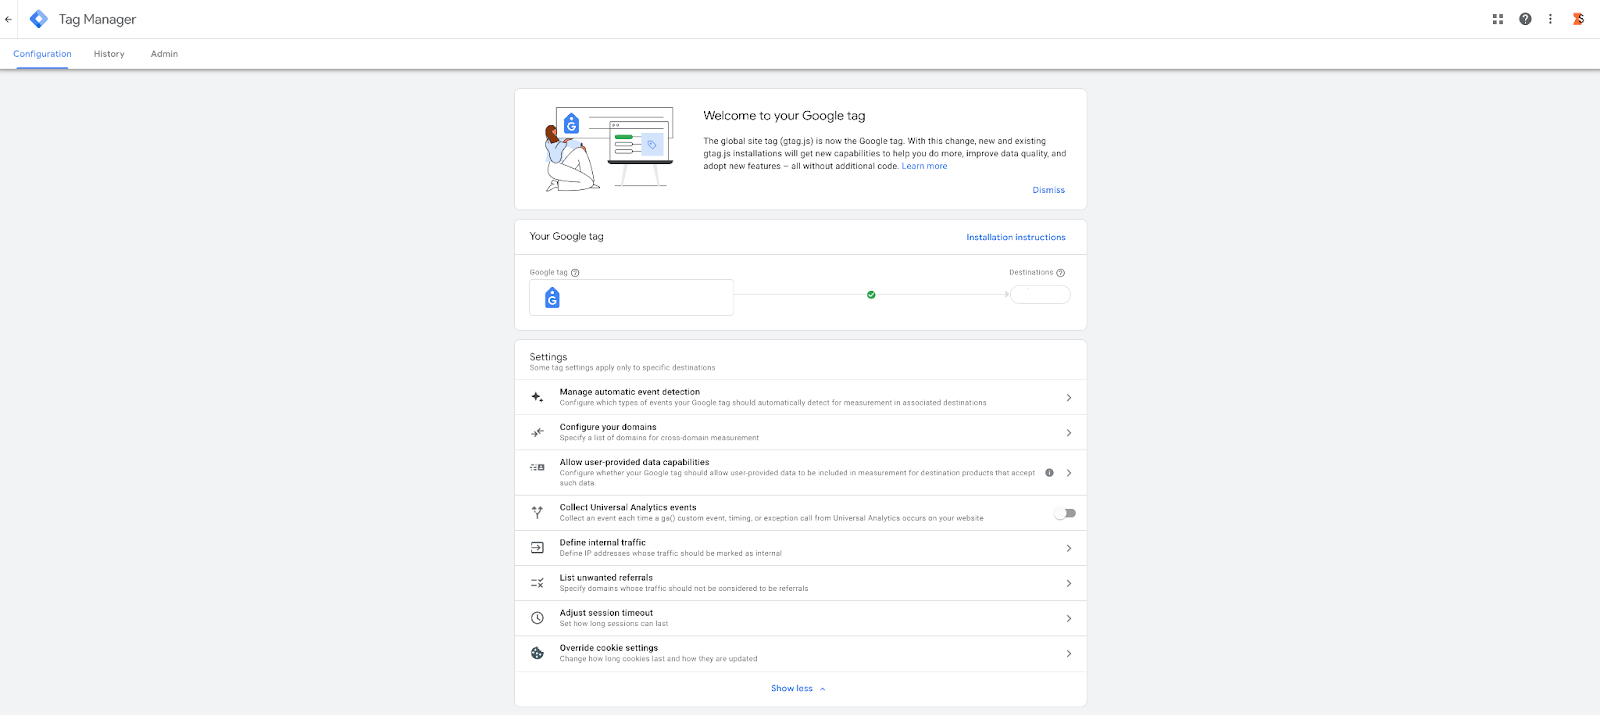
In the Google Tag Manager container, the Google Tags tab shows all the Google Tags you have access to. By opening each Google Tag, you can:
- Manage destination;
- Combine Google Tags;
- Edit settings.
How to set up the Google Tag step by step?
The Google Tag is created in your web container. It sends your data to Google Analytics and, if you configure it that way, to your server container.
1. In your web Google Tag Manager container, go to the Tags menu → click New.
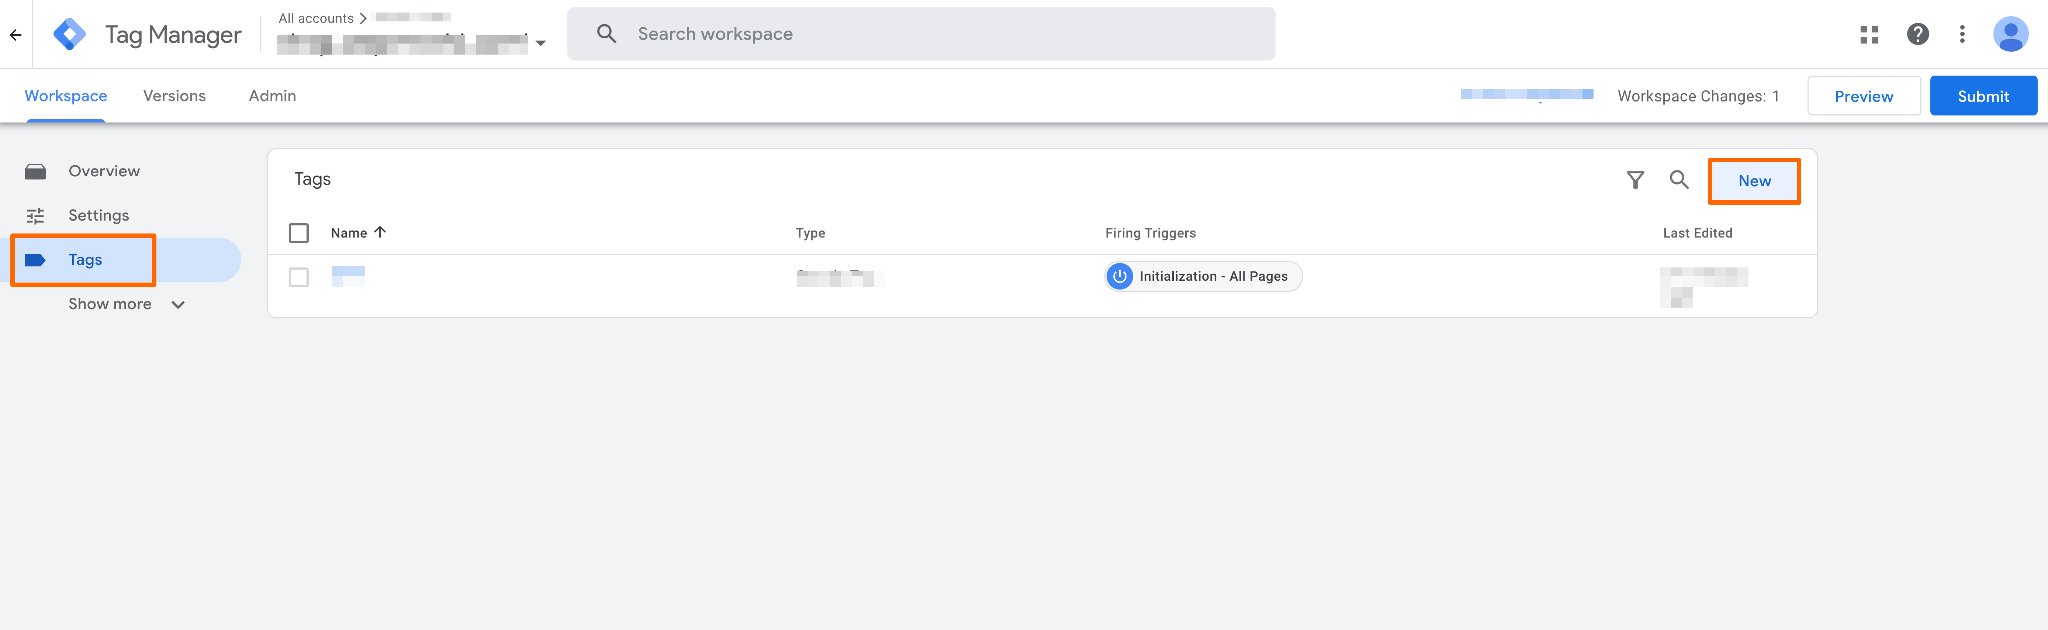
2. Click Tag Configuration → select Google Tag.
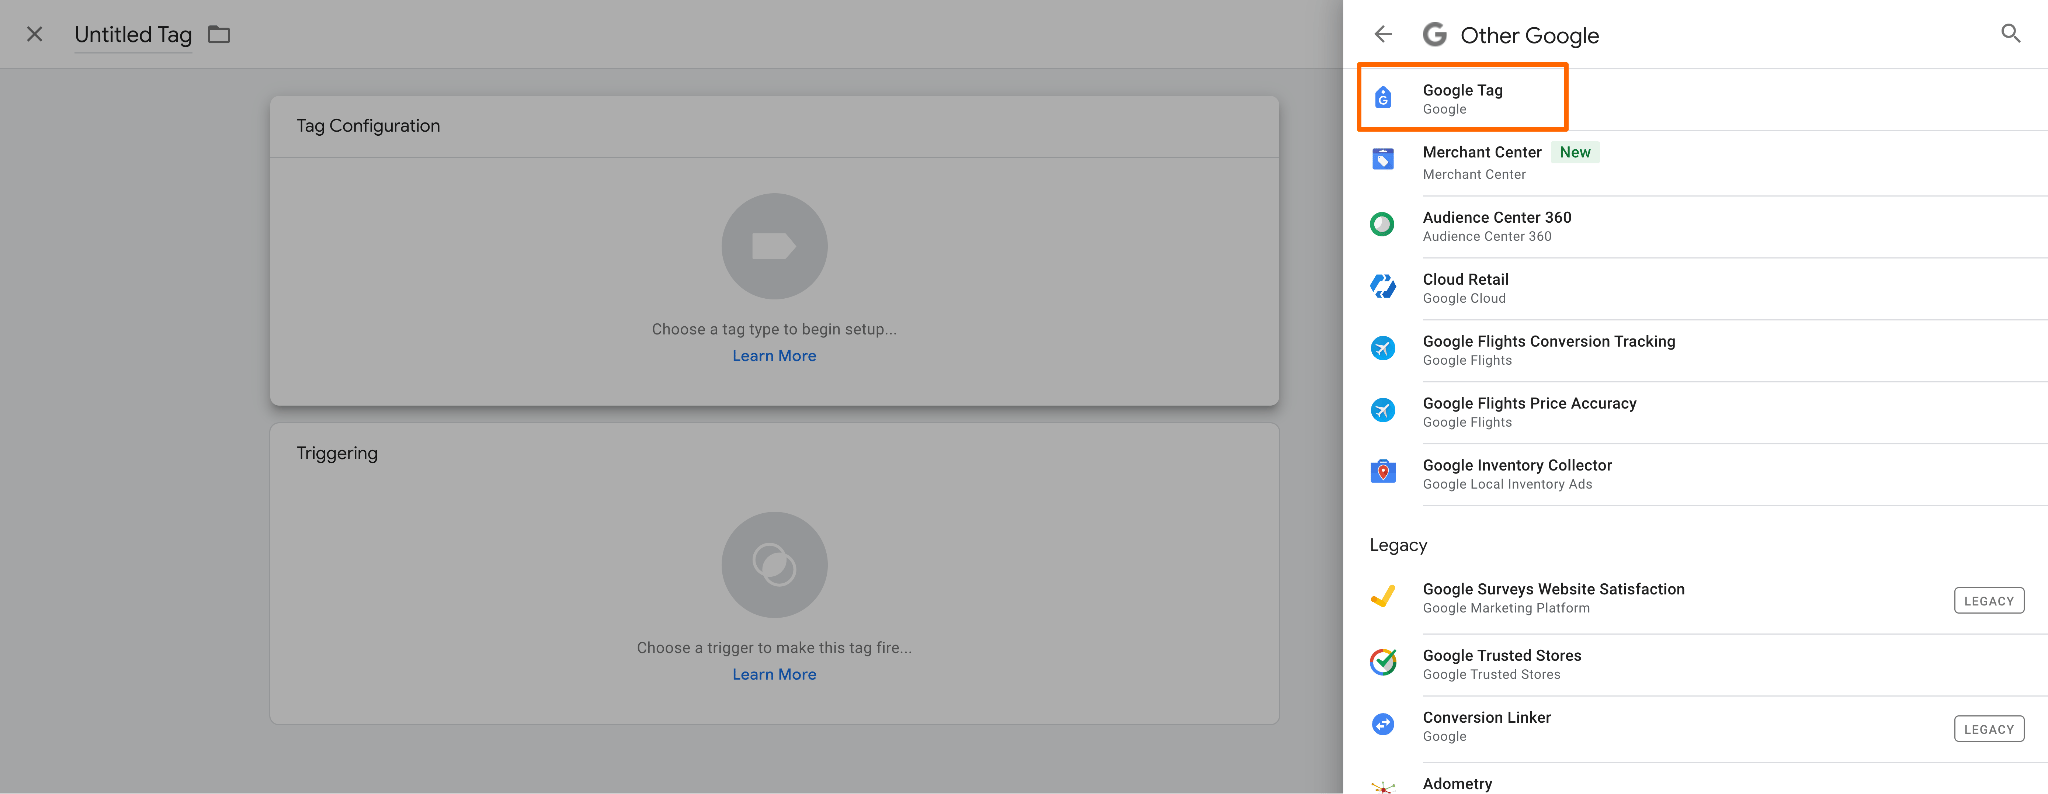
3. In the Tag ID field, enter your Google Tag ID. For Google Analytics 4, this is the measurement ID (G-XXXXXXXXXX).
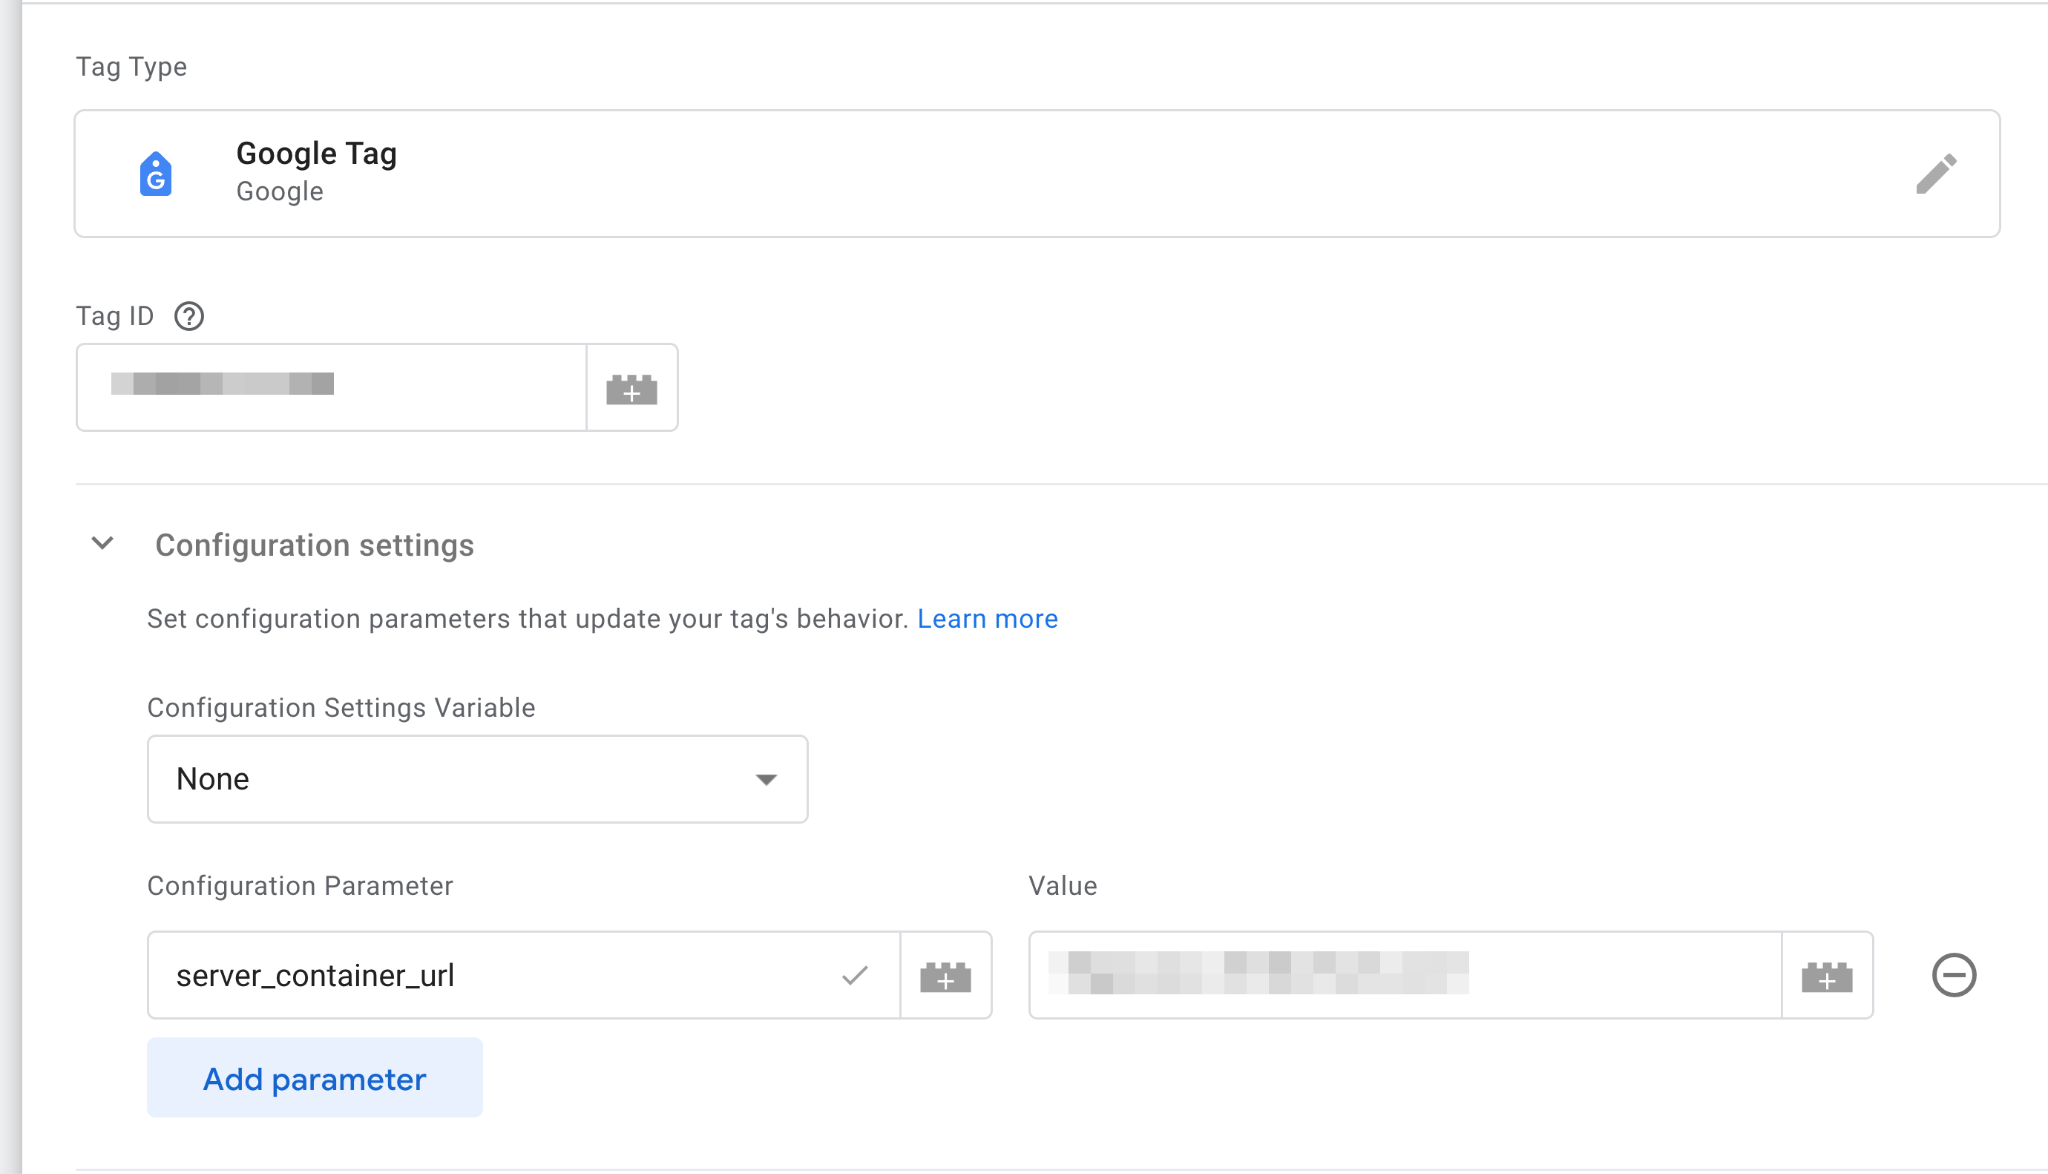
4. In Configuration settings, click Add parameter. Enter server_container_url in Configuration Parameter, then enter the URL of your server container in Value (for example, https://ss.yourdomain.com). To treat cookies as first-party, use a subdomain of your website (for example, ss.example.com for example.com). You can also store this parameter in a reusable Configuration settings variable, described below, and select it in Configuration Settings Variable.
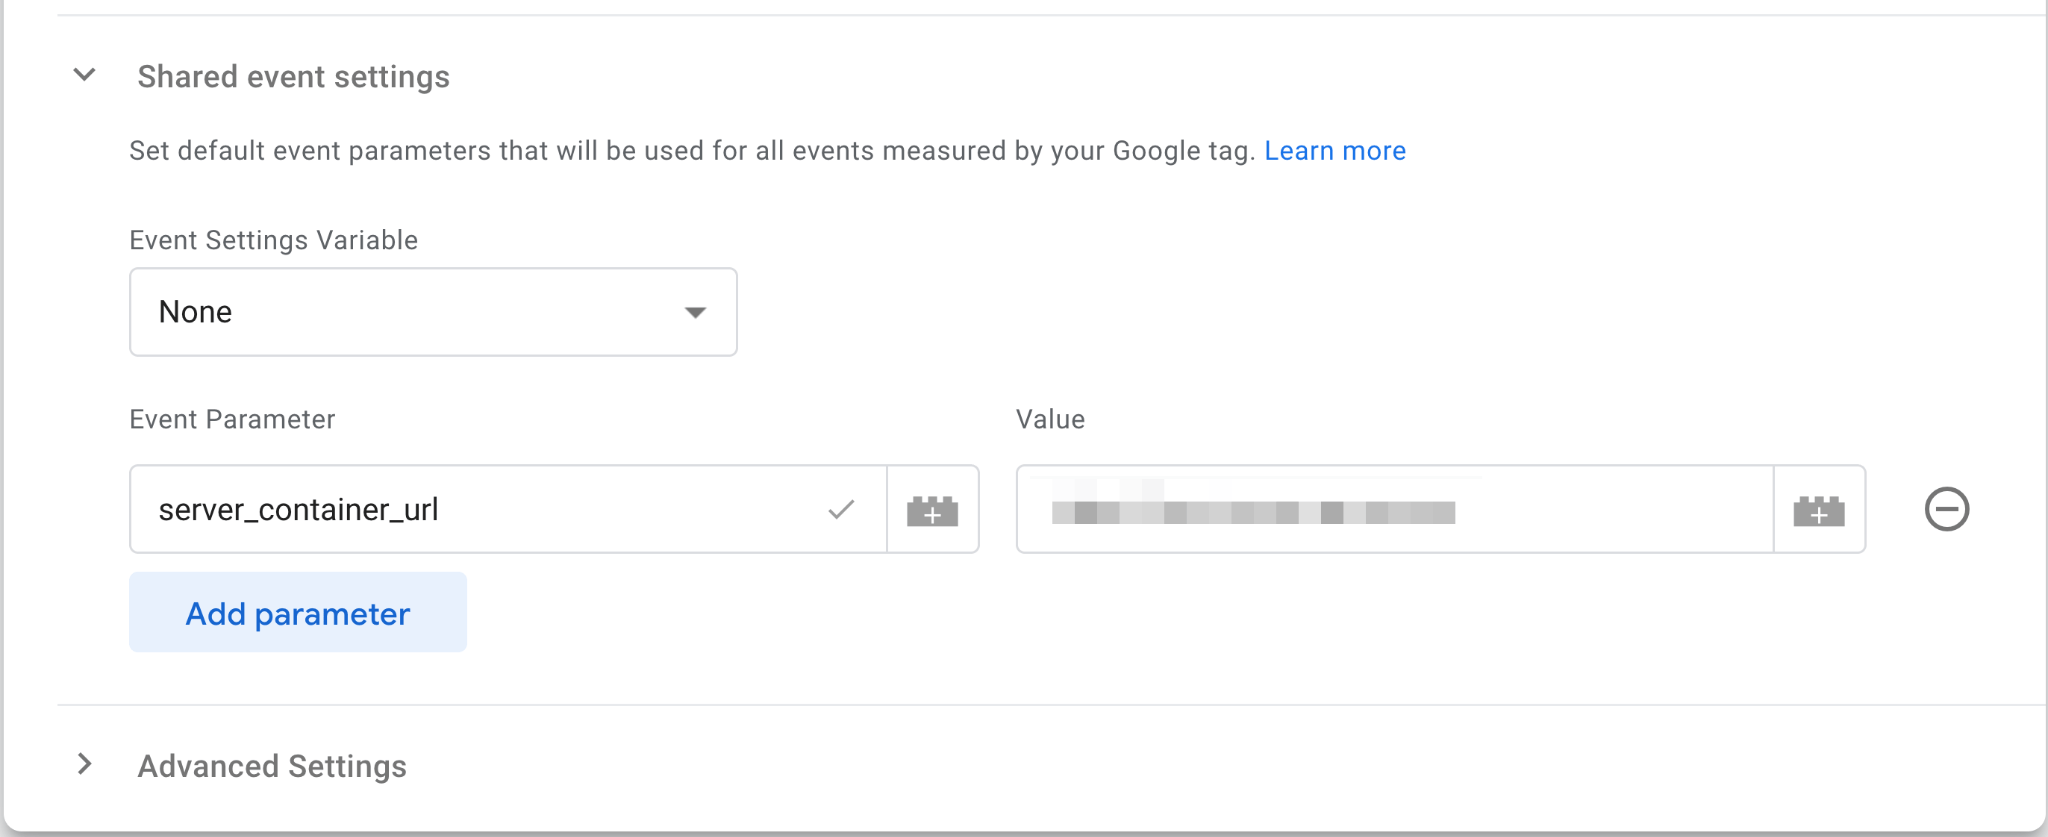
5. Optional: In Shared event settings, click Add parameter and fill in the Event Parameter and Value to send the same parameters with all events. You can also select an Event settings variable, described below.
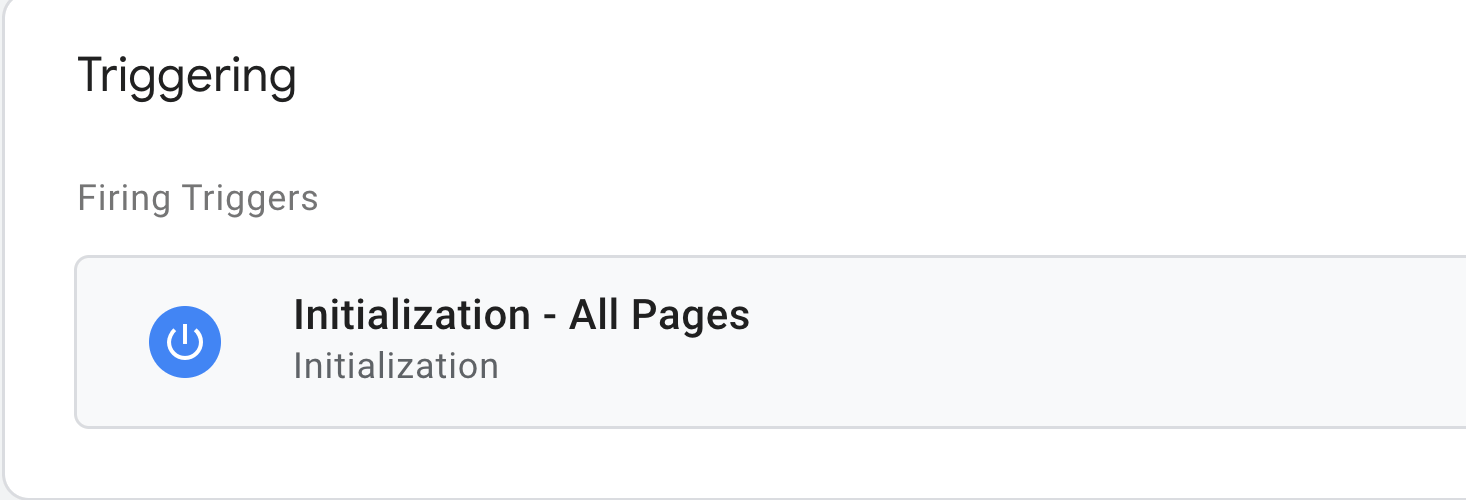
6. In Triggering, choose Initialization - All Pages. This trigger loads the Google Tag before other tags.
7. Click Save.
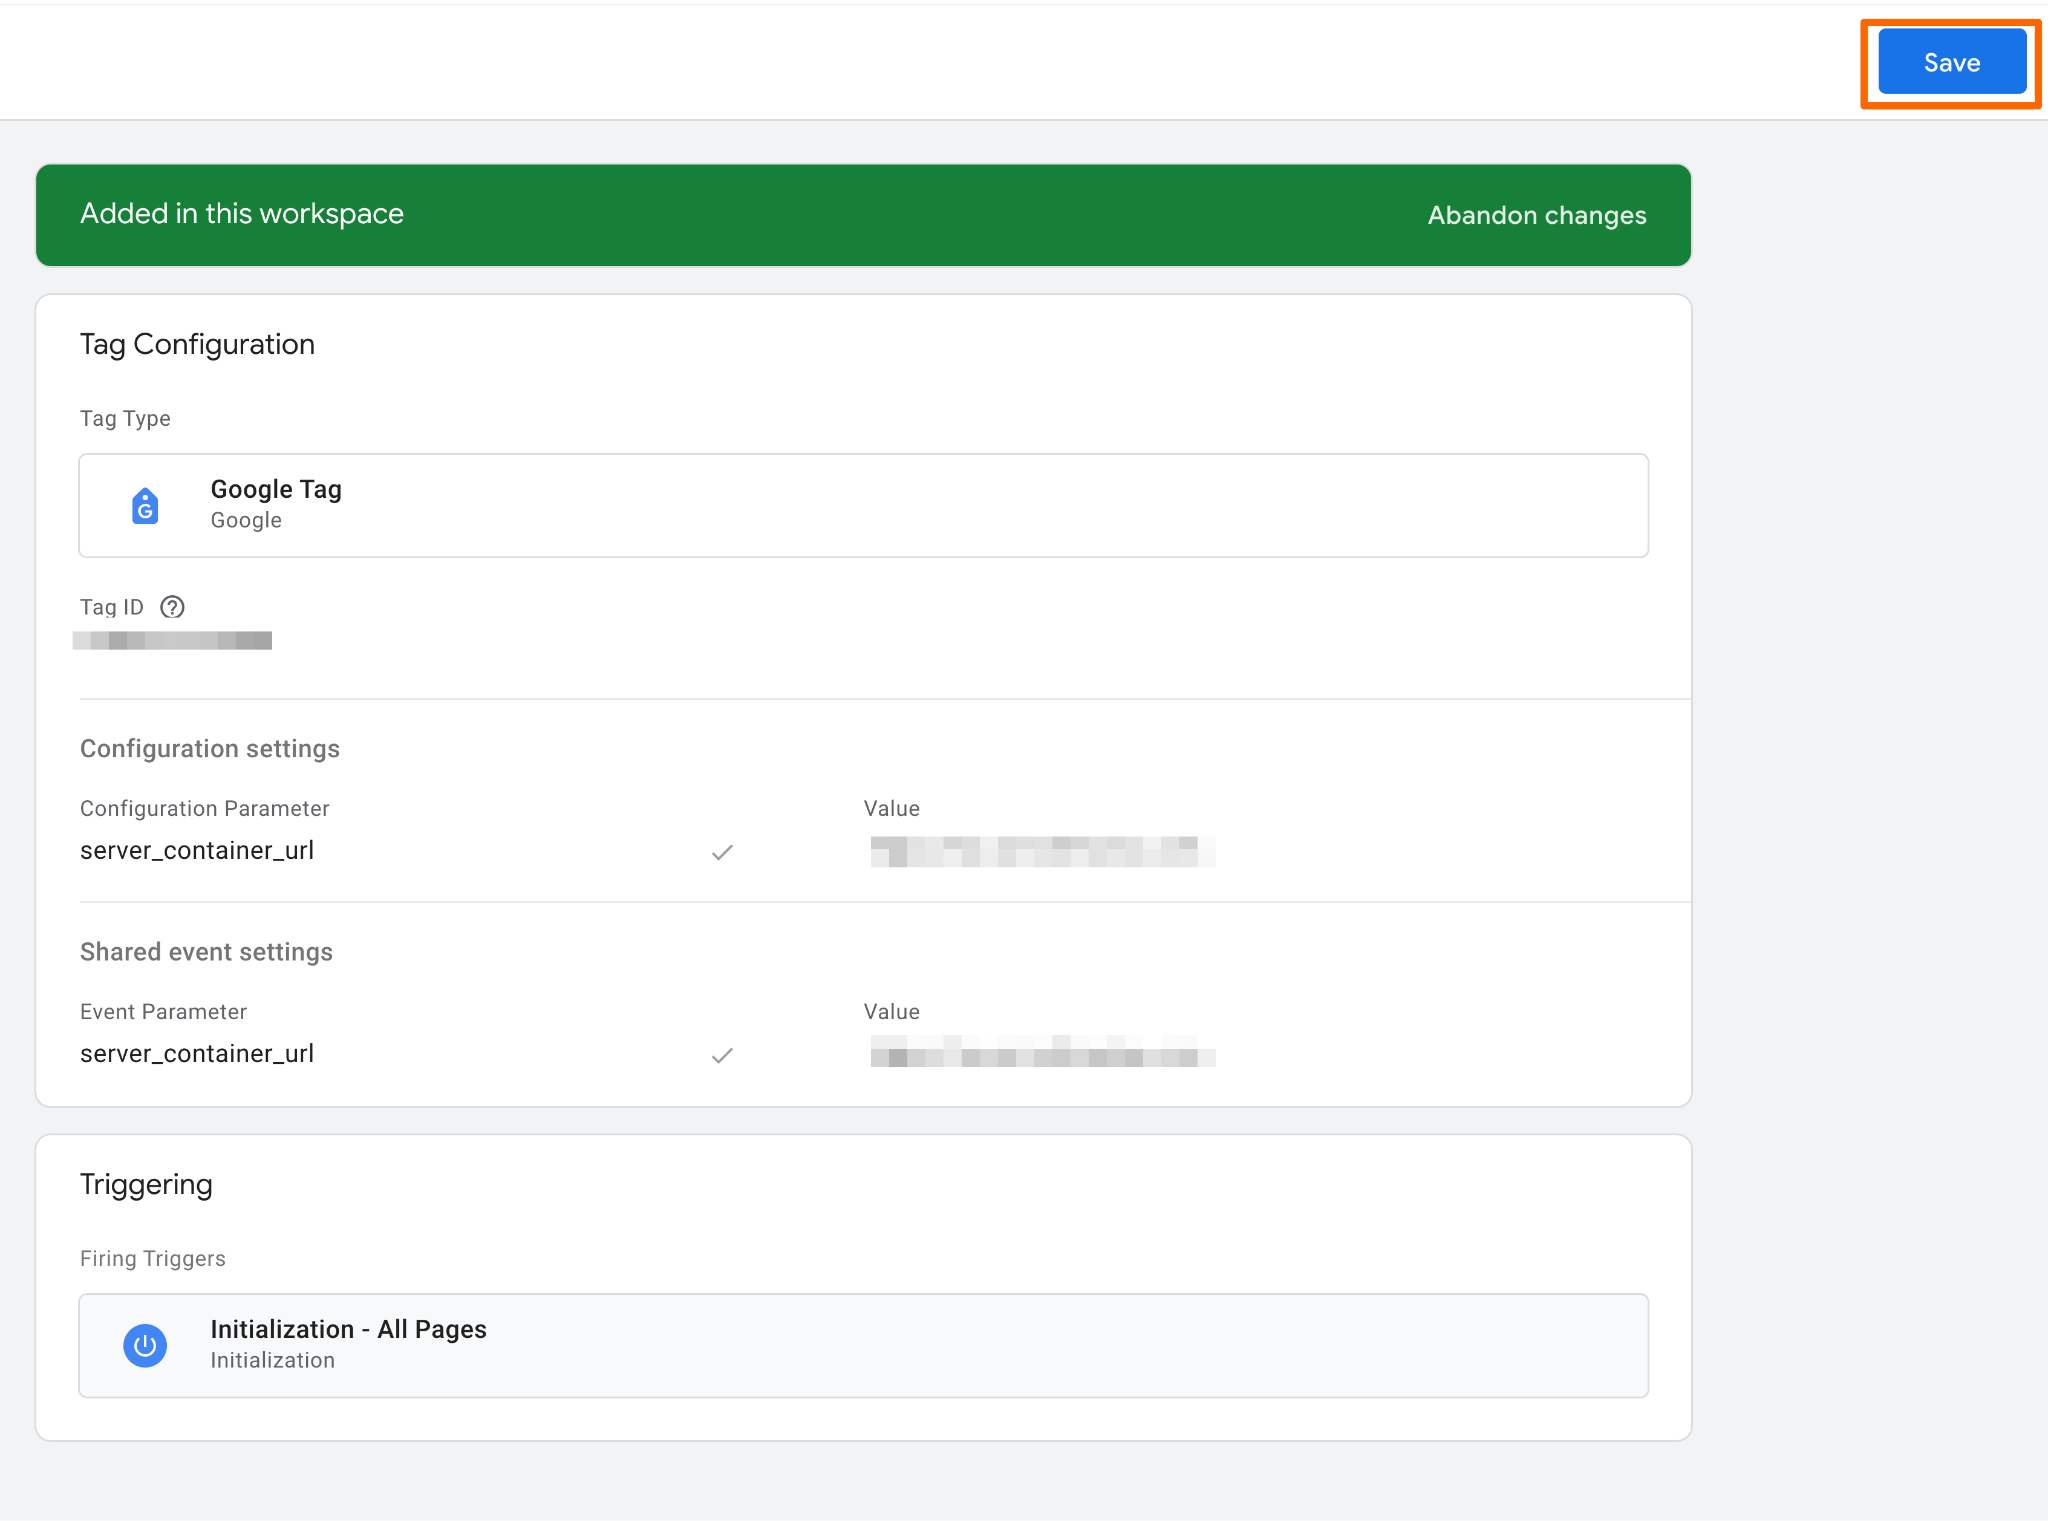
8. Click Preview, load your website, and check that the Google Tag fires. Then check in the server container's Preview mode that requests arrive, and publish the web container.

Google Tag Manager variables explained
A Google Tag Manager variable is a placeholder that holds a value: a page URL, the text of a clicked button, a product ID, or a measurement ID. Instead of typing that value into every tag, you insert the variable, and GTM replaces it with the real value when the tag runs. In the interface, a variable is written in double curly brackets, for example {{Page URL}}.
This gives you two benefits: you define a value once, and if it changes, you update it in one place.
There are two types of variables:
- Built-in variables: provided by GTM, you only need to enable them (for example, Page URL or Click Text).
- User-defined variables: the ones you create yourself, based on your needs.
Here are the most common user-defined variable types:
| Variable type | What it does | Example |
| Data Layer Variable | Reads a value pushed to the data layer | An order value |
| Constant | Stores a fixed value reused in several tags | A GA4 measurement ID |
| Lookup Table | Returns a different value depending on the value of another variable | A conversion ID based on the page |
| Custom JavaScript | Calculates a value with a JavaScript function | Converting a URL to lowercase |
| Configuration Settings | Groups reusable configuration parameters | server_container_url |
| Event Settings | Groups reusable event parameters | coupon |
What is the difference between Configuration settings and Event settings?
| Criteria | Configuration settings | Event settings |
| Level | Google Tag configuration, applied when the tag loads | Event, sent with the data of an event |
| Purpose | Global rules shared by several tags | Reusable event parameters and user properties |
| Example parameters | server_container_url, language, groups | coupon, content_type, a custom parameter (for example, "Read More" clicks) |
| Where to apply | Configuration settings field of the Google Tag | Shared event settings field of the Google Tag (all events) or a GA4 Event tag (selected events) |
| When to use | Send data to your server GTM, segment by language | Track coupon use, measure a button click |
Configuration Settings Variable
A Configuration Settings Variable is a sort of "recipe" for how your Google Tags should behave. Once you create this recipe, you can apply it to multiple tags simultaneously instead of inputting the settings one by one for each tag. It's a way to create a set of rules that any Google Tags you choose can follow.
For instance, you run an e-commerce site with multiple product categories like electronics, clothing, and home goods. You want to segment your audience based on the category they're interested in. Creating a configuration variable that includes a product category parameter allows you to apply this setting across all your relevant Google tags efficiently. This eliminates the need to update each tag individually.
However, this variable comes with a minor drawback. Previously, there was a user-friendly interface that made it easier to input these settings. You'll need to type in the field parameters you want to configure manually. This may be more challenging for a beginner, but once you get the hang of it, the flexibility it offers is a significant advantage.
This variable is also essential for server-side tracking: you add the server_container_url parameter to it, then select it in the Configuration settings field of your Google Tag, as described in the previous section.
How to set up the Configuration Settings Variable
1. Create and set up a server Google Tag Manager container. Or if you already have one, go to your Account.
2. Click on Variables on the left of the menu and choose New.
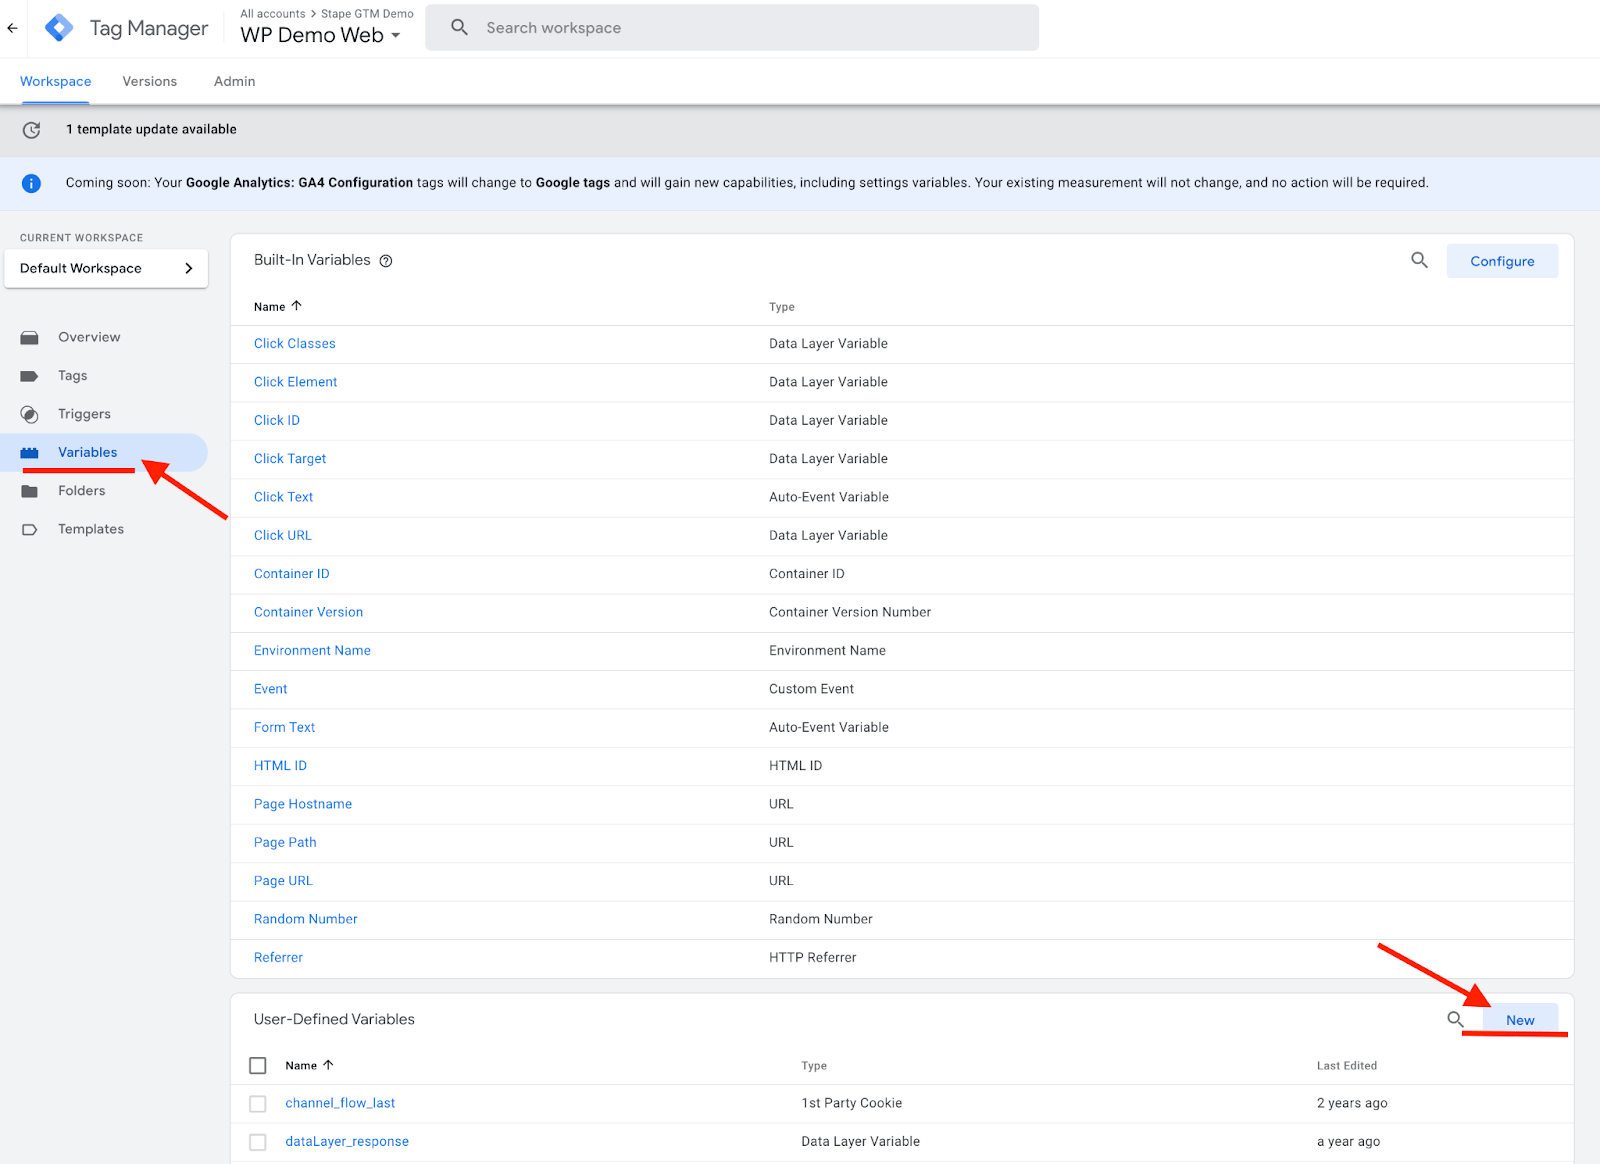
3. Click on Variable Configuration and choose Google tag: Configuration settings.
4. Type what parameters you want to reuse, like in the screenshot below. You can take a look at Valid parameters for configuration settings or type a custom parameter.
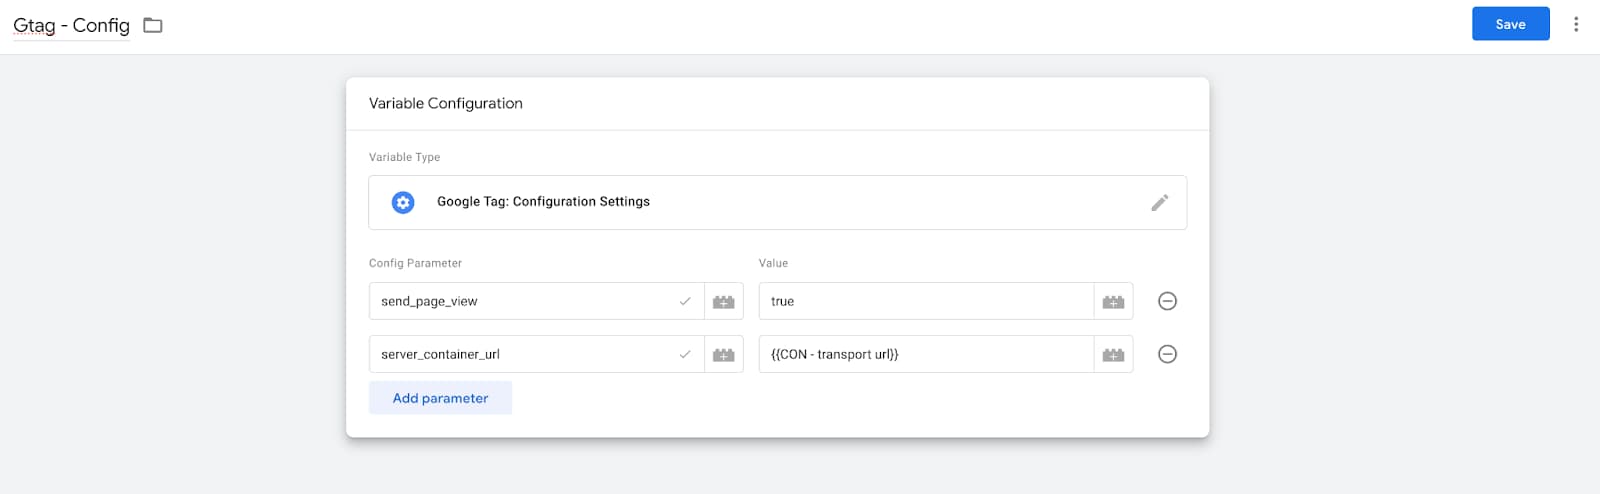
5. Don’t forget to name the Variable and click the Save button.
Event Settings Variable
The Event Settings Variable lets you easily manage and standardize "events" or specific actions that users take on your website, like clicking a button or filling out a form.
You can create a list of these event parameters and settings in one place and then apply them to multiple tags.
Let's say you operate a news portal and want to monitor the number of people who click on a "Read More" button for featured articles. Instead of manually inserting a "Read More Clicks" parameter into each separate tag, you can centralize this setup by creating an Event Settings variable containing that parameter.
Moreover, even though this variable is designed to be used with various products, it offers a dedicated field for adding Google Analytics User Properties. This means you can customize how you track specific user behaviors, offering a more nuanced understanding of your audience.
How to set up the Event Settings Variable
2. Click on Variables and choose New.
3. Click Variable Configuration and choose Event Settings.
4. Type what parameters you want to reuse, like in the screenshot below. You can take a look at Valid parameters for event settings or type a custom parameter.
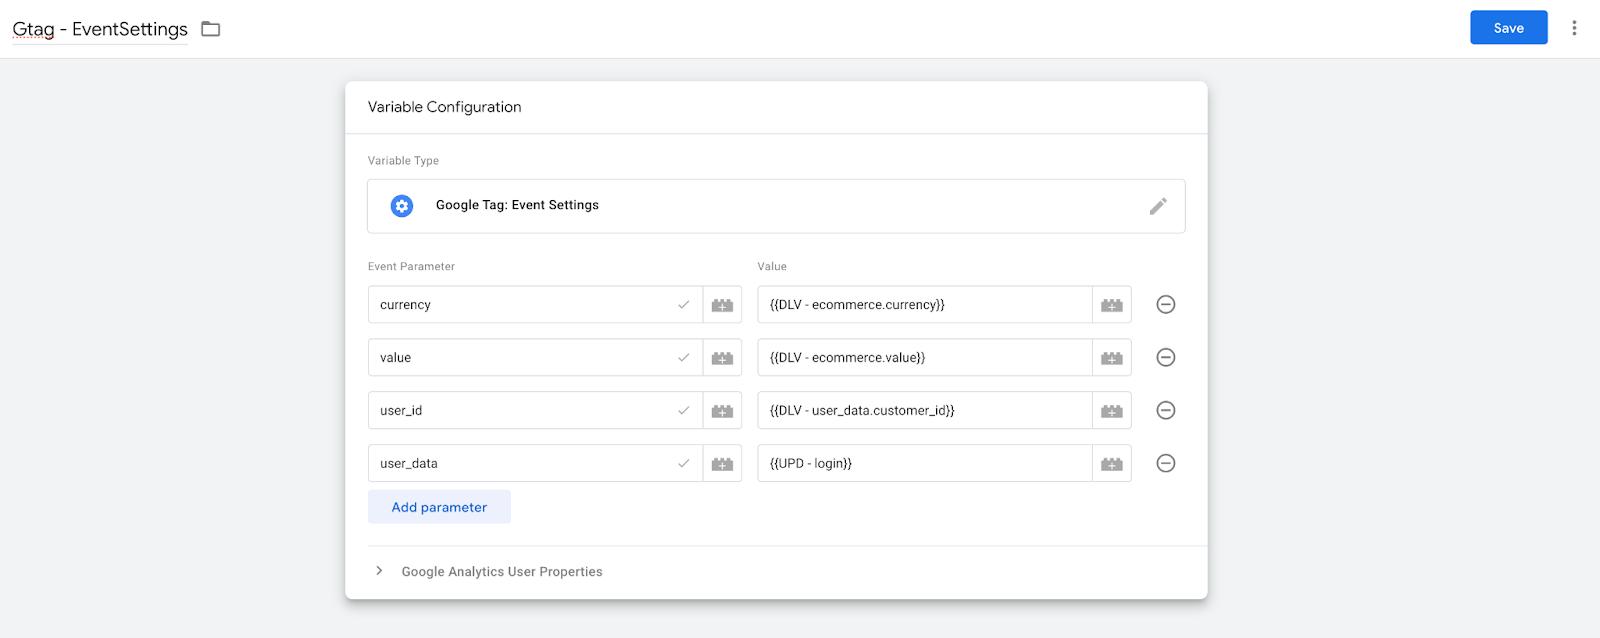
5. To transmit event-specific parameters solely for certain GA4 events, include the event settings variable within a GA4 Event tag. Go to Tags and select GA4 Event tag.
6. Select an Event Settings variable from the dropdown list and edit the parameters as you’d like.
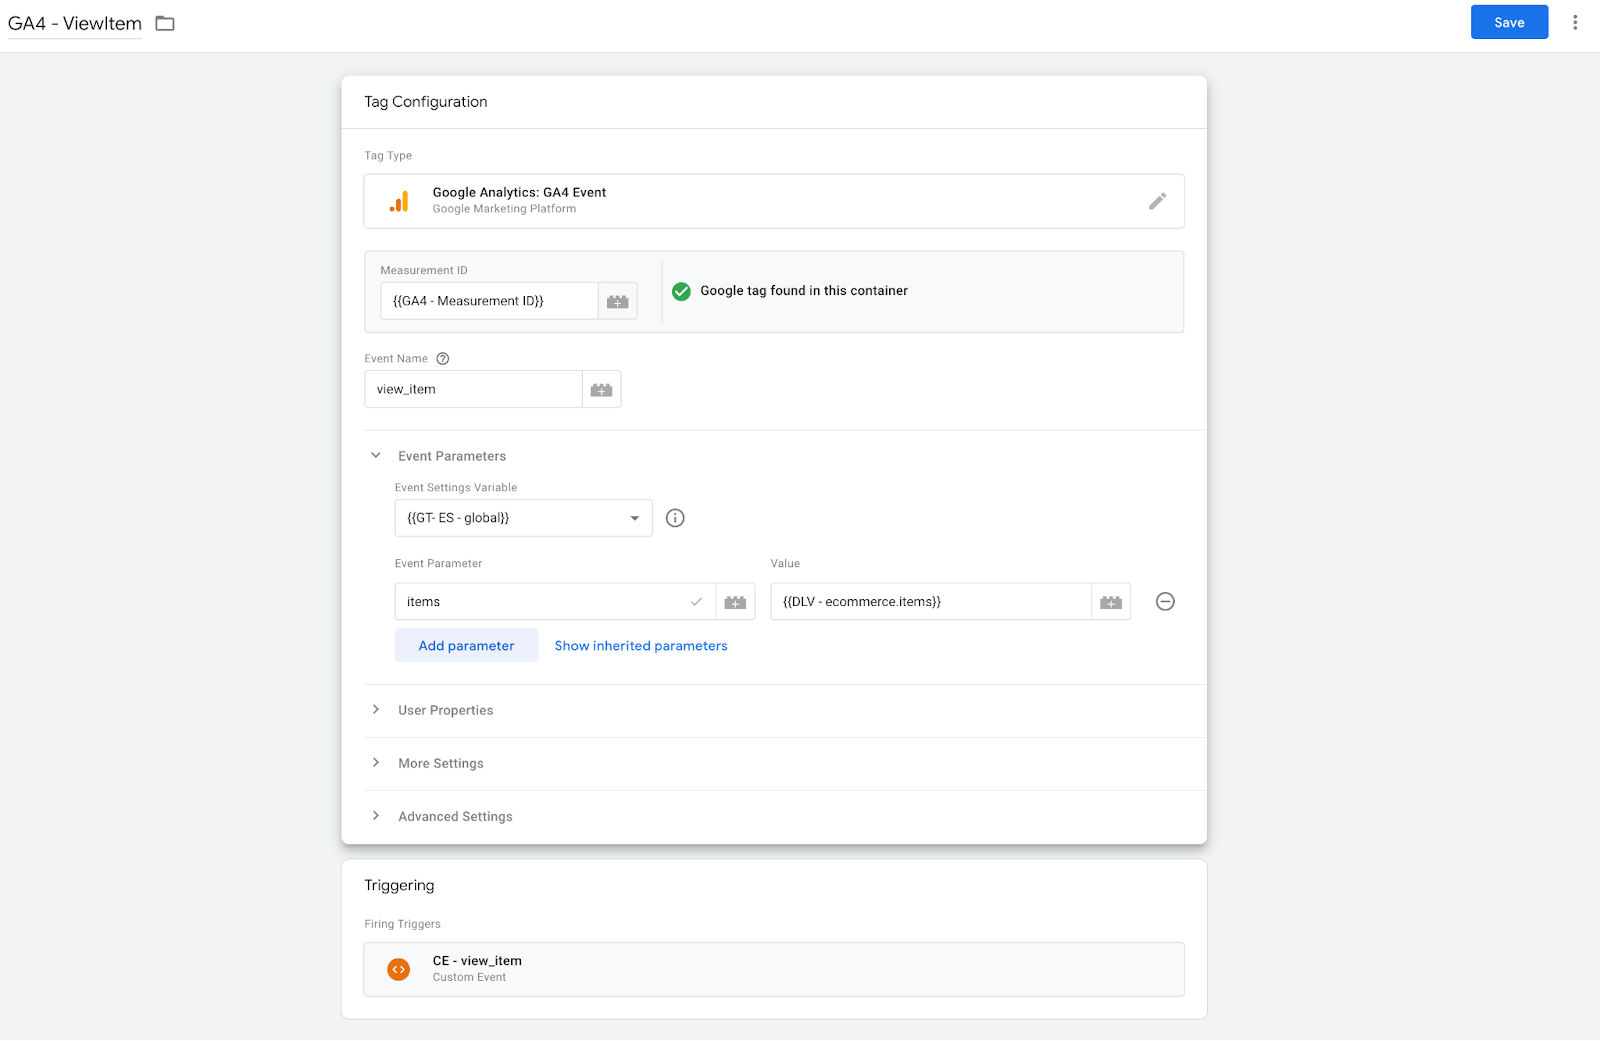
7. Don’t forget to click Save and publish the changes.
To send these parameters with all events of a Google Tag, open your Google Tag, select the variable in the Shared event settings field, click Save, and publish the changes.
Conclusion
Google Tag and Google Tag settings variables simplify how you set up tracking for Google products. One tag replaces the many tags that used to do the same thing for different platforms.
Settings variables help cut down on repeated tasks. The Configuration Settings Variable is used less often day to day, but it's essential for server-side tracking because it can hold the server_container_url parameter. The Event Settings Variable will be handy for standardizing your event parameters.
Want to start on the server side?
Try for freeRecommended for you
Blog
User Data Extractor variable for Google Tag Manager server container
User Data Extractor for sGTM captures personal details from server-side events, such as emails and phone numbers, boosting marketing and tracking.
Feb 26, 2025

Comments