How to set up the Nuvemshop app
Updated Oct 12, 2026
Before you begin
If you wish to use Stape’s features like Custom Loader and Cookie Keeper, you need to host an sGTM container on Stape. You will also need GA4 or Data tags configured in a web GTM. Please follow the Get started with sGTM hosting instructions for more information.
How to set up the app
1. Set up the server GTM container and host it on Stape.
2. To install the app, log in to your Nuvemshop account, open the Stape Conversion Tracking app page, and click the Instalar (Install) button.
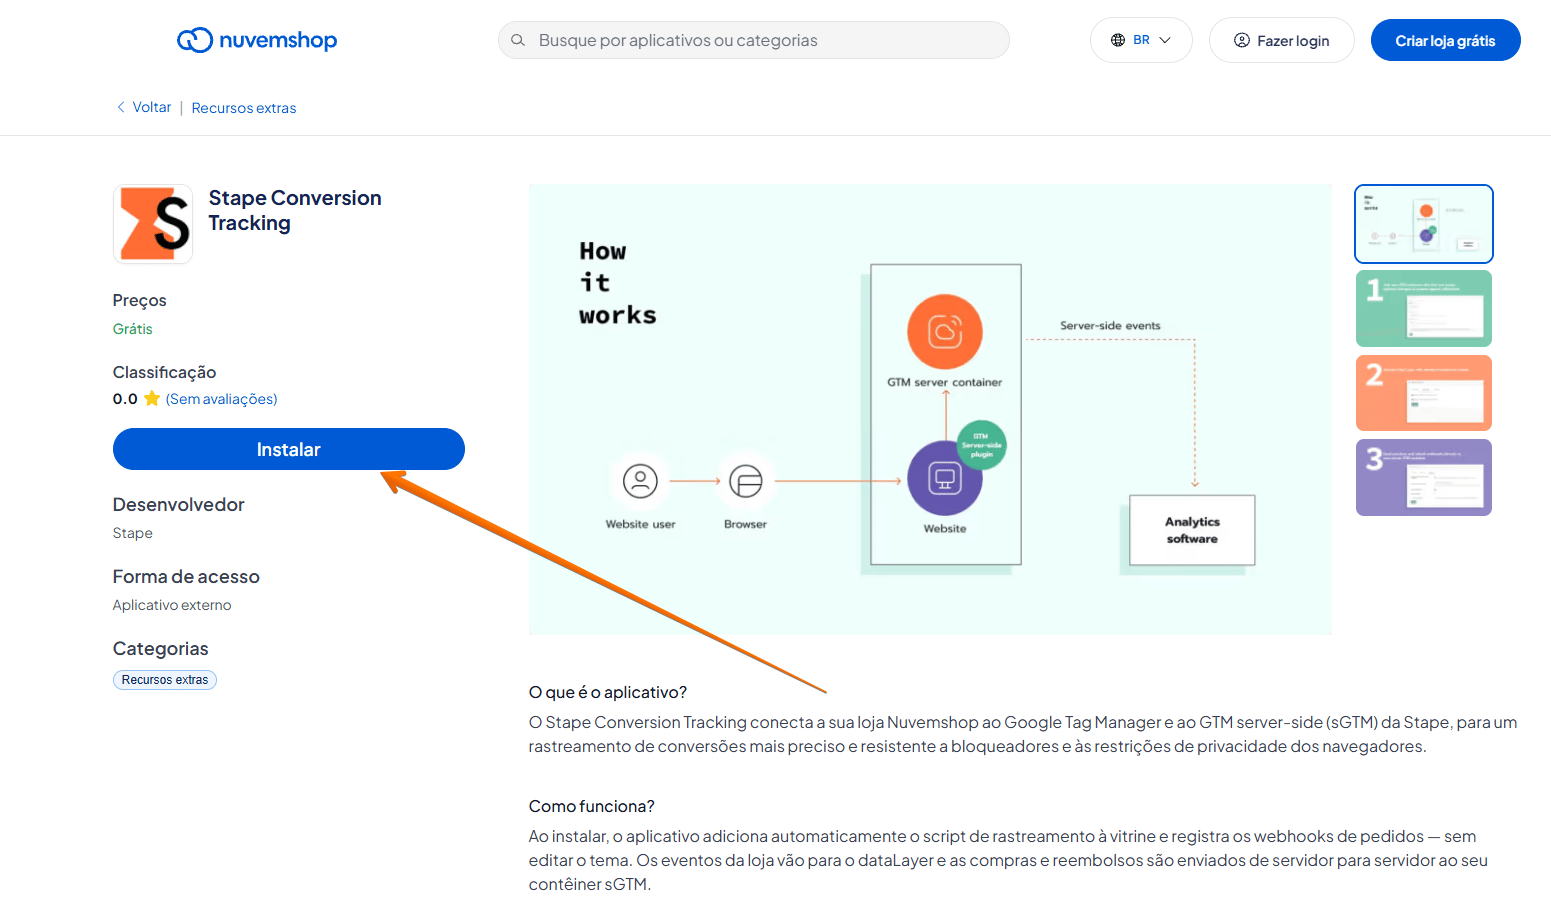
3. Configure the app. You will need to configure three sections: General, Data Layer, and Webhooks.
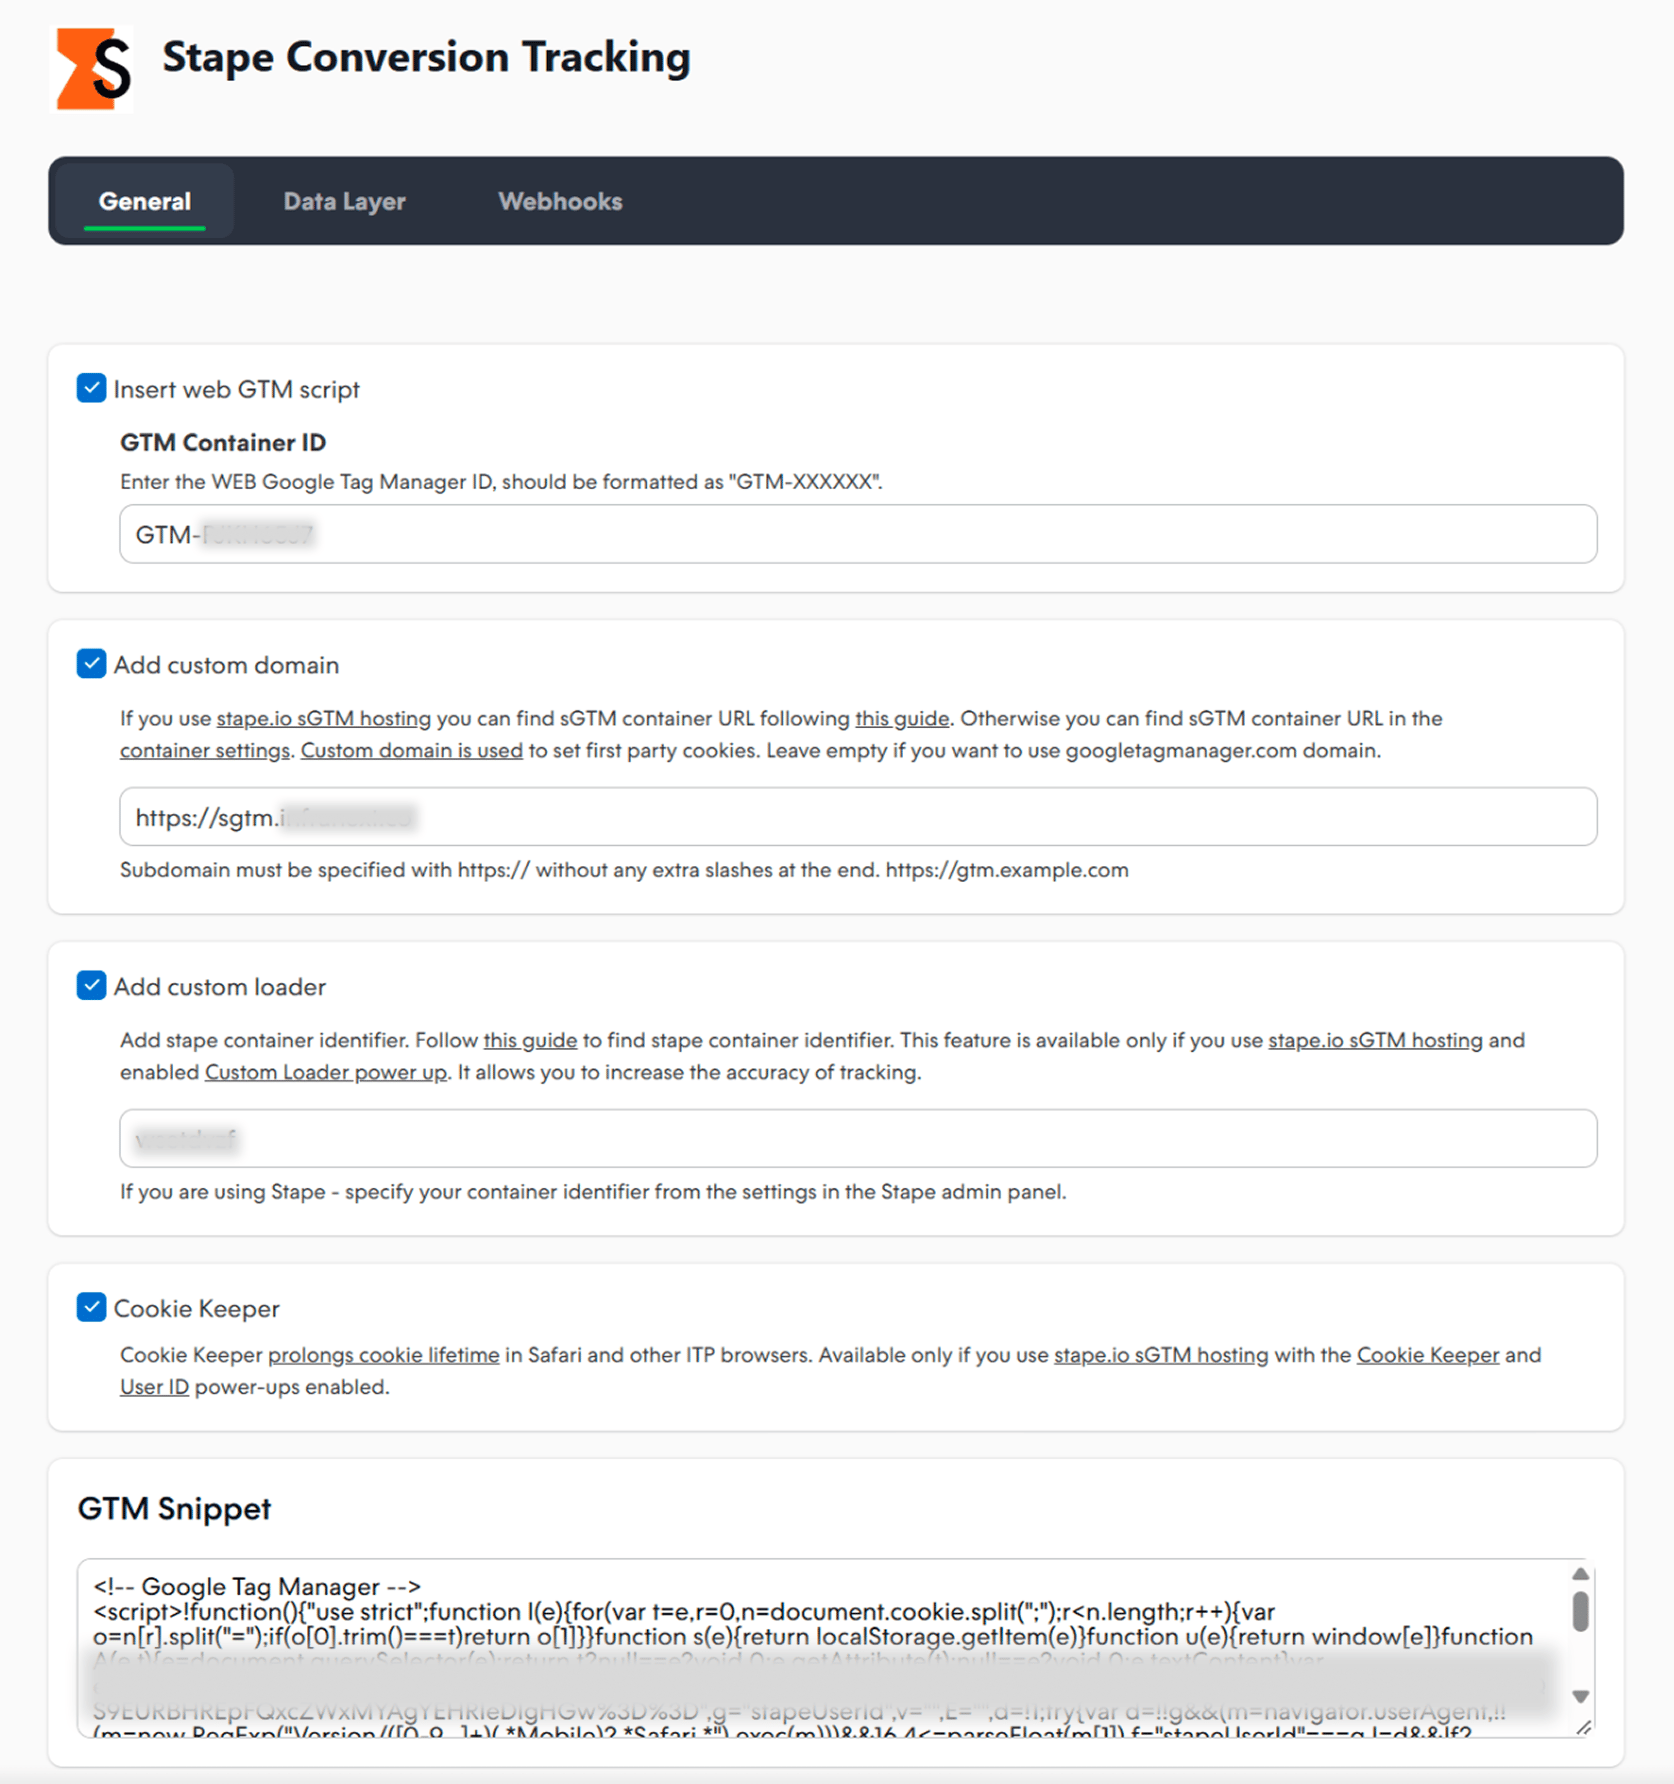
General
This section contains all the options for the GTM setup:
- 1.Insert web GTM script - check this box to have the app install the GTM snippet on every page of your Nuvemshop site. If you do, enter your GTM Container ID - the ID of your web GTM container (you can find it in your GTM account in the tab Accounts). The format should be the following: GTM-XXXXXXX. Learn more about how to find your web GTM ID.
- 2.Add custom domain - check this box to use the subdomain you have created for server-side tracking. It should start with https:// without any extra slashes at the end (like https://gtm.example.com). When left empty, it will use the googletagmanager.com domain instead.
- 3.Add Custom Loader - this is Stape’s power-up used to minimize the impact of ad blockers on your tracking. This option is available only if you use Stape's sGTM hosting and set up the Custom Loader power-up. To enable this option, specify your container identifier, located in the Stape admin panel settings.
- 4.Cookie Keeper - this is Stape’s power-up used to prolong cookie lifetime in Safari and other browsers with ITP. This option is available only if you use Stape's sGTM hosting and set up the Cookie Keeper power-up. Please also make sure to enable Stape User ID in your container power-ups. The User ID power-up creates a persistent, privacy-conscious user identifier and attaches it to each incoming request handled by your sGTM container.
Data Layer
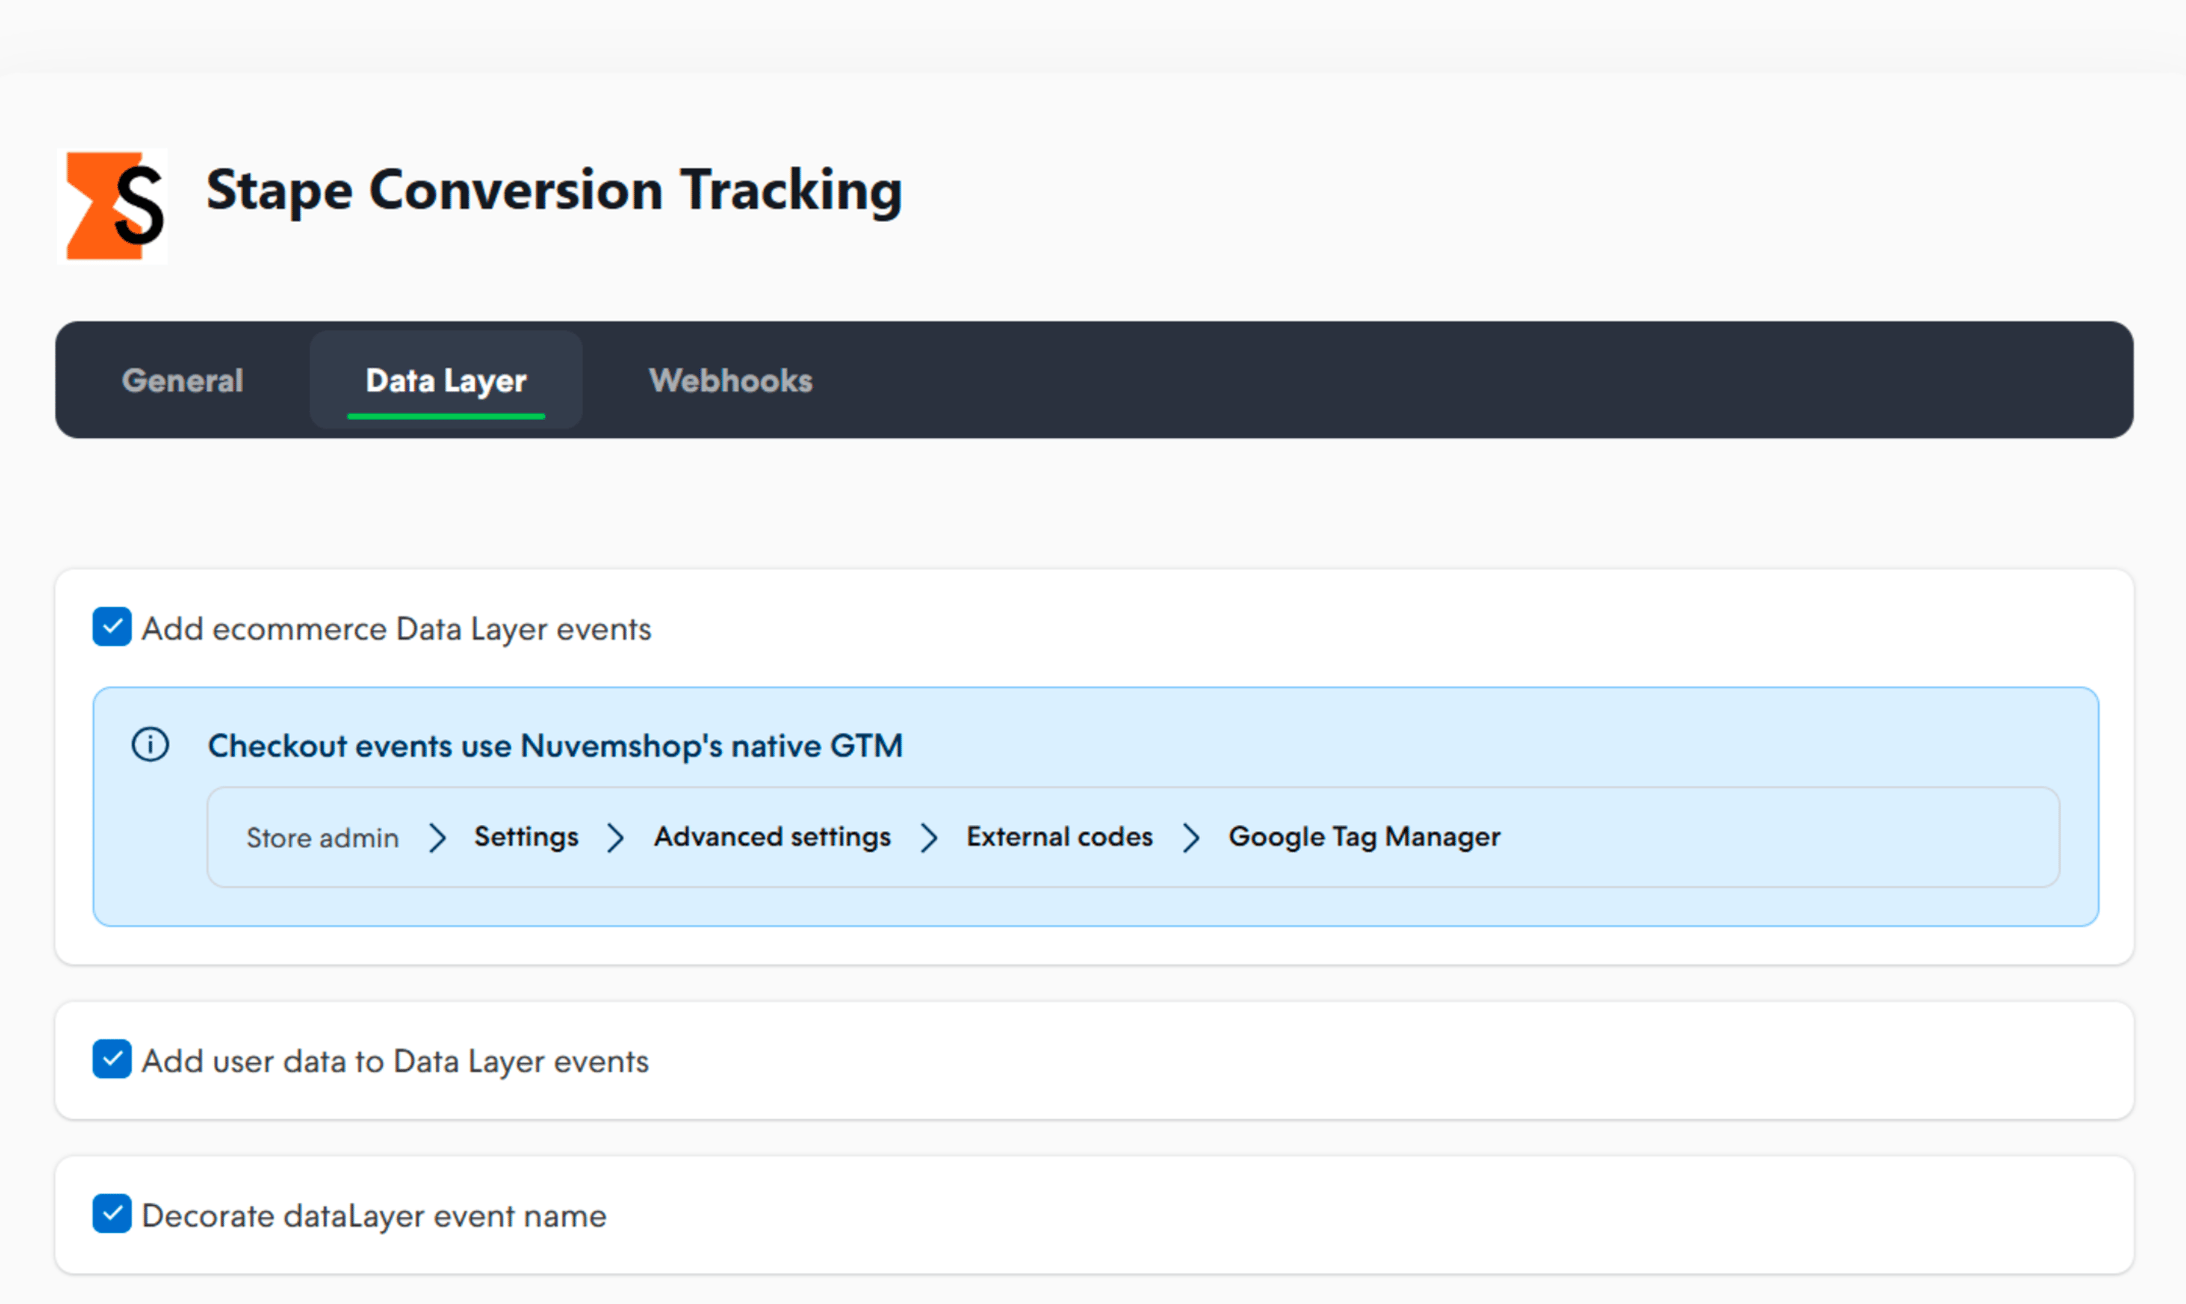
In this section, you can see boxes that enable Data Layer events. With their help, you can enrich the data by incorporating product and user details.
Note:
Checkout events only fire if the user enables GTM natively in Nuvemshop.
- 1.Add ecommerce Data Layer events - enables the app to automatically push standard ecommerce events and their ecommerce data into the Data Layer.
- 2.Add user data to Data Layer events - adds user/customer information to the ecommerce events in addition to the product and event data.
- 3.Decorate dataLayer event name - adds the _stape suffix in event names to prevent any clashes in GTM. If it’s off, events keep their normal names.
Webhooks
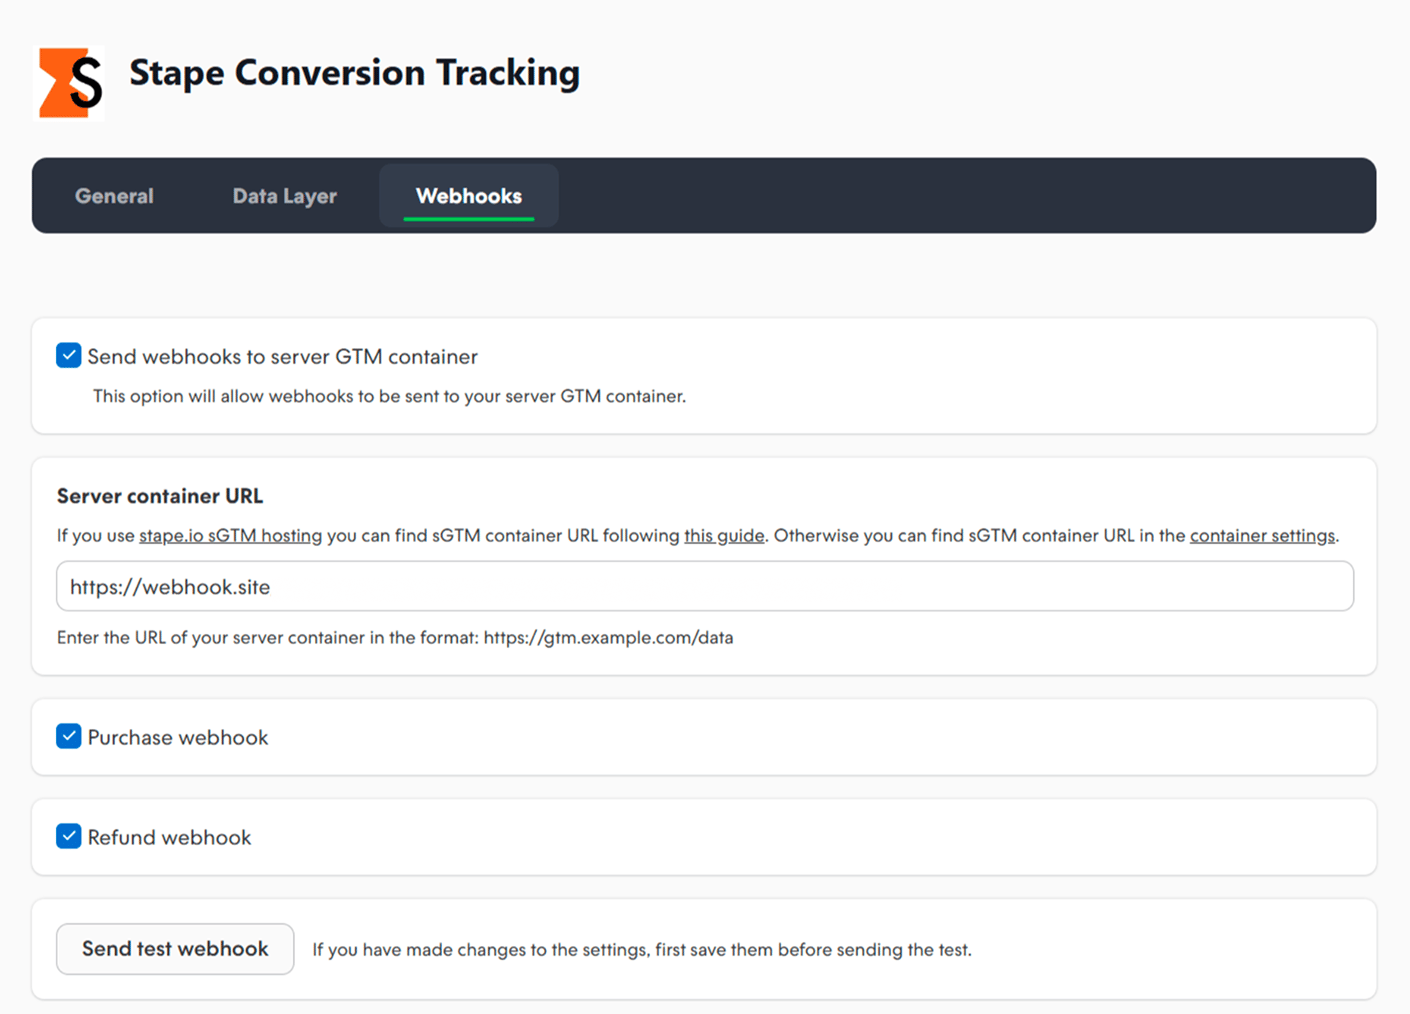
In this section, you can set up sending webhooks to a specified URL for various events, such as purchases and/or refunds.
- Send webhooks to server GTM container - enables webhook configuration.
- Server container URL - if you use Stape’s GTM hosting, this URL is located in Stape container settings of the sGTM container. Otherwise, it is located in your server container settings on GTM.
- Purchase webhook - sends a purchase event to your sGTM container when a new order is created in Nuvemshop.
- Refund webhook - sends a refund event to your sGTM container when an order is refunded
- Send test webhook - click this to send a sample webhook request so you can check whether your webhook configuration works correctly.
Testing
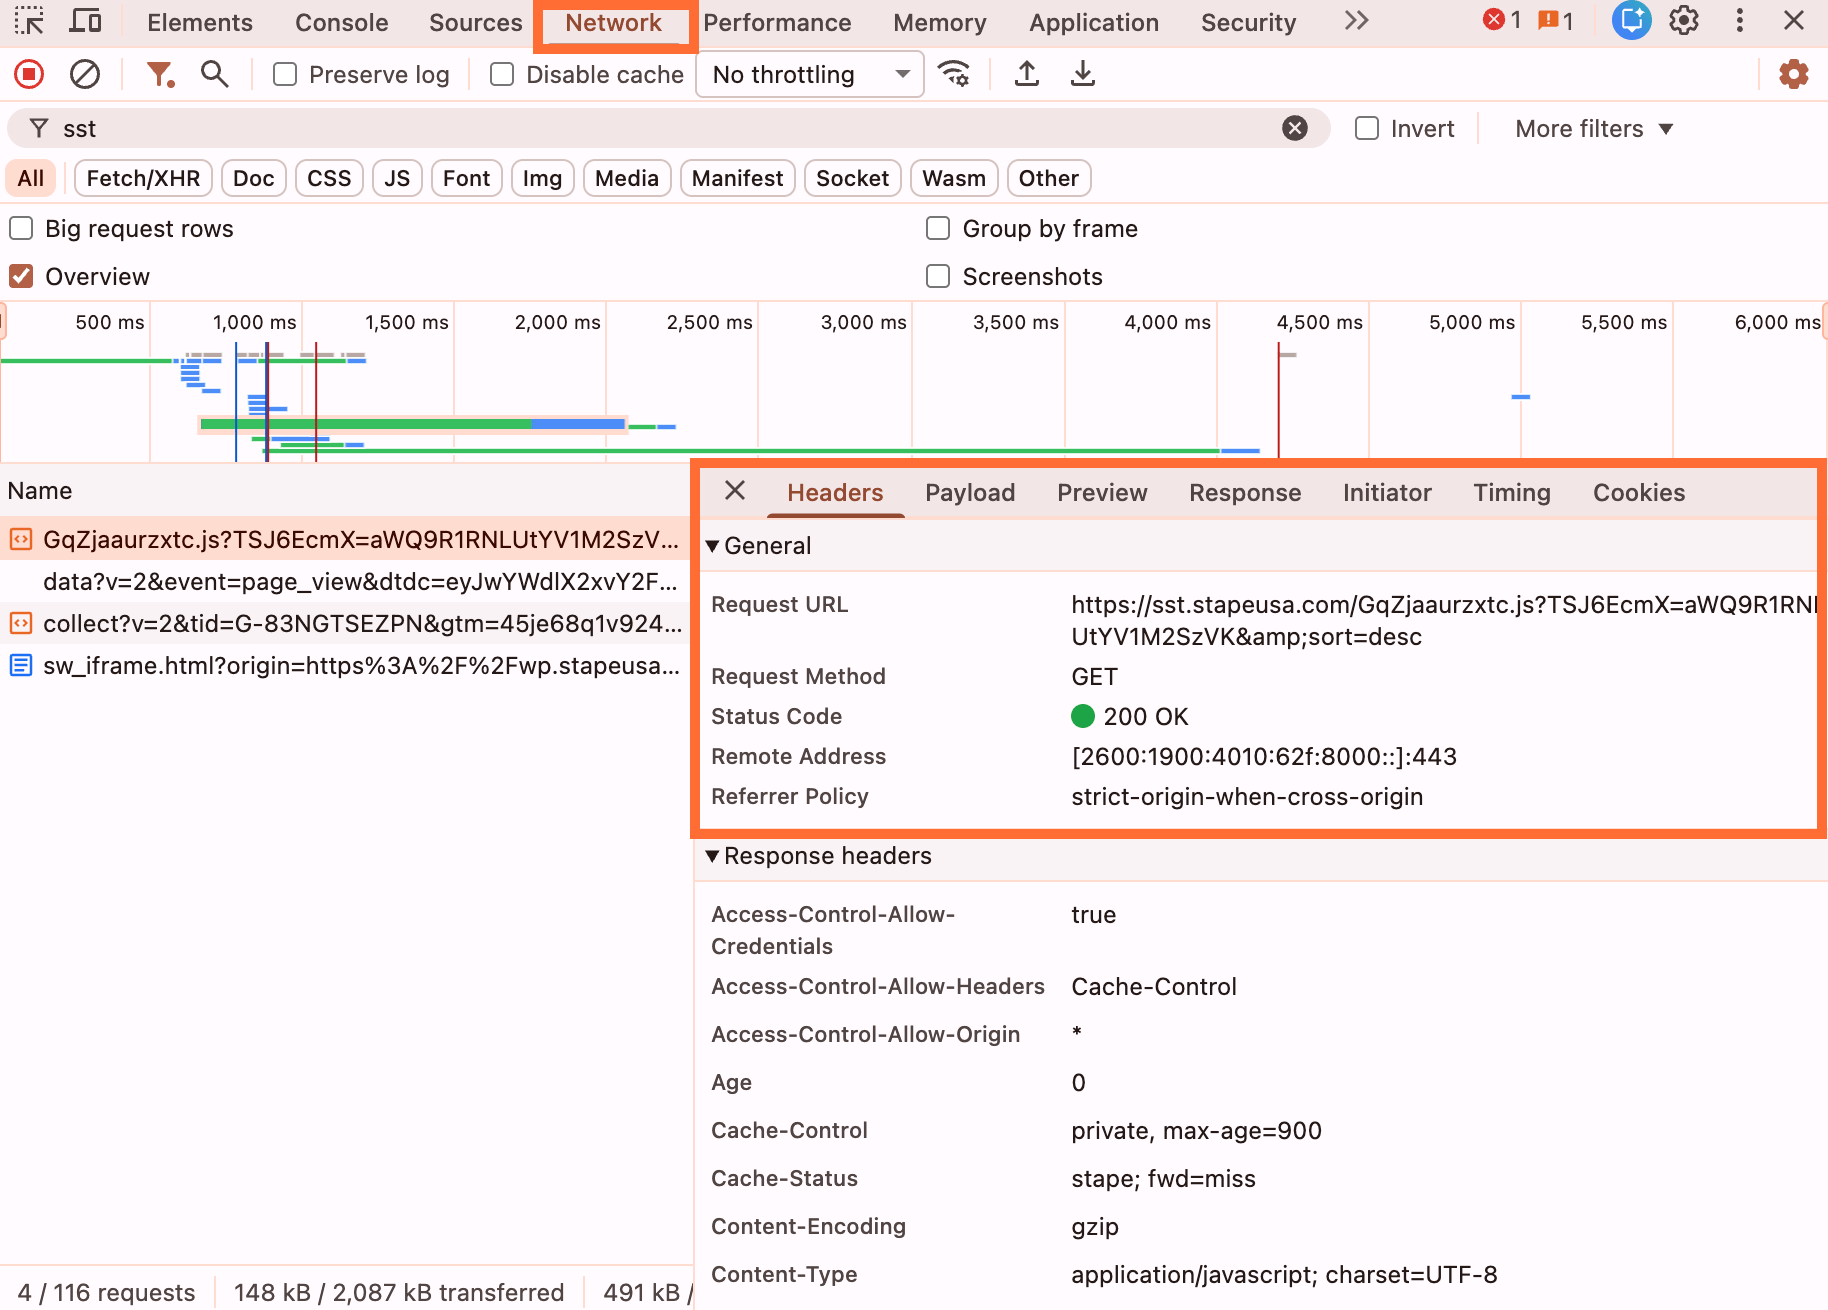
1. Open any site page, open the Developer Tools, and in the Network tab filter by your tagging server URL. If you didn’t set up a custom domain, search by gtm.js. You should see the web GTM script served through that URL, with status 200.
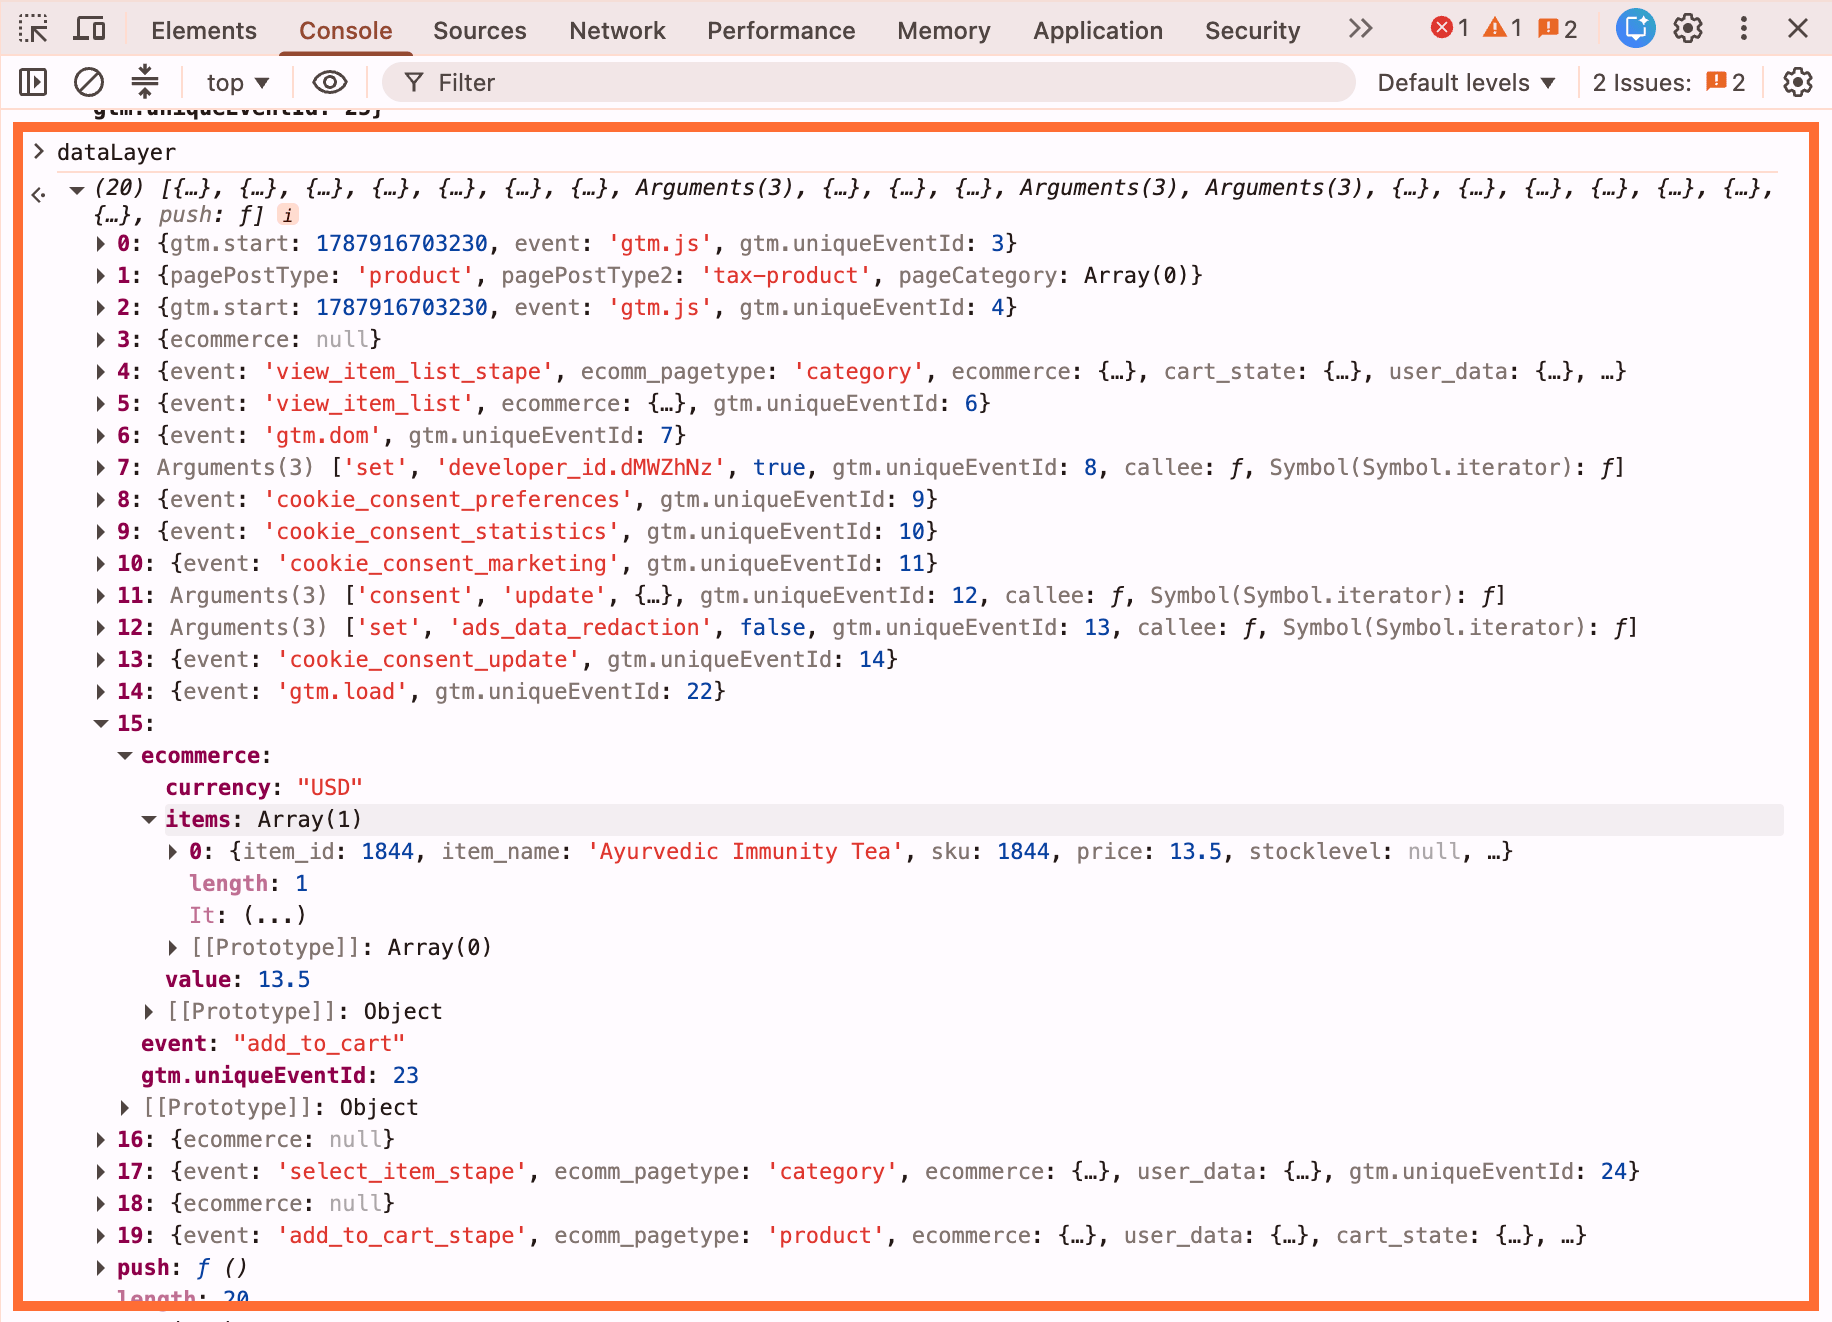
2. In the same Developer Tools, go to Console and do some actions on your site (for example, add to cart). Type in dataLayer and press Enter. Confirm that the dataLayer is being filled.
3. Test in Google Tag Manager:
3.1. Open your sGTM container → click Preview.
3.2. In a separate tab, open your web GTM container → click Preview and enter your site URL.
3.3. Perform test actions on your website (such as add to cart).
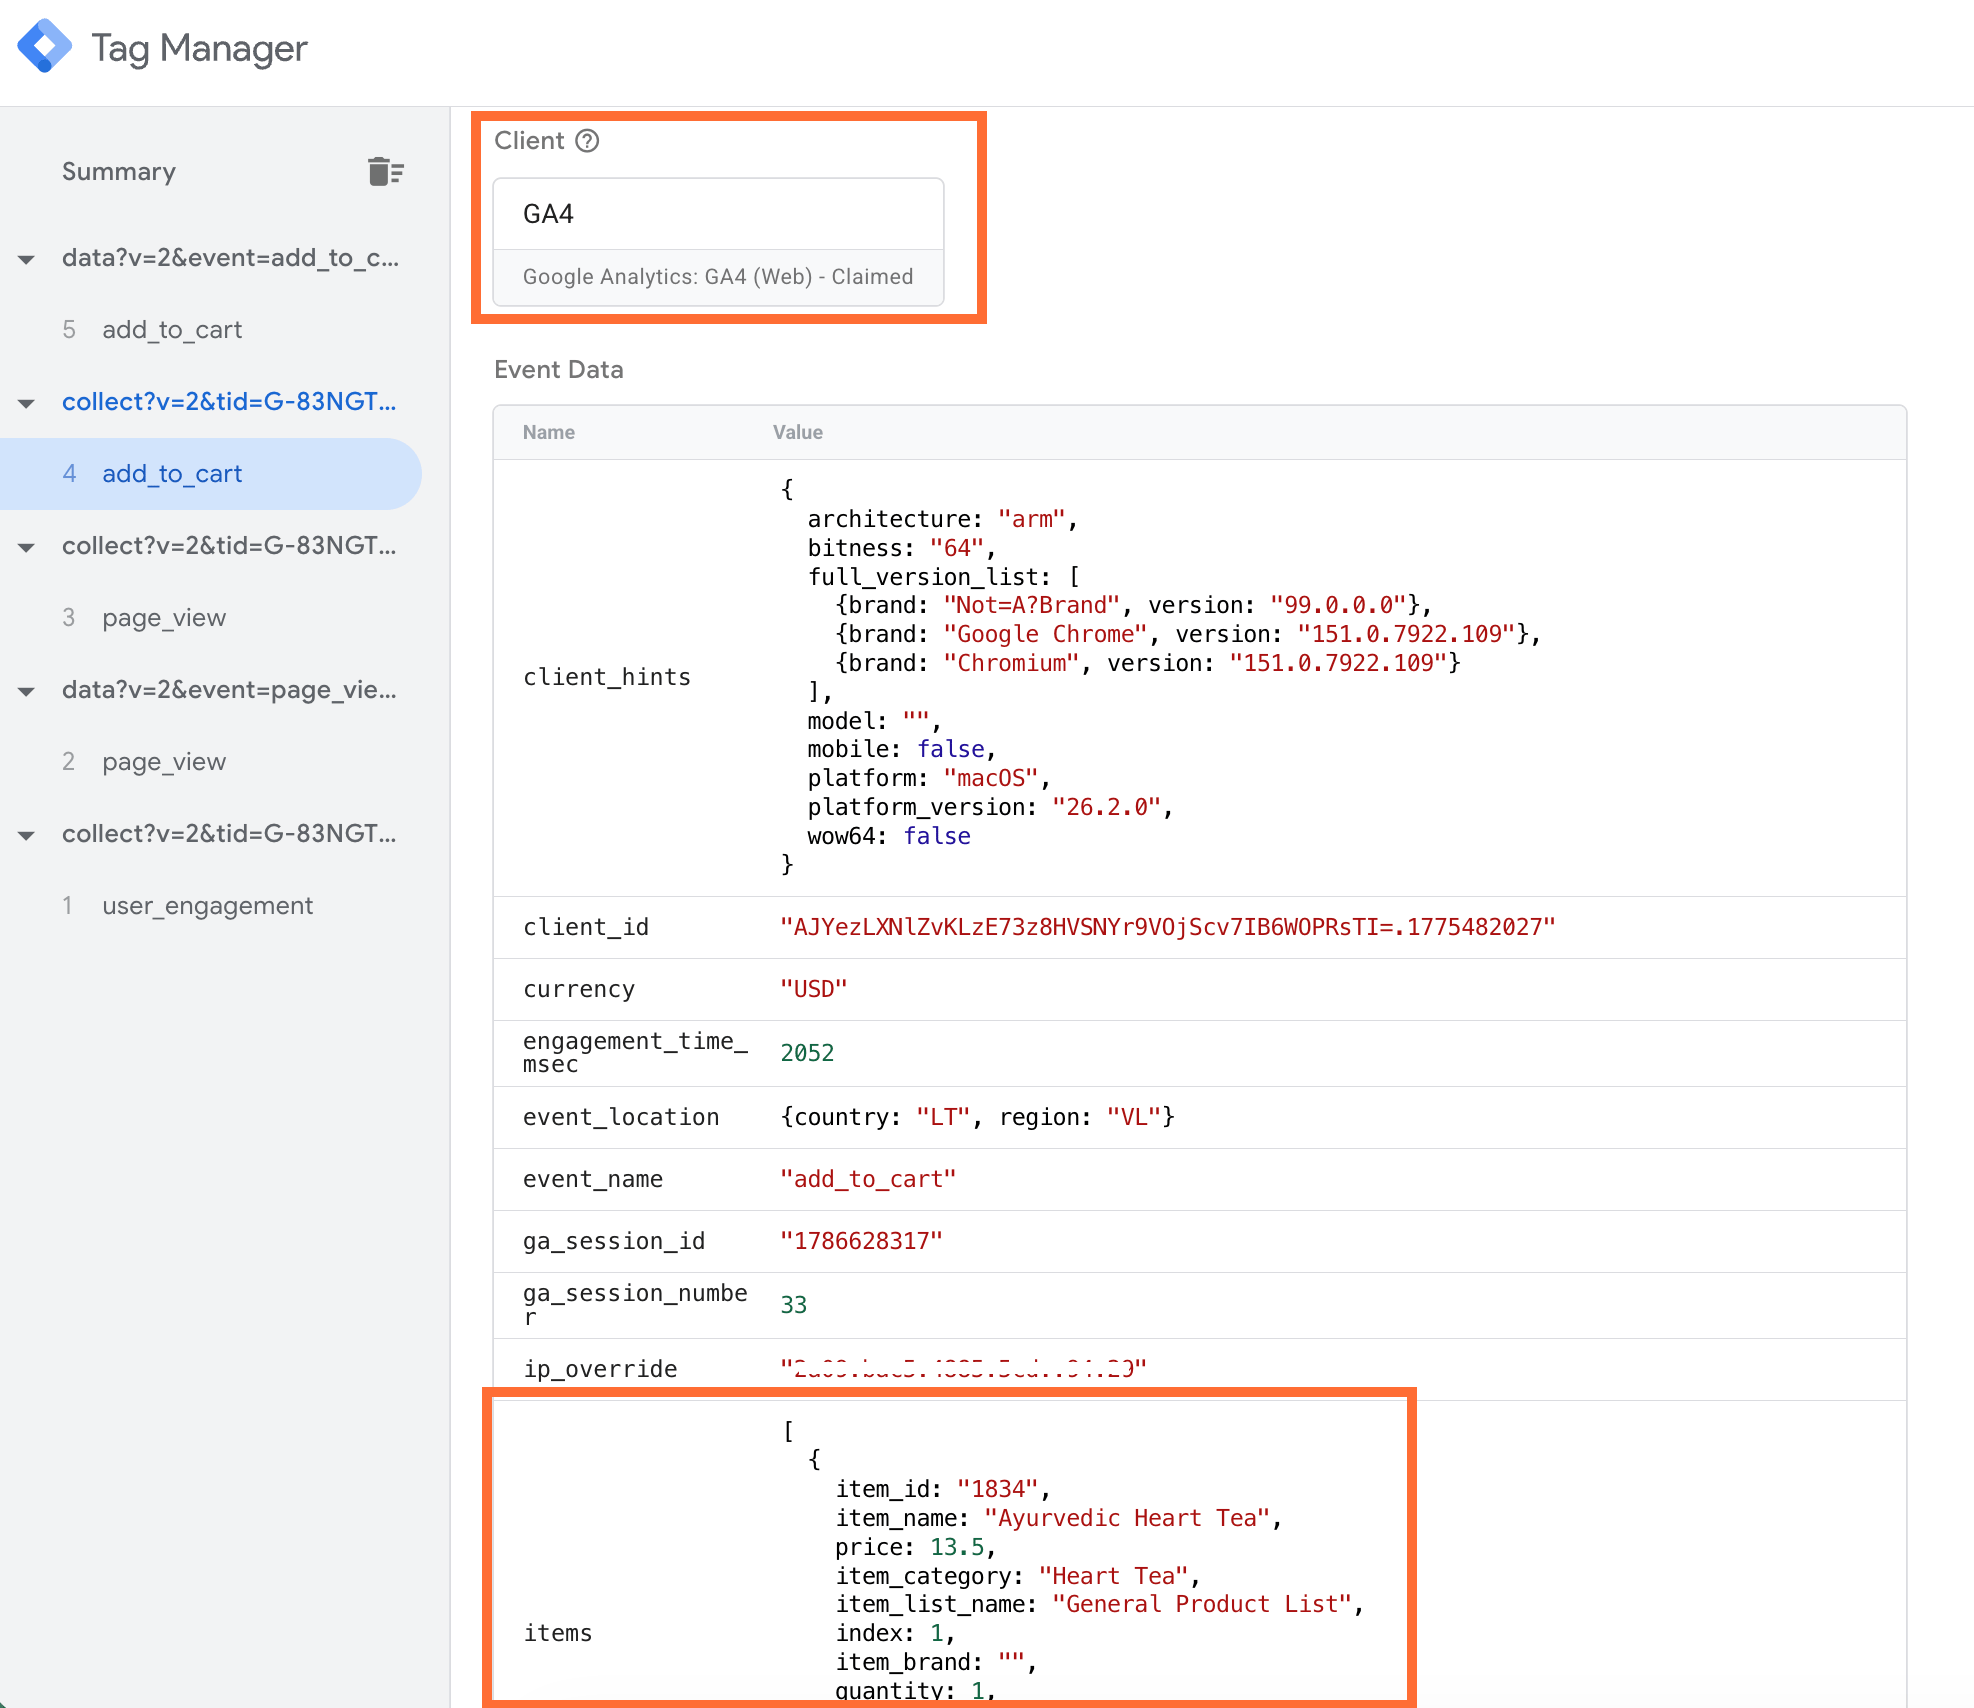
3.4. In the sGTM debug window, verify that incoming requests arrive at your sGTM and are claimed by your Client (GA4 Client or Data Client).
Was this article helpful?
🍽 Table of content:
Comments