How to set up Meta Conversions API
Updated May 10, 2026
The following guide demonstrates setting up Meta Conversions API via server-side GTM. You can alternatively configure it via Meta Conversions API Gateway or Signals Gateway.
Requirements for setting up Meta Conversions API
1. Please ensure that you already have Google Tag Manager web and server containers, as well as a configured server container and custom domain in Stape. Please follow these guides if you don’t have any of those:
2. Meta supports event deduplication, meaning that you can combine web and server tracking for Facebook. If you do so, please ensure to add the same event_id to web and server tags. In this guide, we will explain how to do it using a Unique Event ID variable.
Step-by-step guide to configuring Meta Conversions API via server GTM
1. Configure sending data to the server GTM container. The two most popular options for sending data to sGTM are Google Analytics 4 and Data Tag/Data Client. Here is a step-by-step guide on sending data to sGTM.
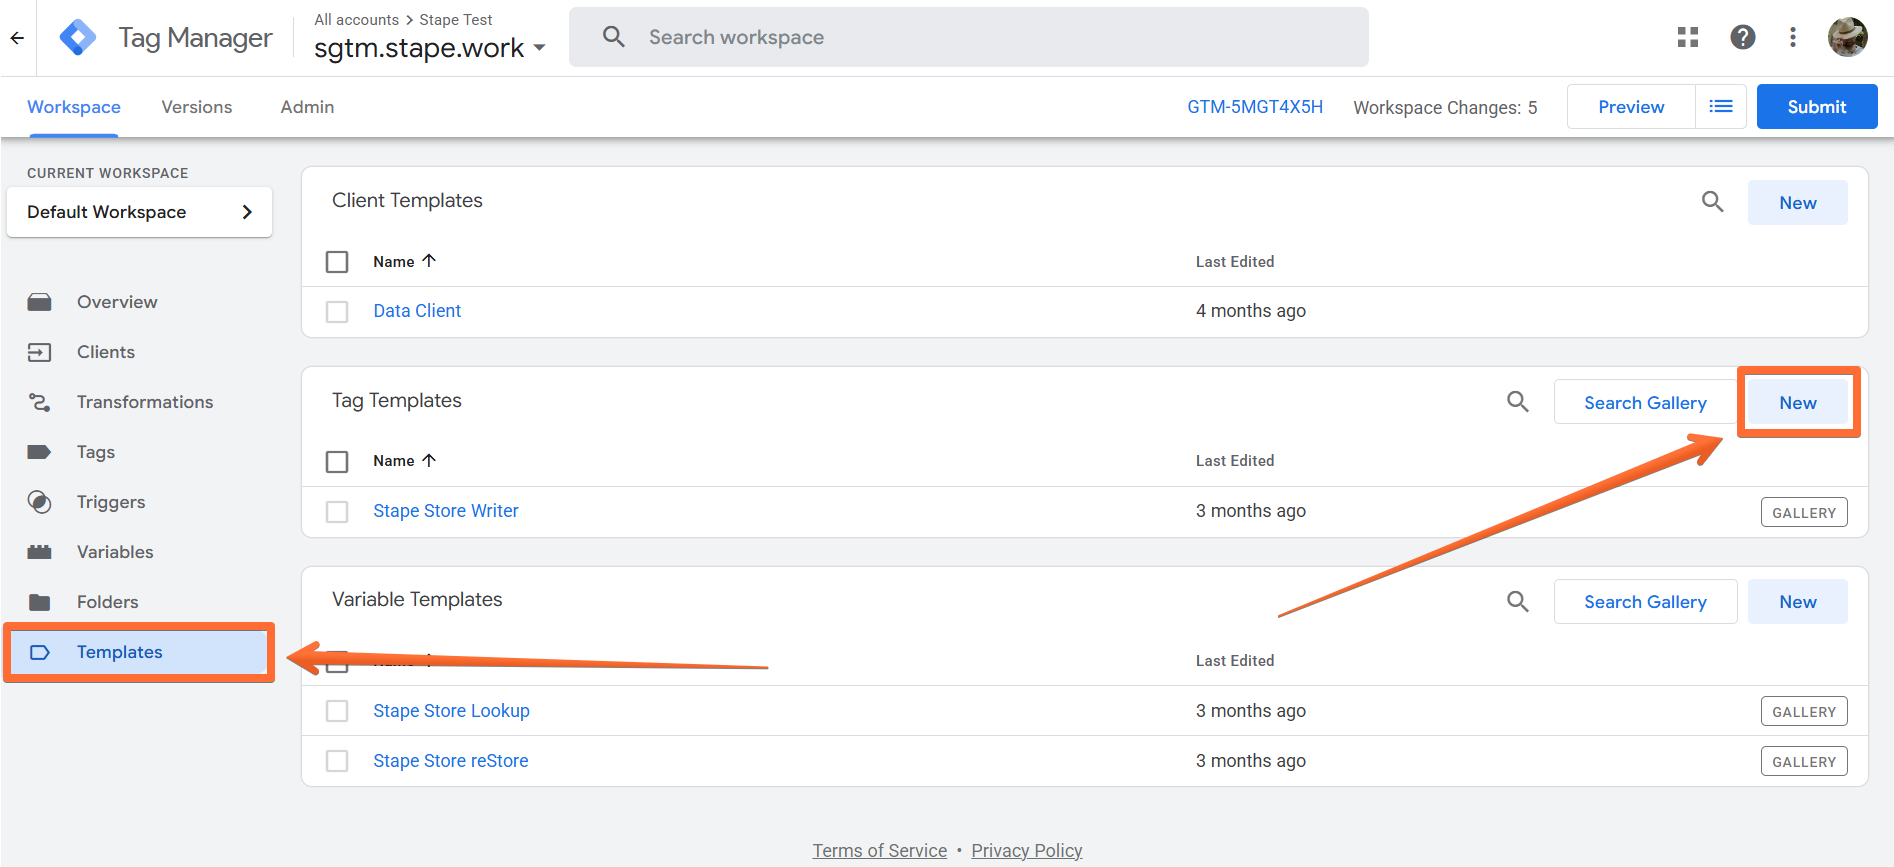
2. Add the Facebook Conversions API tag. You can install it from either sGTM Template Gallery or GitHub.
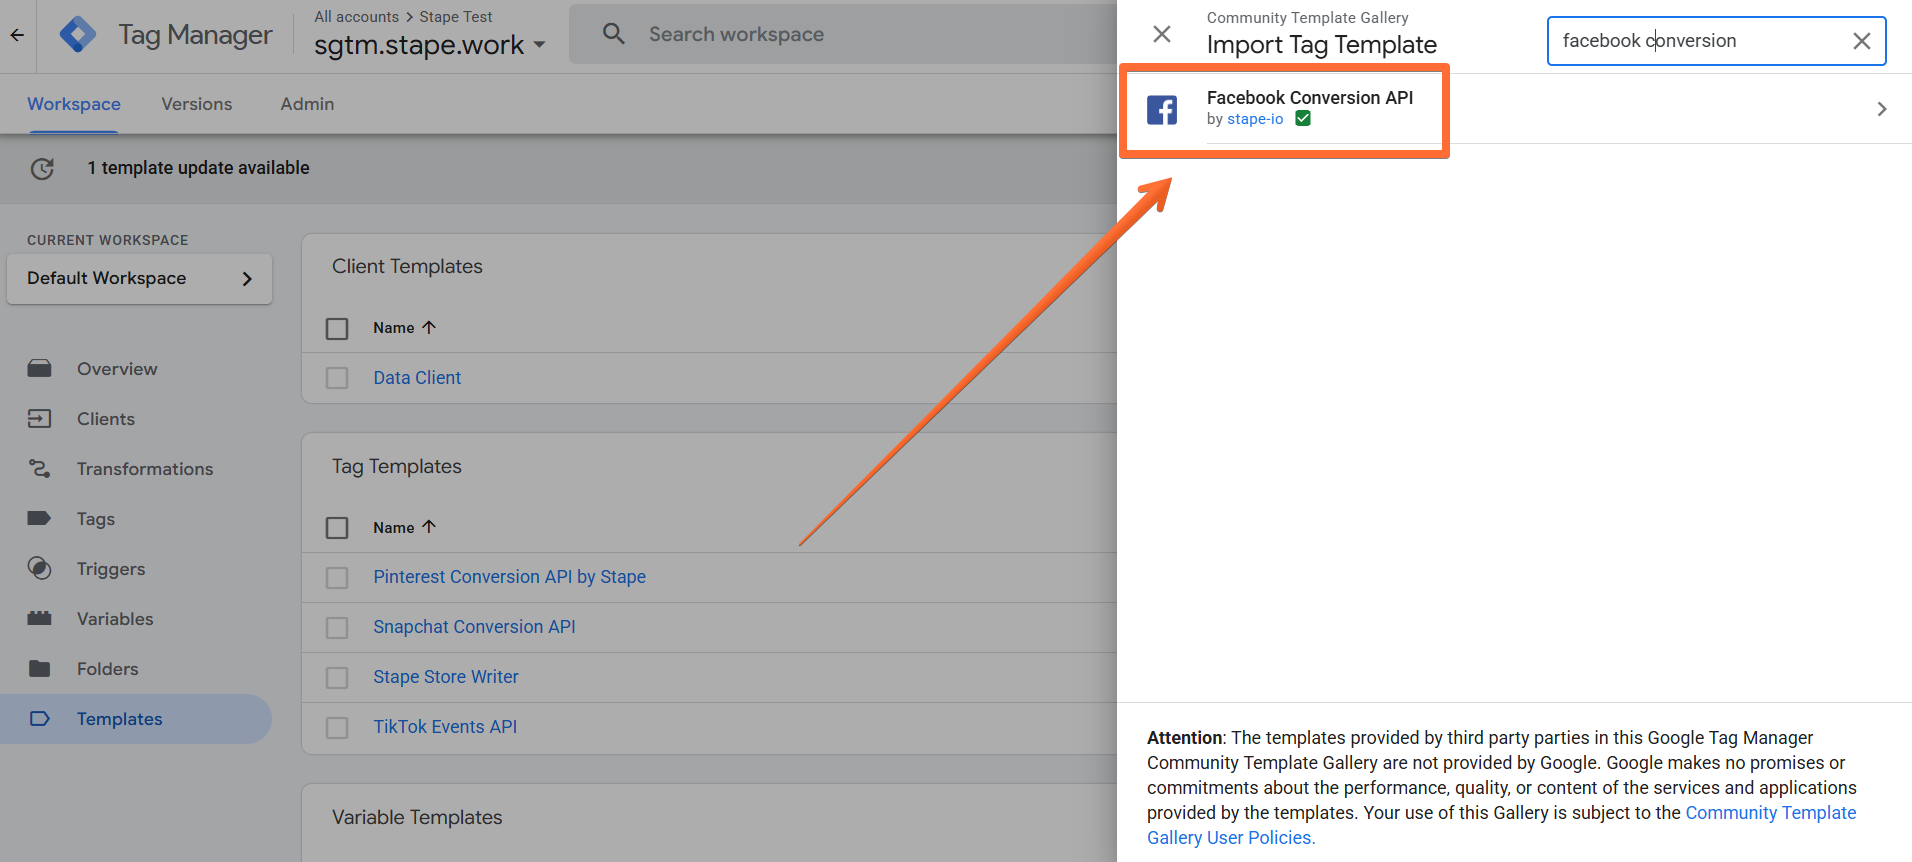
Option 1. Importing the tag from the Template gallery:
- Follow this link or search for Facebook Conversions API from Stape in the Google Tag Manager Tag Template gallery.
- Click Add to workspace.
Option 2. Importing the tag from GitHub:
- Follow this link and download the tag template.
- In Google Tag Manager, open the Templates menu → click New.
- Click Import → select the Facebook tag template you’ve downloaded from GitHub → click Save.
3. Generate a Meta Access Token following Meta’s official guide.
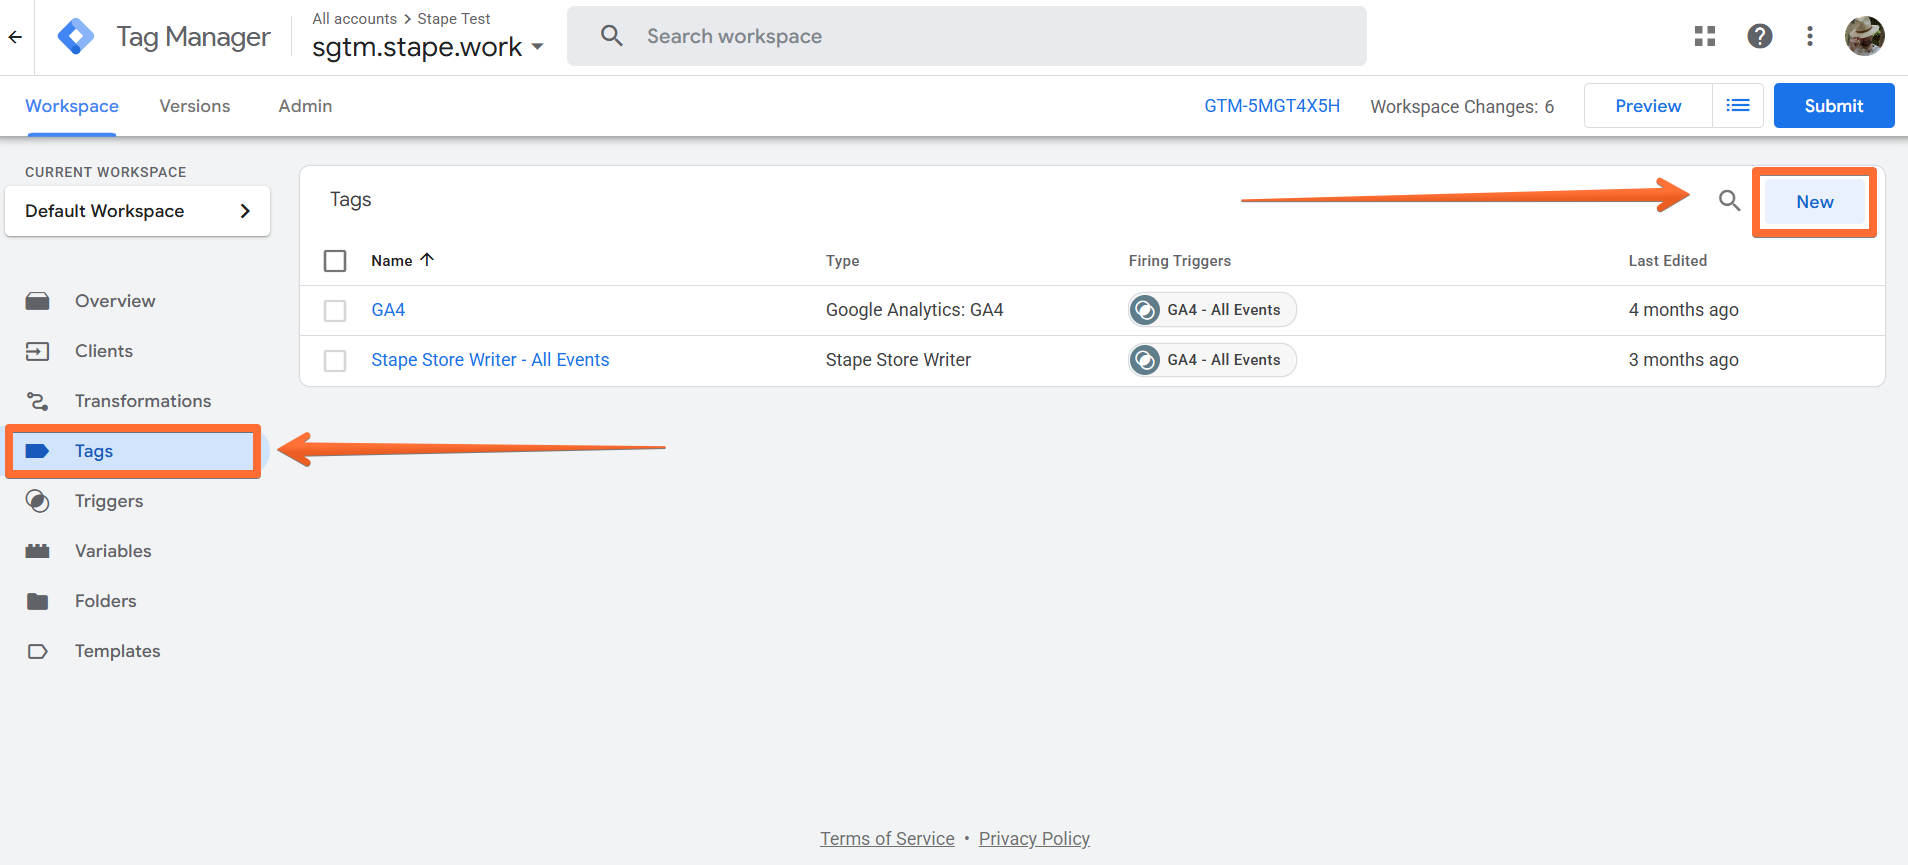
4. Create a Facebook Conversions API tag in the server GTM container:
- Go to the Tags menu → click New.
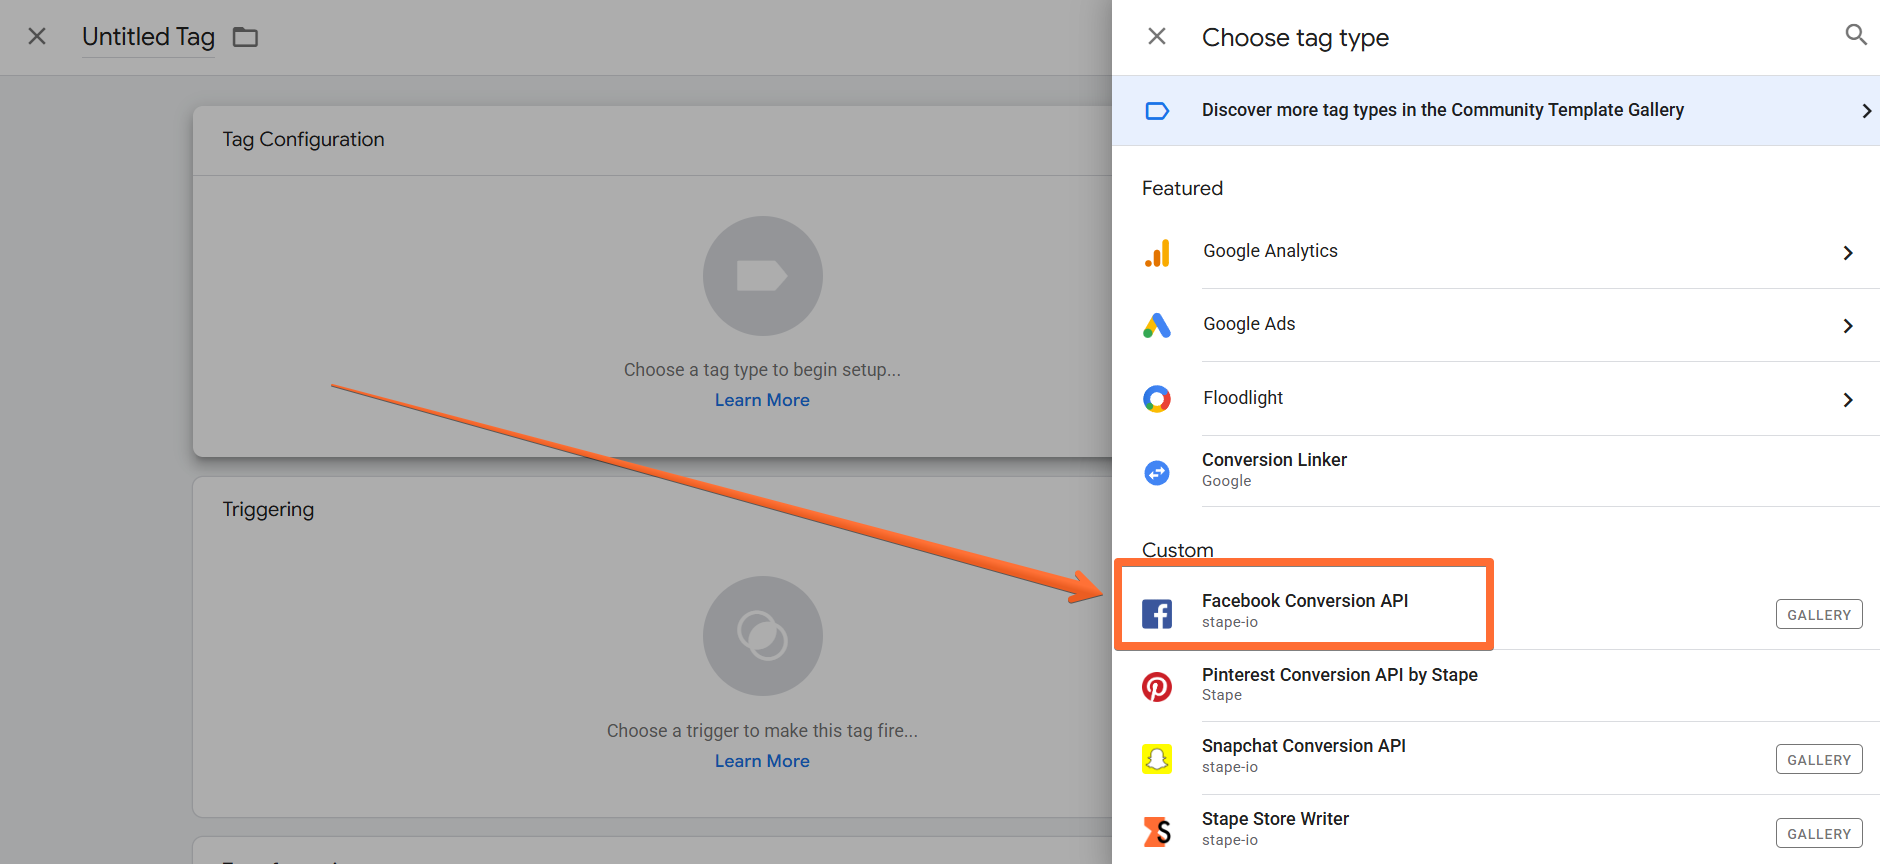
- Click Tag Configuration → select Facebook Conversions API.
- You have two options for configuring the Event Name Setup Method in the Facebook Conversions API tag:
- Override: this is the preferred way, even though it’s more complex. It lets you configure Meta events manually, granting you full control over events’ payload. If you select this option, also choose either a standard or custom Event Type.
- Inherit from client: in this case, the tag will attempt to match your GA4/Data event’s payload to Meta standard events automatically. If the tag can’t match the GA event to the standard Meta event, it will be sent as a custom event.
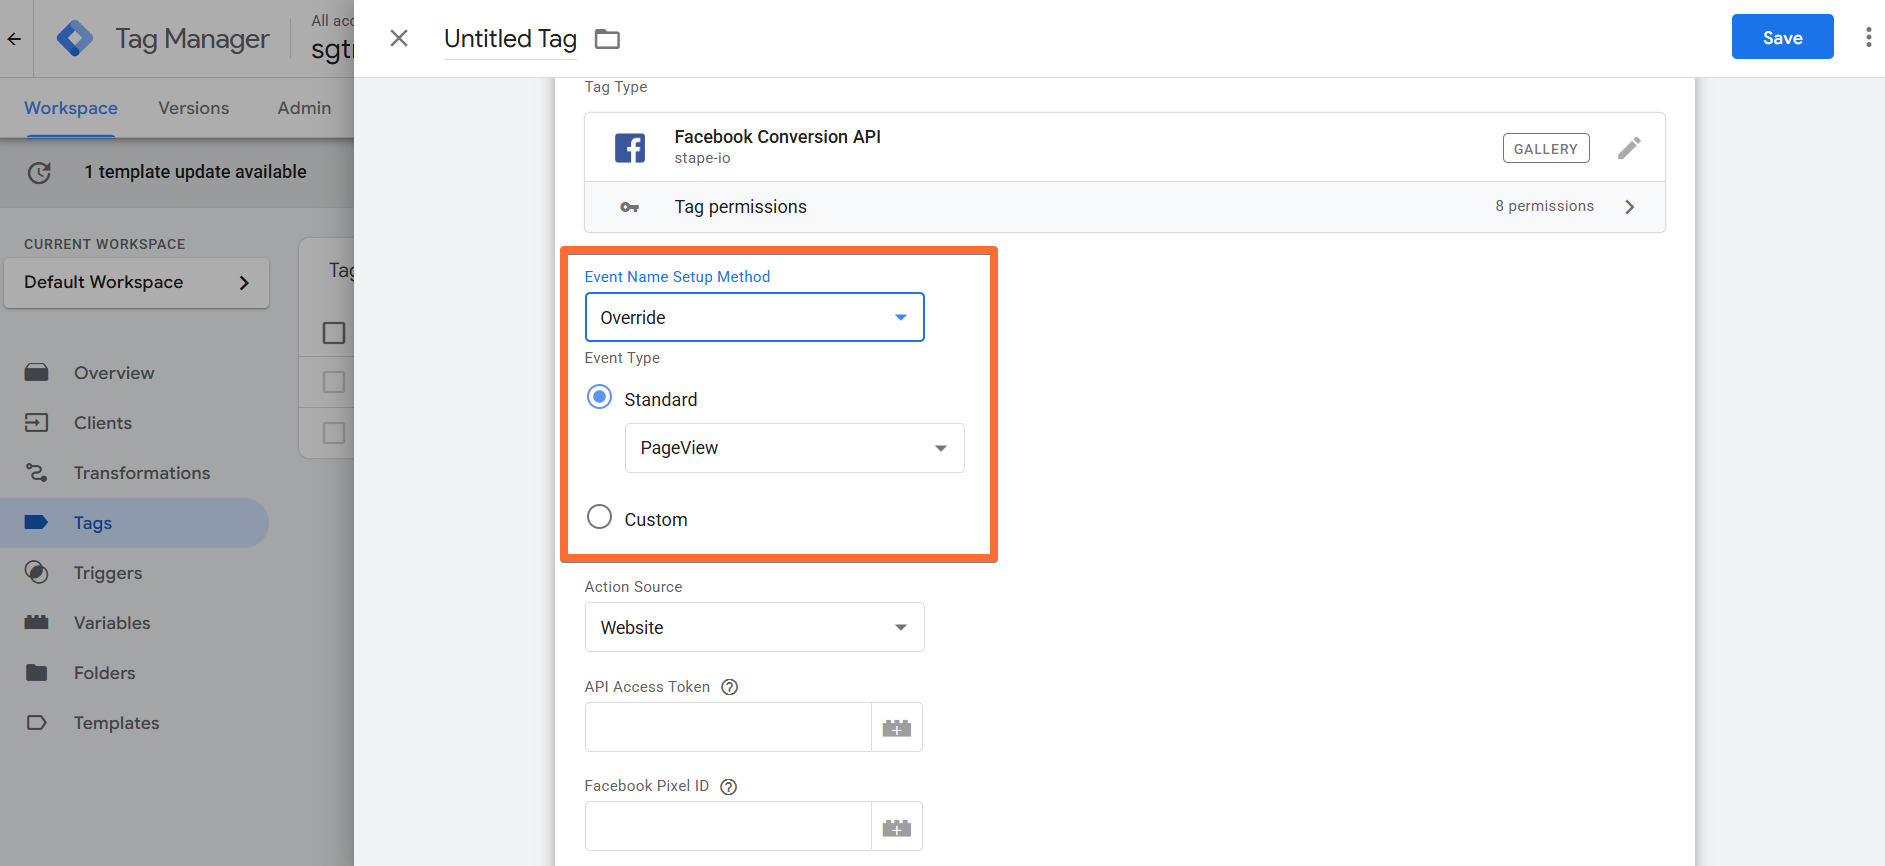
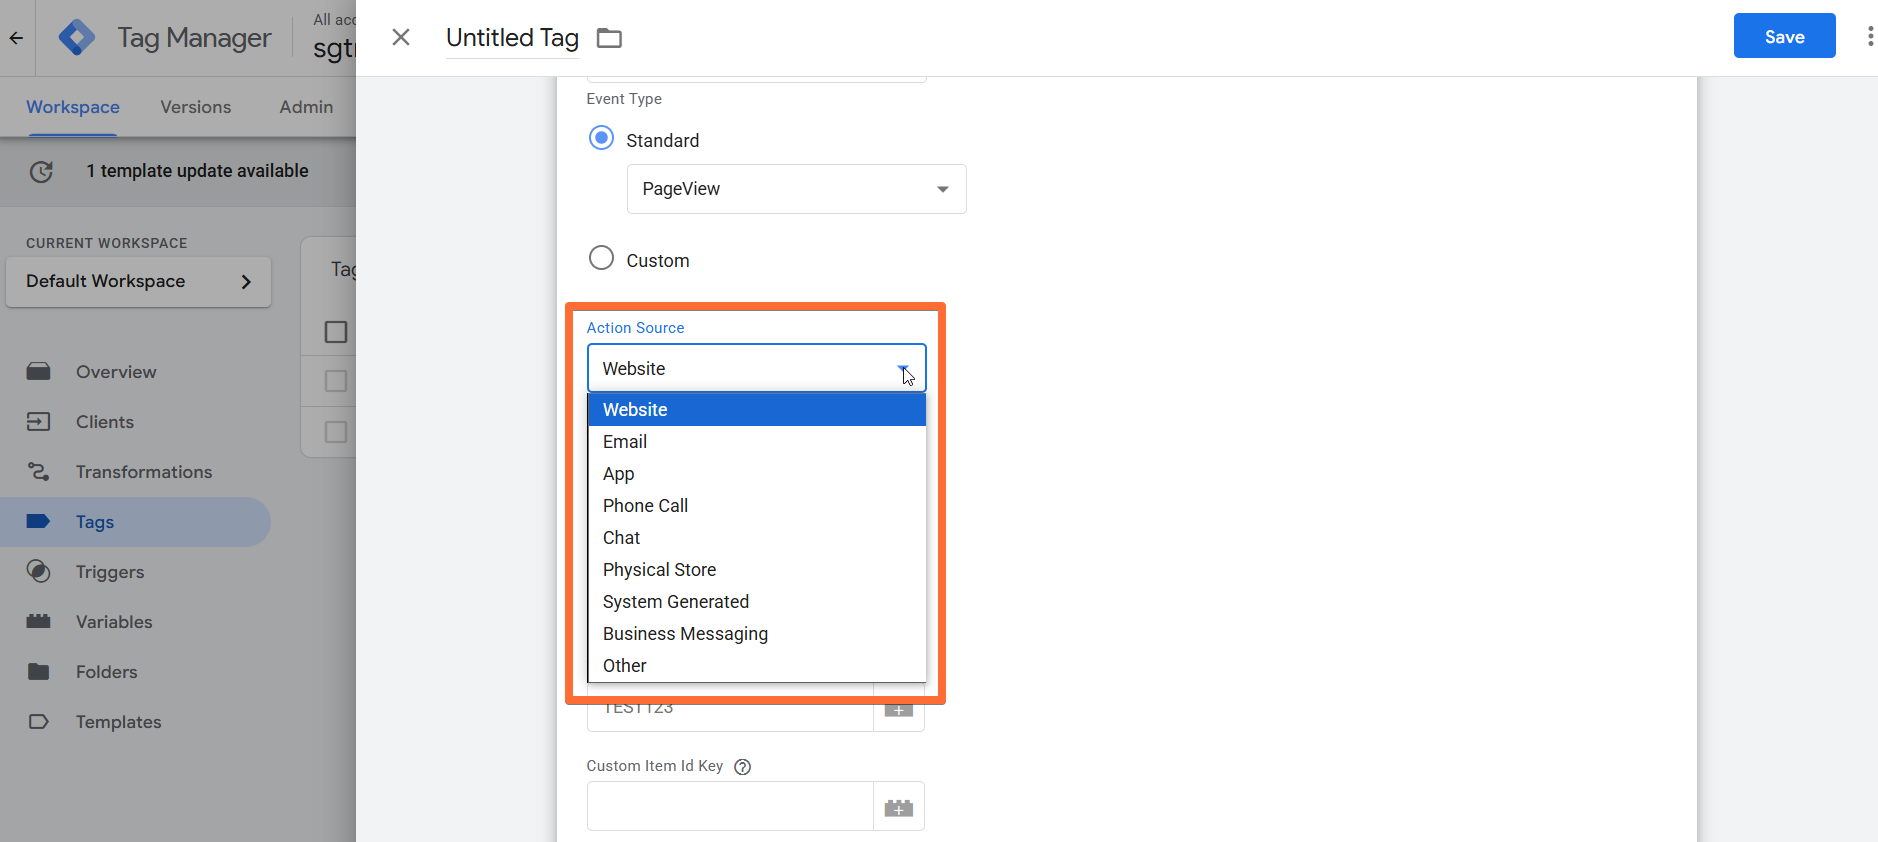
- Action Source - select where your events will be coming from.
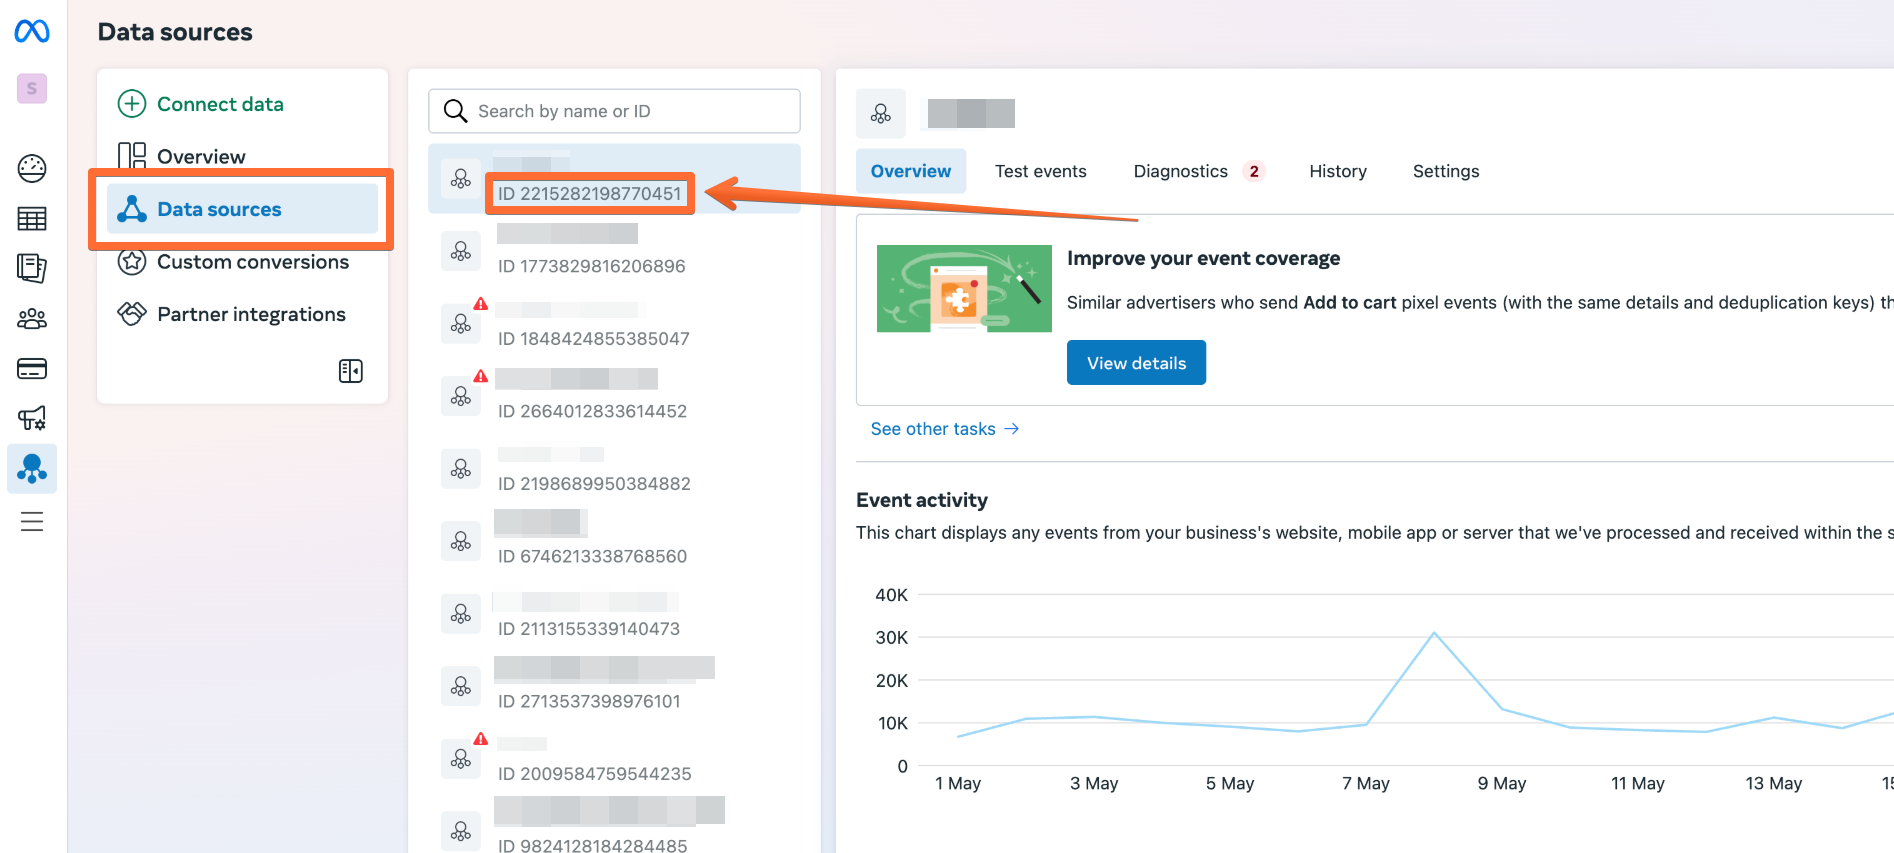
- Add your Facebook Pixel ID (it can be found in your Meta Events Manager → Data Sources menu → see the string next to the Pixel’s name, see the screenshot below) and the Meta Access Token (that you’ve generated in step 3). Optionally, you can tick the Add Multiple Facebook Pixel IDs feature to add one Facebook Pixel ID and one Access Token per line.
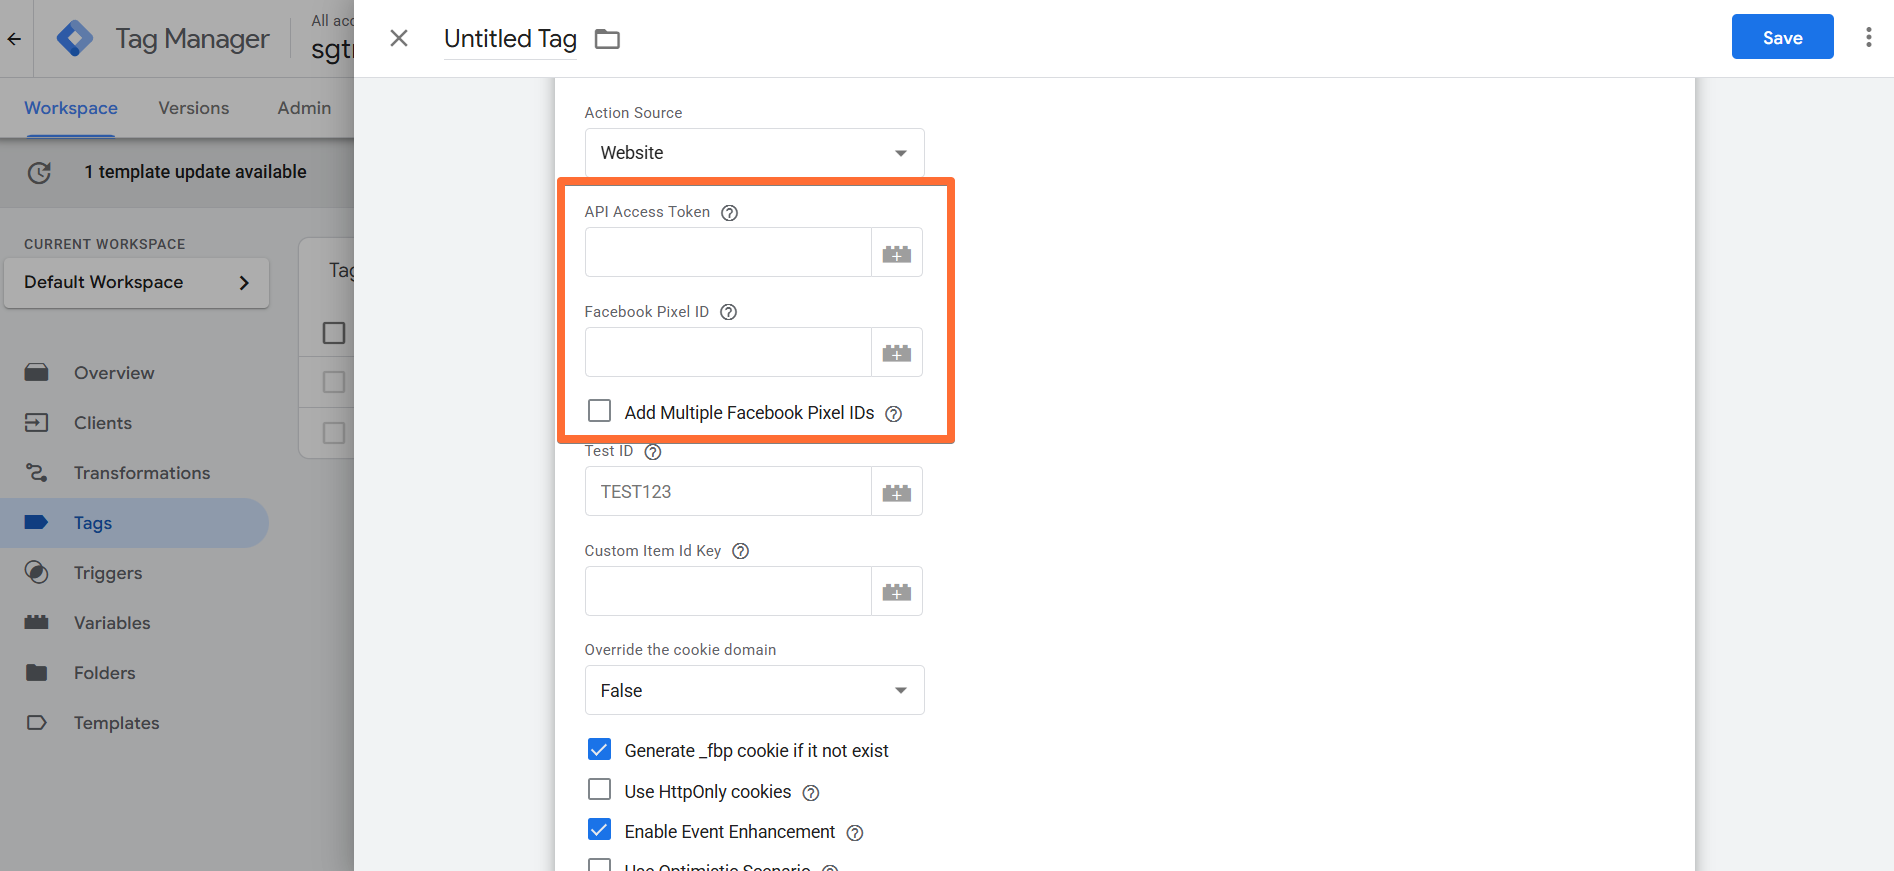
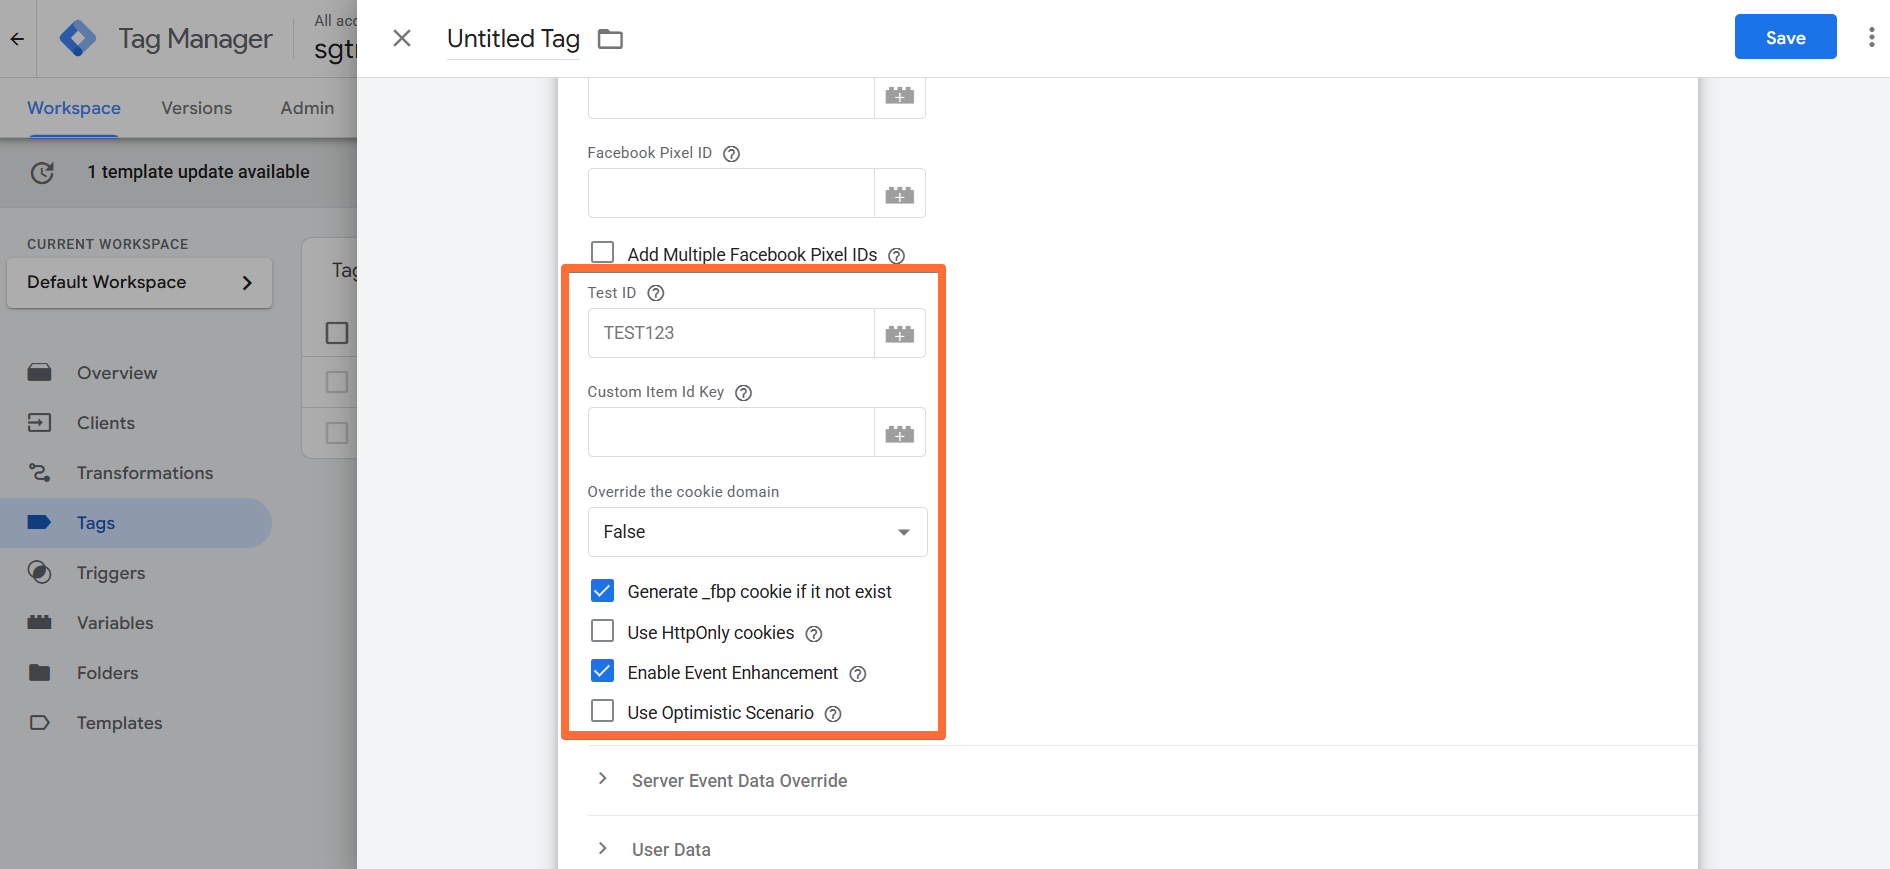
- Optional configurations:
- Test ID: enable it if you’d like to use the Meta testing tool to test the completed setup of Meta Conversions API.
- Custom Item Id Key: you can specify a custom key, which will be used to set the content item id, by default item_id will be used. This may be useful if you are using WooCommerce extensions.
- Override the cookie domain: optional, can be used to override the default domain where cookies are set.
- Generate _fbp cookie if it not exist: it will only generate the cookie if it’s missing, so it’s almost always best to keep this option enabled.
- Use HttpOnly cookies: forbids JavaScript from accessing the cookie.
- Enable Event Enhancement: use the HTTP-only secure cookie (gtmeec). When this feature is enabled, the tag will store user data in cookies and enrich events with user data if user data is not available. This will increase event match quality and, as a result, conversion attribution to campaigns.
- Use Optimistic Scenario: the tag will call gtmOnSuccess() without waiting for a response from the API. This will speed up sGTM response time. However, your tag will always return the status “fired successfully,” even if it is not.
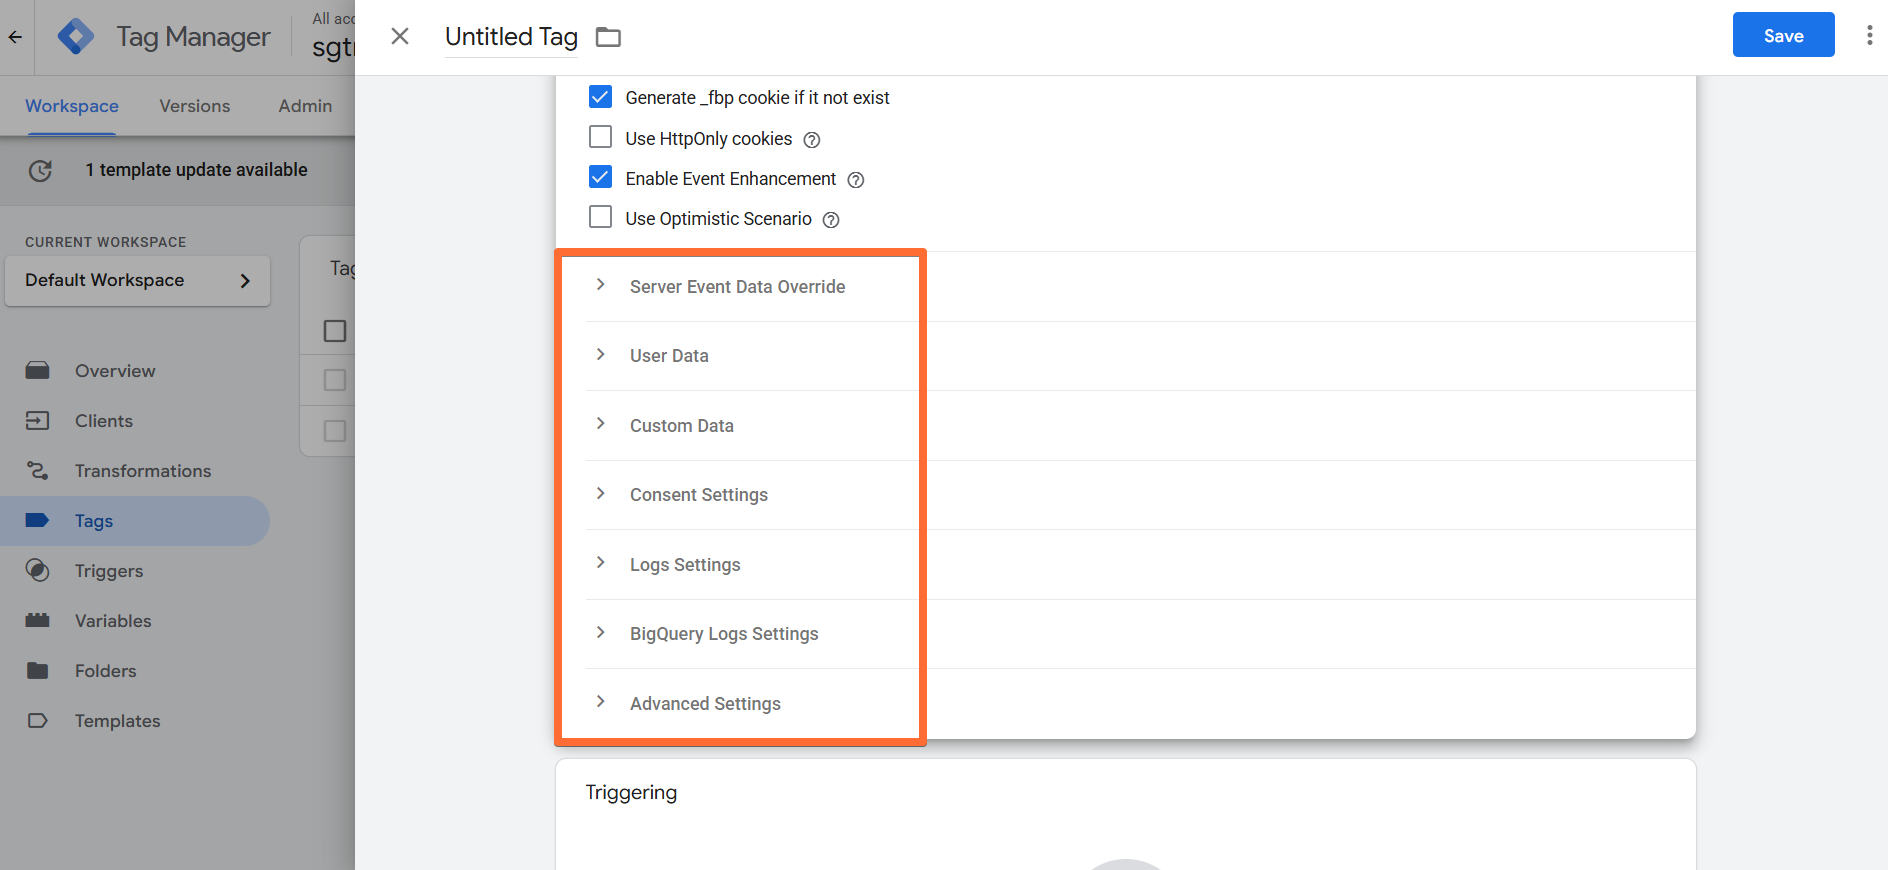
- Advanced options:
- Server Event Data Override: select from a list of custom data. A frequently asked question for this section is how to add an Event ID. Event ID is automatically grabbed from event data, or you can redefine it in tag settings.
- User Data: select from a list of user data.
- Custom Data: select from a list of product data.
- Consent Settings: gives you an option to send data only if marketing consent is given. Should only be enabled when the web container is configured to send to the server container the consent status (e.g., via the Data Tag); otherwise leave this option disabled to avoid tracking issues.
- Logs Settings: choose if you want to log requests to your Stape account. This feature is handy when setting up server-side tagging since it allows seeing incoming and outgoing requests and network responses.
- BigQuery Logs Settings: allows you to configure BigQuery logging.
- Advanced Settings (Additional Tag Metadata): specify additional tag metadata to be included in the event data when a tag is fired.
- Finally, add a Trigger, complete the rest of the setup, and Save the Meta Conversions API tag.
How to test and verify Meta Conversions API setup
When you are done setting up all your Meta events, use Google Tag Manager debug mode and test that they’re working correctly. Open the GTM debug tool, click through your site’s pages, and perform events you want to test. Once you’ve done it, go to the Tag Manager debugger tab and check the results.
First, make sure that the FB base pixel is firing on a pageview. If you see the tag status Fail, check outgoing requests. It should show the reason why the tag failed.
See our guide to learn more about debugging and monitoring server-side tracking configuration in GTM.
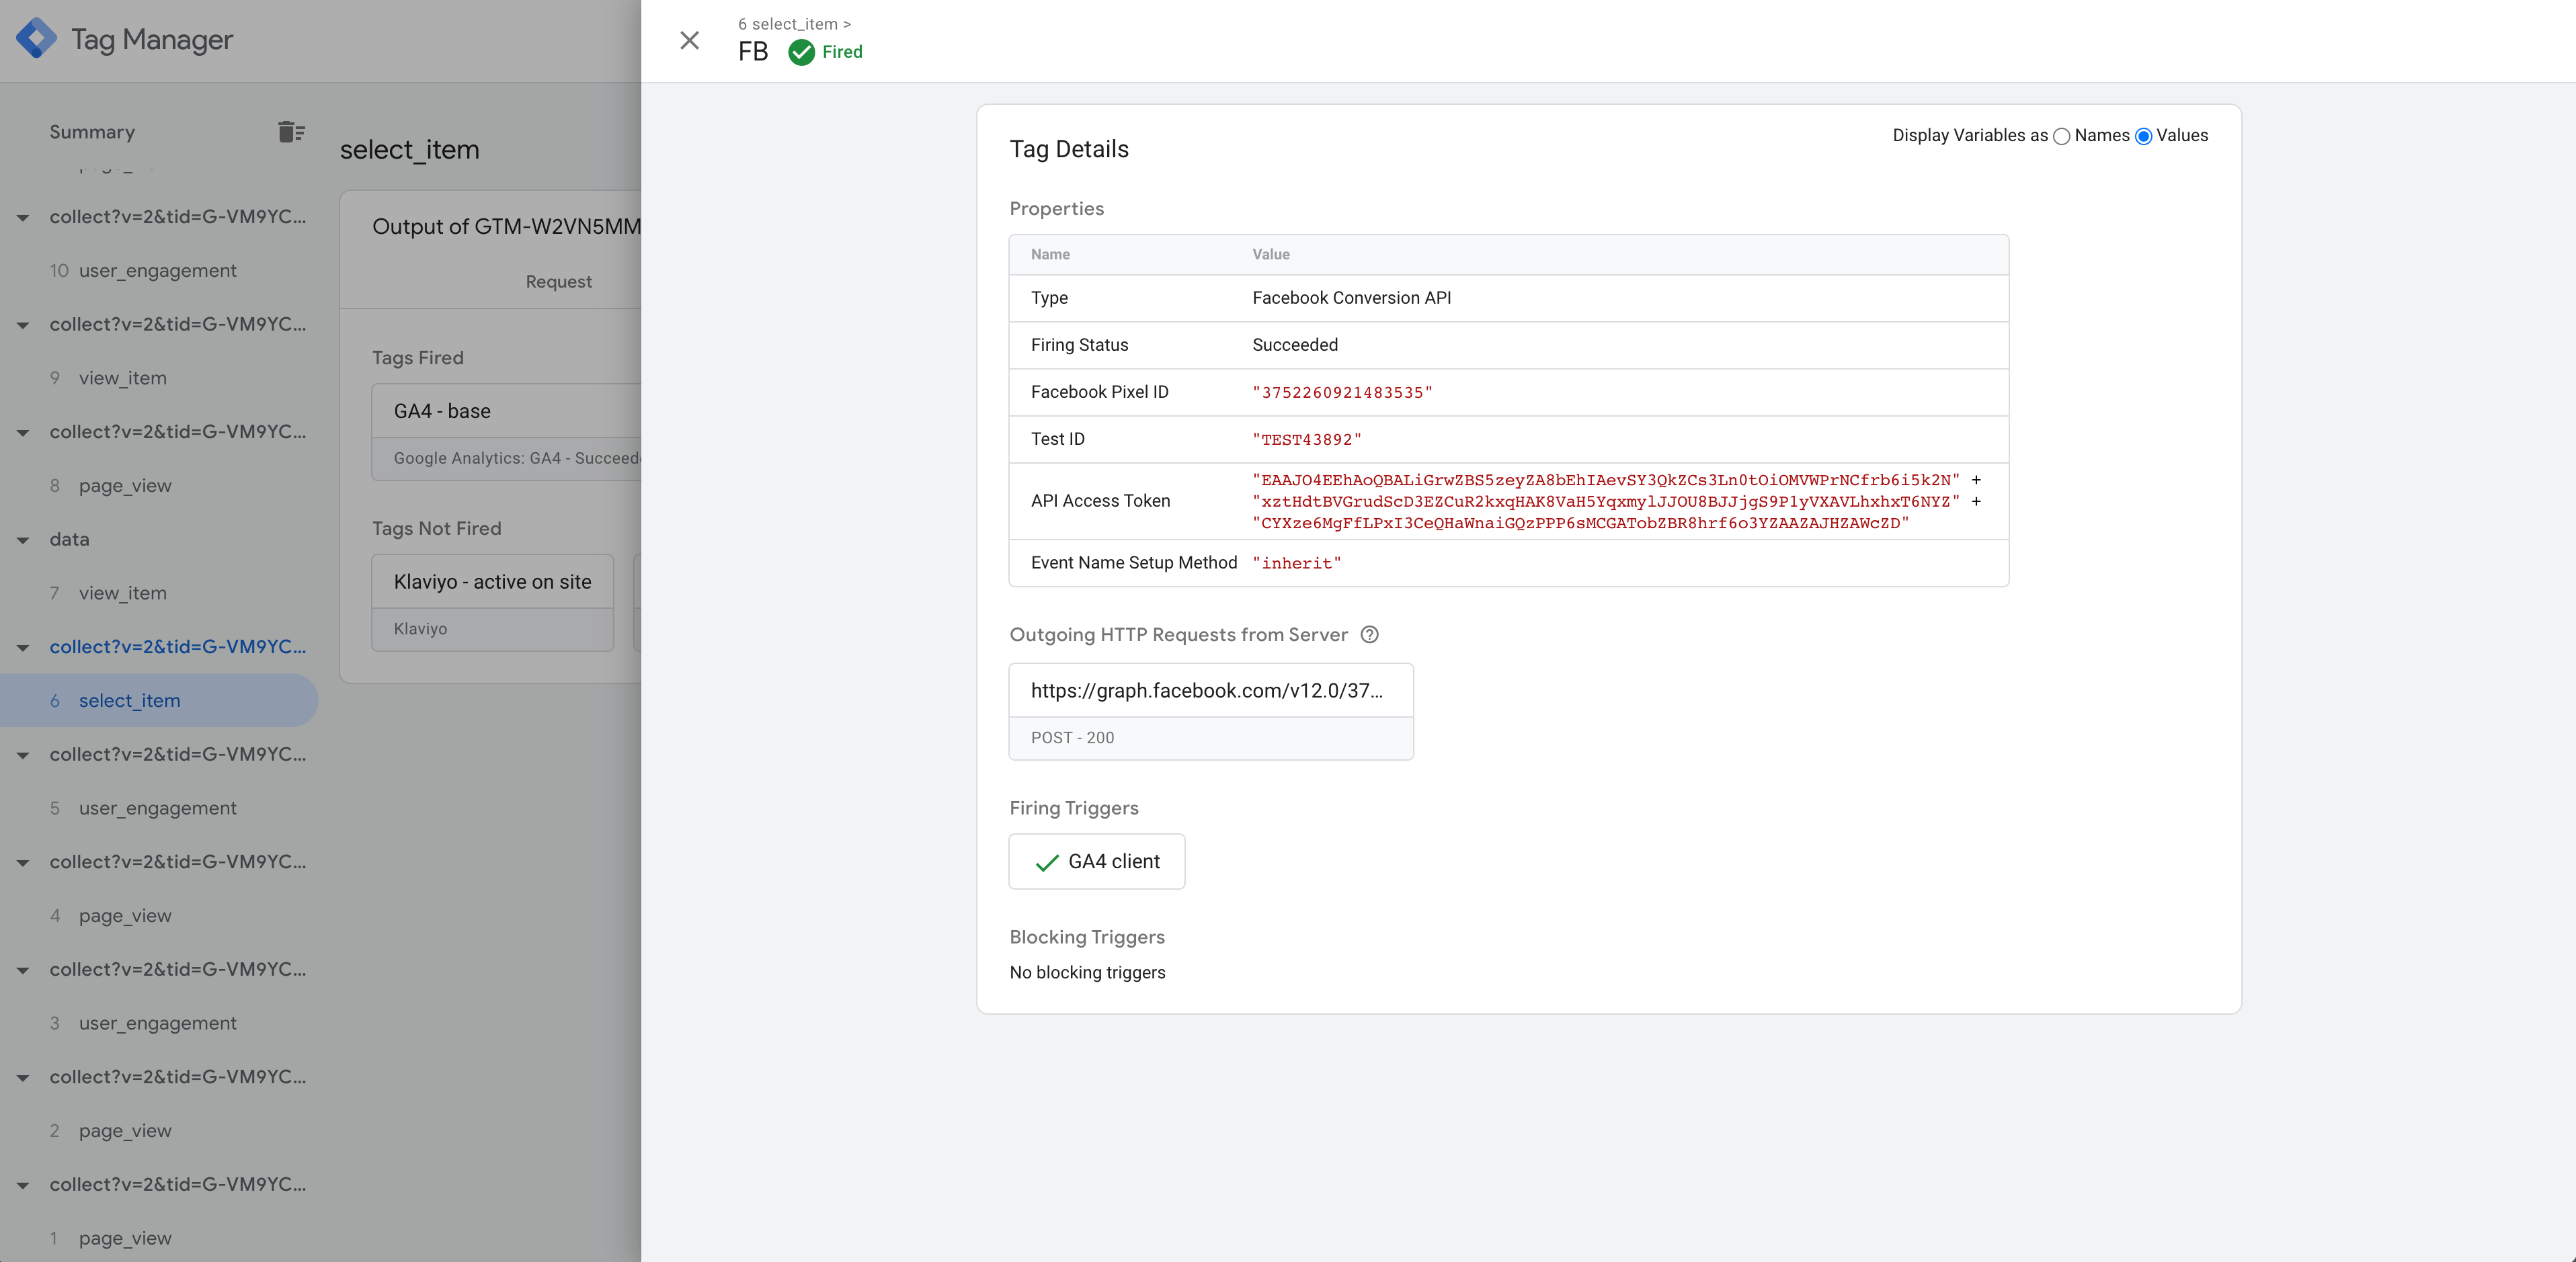
Next, if you’ve added Test Event ID in the tag’s configurations, you will be able to test Meta server events in real time. Open your site and perform actions triggering your Meta events. Then return to the Meta testing tool and check the events it shows you. In the column Received From you should see Server. You can click on the event and see the recorded parameters.
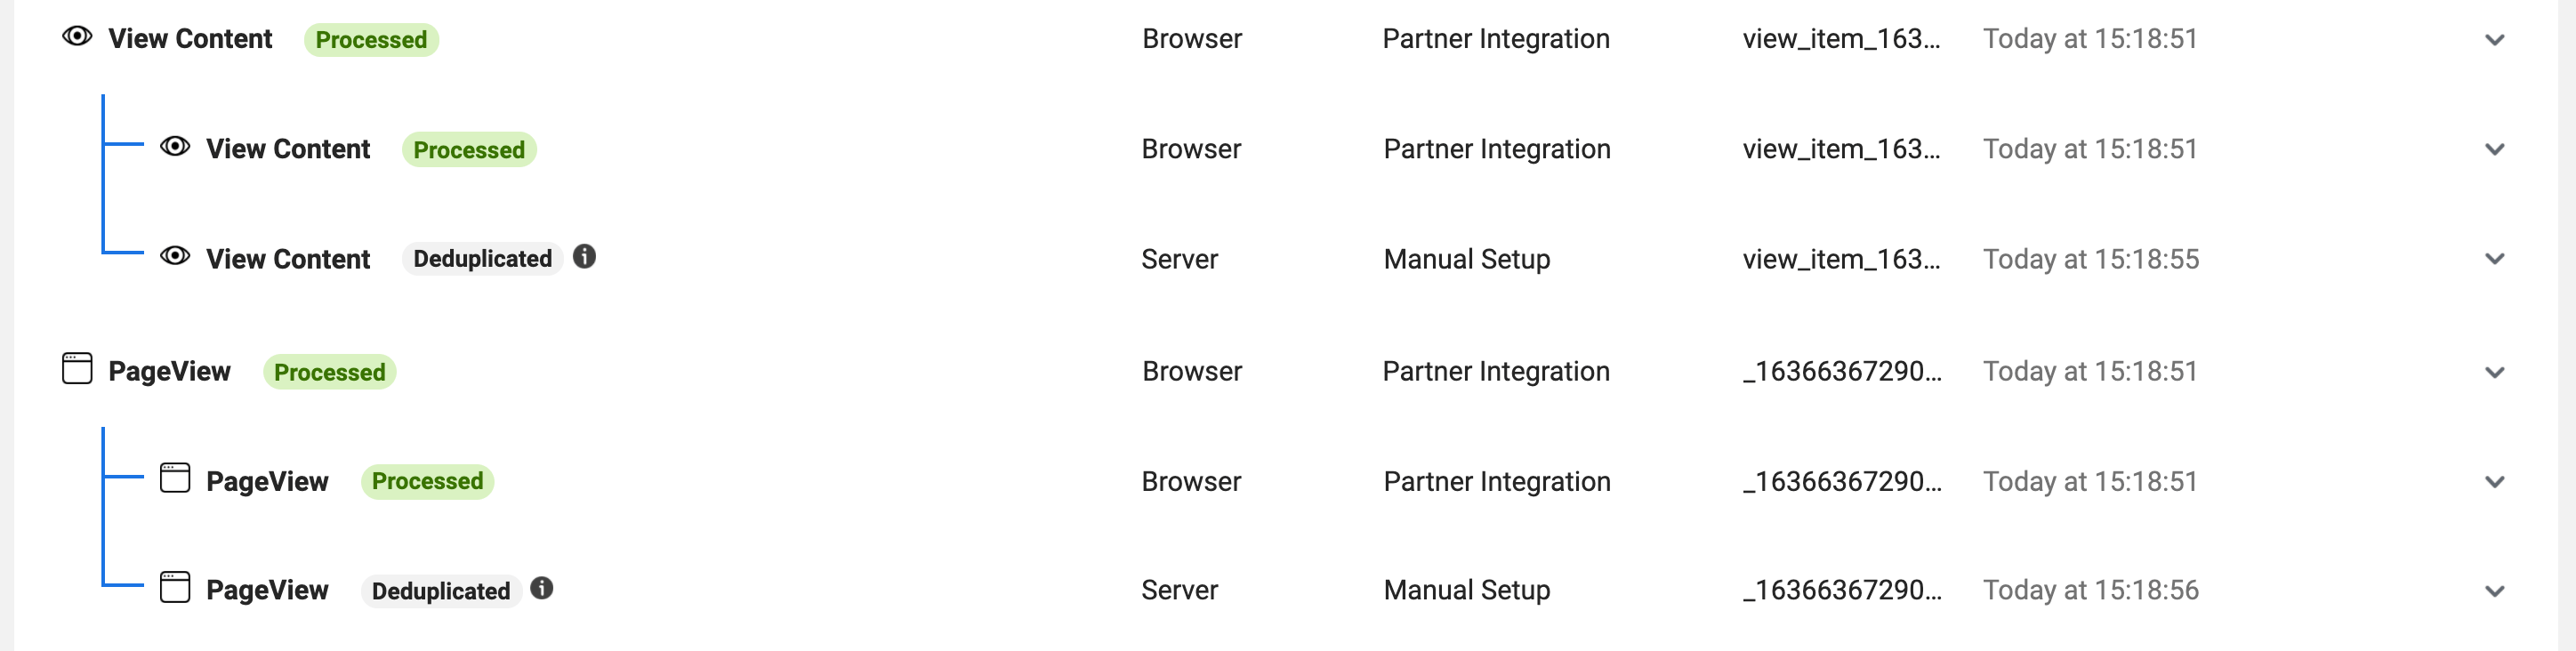
Once you’ve set up and verified that Facebook Conversions API works correctly, you need to either remove Meta web tracking or set up event deduplication (the latter is preferable, according to Meta.)
Was this article helpful?
Comments