Infobip CDP Lookup variable
Updated Nov 20, 2026
The Infobip CDP Lookup variable by Stape allows you to retrieve and enrich contact profiles in your Google Tag Manager server container (sGTM) using the Infobip CDP API. It lets you look up existing contact profiles by different identifiers and use the returned information in your server-side tracking setup.
- The variable supports multiple identifier types, allowing you to look up contacts using ID, External ID, email, phone, Facebook, Telegram, and other supported identifiers.
- It includes built-in response caching through sGTM's Template Storage, helping reduce repeated API requests and improve lookup performance. You can configure cache expiration to control how long responses are stored.
- It offers flexible output options, allowing you to extract specific values using key paths or return the full API response. You can also choose between flat and nested JSON structures to organize the returned contact data.
Before you begin
Please ensure that you already have Google Tag Manager web and server containers, as well as a configured server container and custom domain in Stape. Please follow these guides if you don’t have any of those:
In addition, you’ll need to configure sending data to the server GTM container. The most popular options for sending data to sGTM are Google Analytics 4 and Data Tag/Data Client. For more information, read the Send data to server container article.
How to set up the Infobip CDP Lookup variable
1. Add the Infobip CDP Lookup variable template in the server GTM container by importing it from the Template gallery:
- Search for the Infobip CDP Lookup variable by Stape in the Google Tag Manager Template gallery.
- Click Add to workspace.
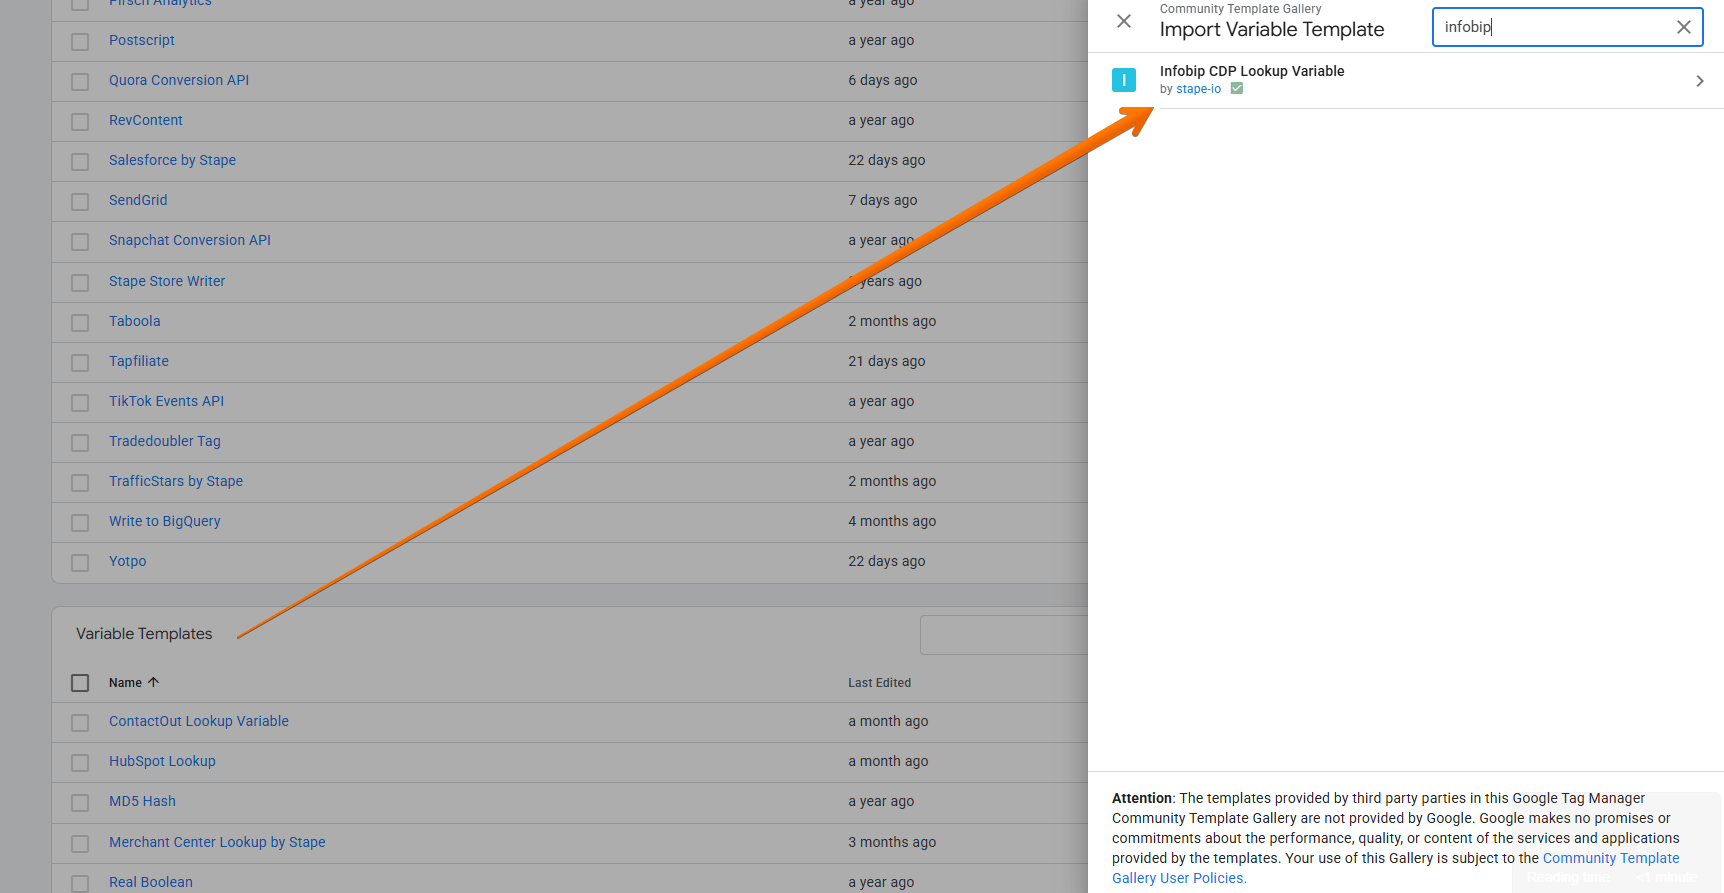
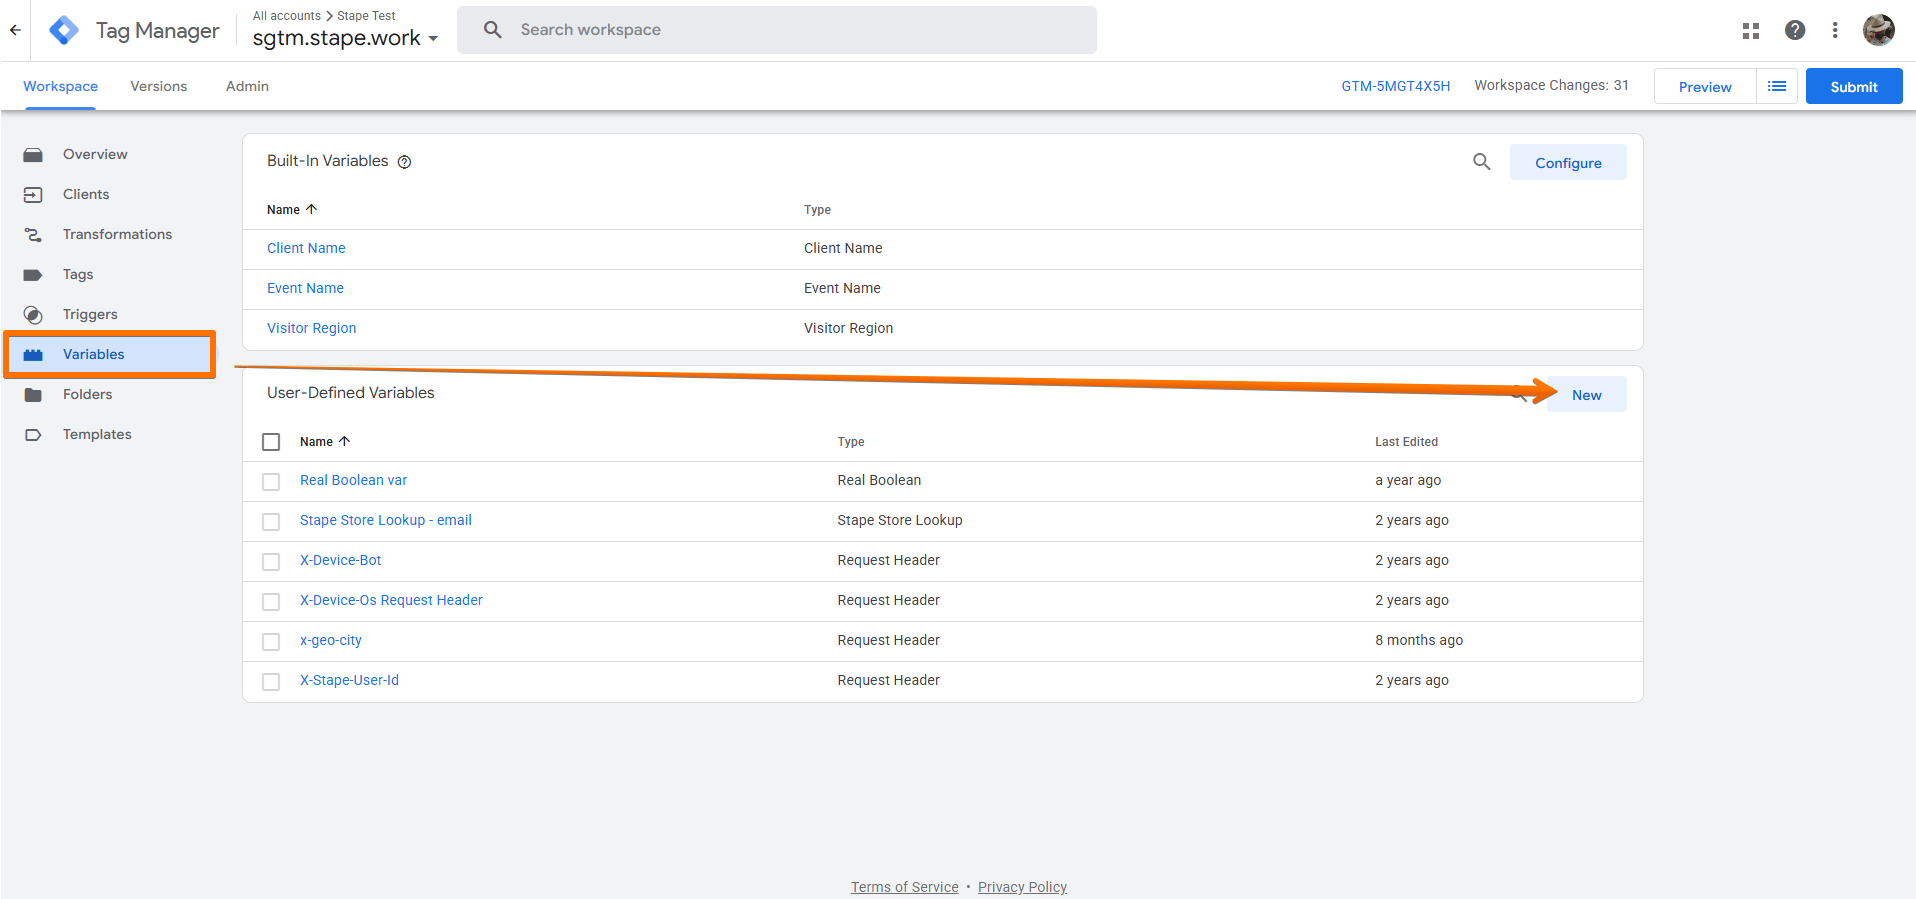
2. Create the Infobip CDP Lookup variable:
- Go to the Variables menu → click New.
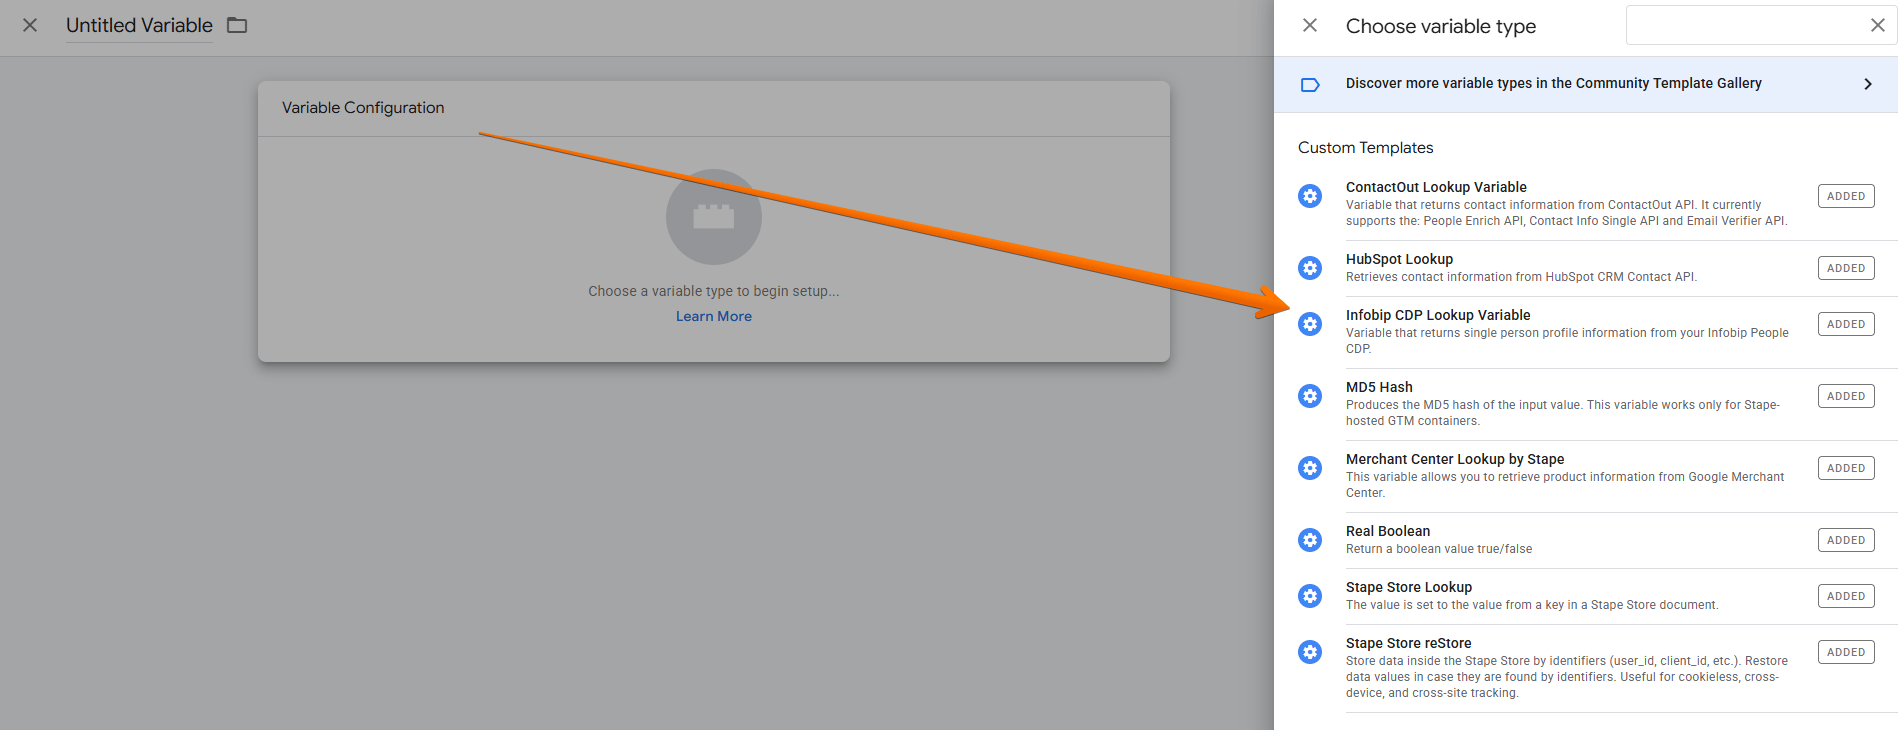
- Click Variable Configuration → select Infobip CDP Lookup Variable.
3. Configure the Infobip CDP Lookup variable:
- API Configuration:
- Base URL - your personal Infobip API Base URL, located in Developer Tools > API Keys page. Be sure to use the API Base URL given by the platform as is -
xxxxx.api.infobip.com (do not includehttps://). - API Key - your Infobip API Key, located in Developer Tools > API Keys page. Should have at least one of the following scopes:
people:manageorpeople:read.
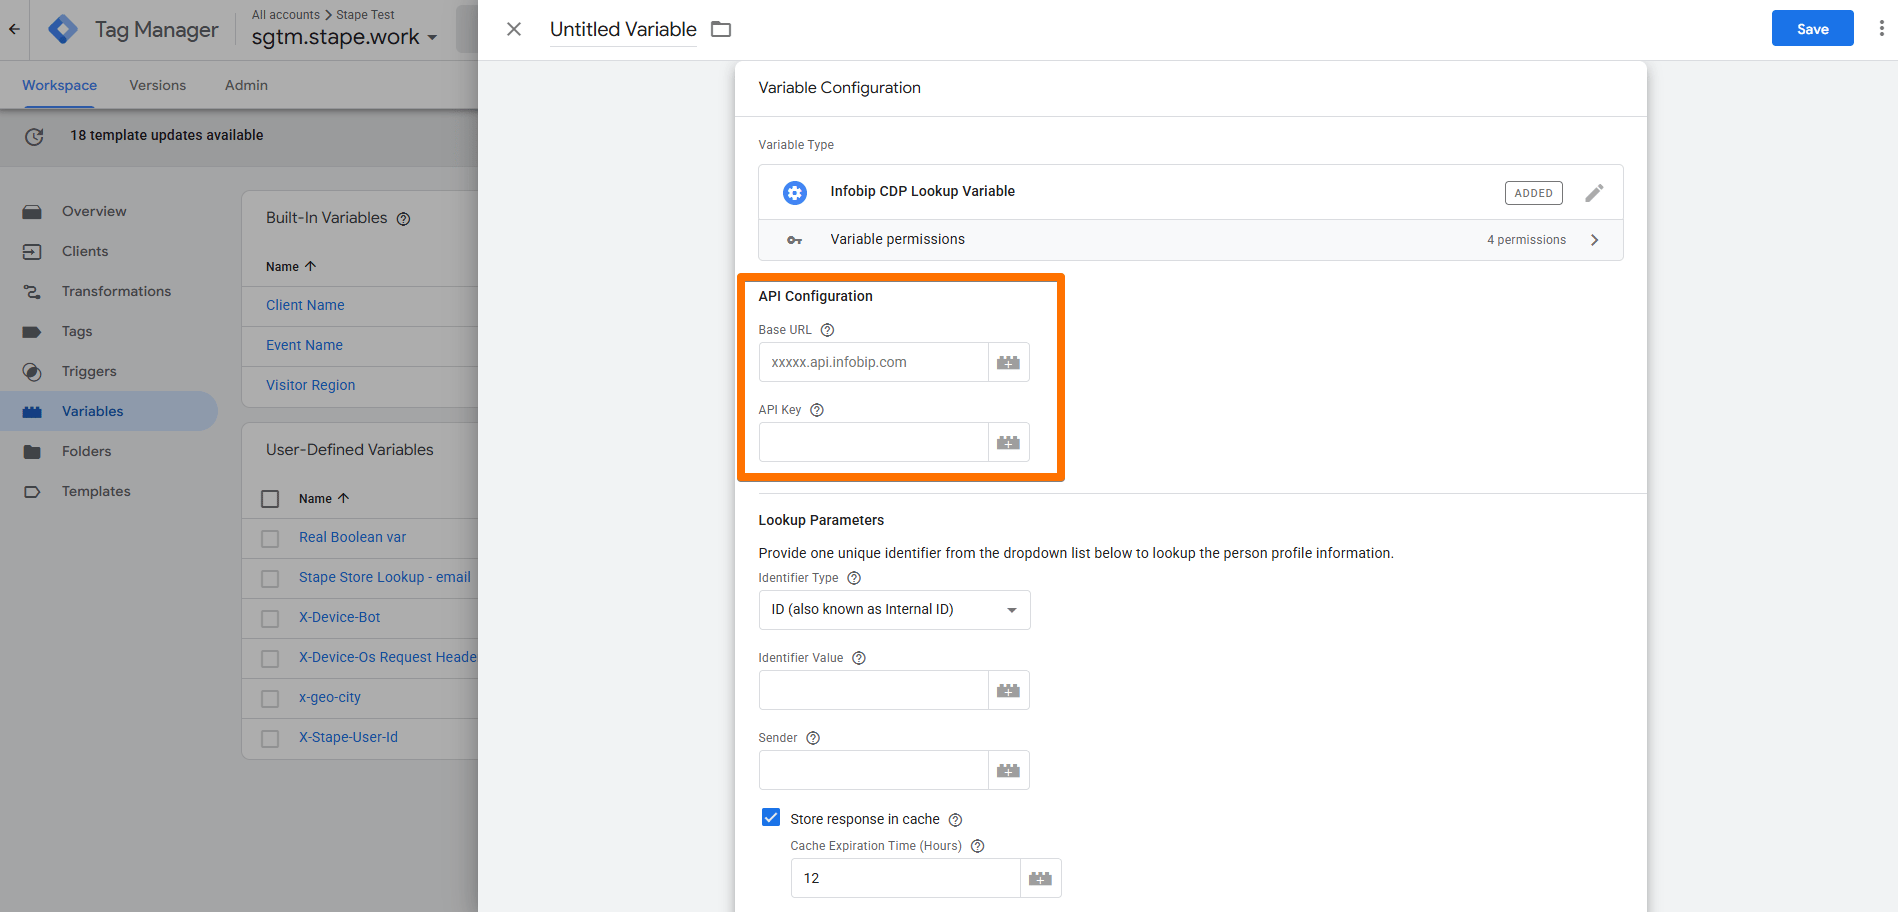
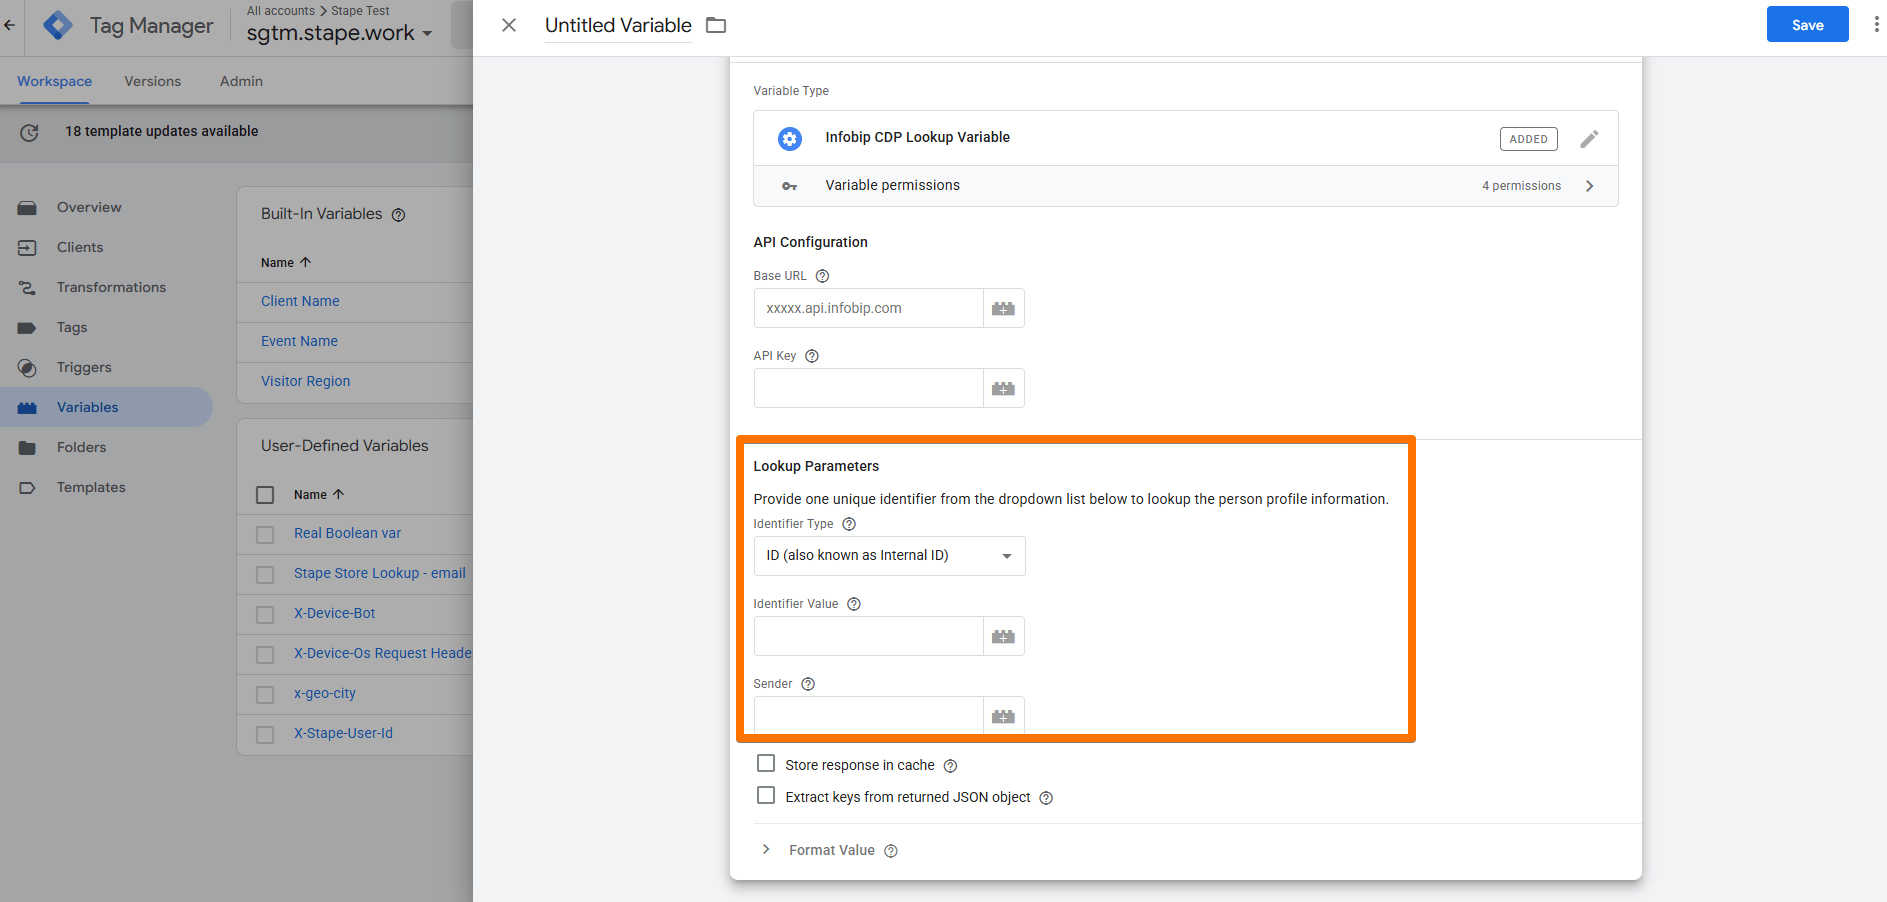
- Lookup Parameters:
- Identifier Type - select the type of identifier to use for the lookup from the dropdown (such as ID, External ID, Email, Phone, etc.).
- Identifier Value - the value of the selected ID type used for the person profile lookup.
- Sender - Sender or Application ID, required for all Identifier Types except ID, External ID, Phone, and Email).
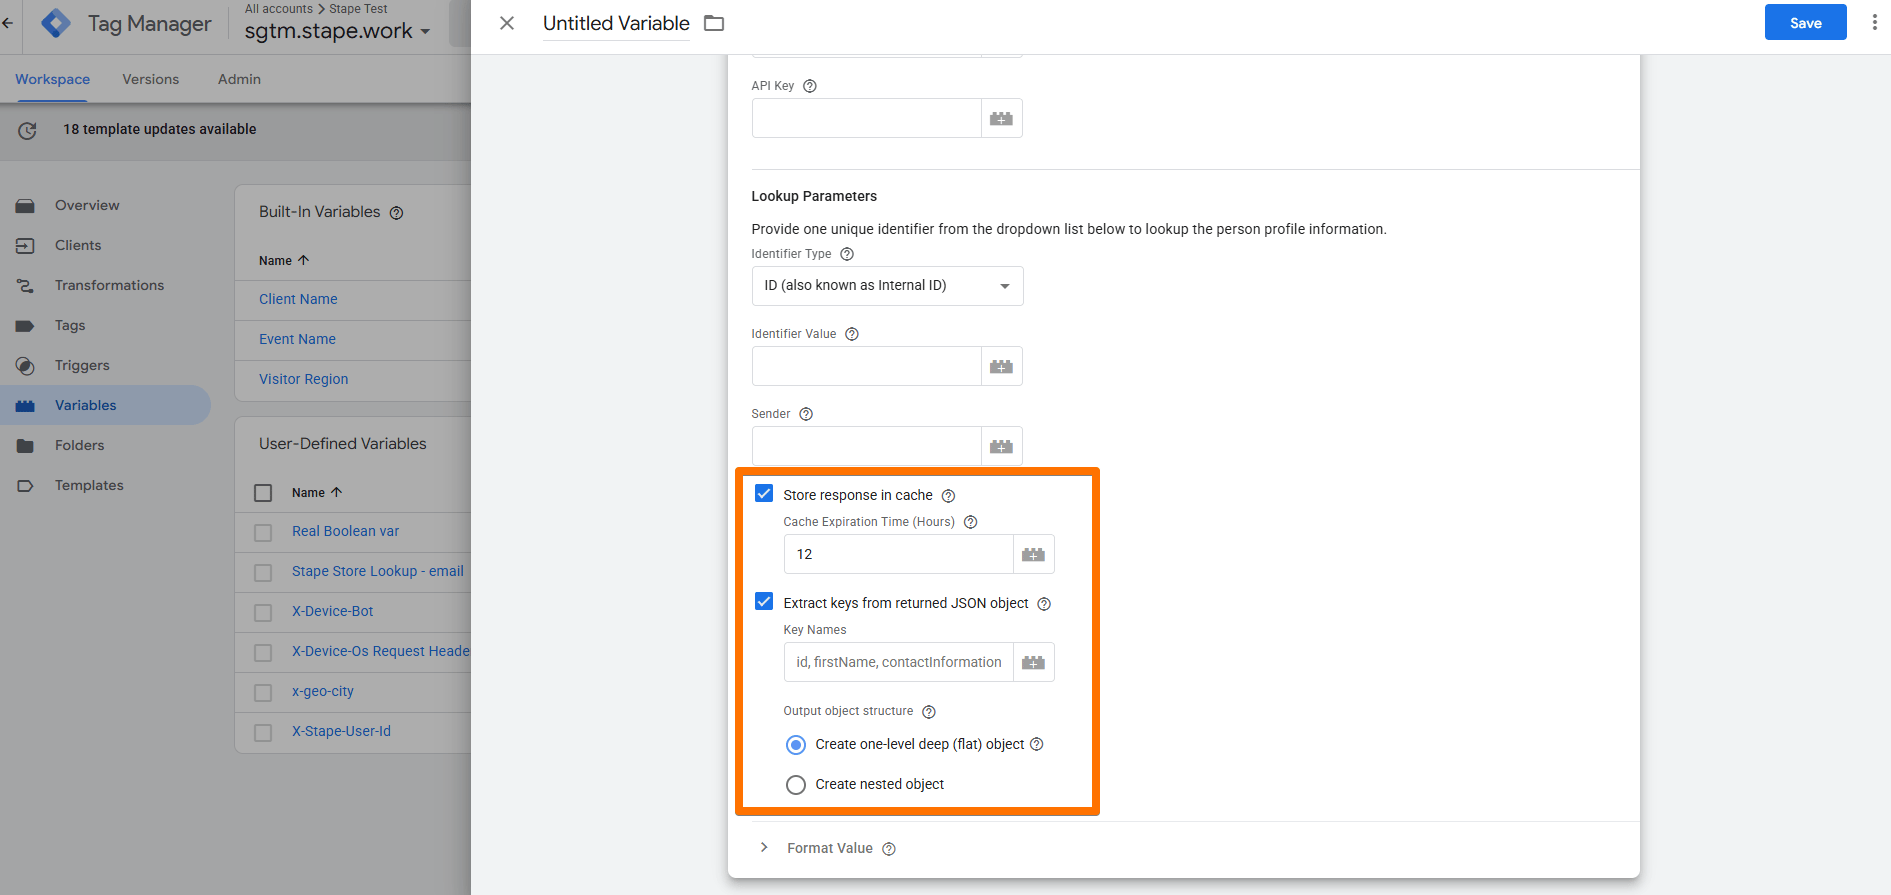
- Store response in cache - store the API response in Template Storage. If all parameters of the request are the same, the response will be taken from the cache if it exists. Enabled by default. You can enter Cache Expiration Time (Hours) to update the cache if the data is expired.
- Extract keys from returned JSON object - allows you to limit the returned object by choosing one or more specific Key Names that you want to extract. If you wish to extract nested values, use dot notation (e.g.
contact.email,contact.phone). If multiple keys are listed, they will be returned in a key/value JSON format. Separate the keys/paths by comma. If enabled, select the Output object structure:- Create one-level deep (flat) object - to have all nested objects transformed into a single-level object, with their keys joined with an underscore (
_). Any existing hyphens (-) in the original keys are replaced with an underscore (_). - Create Nested Object - to have the nested keys persist in the same nested position as the source object.
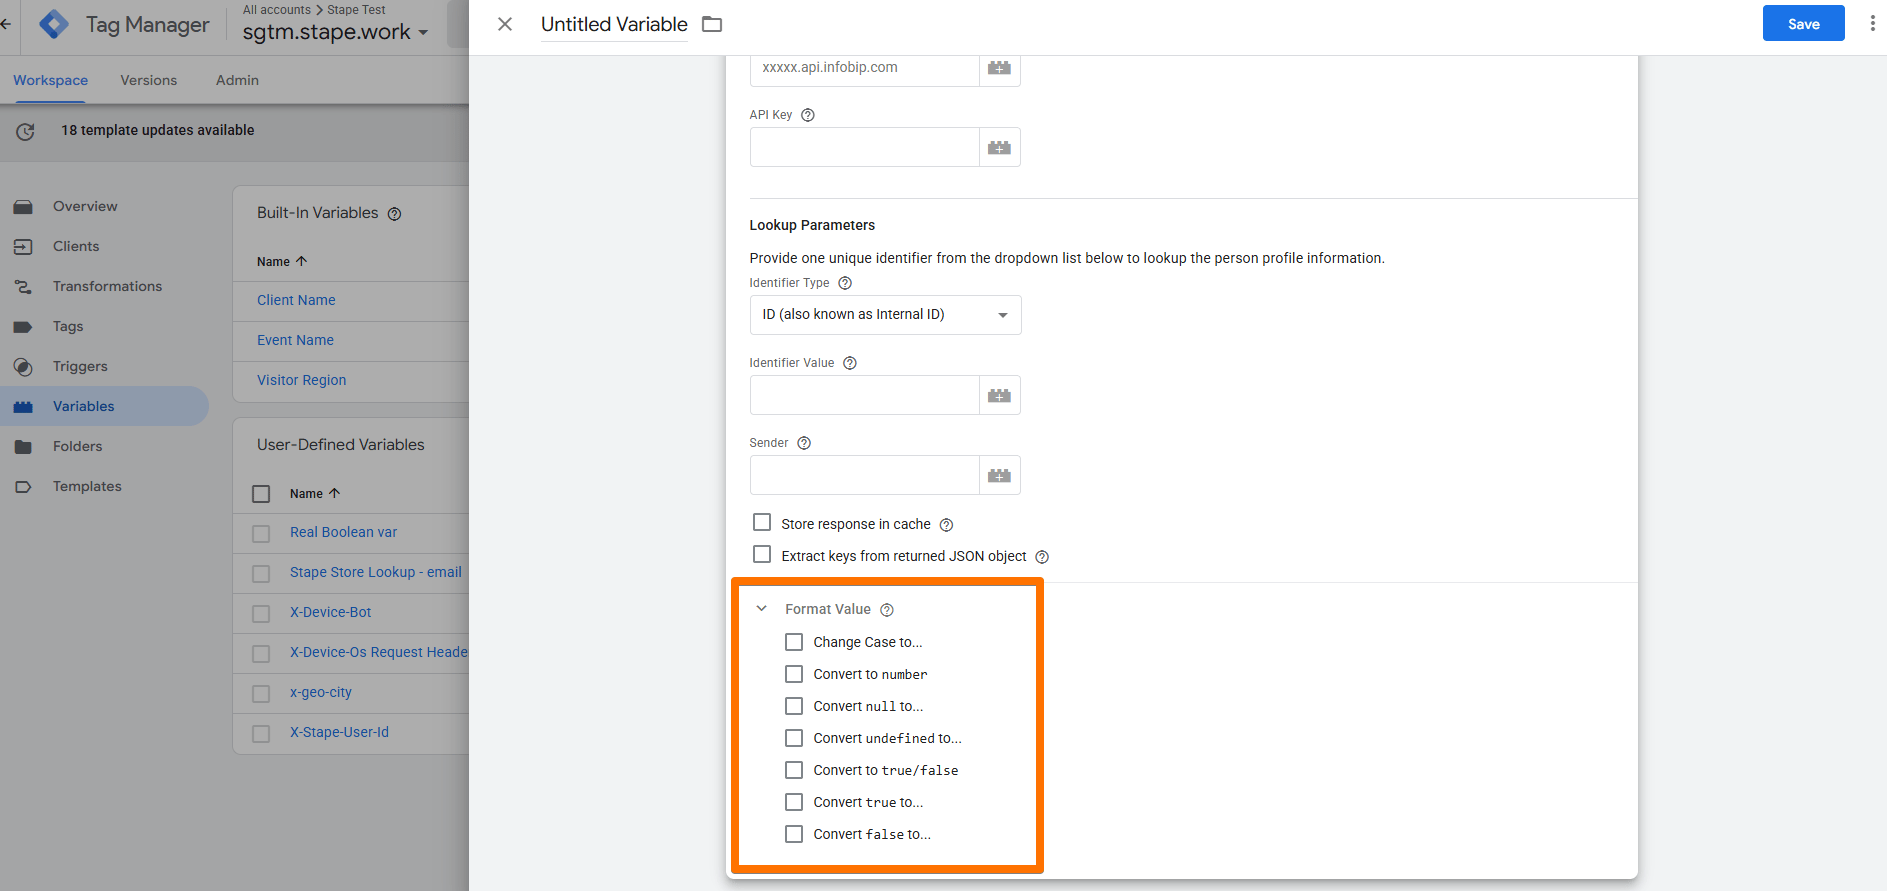
- Format Value - allows you to edit the value that this variable outputs. Learn more in the documentation on format values in user-defined web variables.
- Change Case to… - transforms all data to lowercase or uppercase.
- Convert to number - converts all data to numeric values. Allows you to choose the Decimal separator format.
- Convert null to… - choose a variable to convert null values to.
- Convert undefined to… - choose a variable to convert undefined values to.
- Convert to true/false - changes the value to the true/false type.
- Convert true to… - choose a variable to convert true values to.
- Convert false to… - choose a variable to convert false values to.
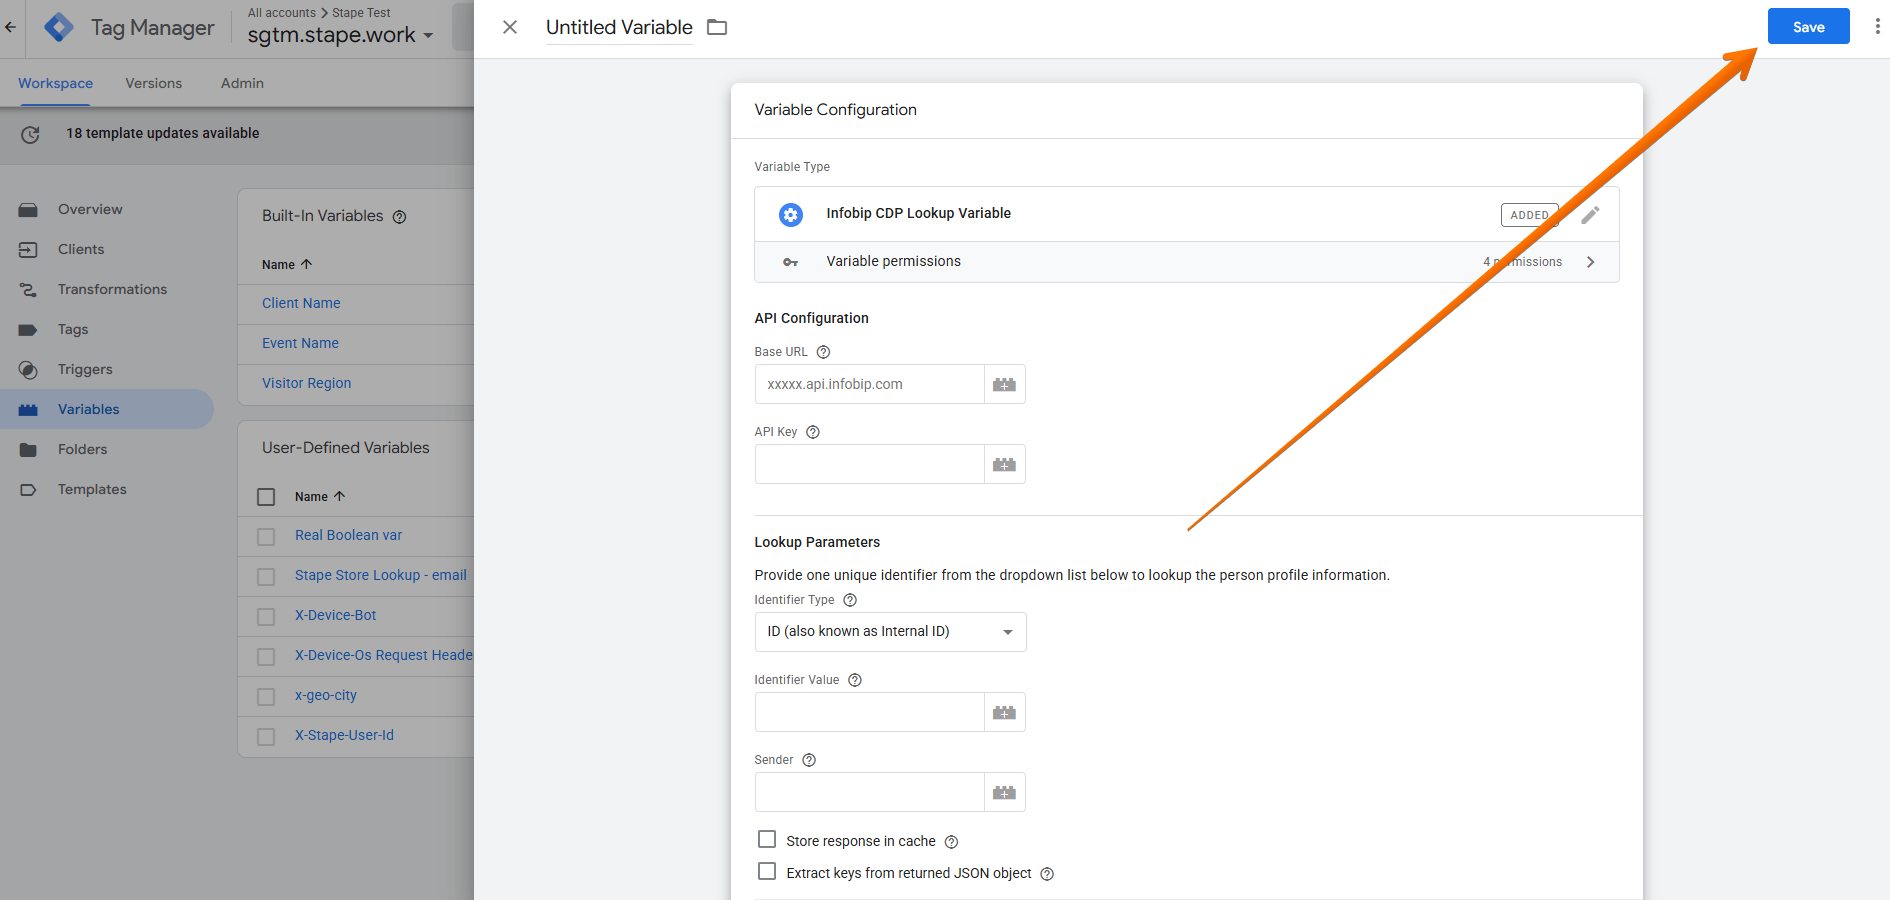
4. Give your variable a descriptive name and click Save.
Testing
You can test the configurations in Google Tag Manager. Click on Preview, trigger the event where you use the variable. Then navigate to the Variables tab and check the variable you have created and its value.

Find out more about debugging and monitoring server-side tracking configuration in our guide.
Was this article helpful?
🍽 Table of content:
Comments