How to set up Odoo CMS app
Updated Jul 6, 2026
This guide explains how to configure the Stape Conversion Tracking app for Odoo. The app automatically adds a web Google Tag Manager (GTM) snippet across your website, ensuring consistent tracking on all pages. It plays a key role in setting up server-side tracking for Odoo stores, helping you collect more accurate and reliable data.
How to configure the Stape Conversion Tracking app for Odoo
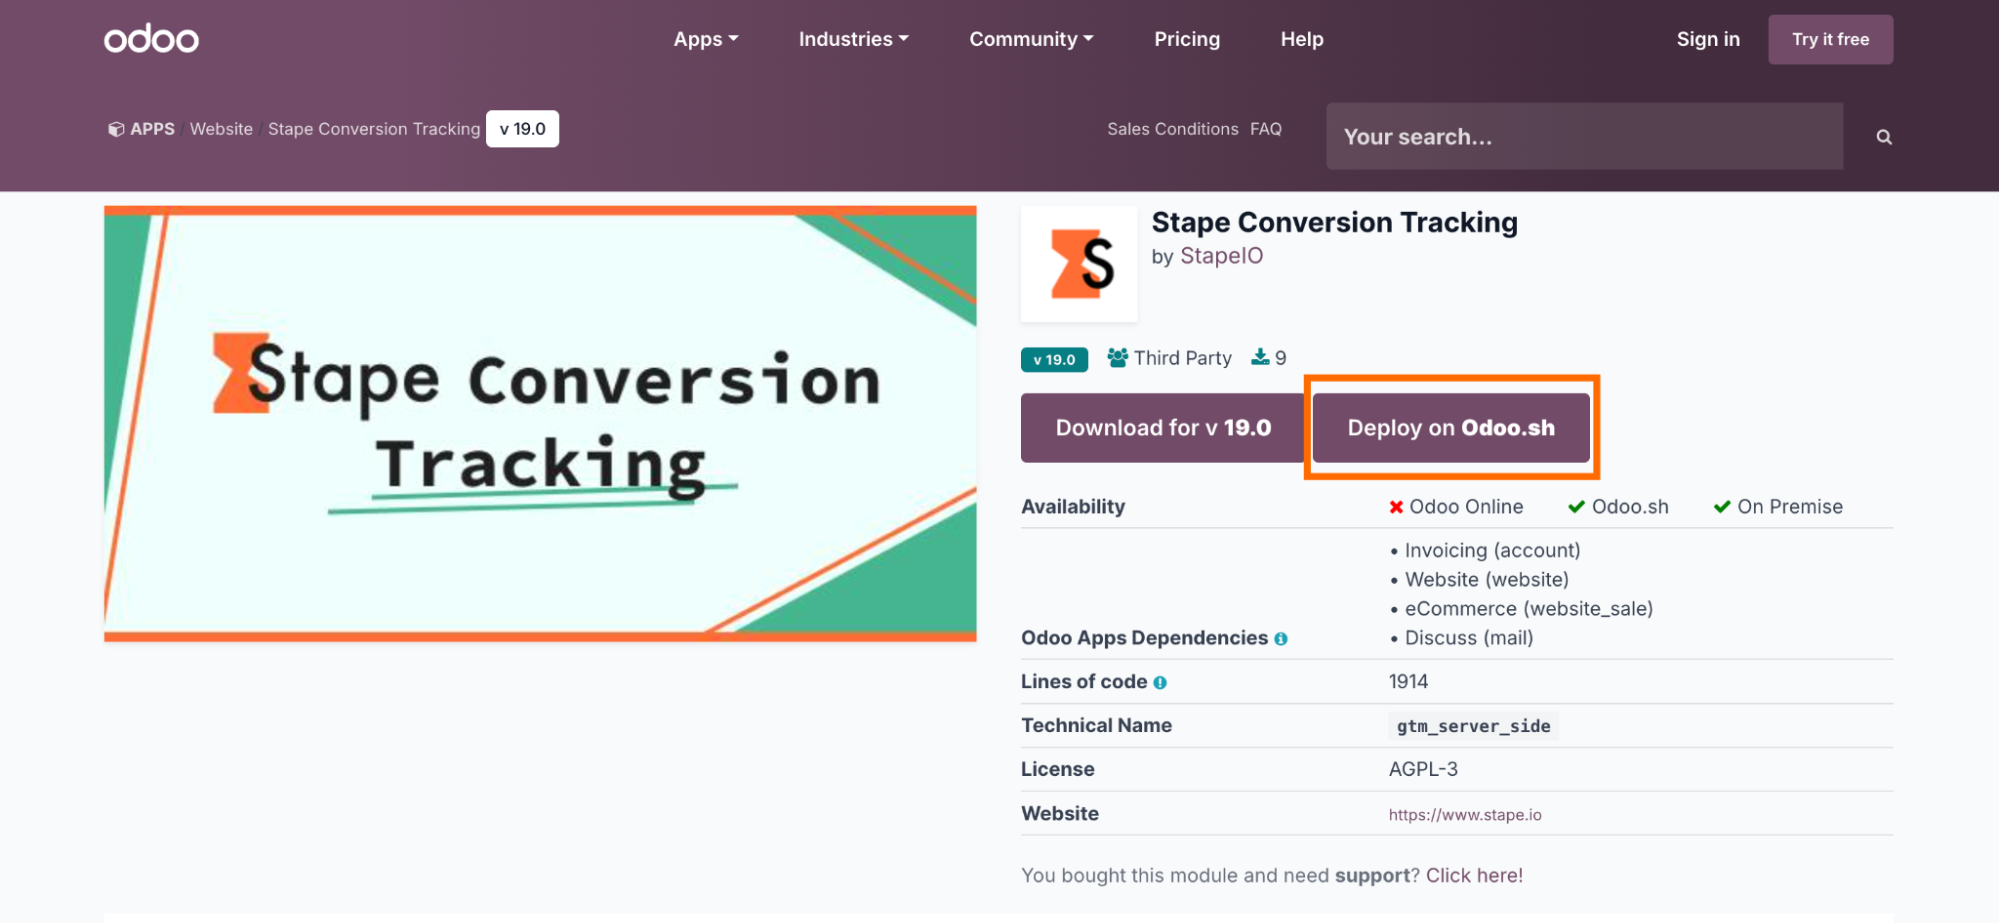
1. Install the Stape Conversion Tracking app for Odoo from the Odoo app store.
Click on “Deploy on Odoo.sh” → Sign in to your GitHub account and install the app.
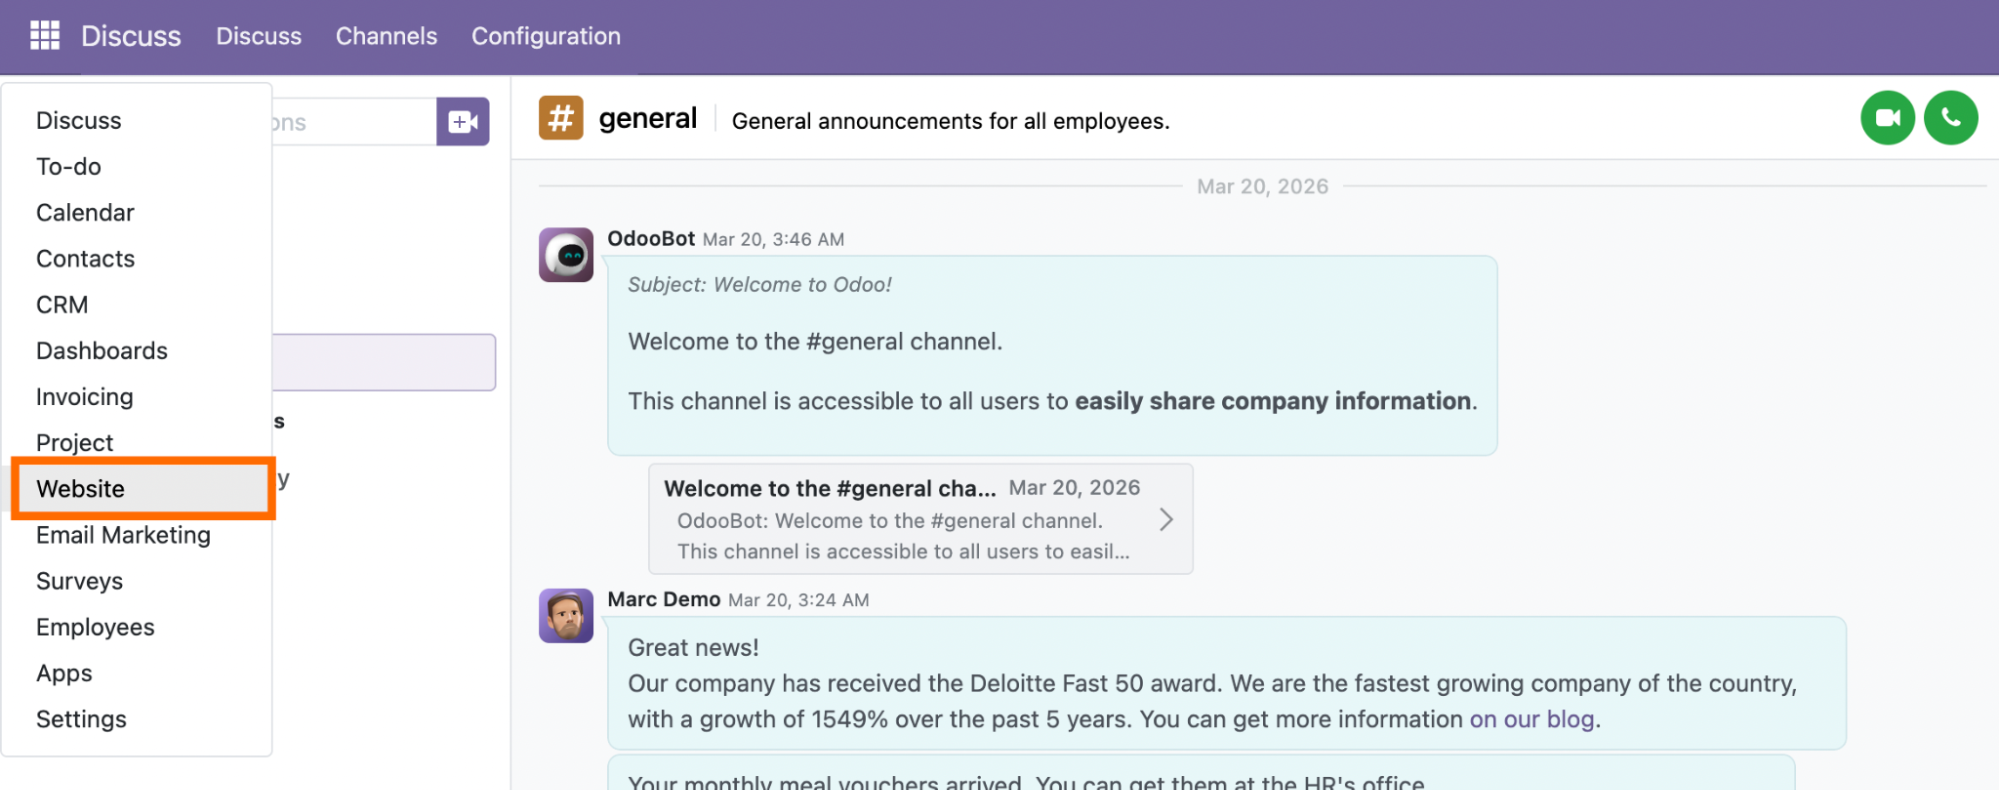
To configure the app after installation, open the Website module.
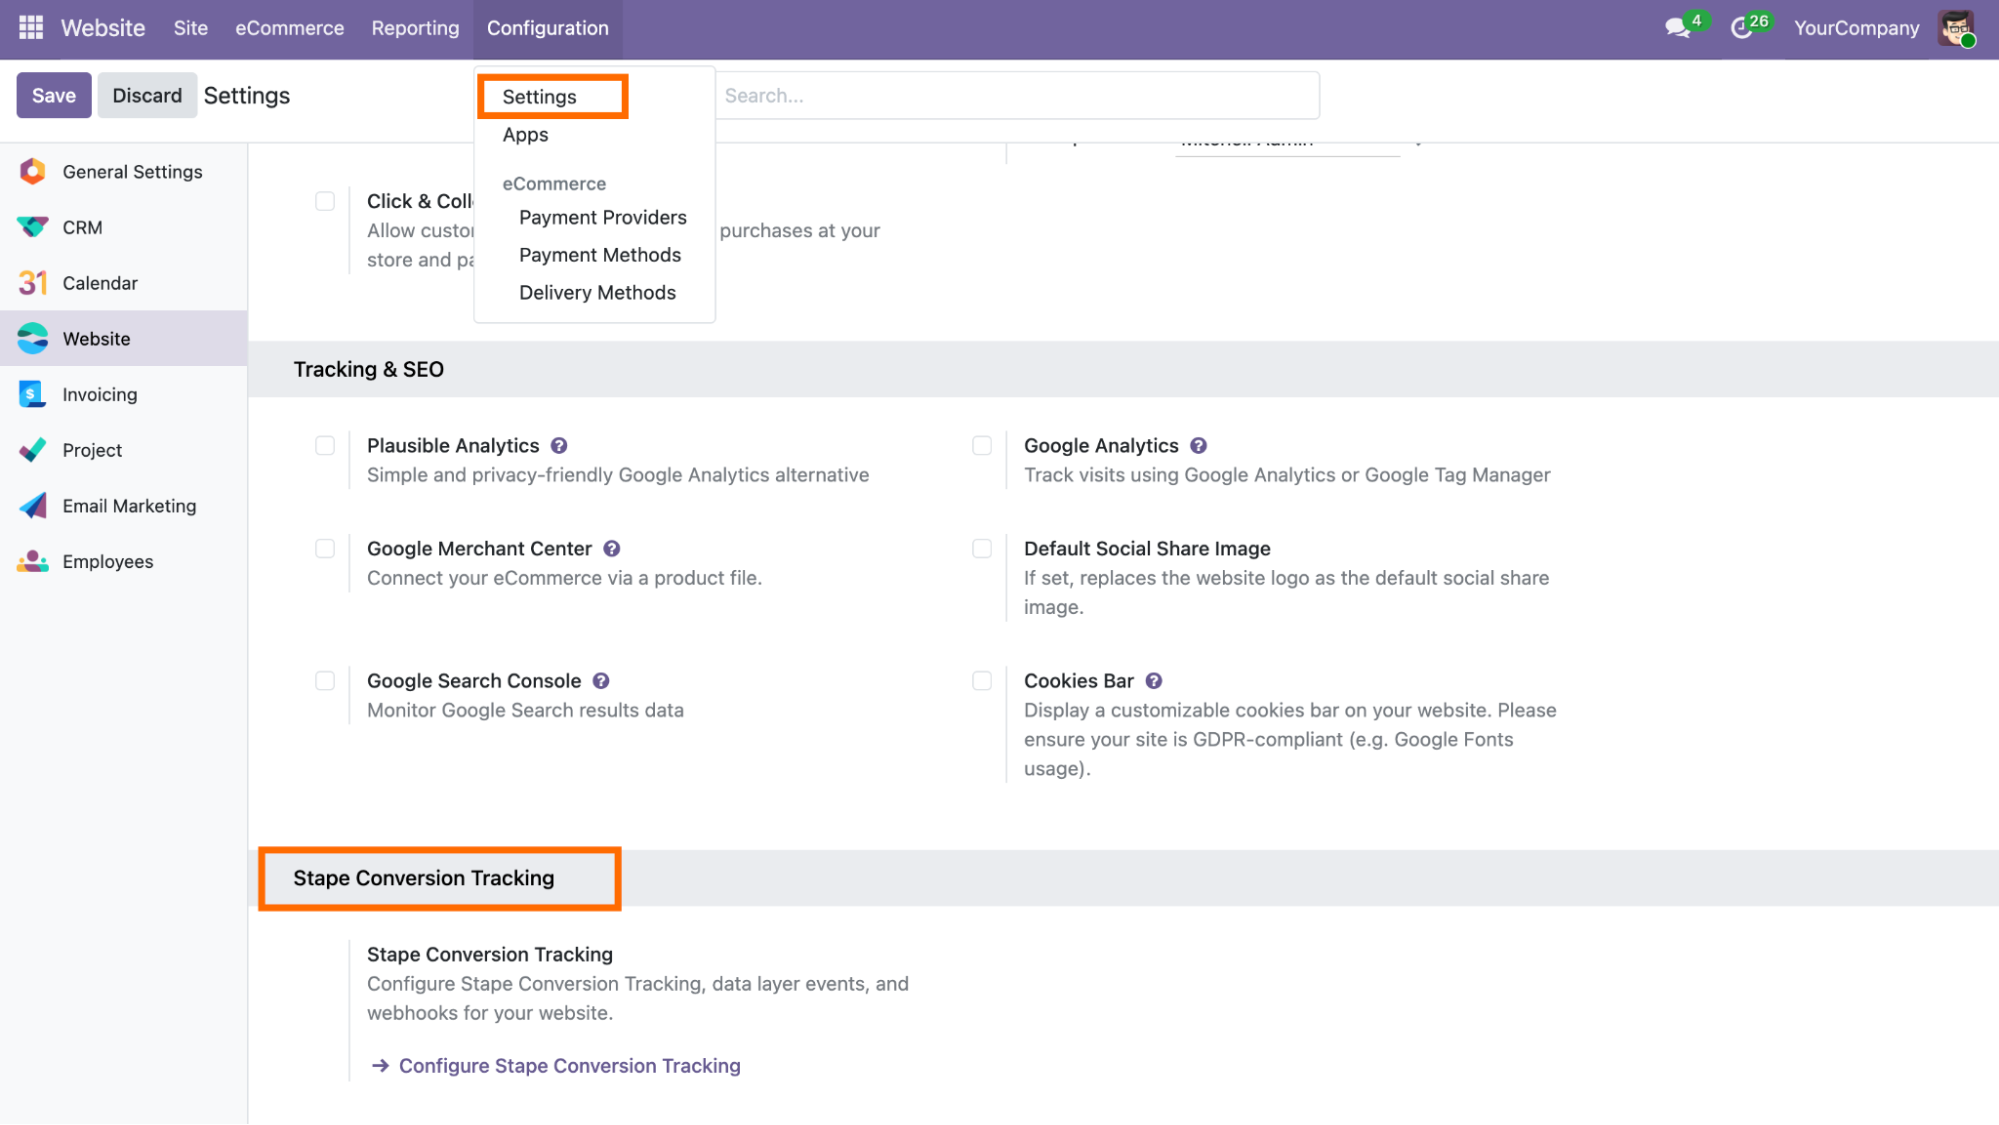
Then click on Configuration → Settings → scroll to find Stape Conversion Tracking app → click Configure Stape Conversion Tracking.
2. Configure the app.
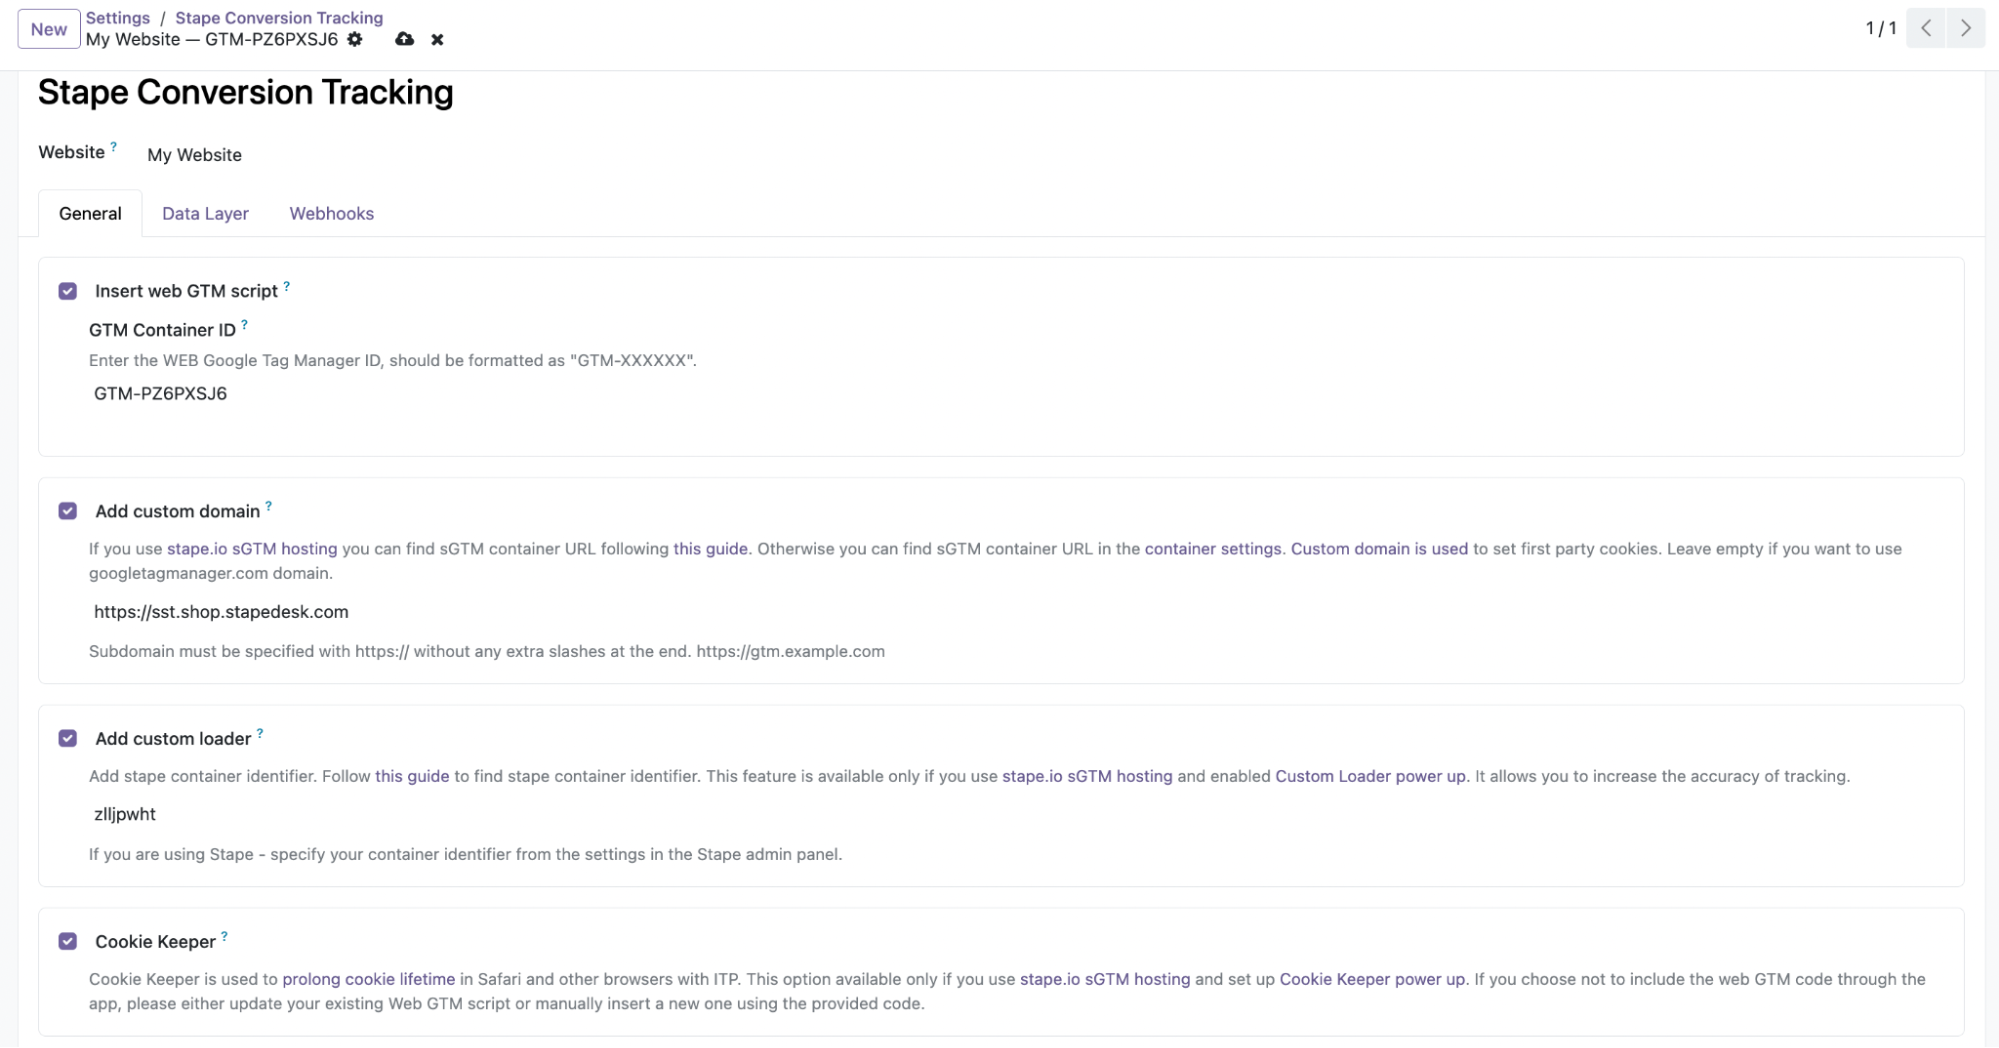
2.1 General tab.
- Insert GTM snippet - check the box to add the GTM tracking snippet on all pages of your Odoo website.
Specify the GTM web container ID. The format should be the following: GTM-XXXXXXX. Here’s how to find the web Google Tag Manager (GTM) ID.
- Add custom domain - select this option if you’ve configured a custom domain to improve data protection against ad blockers and browser restrictions. If you don’t yet have a subdomain, follow the instructions to add a custom domain to your sGTM container.
Add the domain URL - follow the detailed instructions on how to find the server container URL for sGTM container in our guide. The custom domain must be specified in the following format: https://gtm.example.com
- Add Custom Loader - select the option to increase protection against ad blockers. If the box is checked, add the identifier of your Stape container. For more detailed instructions, follow Stape’s guide on how to find the Stape container identifier.
- Cookie Keeper - select the option to prolong cookie lifetime in Safari and other browsers with ITP. The option is available if you have Cookie power-up configured.
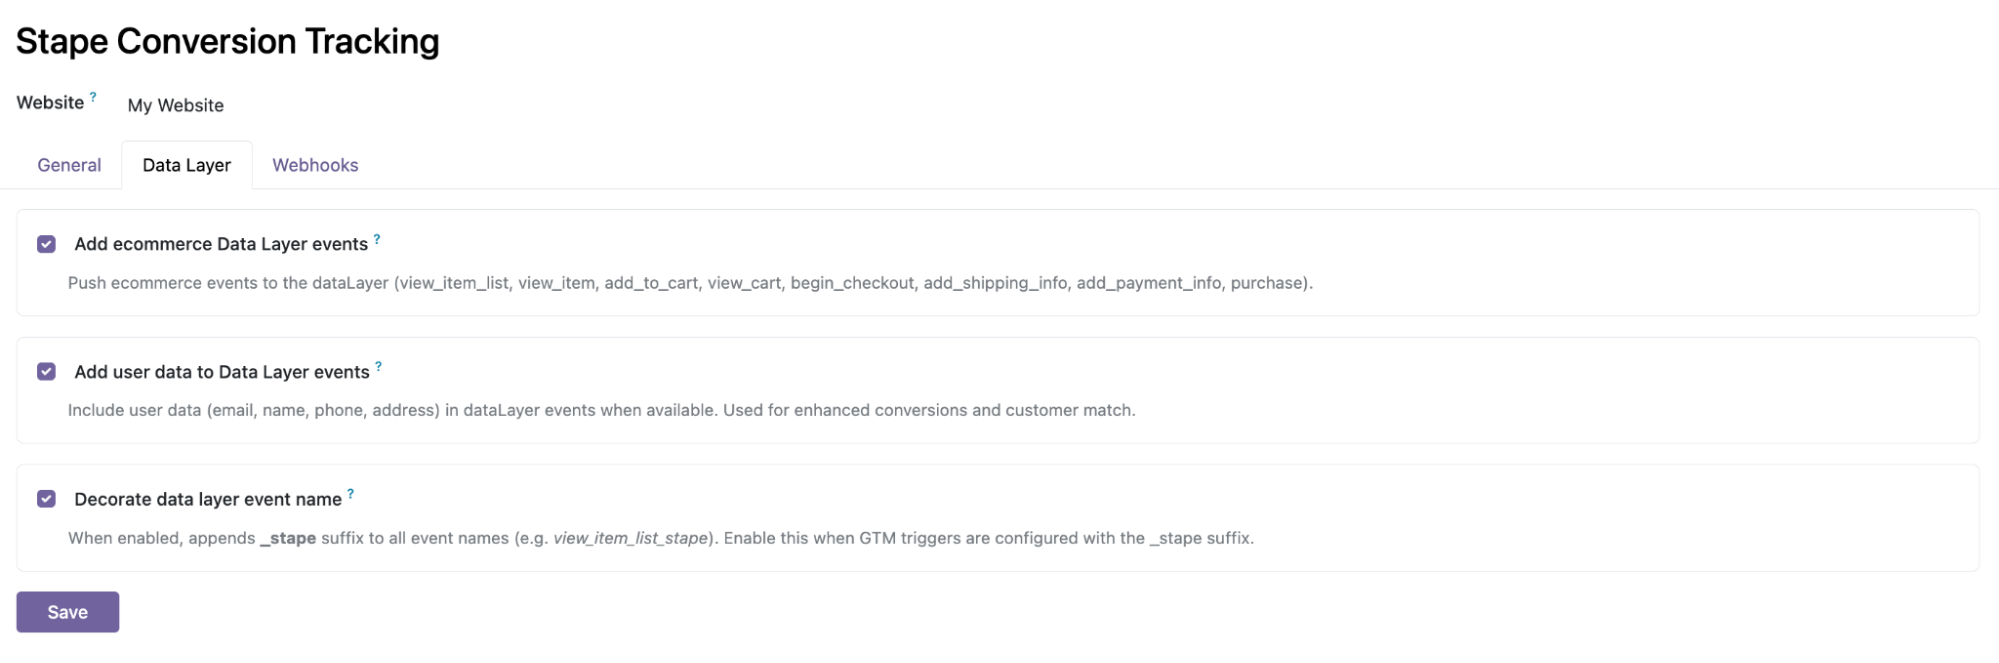
2.2 Data Layer tab.
Use the check boxes in this section to enable Data Layer events. These events allow you to capture richer product and user details, resulting in more comprehensive data collection.
Enable the _stape suffix when GTM triggers are configured with the _stape suffix.
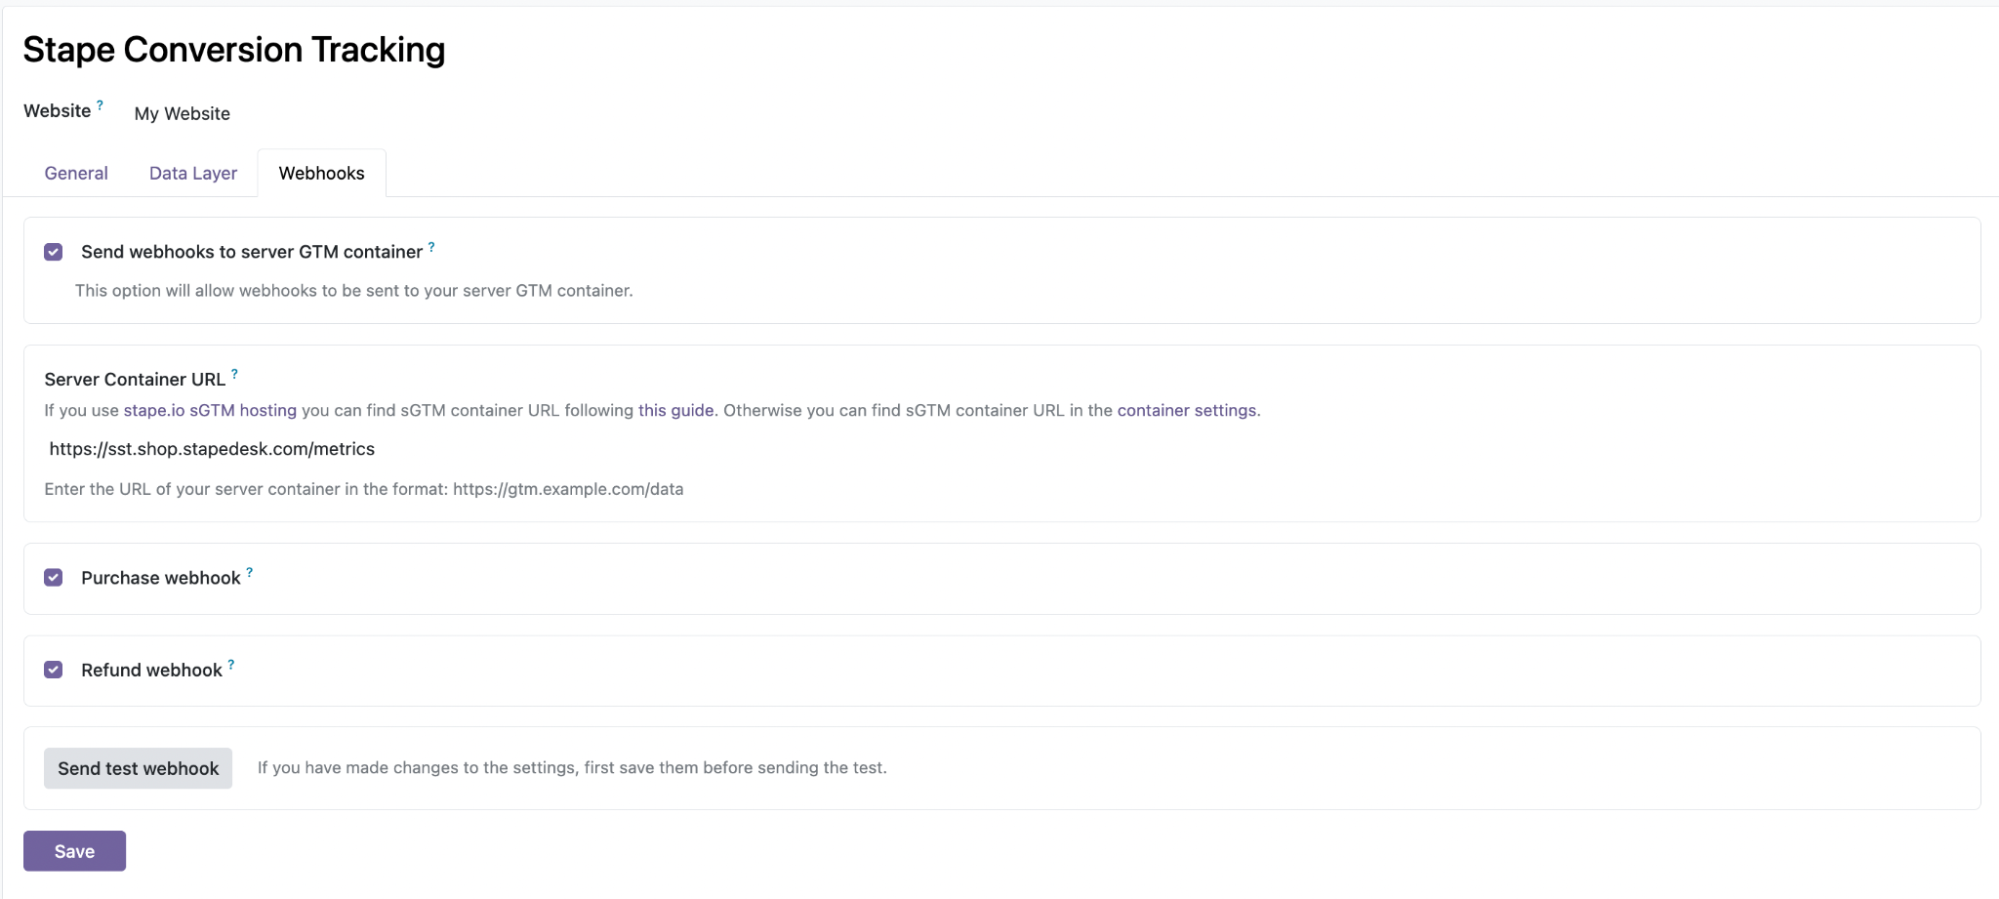
2.3 Webhook tab.
Set up webhooks to send event data (such as purchases and refunds) to a specified URL.
Enter your server container URL and append the path for your sGTM custom domain (e.g., https://sst.example.com/data). Then, enable the toggles for the events you want to track.
For more information, see the guides below:
Once done, click “Save”.
3. Set up data delivery to your server Google Tag Manager container.
Choose one of the two common methods:
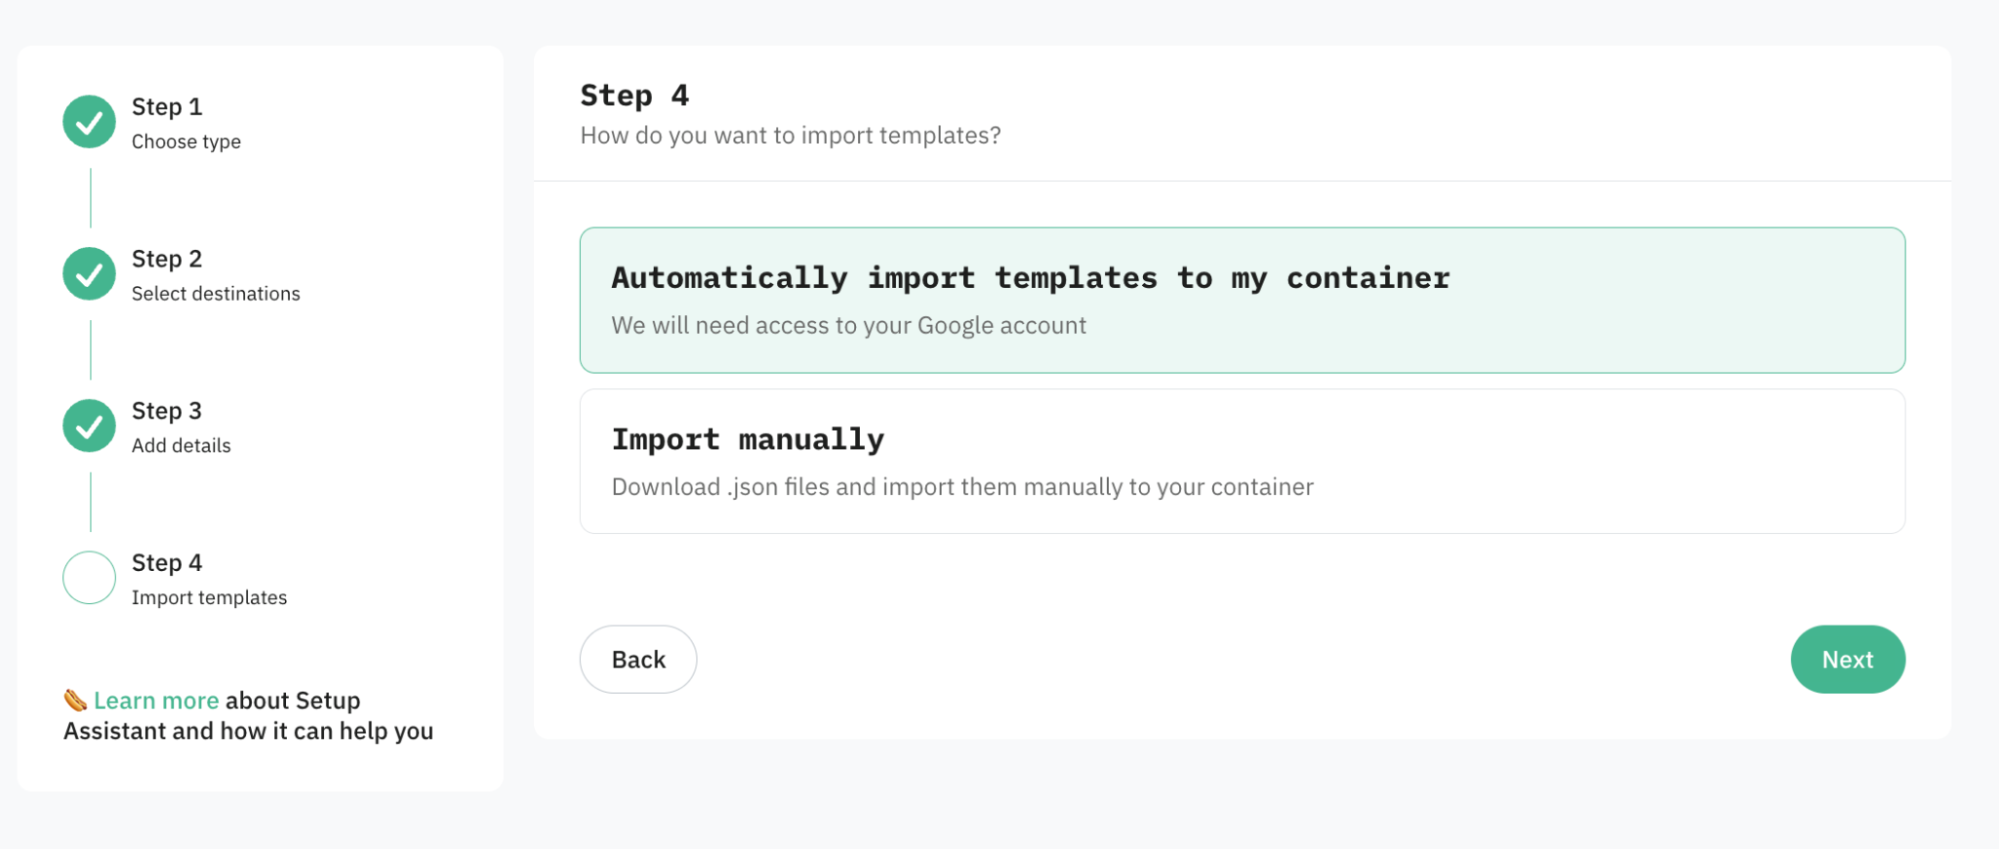
4. Configure server-side tracking for the platforms you use. We’ve created a list of supported platforms. You can set them up manually or use the Setup Assistant to automatically add the necessary tags, triggers, variables, and clients to your GTM containers.
5. Debug your setup to ensure everything is working correctly.
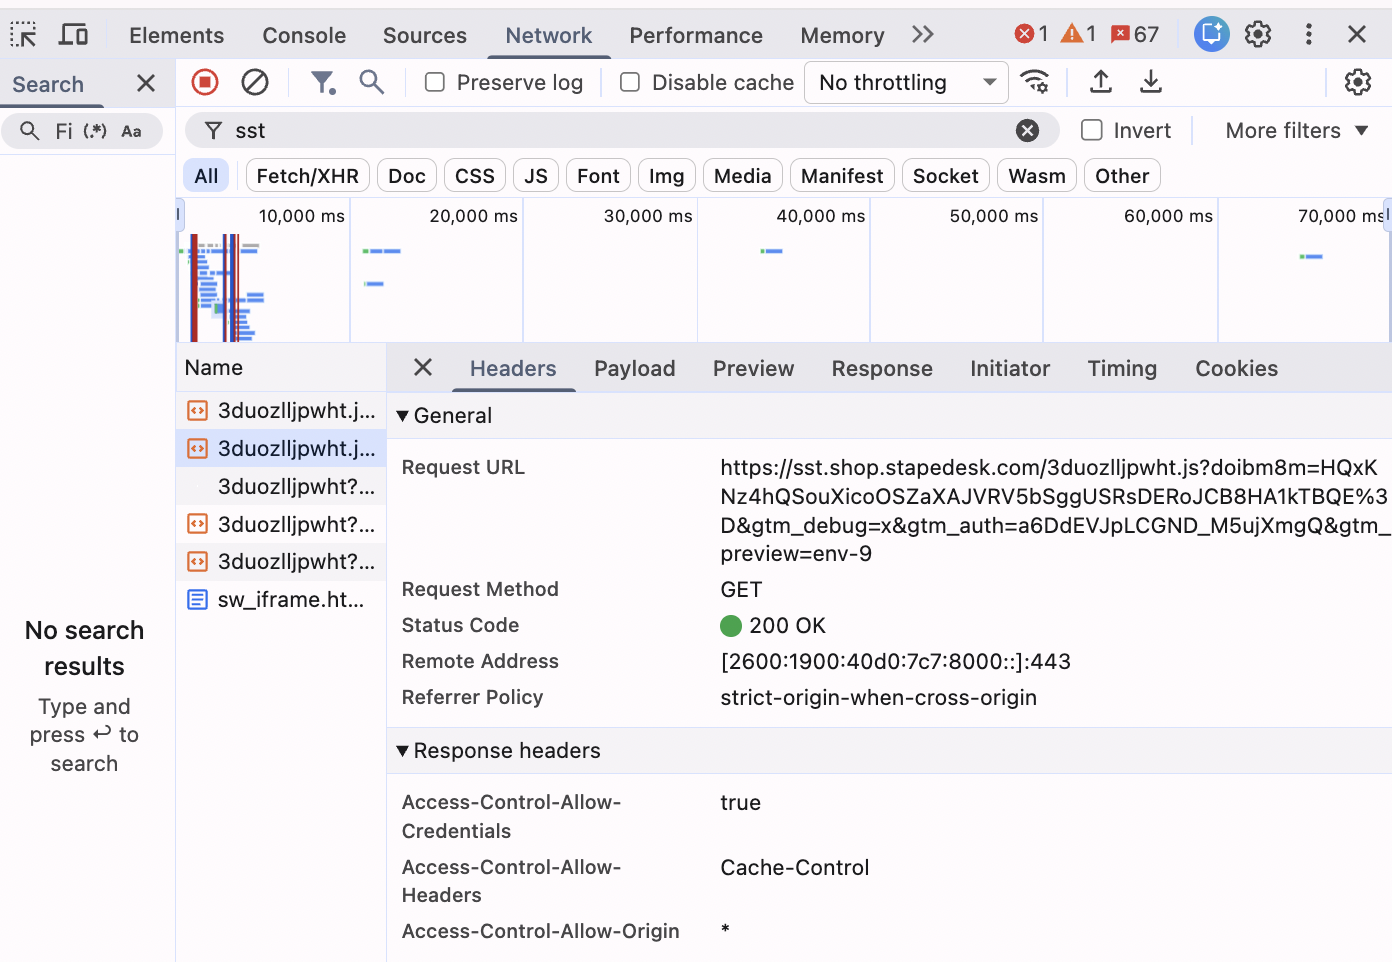
To verify that your container is loading properly, open any page on your website, launch the browser console, and navigate to the Network tab. Filter requests by your subdomain or tagging server URL.
You should see a request similar to the one shown in the screenshot, with a 200 status code, indicating that it loaded successfully.
Was this article helpful?
Comments