Transfer consent status from Shopify storefront to checkout
Updated Jun 12, 2026
Some Consent Management Platforms (CMPs) don't transfer the consent status from the storefront checkout page. Usually, it happens when the CMP widget is manually added via editing the theme.liquid, but in some cases, it can also happen with the GTM or Shopify app cookie banner integrations.
This guide explains how to spot the problem and how to start sending the consent status from the storefront to Shopify's checkout.
Spot the problem
1. Run the preview mode in the web GTM container, and prepare for debugging the checkout page in Shopify with the Stape GTM Helper Chrome extension.
In the tab Inject GTM, click Enable injection, add your domain name, and GTM ID. Save changes.
| Stape Chrome extension also provides other benefits to make the debugging process more convenient. Its features include, but are not limited to, entity filter, request URL formatter, website tracking scanning and evaluation, and displaying consent status in server GTM. For more details on the Stape Chrome extension's features, refer to our guide. |
2. Interact with your cookie banner (accept or deny some cookies).
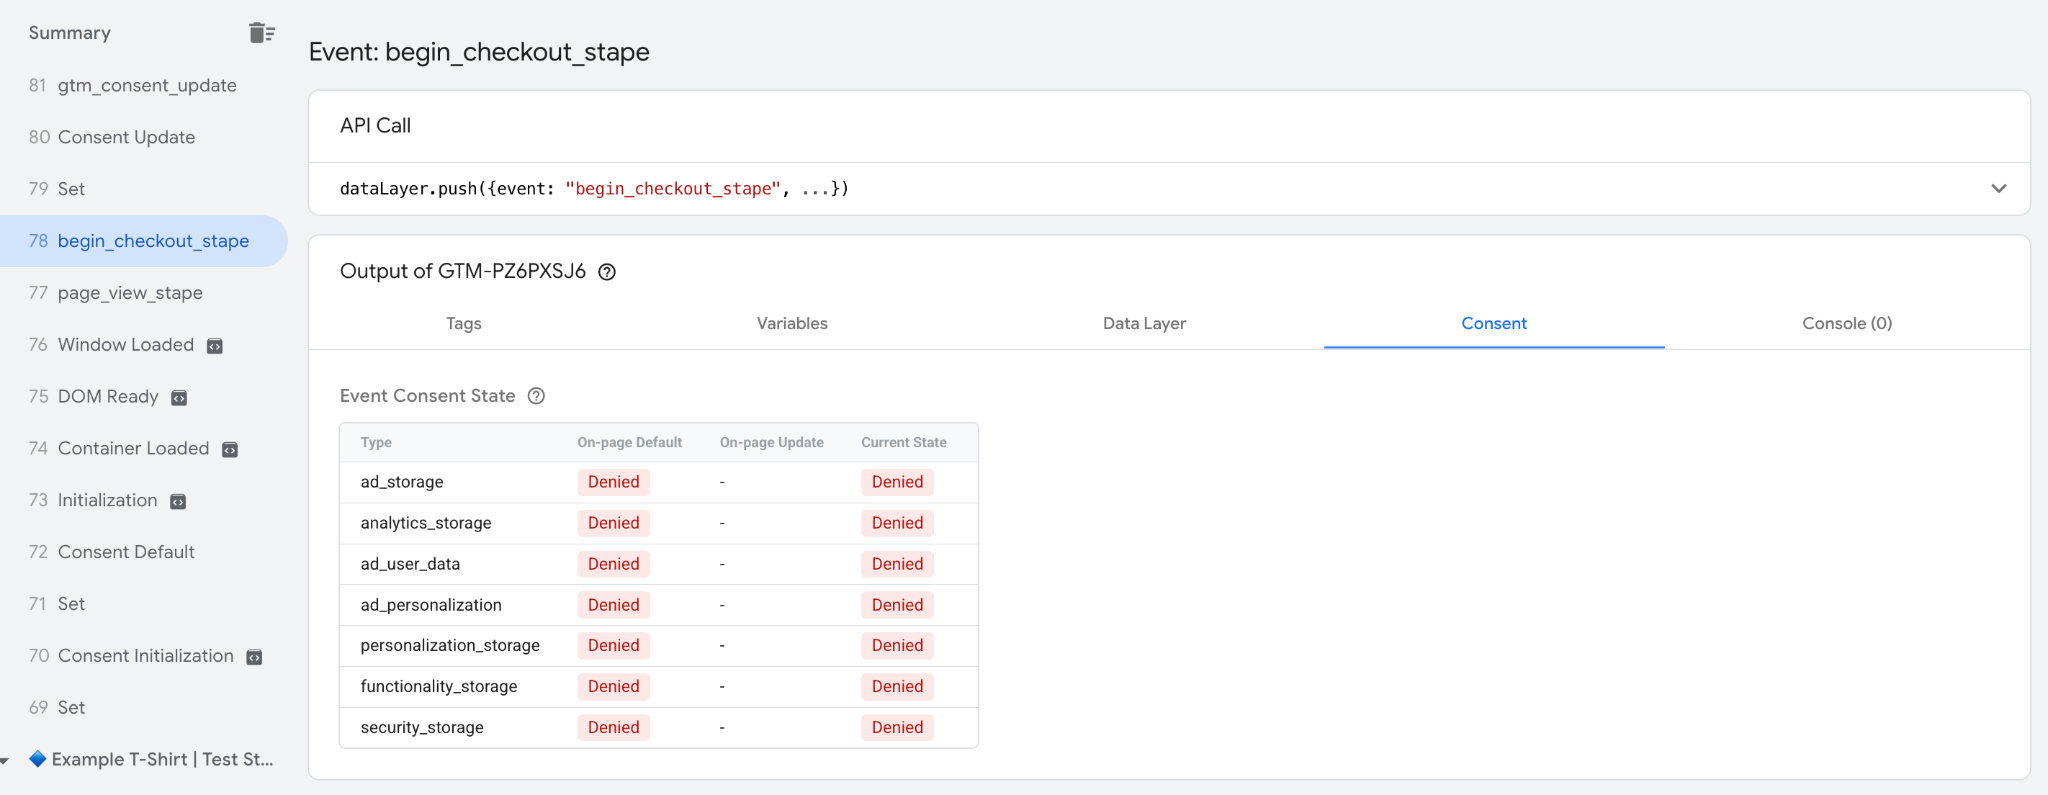
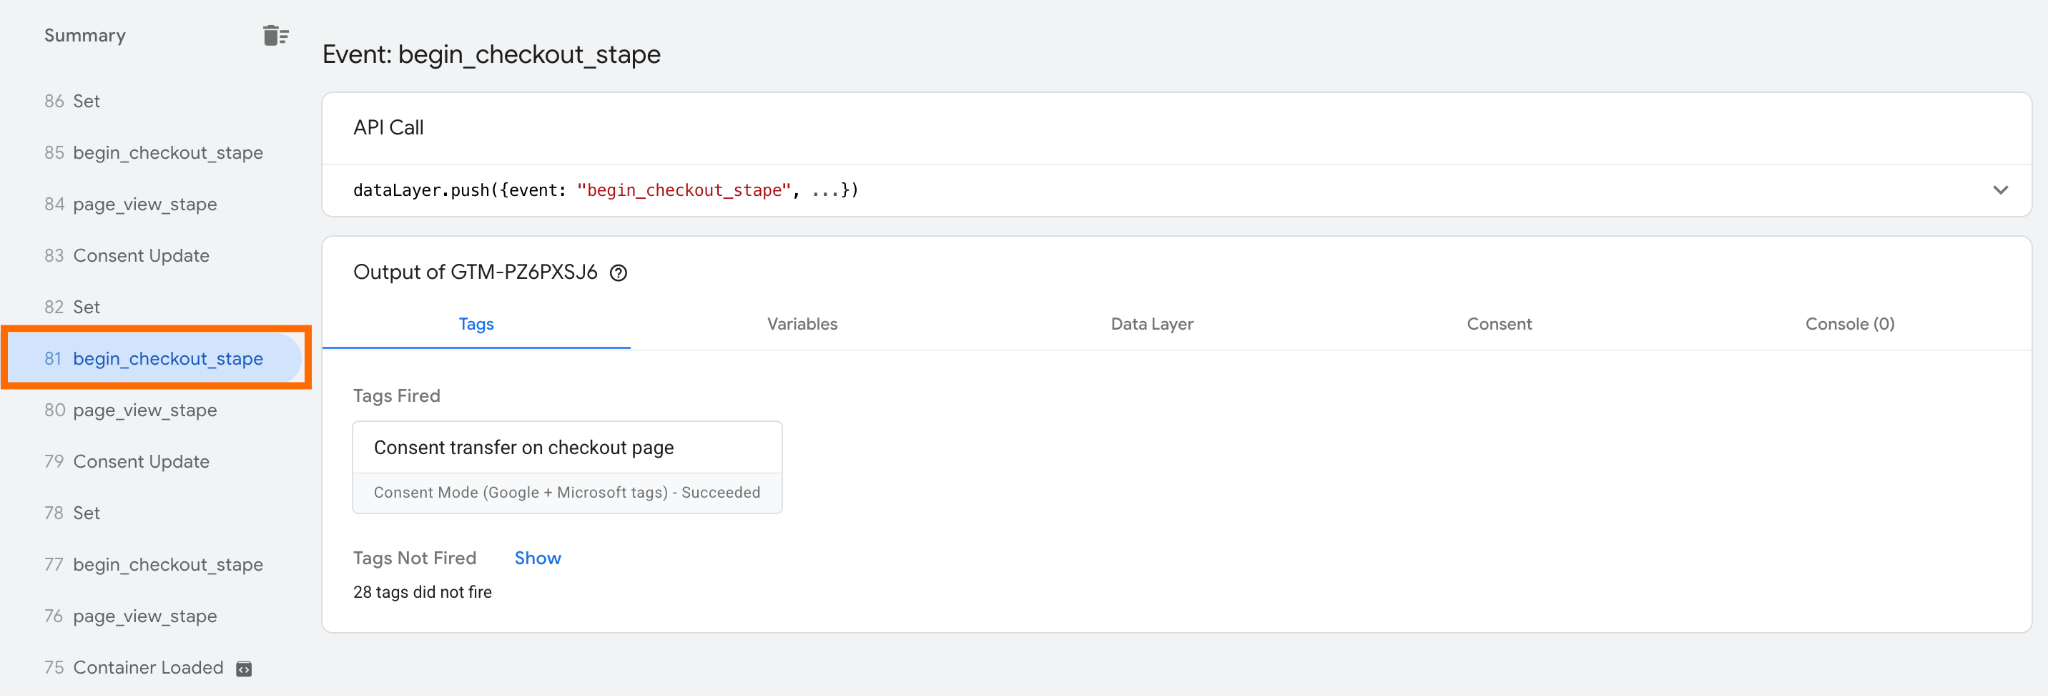
3. Trigger the event and check the cookie statuses in the second and third columns in the Consent tab.
They must reflect the cookie preferences specified on the cookie banner.

4. Navigate to the checkout page.
If the consent isn't transfered automatically to checkout, the status Denied will be displayed as the default and current status.
The Consent Update event will never fire.
How to send consent status from the Shopify storefront to checkout
Step 1. Configure Consent Mode tag
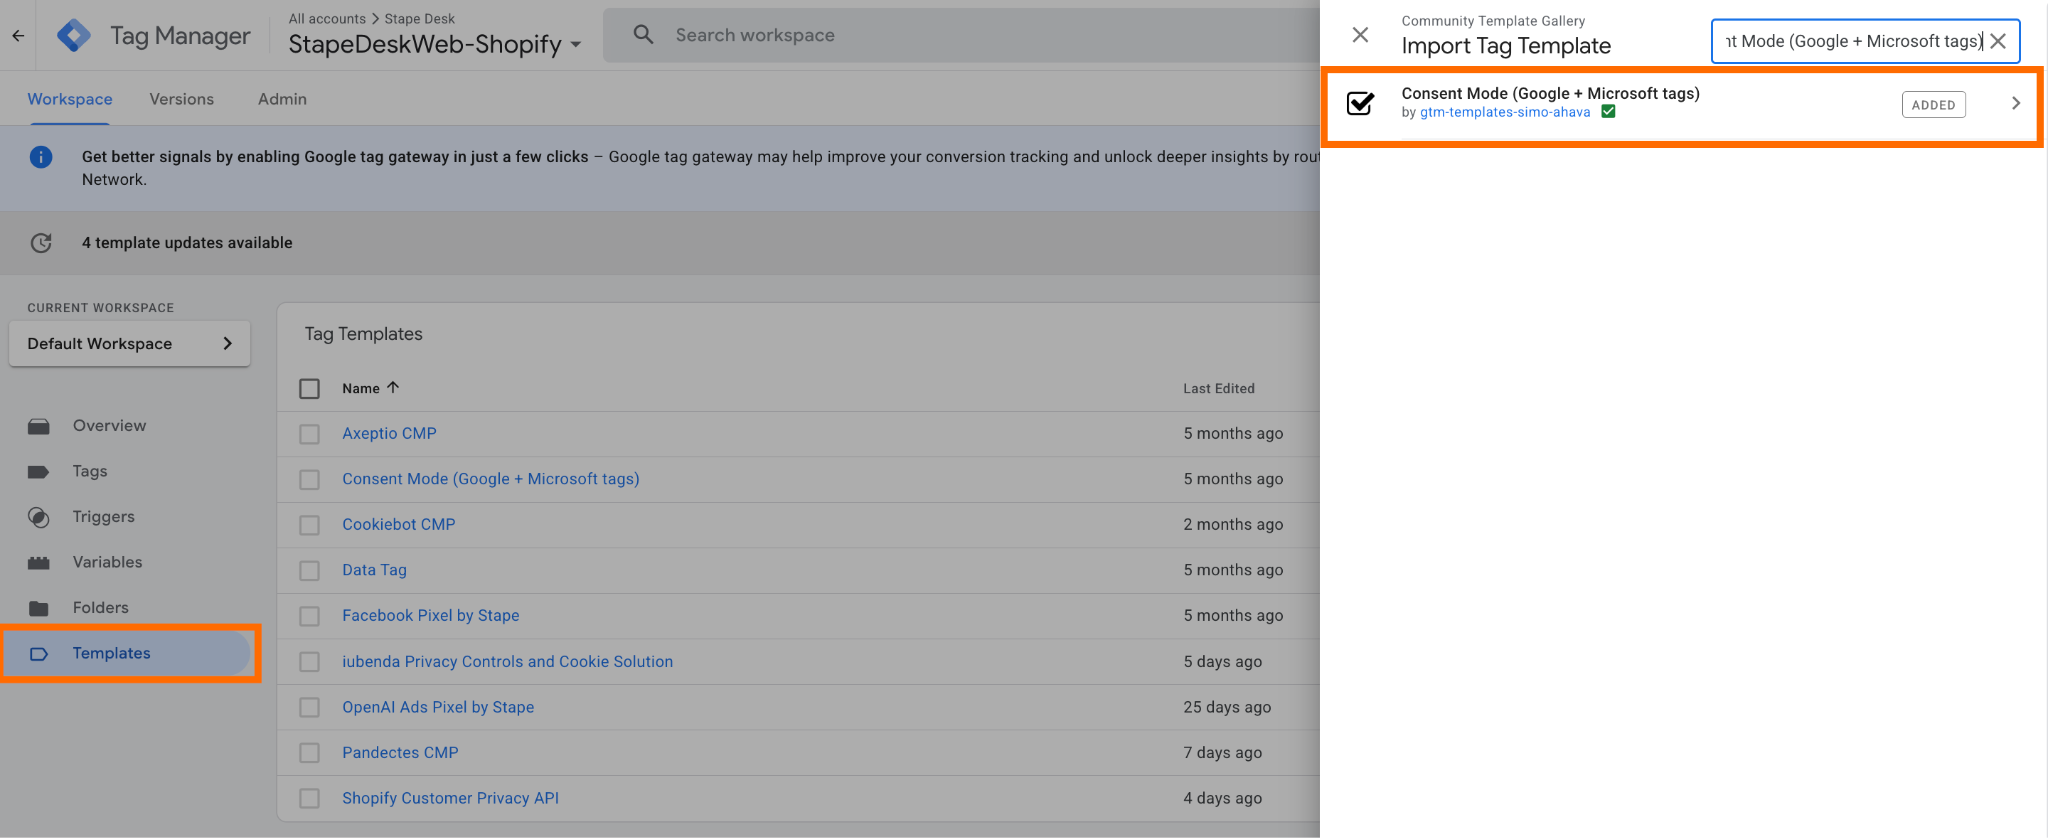
1.1 Add Simo Ahava's Consent Mode (Google + Microsoft tags) to the workspace in the web GTM container.
Go to the web GTM container → click on Templates → Search gallery → find Consent Mode (Google + Microsoft tags) → Add to workspace.
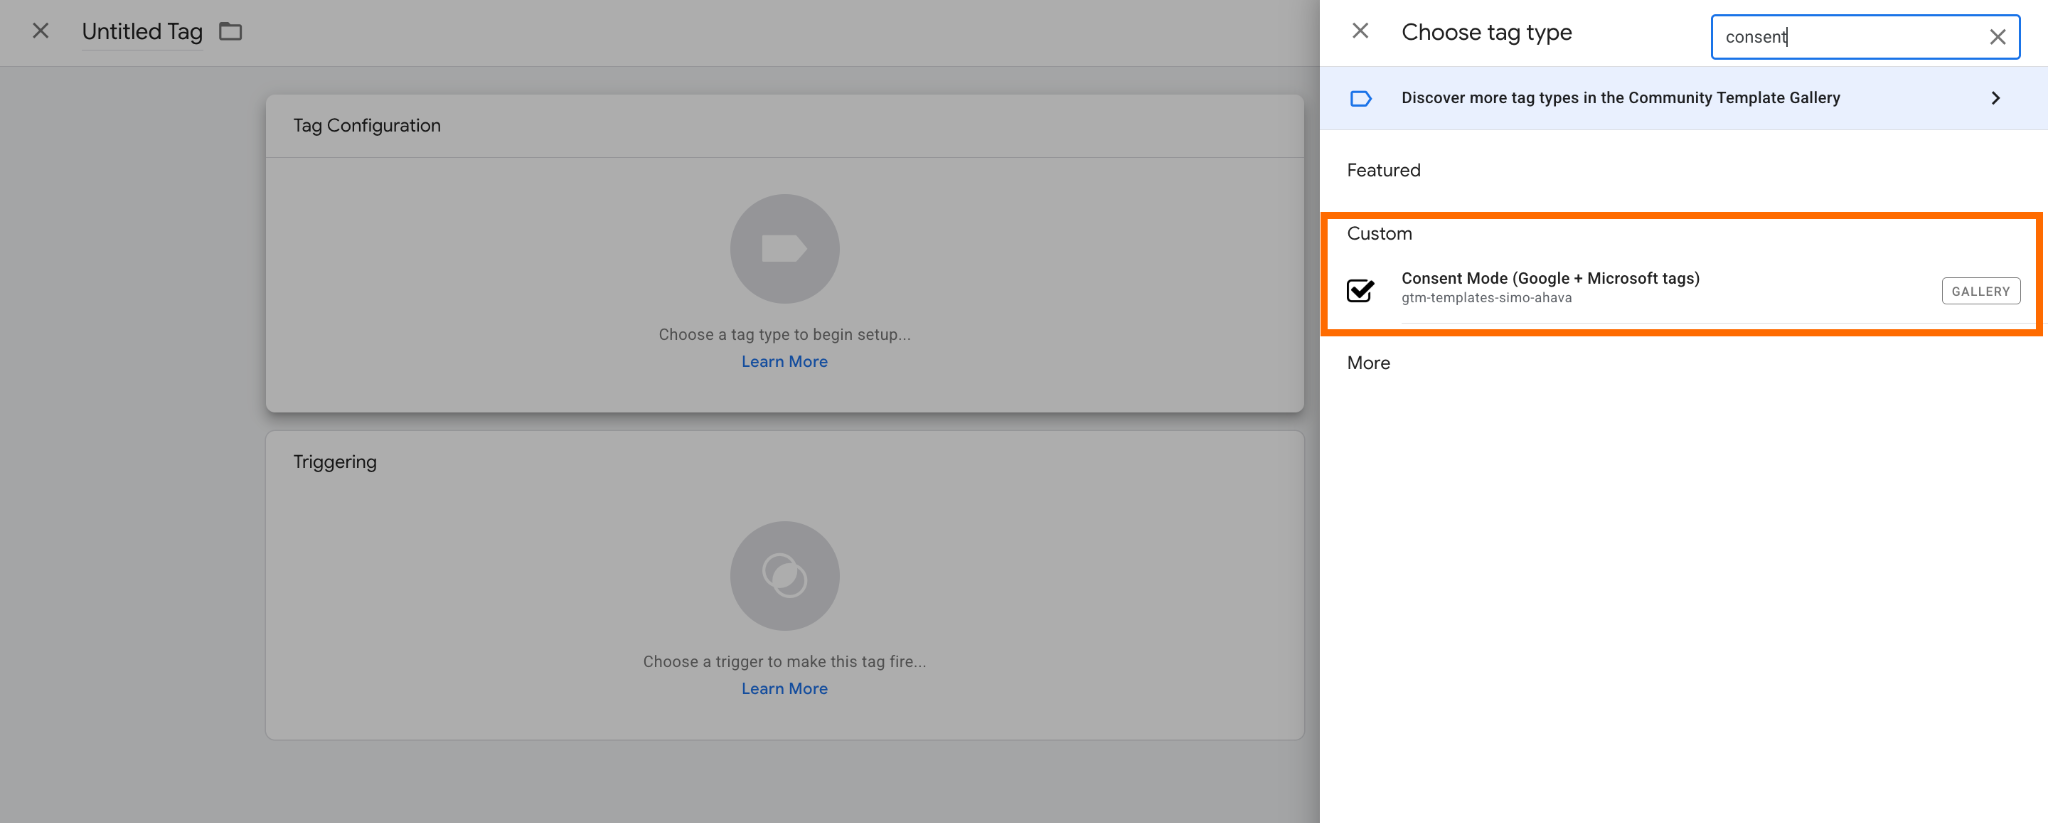
1.2 Create a new tag.
Navigate to Tags section → New → select Consent Mode (Google + Microsoft tags) as tag type.
1.3 As a Consent Command, select Update.

1.4 Configure Consent Settings fields.
There are a few ways to take the consent statuses from the storefront:
- From the
dataLayerevent, pushed by the consent management platform (CMP) - From cookies
Since some CMPs don't push their own event to the dataLayer, we will focus on taking the consent status from cookies.
1.4.1 On the storefront, specify the consent status via cookie banner and navigate to the checkout page.
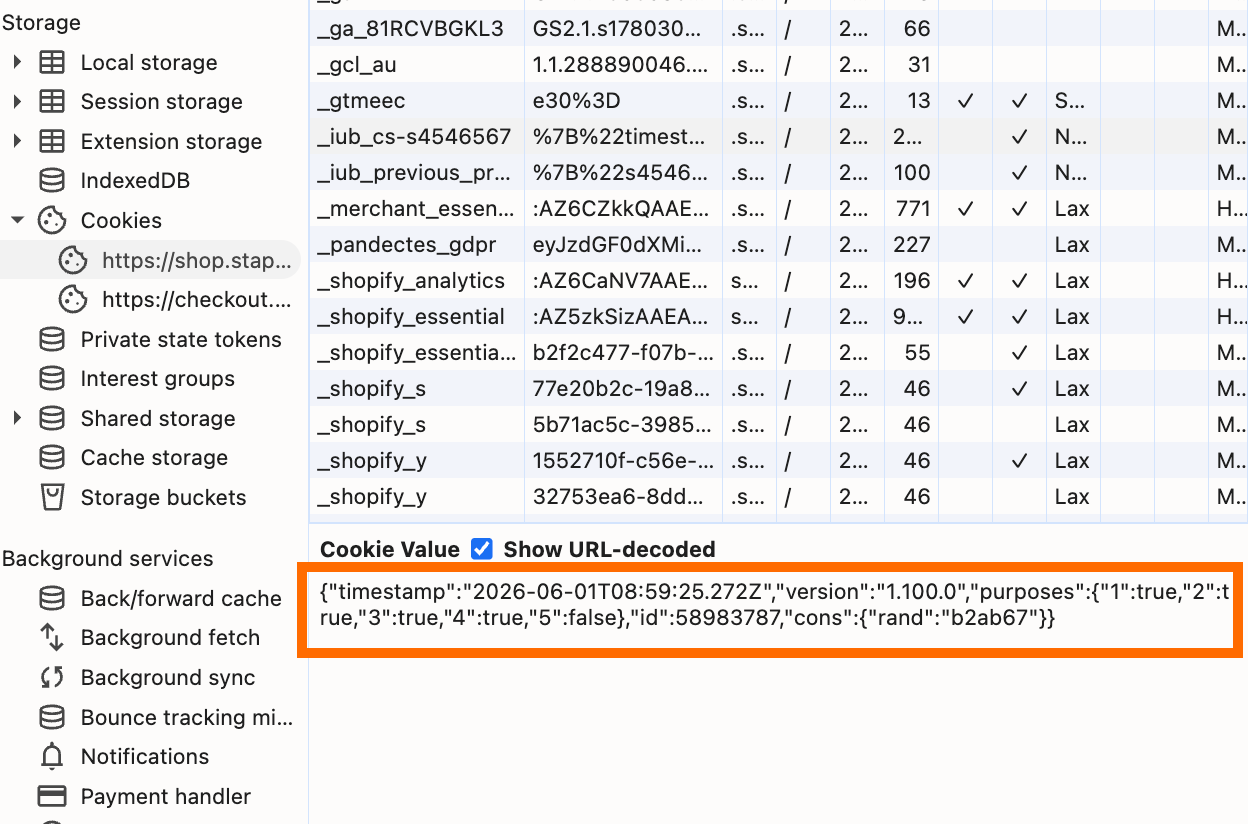
Right mouse click anywhere on the page → click Inspect → navigate to Application in dev tools→ in the Storage section, navigate to Cookies → click on the domain name → find the cookie that contains the consent status (e.g., for Iubenda, it's the cookie _iub_cs-s4546567).
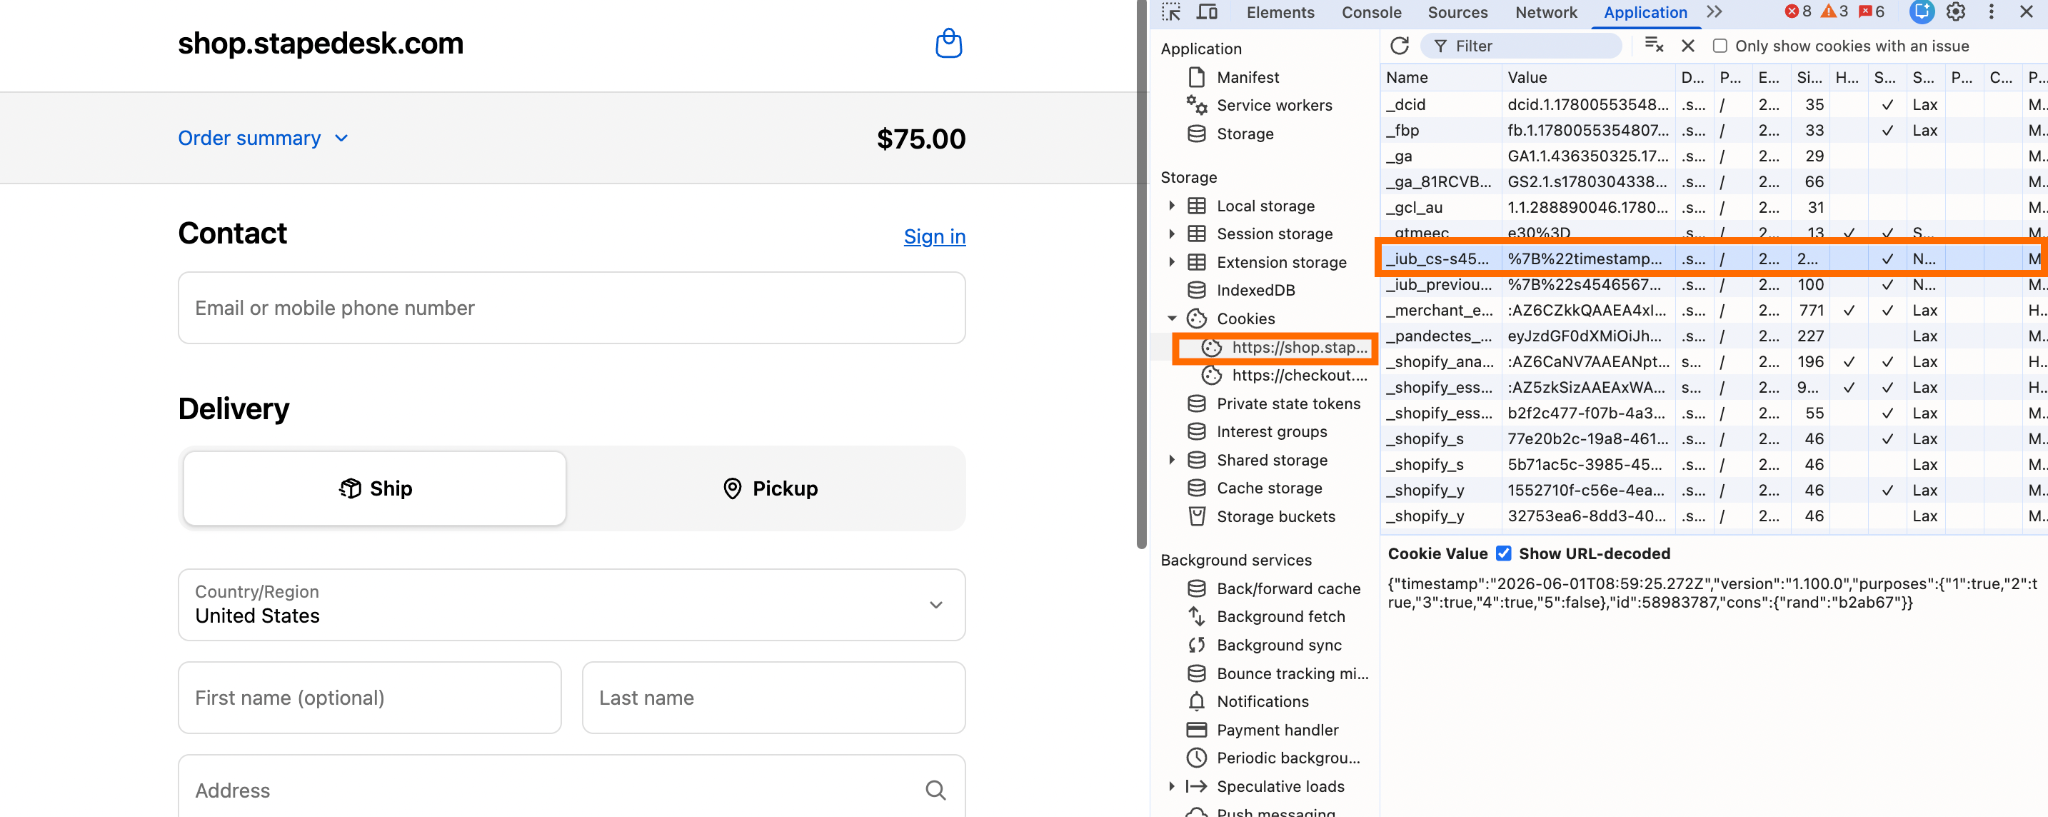
1.4.2 Check the cookie values and understand their purposes.
Click on Show URL-decoded; it must reflect the consent statuses specified via the cookie banner.
In the example with the consent management platform Iubenda, the cookies have different purposes and are marked with specific IDs (1, 2, 3, 4, 5). The IDs for your CMP may differ.
Here, the goal is to understand what cookie type each ID stands for. It can be checked via the official CMP platform; look for cookie purposes. The explanation for the Iubenda cookie purposes is described in the Cookie Solution guide.
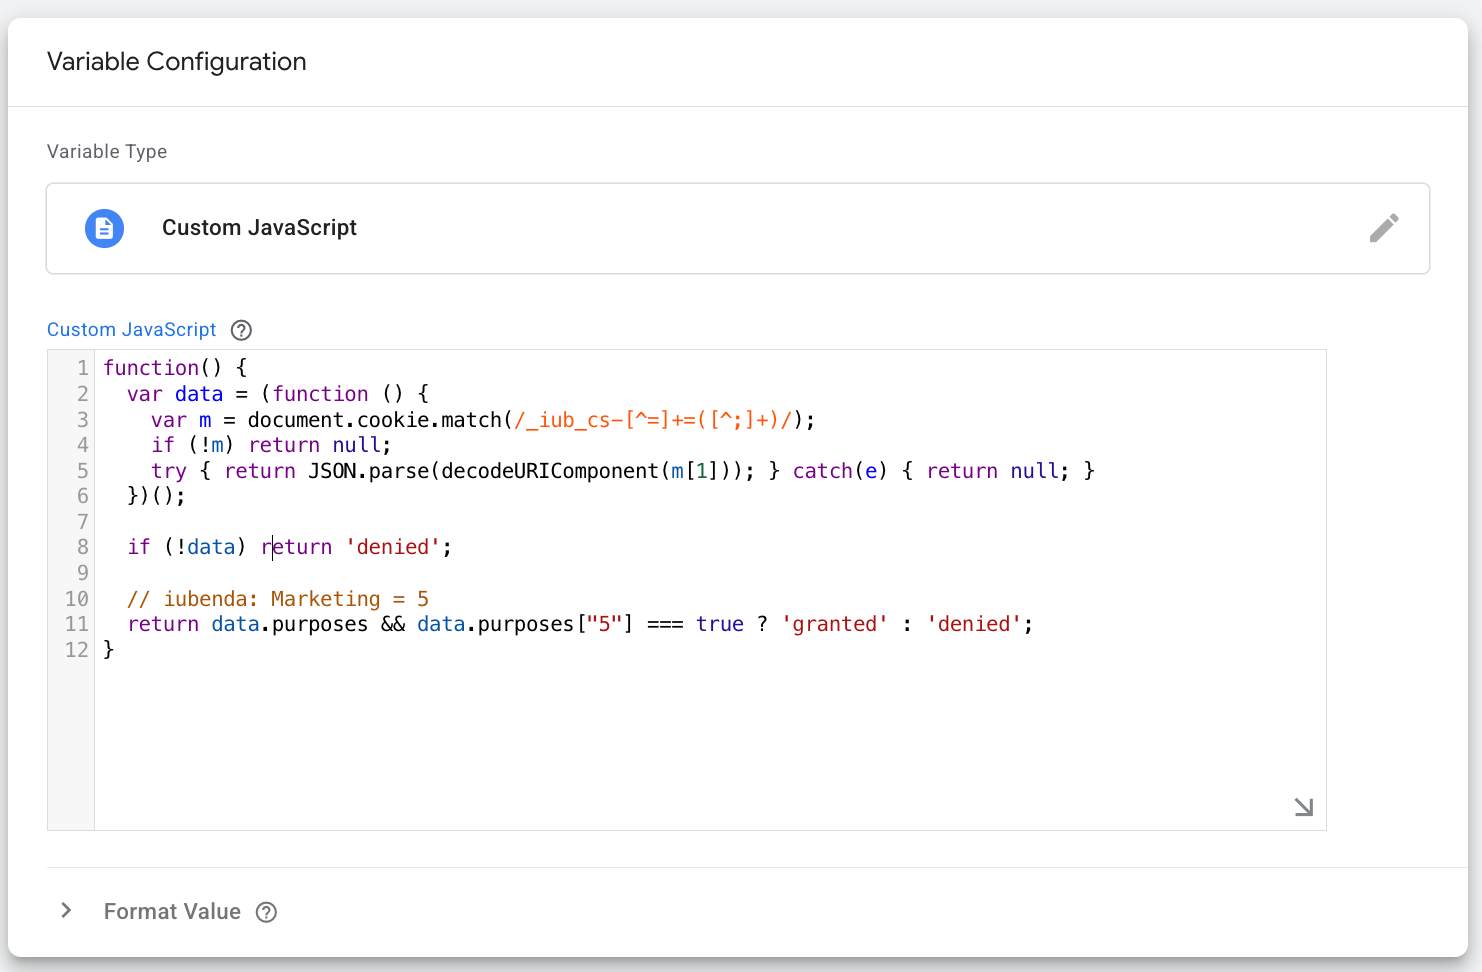
1.4.3 Create the Custom JavaScript variables for each cookie type.
Knowing the cookie purposes, create separate Custom JavaScript variables to "read" the consent status and update it on the checkout page.
Here is an example of JS code to read the consent status for the ad_storage cookie:
function() {
  var data = (function () {
    var m = document.cookie.match(/_iub_cs-[^=]+=([^;]+)/);
    if (!m) return null;
    try { return JSON.parse(decodeURIComponent(m[1])); } catch(e) { return null; }
  })();

  if (!data) return 'denied';

  // iubenda: Marketing = 5
  return data.purposes && data.purposes["5"] === true ? 'granted' : 'denied';
}
In GTM, the variable looks the following way:
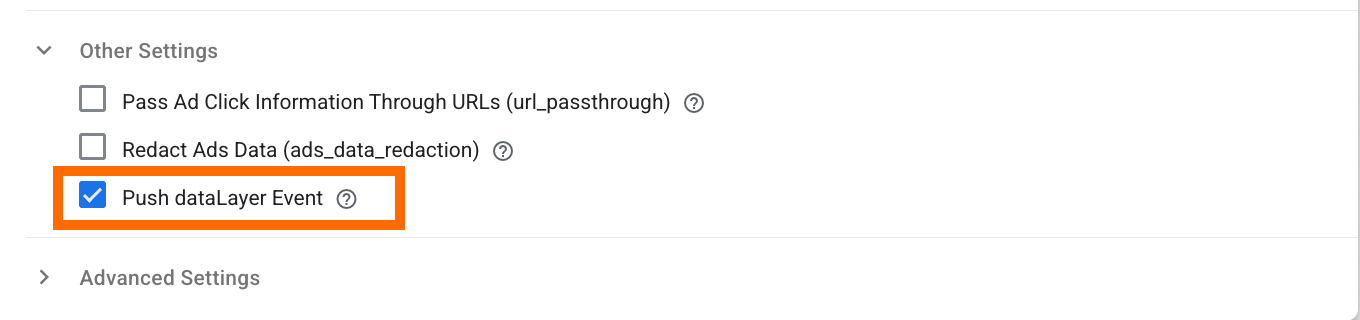
1.5 Check the box Push dataLayer Event.
The tag will push an event gtm_consent_update to dataLayer, along with details about the updated consent state after "update" is fired.
It's required to ensure that tags, configured on the checkout page, are fired only after consent is given. This dataLayer event will be used in step 2 of this guide to create a trigger group.
1.6 Add a trigger for a tag.
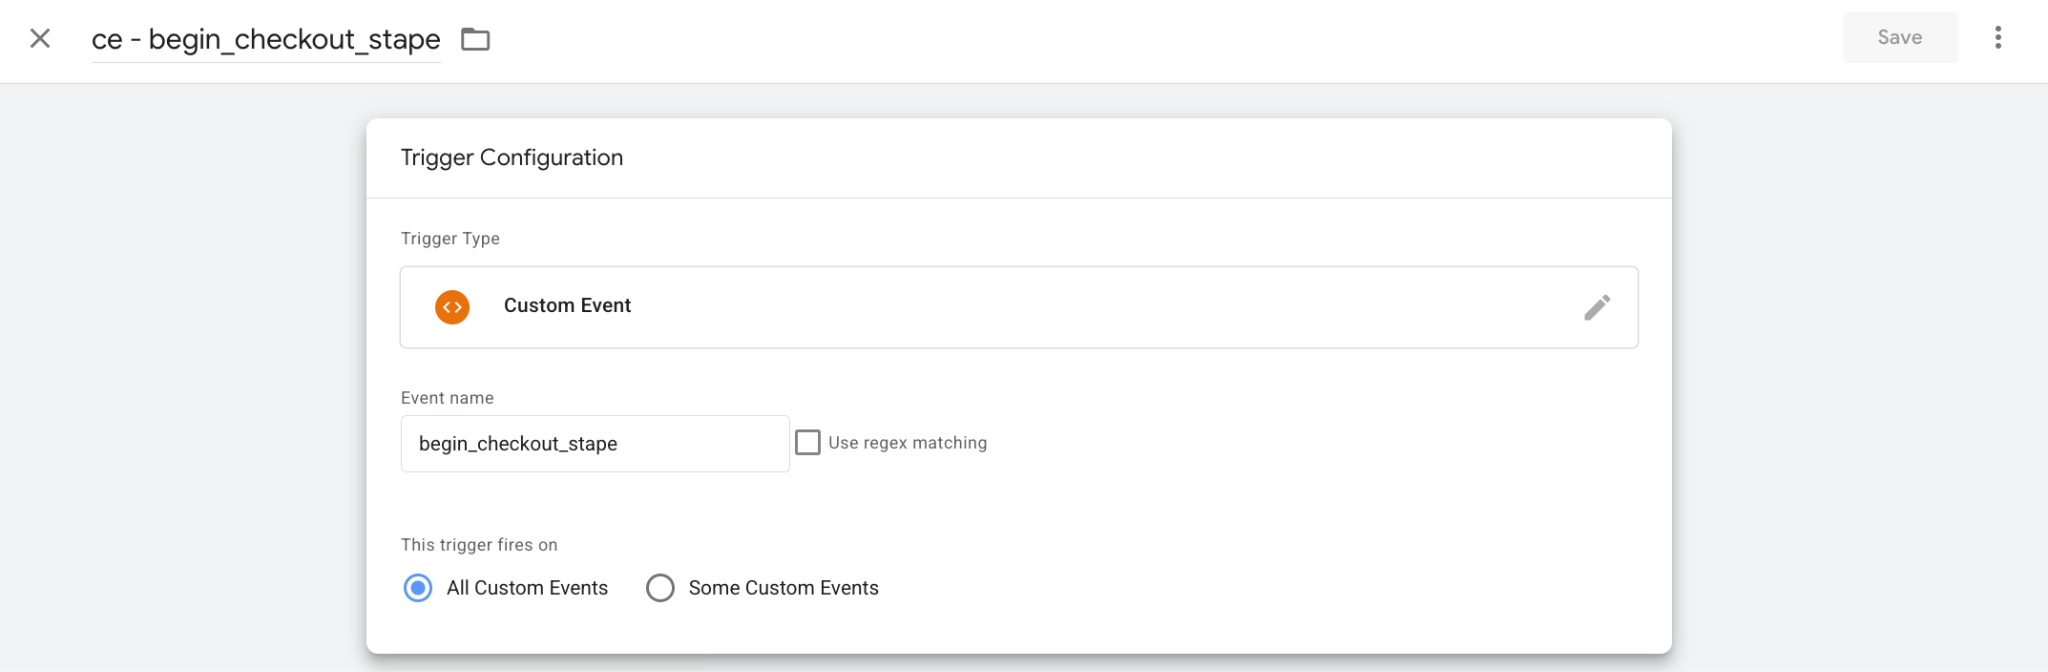
The tag must trigger on the events that take place on the checkout page; in our case, these are begin_checkout_stape
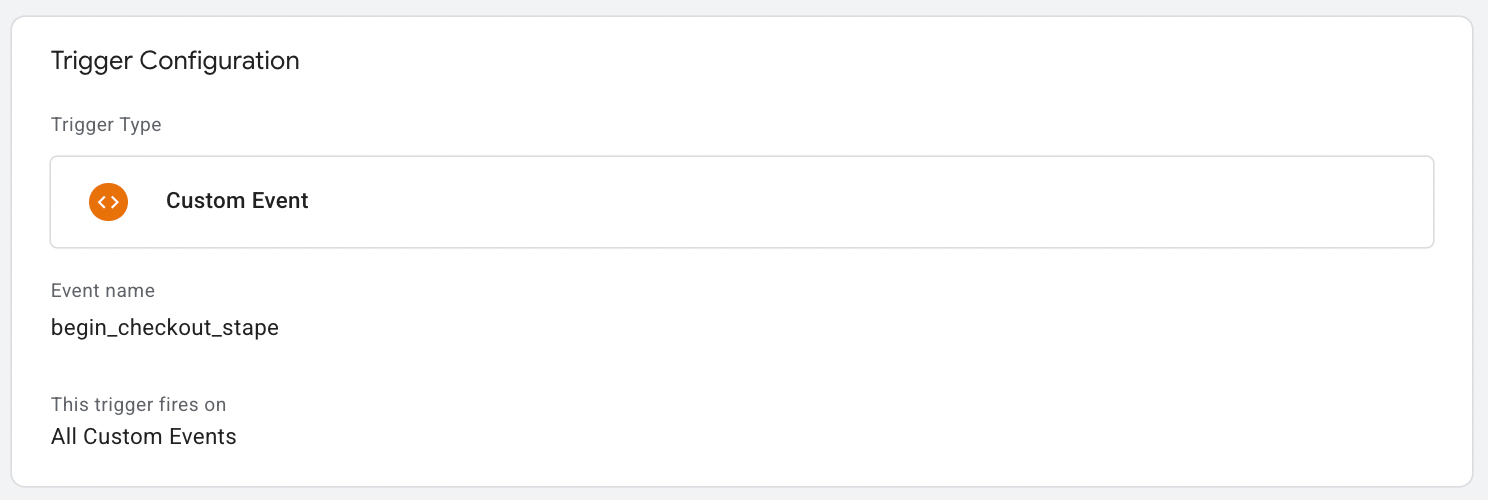
and purchase:
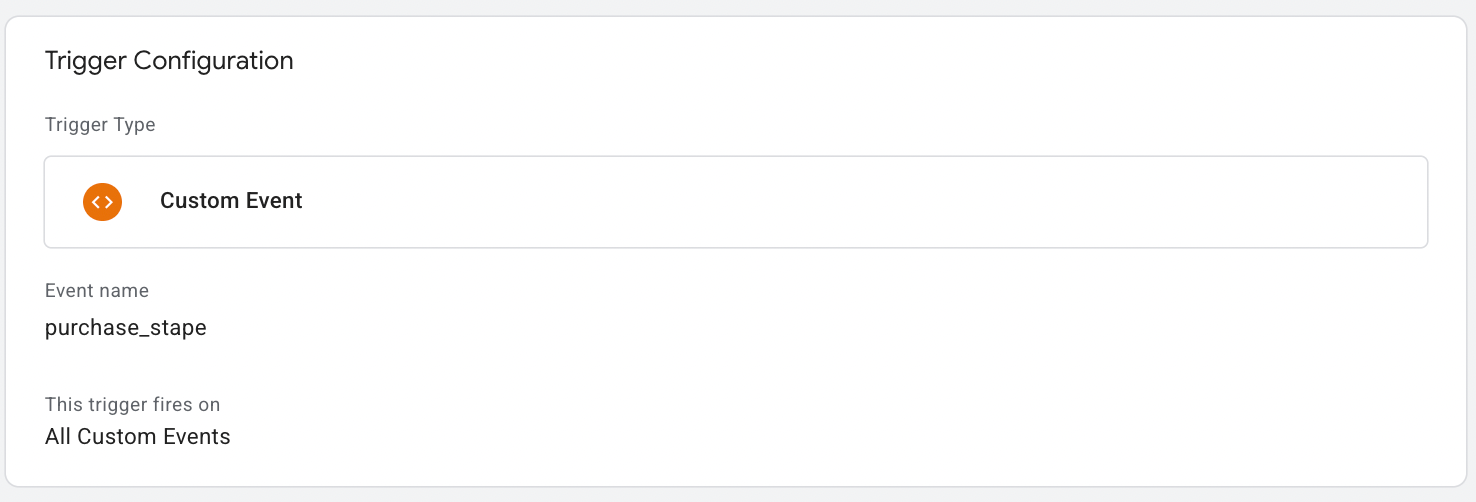
Note: the events contain "stape" since the setup is configured using the Shopify Conversion Tracking app, and this is a format of the events that are pushed to the dataLayer by the app.
Here is an example of tag configuration:

Step 2. Update triggers for tags that fire on the checkout page
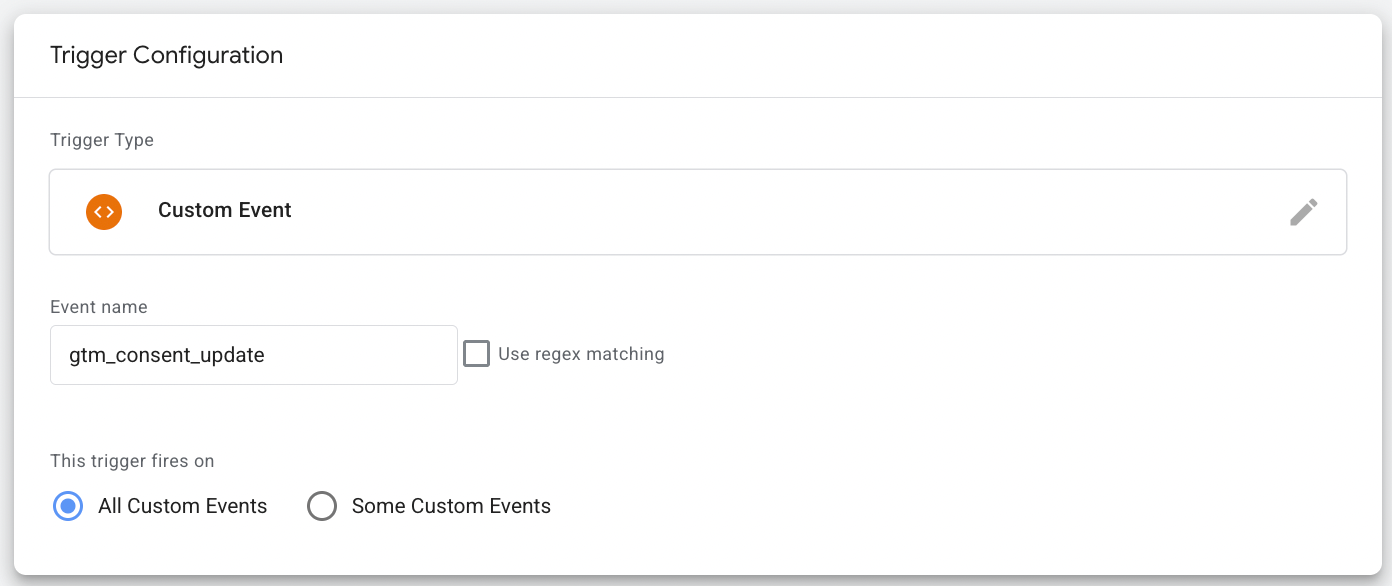
2.1 Create a trigger for the event that the Consent Mode tag pushes:
Event name: gtm_consent_update
This trigger fires on: All Custom Events
2.2 Create a trigger group for each event that happens on the checkout page.
As an example, the begin_checkout event is shown in the screenshot below.
In the Triggers section, click New → select Trigger group → add the trigger created in step 2.1 → add a trigger that fires on the checkout page.
2.3 Update the tags that fire on the checkout page with the trigger group.
Step 3. Test the configuration
3.1 Run the preview mode in the web GTM container.
3.2 Interact with the cookie banner (specify your consent preferences).
3.3 Go to the checkout page.
In debug, the Consent Update event must appear as well, and the Consent Mode tag should trigger on the first event that happens on the checkout page (begin_checkout_stape).
3.4 Then, the gtm_consent_update event, along with updated statuses, is pushed to the dataLayer.
3.5 The checkout tags are fired on the "Trigger Group."

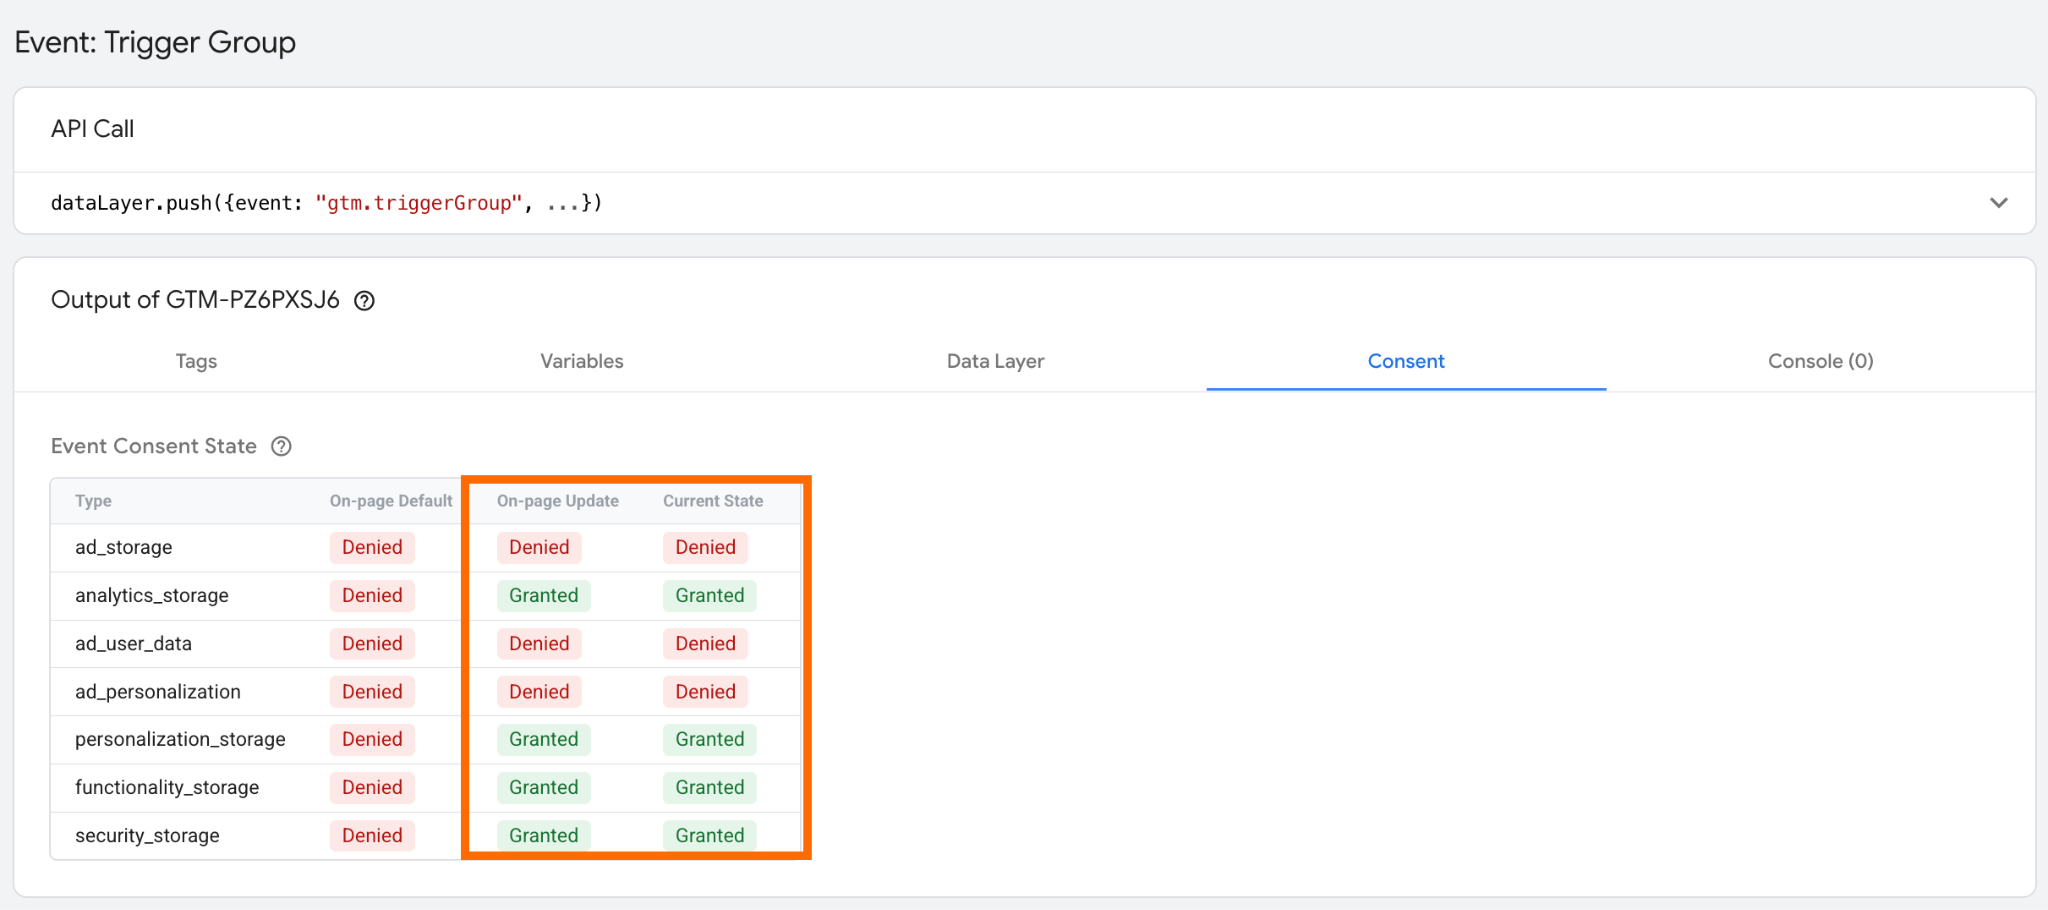
In the Consent tab, the consent statuses must be updated according to the ones specified within the consent banner on the storefront.
Was this article helpful?
Comments