How to configure the same origin domain for Shopify
Updated Sep 25, 2026
Note:
The guide explains how to configure the same origin for Shopify using Cloudflare as an example; however, the configuration can also be done through other platforms other than Cloudflare.
Cloudflare supports Shopify domains through its Orange-to-Orange (O2O) integration. With this integration, the Shopify store domain is proxied through Cloudflare and is still routing traffic correctly to Shopify.
When a user visits the store, requests first pass through the merchant's Cloudflare zone, and then are forwarded to Shopify through Cloudflare's SaaS infrastructure. Cloudflare preserves the hostname and SSL information required by Shopify, so Shopify can validate the domain and serve the correct storefront.
How to proxy the Shopify store domain
To enable the same-origin domain, the Shopify store domain must be proxied. Follow the steps below to do it using Cloudflare.
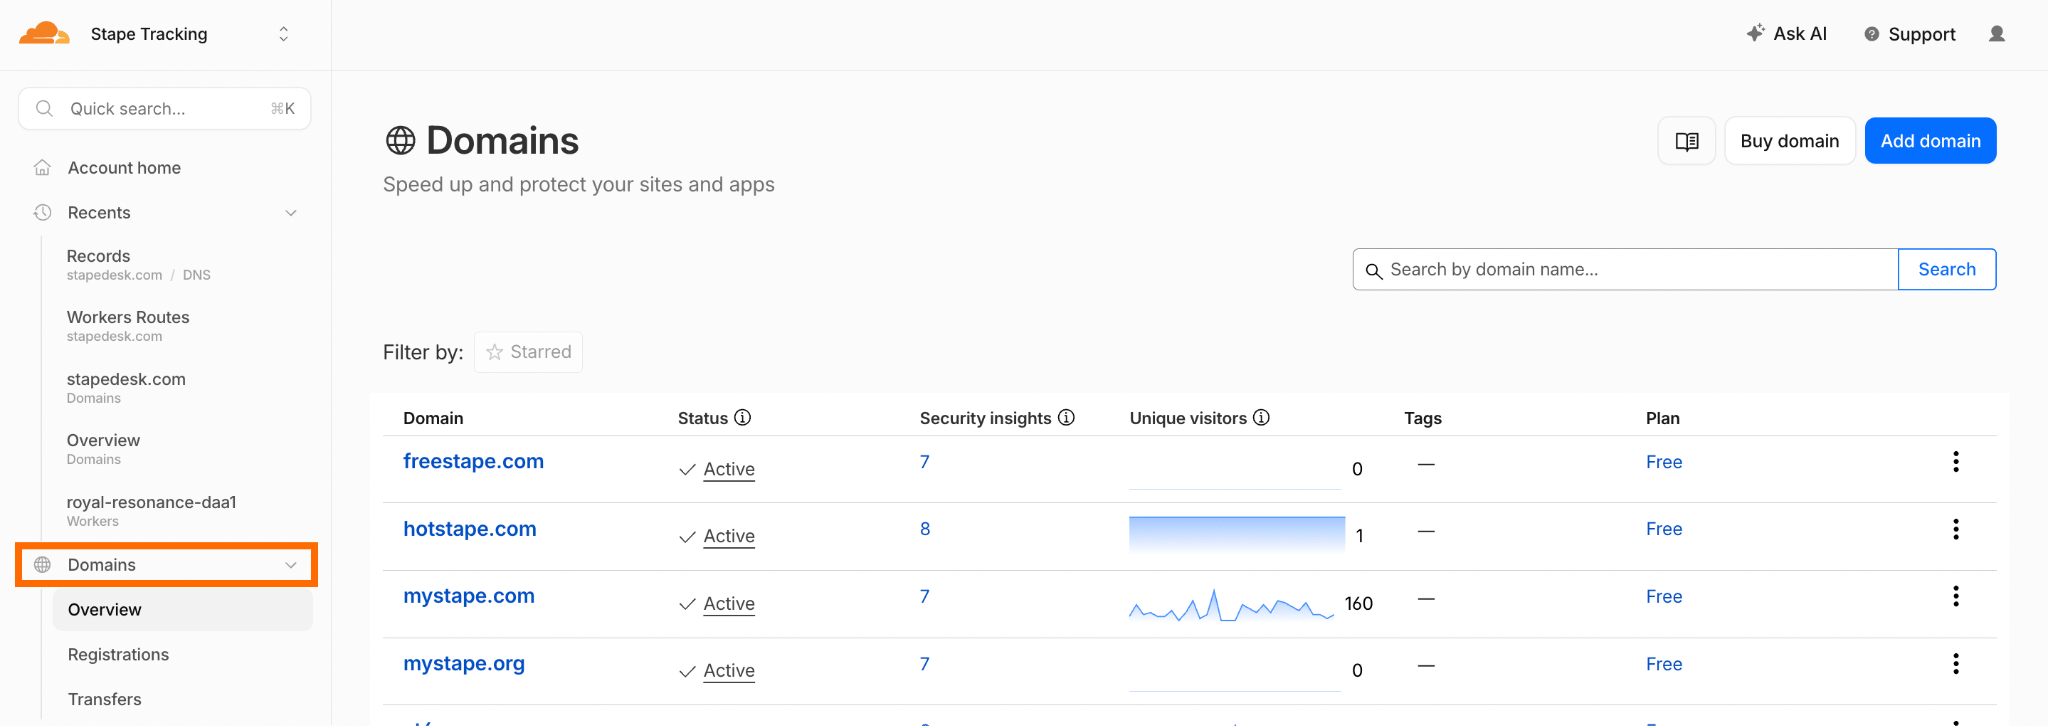
1. In the section “Domains,” select your domain.
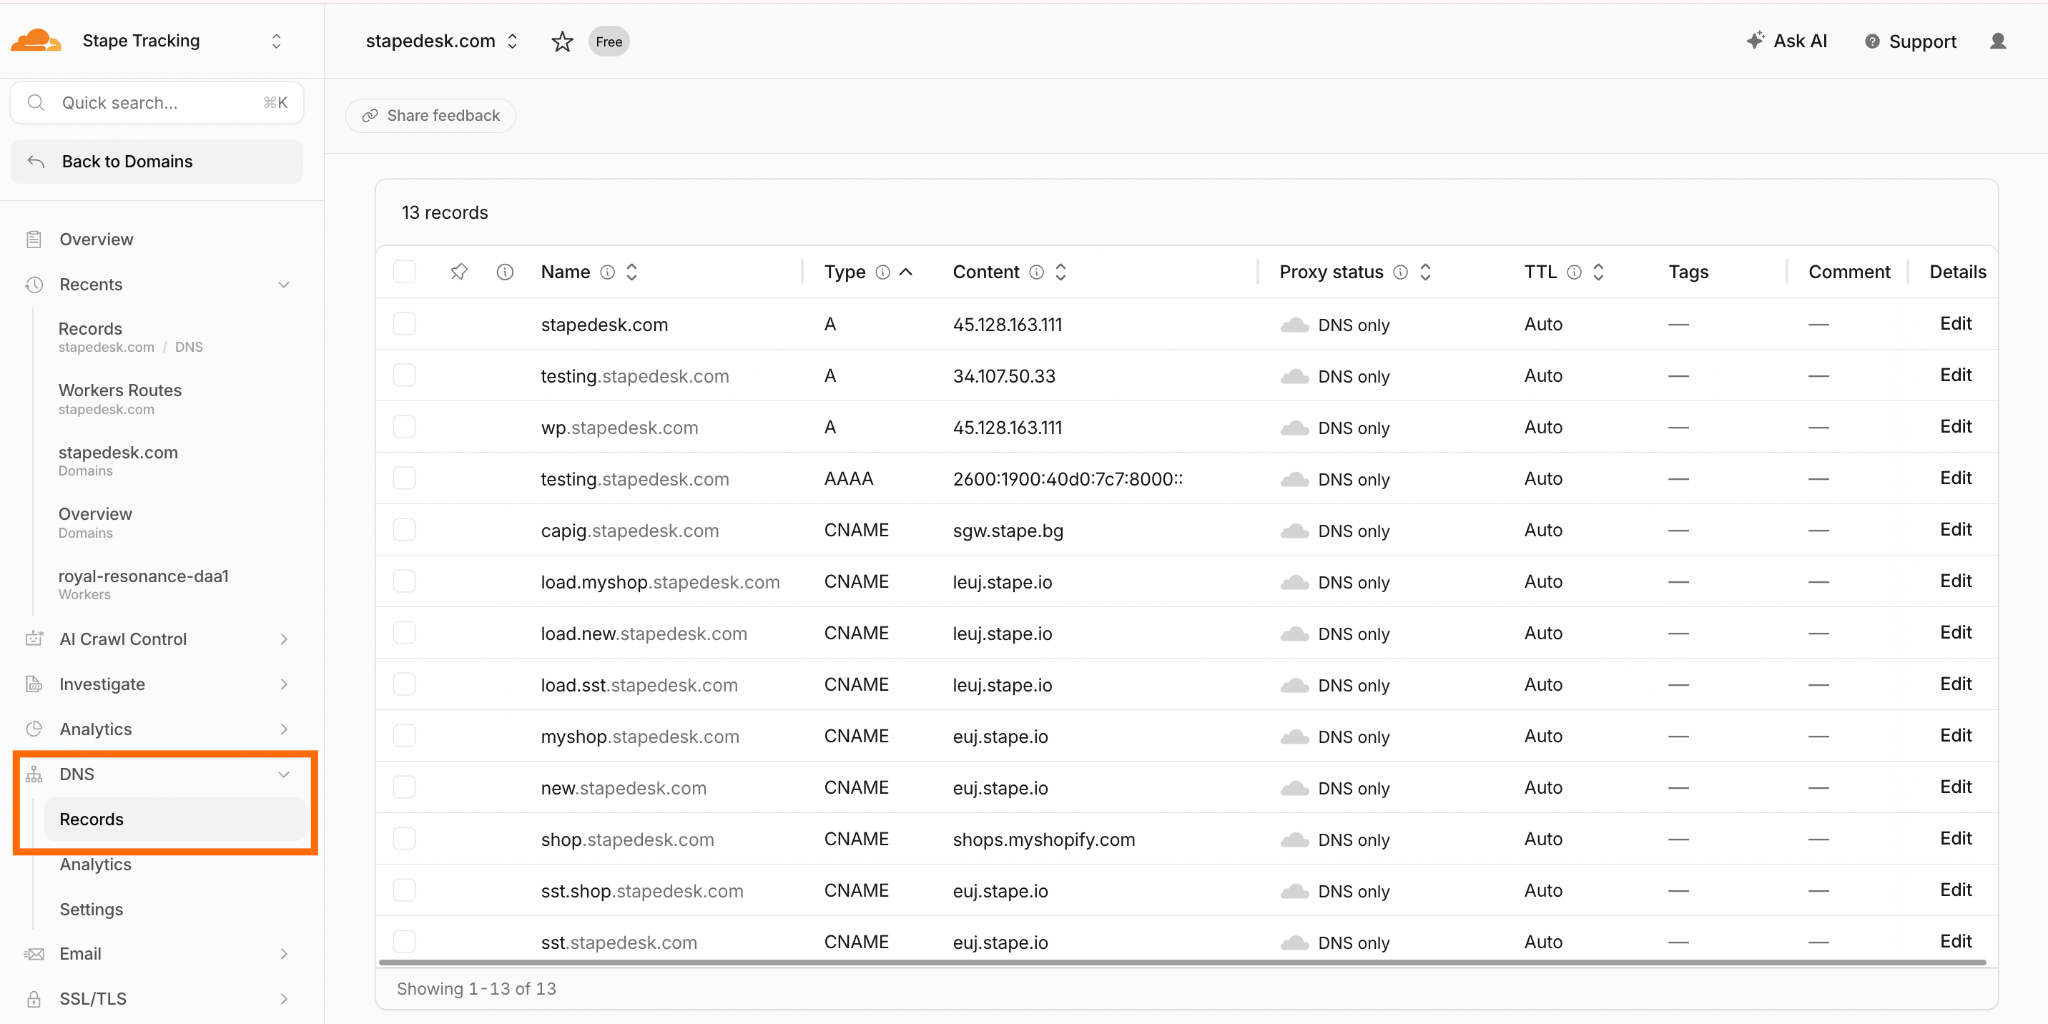
2. Navigate to DNS → Records.
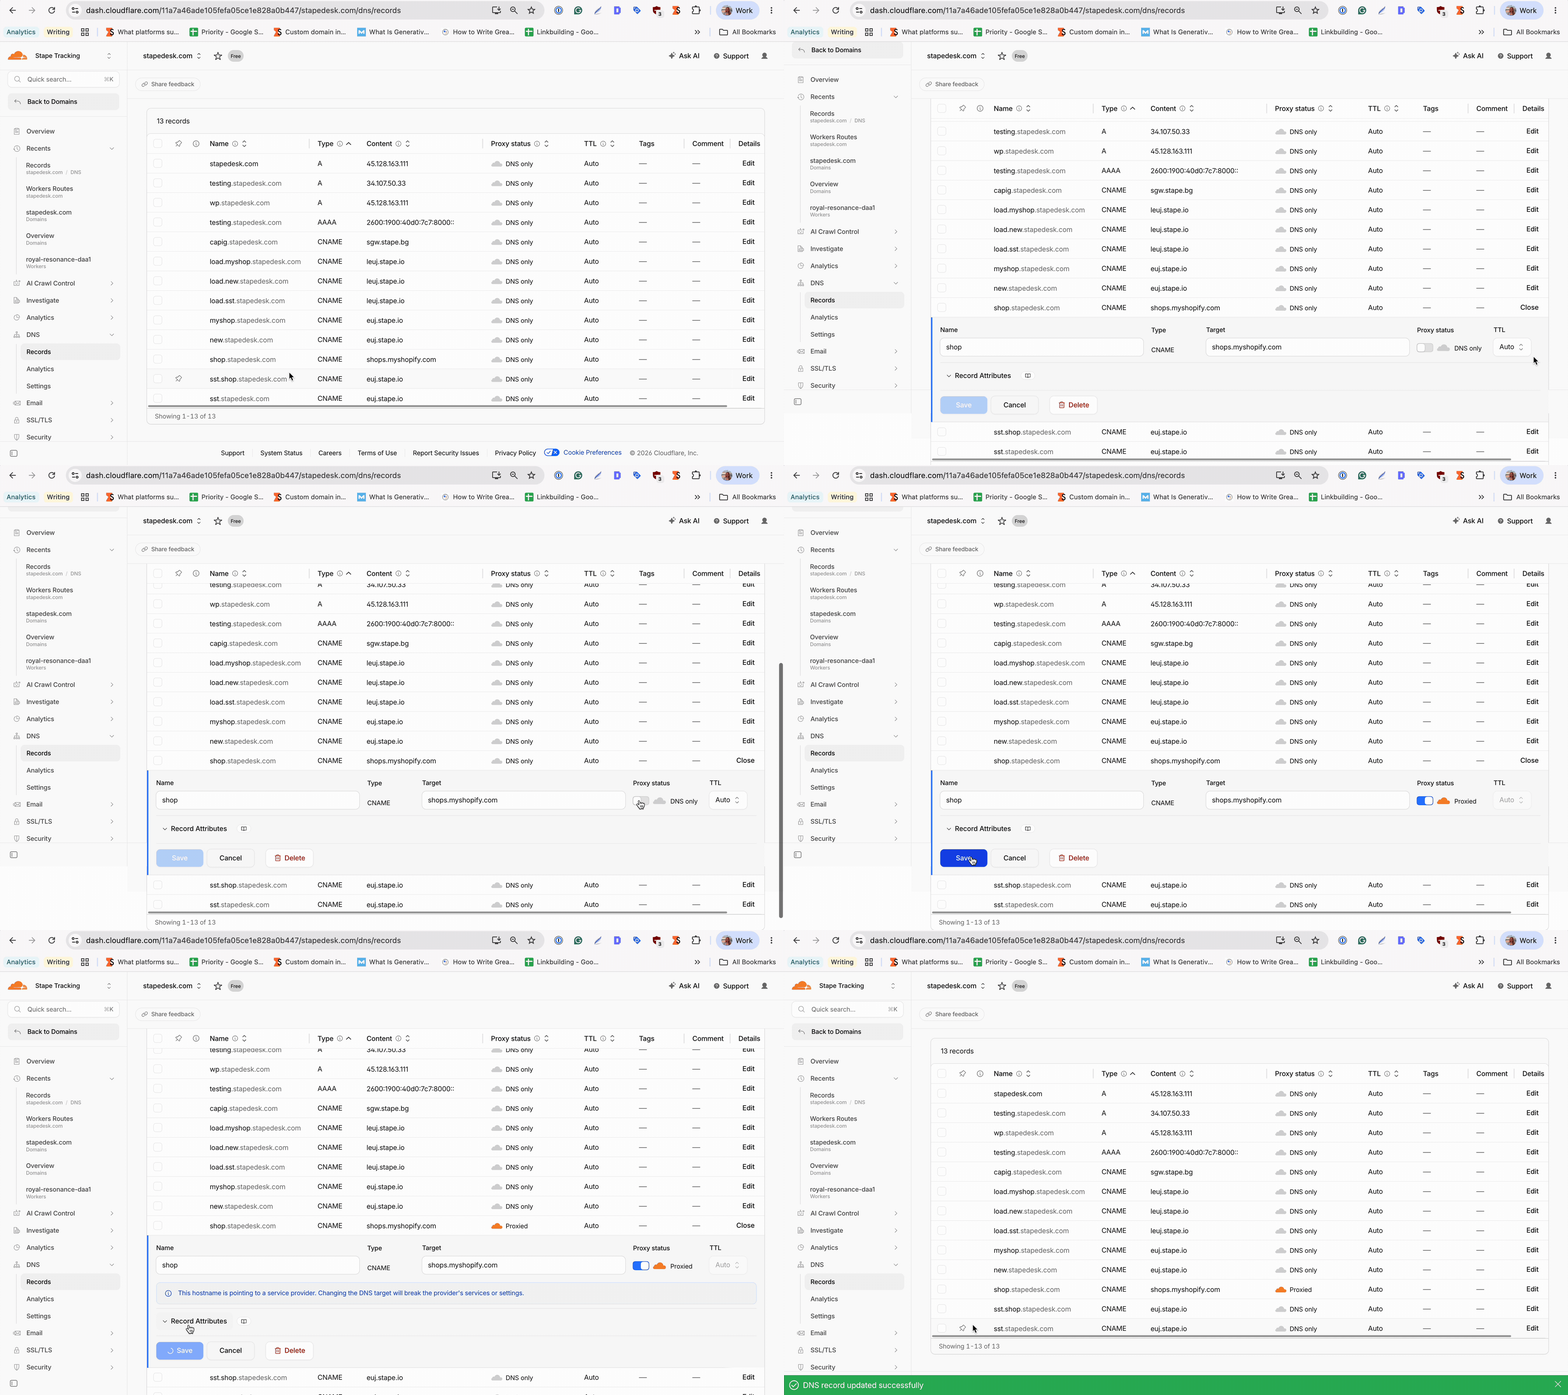
3. On the list, find the domain you want to configure the same origin domain for, click Edit → Enable proxy status → Save.
How to configure the same origin domain for the Shopify Store
Prerequisites
Before you start, make sure you have the following in place:
- A server Google Tag Manager container set up on Stape.
- A CDN or load balancer capable of forwarding requests, through which all your site traffic is routed.
- If you use App Engine, the tagging server should run version 2.2.0 or later.
Note:
Configure same origin domain step-by-step
Depending on your infrastructure, you can configure the same origin custom domain using different platforms and services. Here are the guides for each:
Note:
Below, we'll walk through the setup using Cloudflare as an example.
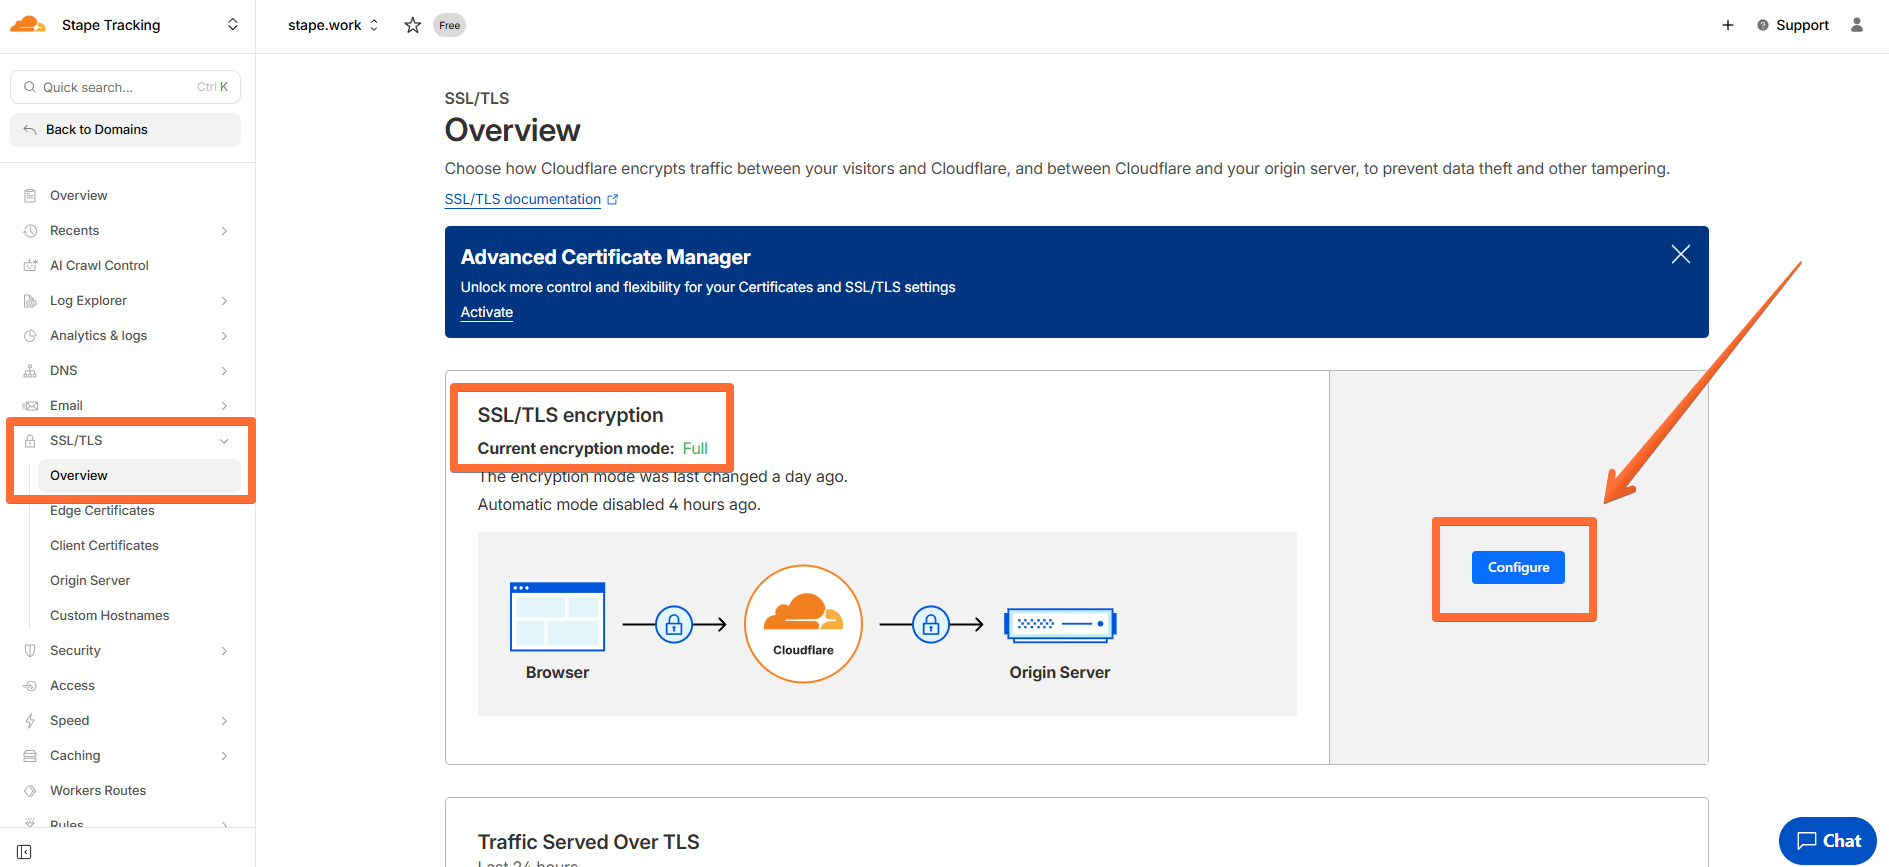
For this option to work, all your site traffic must be proxied through Cloudflare – the Cloudflare Workers functionality will then allow you to proxy sGTM requests as well. You should also use SSL/TLS in Full mode; otherwise, same-origin proxying may work via a 301 redirect, which is incorrect.
Step 1. Create a Cloudflare Worker
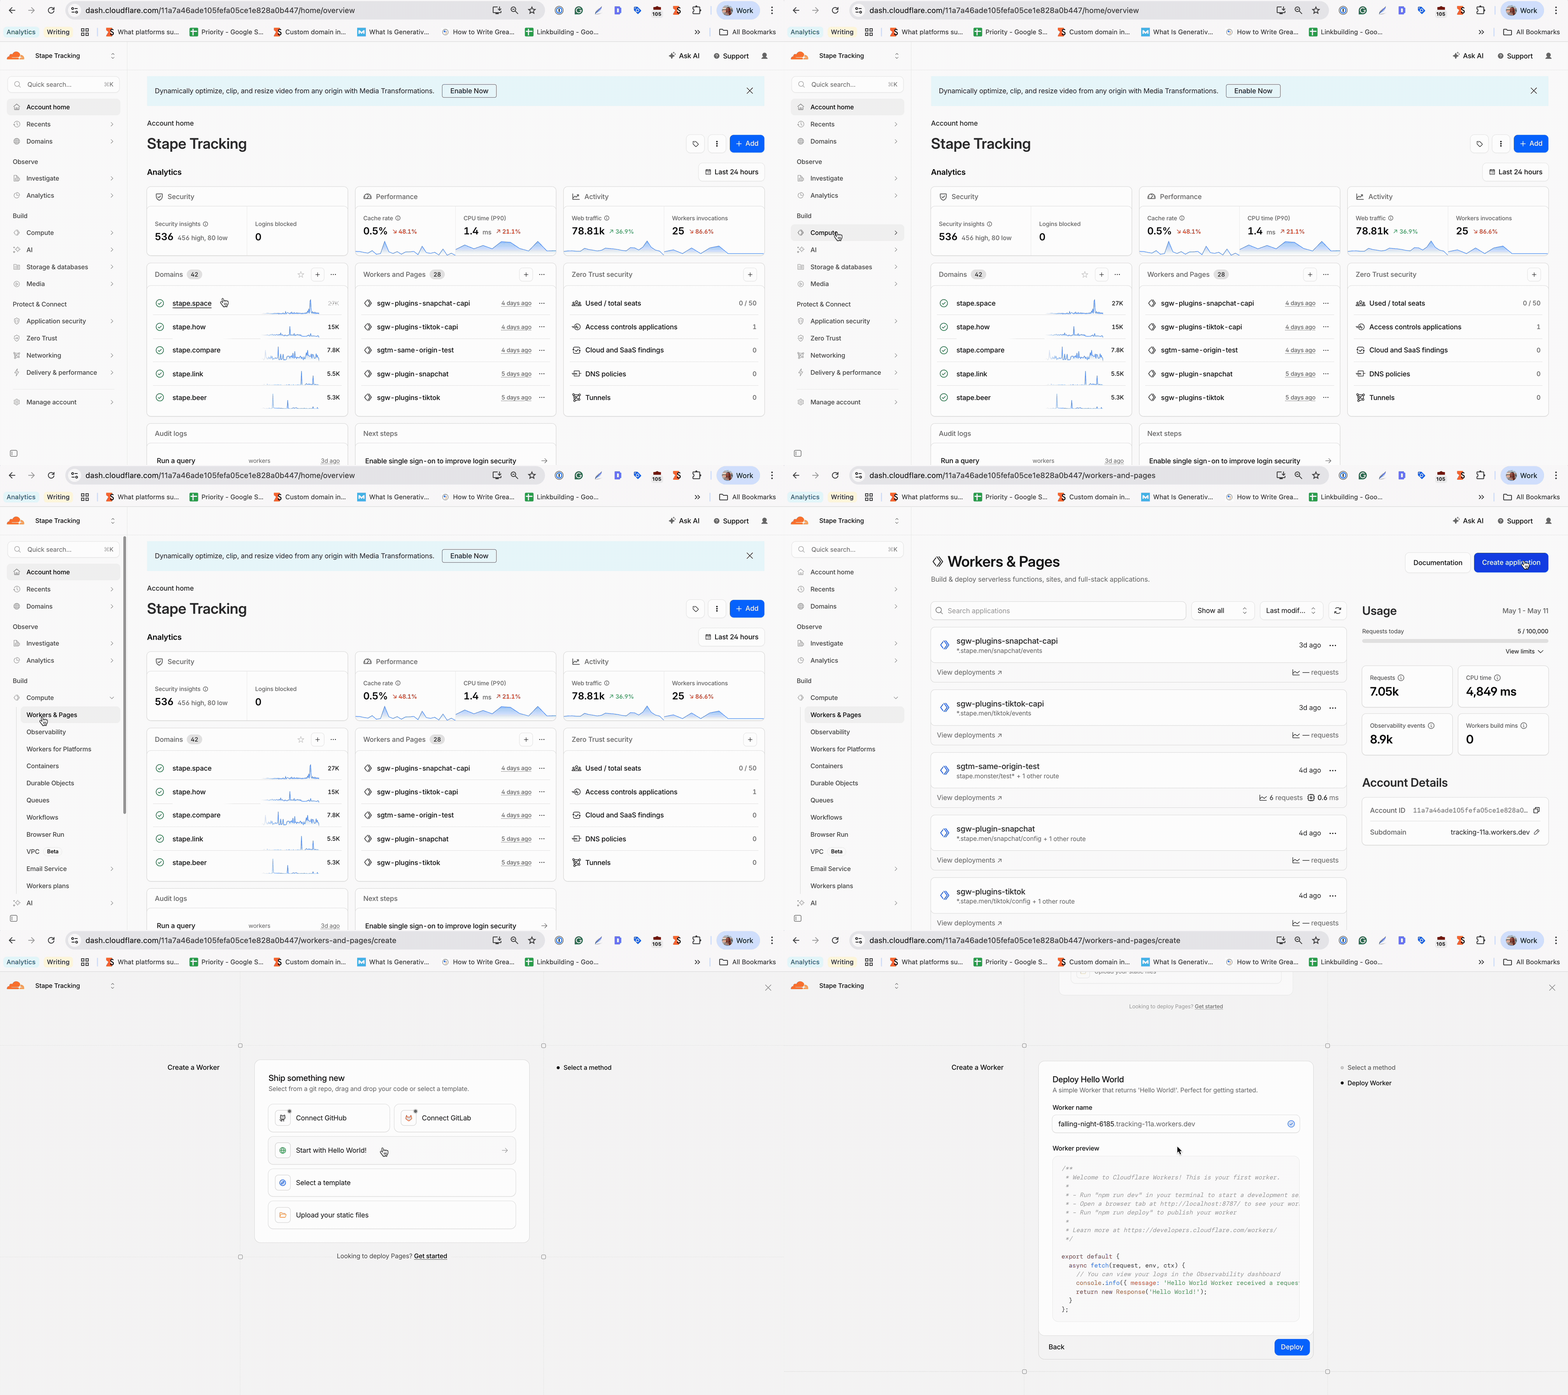
In the left sidebar, click Compute → Workers & Pages → click Create application → select the Start with Hello World! option.
Step 2. Name and deploy the worker
Add a worker name → click Deploy.
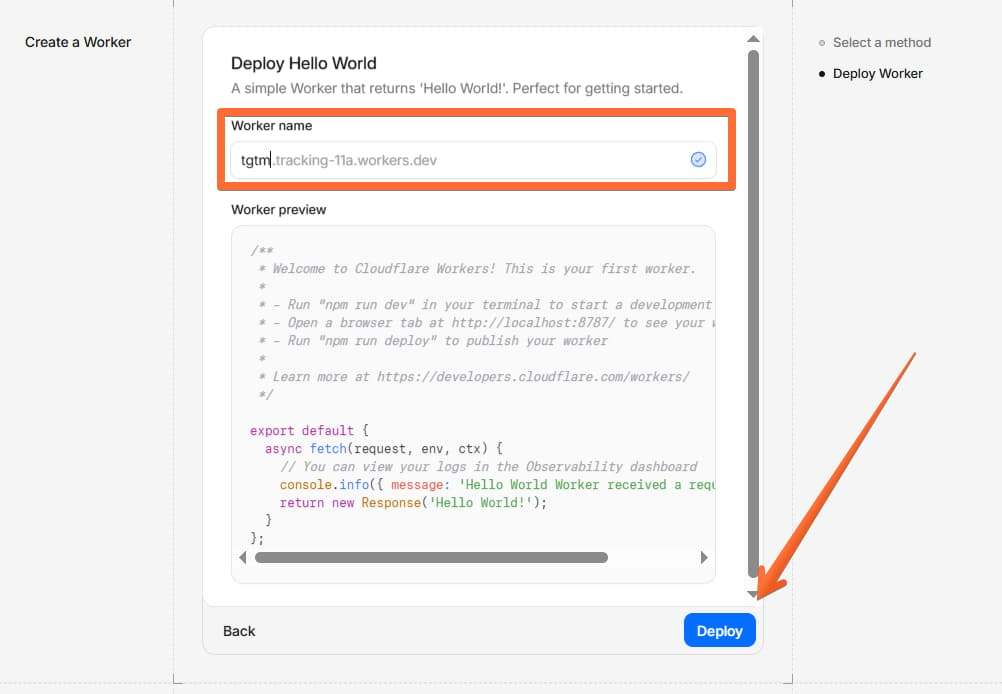
Step 3. Edit the worker code
Decide on the path for your sGTM custom domain – for example, example.com/sgtm, example.com/data, or example.com/metrics.
In the worker settings, click Edit code and paste in JS similar to the example below, where:
/metrics/is the path you've chosen for your server container.https://sst.shop.stapedesk.com/is your tagging server URL.
For the tagging server URL, you have two options:
- The default tagging server URL provided by Stape (e.g.,
https://wapdsrl.ca.stape.io). - The custom subdomain you've set up inside the Stape admin. Using a custom subdomain gives you two advantages: it loads
gtm.jsandgtag.jsfrom a custom path via the Custom Loader power-up, making tracking scripts unblockable, and it enables long-lived first-party cookies.
If you use a custom subdomain as your same-origin tagging server URL, make sure you've added a custom domain to your sGTM container on Stape and created the required DNS records as described here. Do not use Own CDN with the same origin domain.
export default {
  async fetch(request, env, ctx) {
    let { pathname, search, host } = new URL(request.url);
    pathname = pathname.replace('/metrics/', '/');
    const domain = 'sst.shop.stapedesk.com';
    let newRequest = new Request((`https://` + domain + pathname + search), request);
    newRequest.headers.set('Host', domain);
    return fetch(newRequest);
  },
};
Deploy and save your changes.
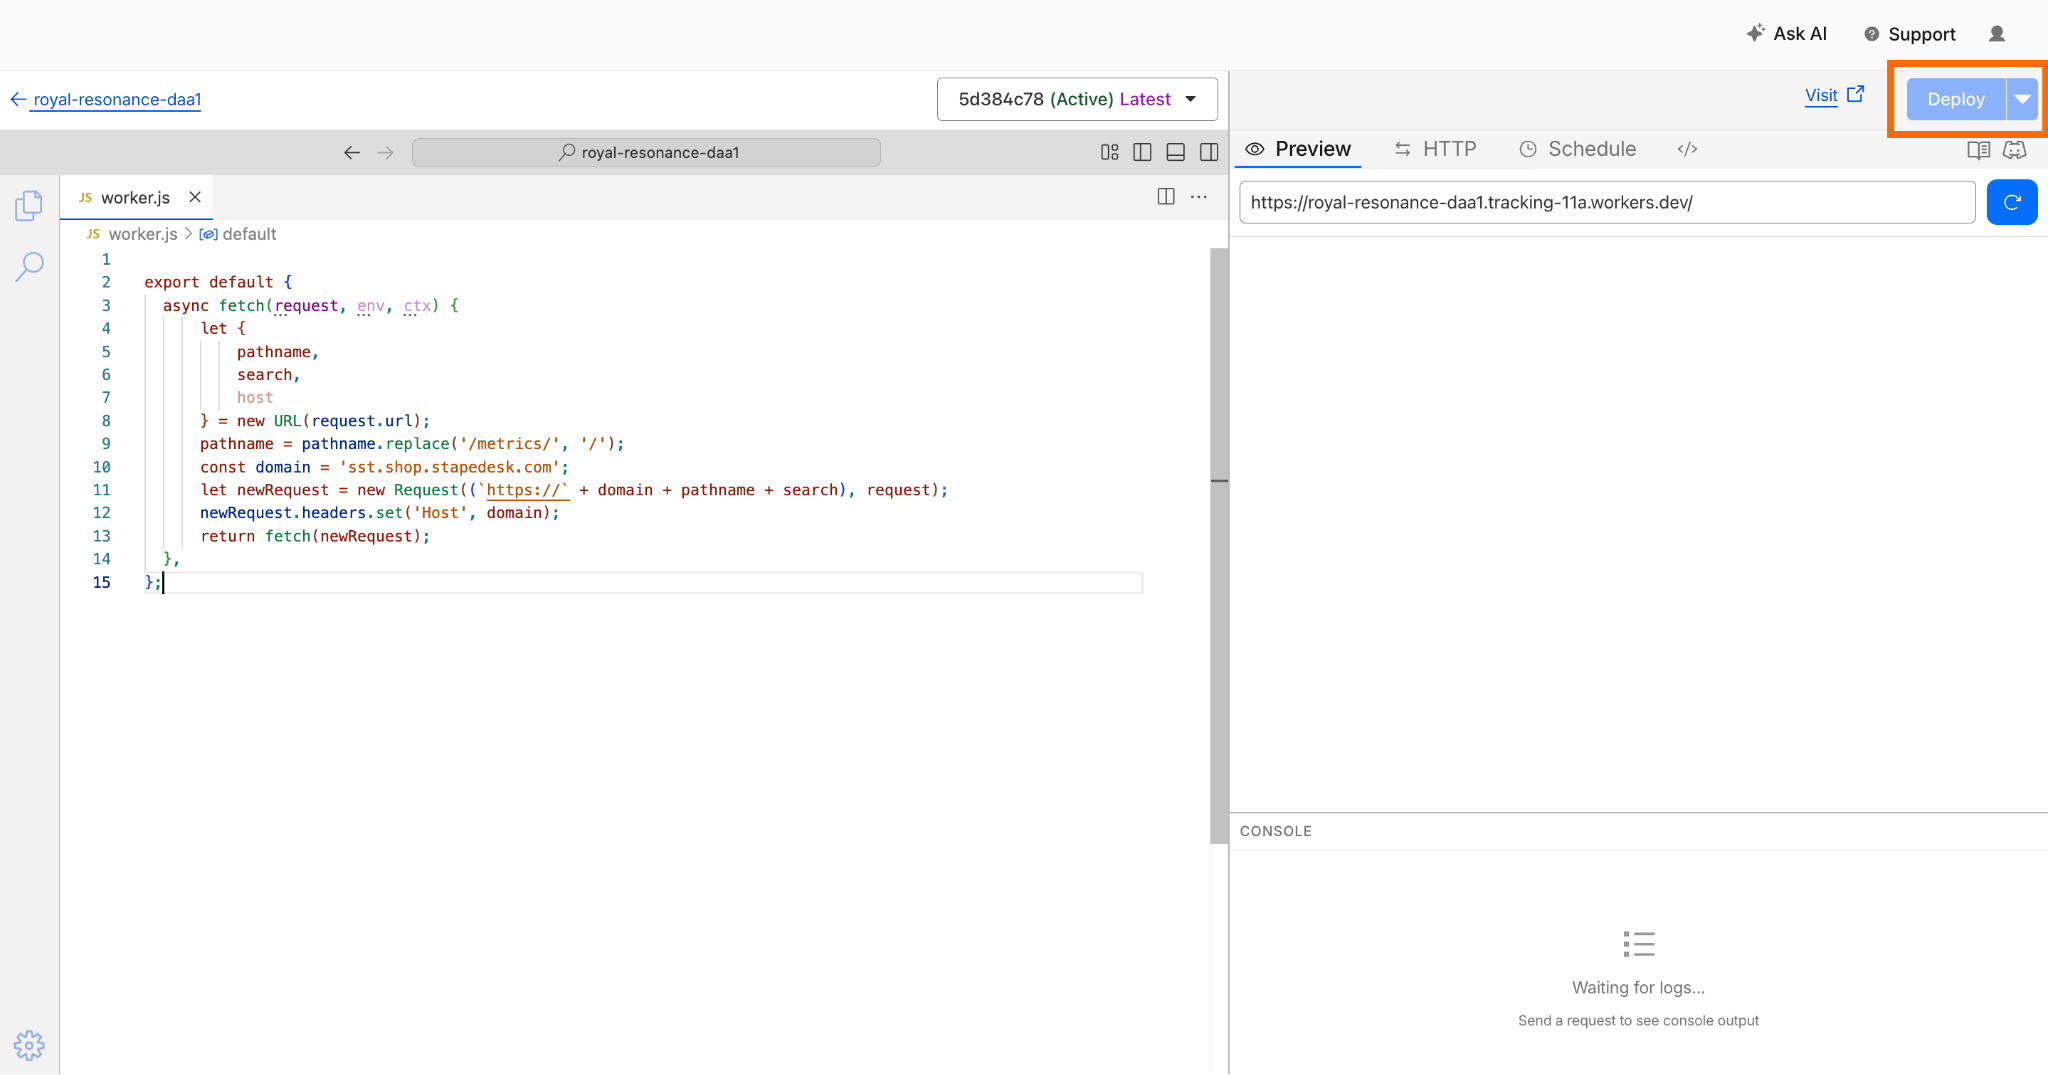
Step 4. Add a route to the worker
Go to your sGTM worker → click Domains → Add domain → Route pattern. Select your domain from the list and add the URL you use for the server GTM ending with * (in our example, it's shop.stapedesk.com/metrics*).
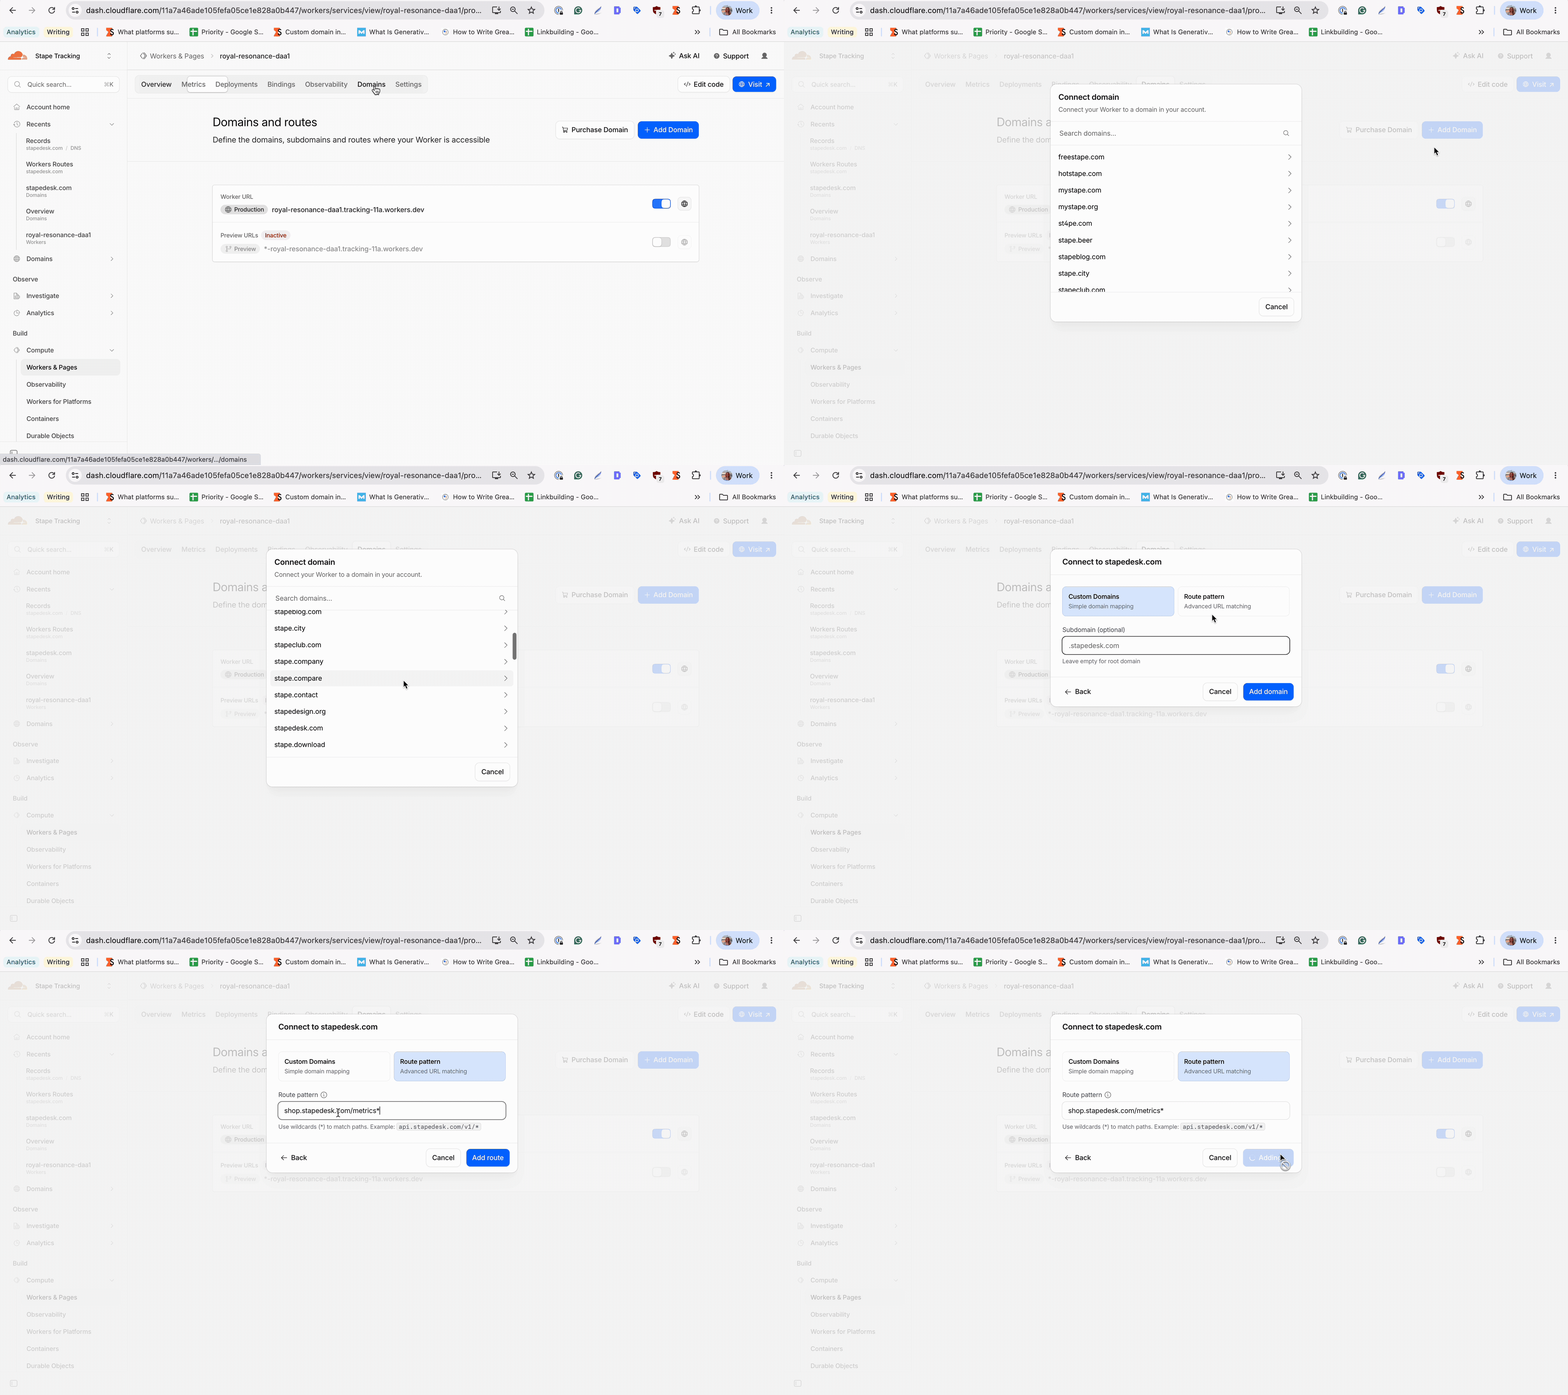
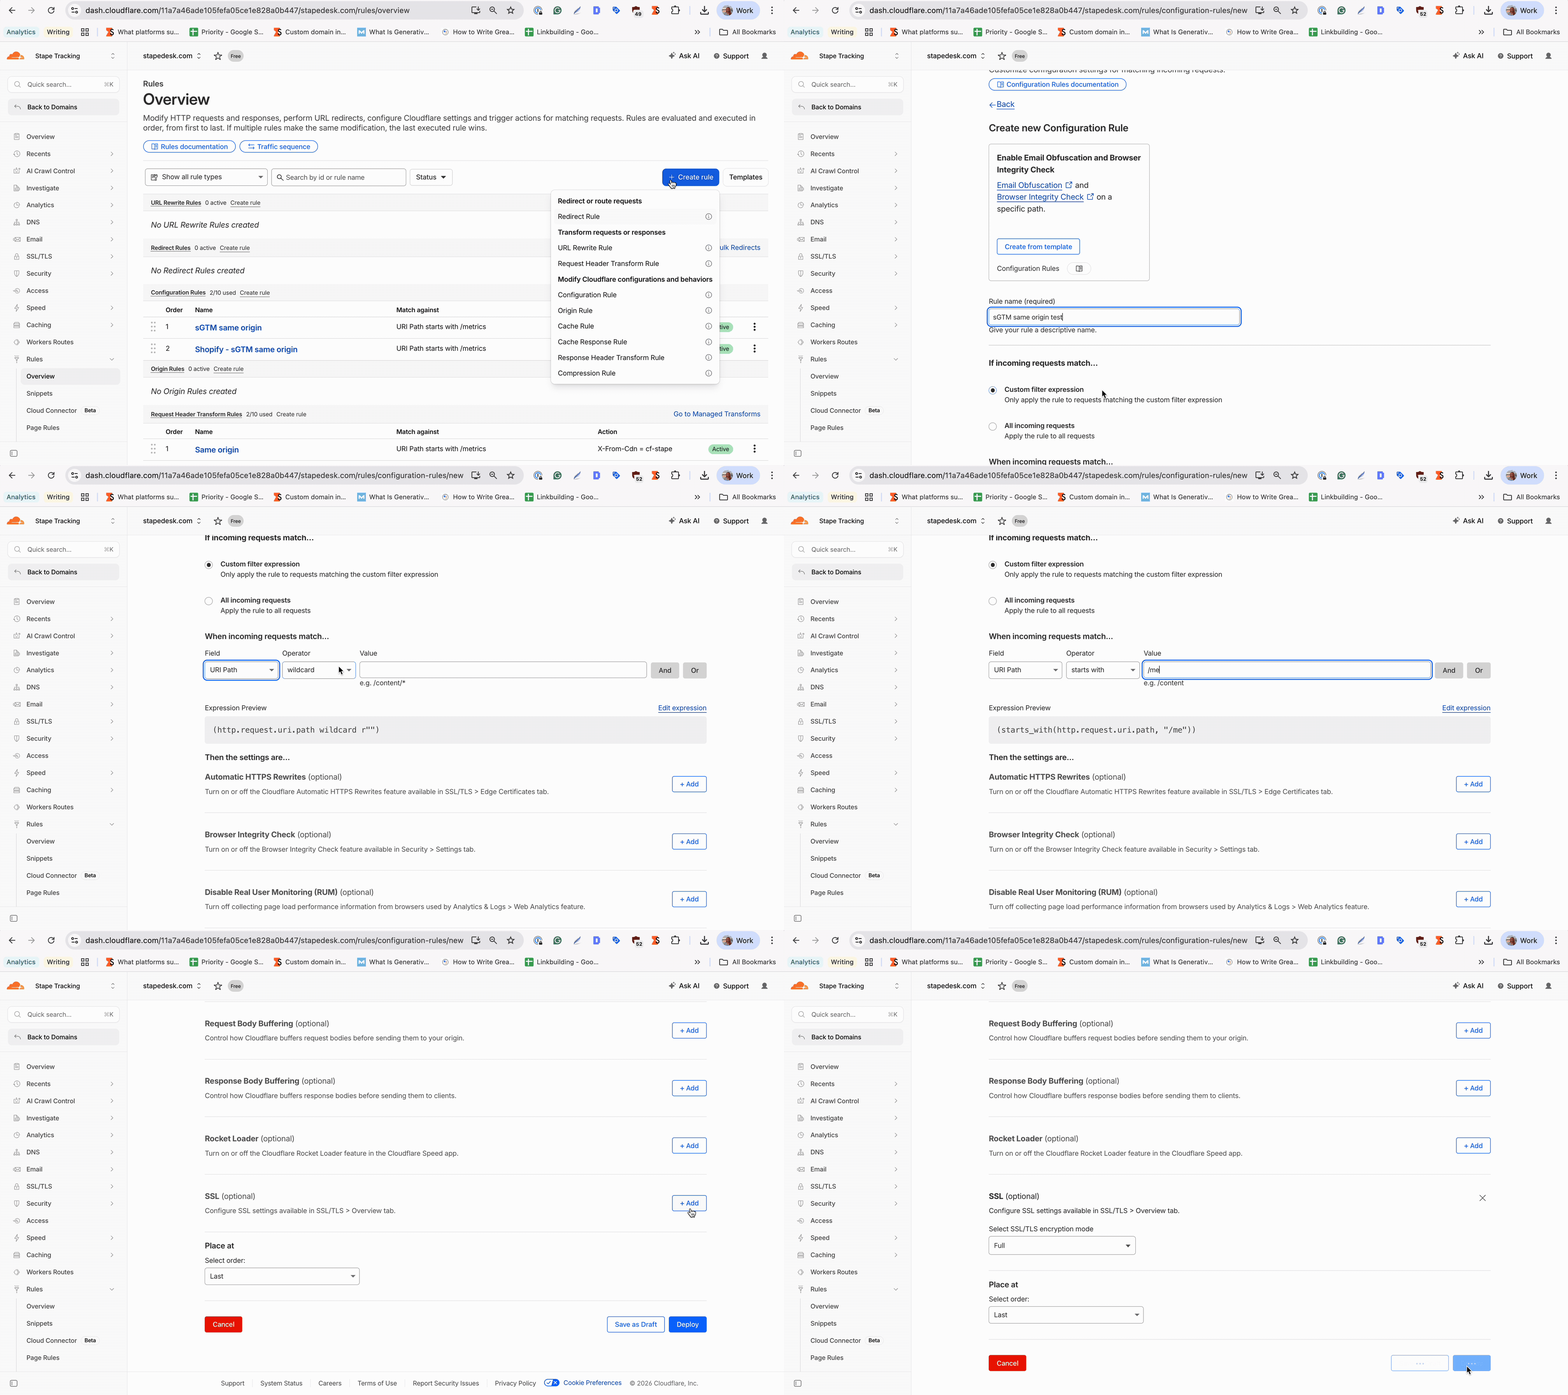
Step 5. Create a Configuration Rule
Next to your domain name, click the three dots → Configure Rules.
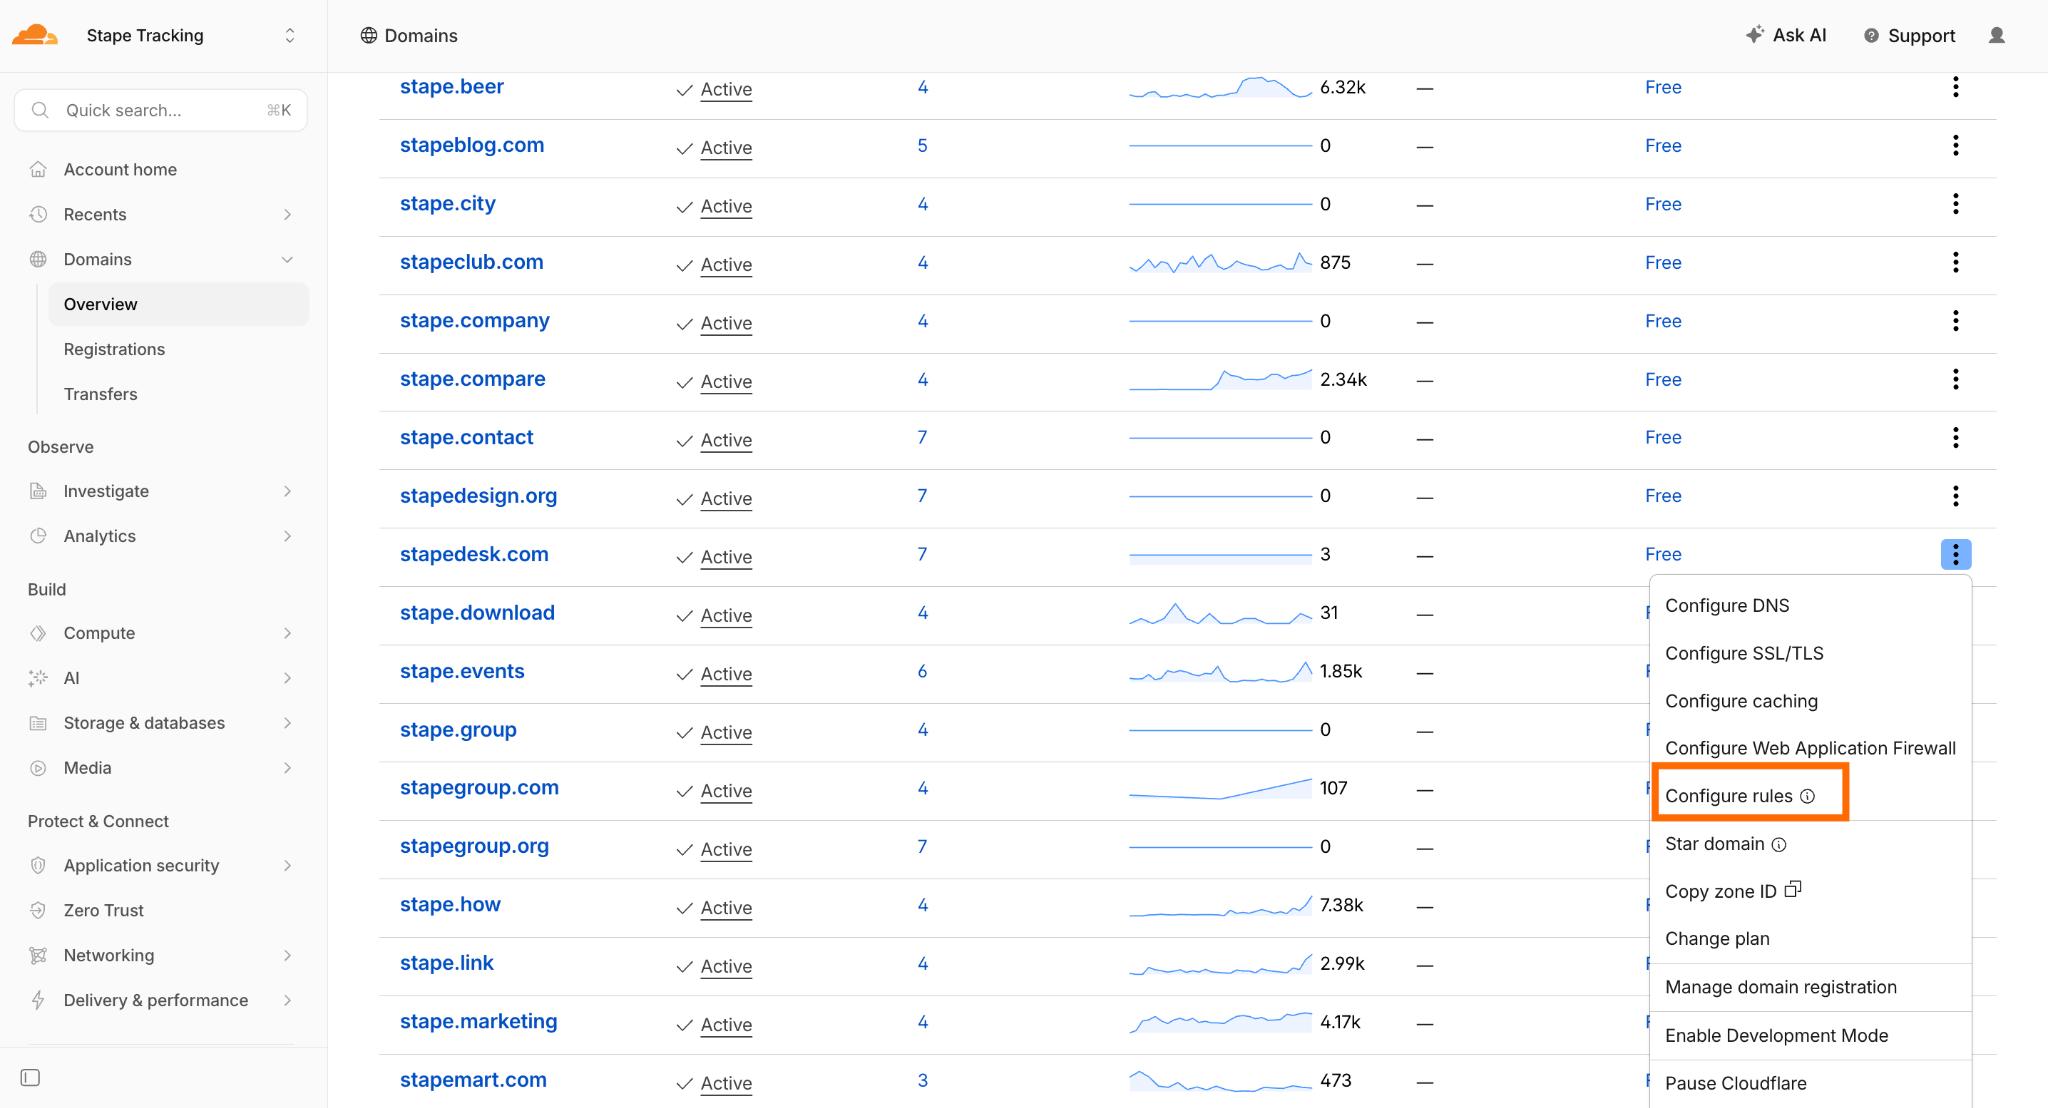
Click Create rule → Configuration Rules:
- Specify any understandable rule name, e.g., sGTM same origin.
- Select Custom filter expression.
- URI Path starts with
/metrics(update this if you're using a different path). - SSL → select the option Full.
Click Deploy.
Step 6. Create a Request Header Transform Rule
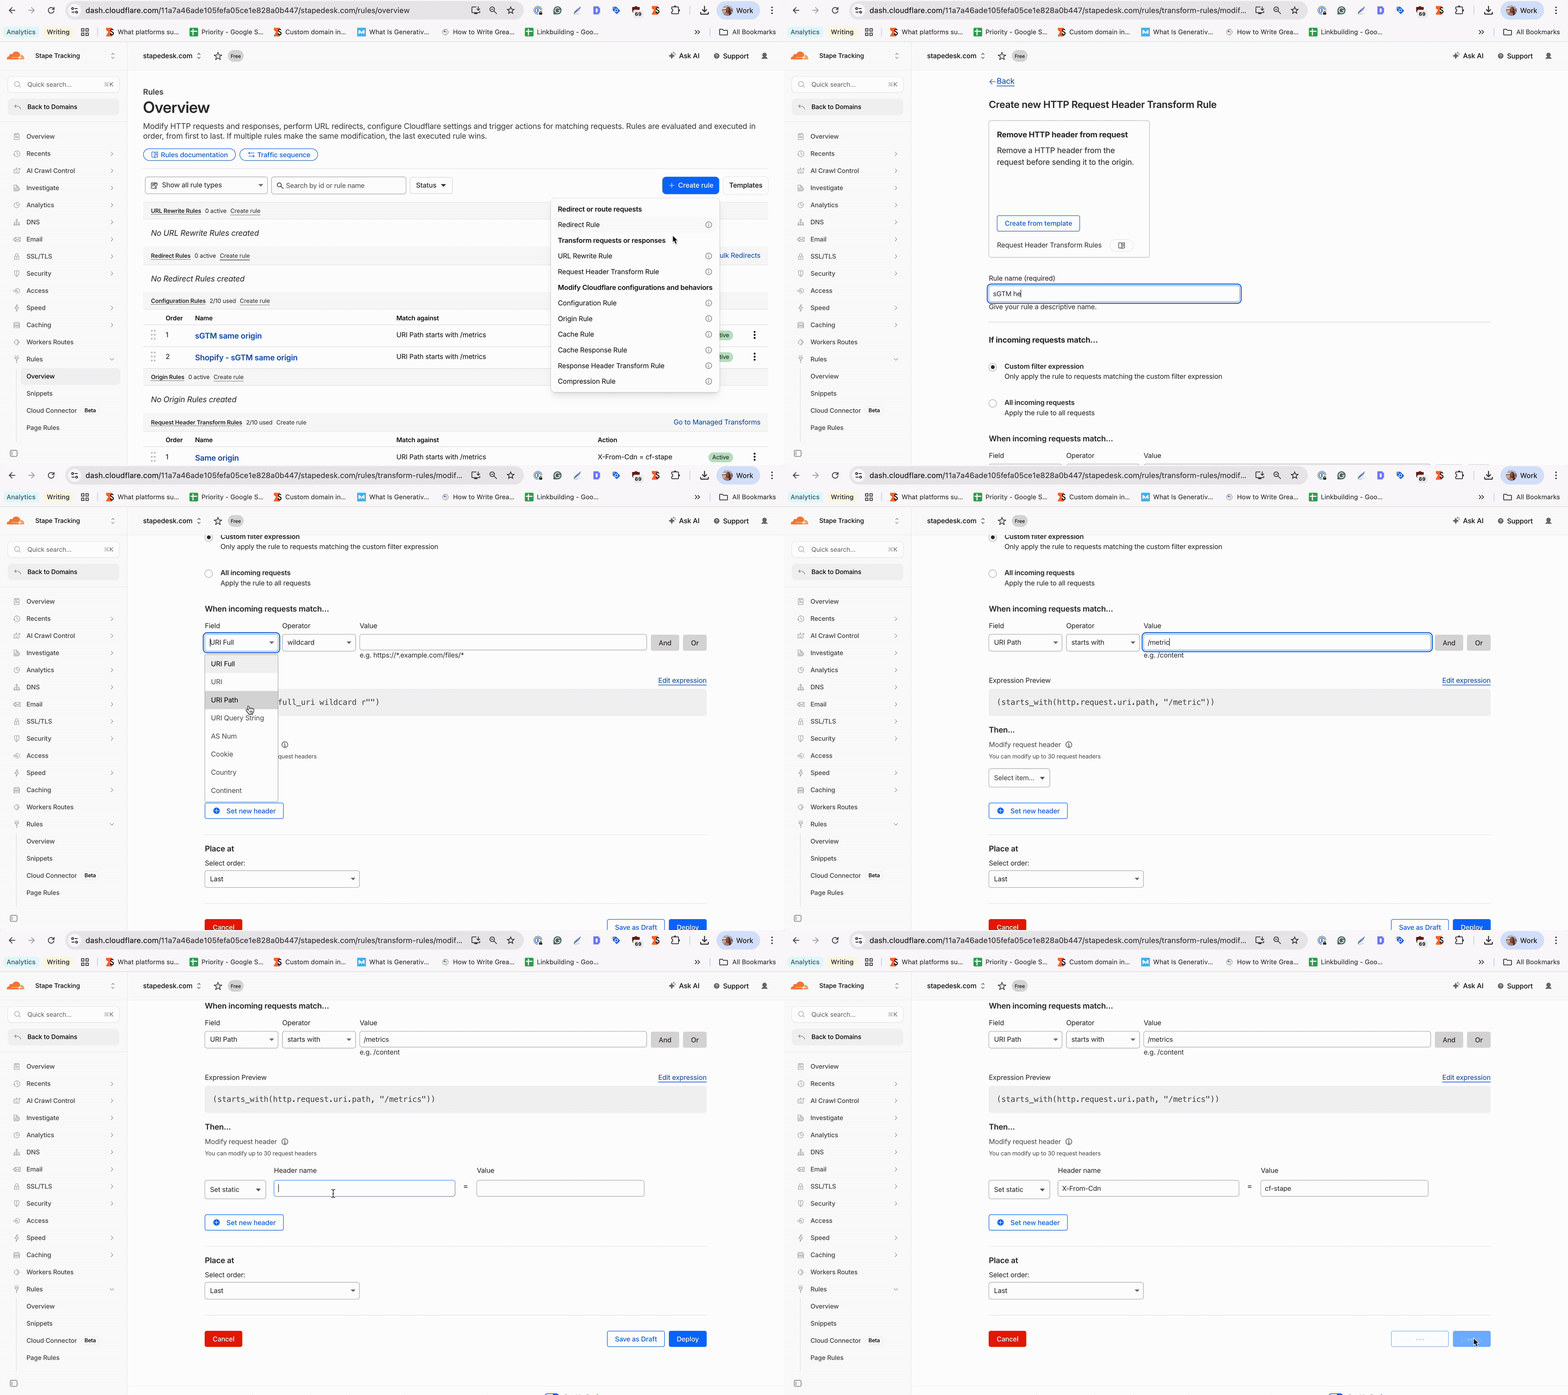
Go to Rules → Overview → Create Rule → Request Header Transform Rule:
- Enter a descriptive rule name, e.g., sGTM header.
- Select Custom filter expression.
- URI Path starts with
/metrics(update this if you're using a different path). - Set a static header name
X-From-Cdnwith the valuecf-stape.
Save the rule.
Step 6.1. Add the X-Stape-Host header (if not using a custom subdomain)
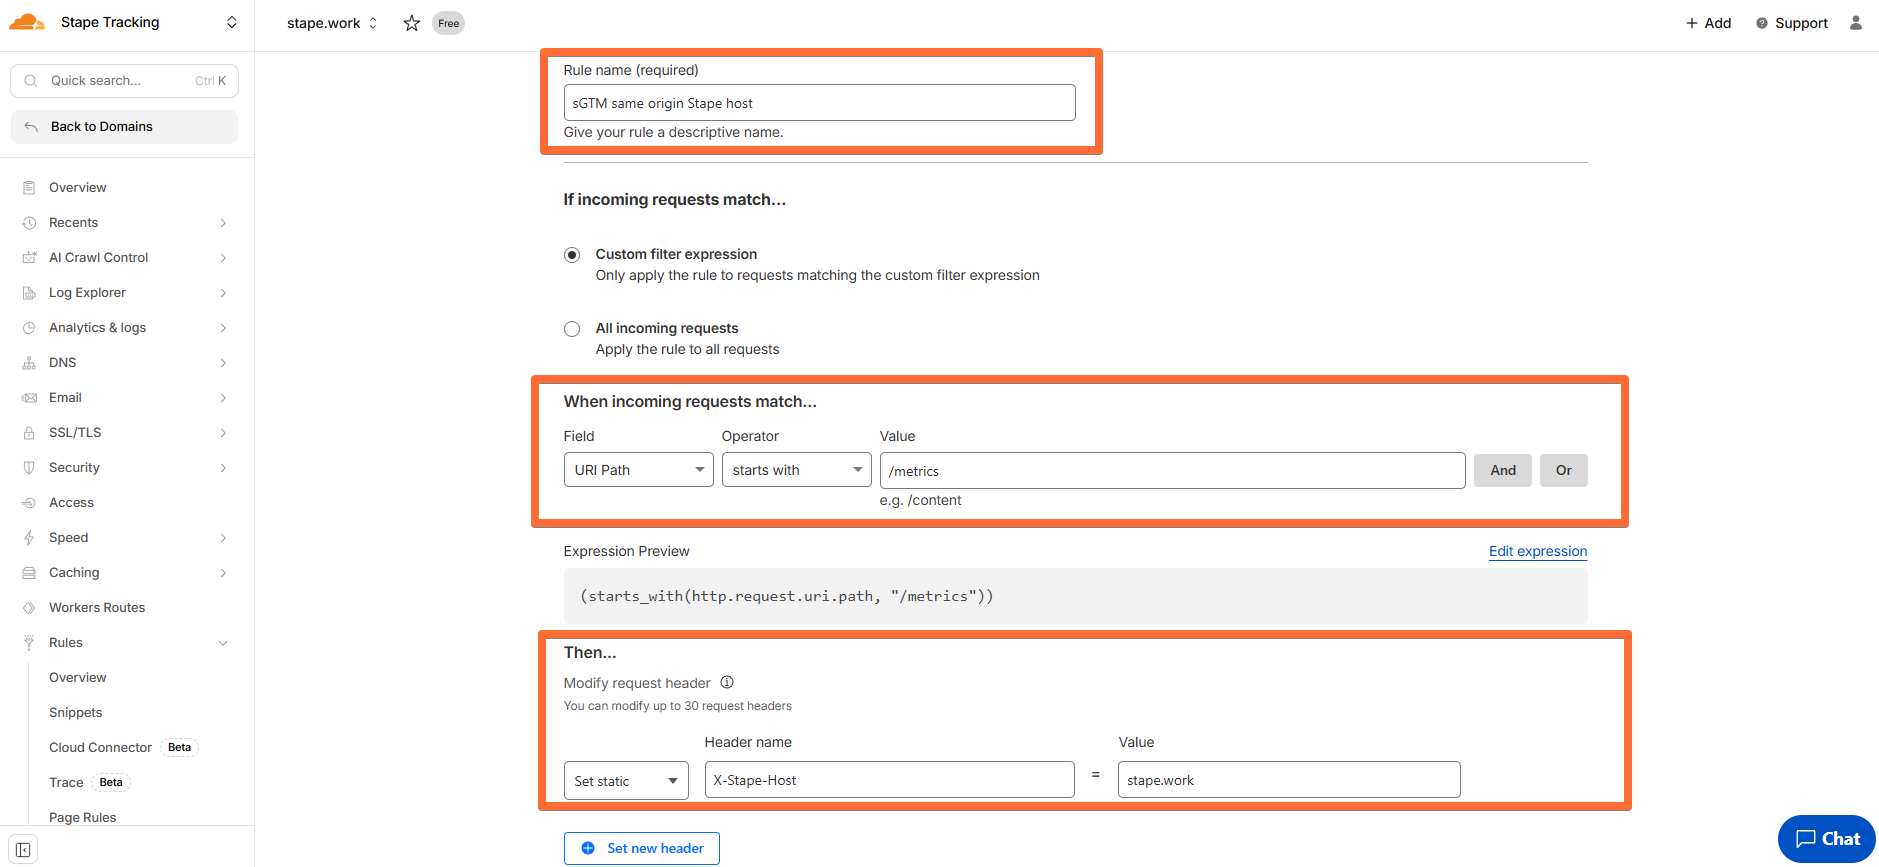
If you're not using your own subdomain and are proxying requests to the standard Stape subdomain, you also need to add the X-Stape-Host header.
Go to Rules → Overview → Create Rule → Request Header Transform Rule:
- Enter a descriptive rule name, e.g., sGTM same origin Stape host.
- Select Custom filter expression.
- URI Path starts with
/metrics(update this if you're using a different path). - Set a static header name
X-Stape-Hostwith the value of the host where events are taking place (in our example, it's stape.work).
Save the rule.
Step 7. Update Custom Loader
Once the same origin setup is done, we also recommend updating the Custom Loader power-up for ad blocker protection and implementing it on your site. Don’t forget to specify your Same Origin path in it.
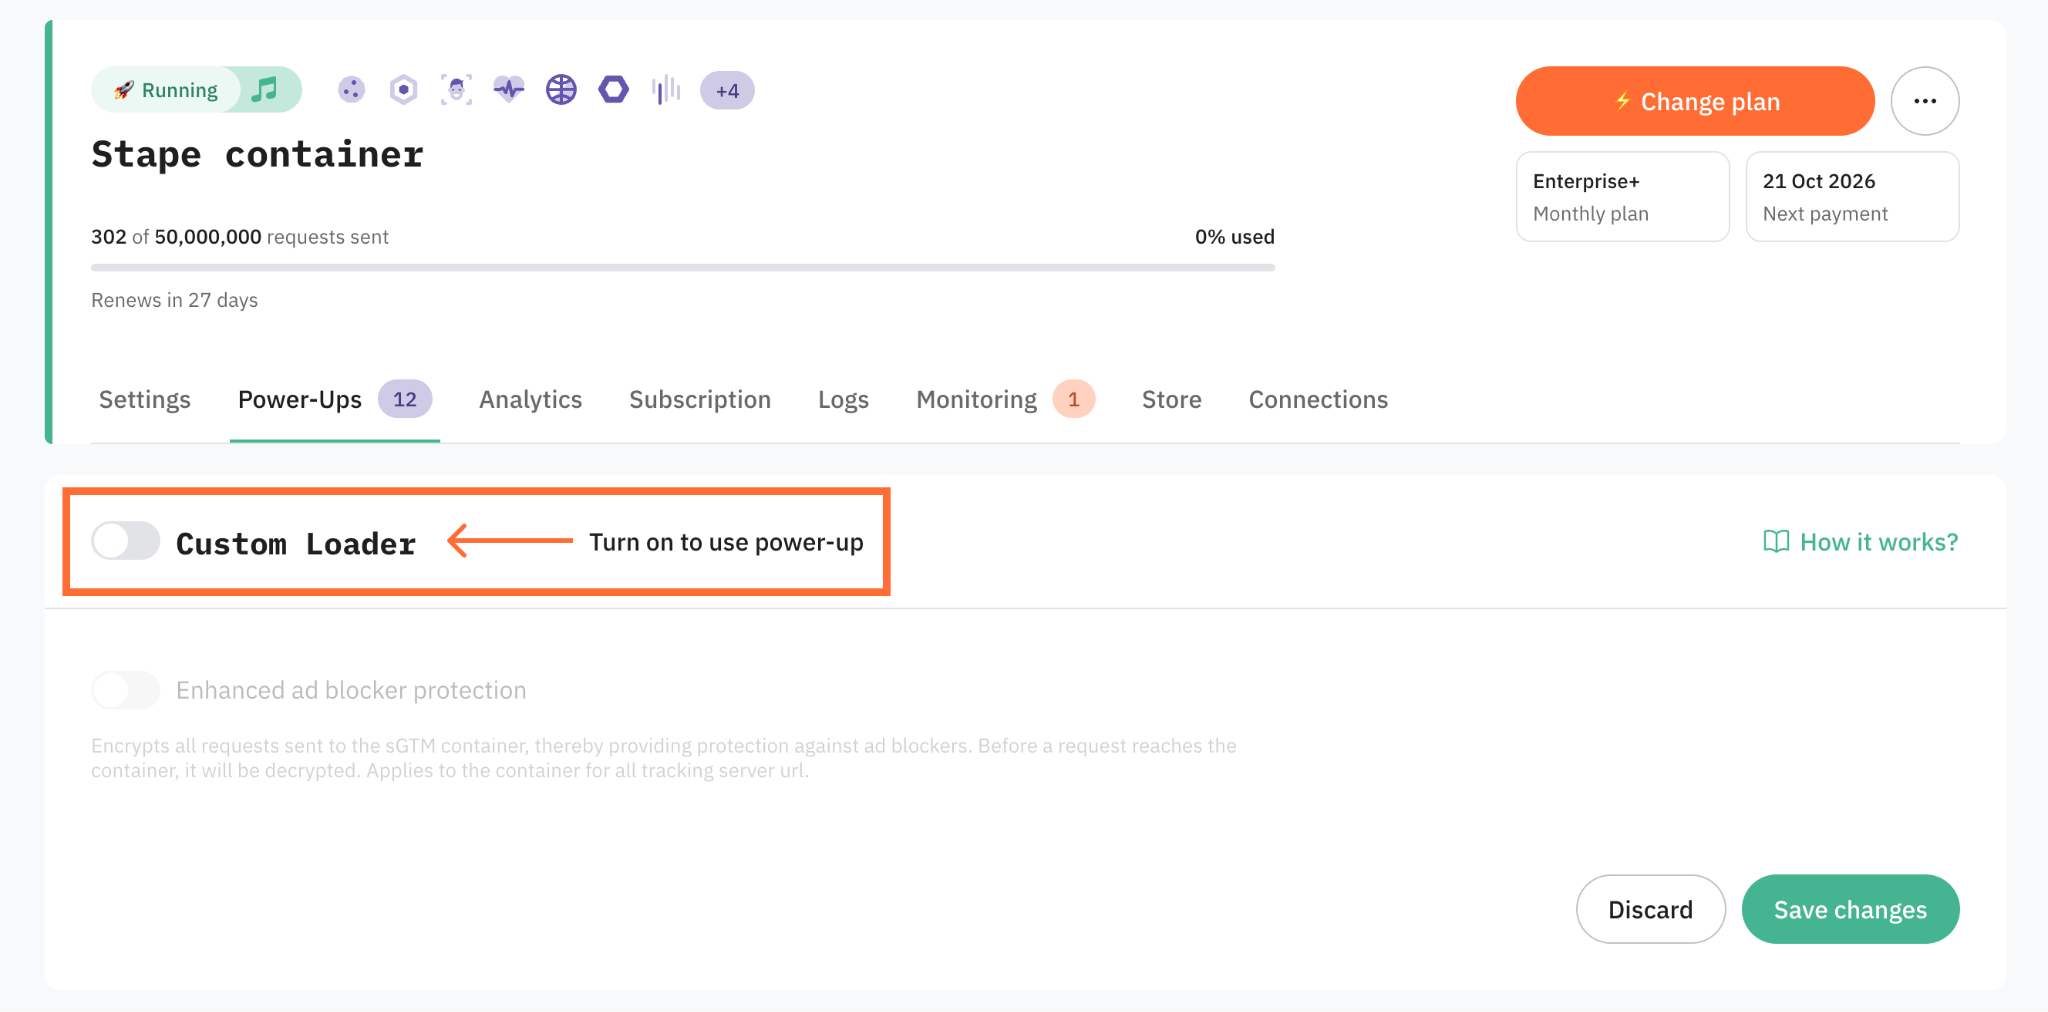
For more information, see our guide on Custom Loader.
Step 8. Add the server container URL in the web and server GTM
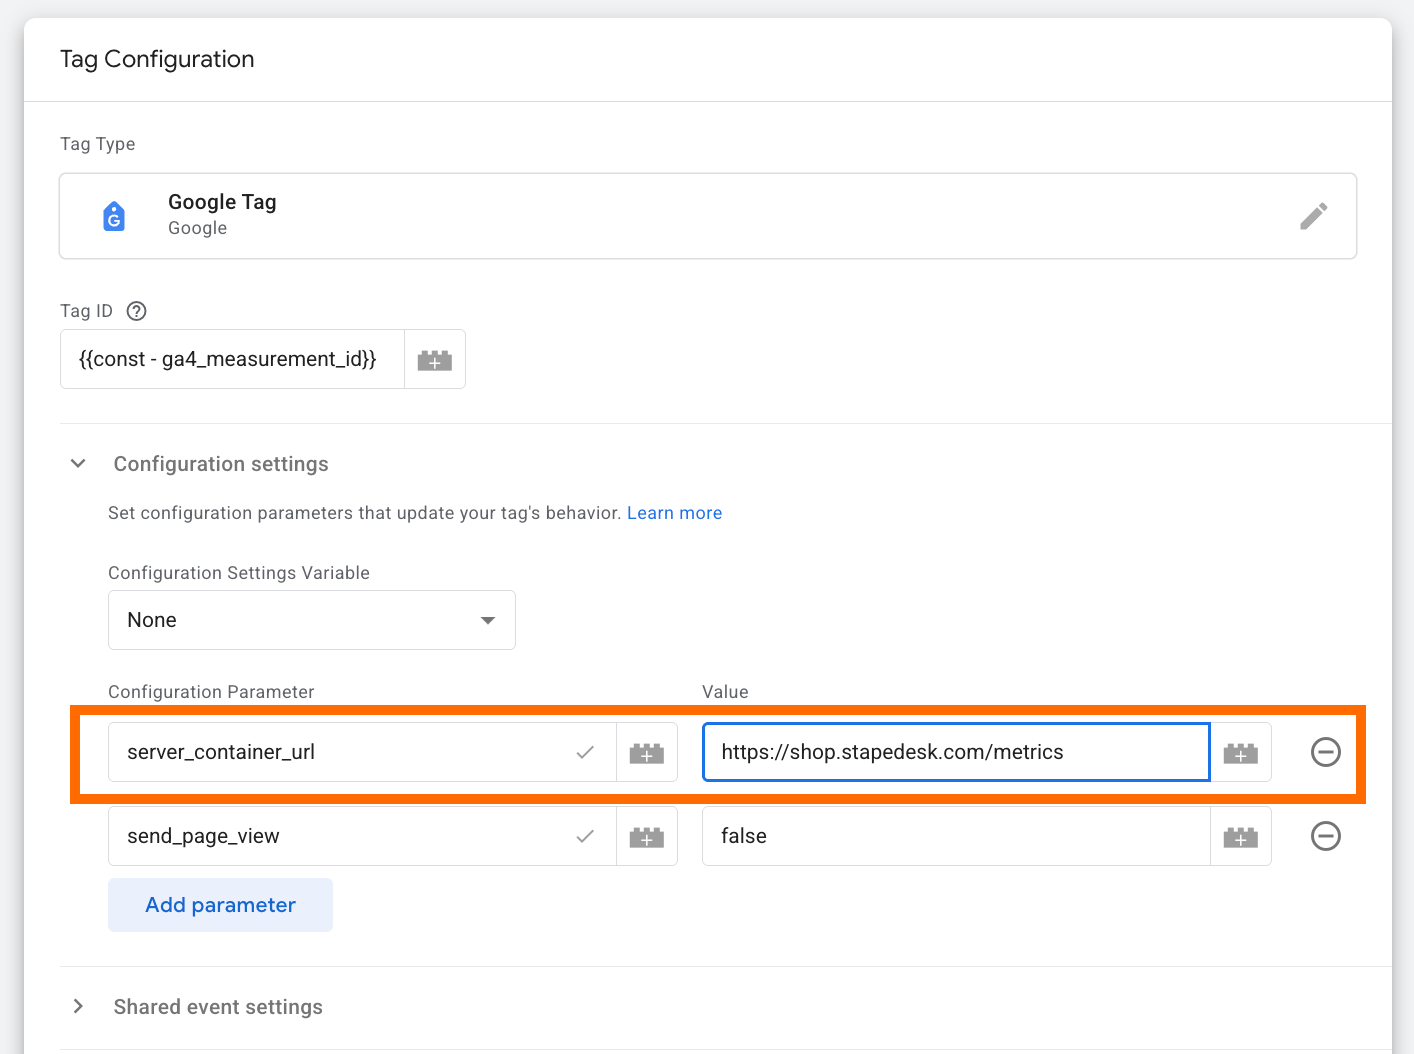
1. In your web GTM container, add Google Tag and specify your Measurement ID (any ID works for testing). Set the server_container_url to the same origin path you configured (in our example, it is https://stapedesk.com/metrics).
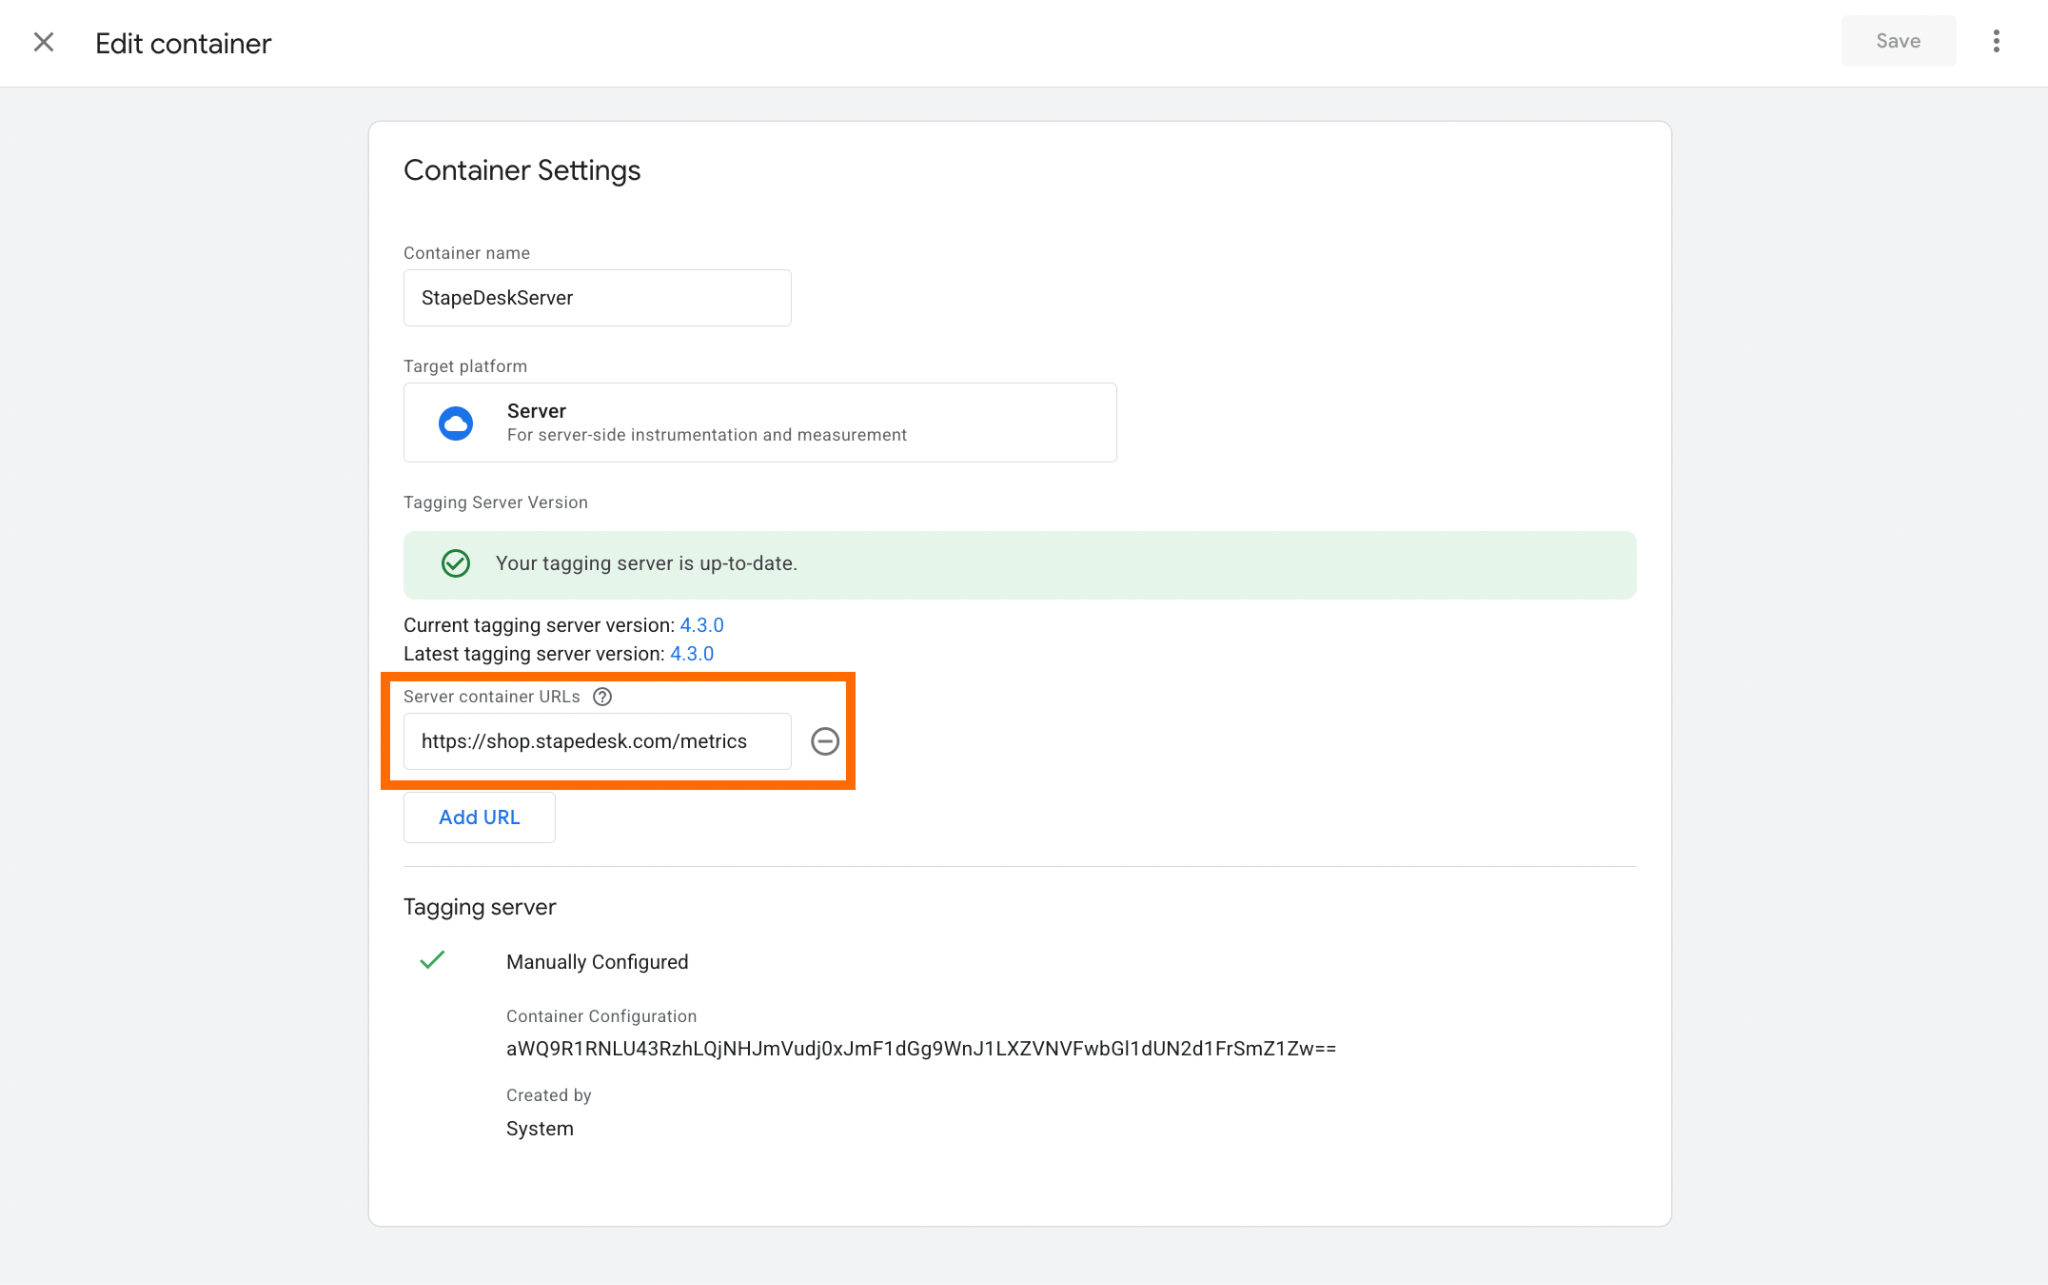
2. To streamline testing, click Admin → Container Settings → enter the path under Server container URLs.
3. For the testing, the same origin domain (as we show in the step below), you will also need to configure Client (that will transmit data from the web to the server container) and Google Analytics: GA4 tag in the server GTM.
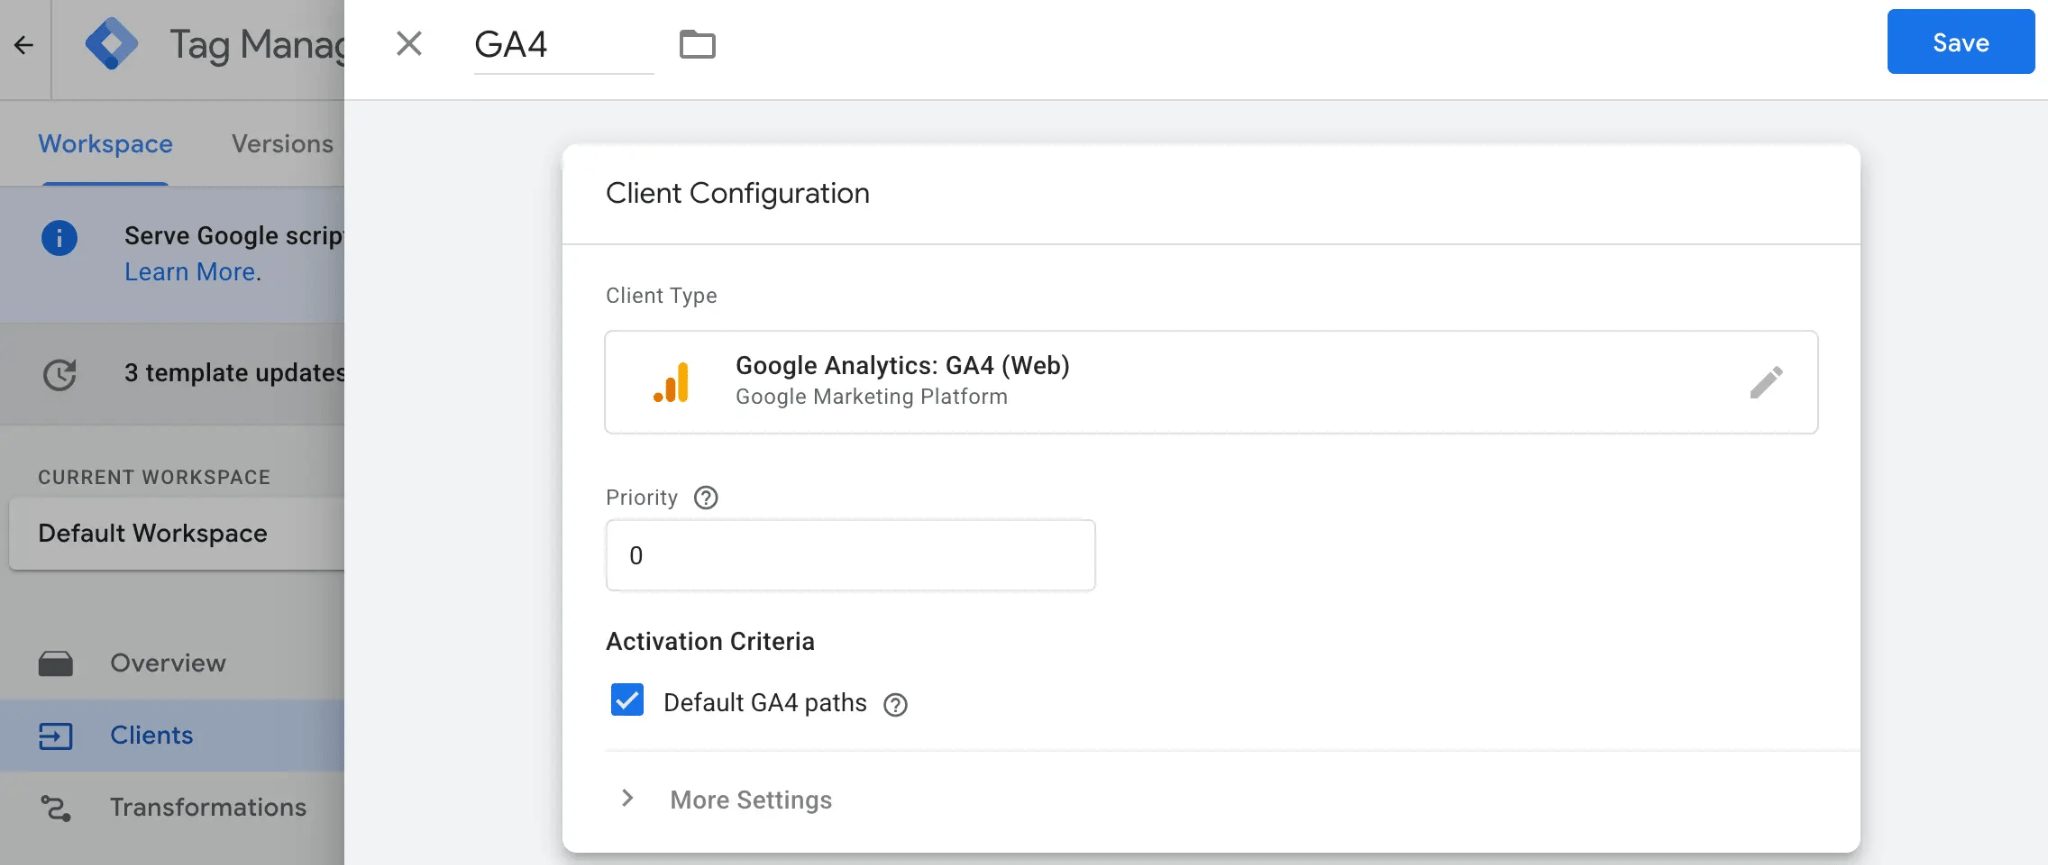
As Client, we will use GA4.
To add GA4 Client in the server GTM, open the clients’ section → Create New client → Select client type Google Analytics: GA4 (Web) → Add client name and click Save.
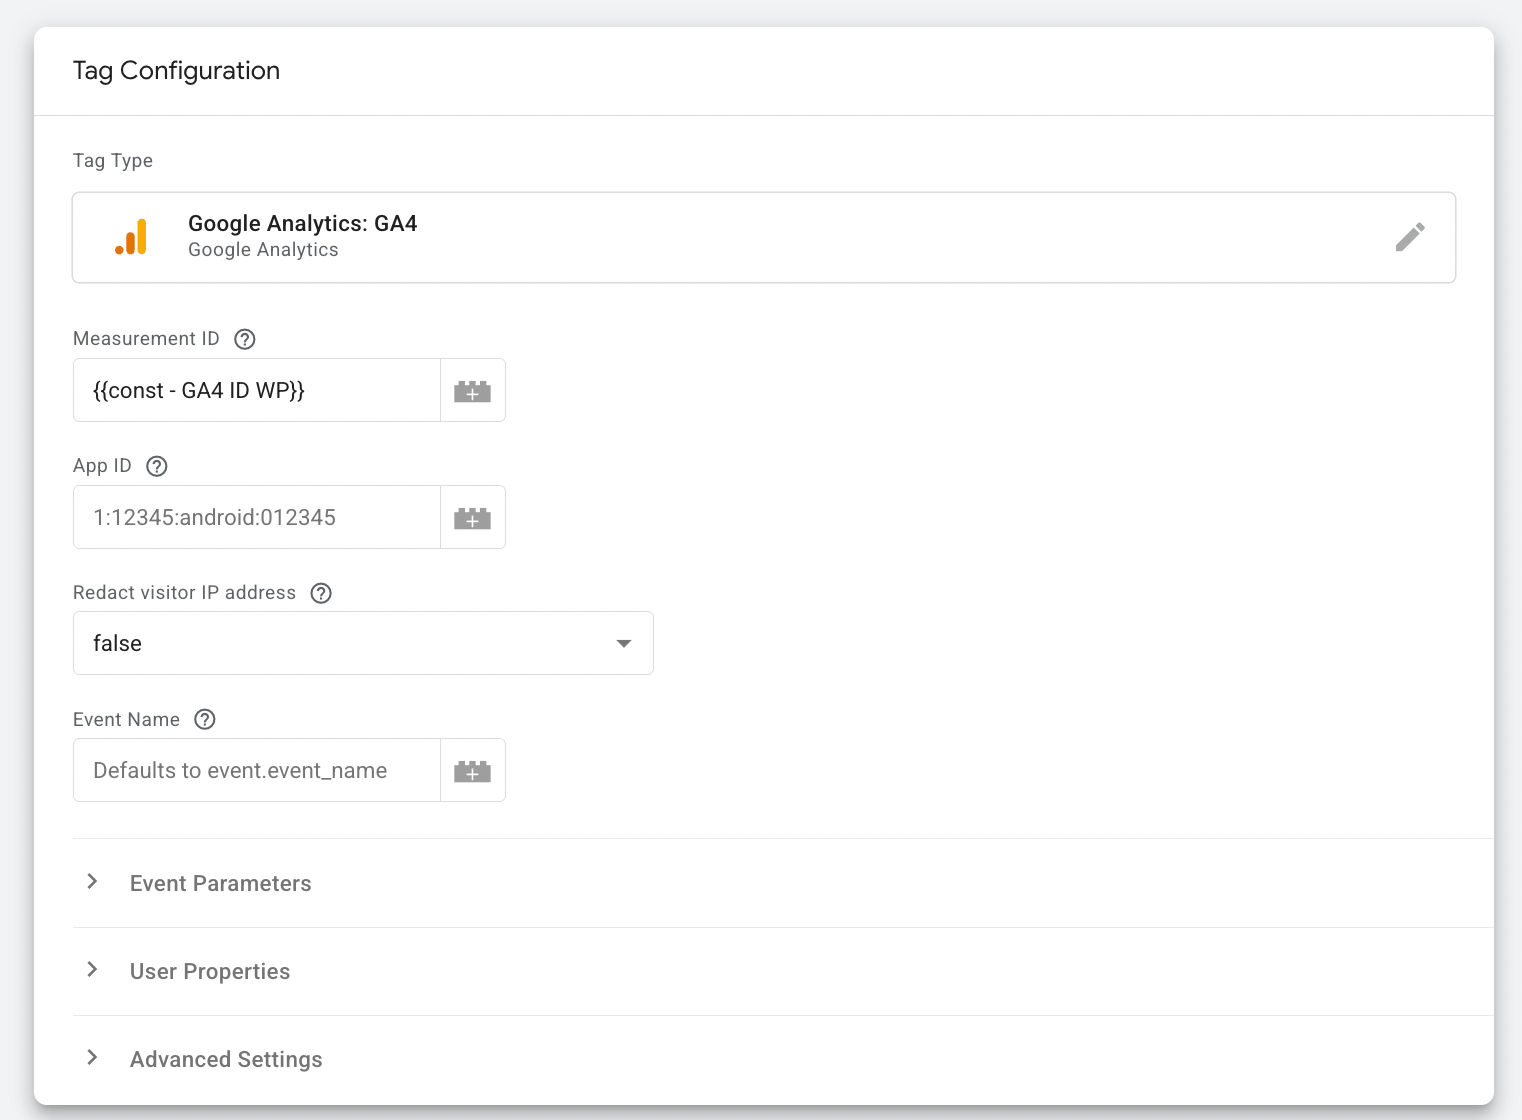
To configure the GA4 tag, add a new tag with tag configuration “Google Analytics: GA4”, and just specify your Measurement ID in the tag.
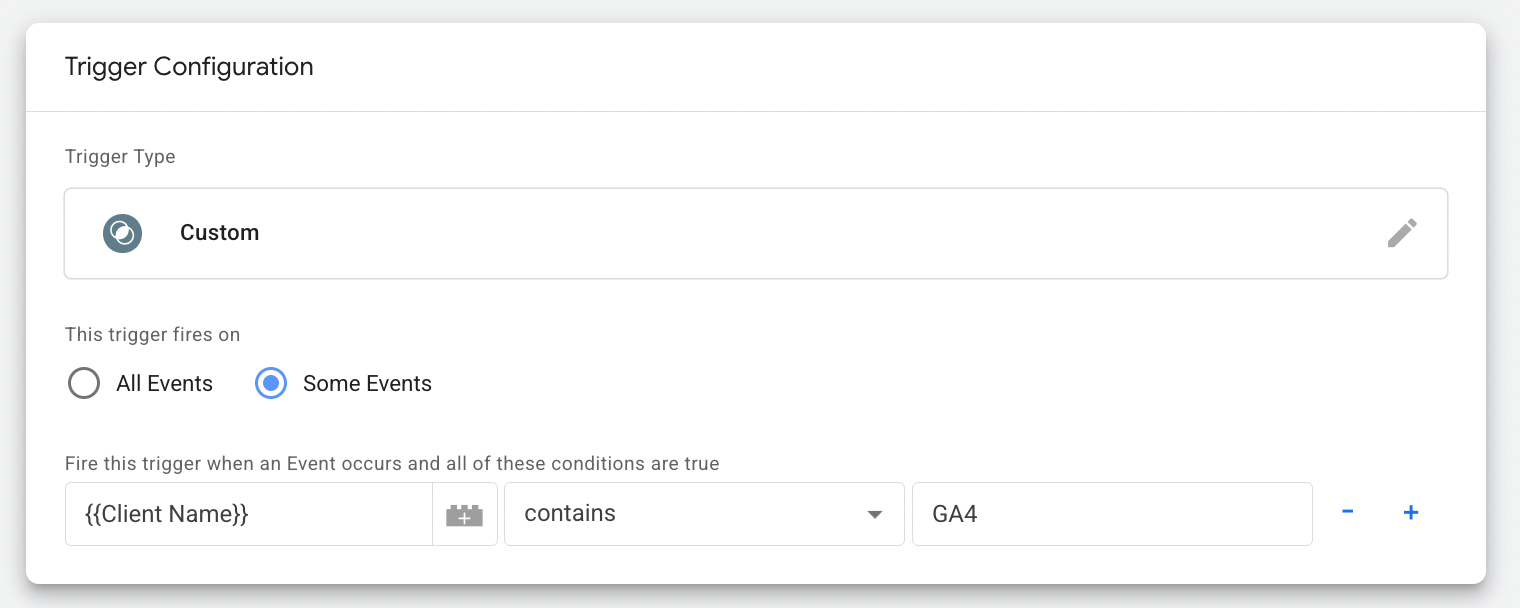
And add the trigger for a tag. It should trigger when the client name receives the requests (in our case, the Client is GA4):
Testing your Same Origin setup
Click Preview in both web and server GTM containers.
If everything is set up correctly, the server container should open in preview at the new path you created. If, for some reason, the preview doesn't open at the new path, you can manually enter it in the preview window's URL.
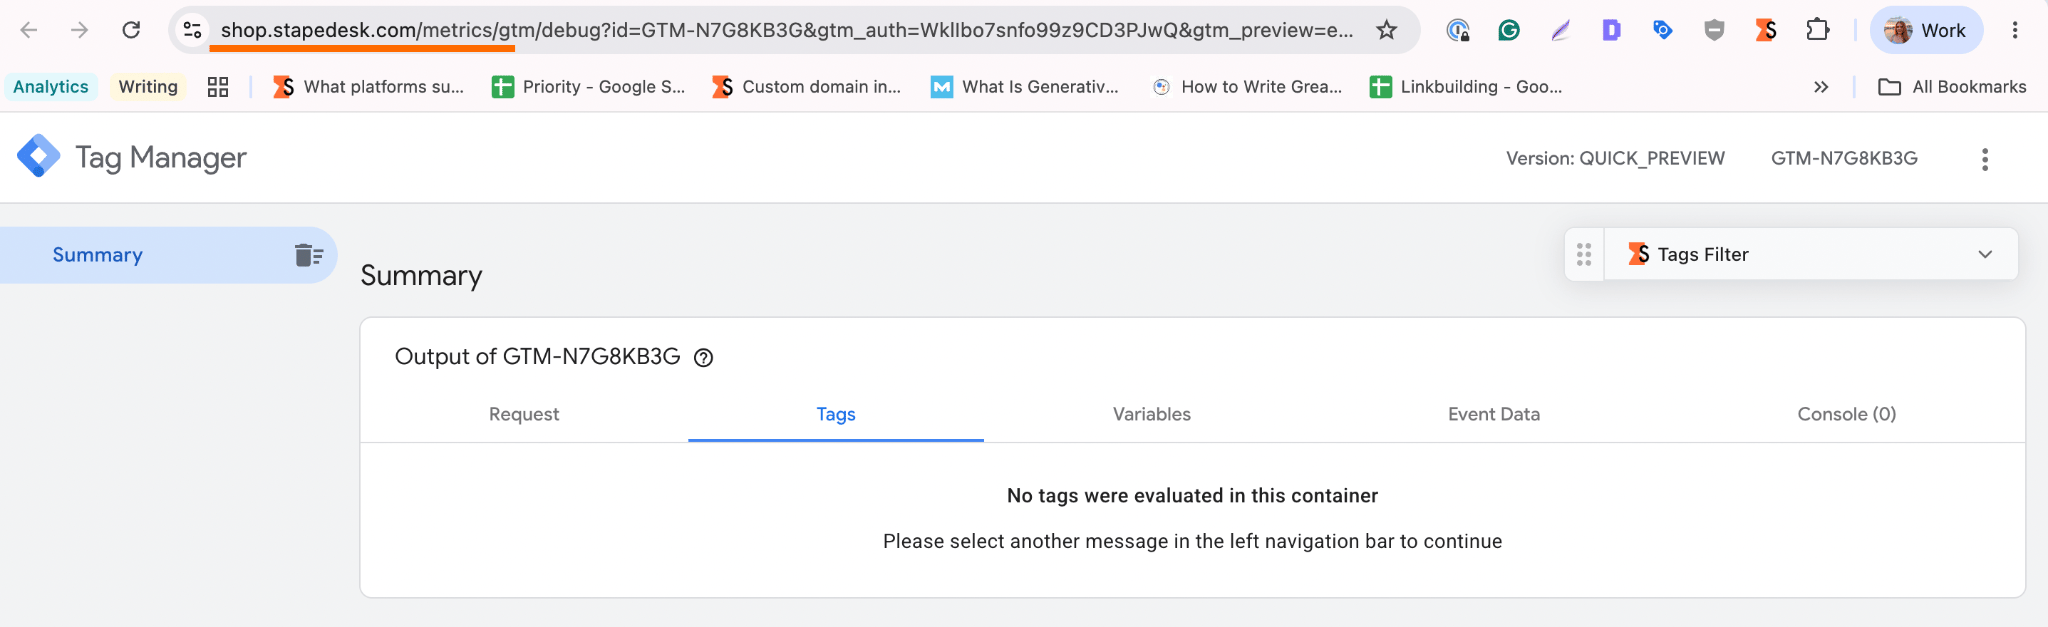
If the URL doesn't work, potential solutions are:
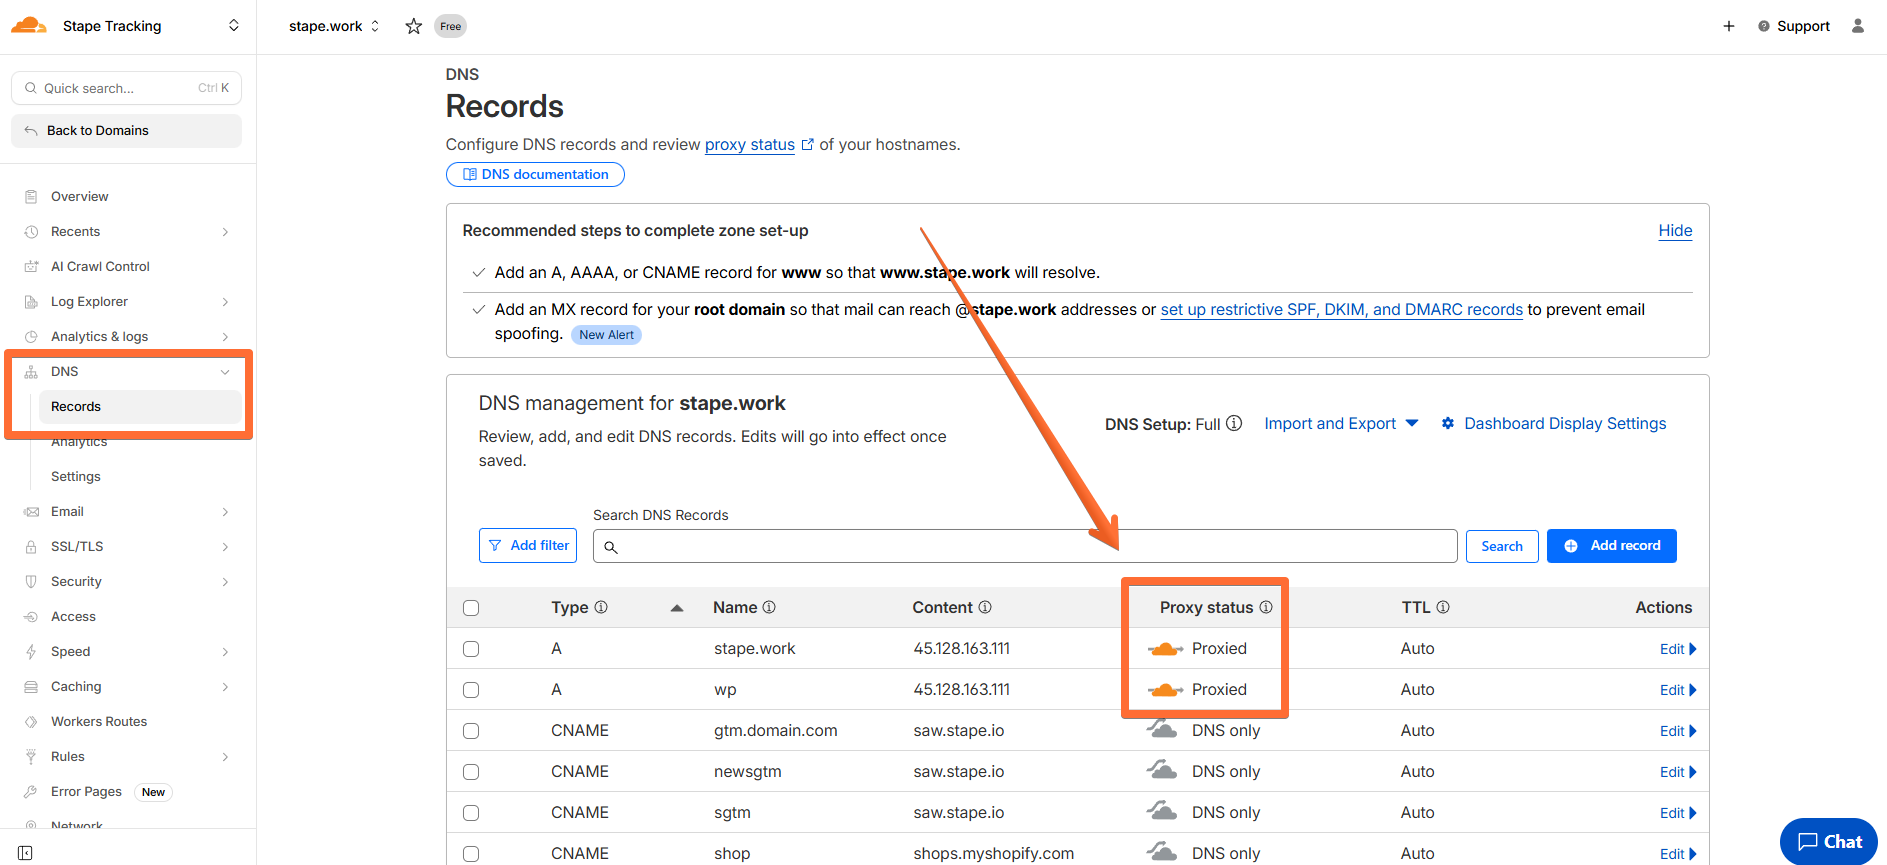
- In Cloudflare's DNS Records, make sure that requests to your main domain are proxied through Cloudflare.
- In SSL/TLS, check that the encryption mode is set to Full. If it isn't, click Configure, select Full, and click Save. This change may take up to 24 hours, so give it enough time to update.
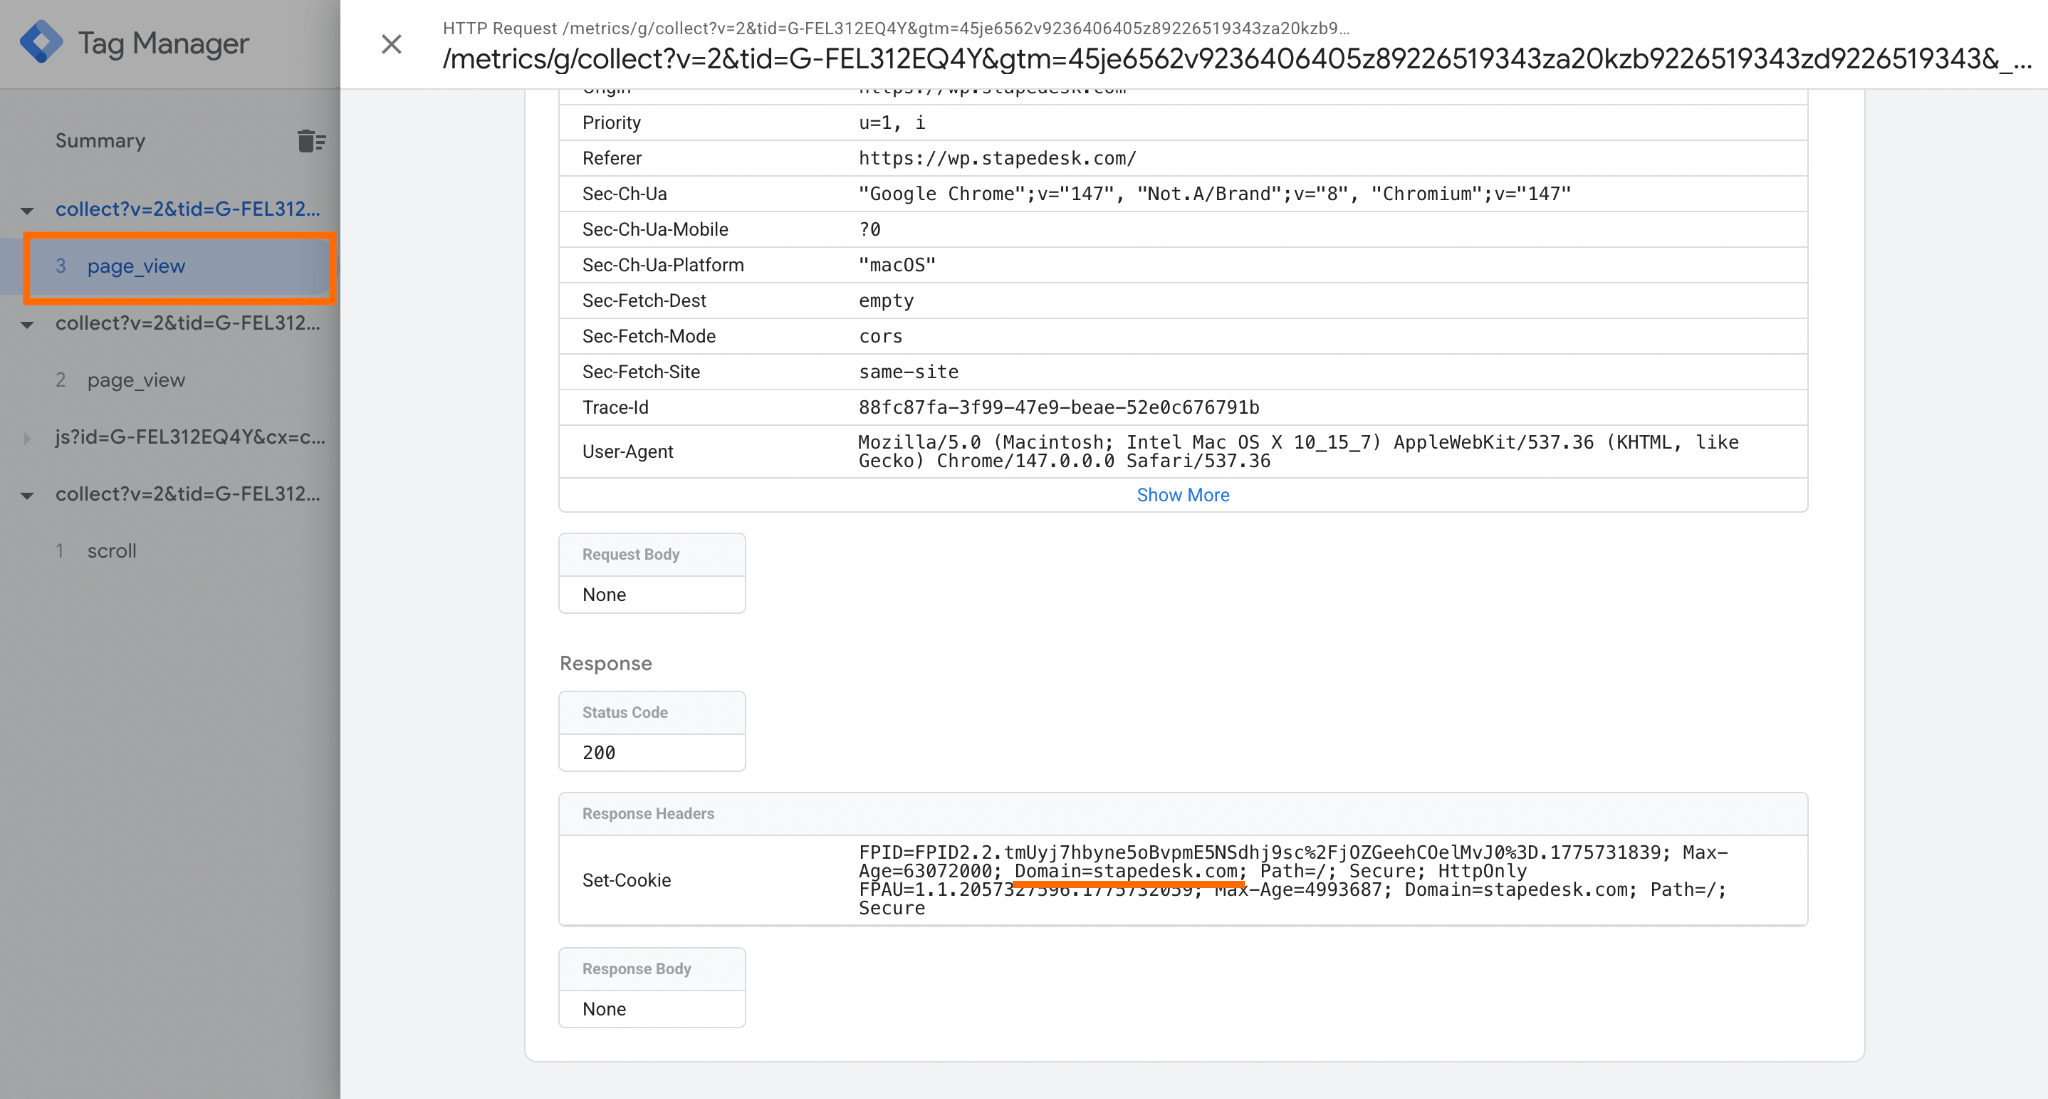
Visit your website. In the server container preview, you should now see an incoming page_view request from your website's real domain.
Was this article helpful?
Comments