How to set up Pinterest Conversions API (CAPI)
Updated May 10, 2026
In this guide, we will explain how to set up Pinterest Conversions API (CAPI) using the server Google Tag Manager container. Pinterest recommends using browser and server tracking simultaneously - if you decide to do so, be sure to configure event deduplication.
Requirements for setting up Pinterest CAPI
Before starting with the Pinterest CAPI setup, please ensure that you already have Google Tag Manager web and server containers, as well as a configured server container and custom domain in Stape. Please follow these guides if you don’t have any of those:
Setting up Pinterest Conversions API using server Google Tag Manager
1. How to set up Pinterest tag
1. Add the Pinterest Tag to web GTM:
- In your web GTM container, open the Tags menu → click New.
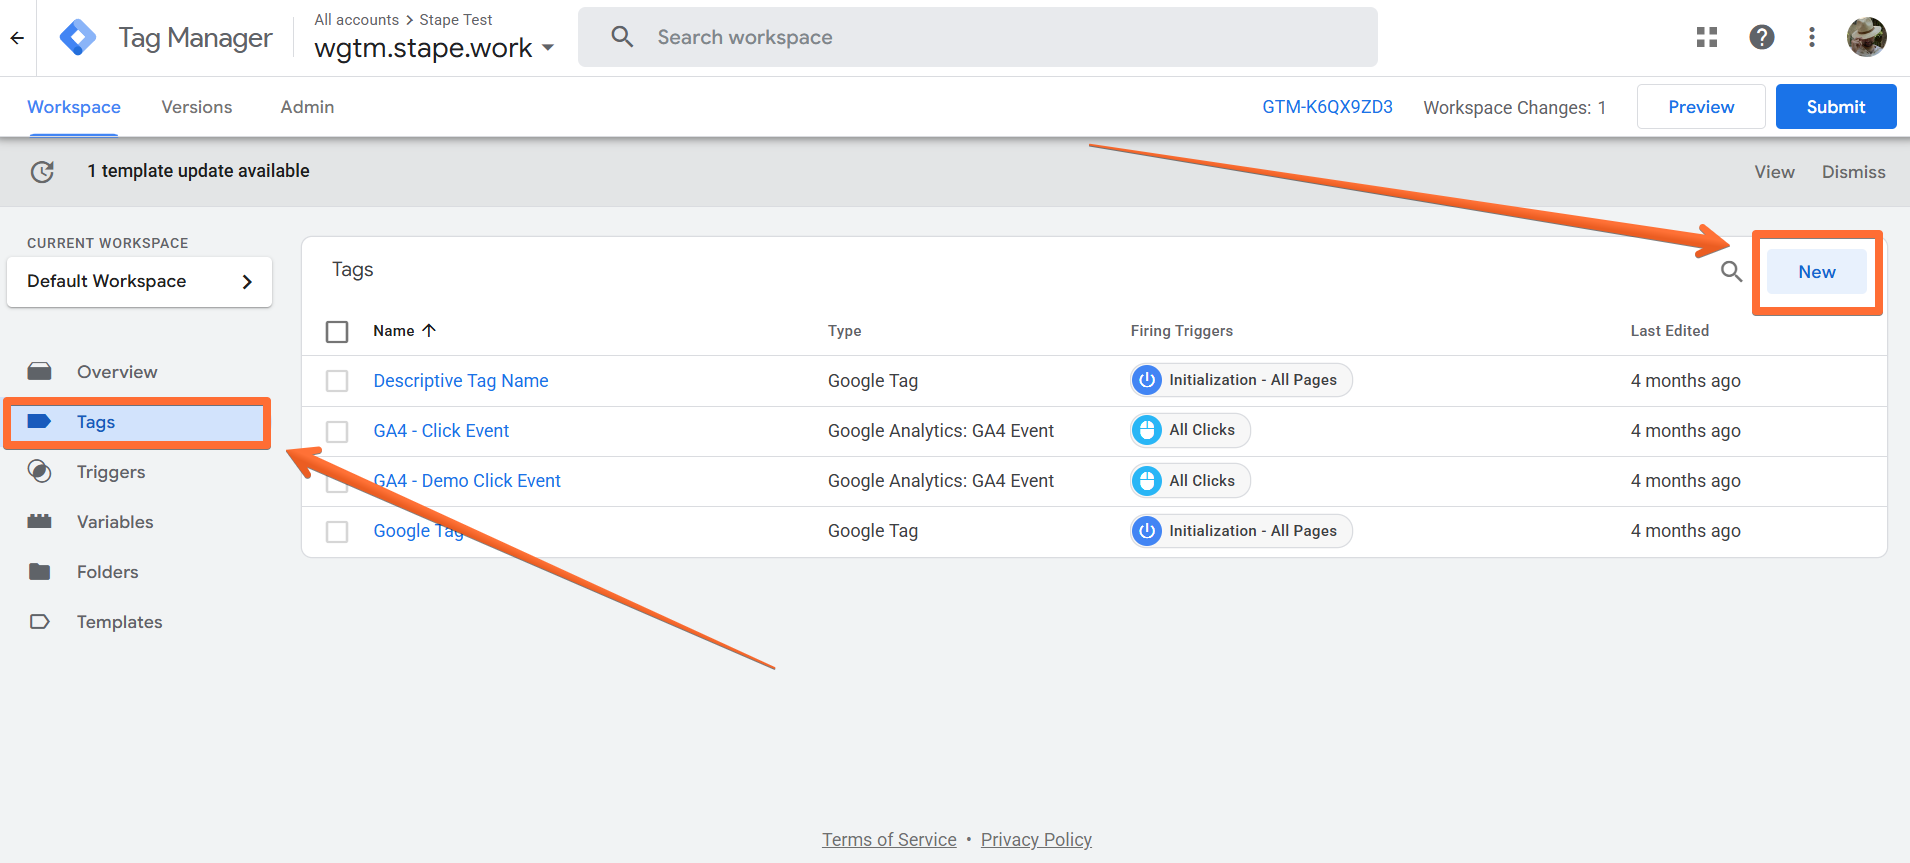
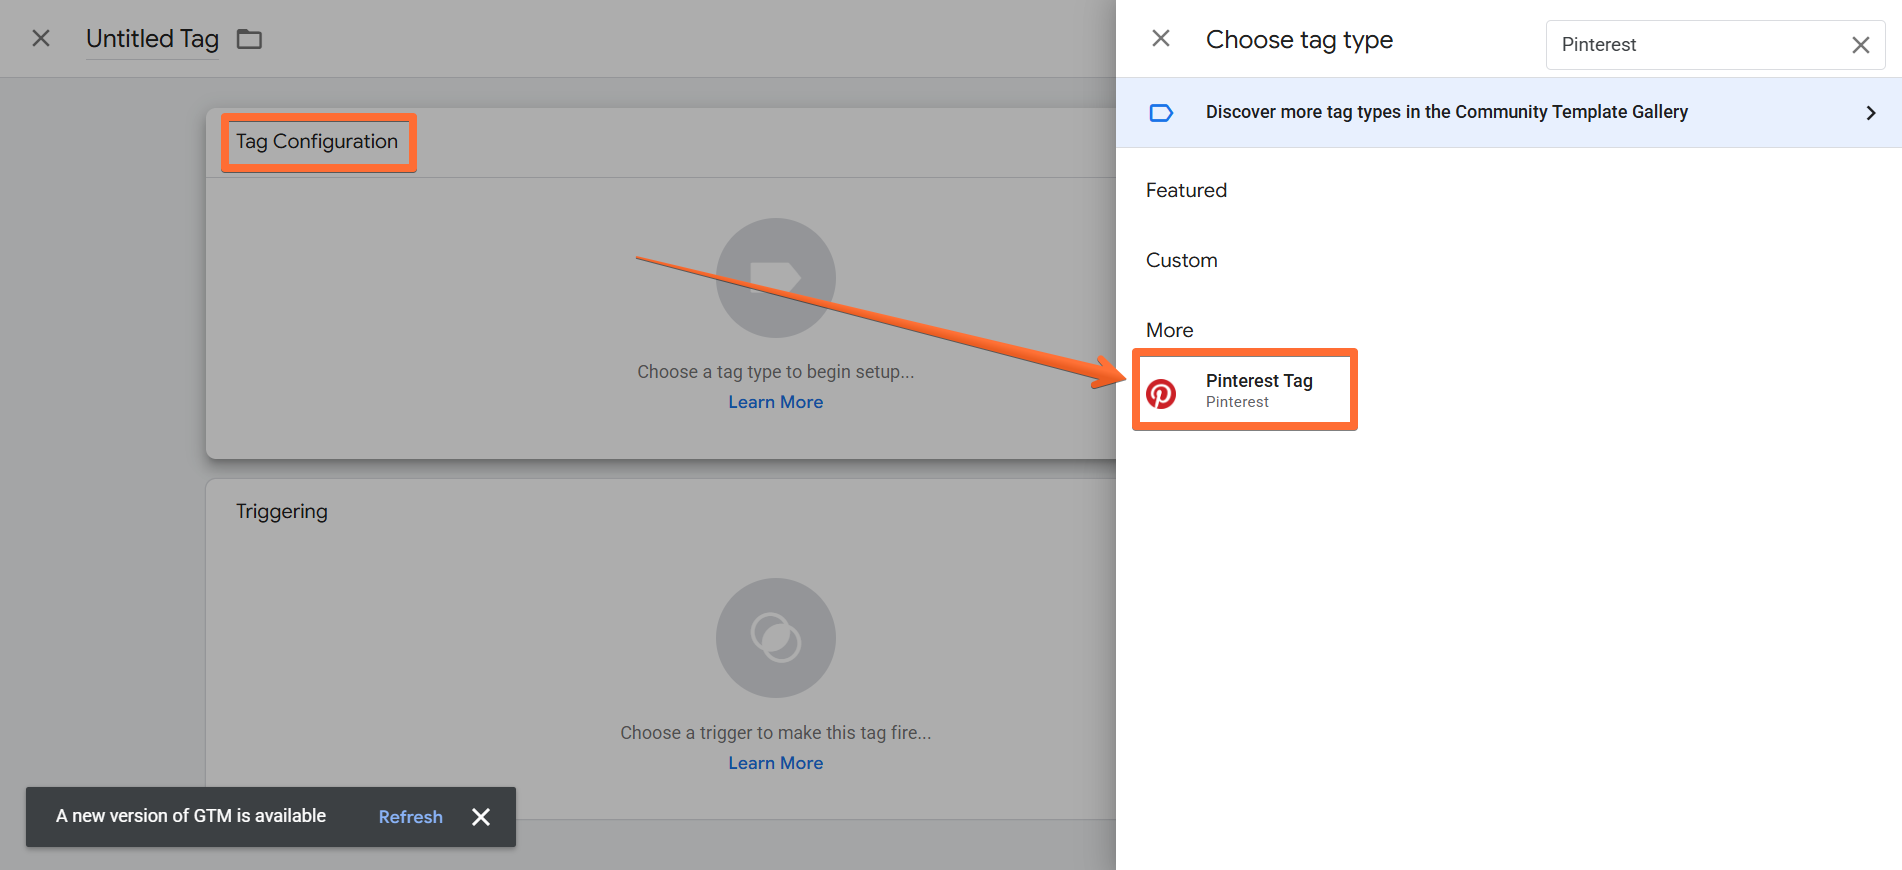
- Click Tag Configurations → search for Pinterest Tag.
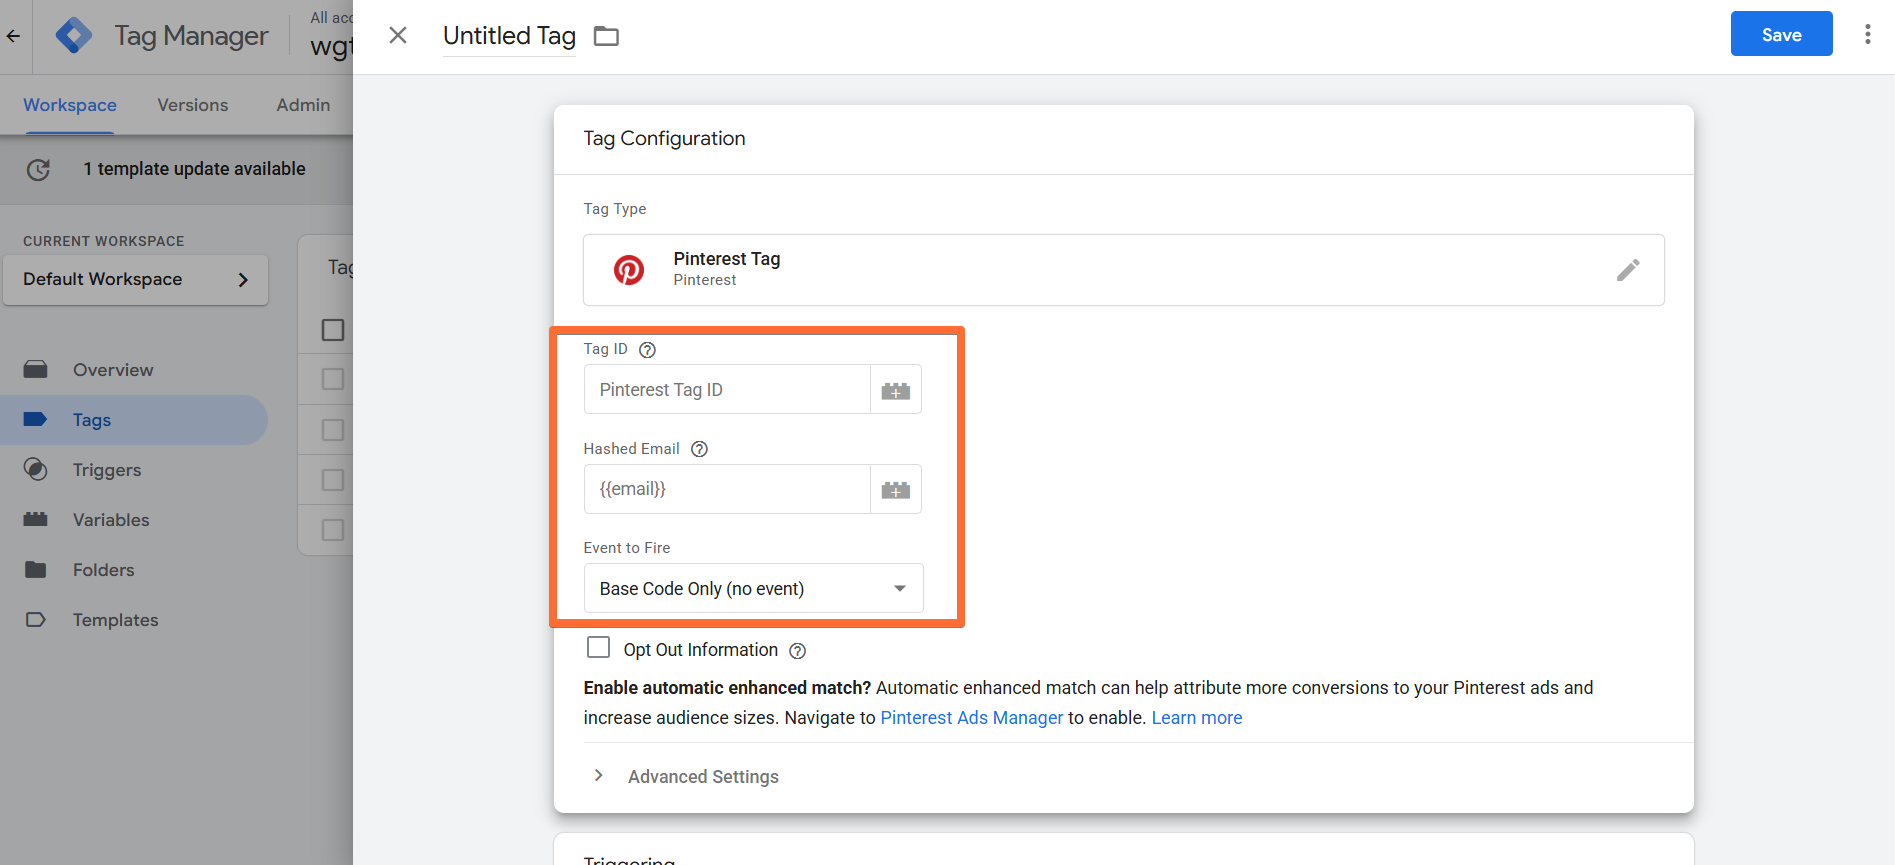
2. Configure Pinterest tag for the Base code event (this is a mandatory step for Pinterest):
- Enter your Pinterest ID and, optionally, hashed email → under Event to fire, select Base Code Only.
- Important! Web and server containers use different Pinterest IDs. To find the Pinterest ID that you need to use at this step:
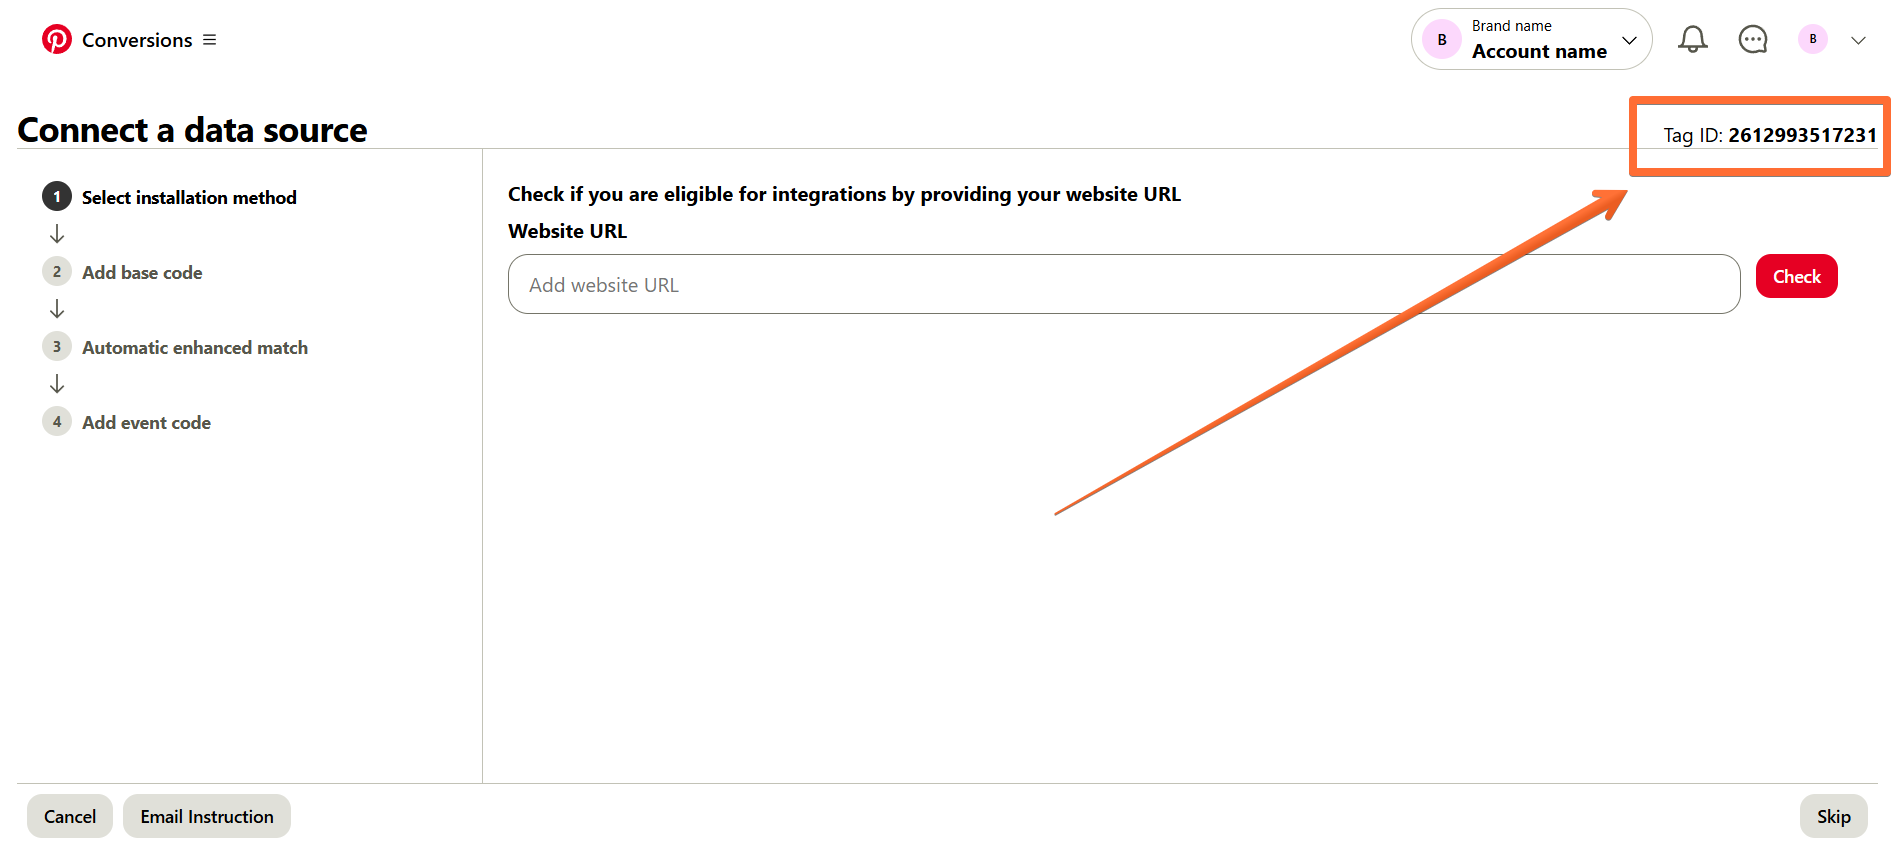
- Log in to your Pinterest Ad account → click Ad account overview in the top left corner → under the Manage Business category, click Conversions → click Tag manager in the left-hand navigation → click the Install the Pinterest tag button.
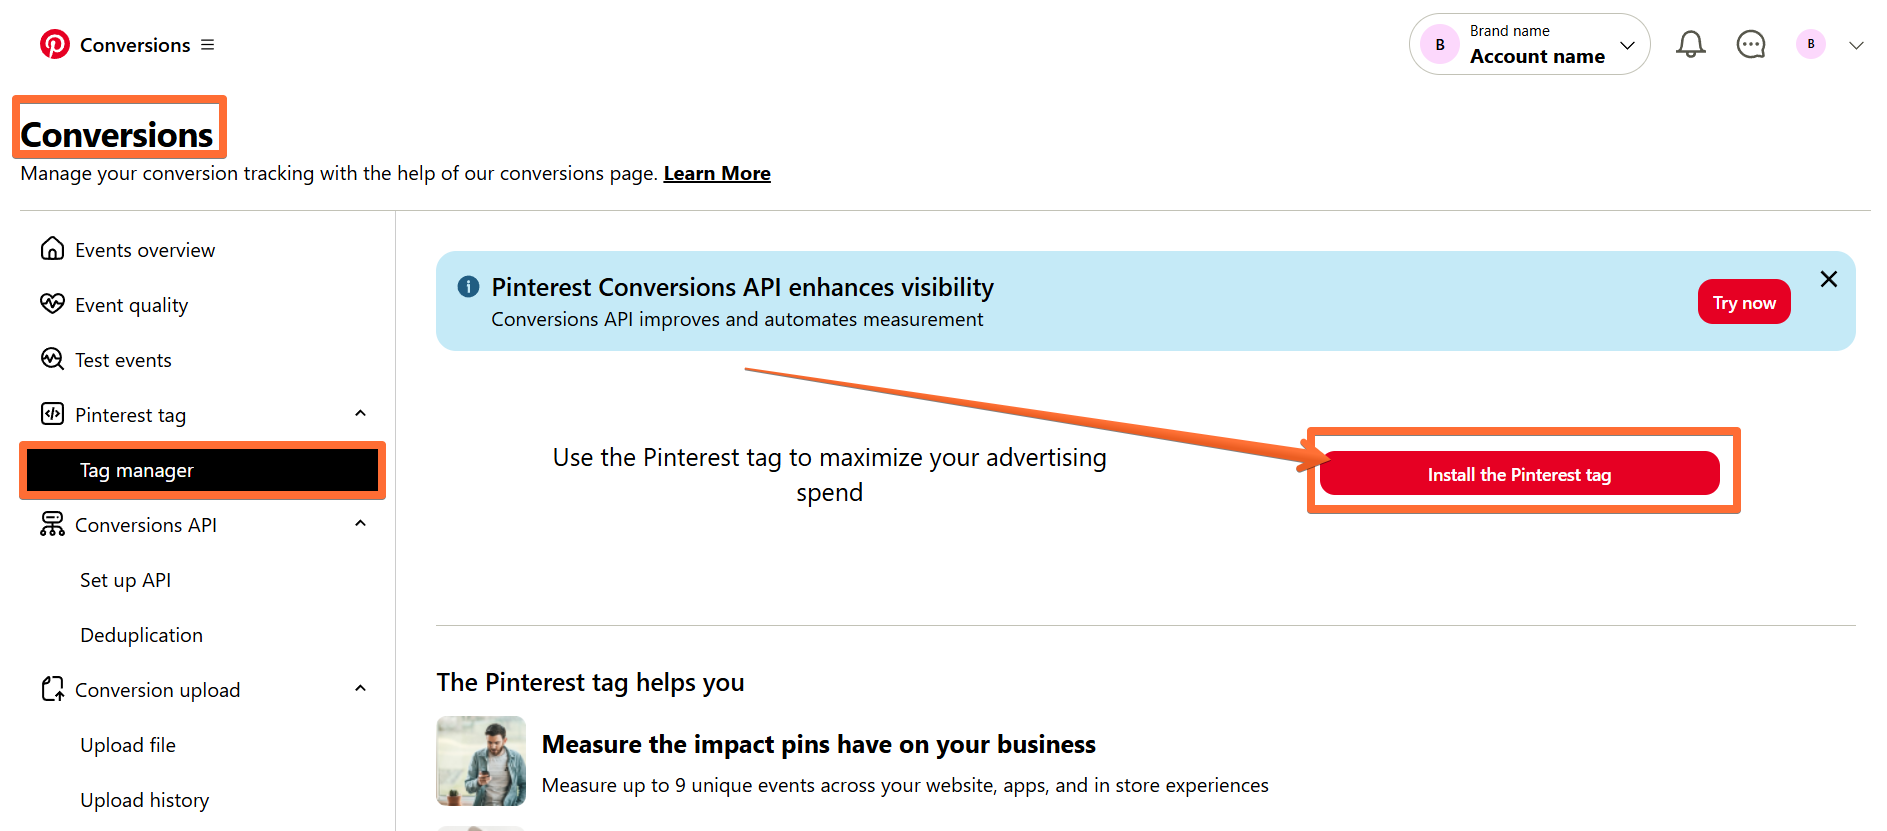
- Configure the tag following Pinterest’s instructions. This tag’s ID is what you will need in your configuration on web Google Tag Manager.
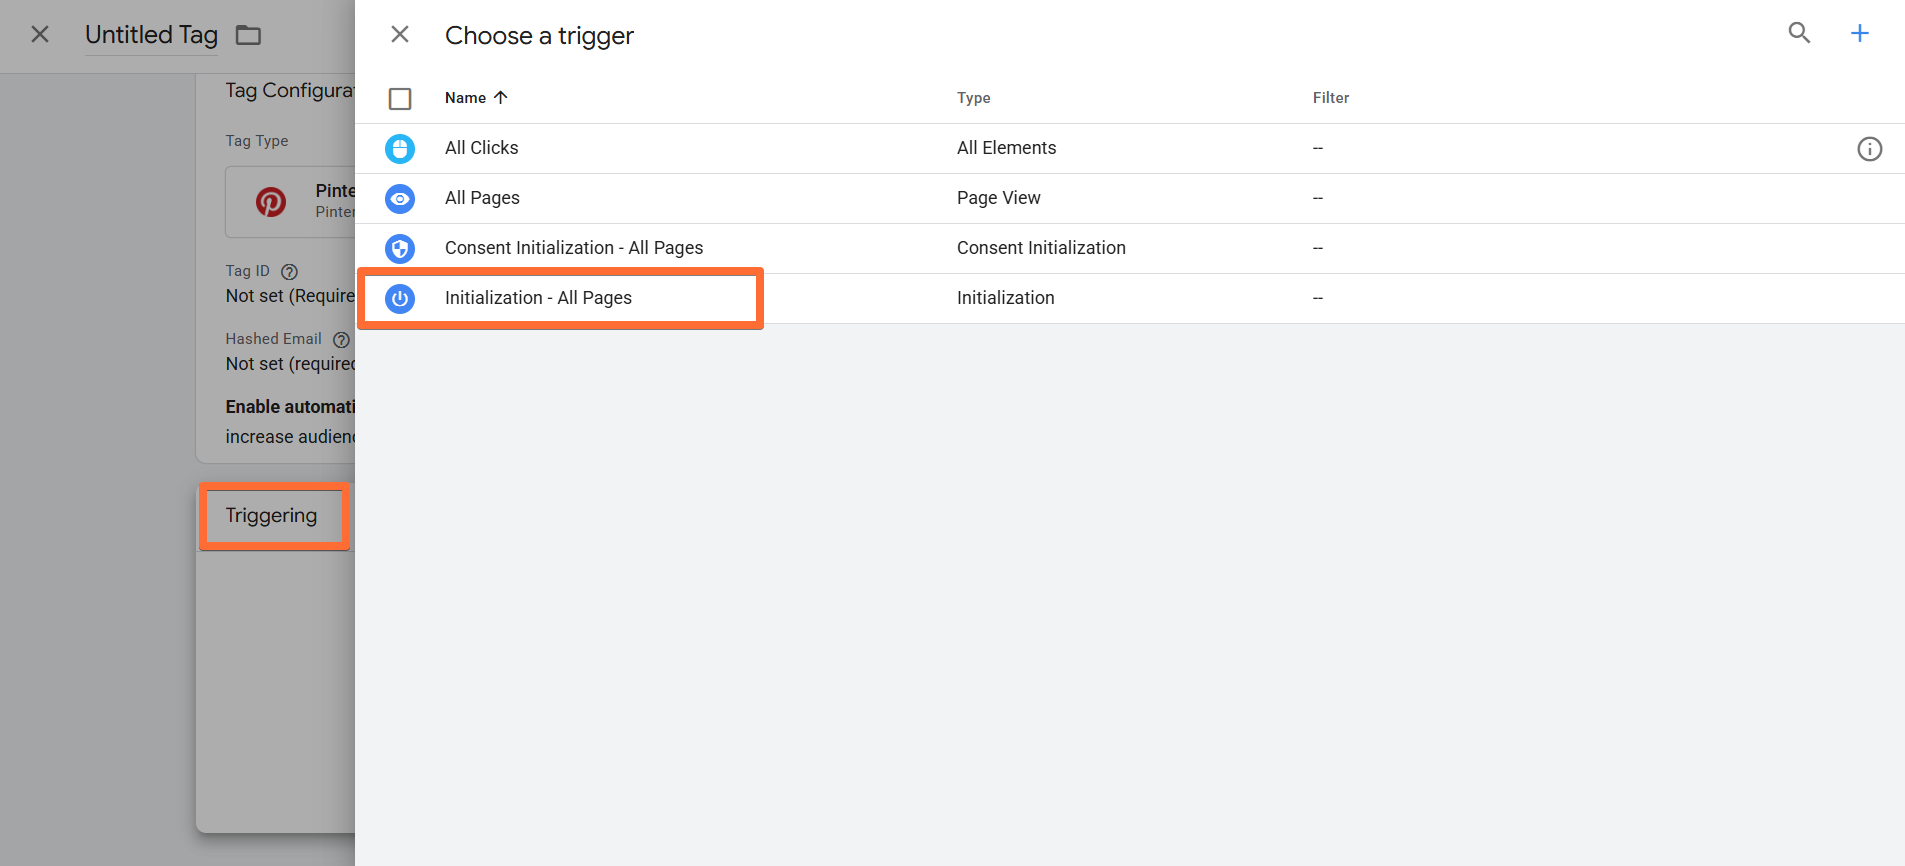
- Back in GTM, configure the tag to trigger on Initialization, give it a descriptive name, and click Save.
3. Configure Pinterest tag for events that you need to track:
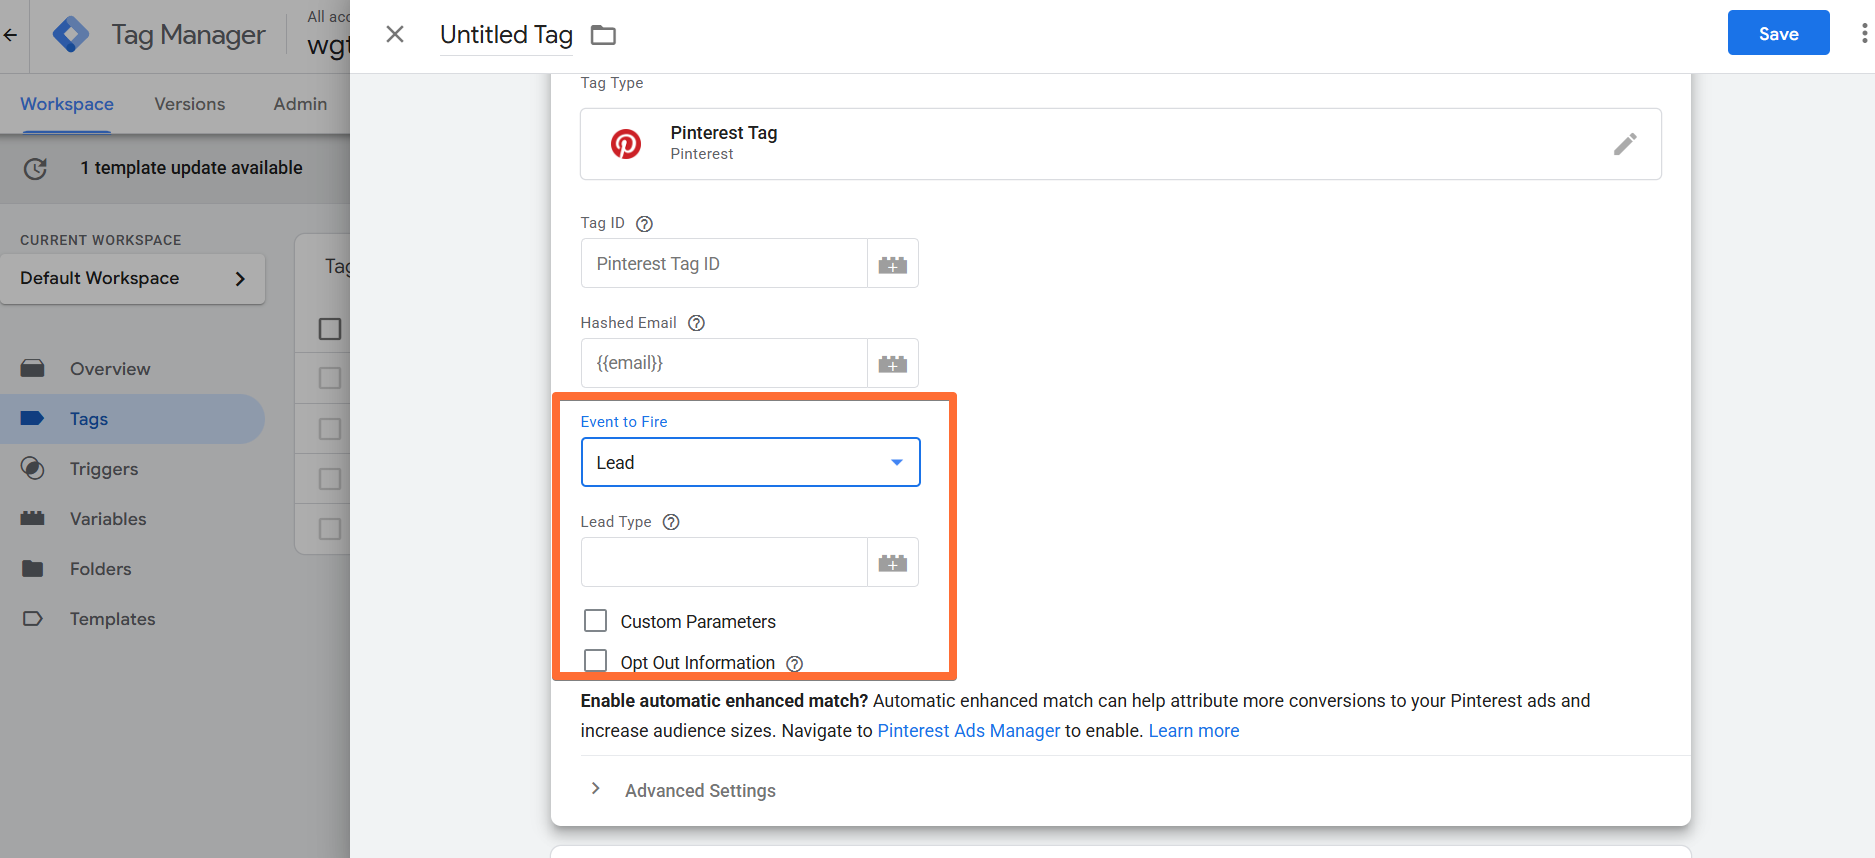
- Enter your Pinterest ID (the same one that you’ve just used in step 2) and, optionally, hashed email → under Event to fire, select the type of events you’d like to track. Every type enables additional event configurations, such as Lead type or Order value.
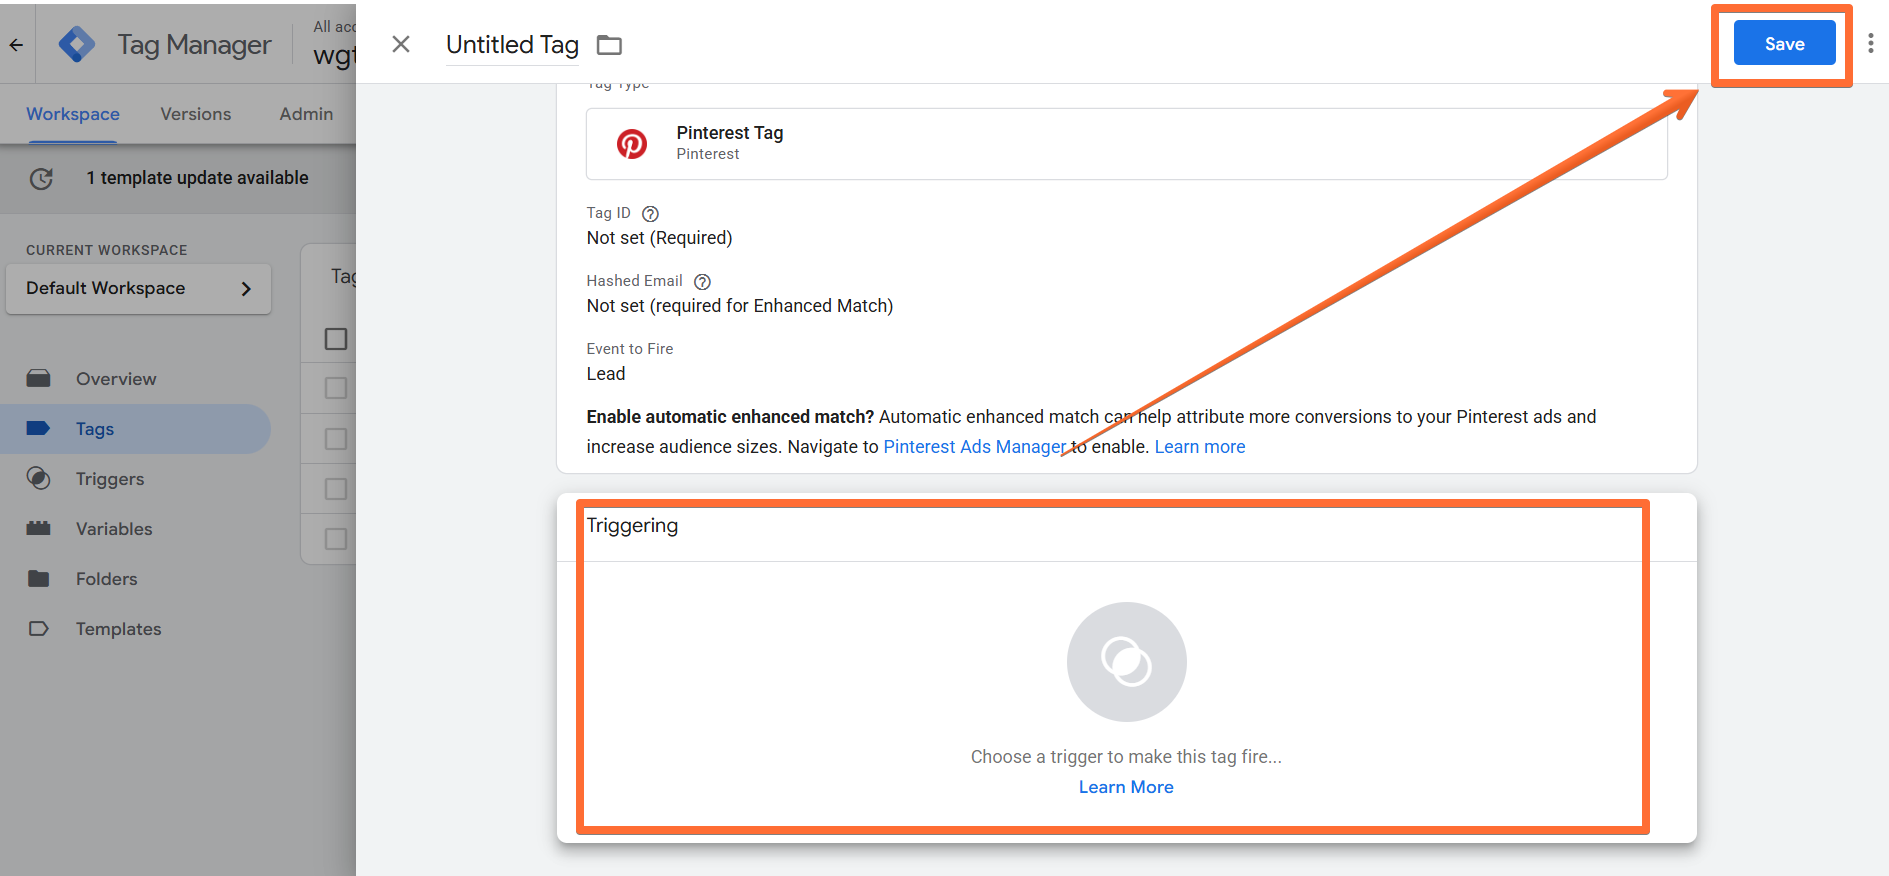
- Configure a trigger for the tag, give it a descriptive name, and click Save.
2. How to configure Pinterest Conversions API
1. Configure sending data to the server GTM container. Two most popular options for sending data to sGTM are Google Analytics 4 and Data Tag/Data Client. Here is a step-by-step guide on sending data to sGTM.
2. Add the Pinterest Conversions API tag to server GTM:
- Follow this link and download the tag template from GitHub.
- In Google Tag Manager, open the Templates menu → click New.
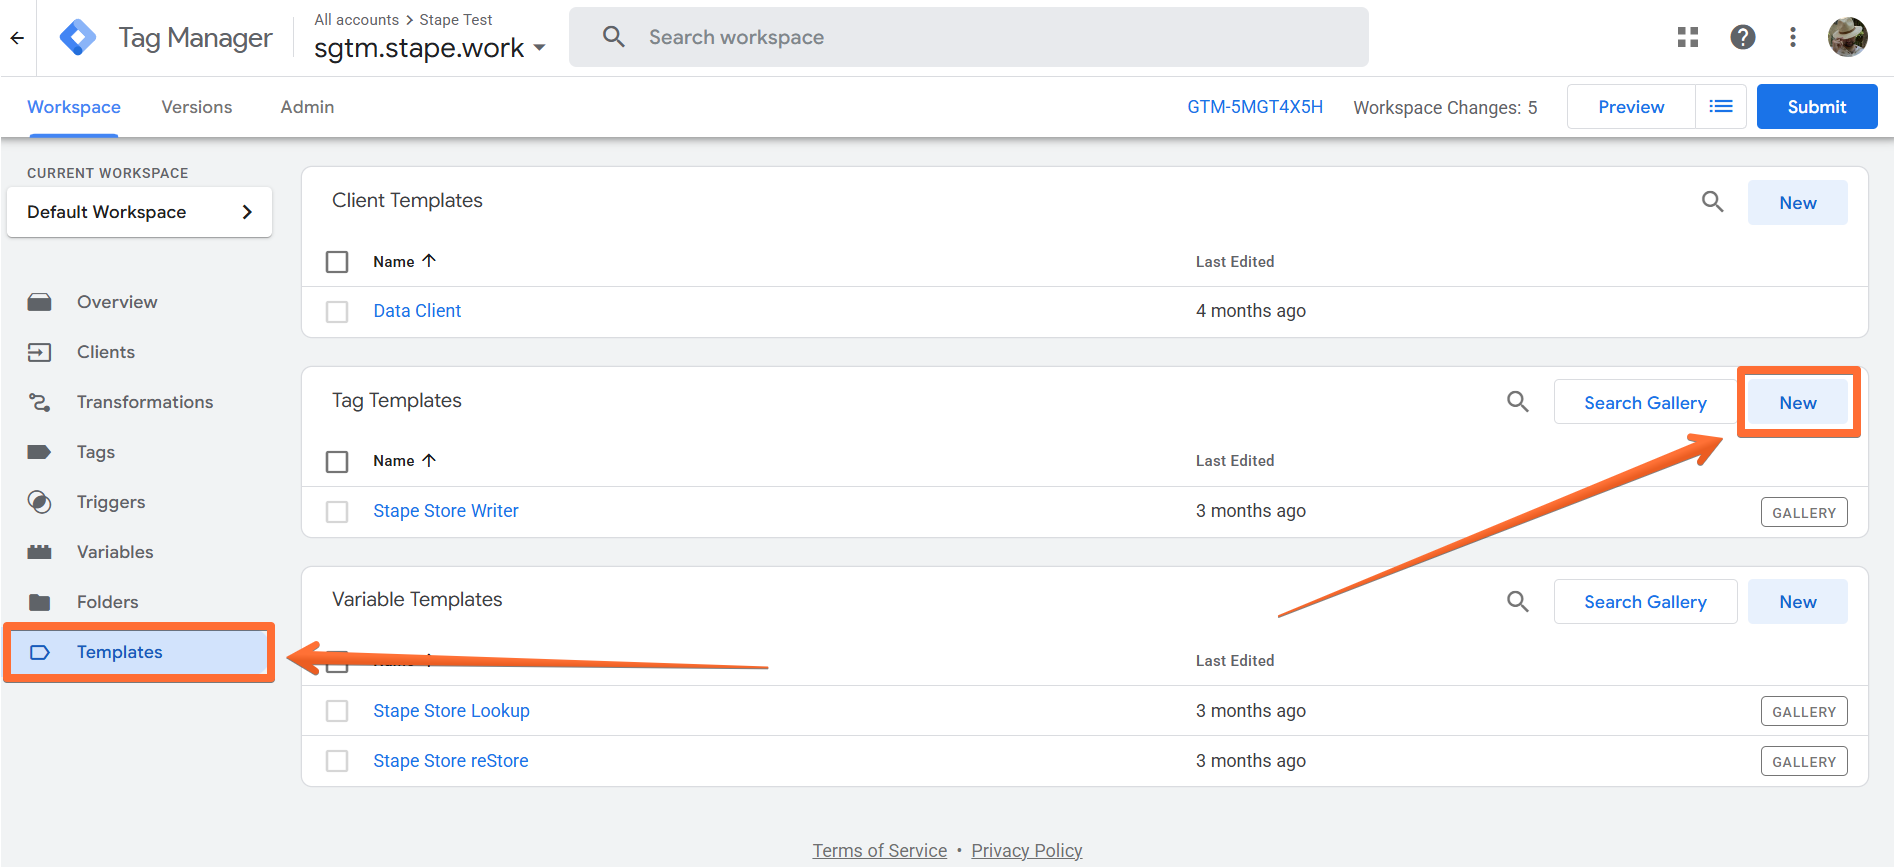
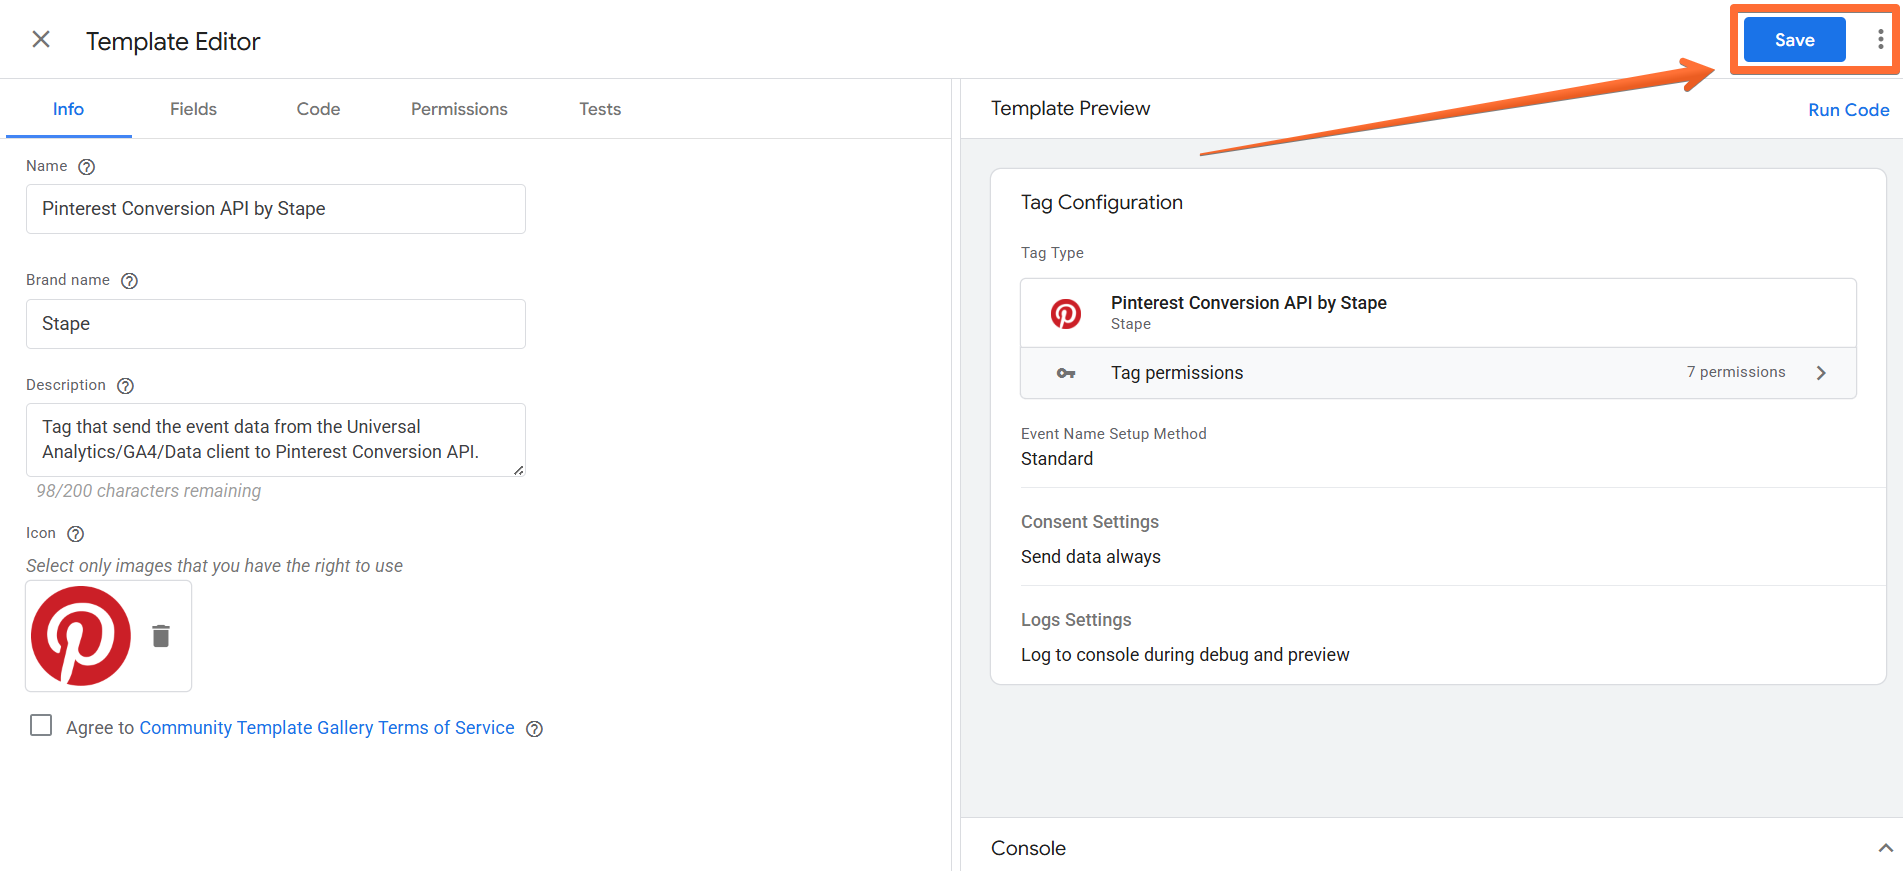
- Click Import → select the Pinterest tag template you’ve downloaded from GitHub → click Save.
3. Create a Pinterest Conversions API tag:
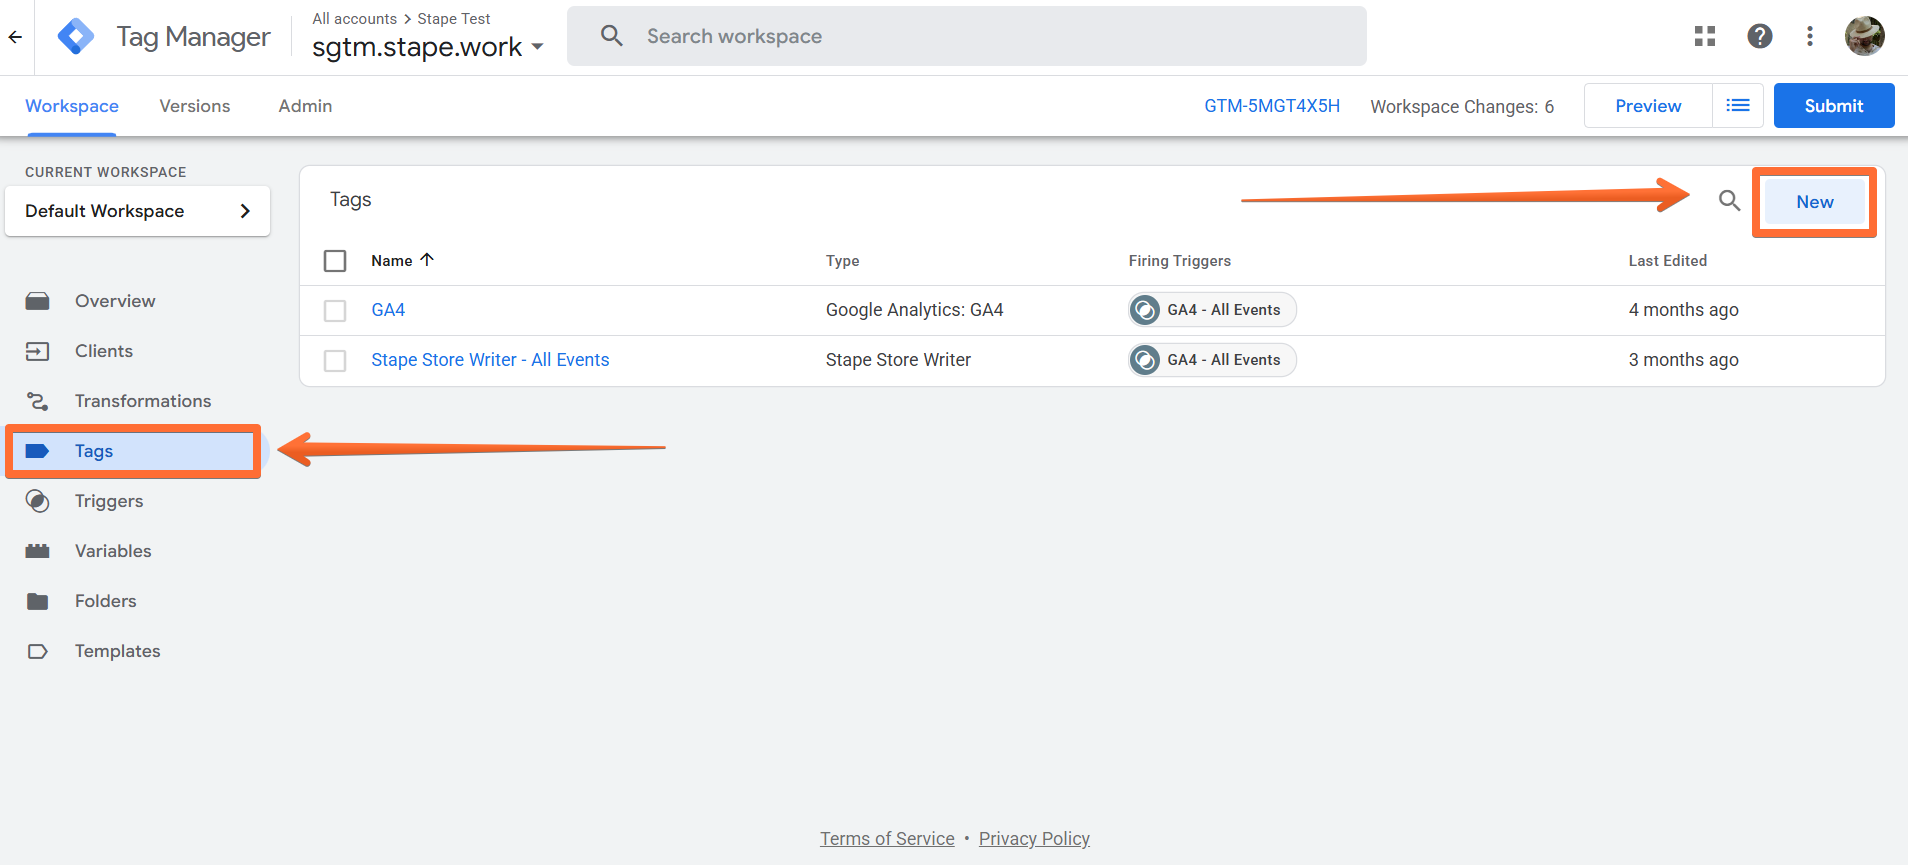
- Go to the Tags menu → click New.
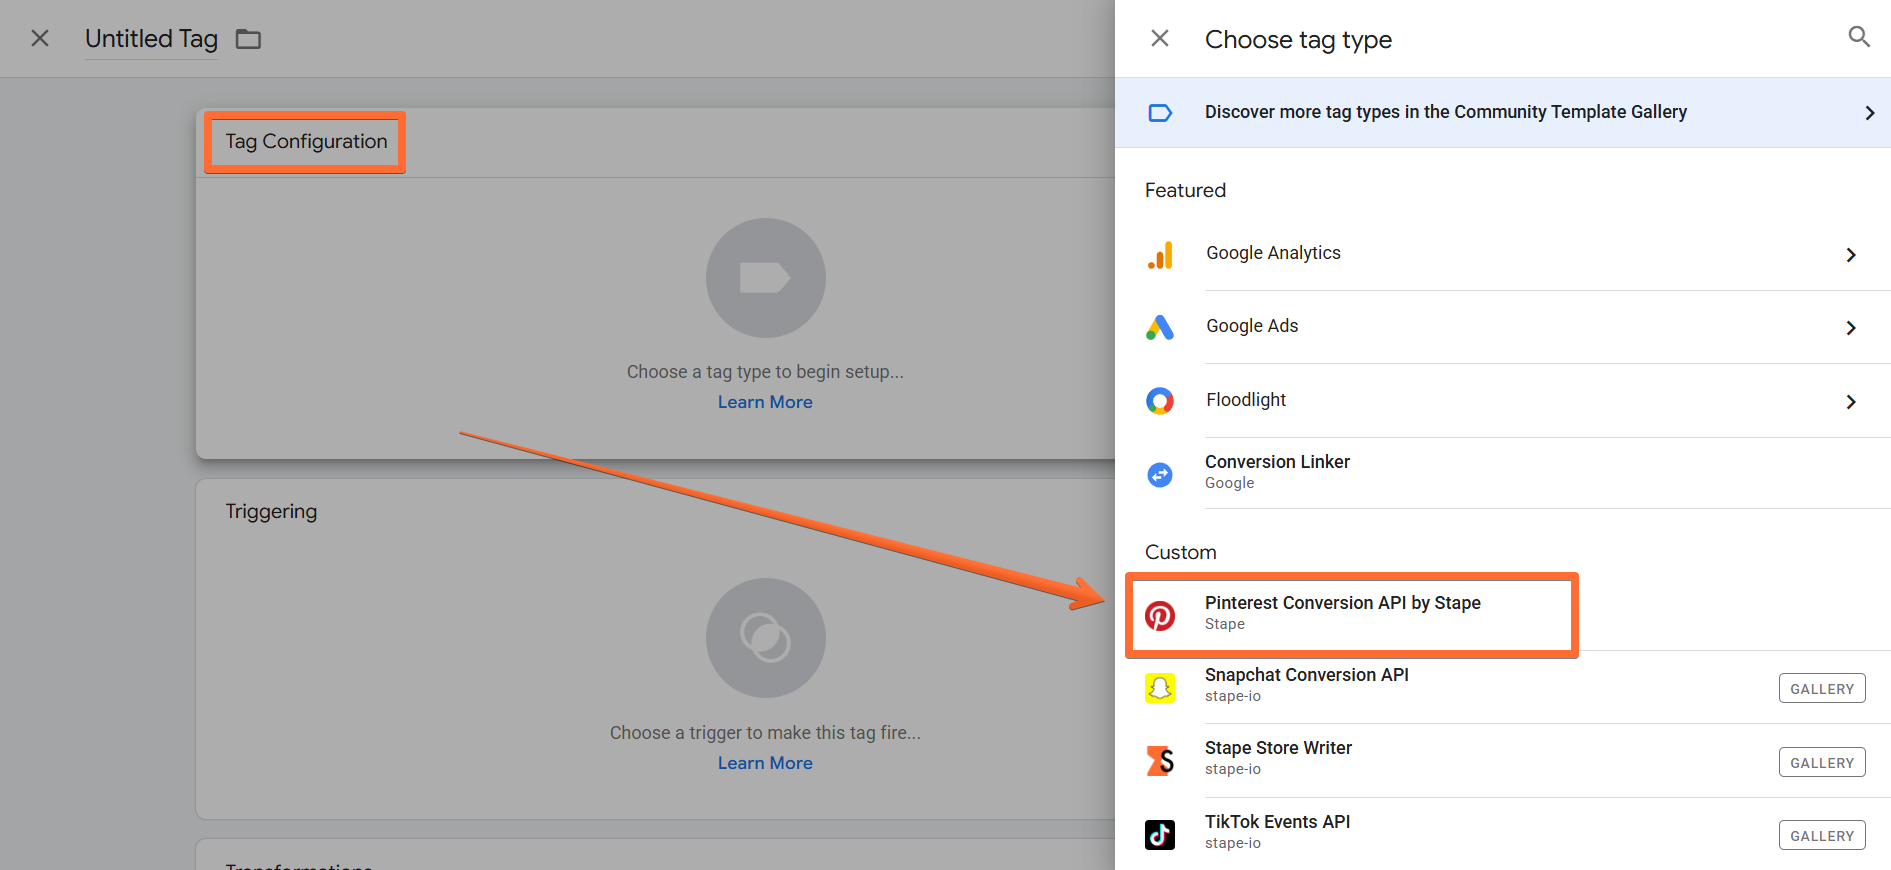
- Click Tag Configuration → select Pinterest Conversion API.
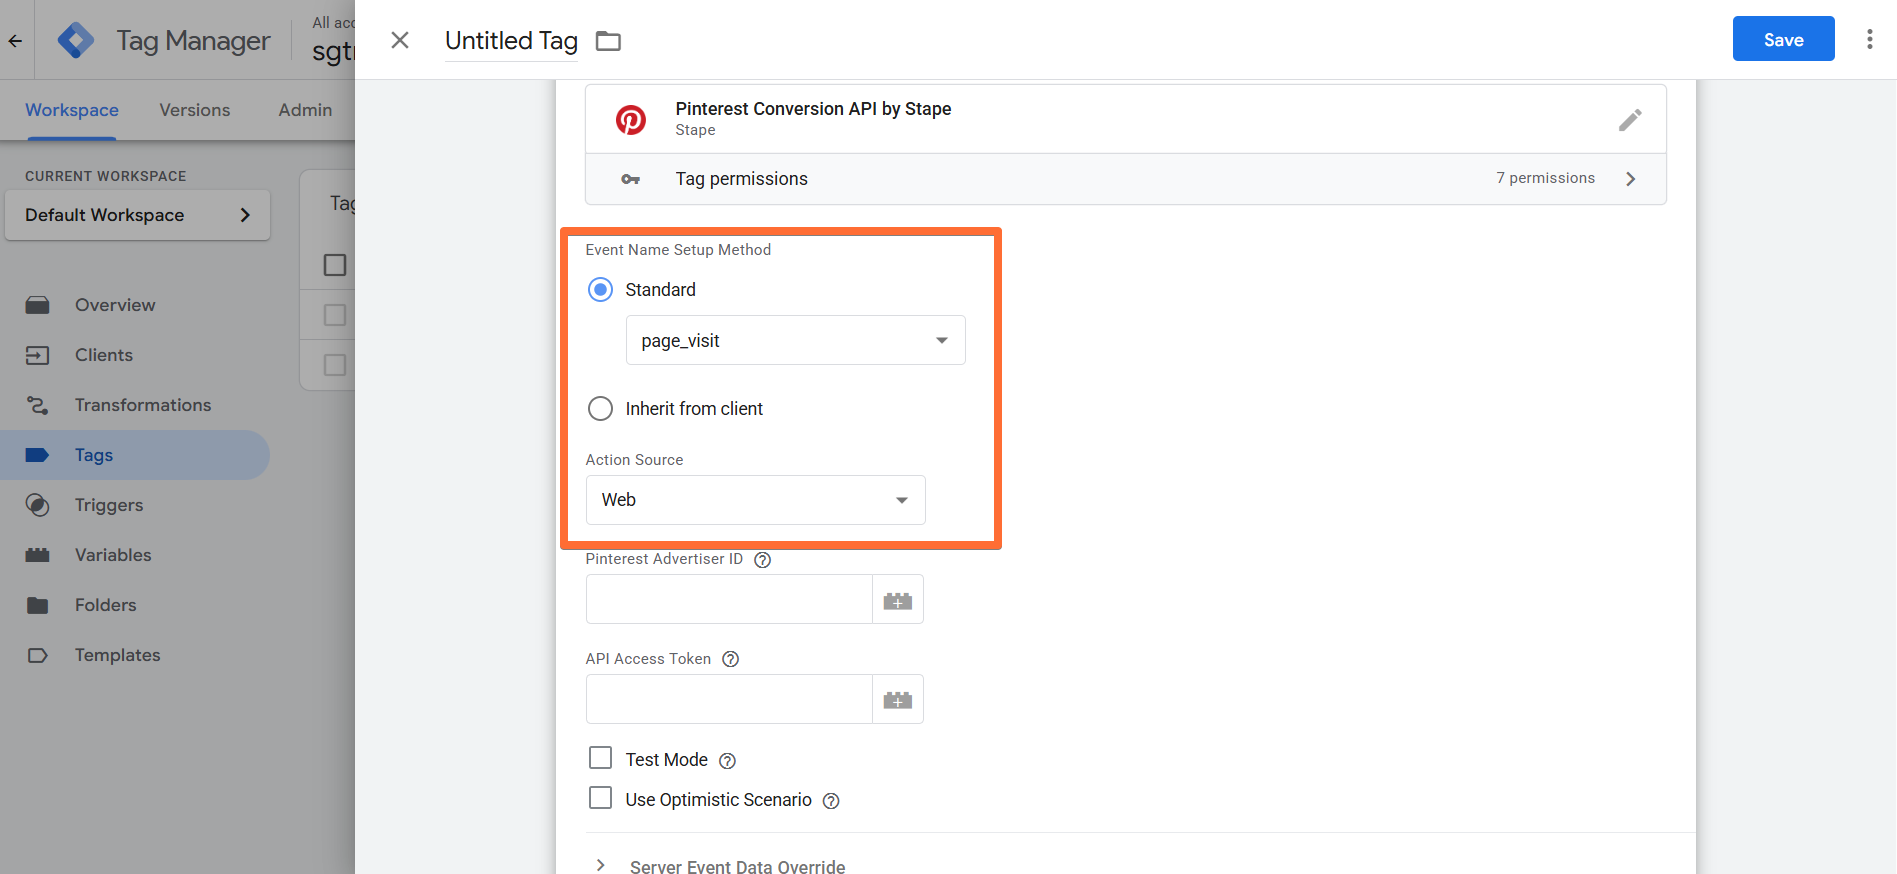
4. Configure the Pinterest Conversions API tag:
- Select Action Source (web, offline, Android, or iOS app) and Event Name Setup Method:
- Standard - with this option, you can choose the event from the list (e.g., page_visit, add_to_cart, checkout, etc.) Please note the Custom option - if you choose it, you can set up custom event tracking.
- Inherit from client - the Pinterest CAPI tag will try to map events automatically into standard events or use a custom name if it’s impossible to map into a standard event.
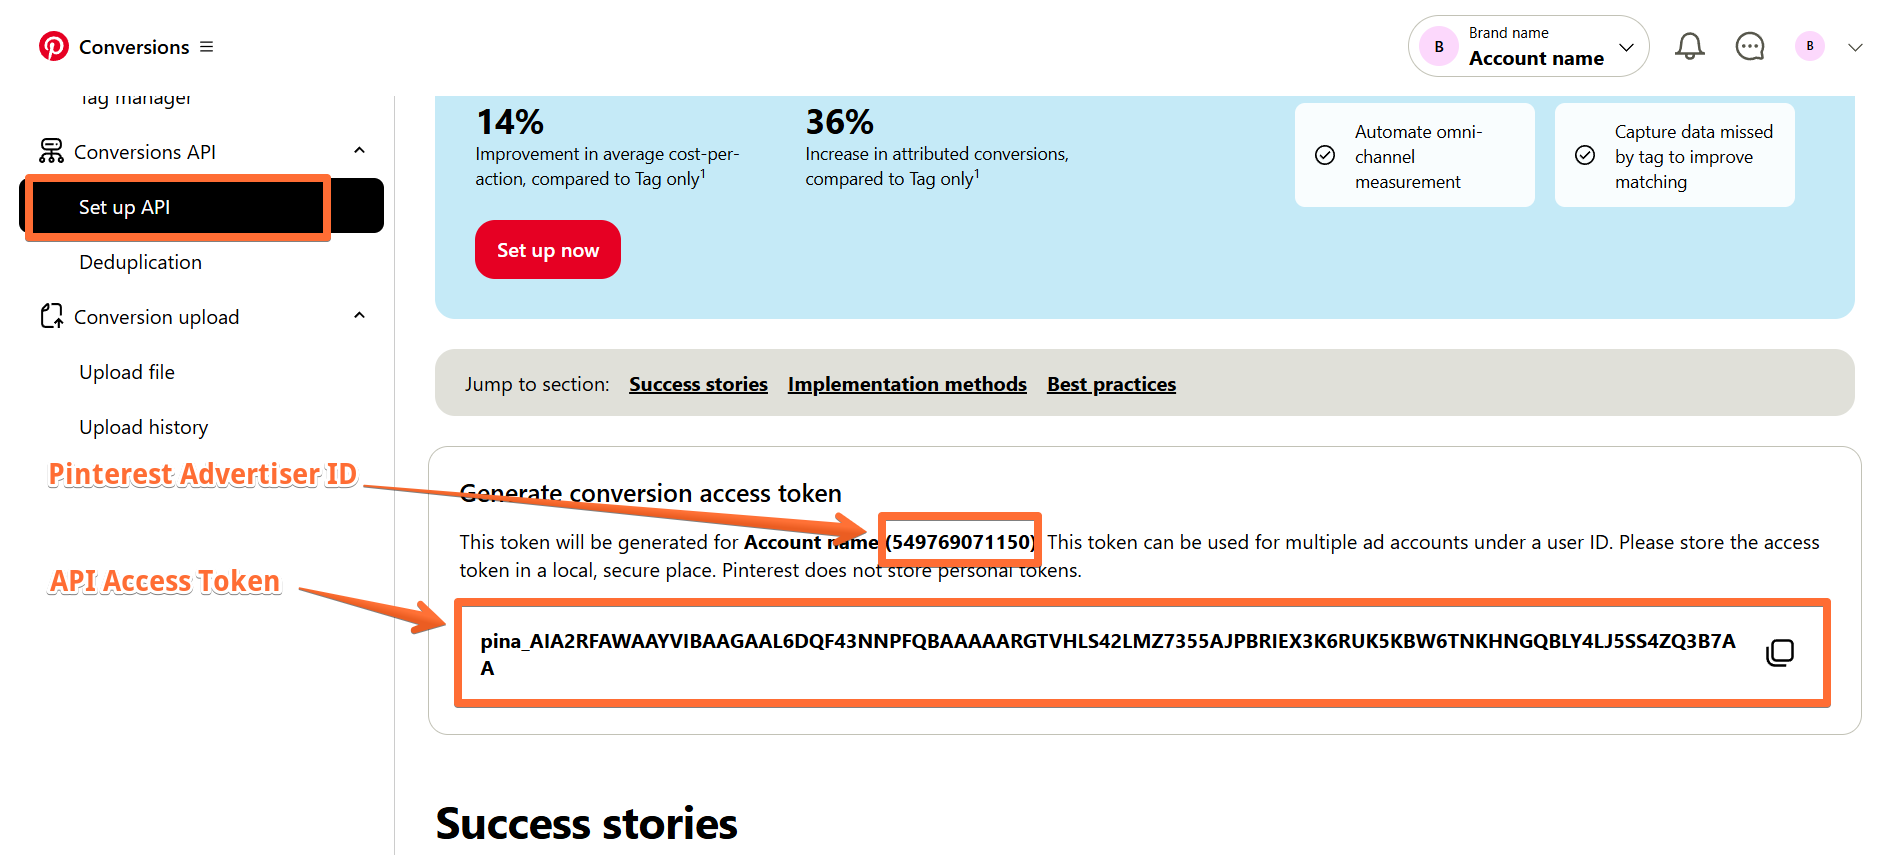
- Add Pinterest Advertiser ID and API Access Token.
- Important! Web and server containers use different Pinterest IDs. To find the Pinterest ID that you need to use at this step:
- Log in to your Pinterest Ad account → click on Ad account overview in the top left corner → under the Manage Business category, click Conversions → open the Set Up API page from the left-hand navigation menu. In the block Generate conversion access token, you'll see your Ad account name and Pinterest Advertiser ID (the characters in brackets). Click the Generate new token button and you’ll also see the API Access Token.
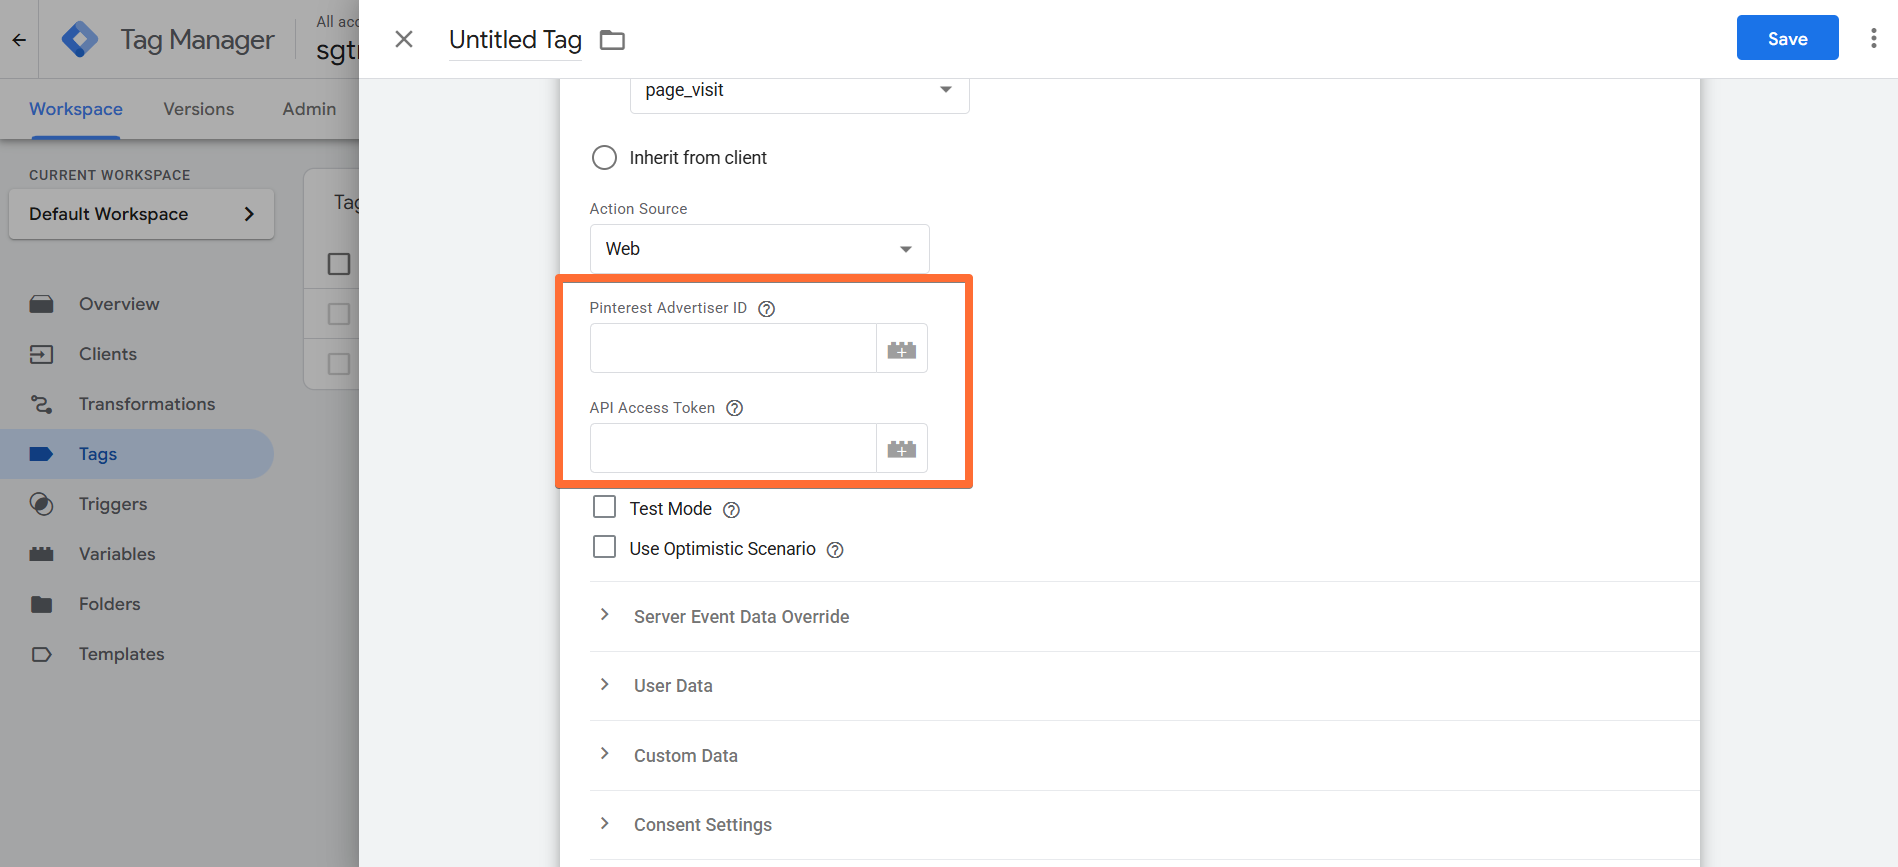
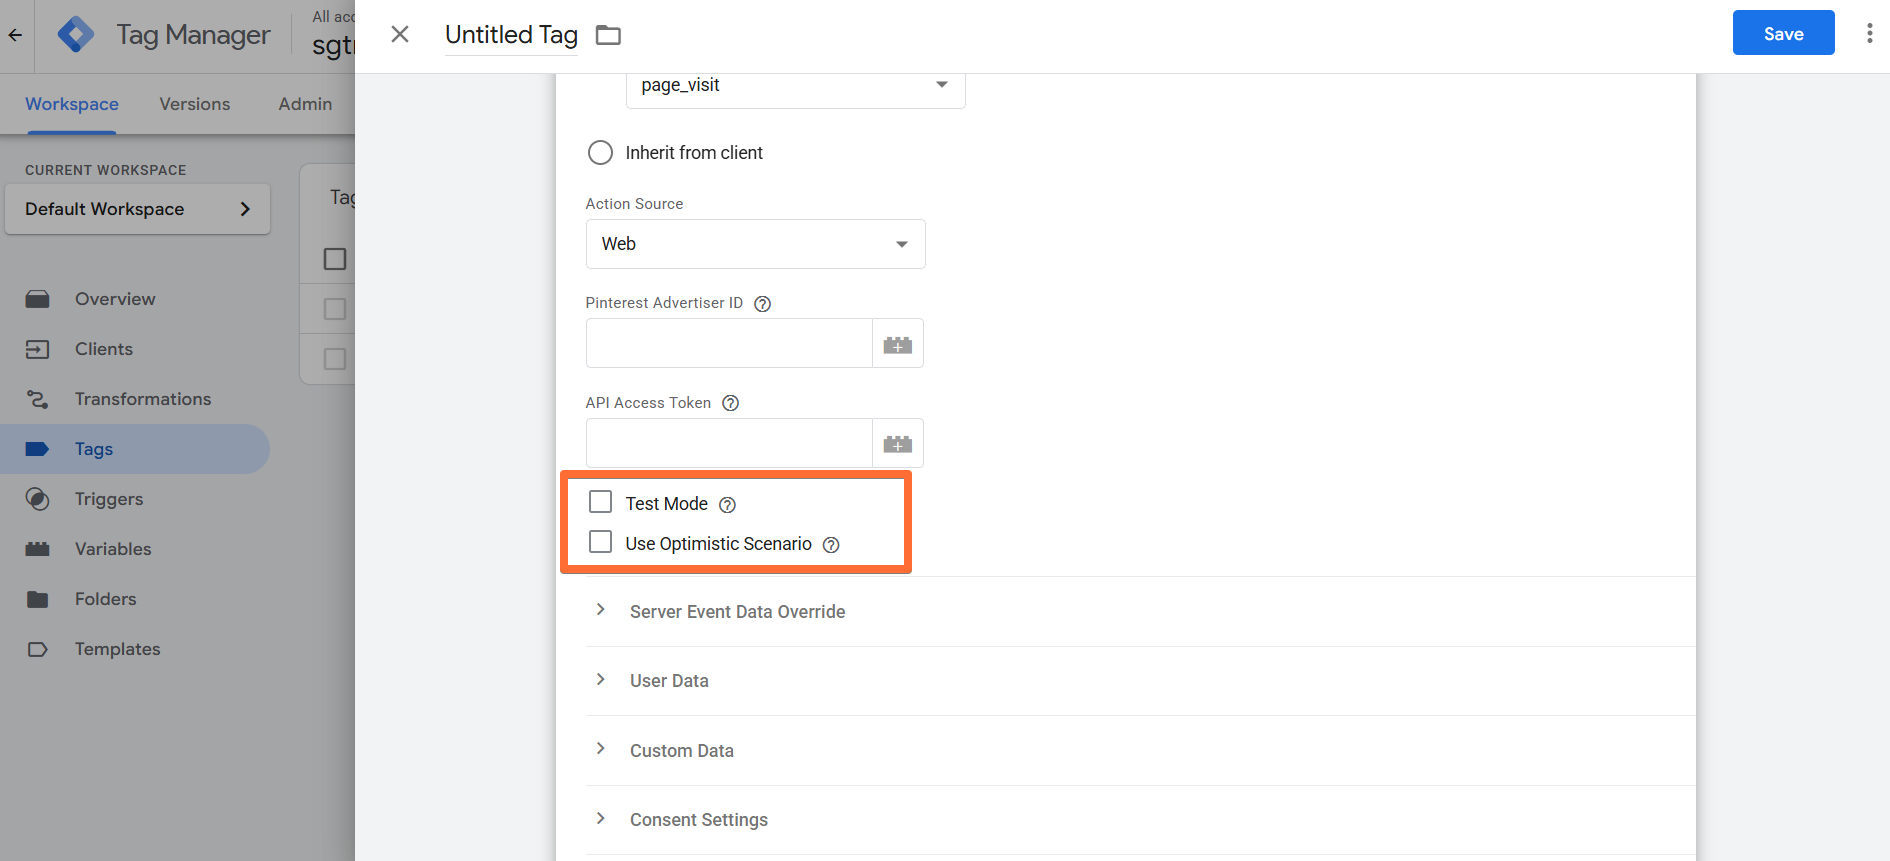
- Consider optional configurations:
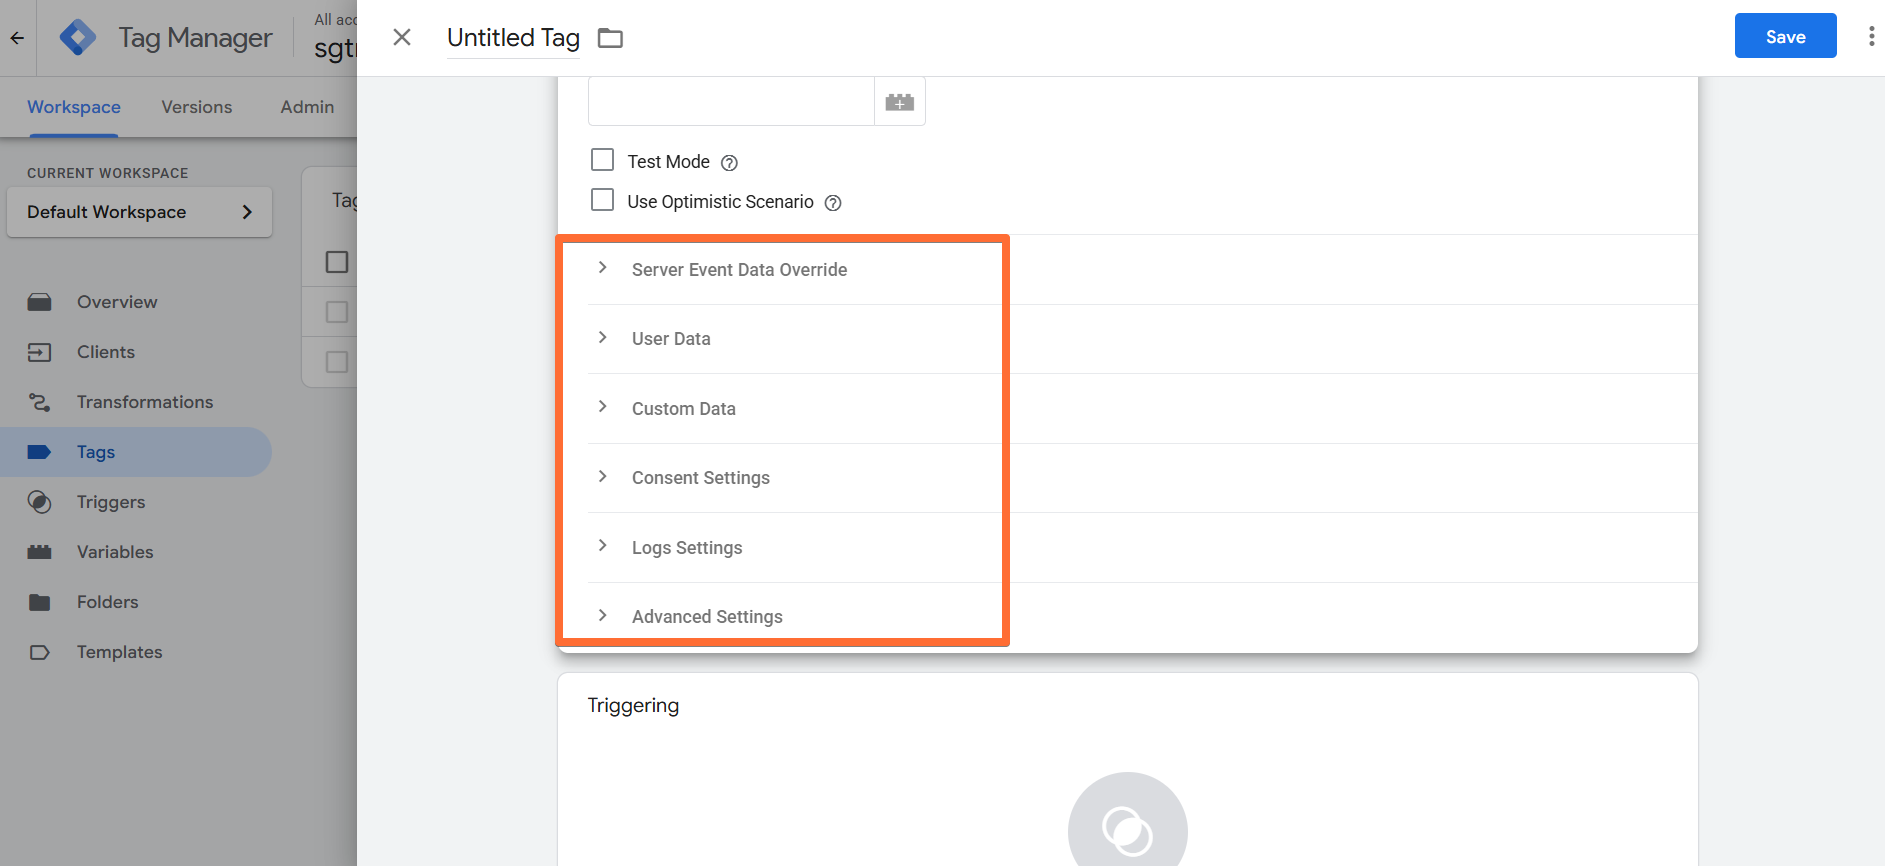
- Test Mode - if you check this box, events will not be recorded, but the API will still send response messages. Use this mode to verify that your requests are working and your events are constructed correctly.
- Use Optimistic Scenario - the tag will call gtmOnSuccess() without waiting for a response from the API. This will speed up sGTM response time. However, your tag will always return the status “fired successfully,” even if it is not.
- Advanced configurations to keep in mind:
- Server Event Data Override - select from a list of custom data. A frequently asked question for this section is how to add an Event ID. Event ID is automatically grabbed from event data, or you can redefine it in tag settings.
- User Data - select from a list of user data.
- Custom Data - select from a list of product data.
- Consent Settings - gives you an option to send data only if marketing consent is given.
- Logs Settings - choose if you want to log requests to your Stape account. This feature is handy when setting up server-side tagging since it allows seeing incoming and outgoing requests and network responses.
- Advanced Settings (Additional Tag Metadata) - specify additional tag metadata to be included in the event data when a tag is fired.
5. Add the Trigger for the tag, give it a descriptive name, and click Save.

How to test and troubleshoot Pinterest CAPI setup
You can test the configurations in Google Tag Manager. Click on Preview, trigger the event, and check whether the tag has fired.

Find out more about debugging and monitoring server-side tracking configuration in our guide.
Was this article helpful?
Comments