How to use same origin through Deno Deploy
Updated May 10, 2026
This instruction uses /metrics as an example of the same origin path. You can use any of your own.
You should also use the URL of your server GTM container instead of https://sgtm.example.com.
Deploy proxy code
Start by creating a Deno Deploy account if you don't have one.
There are a few ways to get code deployed on Deno Deploy. We'll cover two in this section:
- Using Deno Deploy's web interface.
- Using Deno's runtime CLI.
In both cases, the script that you'll need to deploy will look something like this:
constORIGIN_PATH = "/metrics";
constGTM_URL = "https://sgtm.example.com";
Deno.serve(async(request, connInfo) => {
consturl =newURL(request.url);
if(url.pathname.startsWith(ORIGIN_PATH)) {
constnewHeaders =newHeaders(request.headers);
     newHeaders.set("X-Forwarded-For", connInfo.remoteAddr.hostname);     newHeaders.set("X-From-Cdn", "cf-stape");
     newHeaders.set("CF-Connecting-Ip", connInfo.remoteAddr.hostname);
     newHeaders.set("HOST", "sgtm.example.com");
     returnfetch(GTM_URL, {
       method: request.method,
       headers: newHeaders,
       body: request.body,
});
}
return newResponse(null, { status: 404 });
});
Both ORIGIN_PATH and GTM_URL can and should be customized. They should match the paths you'll end up using in the script tag you'll add to the site you want analytics on.
Using Deno Deploy's web interface
Log into Deno Deploy, navigate to the Projects Overview page, and click the New Playground button:
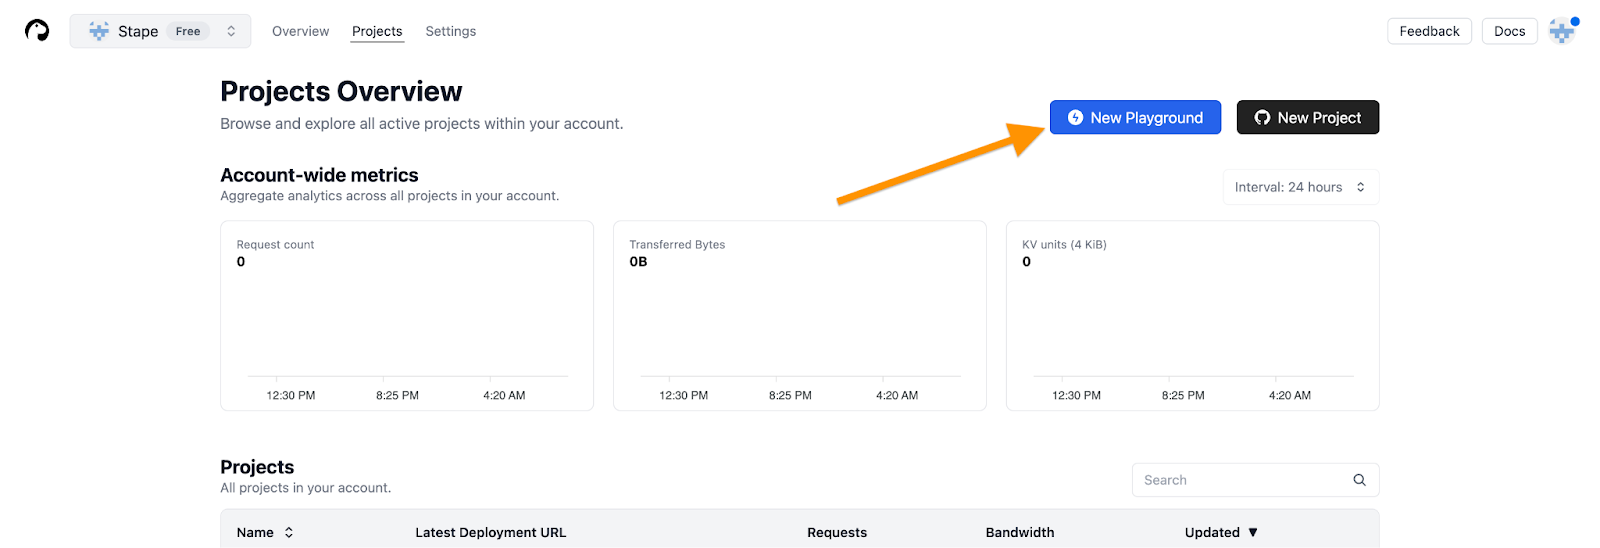
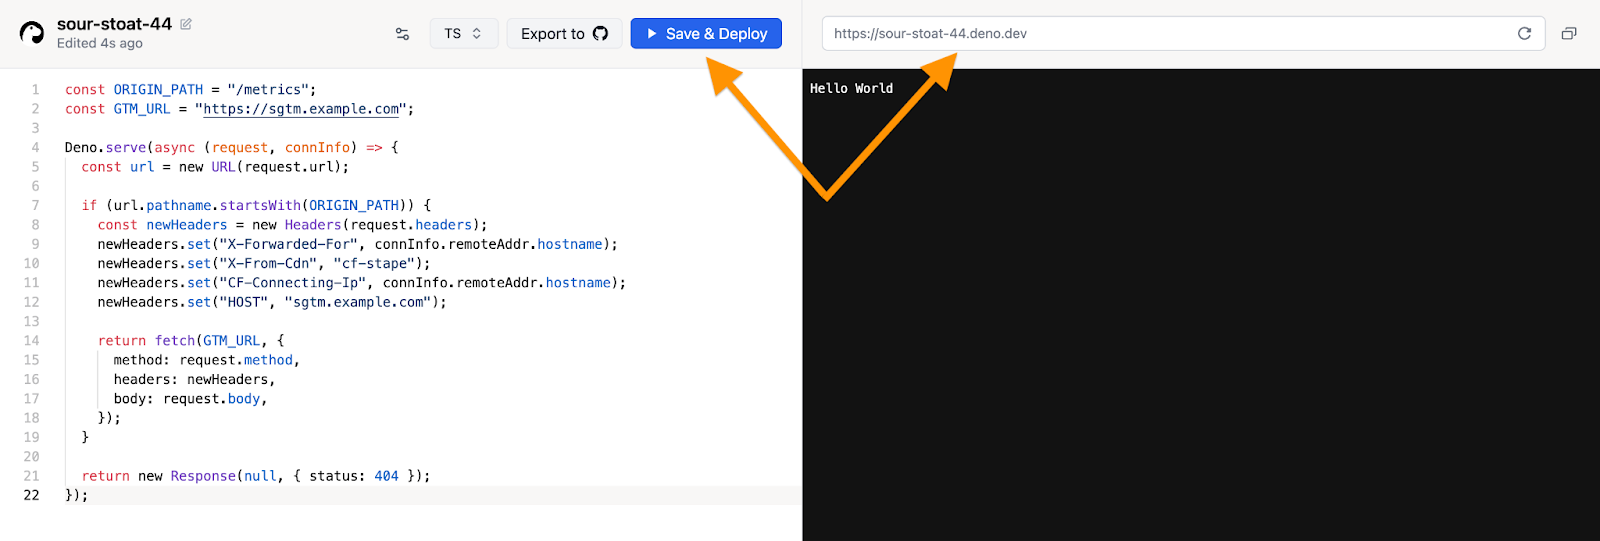
This will deploy a new project and present an online text editor with the contents of your project's main.ts file. Paste the contents of the proxy script provided above and click on Save & Deploy:
Using Deno's runtime CLI
If you have Deno runtime installed locally, initialize a new project with the init command:
deno init proxy-project-folderInside that folder, create a file named main.ts with the contents of the proxy script provided above.
To deploy your proxy script, run the following from the project folder:
deno deployIf you are not using your own subdomain and are proxying requests to the standard Stape subdomain, you also need to add the X-Stape-Host header with the value of the host where the events are taking place (for instance, X-Stape-Host: www.example.com).
After following these steps, add your /path for the same origin to the Custom Loader's settings. Check the article on Same Origin Path to do this.
Test your Same Origin setup
You can check that everything is configured correctly by sending a single test request using a GA4 tag.
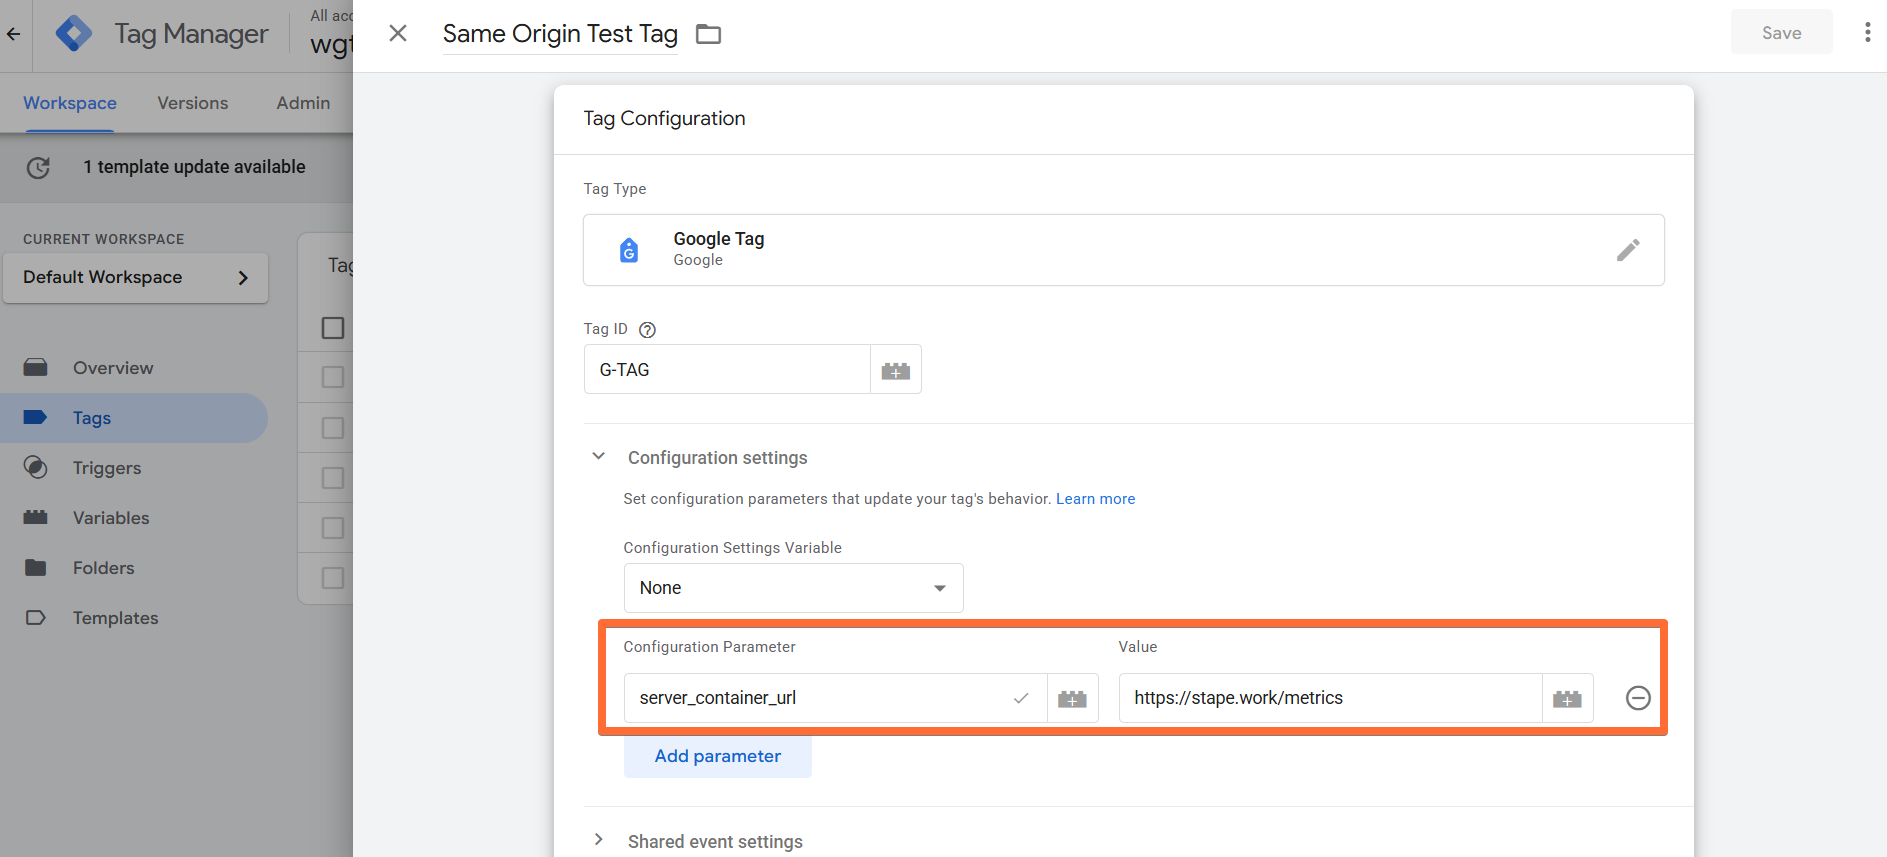
1. Create a GA4 tag in your web GTM container.
Add your Measurement ID (any ID works for testing) and set the server_container_url to the same-origin path you configured (we'll use https://stape.work/metrics as an example).
2. (Optional) To streamline testing, add your same-origin path (in this example, it's https://stape.work/metrics) to your server GTM settings. Click Admin → Container Settings → enter the path under Server container URLs.

3. Open Preview mode in both your web GTM container and your server-side GTM container. If everything is set up correctly, the server container should open in preview at the new path you created.
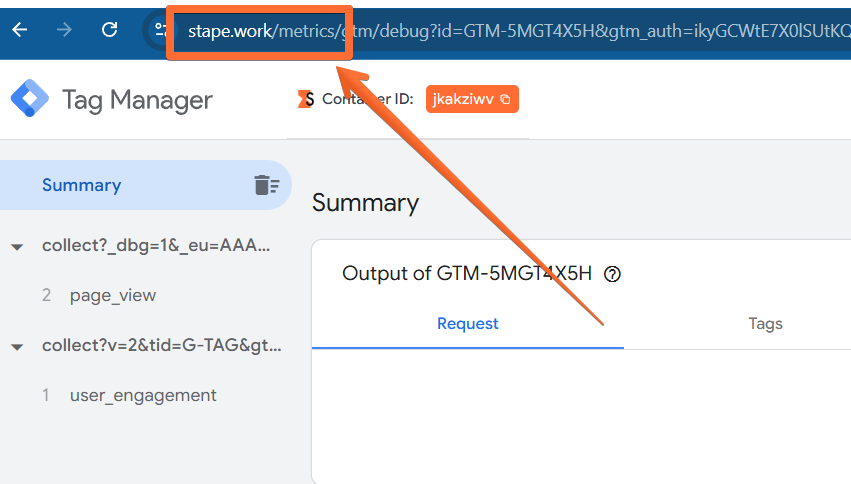
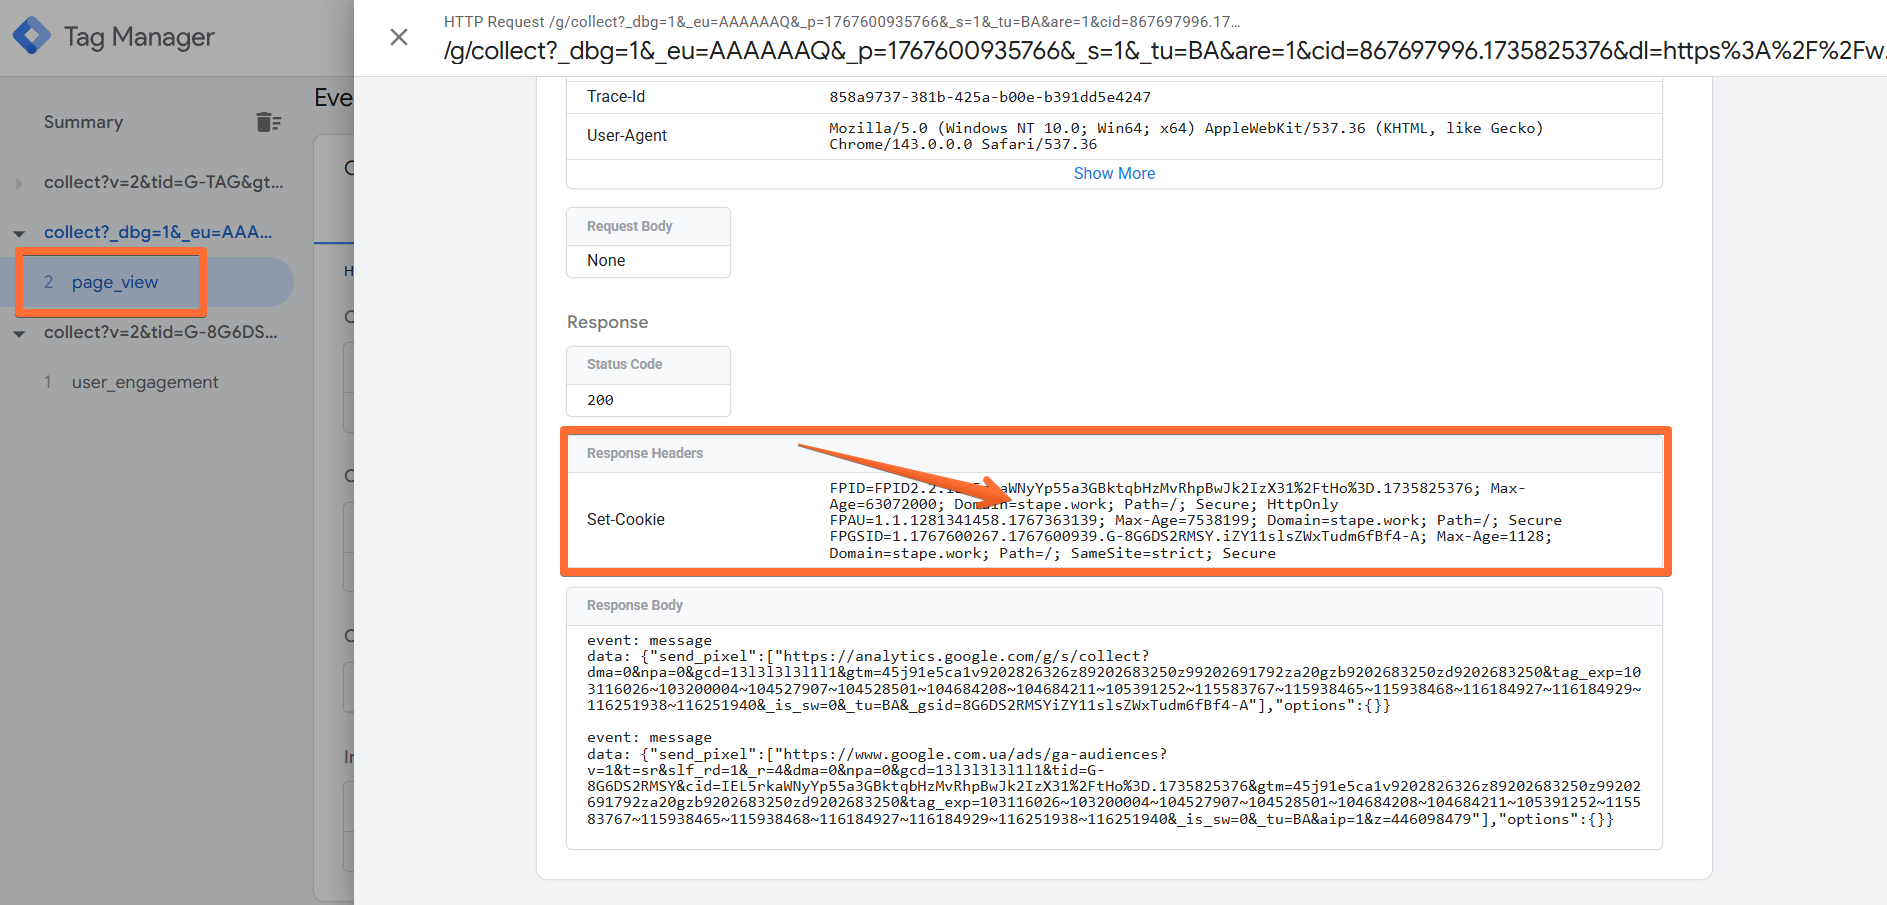
4. Trigger a page view on your site. In the server container preview, you should now see an incoming page_view request from your website’s real domain.
Was this article helpful?
Comments