How to use the same origin through Azure Front Door
Updated Jul 28, 2026
Google now recommends mapping a server-side Google Tag Manager (sGTM) container to the same origin (example.com/sgtm) instead of a subdomain (sgtm.example.com). Using the same origin makes first-party cookie setup easier and avoids extra cookie-lifetime configuration, but the implementation is more complex than a subdomain setup. Let’s see how to configure the same origin through Azure Front Door.
Before you begin
Make sure that your website traffic is already proxied through Azure Front Door. You should already have:
- DNS pointing your website domain to Front Door.
- An active TLS certificate for the domain.
- At least one working route for normal site traffic.
If you’re unsure how to configure any of those, please refer to the official Azure Front Door documentation.
*Also, this guide assumes that you already have a Stape account with a connected server GTM container and a configured custom domain. If you don’t have any of those yet, check out our guides on getting started with sGTM hosting with Stape.
Setup guide
Configuring the same origin through Azure Front Door includes creating an origin and a route for your Front Door configuration.
1. Create an origin for your Front Door configuration
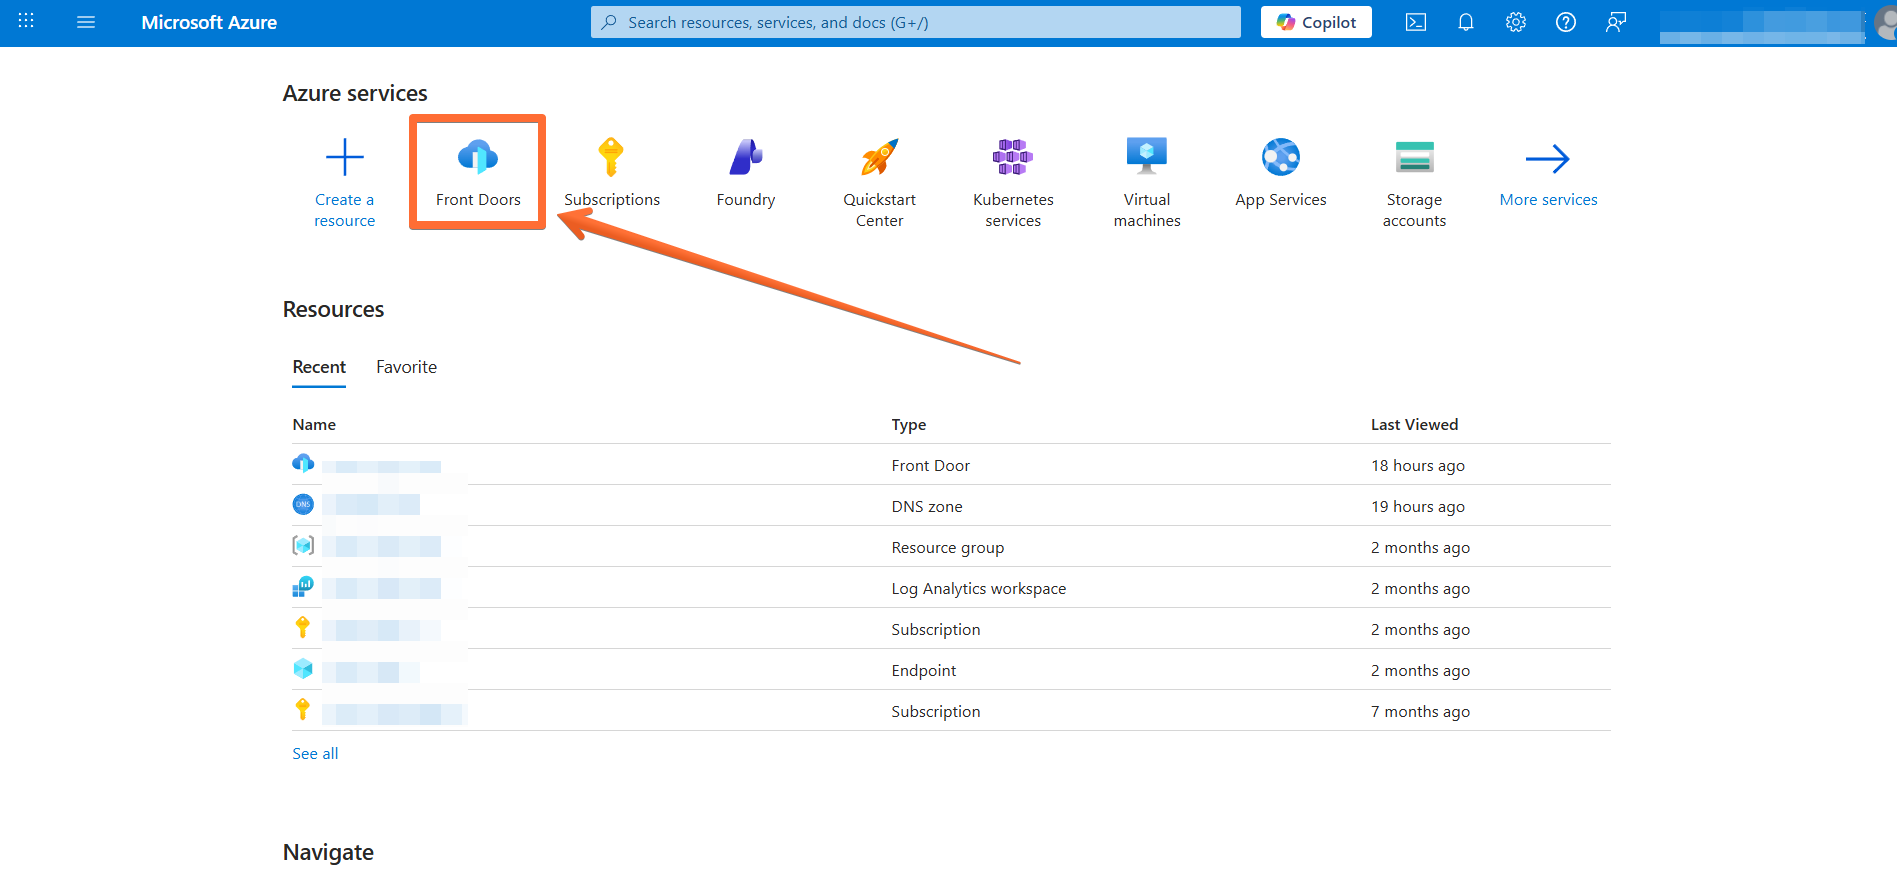
1. Go to the Front Doors console.
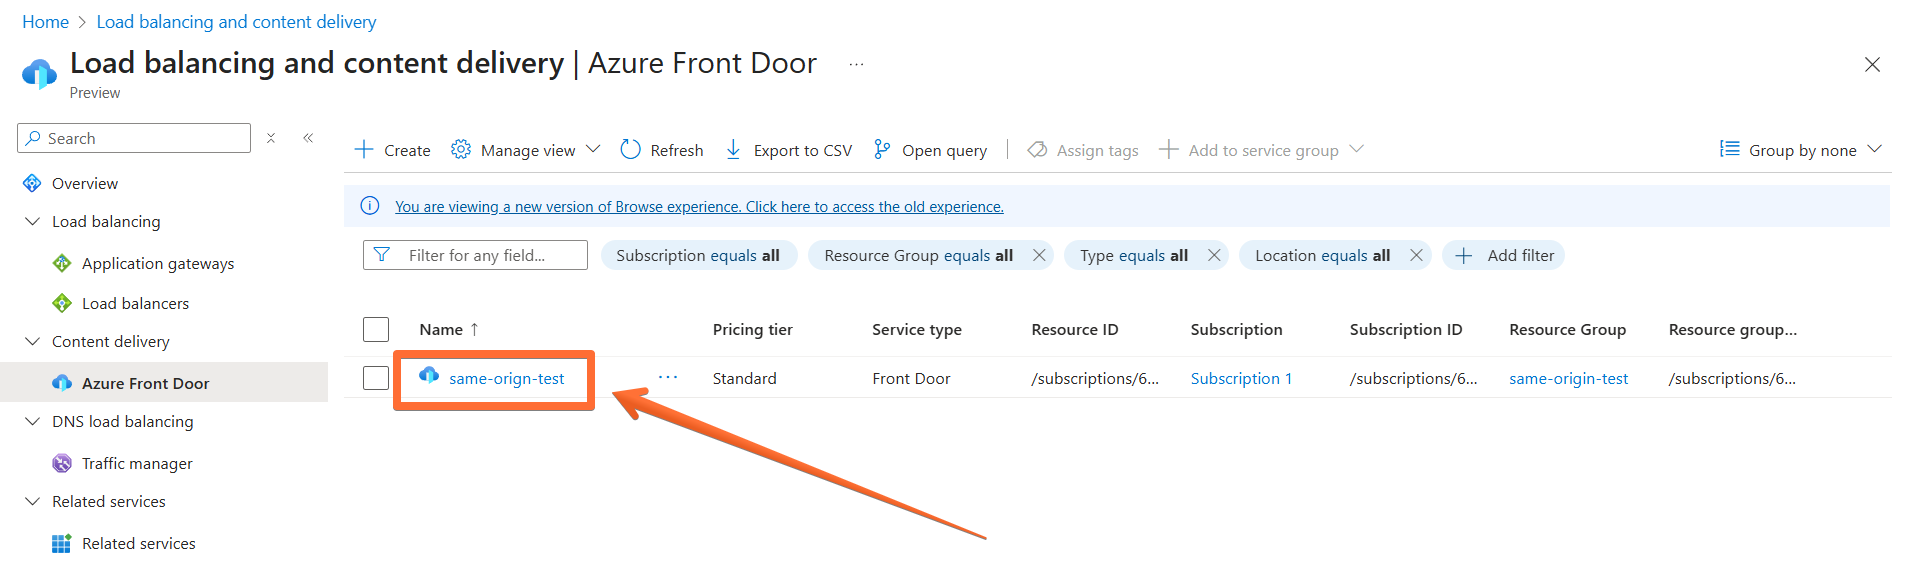
2. Click on your Front Door configuration.
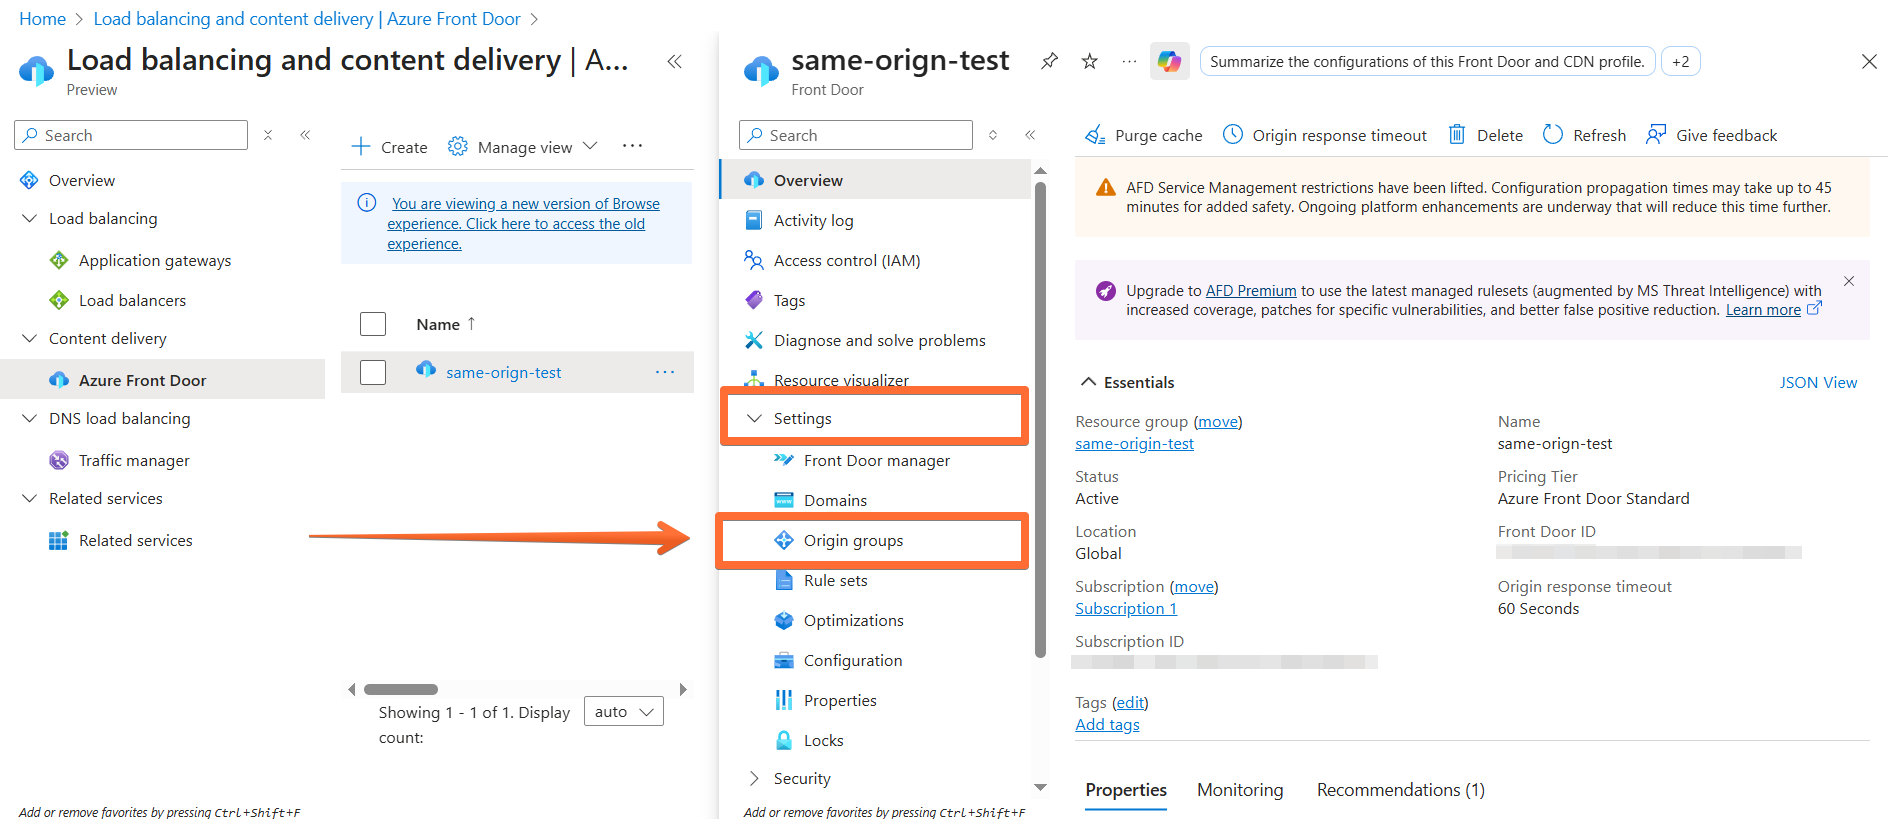
3. In the navigation bar, expand the Settings section and select Origin groups.
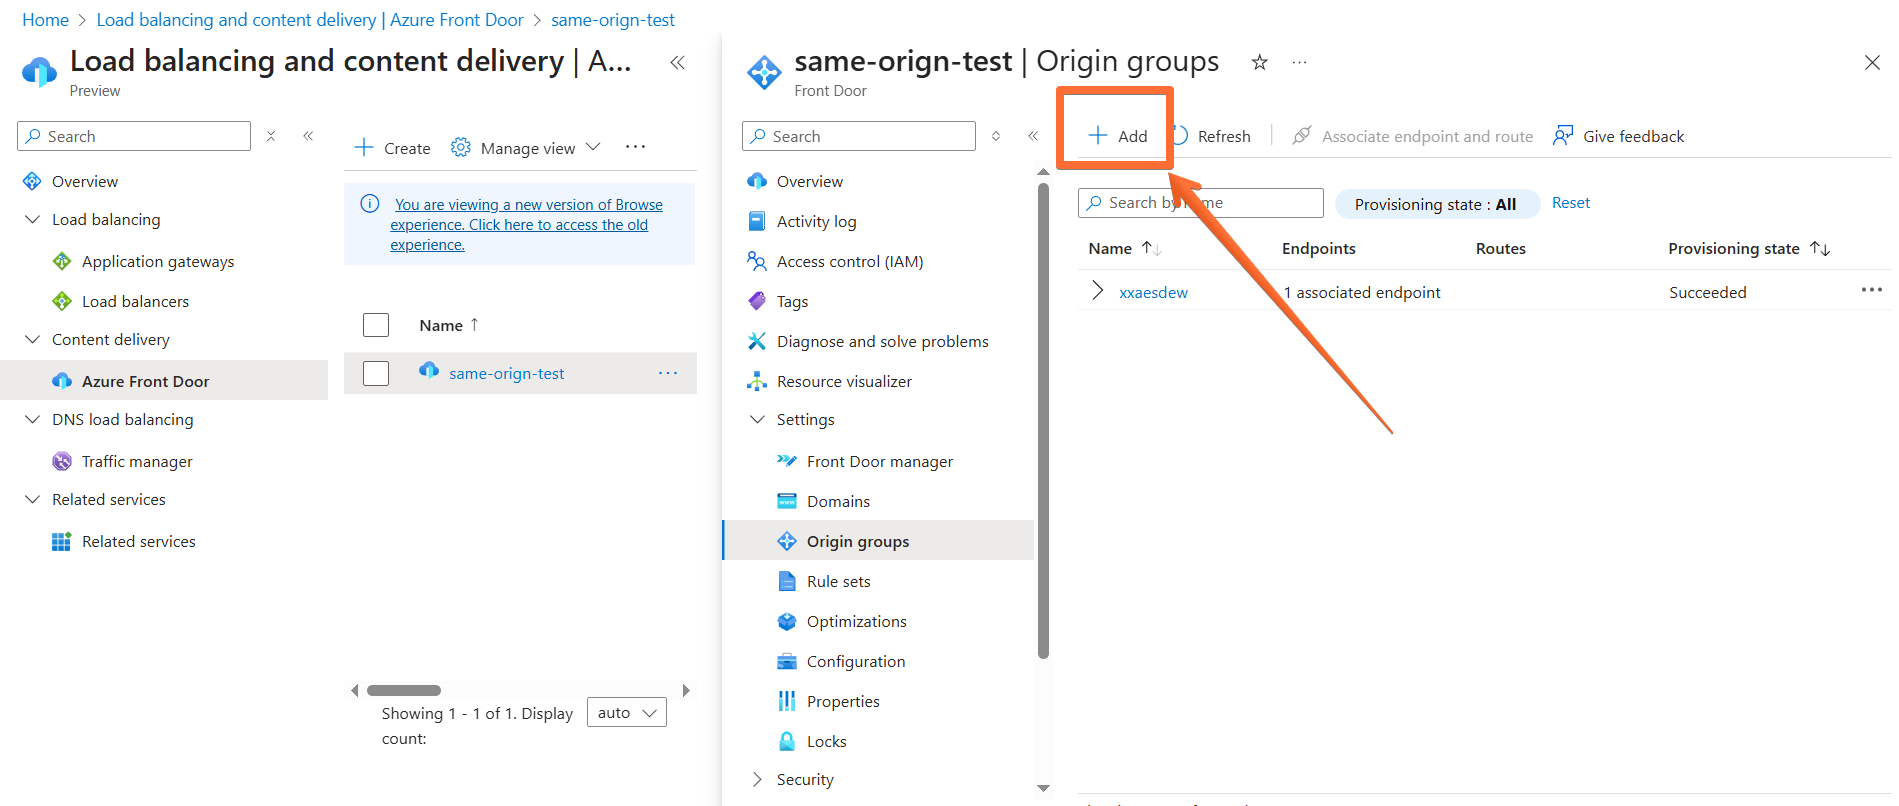
4. Click the Add button.
5. Fill the Name field with a descriptive name and click the Add an origin button.
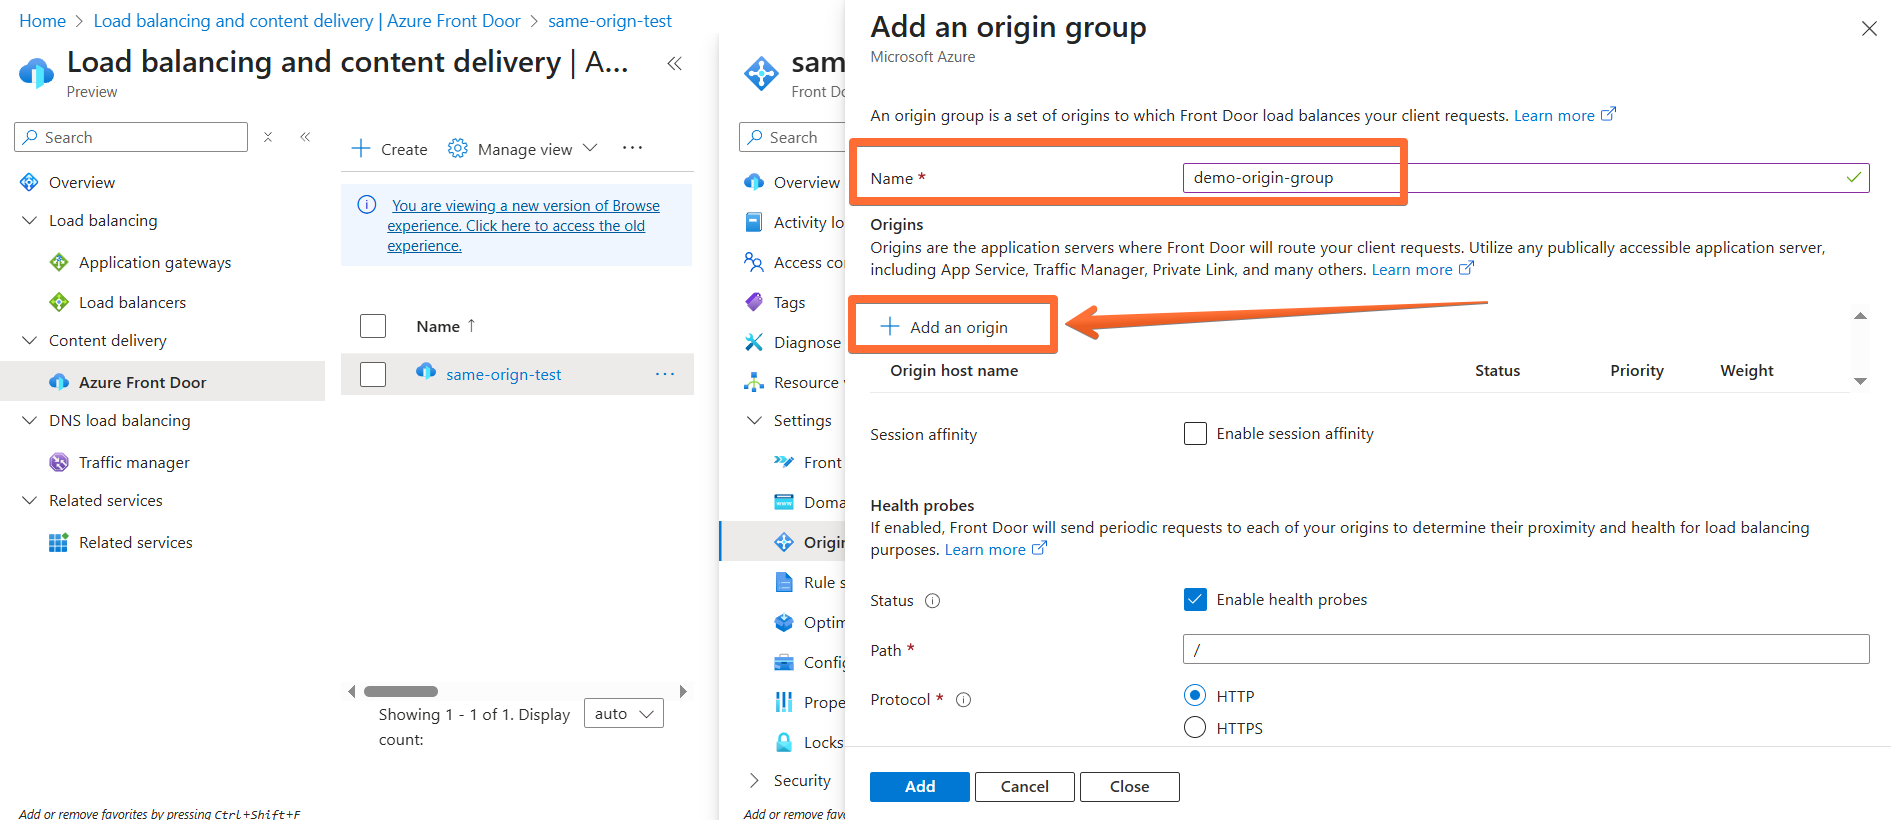
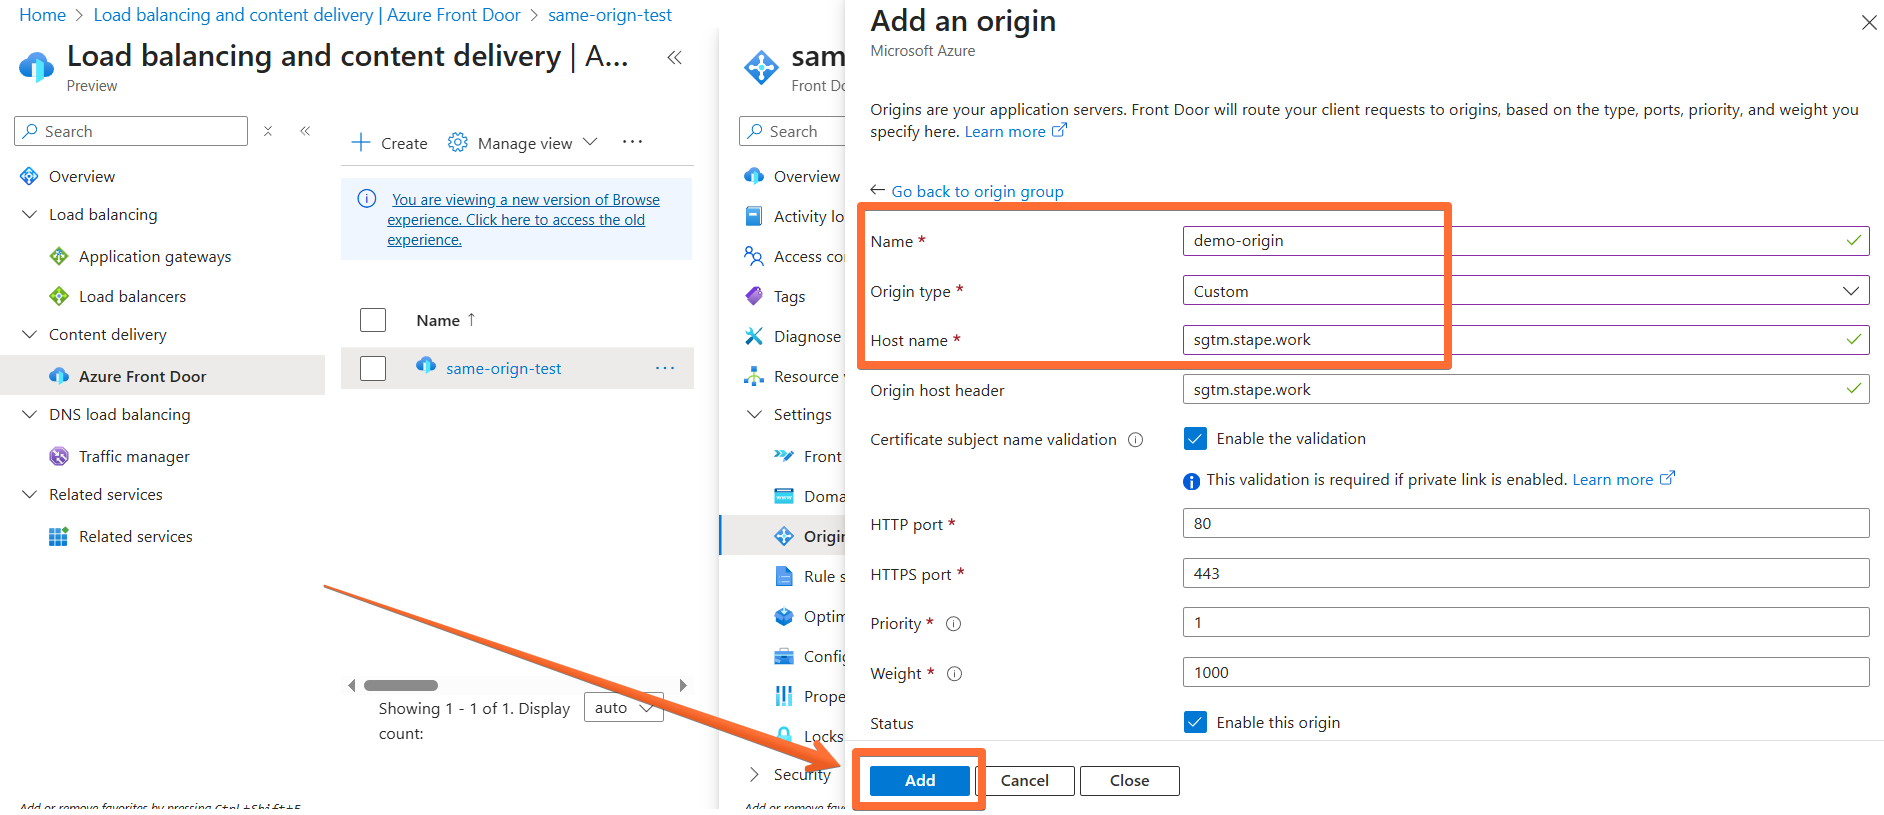
6. Configure the origin:
- Fill the Name field with a descriptive name.
- In the Origin type dropdown, select the Custom option.
- Fill the Host name field with your Stape container default domain, e.g., sgtm.stape.work.
- Click the Add button.
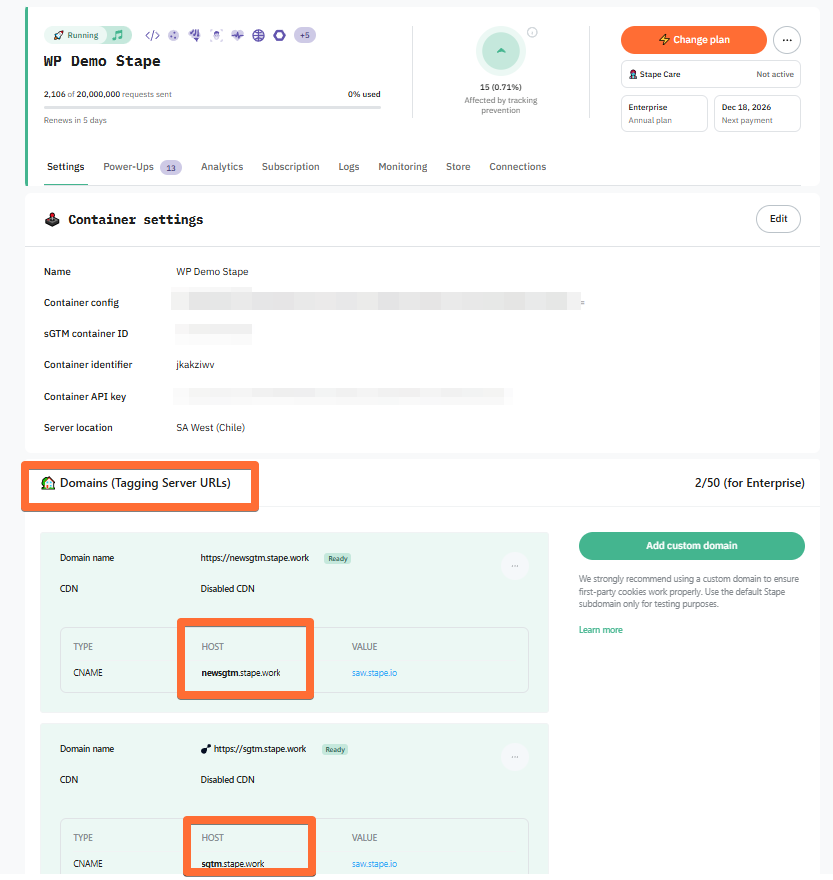
To find your Stape container domain, go to your Stape account, open your container’s settings, and scroll down to the Domains section:
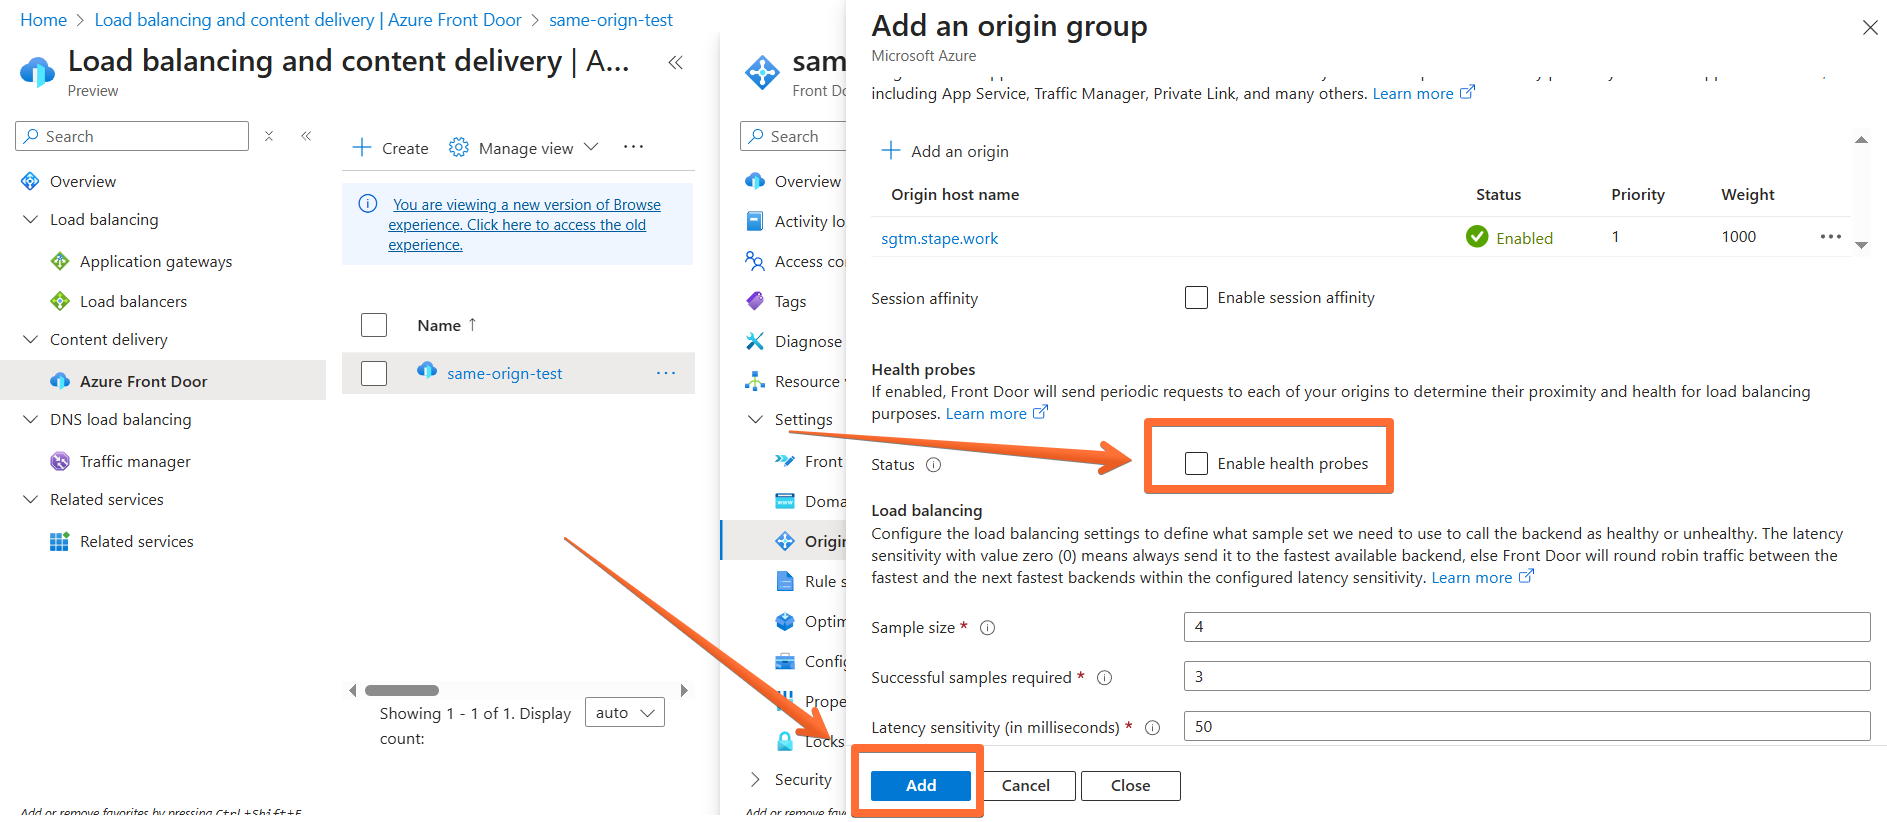
7. Untick the Enable health probes checkbox and click Add. Wait for the setup to be processed (can take a few minutes).
2. Create a route for your Front Door configuration
1. In the navigation bar, under the Settings section, select Front Door manager.
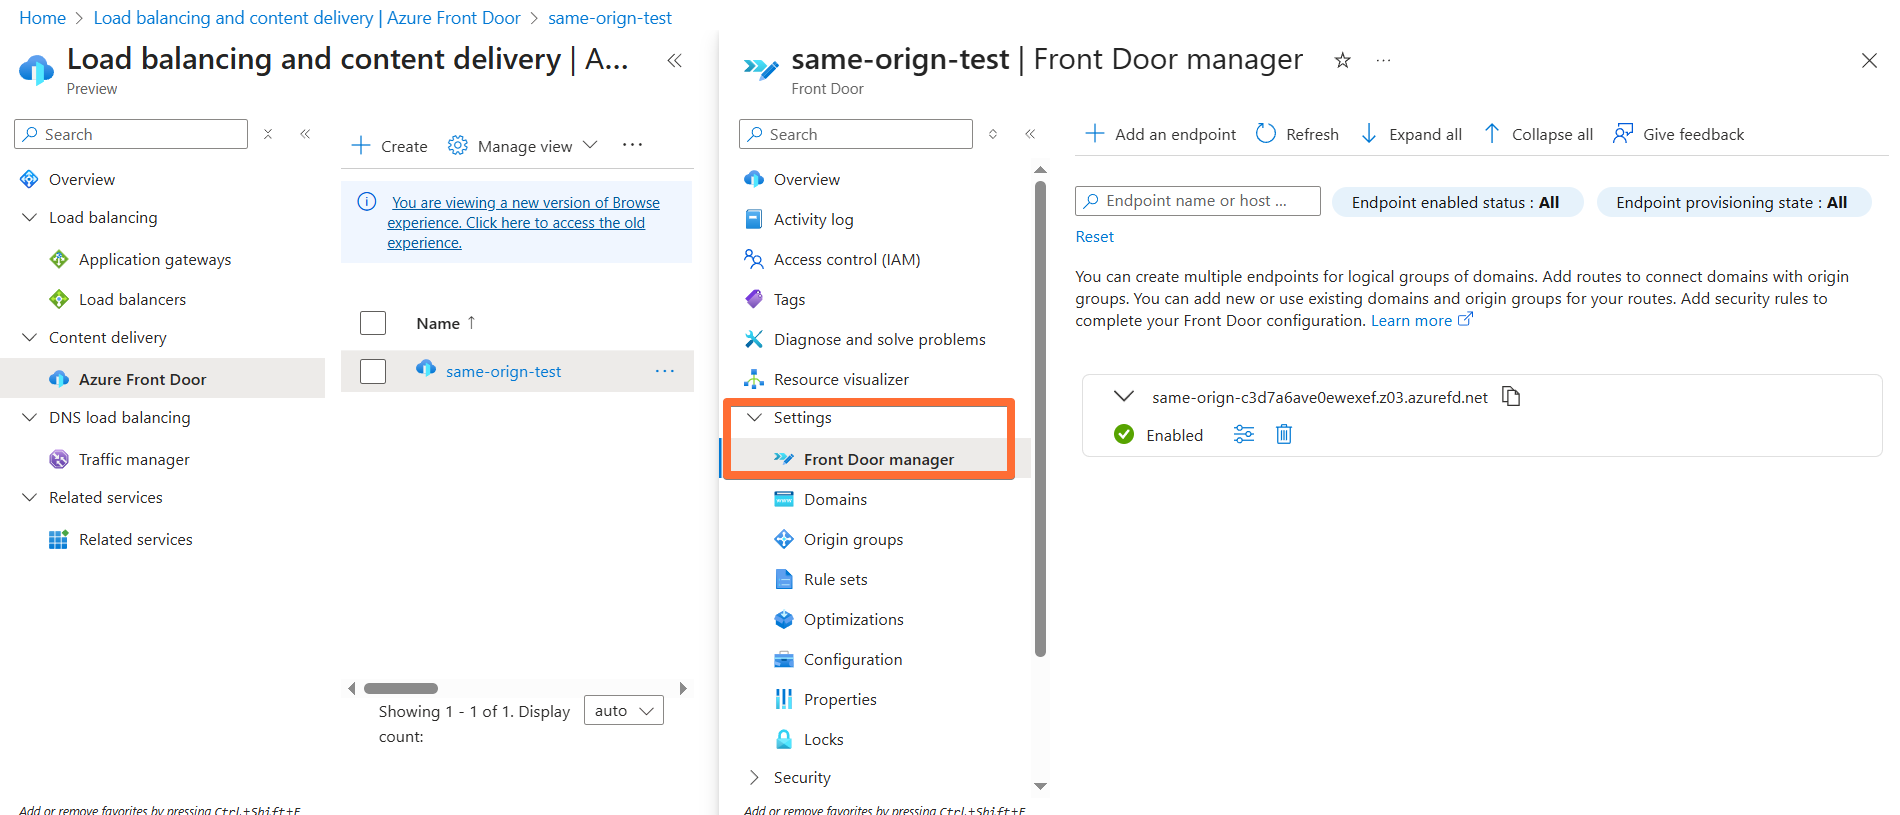
2. Expand the desired endpoint block and click Add a route.
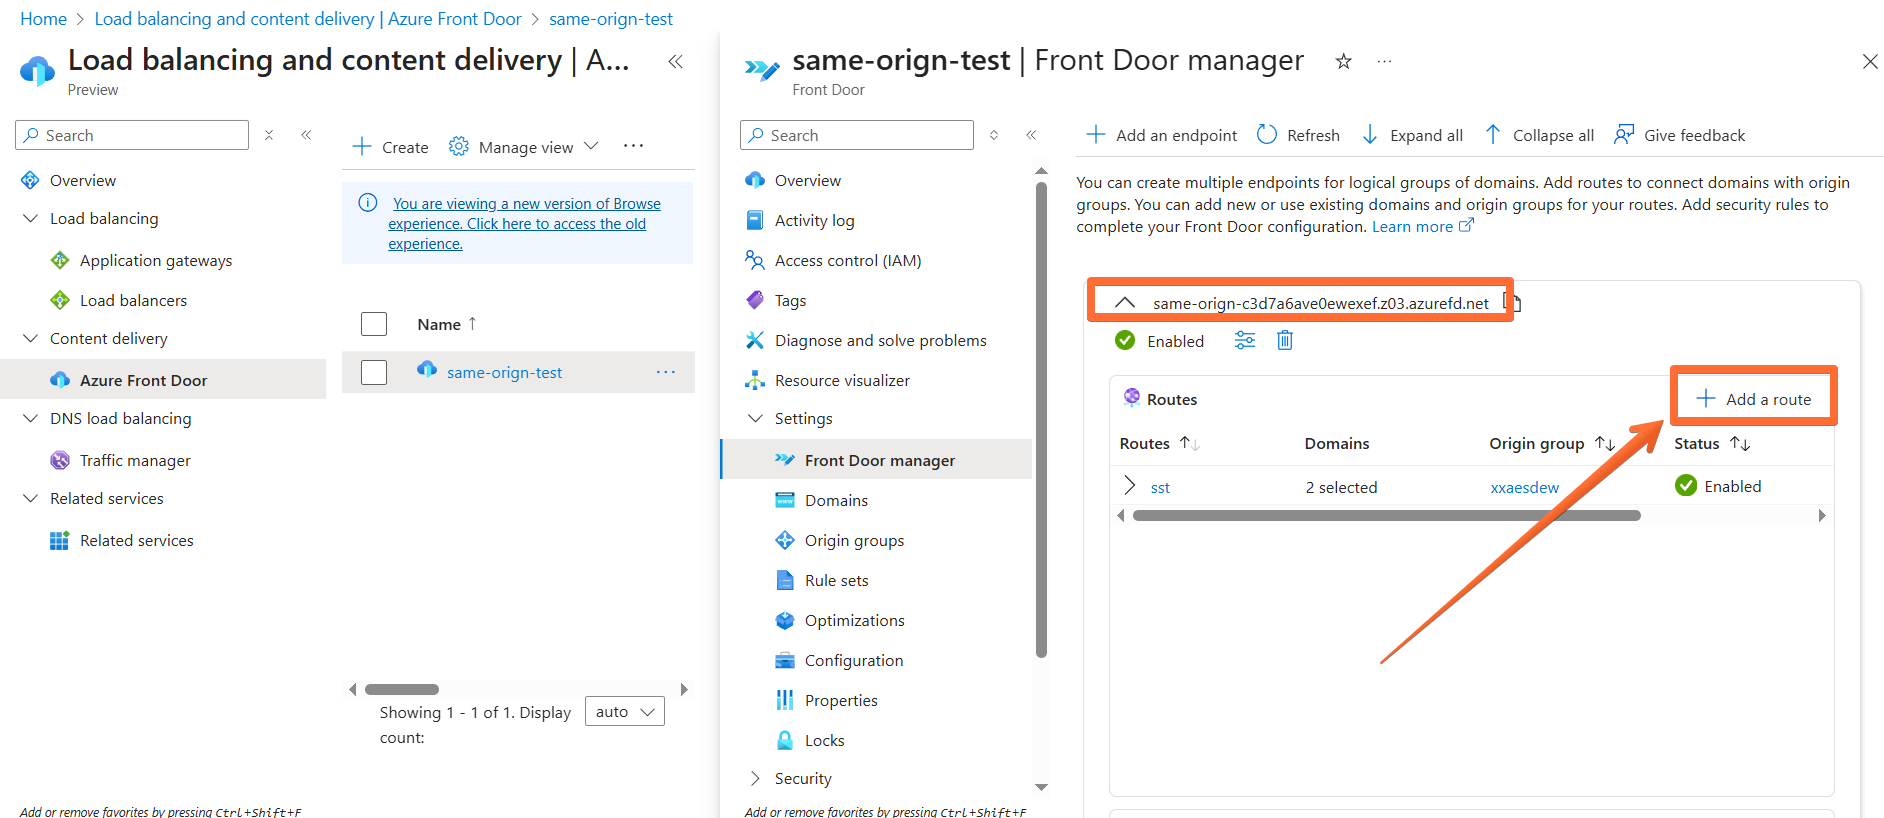
3. Configure the route:
- Enter a descriptive name.
- In the Domains dropdown, ensure that the proper domain is selected.
- Fill the Patterns to match field with your custom path prefix, e.g., /metrics/*.
- From the Origin group dropdown, select the origin group created in the first step.
- Set the Origin path to “/”.
- Click the Add button.
Wait for the setup to be processed (can take a few minutes).
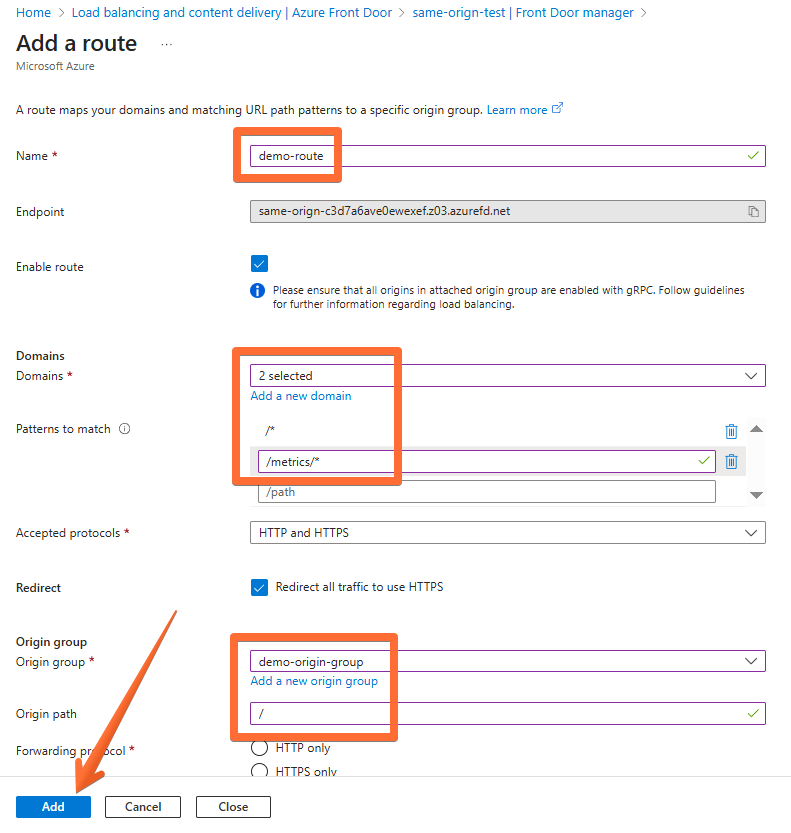
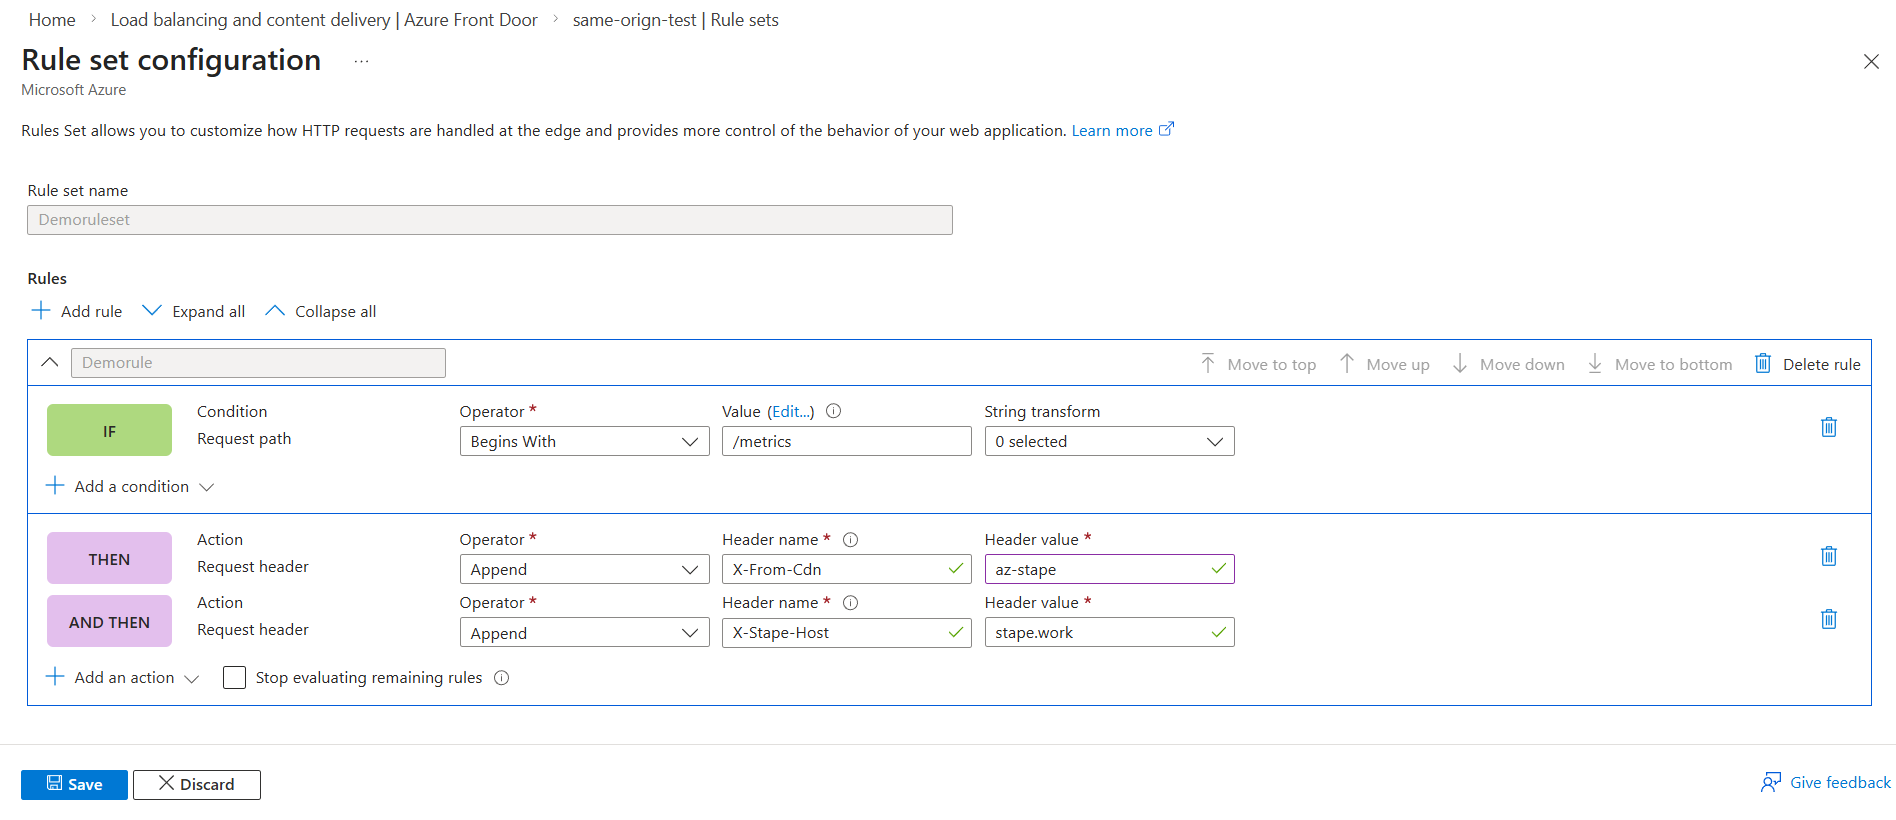
3. Set up a request header rule
1. In the navigation bar, under the Settings section, select Rule sets → click Add.
2. Configure the rule:
- Enter a descriptive rule set name.
- Enter a descriptive rule name.
- Click Add a condition → select Request path.
- Operator - Begins with.
- Value - enter the path you configured, in our case, it’s /metrics (click Edit to change).
- Click Add an action → select Modify request header.
- Operator - Append.
- Header name - X-From-Cdn.
- Header value - az-stape.
- (Optional) If you are not using your own subdomain and are proxying requests to the standard Stape subdomain, you also need to add the X-Stape-Host header with the value of the host where the events are taking place. Click Add an action → select Modify request header.
- Operator - Append.
- Header name - X-Stape-Host.
- Header value - enter the host of events (in our case, it’s stape.work).
Click Save.
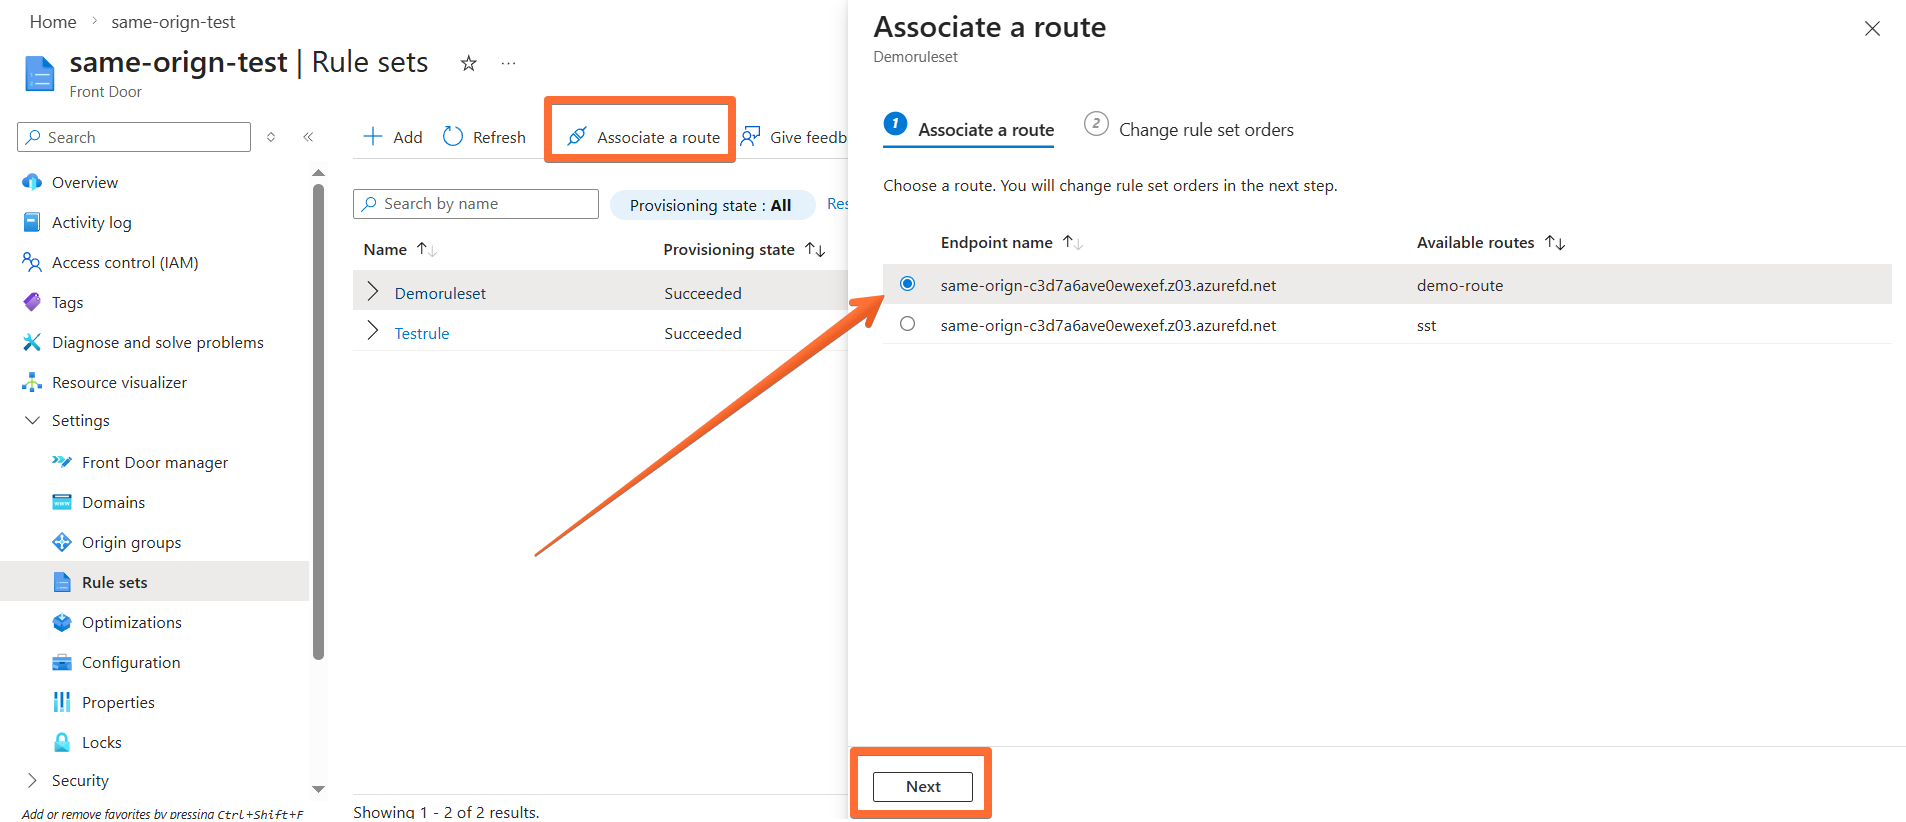
4. Back in the Rule sets menu, select the rule set you’ve just created and click Associate a route → select the route you configured at step 2 and click Next → click Associate.
Custom Loader
Once the same origin setup is done, we also recommend activating Custom Loader for ad blocker protection and implementing it on your site. Don’t forget to specify your Same Origin path in it.
For more information, see our guide on Custom Loader.
Testing your same origin setup
After you create the origin and route in Azure Front Door, verify that requests are correctly proxied to your sGTM container by sending a simple GA4 page_view request.
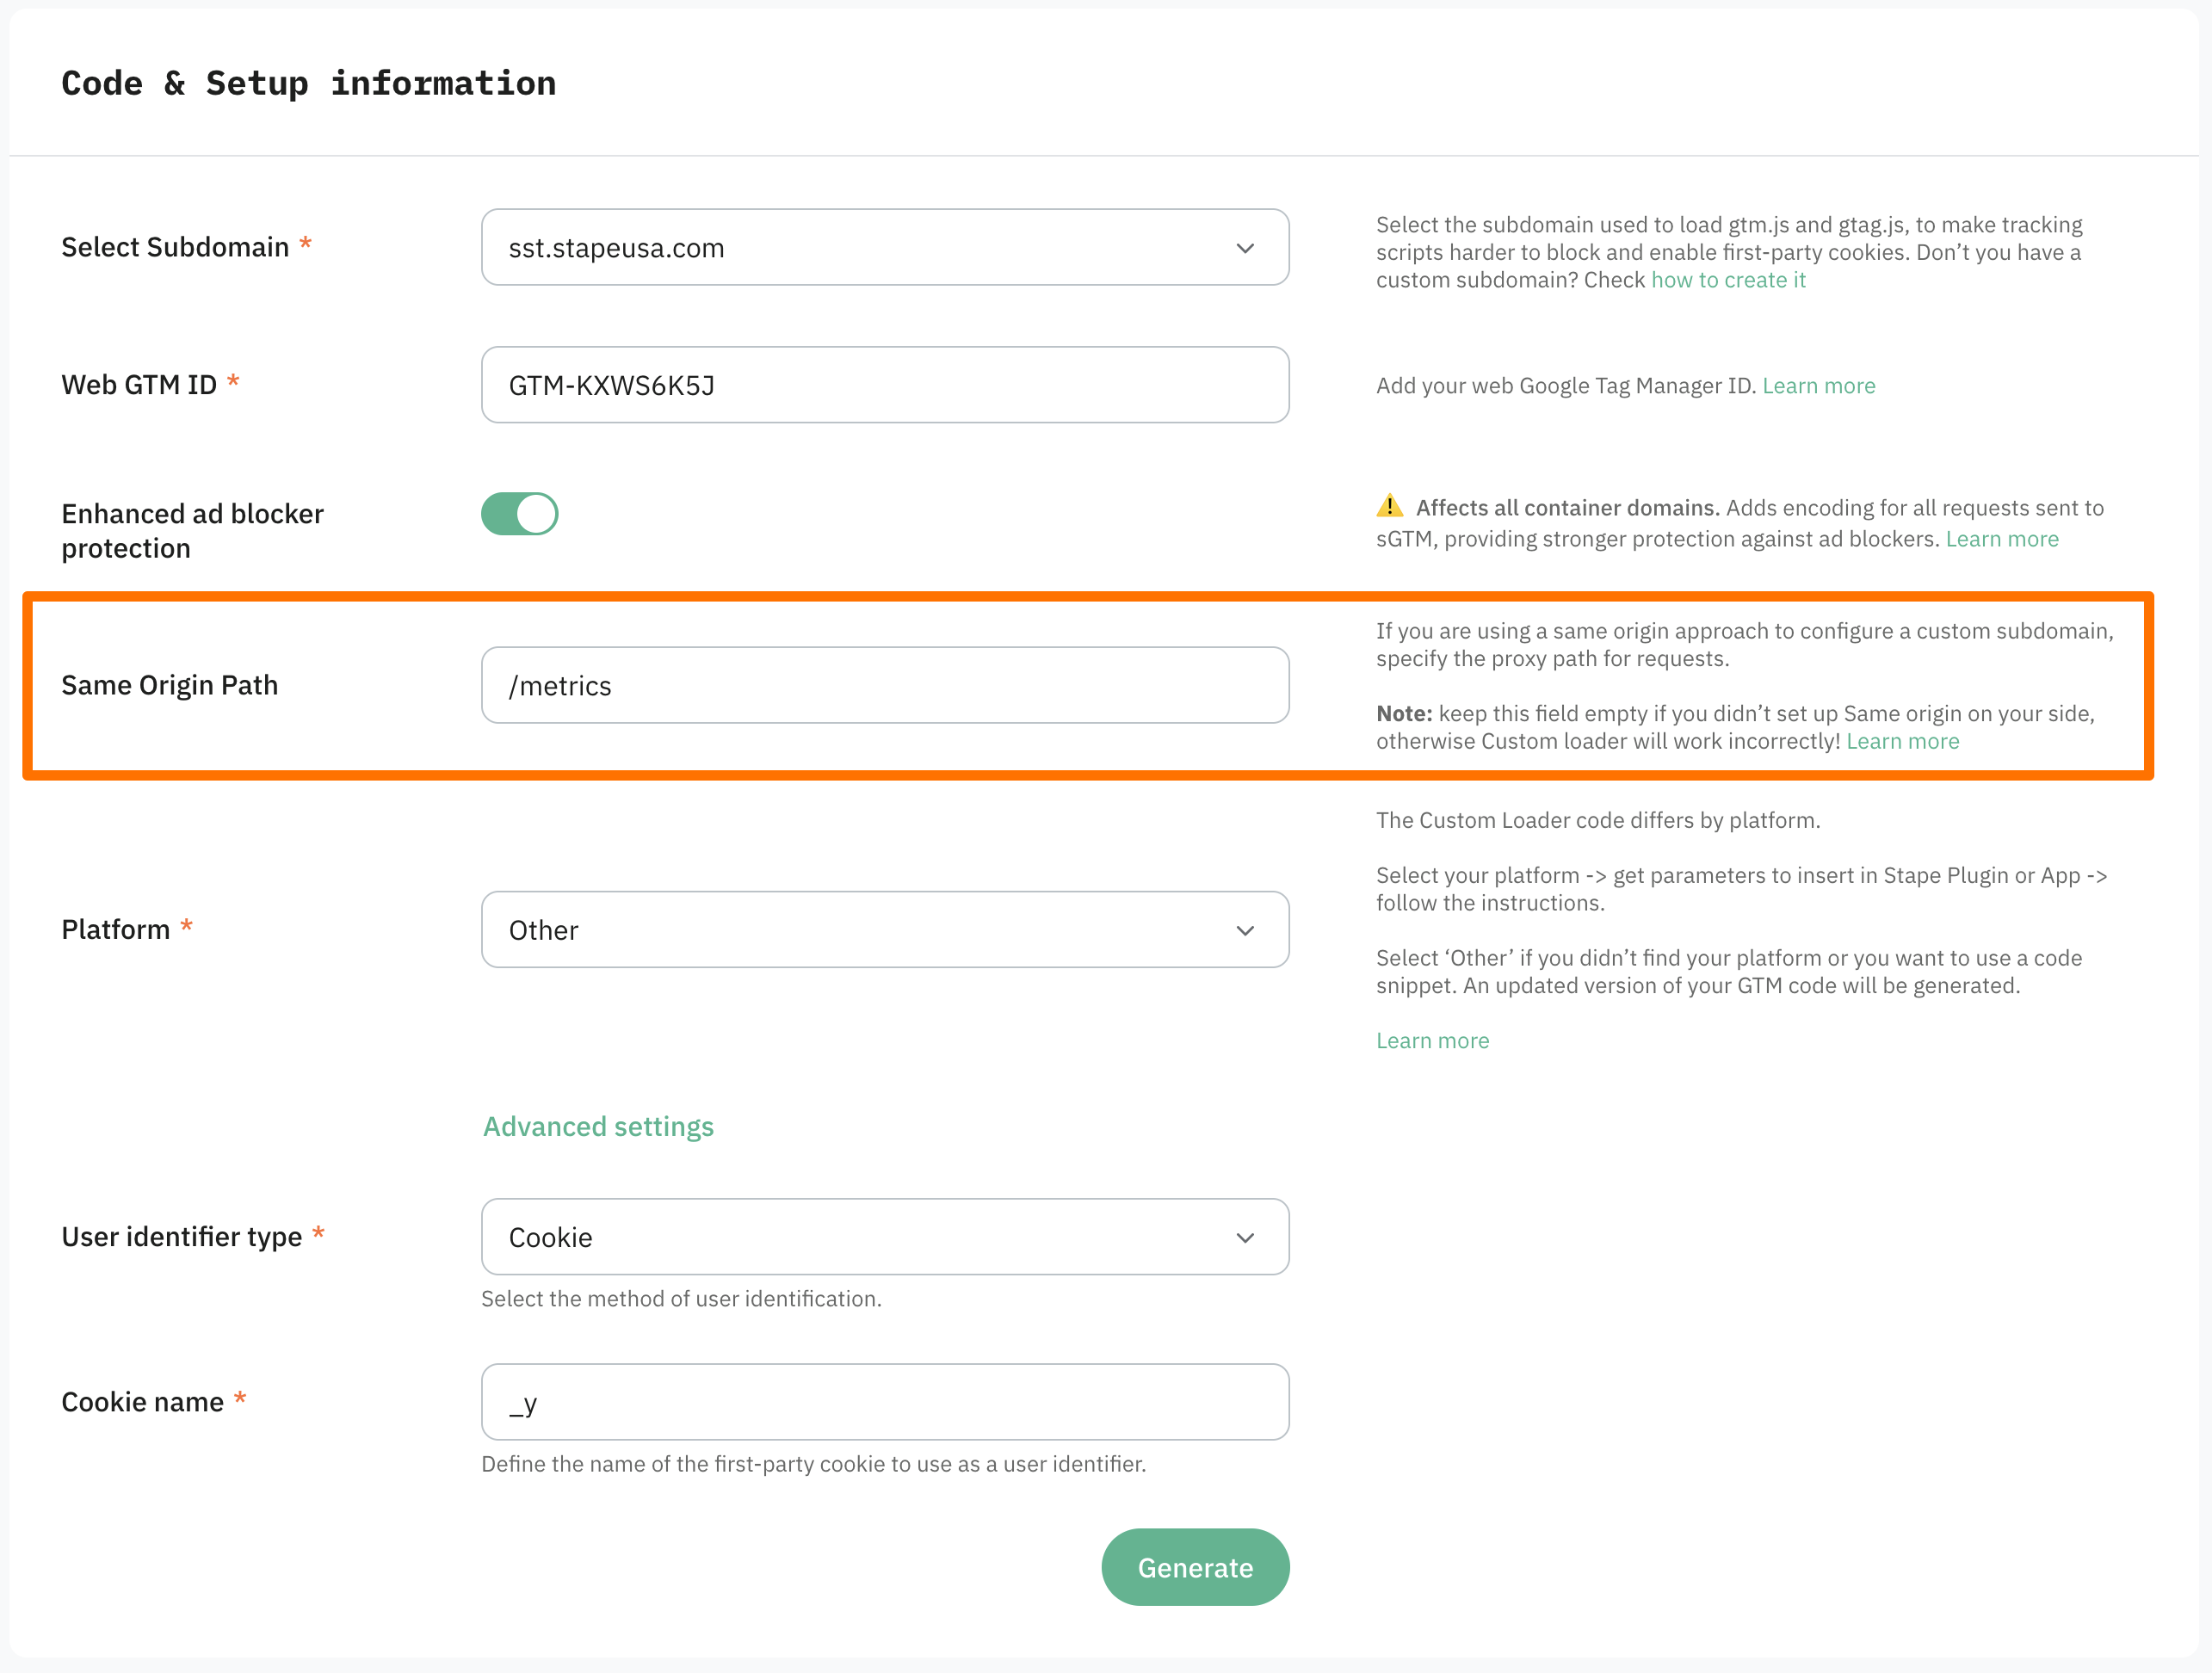
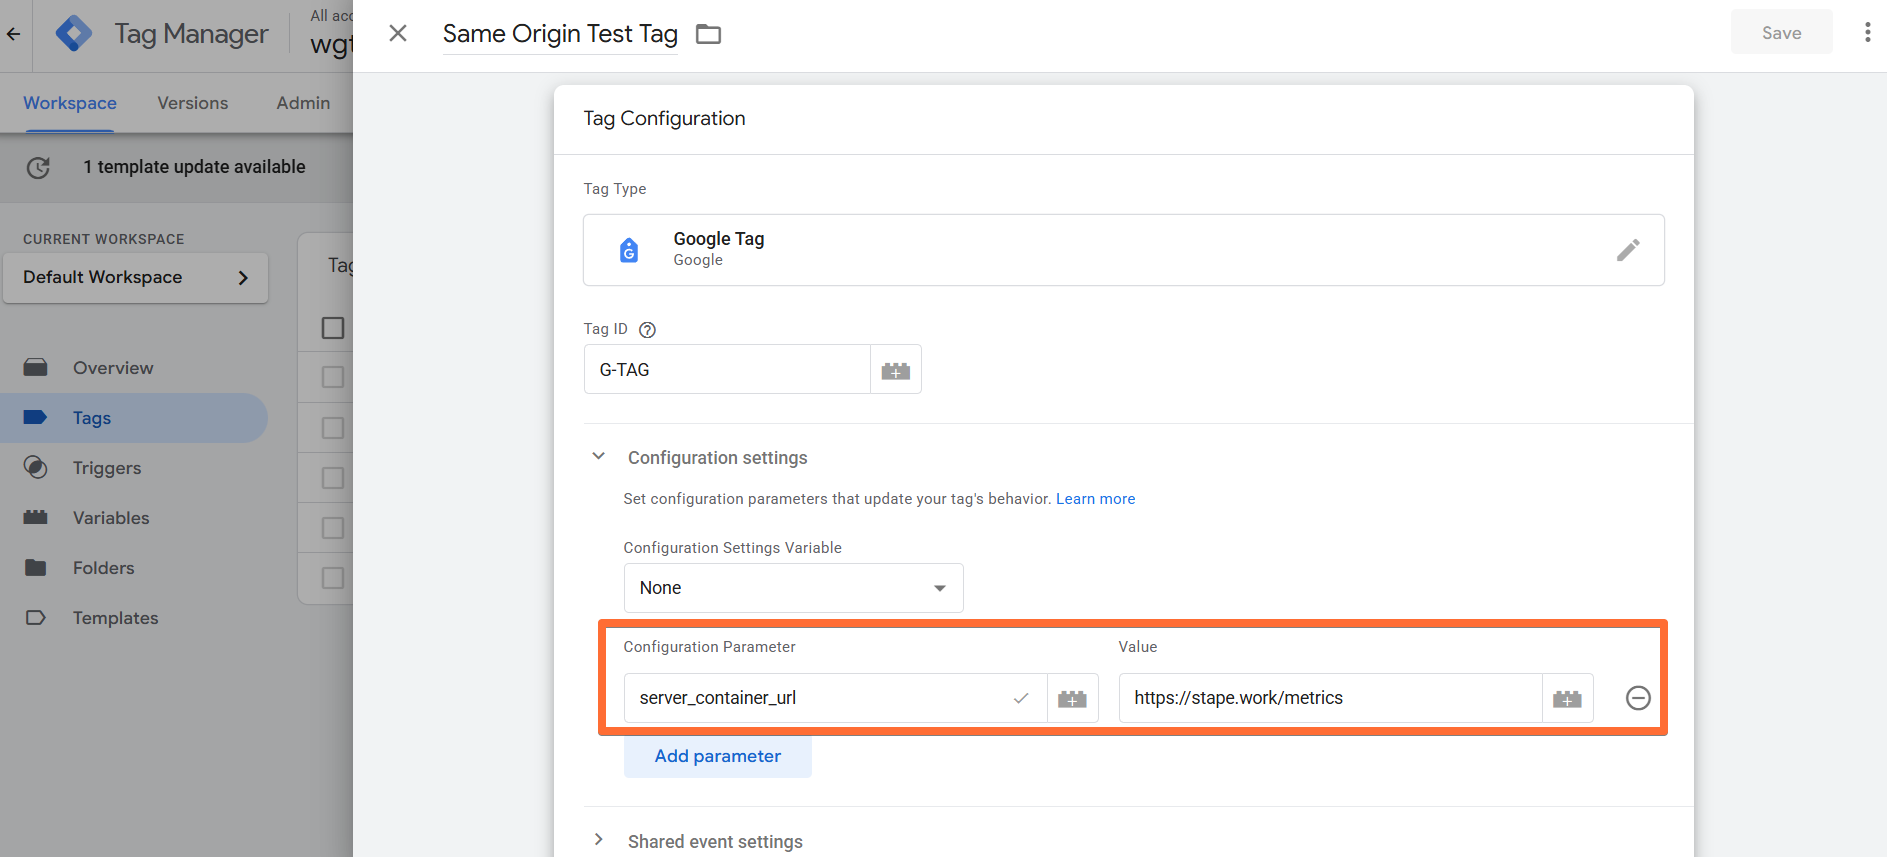
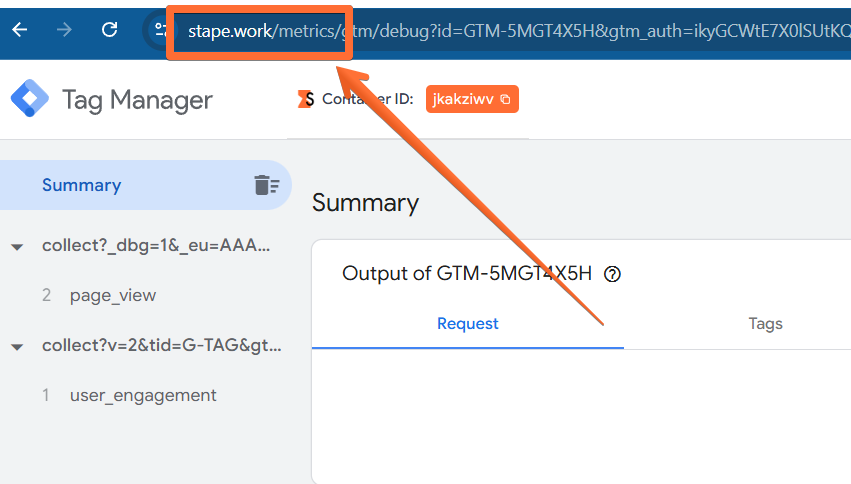
1. Create a GA4 tag in your web GTM container. Add a Tag ID (any ID works for testing) and set the server_container_url to the same-origin path you configured (in our example below, it is https://stape.work/metrics).
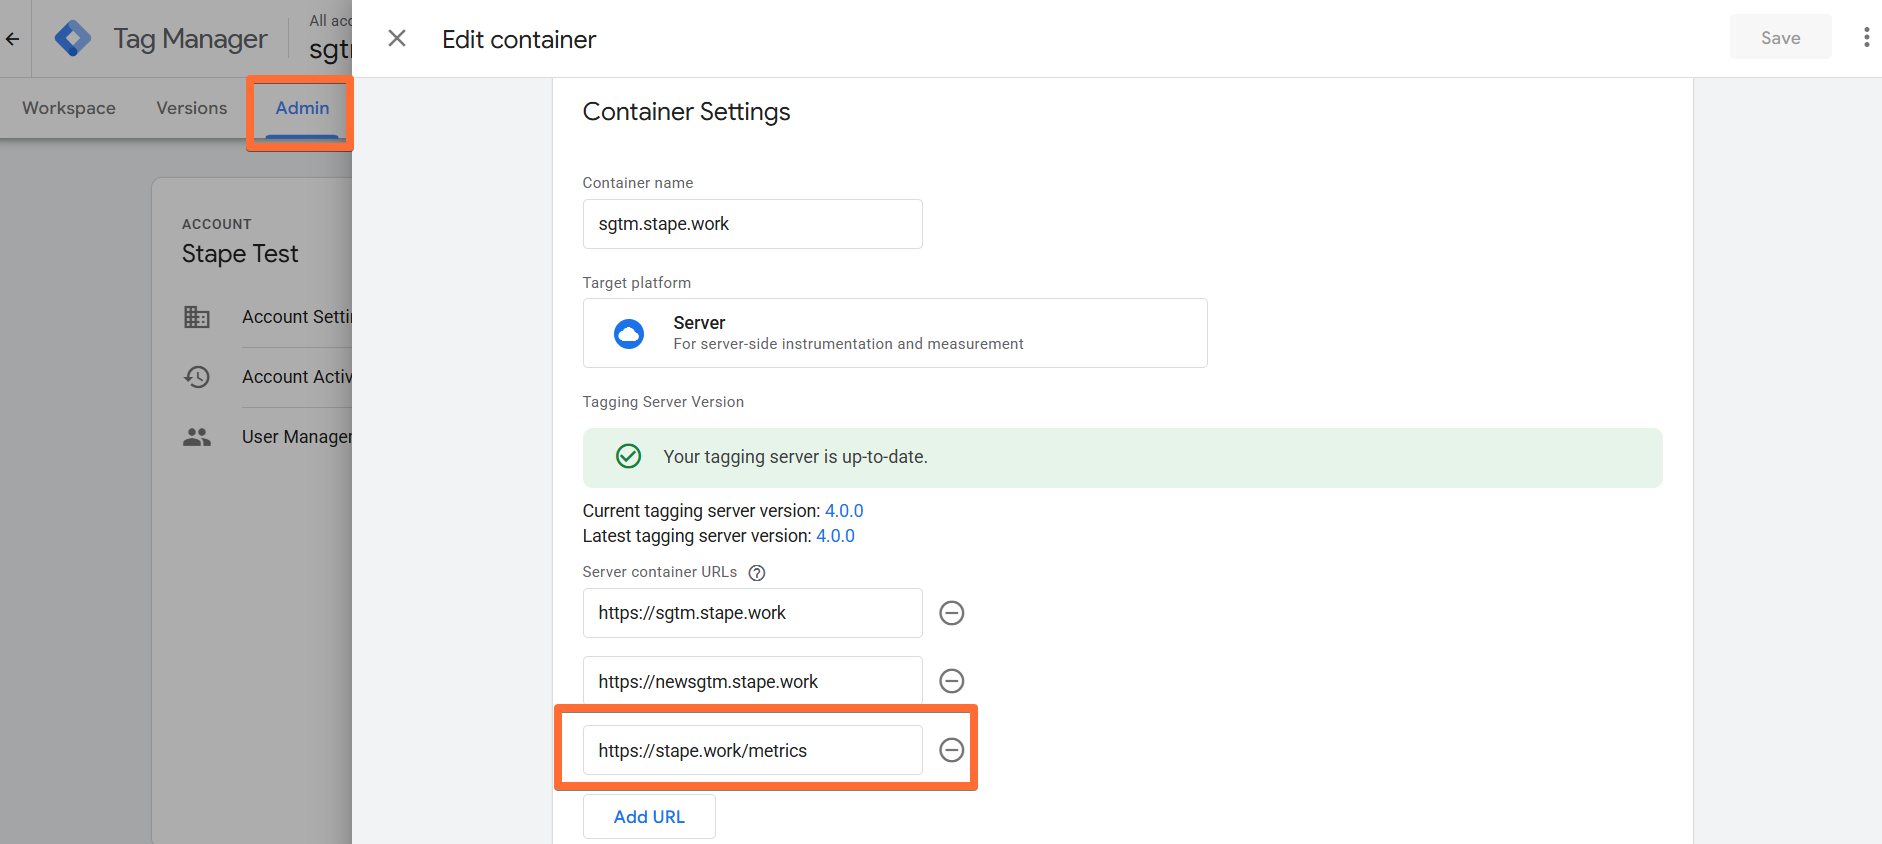
2. (Optional) To streamline testing, add your same-origin path (in our case below, https://stape.work/metrics) to your server GTM settings. Click Admin → Container Settings → enter the path under Server container URLs.
3. Open the Preview mode in both your web GTM container and your server GTM container. If everything is set up correctly, the server container should open in preview at the new path you created.
If, for some reason, the preview doesn’t open at the new path, you can manually enter it in the preview window’s URL.
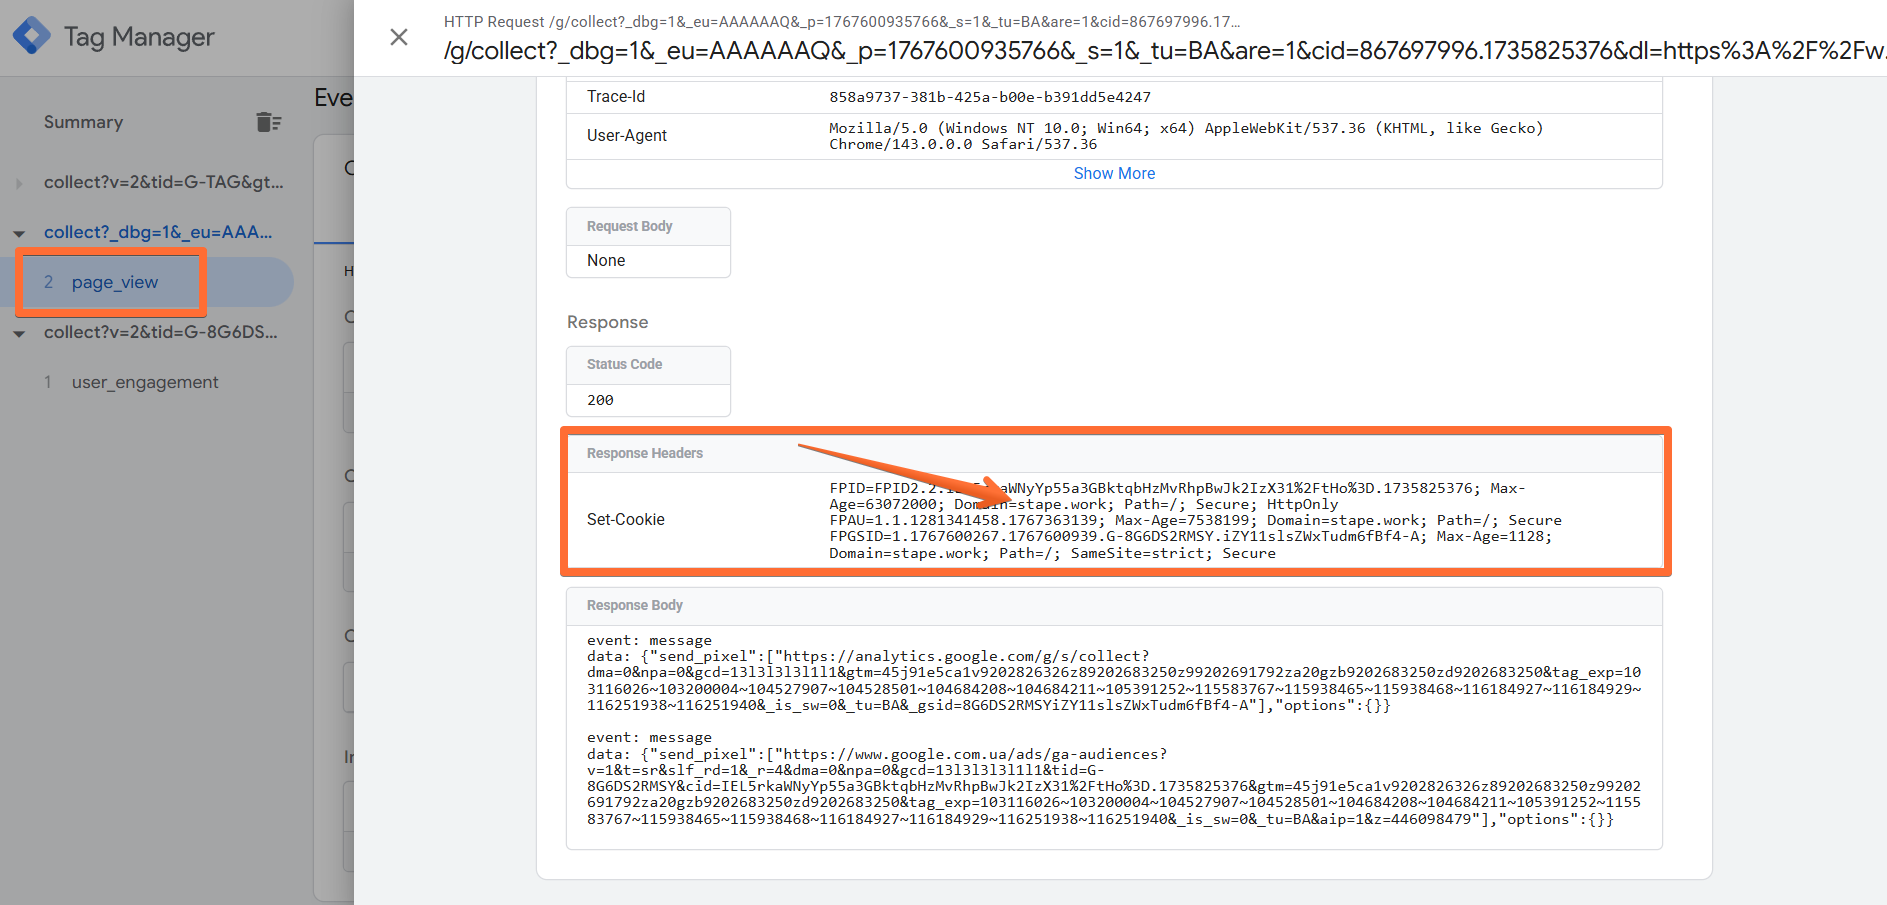
4. Trigger a page view on your site. In the server container preview, you should now see an incoming page_view request from your website’s real domain.
If something doesn’t work, check:
- Route pattern: confirm the Front Door route uses the correct match pattern (e.g., /metrics/*) and points to the correct origin group.
- Origin hostname: confirm the origin is set to your Stape container domain (e.g., sgtm.stape.work).
Was this article helpful?
Comments