How to set up Google Ads conversion tracking
Updated May 27, 2026
The following guide demonstrates setting up Google Ads conversion tracking via server-side GTM. You can alternatively configure it via Stape Gateway.
Requirements for setting up Google Ads conversion tracking
1. Please ensure that you already have Google Tag Manager web and server containers, as well as a configured server container and custom domain in Stape. Please follow these guides if you don’t have any of those:
2. Also, Google Ads does not support deduplication, so you should use EITHER web OR server-side conversion tracking.
Step-by-step guide to Google Ads conversion tracking
1. Configure sending data to the server GTM container. The two most popular options for sending data to sGTM are Google Analytics 4 and Data Tag/Data Client. Here is a step-by-step guide on sending data to sGTM.
2. Configure server-side Google Analytics 4 following this guide. This is required because server-side Google Ads conversion tracking works based on Google Analytics 4 events that you send from a web container.
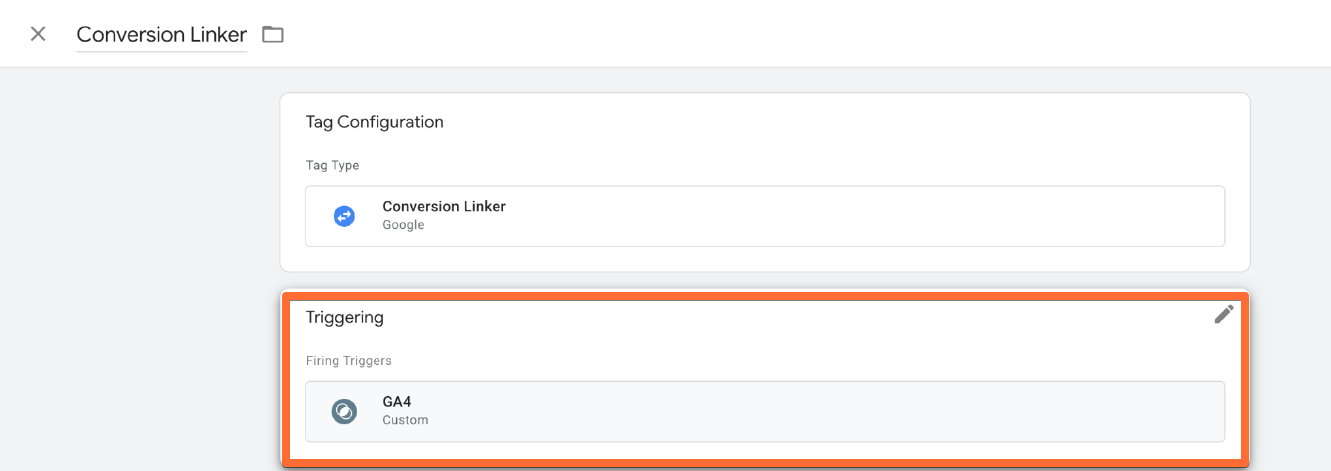
3. Set up the Conversion Linker tag inside the server GTM container. Open the Tags menu → click New → click Tag Configuration → select Conversion Linker.

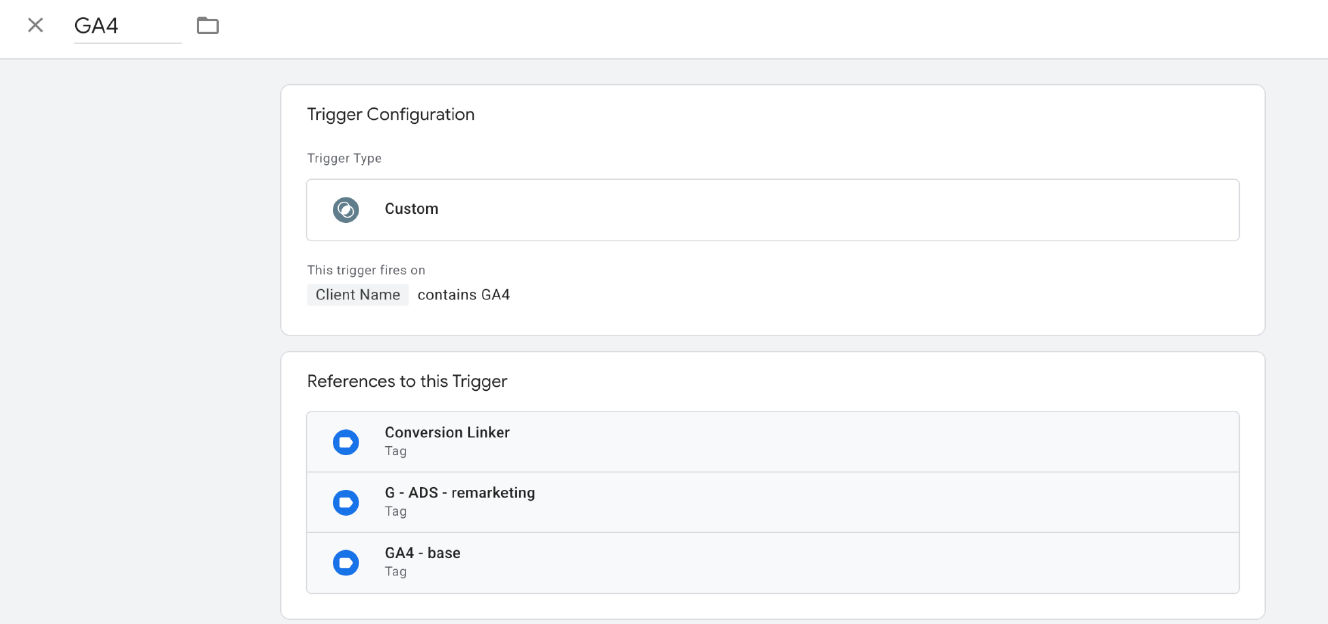
This tag should trigger on all GA4 hits (meaning its trigger should be identical to the trigger of the server’s GA4 tag).
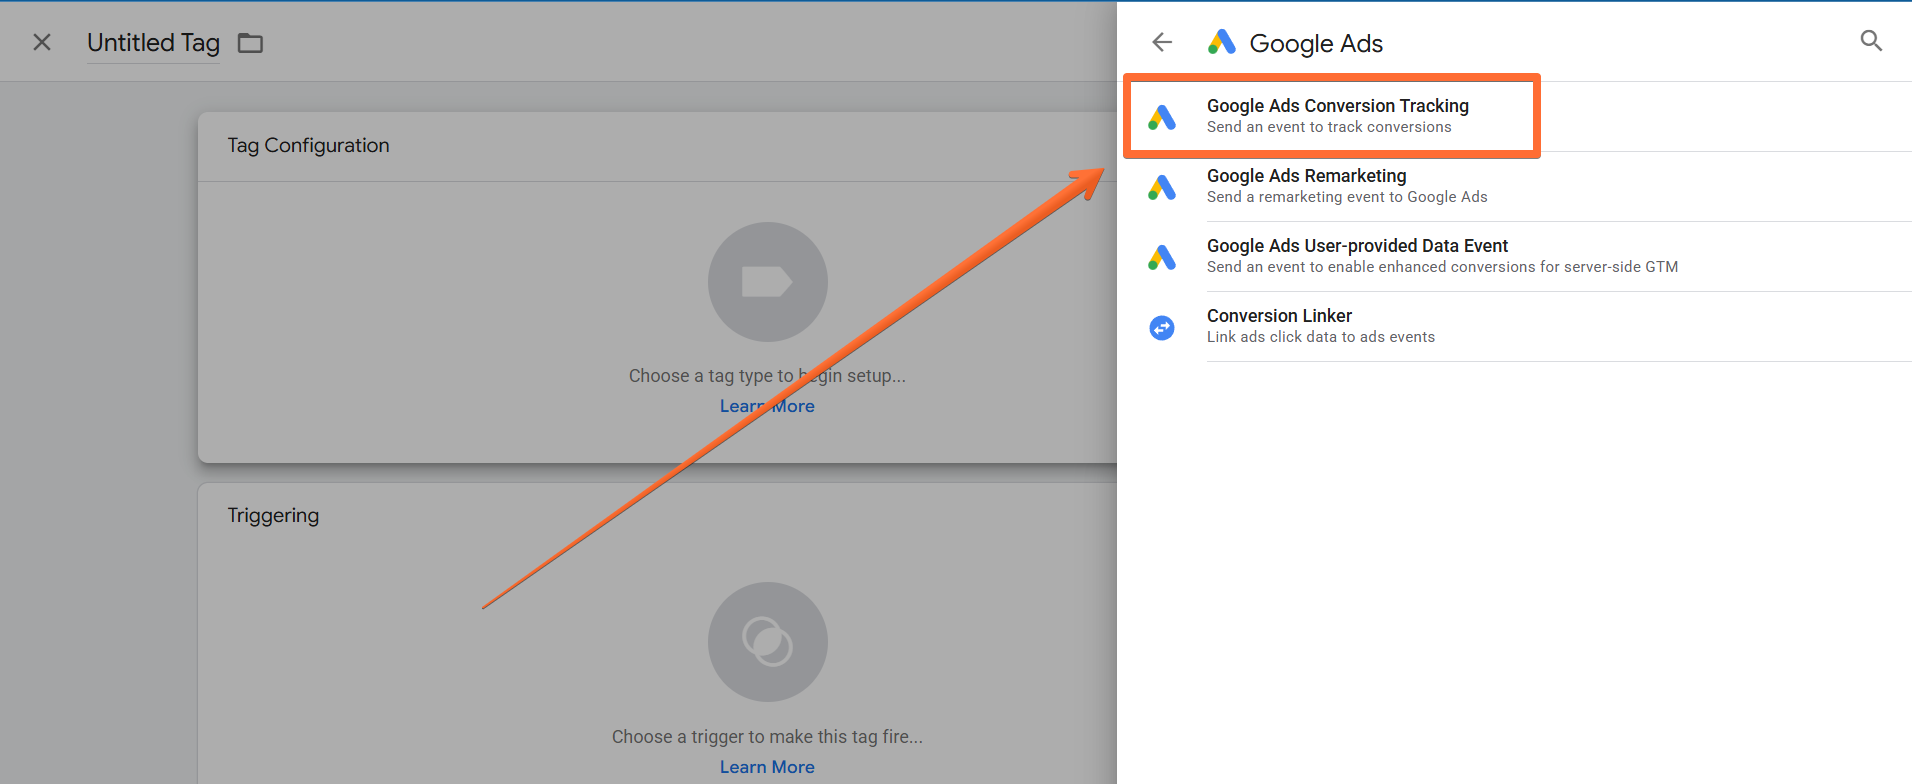
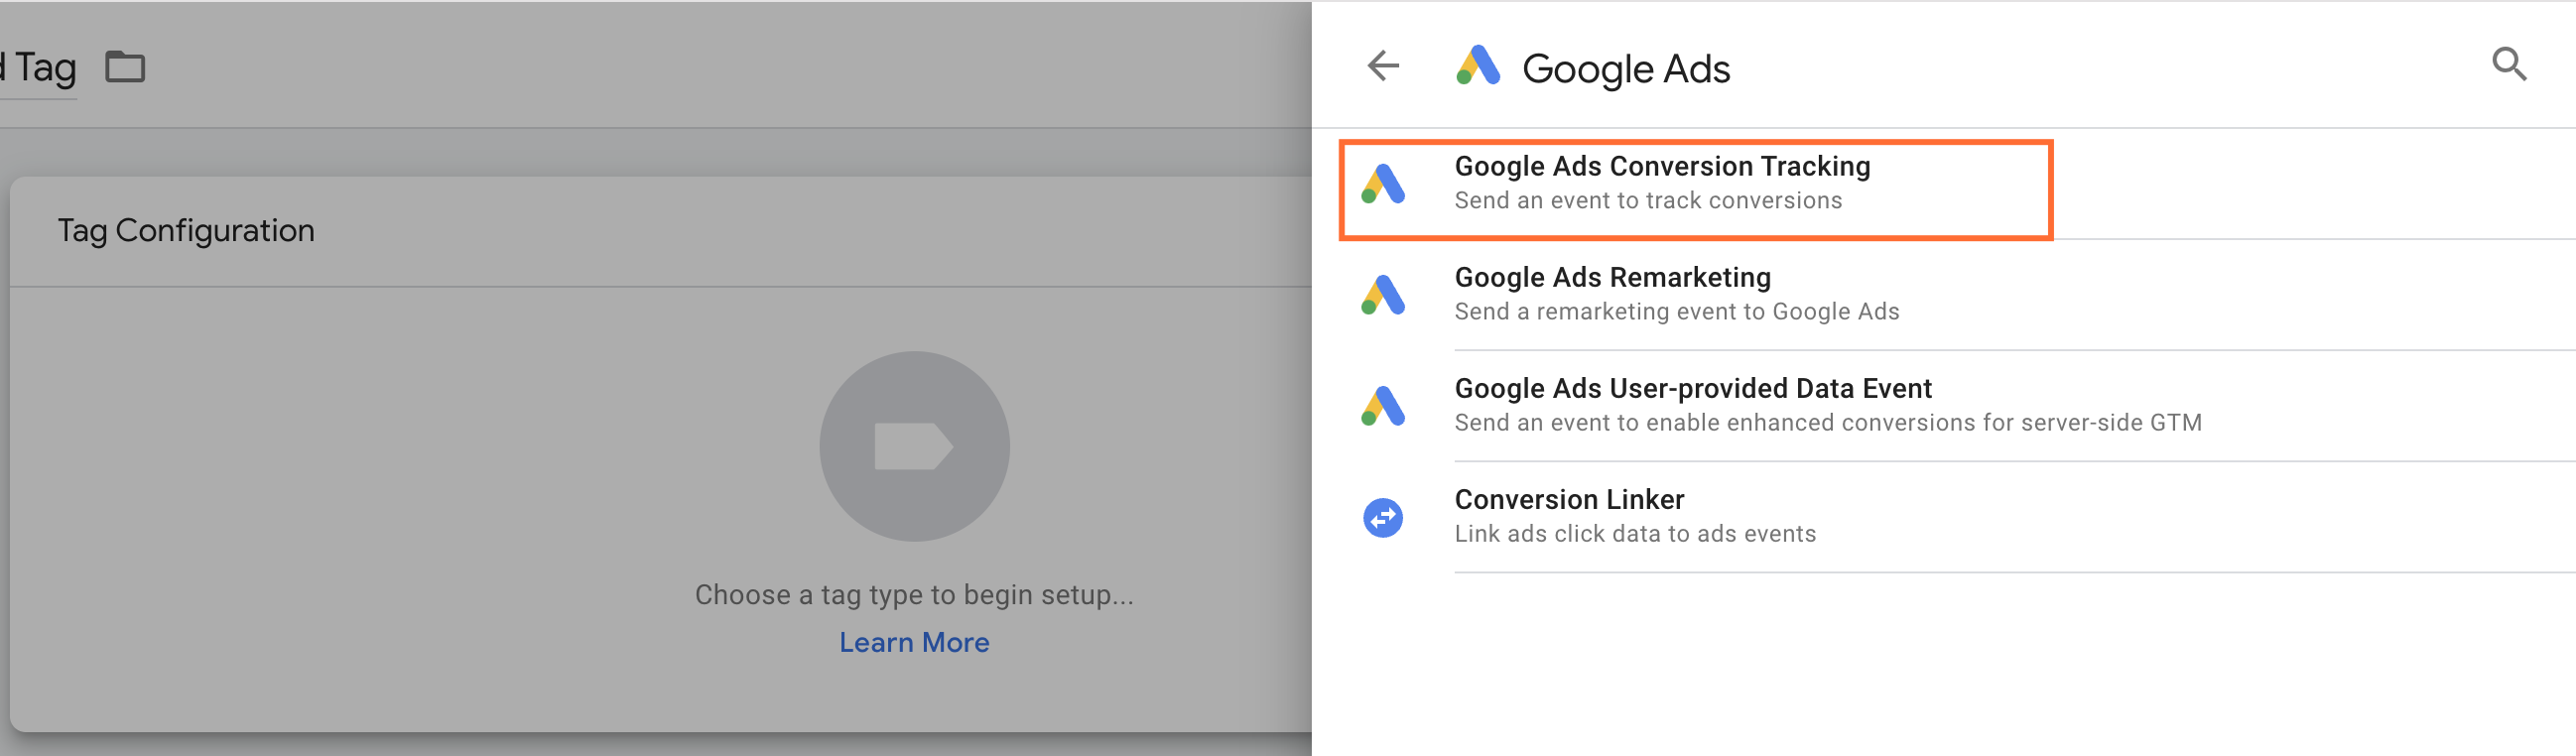
4. Create a new Google Ads Conversion Tracking tag inside the server GTM container. Open the Tags menu → click New → click Tag Configuration → click Google Ads → select Google Ads Conversion Tracking.
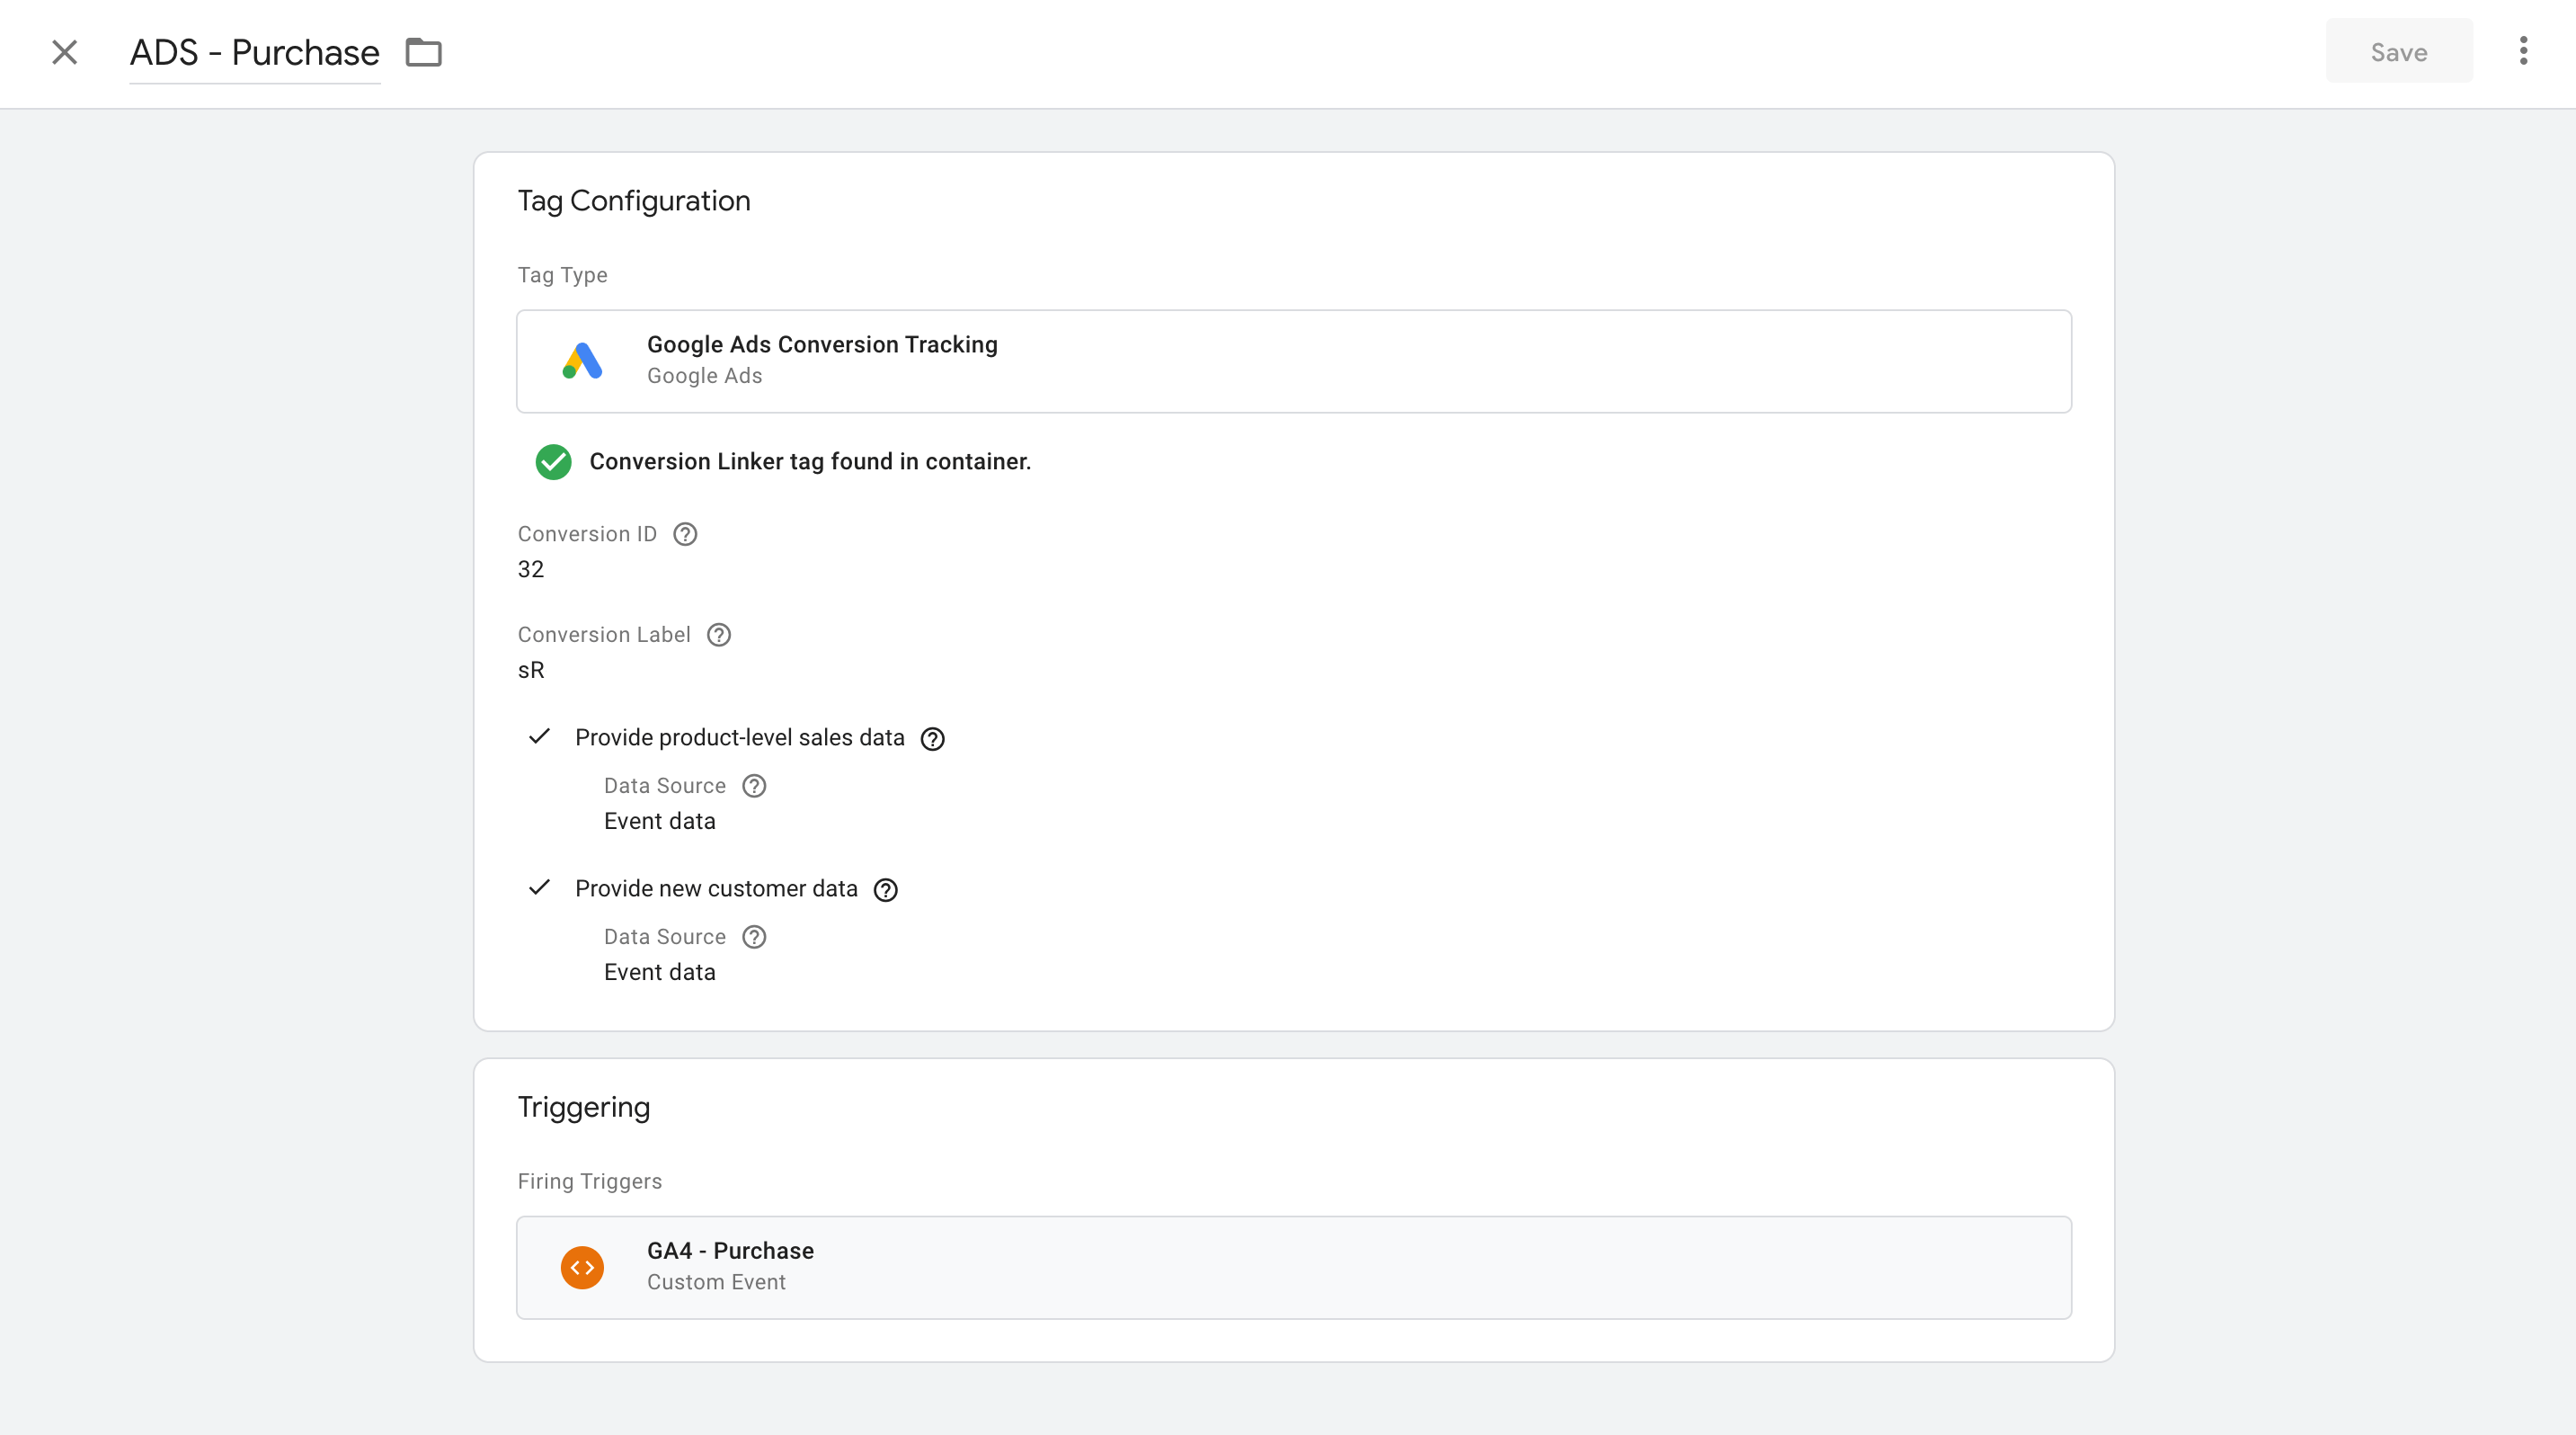
Add Conversion ID and Conversion Label that are similar to the web Google Ads tag setup. If you don’t have web conversions yet, you can create a conversion action in your Google Ads interface. After that, you’ll be able to get the Conversion ID and Conversion Label parameters from this conversion’s settings.
Next, add Product and User Data. If you send user and product data from the web to the server in the standard GA4 format, you can enable these checkboxes and select event data as a data source. In our example below, Google Ads server conversion triggers on the purchase event.
How to set up Enhanced Conversion in Google Ads
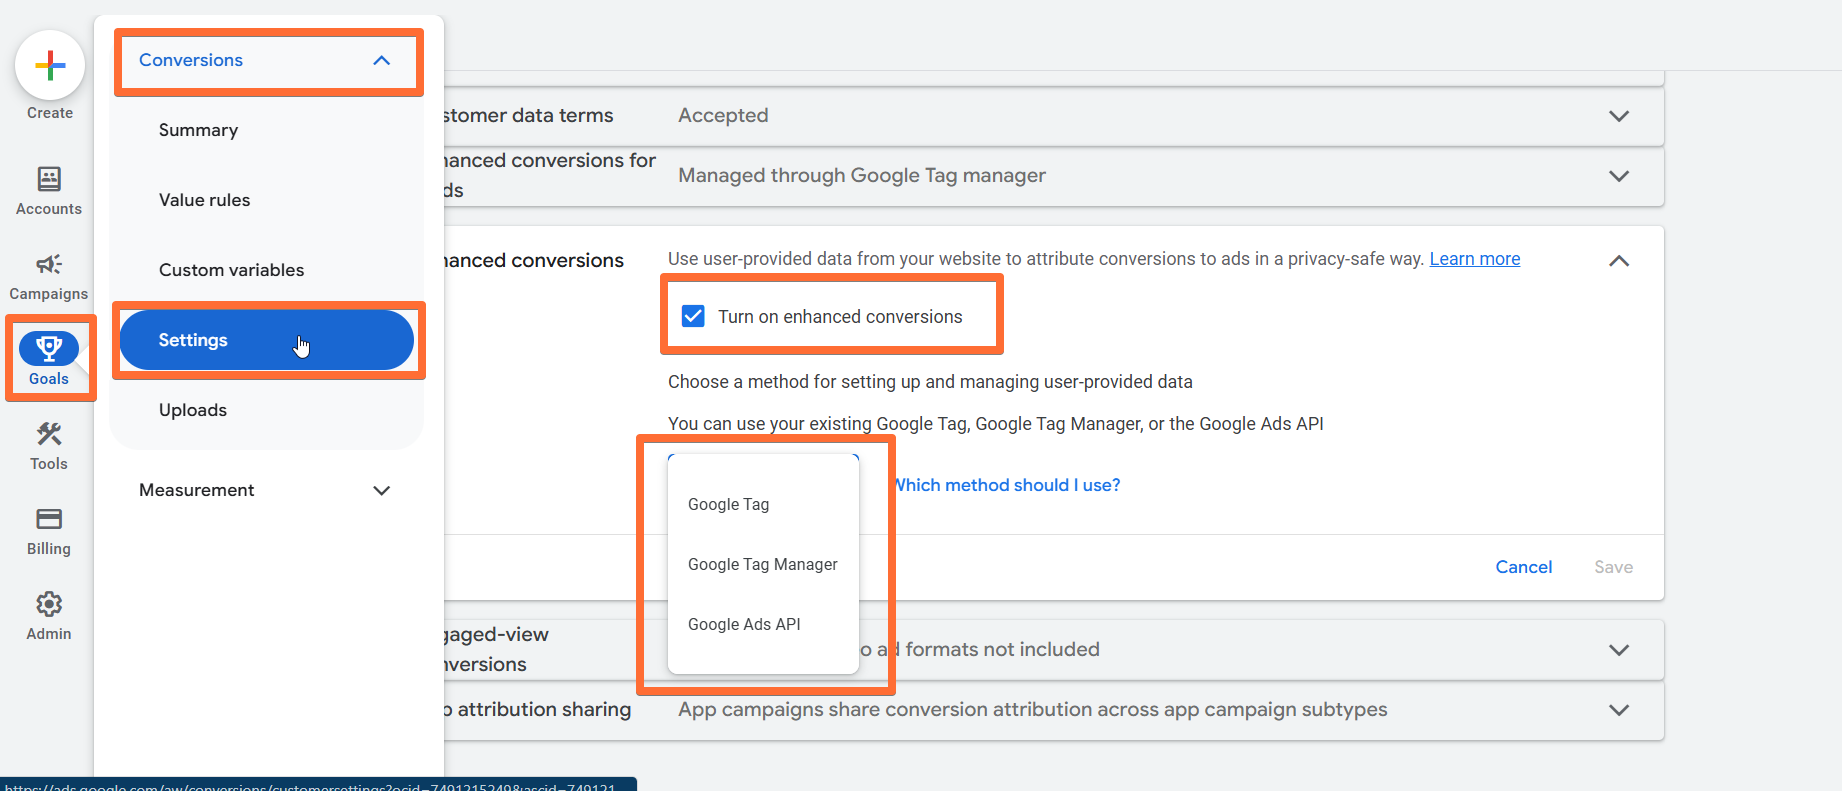
1. Turn on Enhanced Conversions in Google Ads. To do this, log in to your Google Ads account → open the Goals menu→ click Conversions → Settings → Enhanced Conversions → click Turn on enhanced conversions → click Select an option and choose Google Tag Manager → click Save.
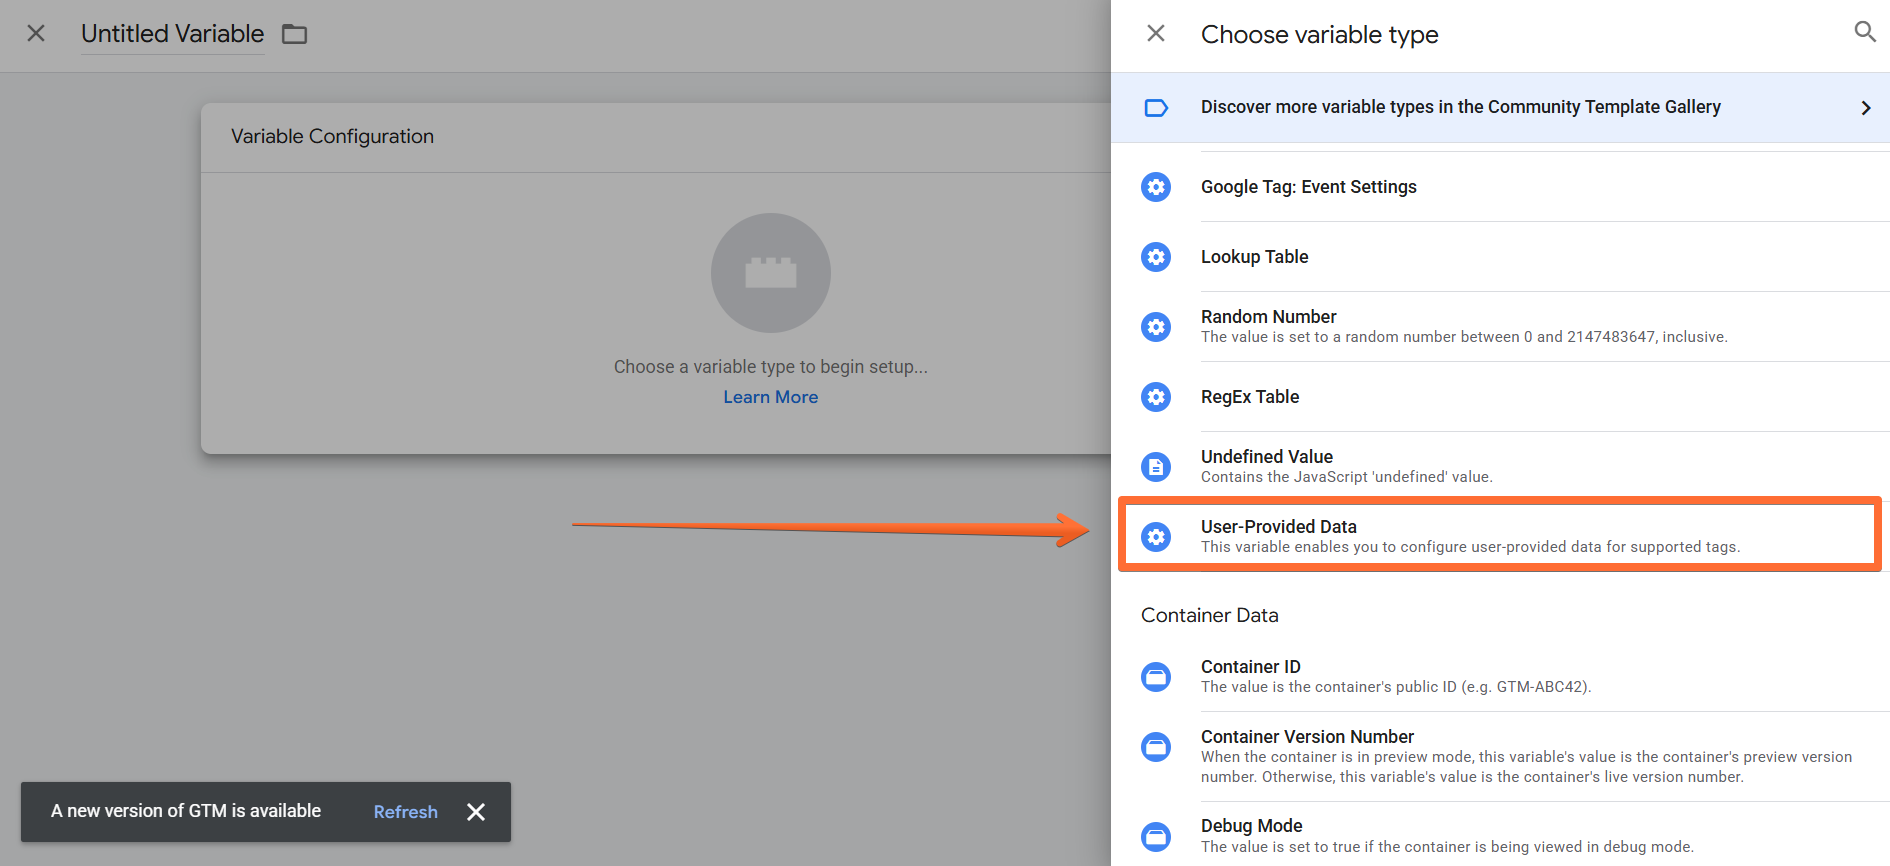
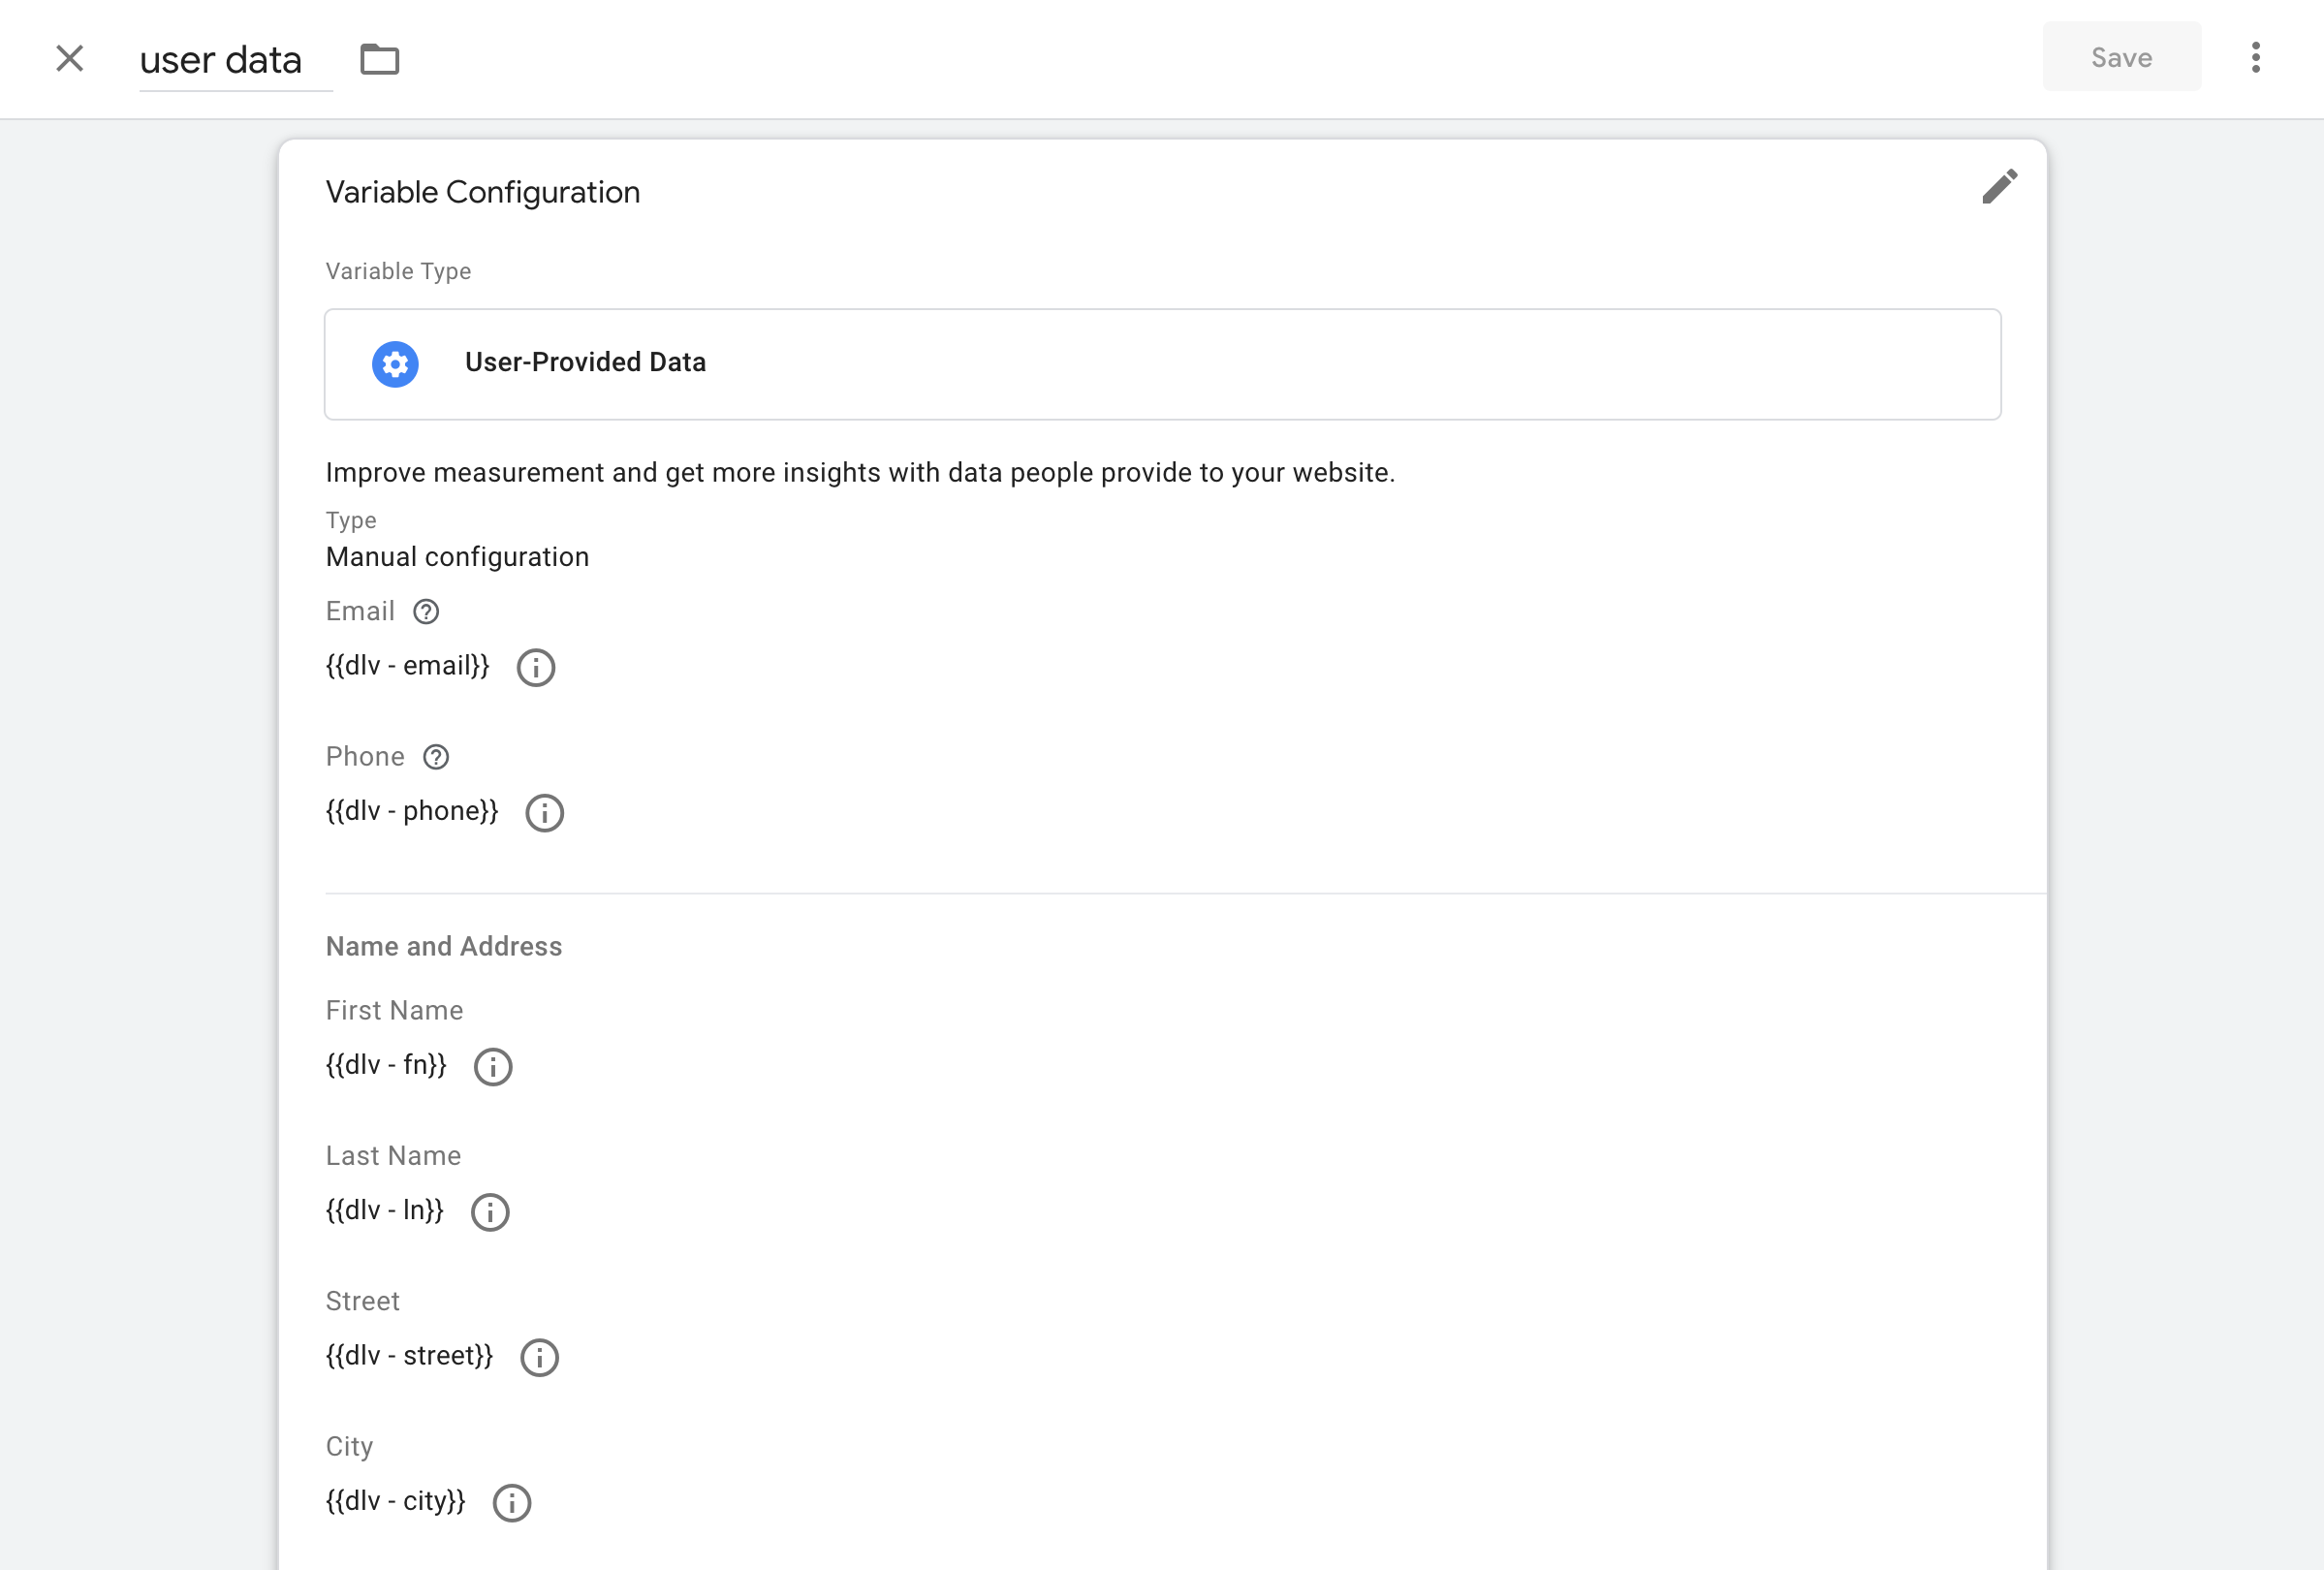
2. Next step is to create a User-Provided Data variable inside the web GTM container. In web GTM, go to Variables menu → in the section User-Defined Variables, click New → click Variable Configuration → search for User-Provided Data.
For Type, select Manual Configuration. Configure the rest of the variable’s parameters as shown in the screenshot below:
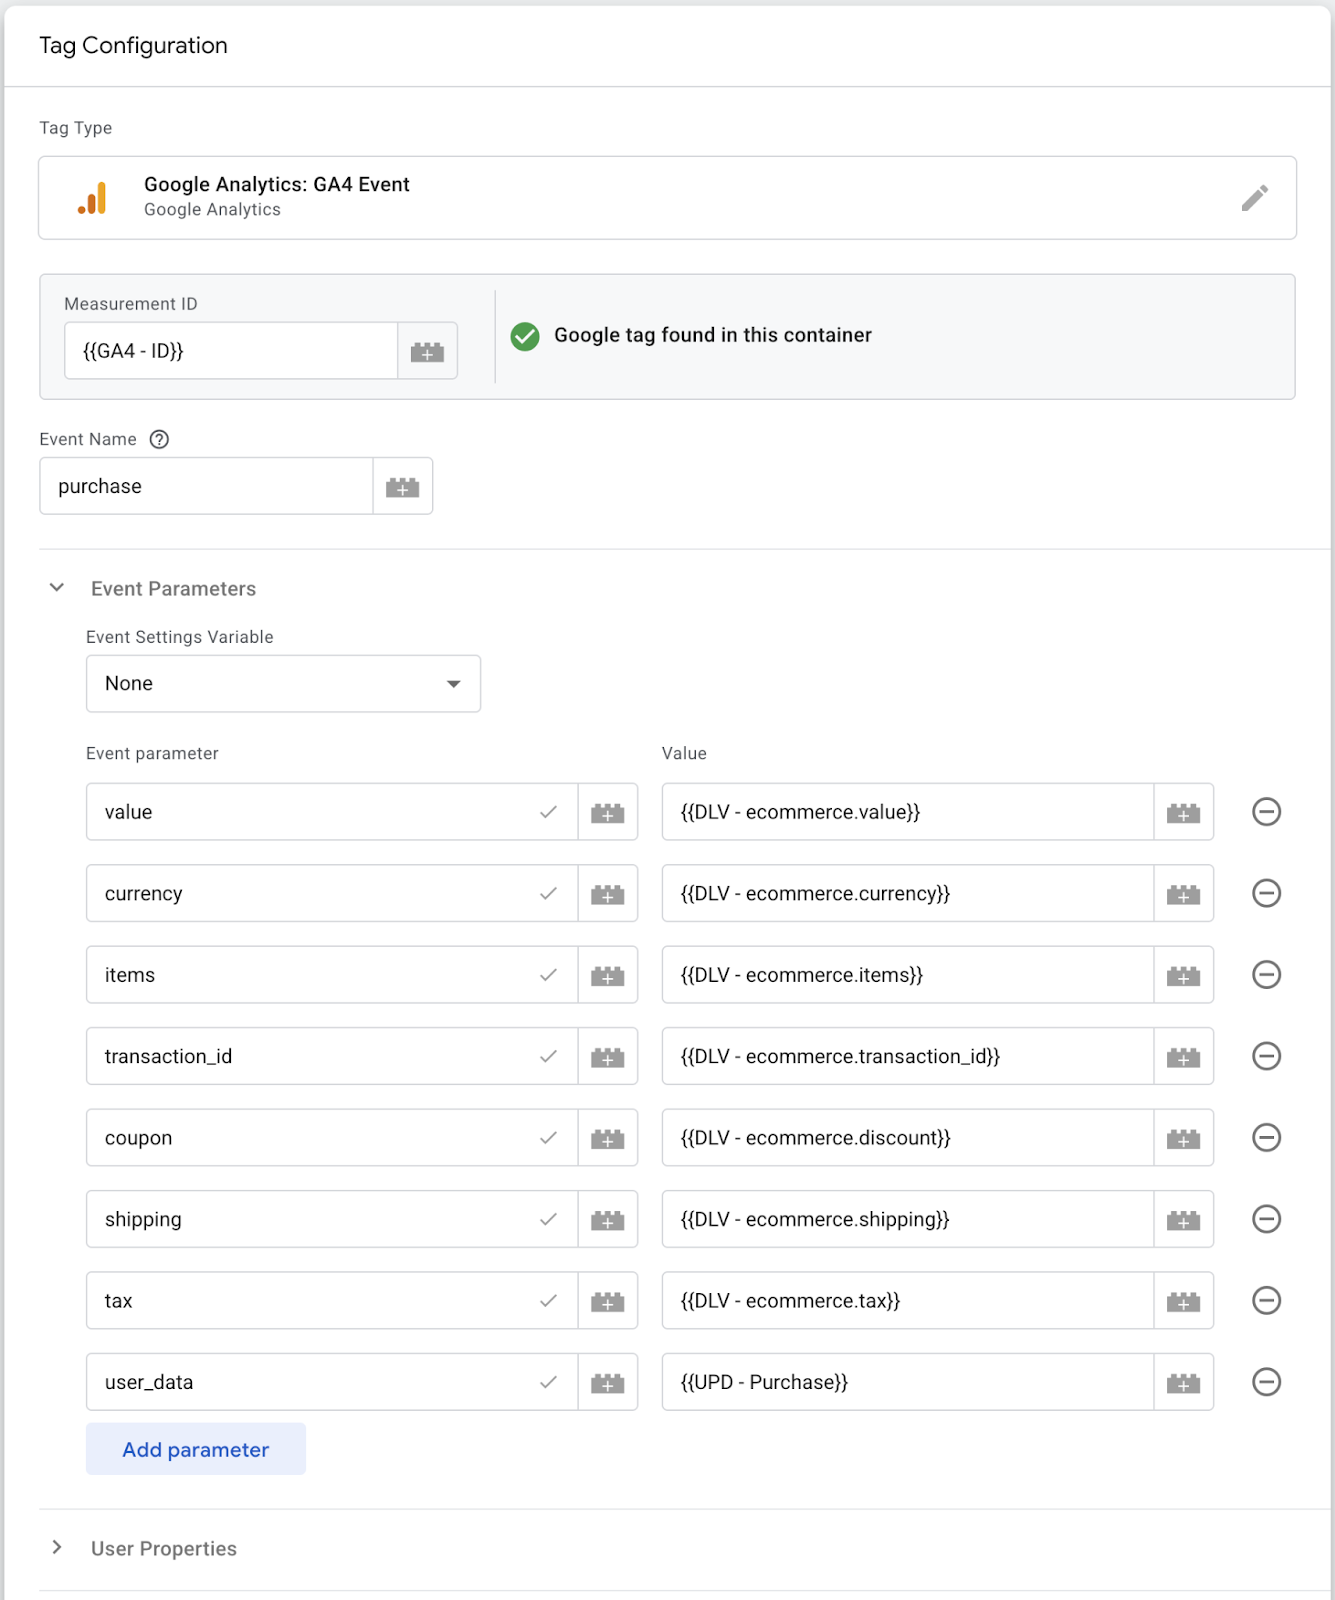
3. Next, we’ll add the User-Provided Data variable to GA4 tag settings. In the web GTM container, go to the Tags section and select a GA4 tag (or create it by clicking New → selecting the Google Analytics: GA4 Event tag type.)
Add the user-provided data using the user_data parameter, as shown in the screenshot below. Select the variable you created in Step 2 in the User Data section.
Next, set up the Conversion Tracking tag. In the server GTM container, go to Tags → New → click Tag configuration and select Google Ads Conversion Tracking.
Add triggers based on needed conversion events. The tag will automatically process user data from GA4 requests.
That’s it, now all Google Ads conversions that work based on this GA4 event will receive user data and send it to Google Ads.
How to test and debug Google Ads Conversion tracking
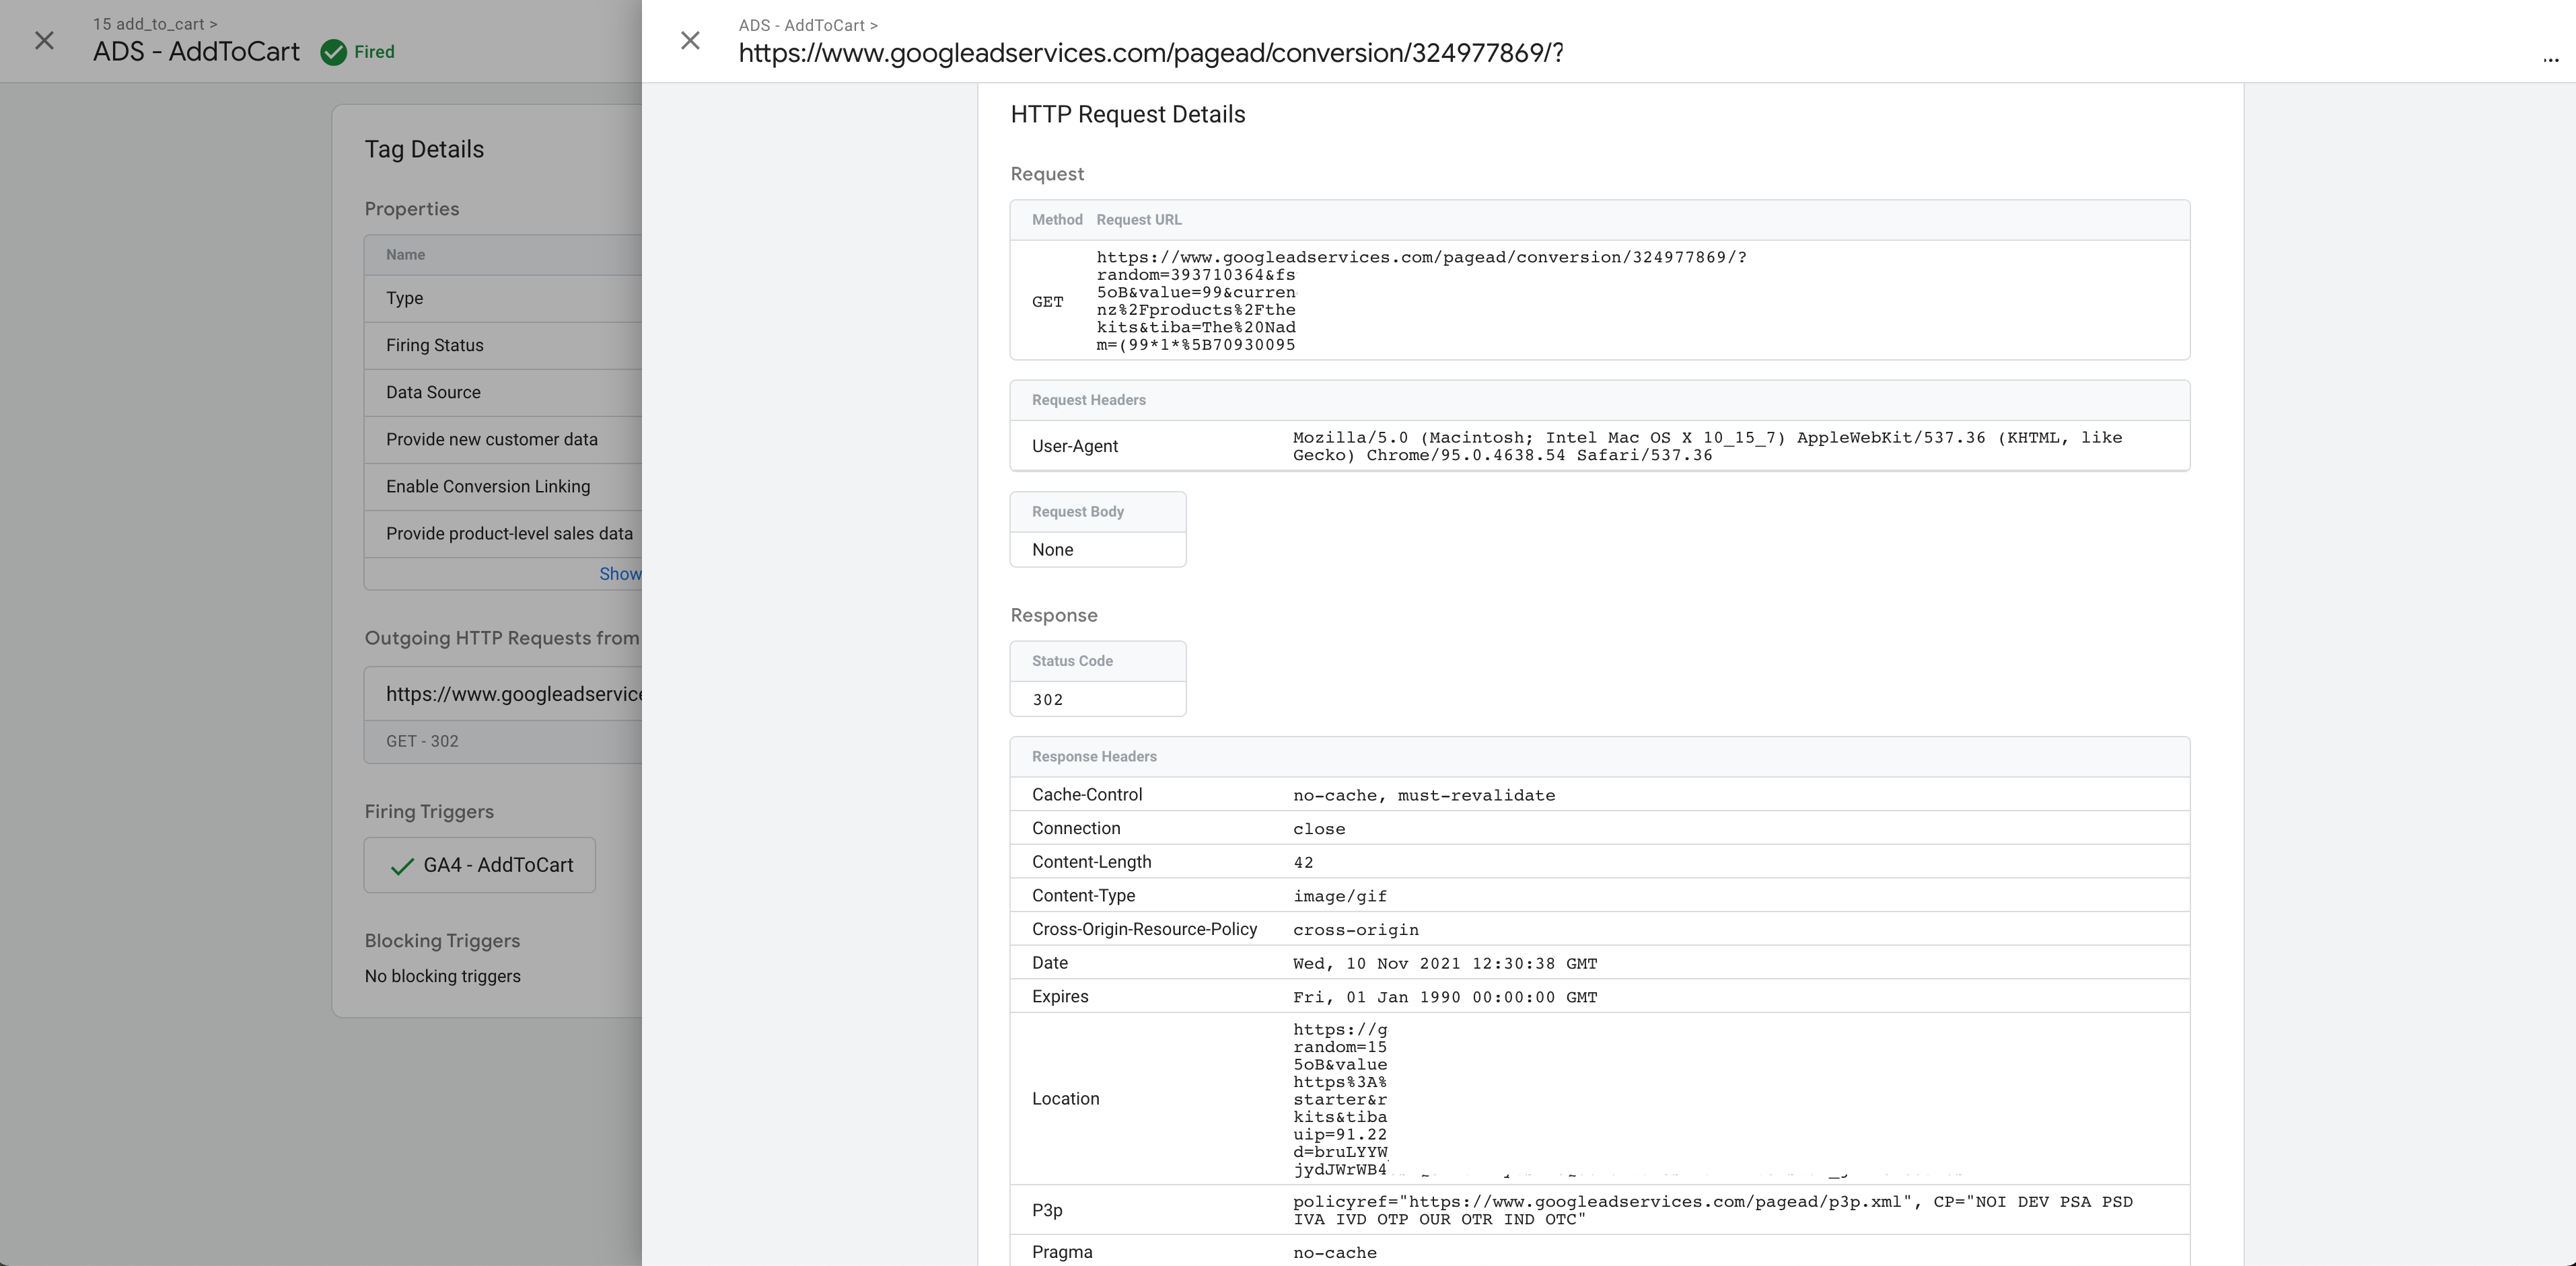
First, test that the Google Ads Conversion tag was triggered in the server container and that the request it sent was correct.
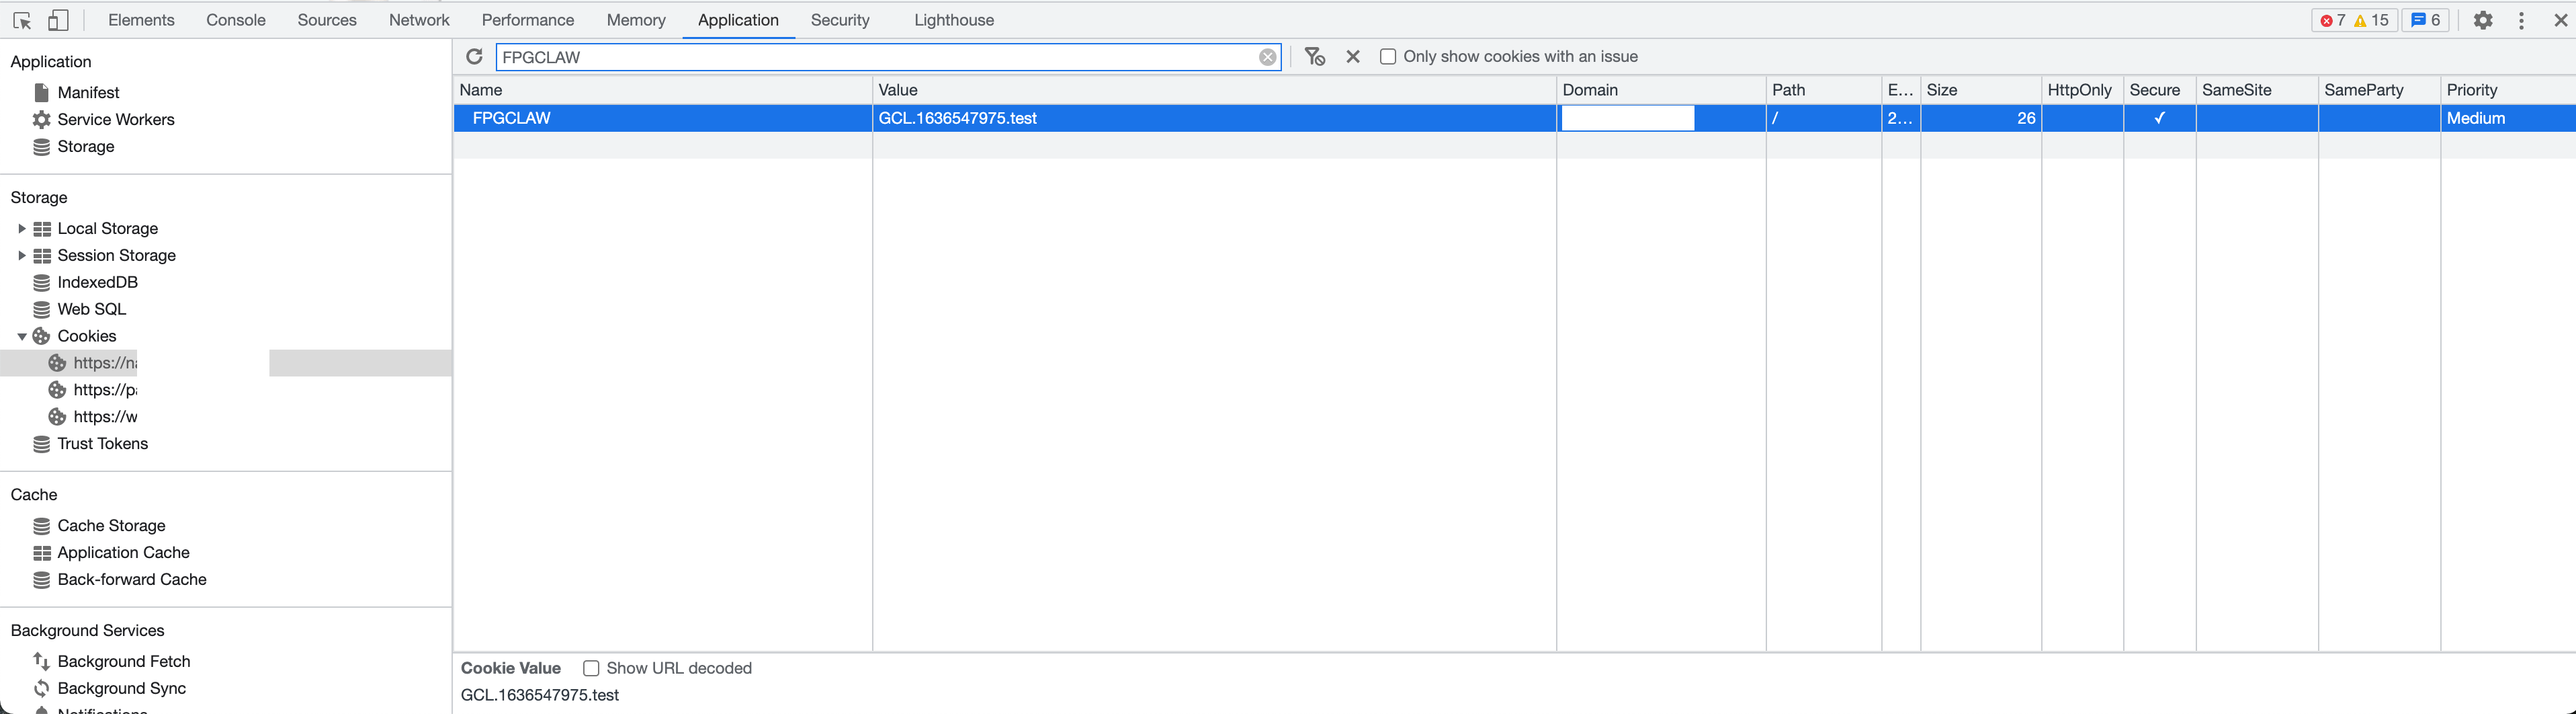
Next, check that the FPGCLAW cookie was added. It will work if you add the gclid parameter to the URL.
Was this article helpful?
Comments