How to improve the configuration of a LinkedIn-sponsored Stape server container
Updated May 18, 2026
Once your server container is created through LinkedIn Campaign Manager, your Conversions API connection is established. To improve data quality and make use of the features included with your LinkedIn-sponsored container offer, consider the following steps in your Stape container:
Step 1. Add a custom domain
When creating your Stape container, we have already provided you with a randomized technical domain (for example, wjzsdfvom.us.stape.io). You could use it as a tagging server URL, but it’s recommended to use a custom domain.
When your tagging server is situated on the same domain as your business website (e.g., if your website is example.com, then your tagging server URL could be sst.example.com). In that case, your cookies will be considered first-party, which bypasses ITP limitations of browsers like Safari and significantly increases the cookie lifetime.
With a LinkedIn-sponsored Stape server container, you can configure a custom domain automatically or manually. You can enter a domain name, either use the No CDN or Own CDN option (Stape Global CDN is unavailable to LinkedIn-sponsored server containers), as well as configure advanced settings.
More info
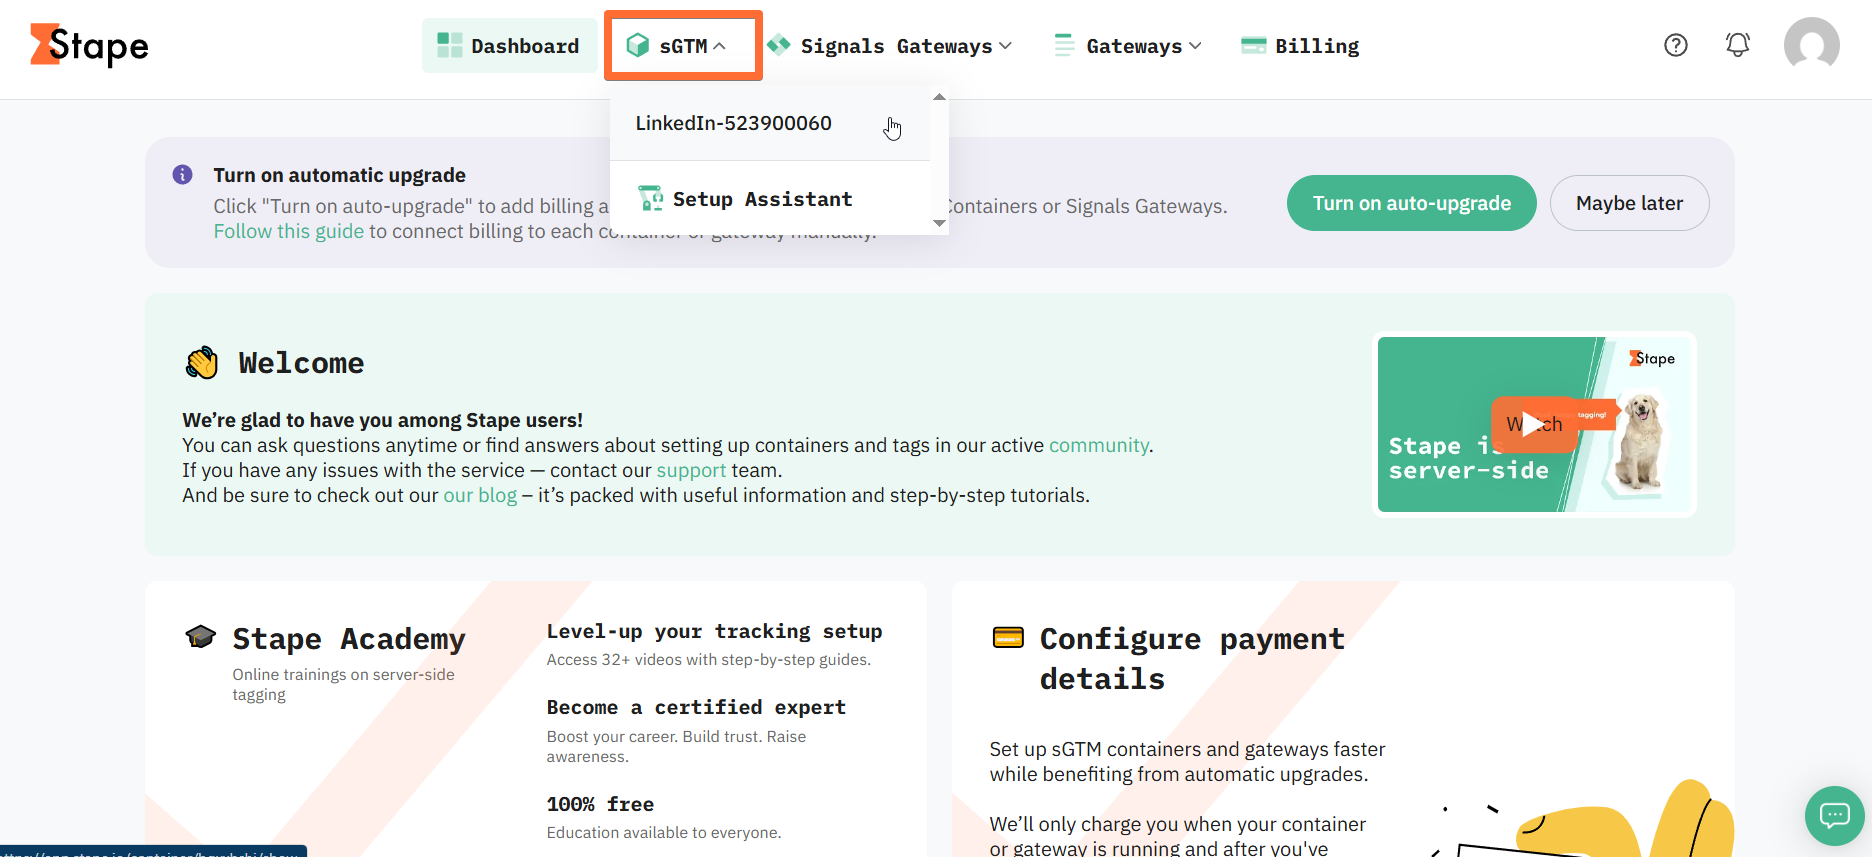
1. Log in to your stape.io account → choose a container → scroll down and click Add custom domain.
2. There are two ways of adding a custom domain:
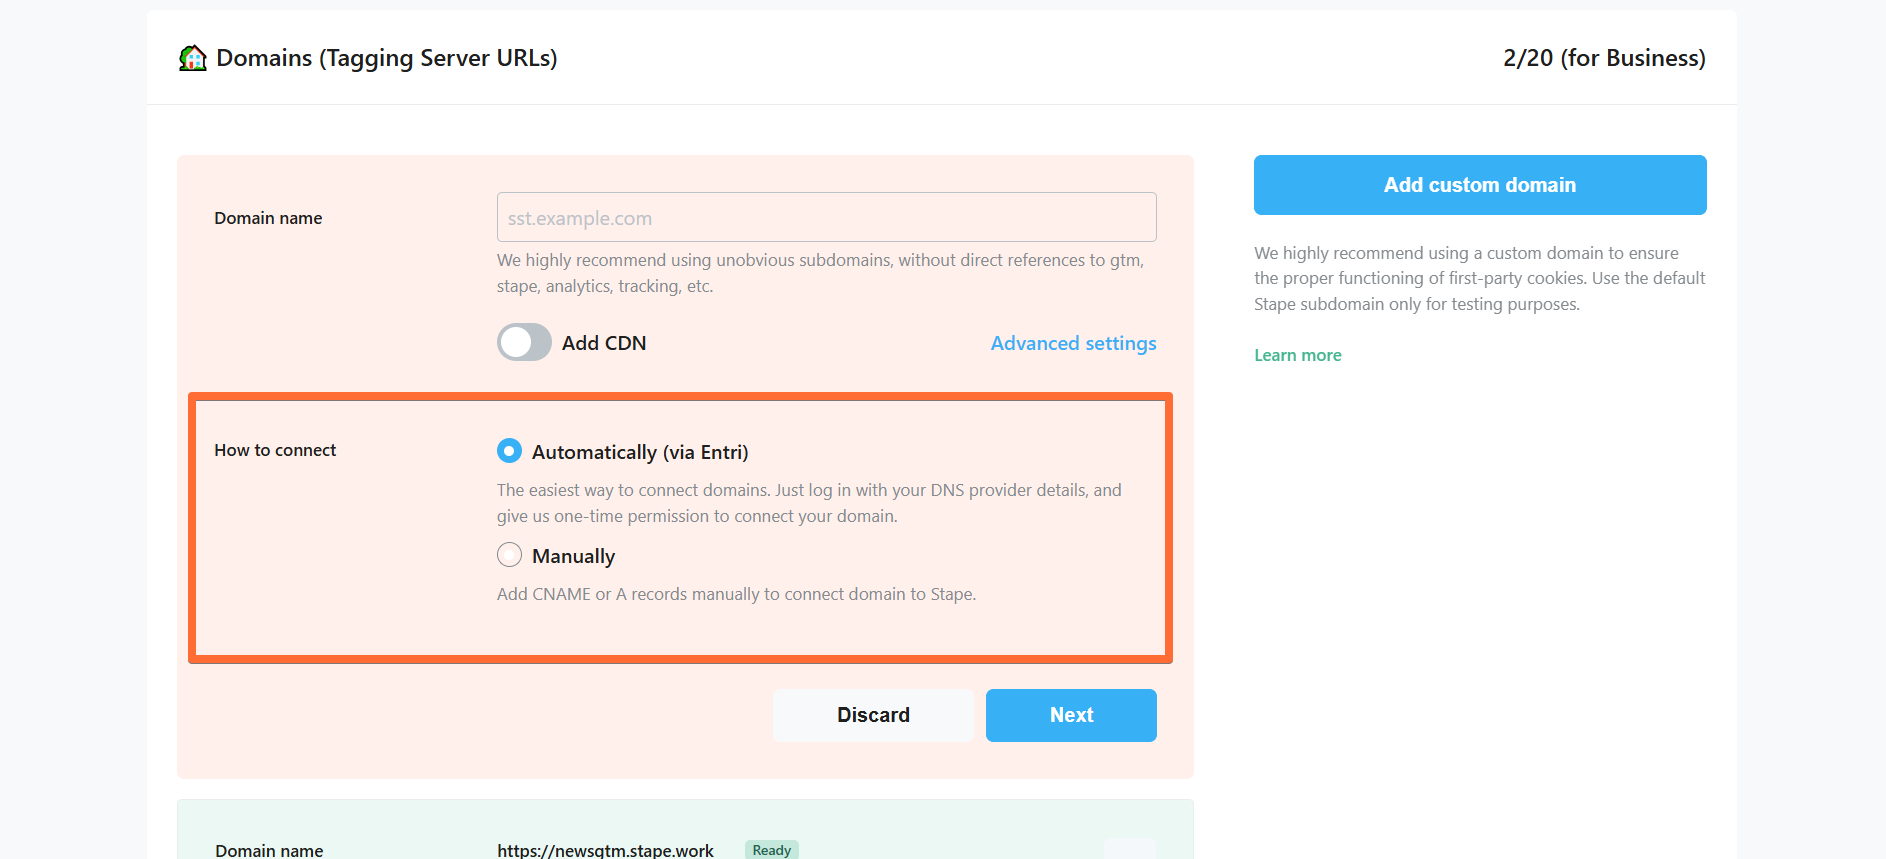
- Automatically (via Entri) - the easiest way to connect domains. Log in with your DNS provider details via Entri, and give us one-time permission to connect your domain. Check the full list of supported DNS providers by Entri.
- Manually - After you add a custom domain to your Stape container, you will see DNS records that should be added to your DNS provider to verify the custom domain. The DNS records depend on the server location and which CDN options you choose.
Here are all available configurations for your custom domain (don’t worry, we’ll cover the configuration process in later sections):
- Domain name - enter your tagging server domain (example: gtm.my-domain.com).
- Add CDN - in LinkedIn-sponsored sGTM containers, you can use either the Own CDN option or leave the switch deactivated for No CDN.
- Advanced settings - here you can tick the box to Use A records instead of CNAME records. If DNS providers restrict adding duplicate records, you should use CNAME record. If not, then choose A records. Please note that this setting is incompatible with the Add Global CDN setting.
Read more in our manual on how to set up a custom domain.
Step 2. Set up Custom Loader
It’s highly recommended to enable Custom Loader as part of your server-side tracking configuration. This power-up minimizes the impact of ad blockers on your GTM and GA4 scripts. It routes requests through a path that turns all cookies first-party, increasing their lifetime.
More info
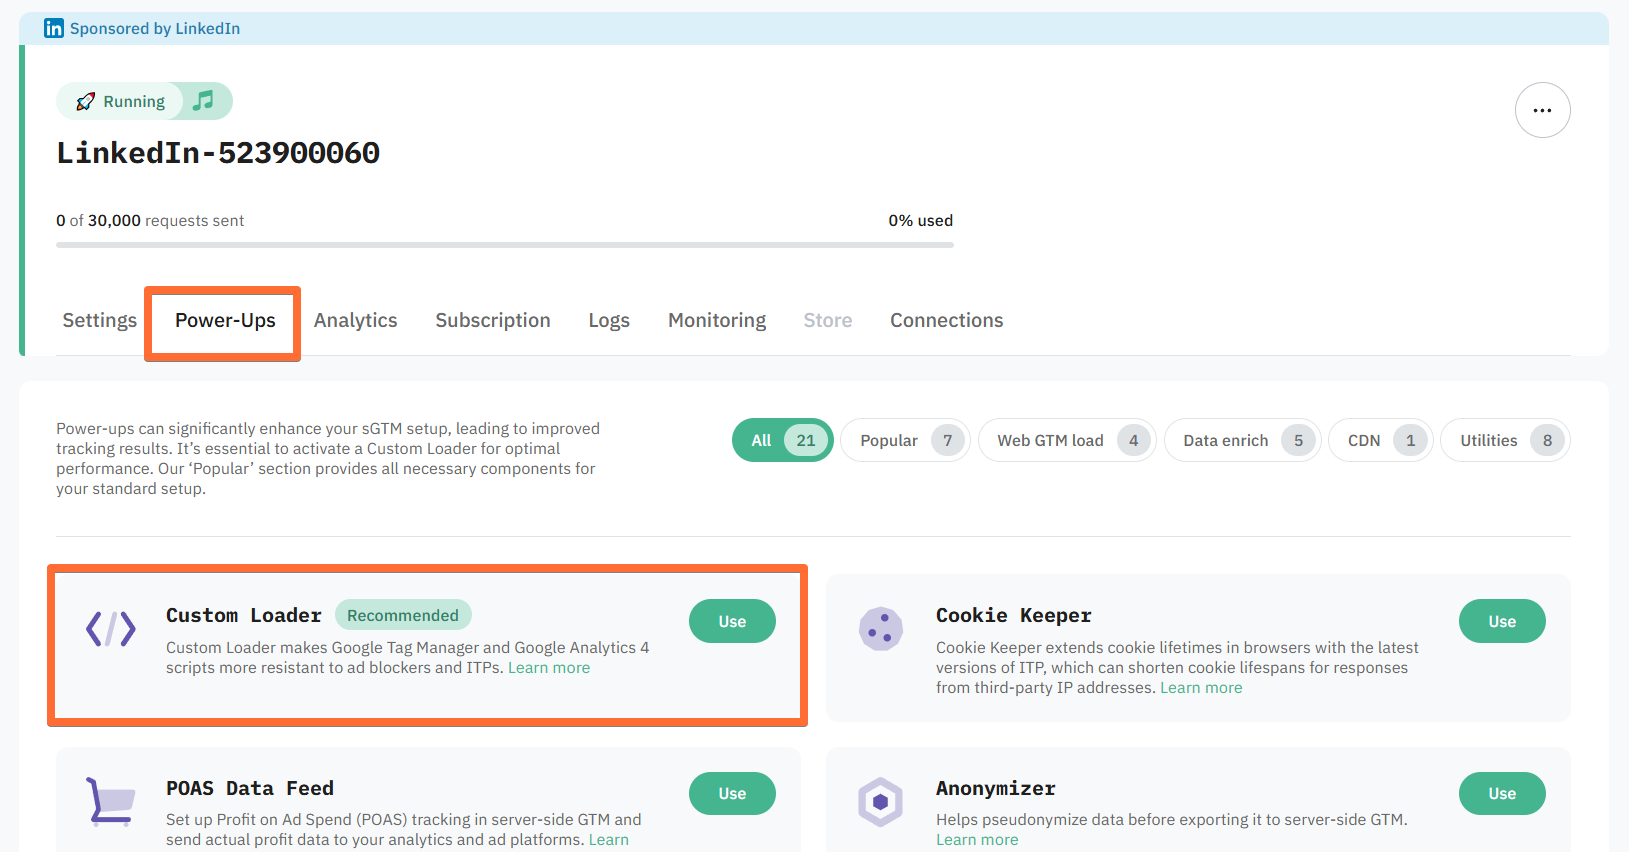
1. Log in to your Stape account and select your sGTM container from the dashboard.
2. Go to Power-ups and click Use next to the Custom Loader panel.
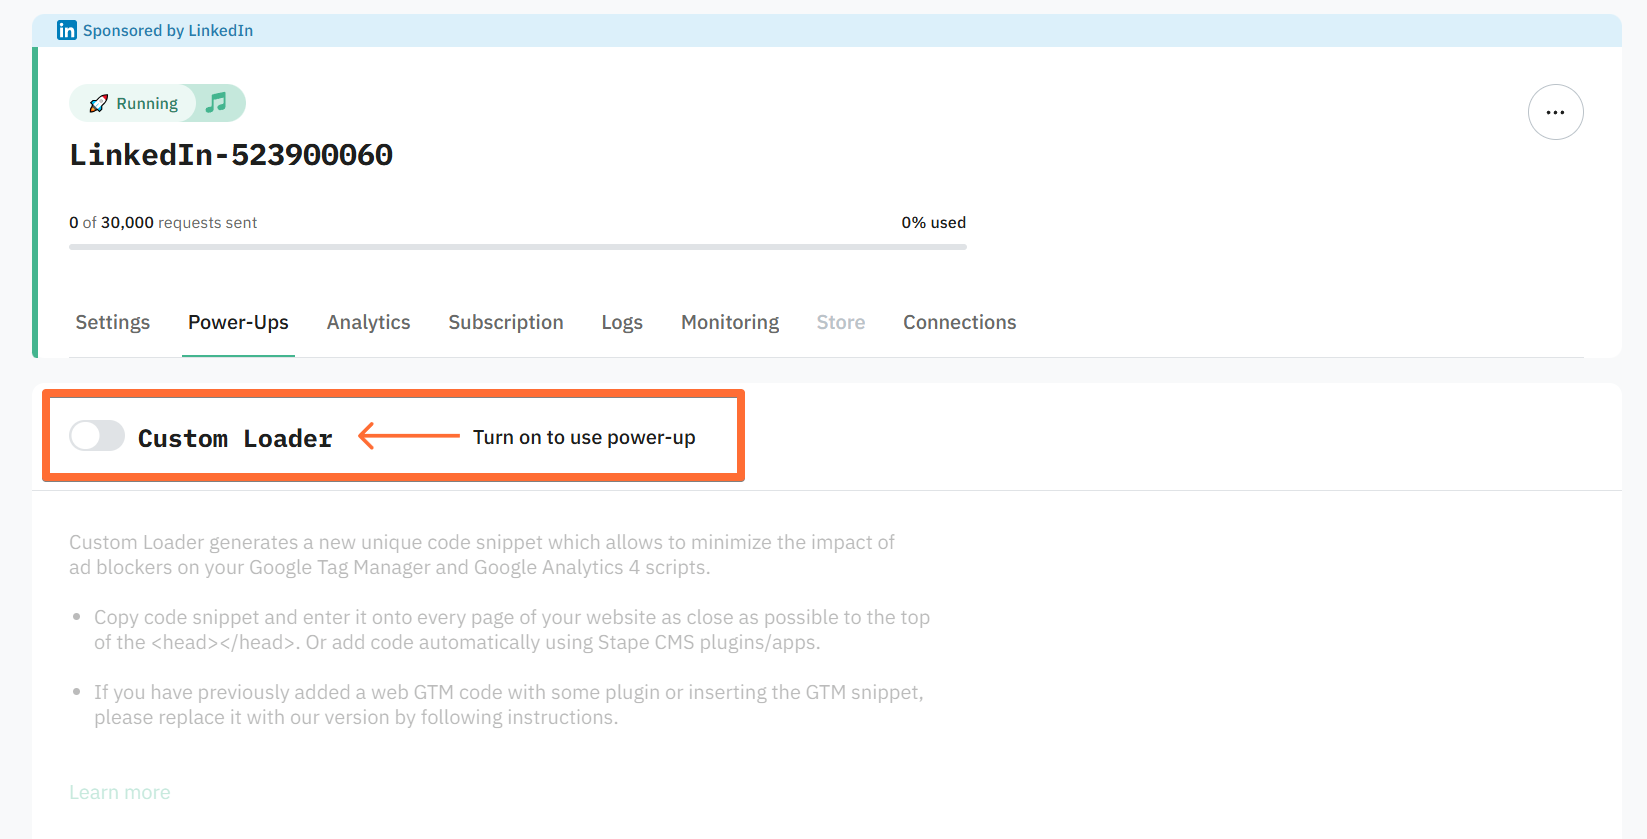
3. Toggle the Custom Loader switch to enable it and click Save changes.
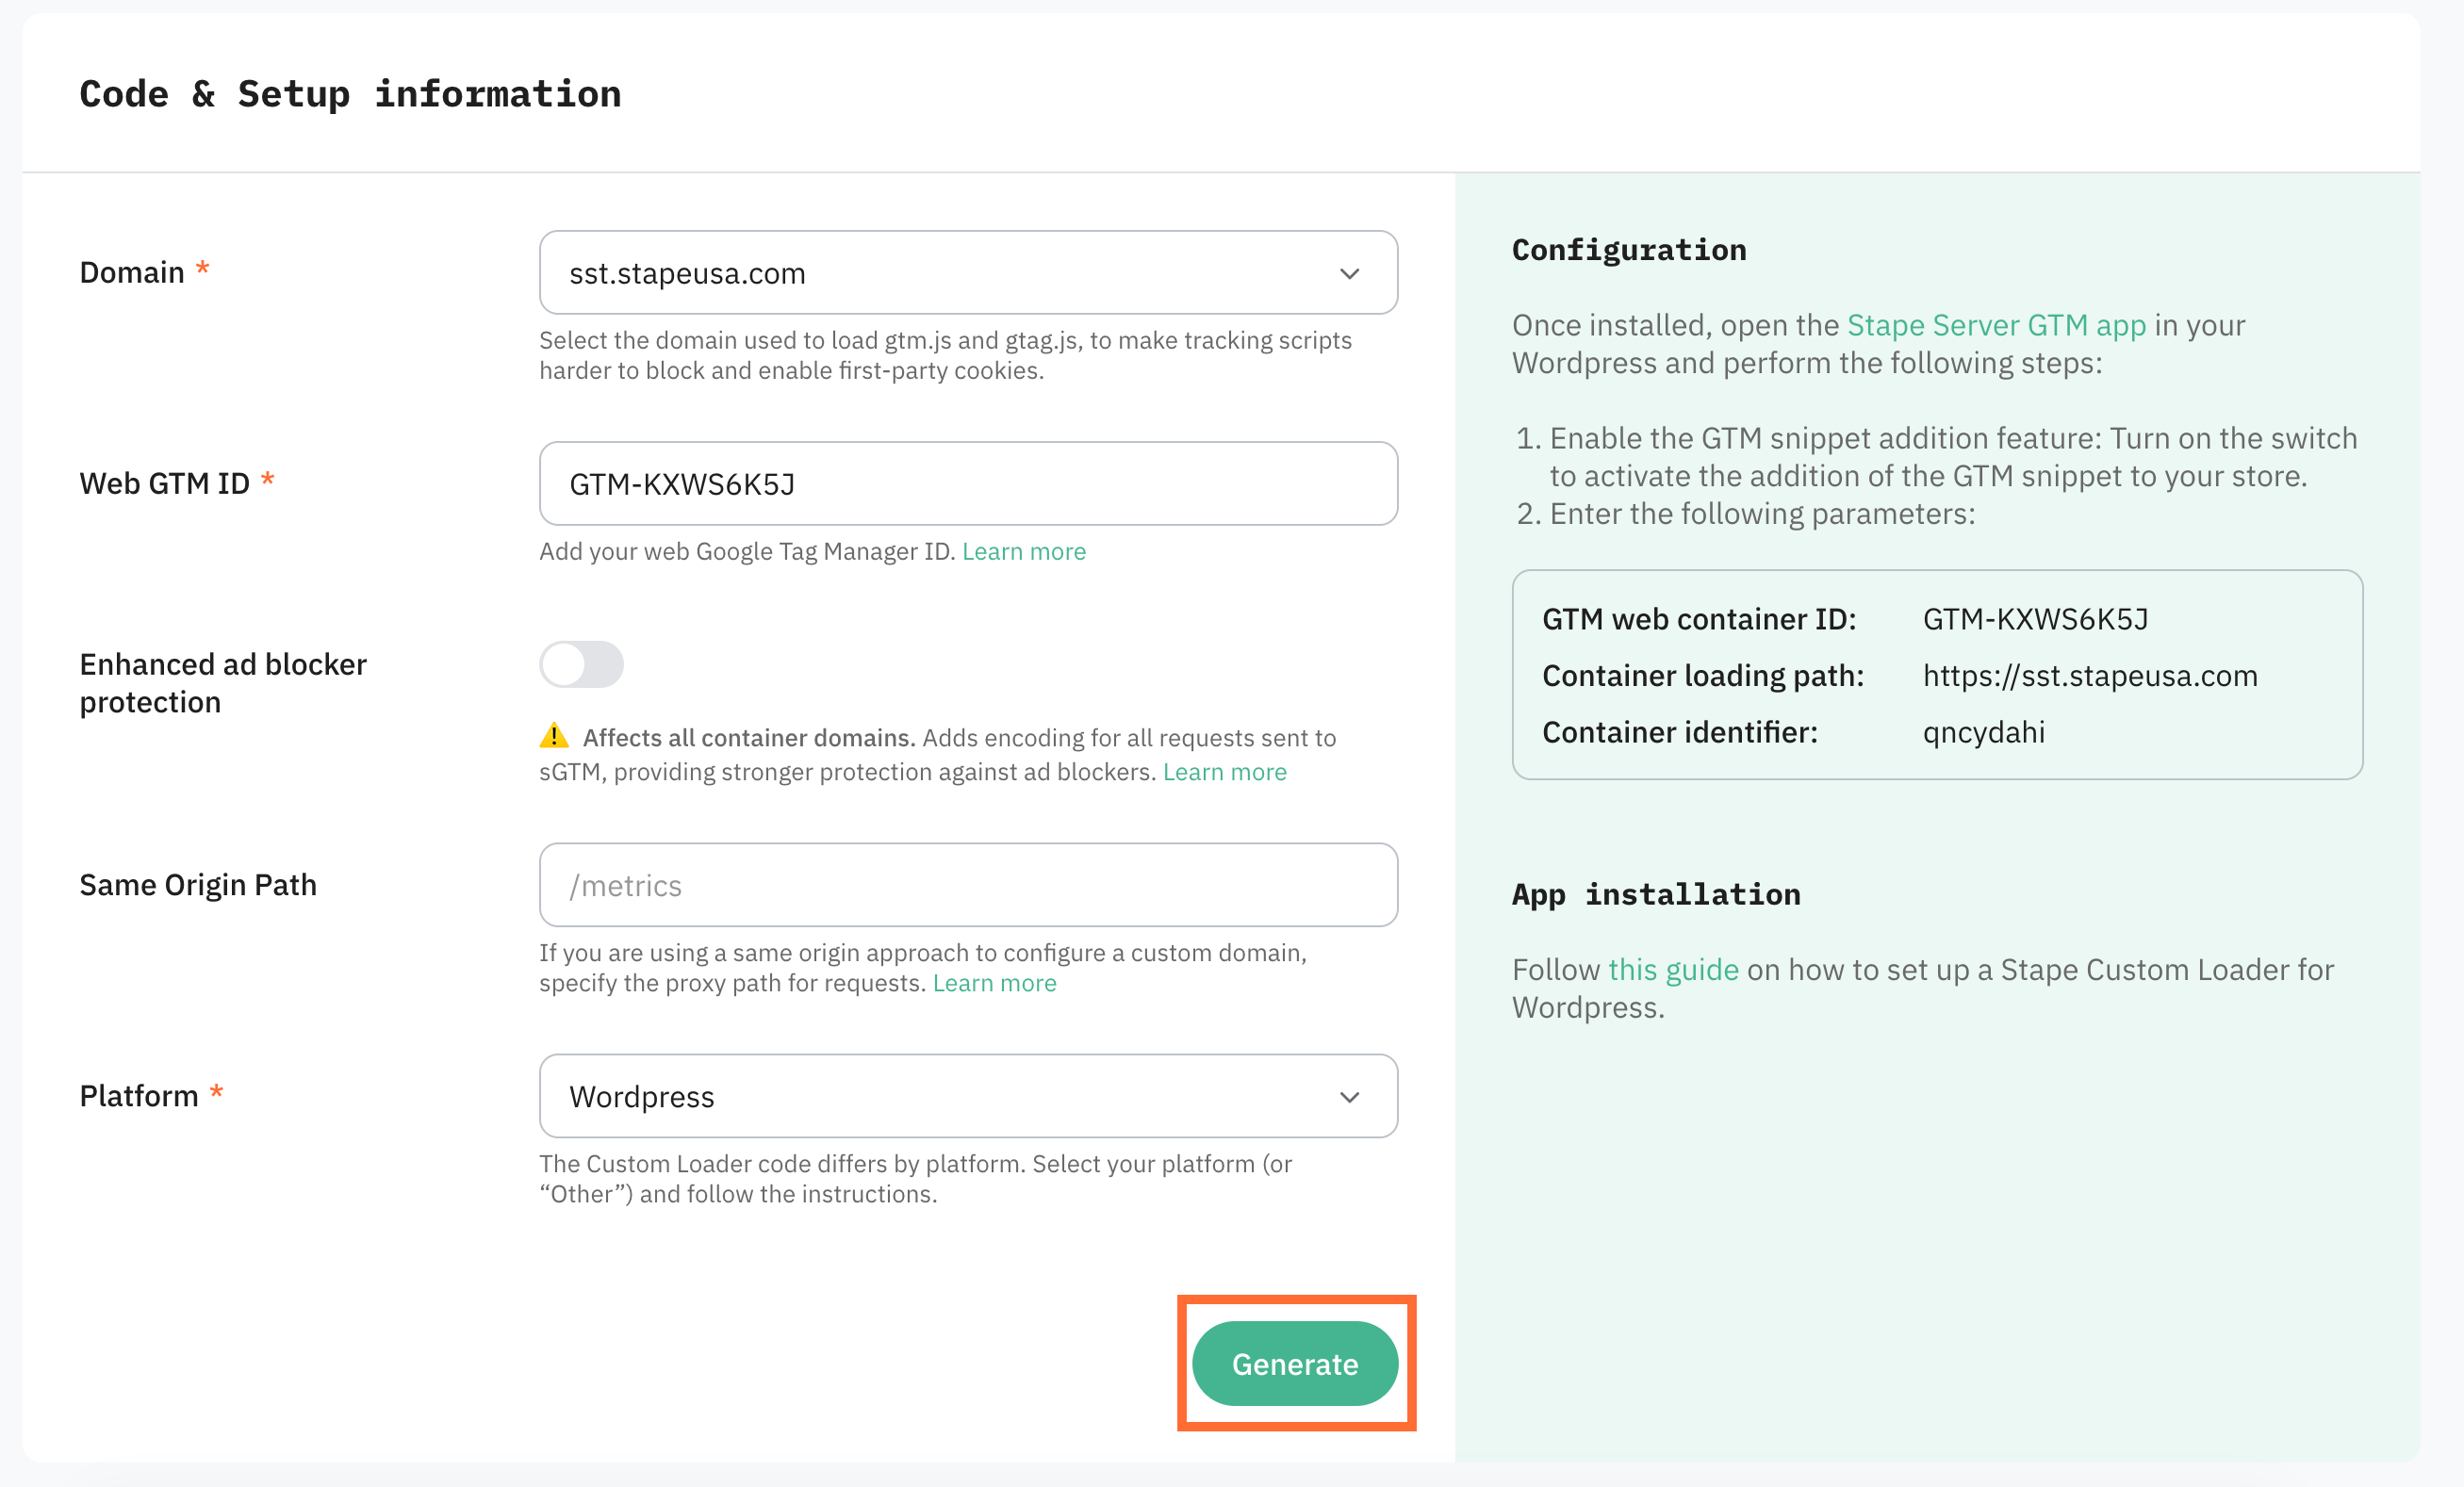
4. In the Code & Setup information section, configure the following settings:
- Domain - select one of the domains linked to your container.
- Web GTM ID - enter your web Google Tag Manager ID.
- Enhanced ad blocker protection - when enabled, all requests to your sGTM server are encrypted so ad blockers can’t block them based on request patterns. Learn more about the enhanced ad blocker protection.
- Same Origin Path - if you use the same-origin approach, enter the path here so both GTM and gtag.js load through it.
- Platform - here you can either:
- Select your CMS platform (such as Shopify, Wordpress, etc.). In this case, you’ll be required to install and configure a Stape app.
- Select Other to receive a JS snippet in case you’re using another platform or a custom website.
Setup for a listed platform
Select your platform and click Generate. You’ll get configuration and app installation instructions in the Configuration panel for your selected platform. Follow the app installation guide.
Note: Some platforms may require you to tick the Custom Loader checkbox for the power-up to be enabled.
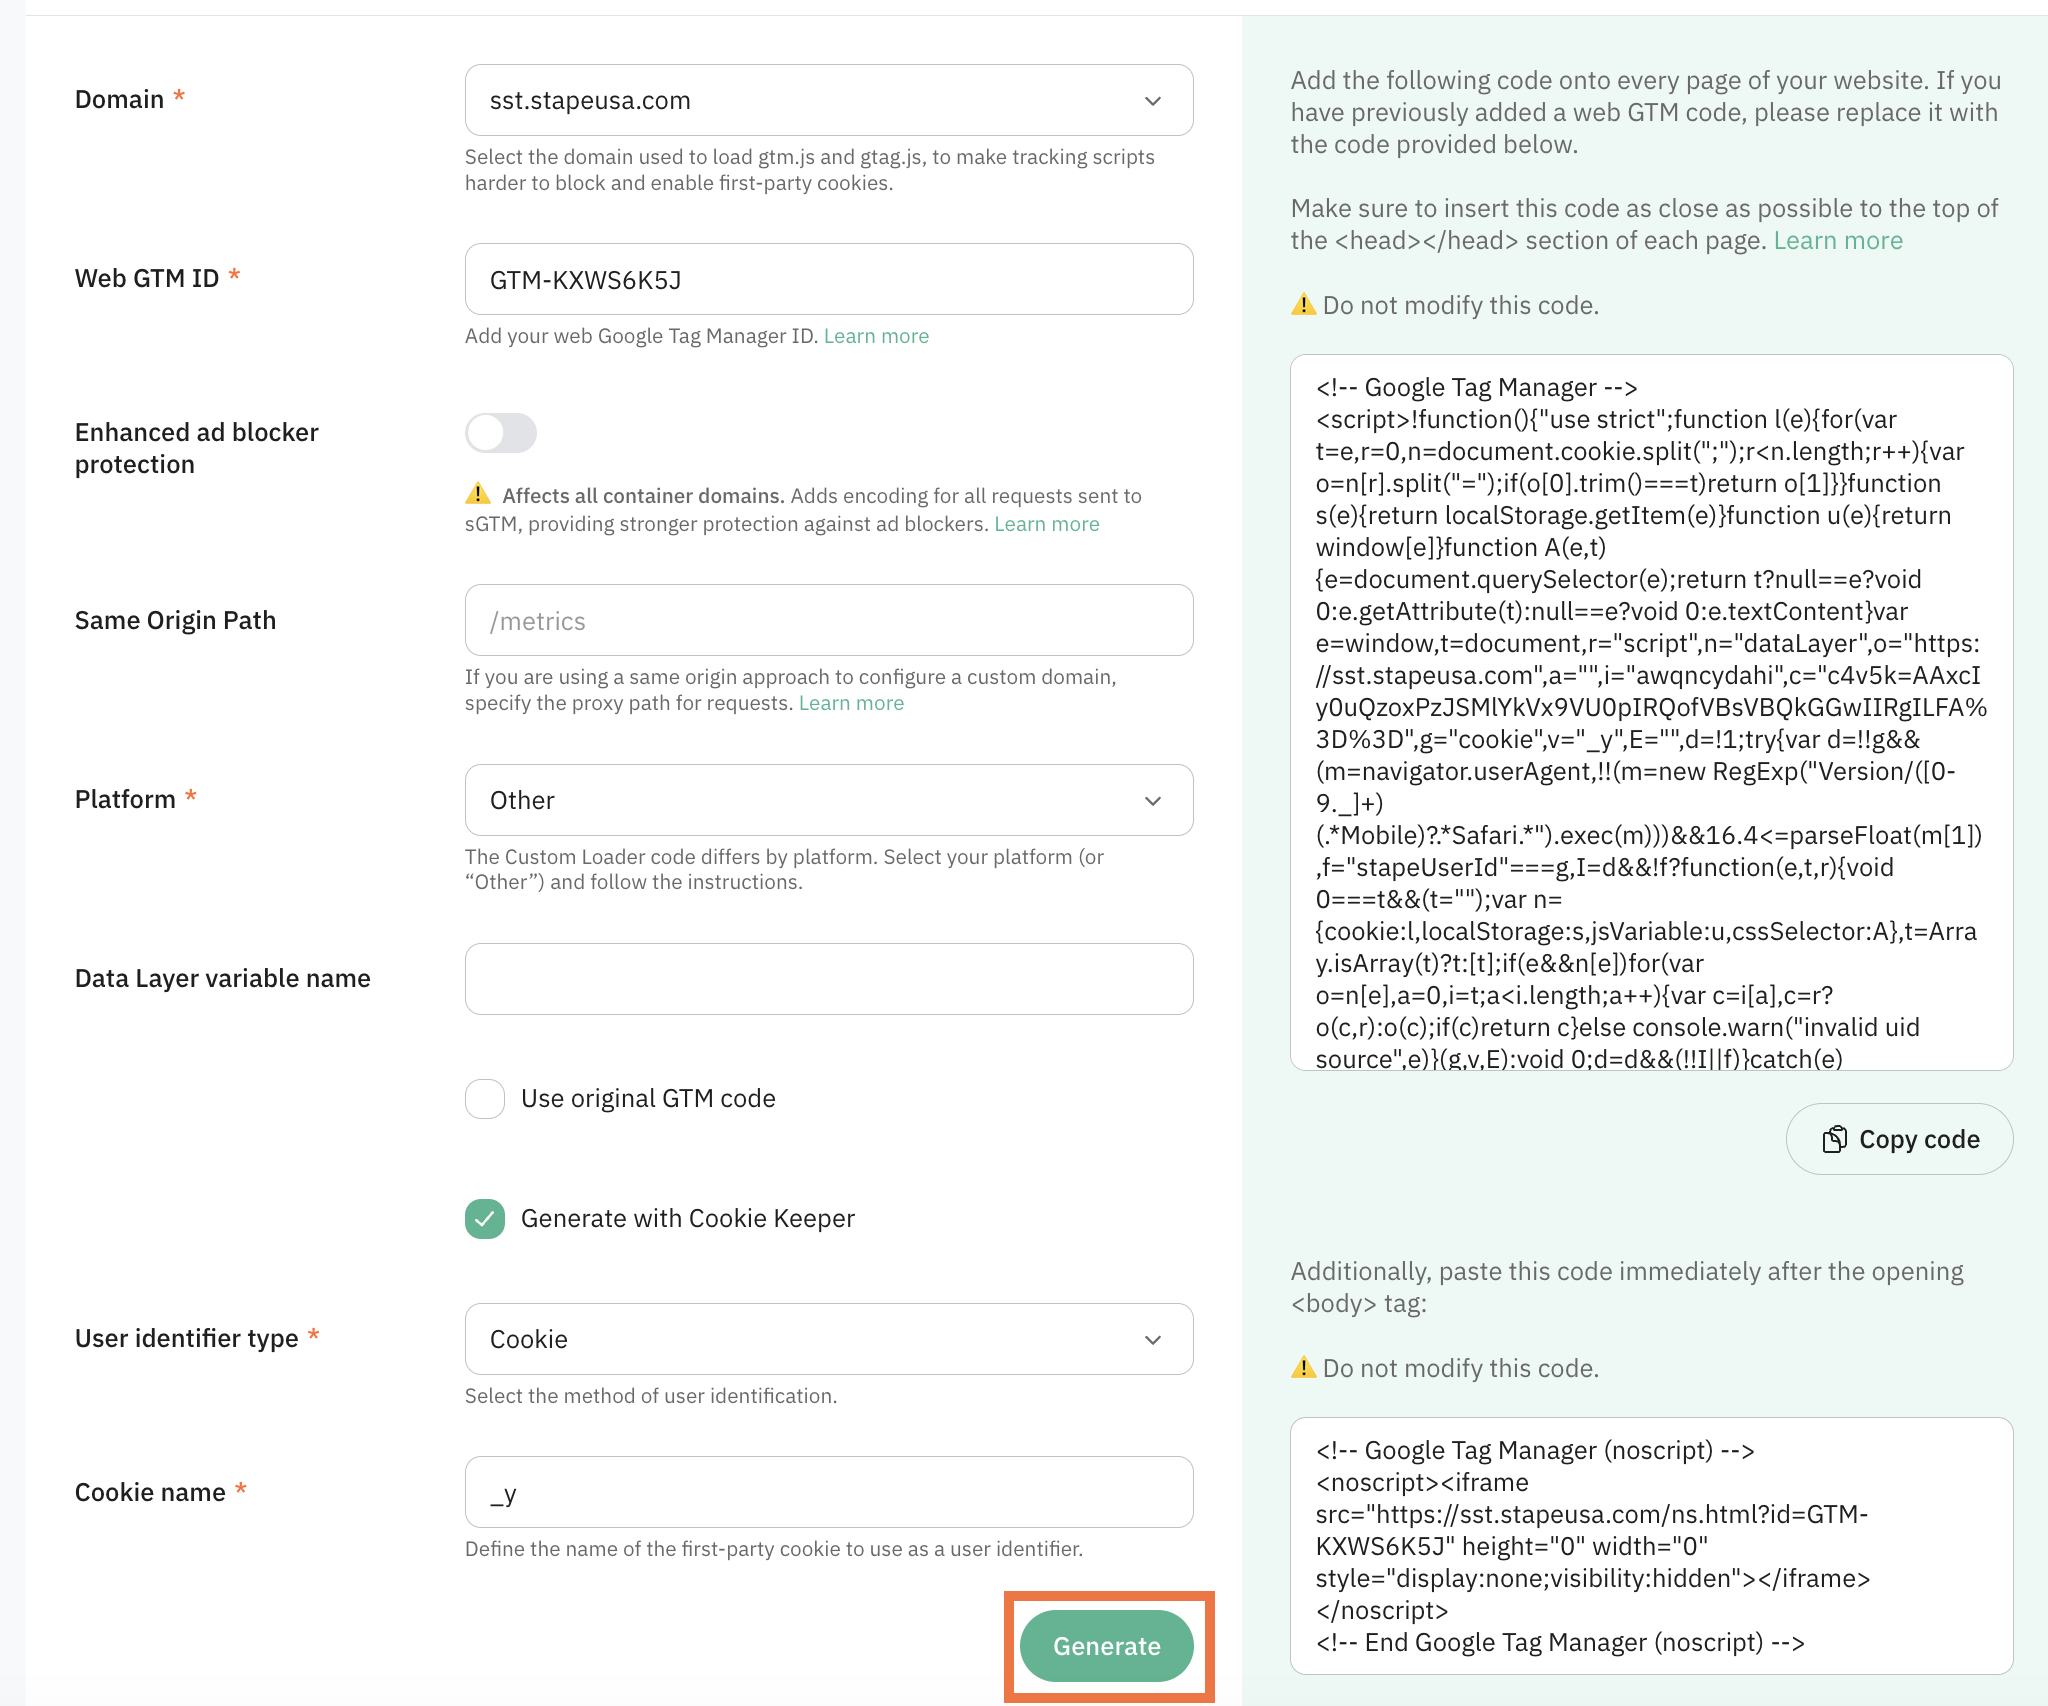
Setup for other platforms
1. Select Other. You can also configure Advanced settings:
- Data Layer variable name - specify only if you use a non-standard
dataLayer. - Generate with Cookie Keeper - includes Cookie Keeper logic in the generated code. This checkbox appears and is automatically enabled when you have the Cookie Keeper power-up.
- User identifier type - appears together with Generate with Cookie Keeper. Choose how to identify users - cookie is the recommended option. When selected, enter the name of the first-party cookie to use as the identifier. For more information read How to choose user identifier type in Cookie Keeper.
2. Click Generate and add the provided code to your website.
Note: Remove the standard GTM loader from your site if you have one - running both simultaneously will cause conflicts.
Testing
To verify the setup is working:
- Open any page on your website.
- Right-click → Inspect → open the Network tab.
- Filter requests by your custom subdomain or same-origin path.
- Look for the GTM request URL - it should return a 200 OK status code.
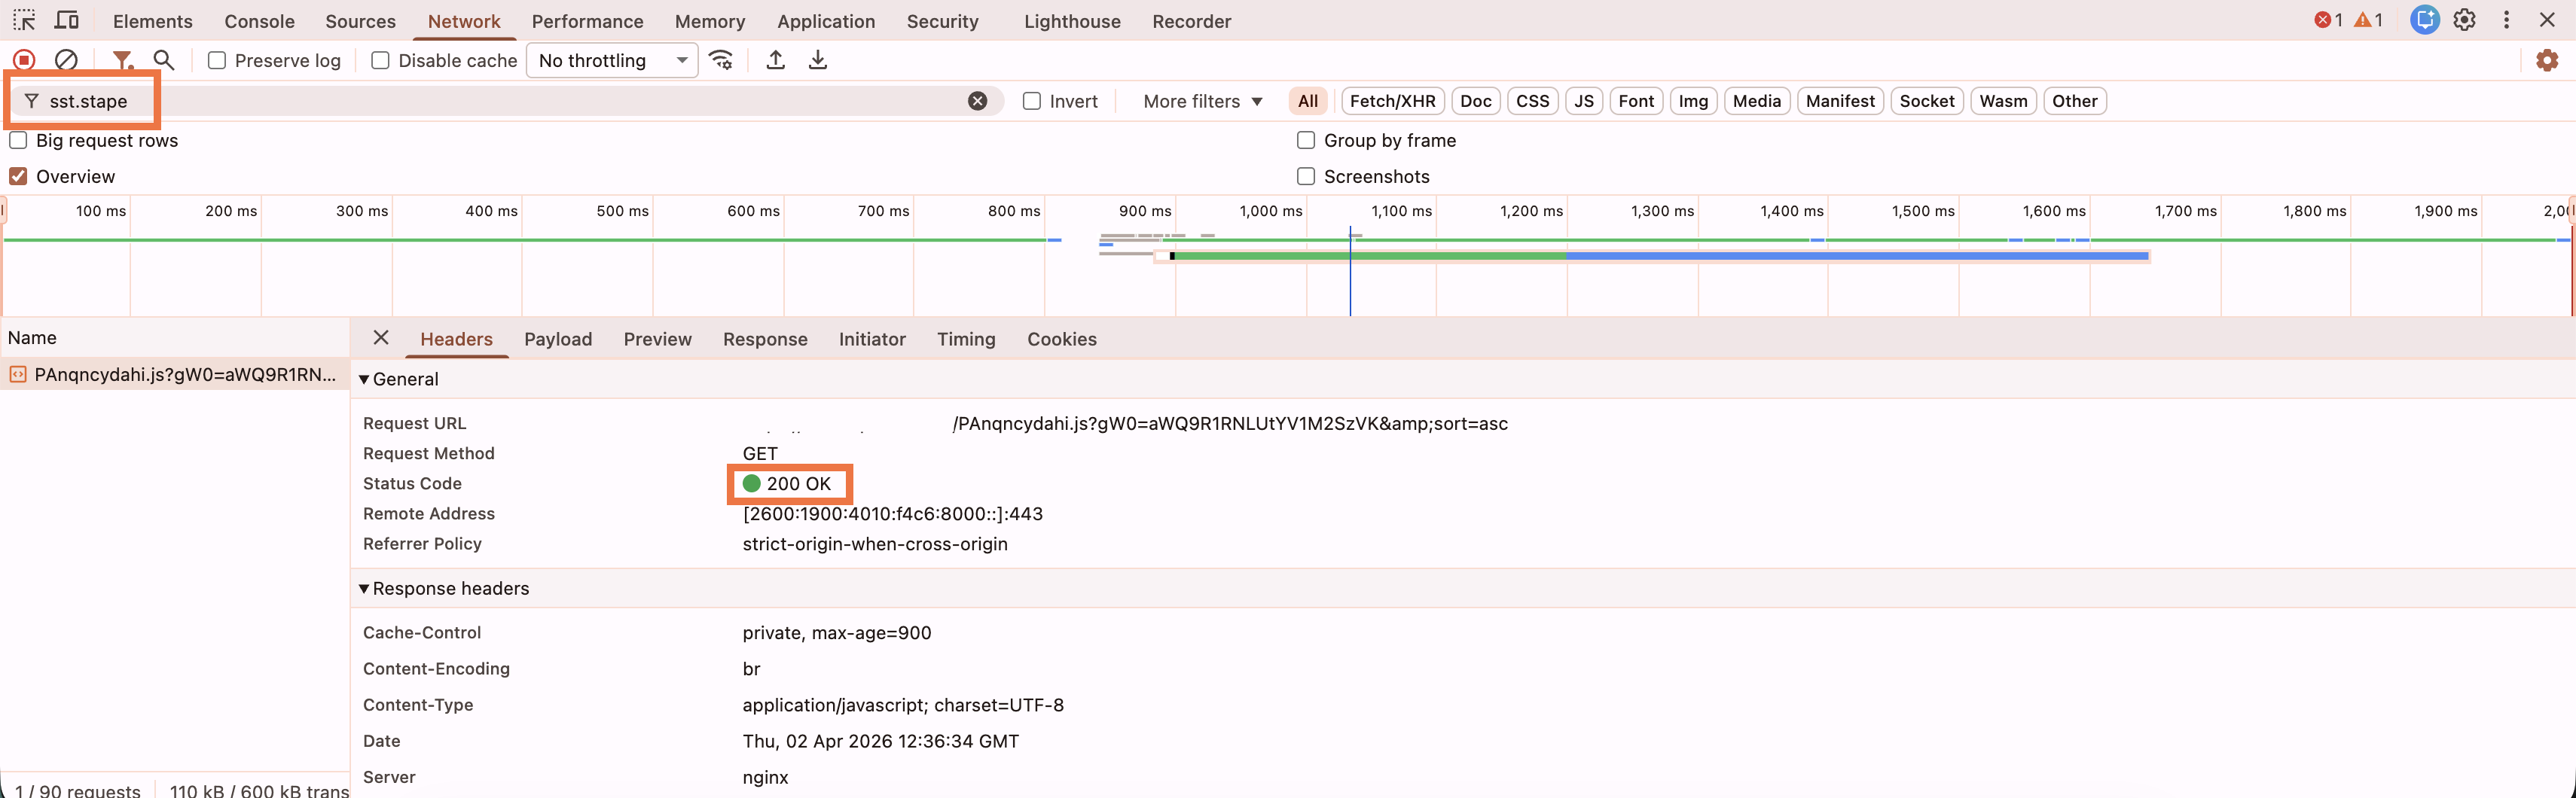
| Note: With Custom Loader and enhanced ad blocker protection enabled, GA4 request URLs will appear encrypted. |
Was this article helpful?
Comments