Disabled CDN
Updated May 10, 2026
You have several CDN options for configuring a custom domain in Stape: Stape Global CDN, Own CDN, or have CDN Disabled. In this article, we’ll cover Disabled CDN.
When you don’t use CDN for your server-side Google Tag Manager (sGTM) custom domain, none of the traffic or script loading is routed through a content delivery network. This means JavaScript files (like gtm.js, gtag.js, and analytics.js) are served directly from the server location where your sGTM container is hosted. Effectively, it bypasses both Stape Global CDN and Own CDN options, giving you a direct, unproxied connection between your site and the sGTM container.
Disabled CDN is available for all server-side GTM subscription plans.
Important! Please consider your country's privacy regulations before enabling CDN.
Benefits of a Disabled CDN
- Simplicity & reduced configuration - with CDN disabled, there are little to no settings to manage. This straightforward approach can be ideal if you prefer a minimal setup or want fewer moving parts.
- Fewer potential compatibility issues - some environments (especially custom or security-focused setups) may introduce issues when routing through a third-party CDN. Disabling CDN avoids conflicts with firewalls, caching policies, or advanced DNS rules.
- Streamlined debugging - when troubleshooting or running tests, removing the additional layer (CDN) can simplify isolating issues. All logs and network requests reflect a single server route, making it easier to pinpoint problems.
How to configure a custom domain with disabled CDN
This instruction considers that you’re looking to use no CDN at all. If you’d like to configure your Stape’s Global CDN instead, please refer to this guide; if you’d like to configure your Own CDN, please refer to this guide.
1. Log in to your stape.io account.
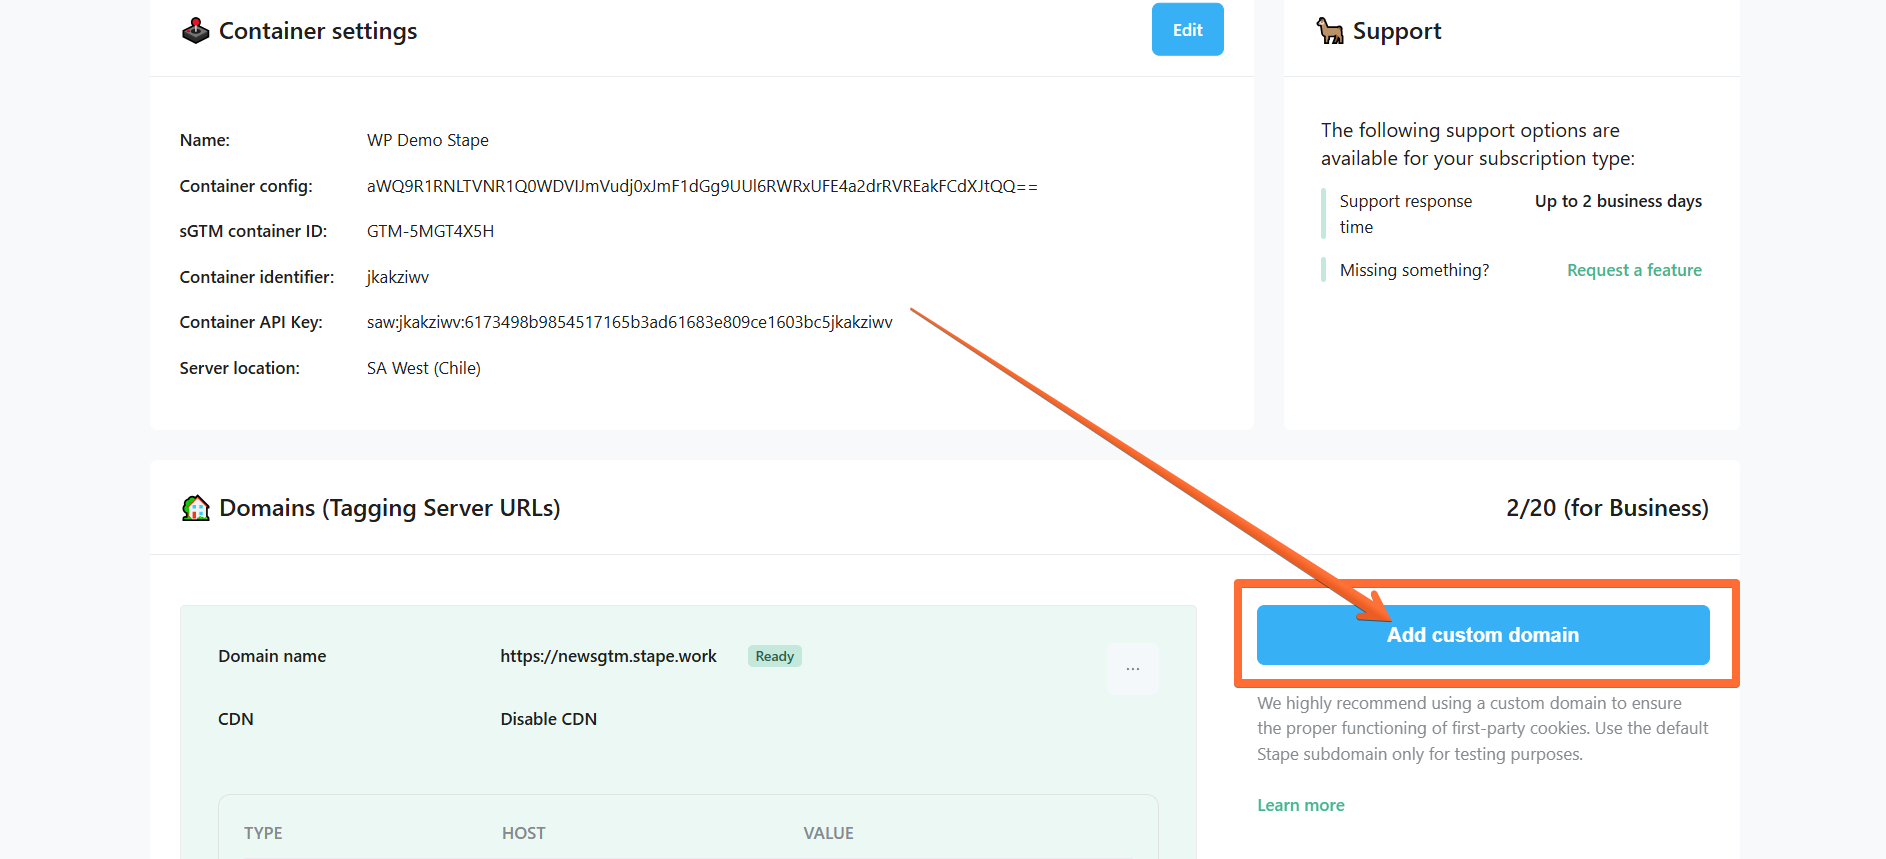
2. Select your sGTM container on the dashboard.

3. Scroll down and click Add custom domain.
4. There are two ways of adding a custom domain:
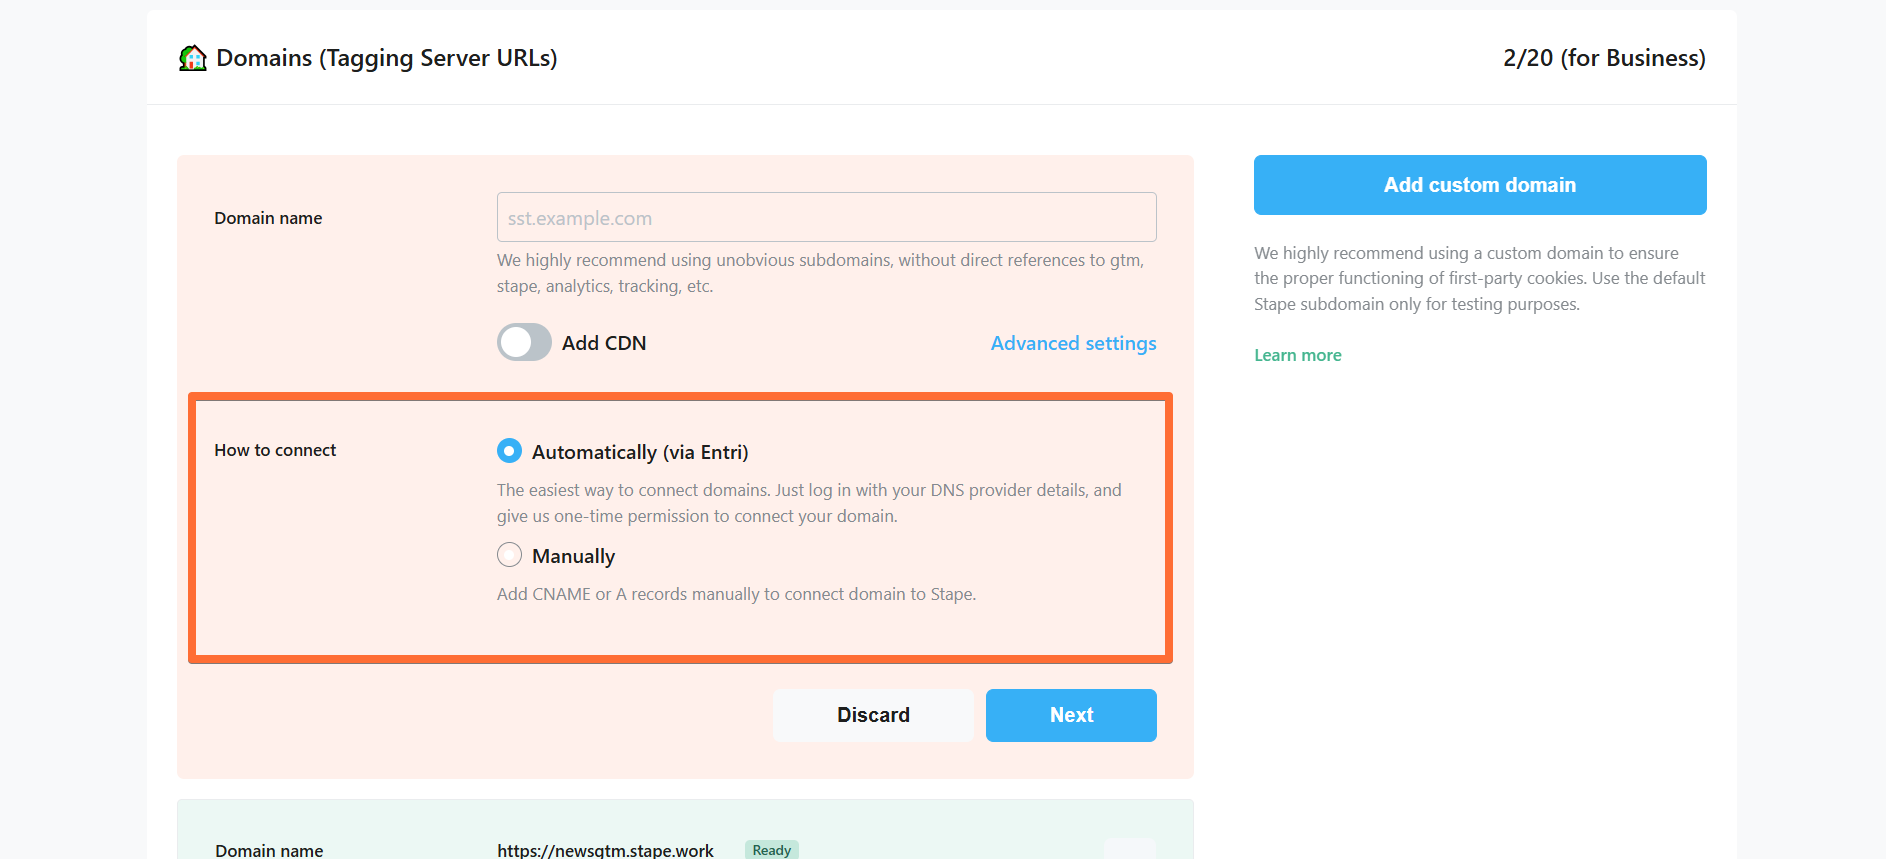
- Automatically (via Entri) - the easiest way to connect domains. Log in with your DNS provider details via Entri, and give us one-time permission to connect your domain. Check the full list of supported DNS providers by Entri.
- Manually - After you add a custom domain to your Stape container, you will see DNS records that should be added to your DNS provider to verify the custom domain. The DNS records depend on the server location and which CDN options you choose.
Here are all available configurations for your custom domain (don’t worry, we’ll cover the configuration process later):
- Domain name - enter your tagging server domain (example: gtm.my-domain.com).
- Add CDN - toggle this switch if you want to load js files (gtm.js, gtag.js, analytics.js, etc.) from a server closer to your site’s visitors, resulting in a faster js file serving.
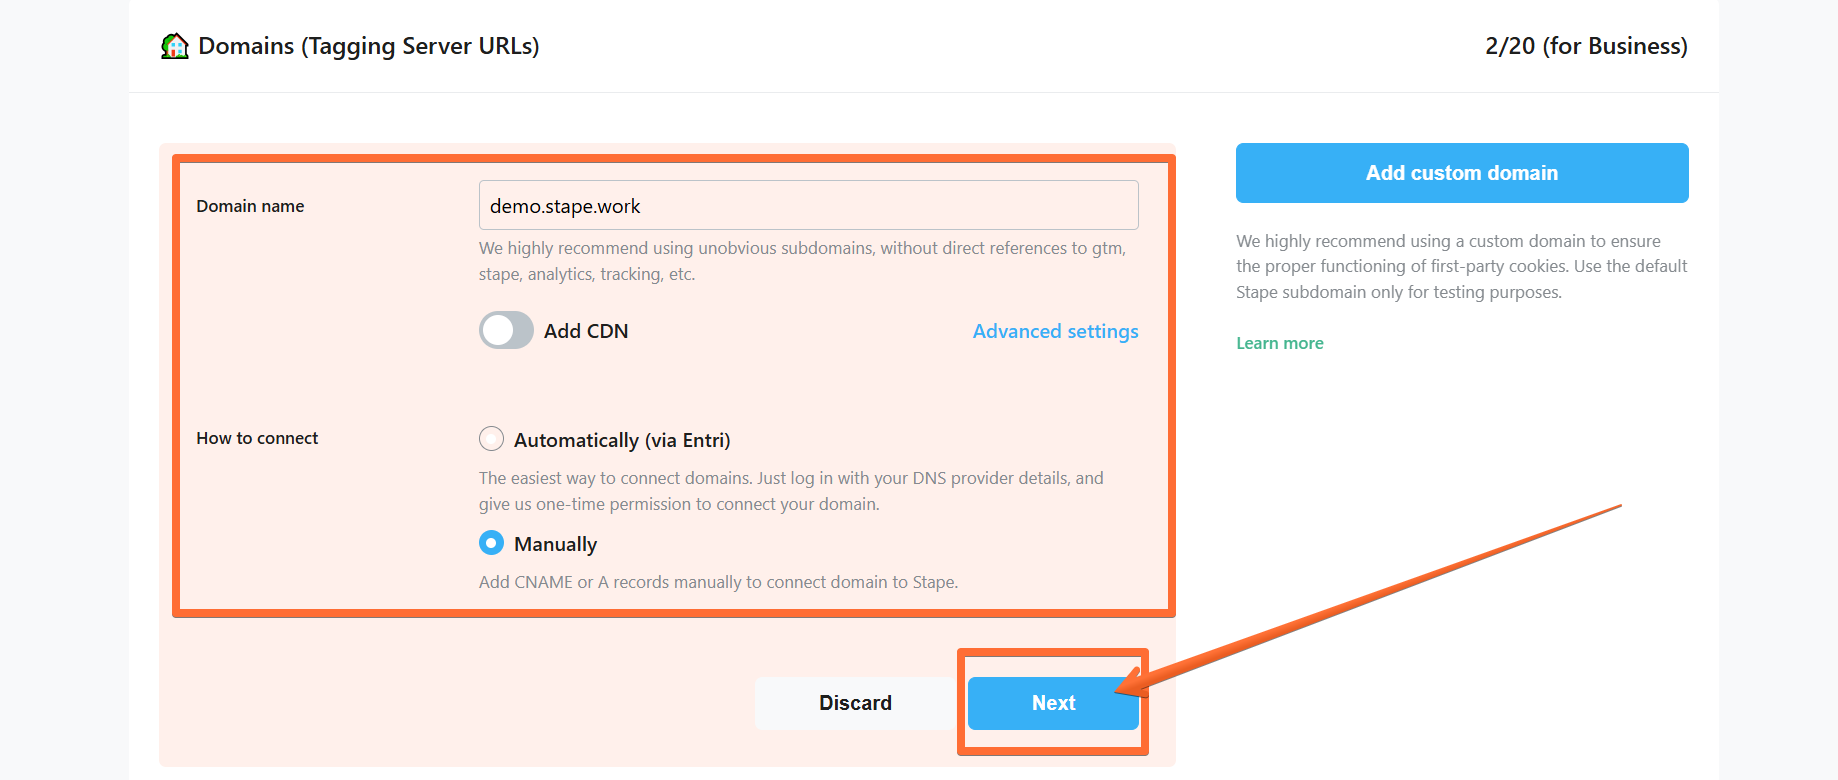
- This guide covers the setup with CDN disabled, so toggle off the Add CDN switch - no type of CDN will be used.
- Advanced settings - here you can tick the box to Use A records instead of CNAME records. If DNS providers restrict adding duplicate records, you should use CNAME record. If not, then choose A records. Please note that this setting is incompatible with the Add Global CDN setting.
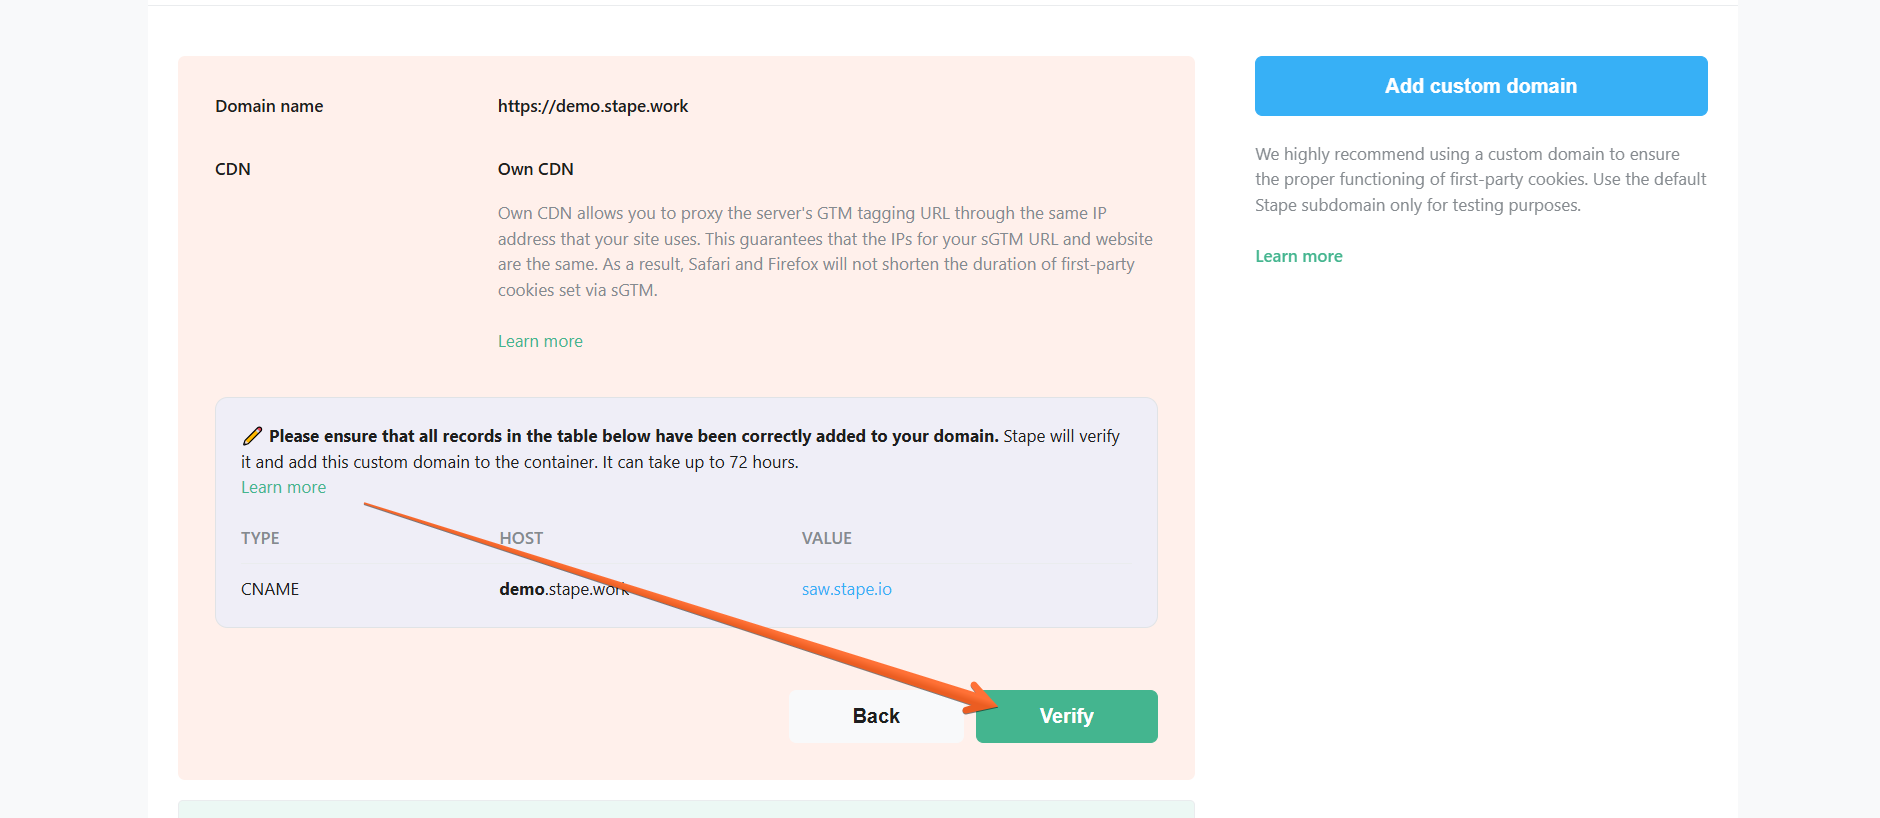
5. Enter your Domain name, toggle off the Add CDN switch → select whether you want to connect Automatically or Manually → click Next.
You will be provided with CNAME records. Here is an example of how to add these records to Cloudflare DNS provider, but you can do the same with any provider you use.
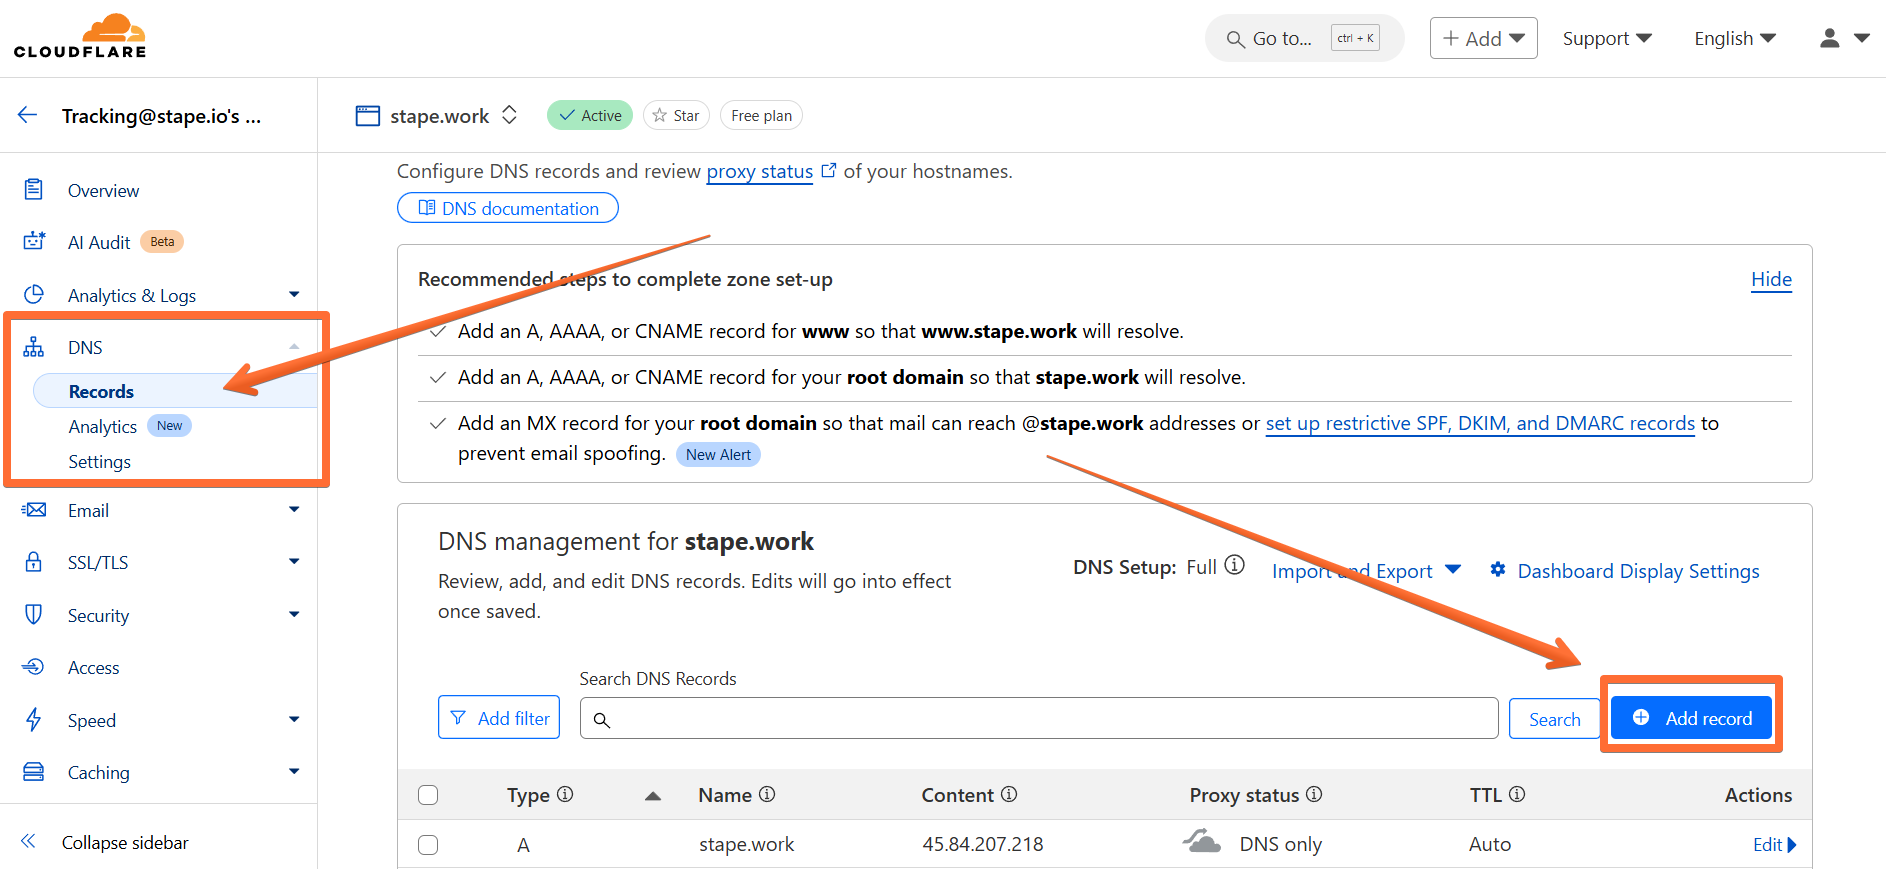
6. Visit your Cloudflare profile → open the DNS tab in the side menu → open the Records screen → click Add record.

7. Enter the DNS records from Stape:
- Type - copy the TYPE parameter from Stape.
- Name - copy the HOST parameter from Stape.
- Target - copy the VALUE parameter from Stape.
- Proxy status - make sure to toggle this OFF.
Click Save.
8. Once you’ve entered the DNS records to your DNS provider, return to the Stape container page where you’ve been configuring the custom domain and click Verify.
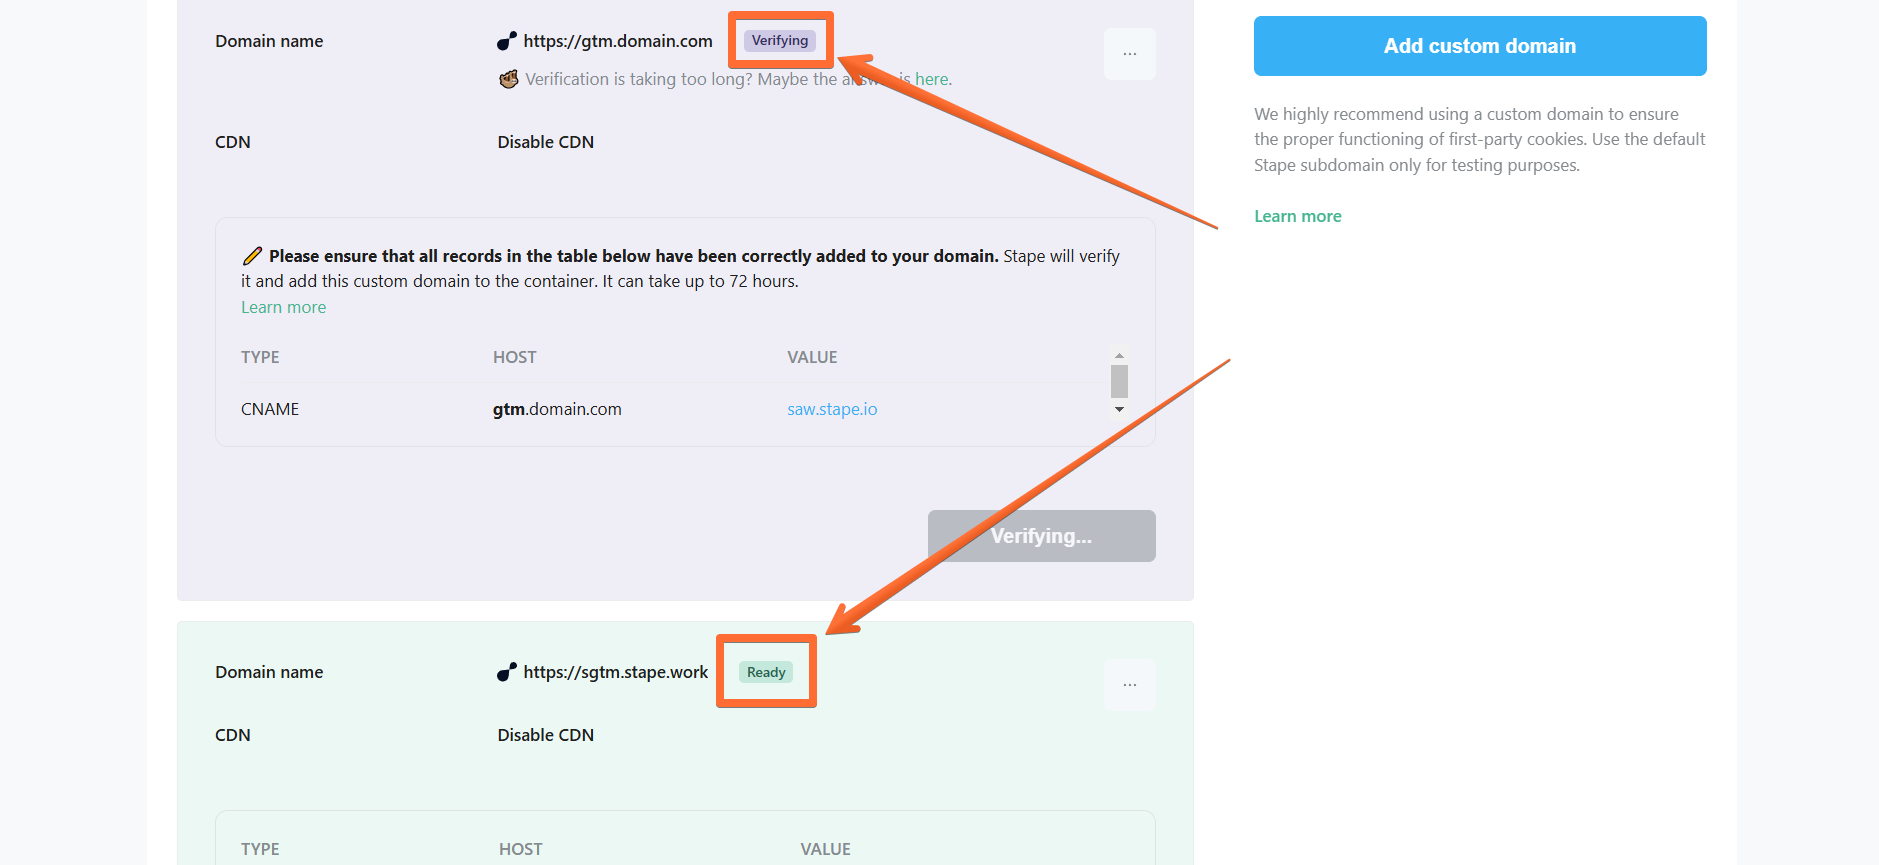
9. Wait for Stape to finish verifying your custom domain (when the container status bar changes from Verifying to Ready). Usually, it takes from 30 minutes to 2 hours, but in some cases it can take up to 72 hours.
10. Go to your Google Tag Manager Server container → click Admin → click Container Settings → change the Tagging server URL to your subdomain.

Testing Disabled CDN
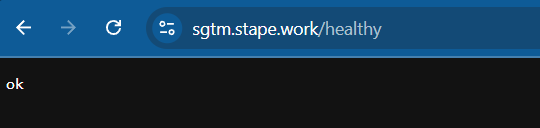
To verify that the custom domain is working properly, open its URL and add /healthy at the end (e.g., https://sgtm.stape.work/healthy). If everything is correct, you should see the OK response.
Was this article helpful?
Comments