Own CDN
Updated Apr 8, 2026
You have several CDN options for configuring a custom domain in Stape: Stape Global CDN, Own CDN, or have CDN Disabled. In this article, we’ll cover Own CDN.
Own CDN is a feature that routes your server-side Google Tag Manager (sGTM) domain through the same IP address as your main website. By matching the IP addresses between your sGTM domain and your site domain, browsers like Safari and Firefox treat sGTM cookies as true first-party cookies, preventing their shortened lifespans under Intelligent Tracking Prevention (ITP).
With Own CDN, you can maintain longer-lasting, more accurate cookie data for your analytics and marketing efforts while also enjoying increased loading speed.
Own CDN is available for all server-side GTM subscription plans.
Note:
If you go with Own CDN option, you are responsible for the issuance of SSL certificate for your custom domain. Please make sure that SSL vertificate is in place, only after that we can validate your custom domain from our side.
How to use Own CDN
This instruction considers that you’re looking to use Own CDN as your CDN. If you’d like to configure your Stape’s Global CDN instead, please refer to this guide.
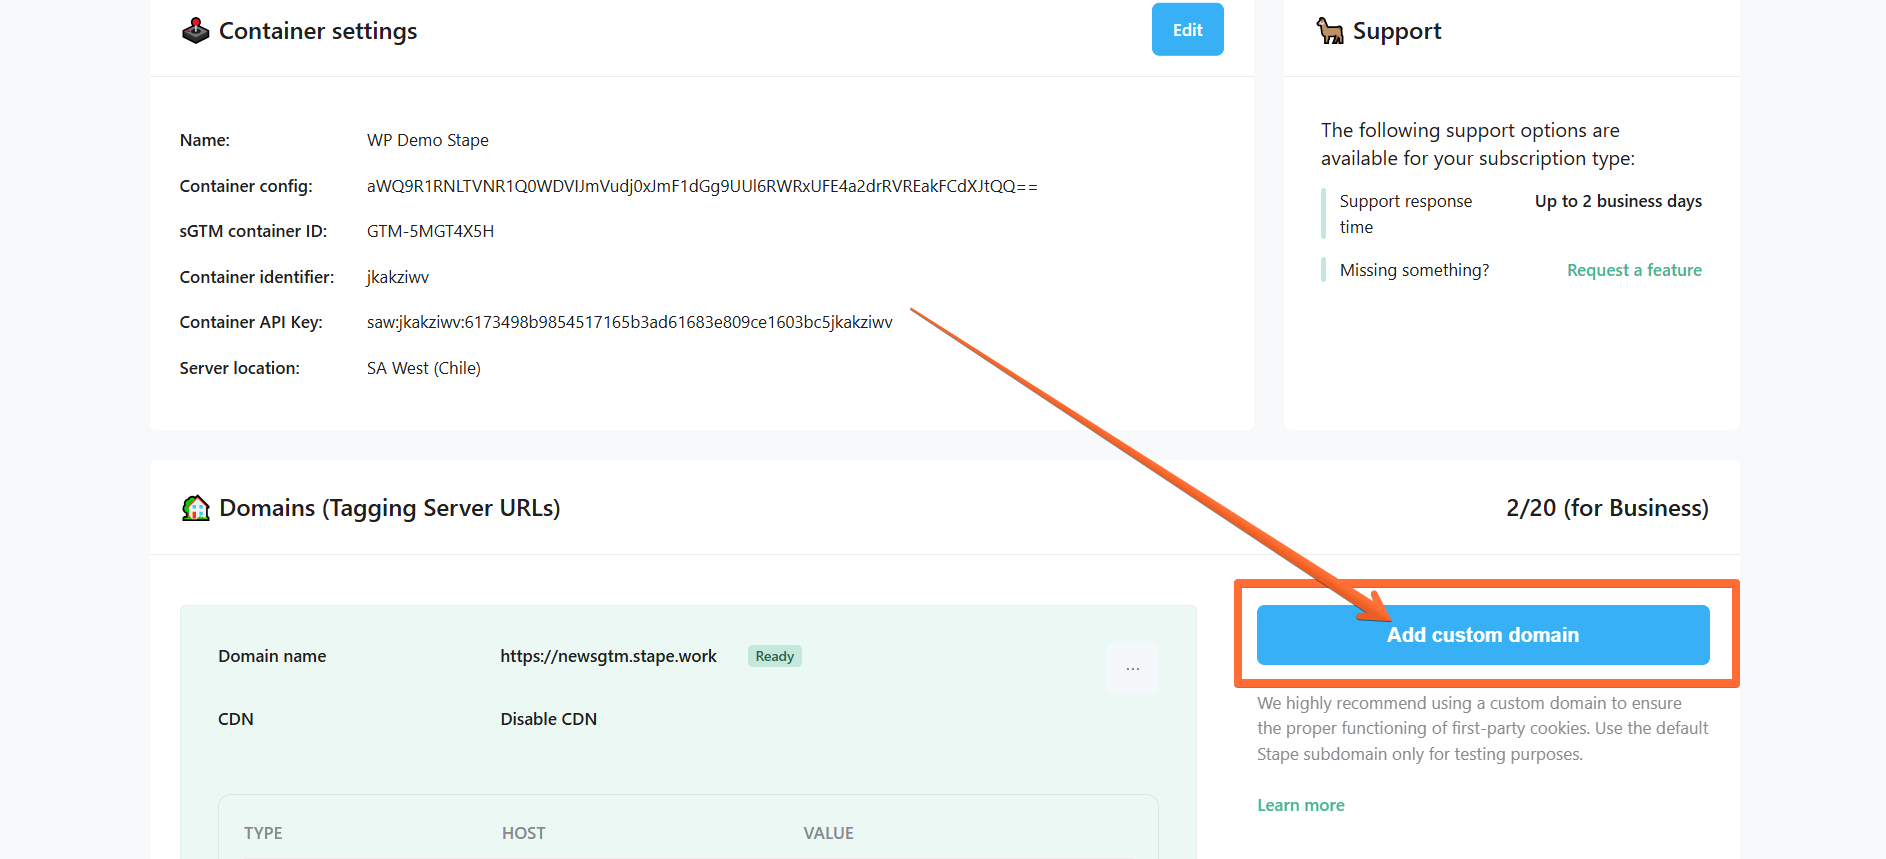
1. Log in to your stape.io account.
2. Select your sGTM container on the dashboard.

3. Scroll down and click Add custom domain.
4. There are two ways of adding a custom domain:
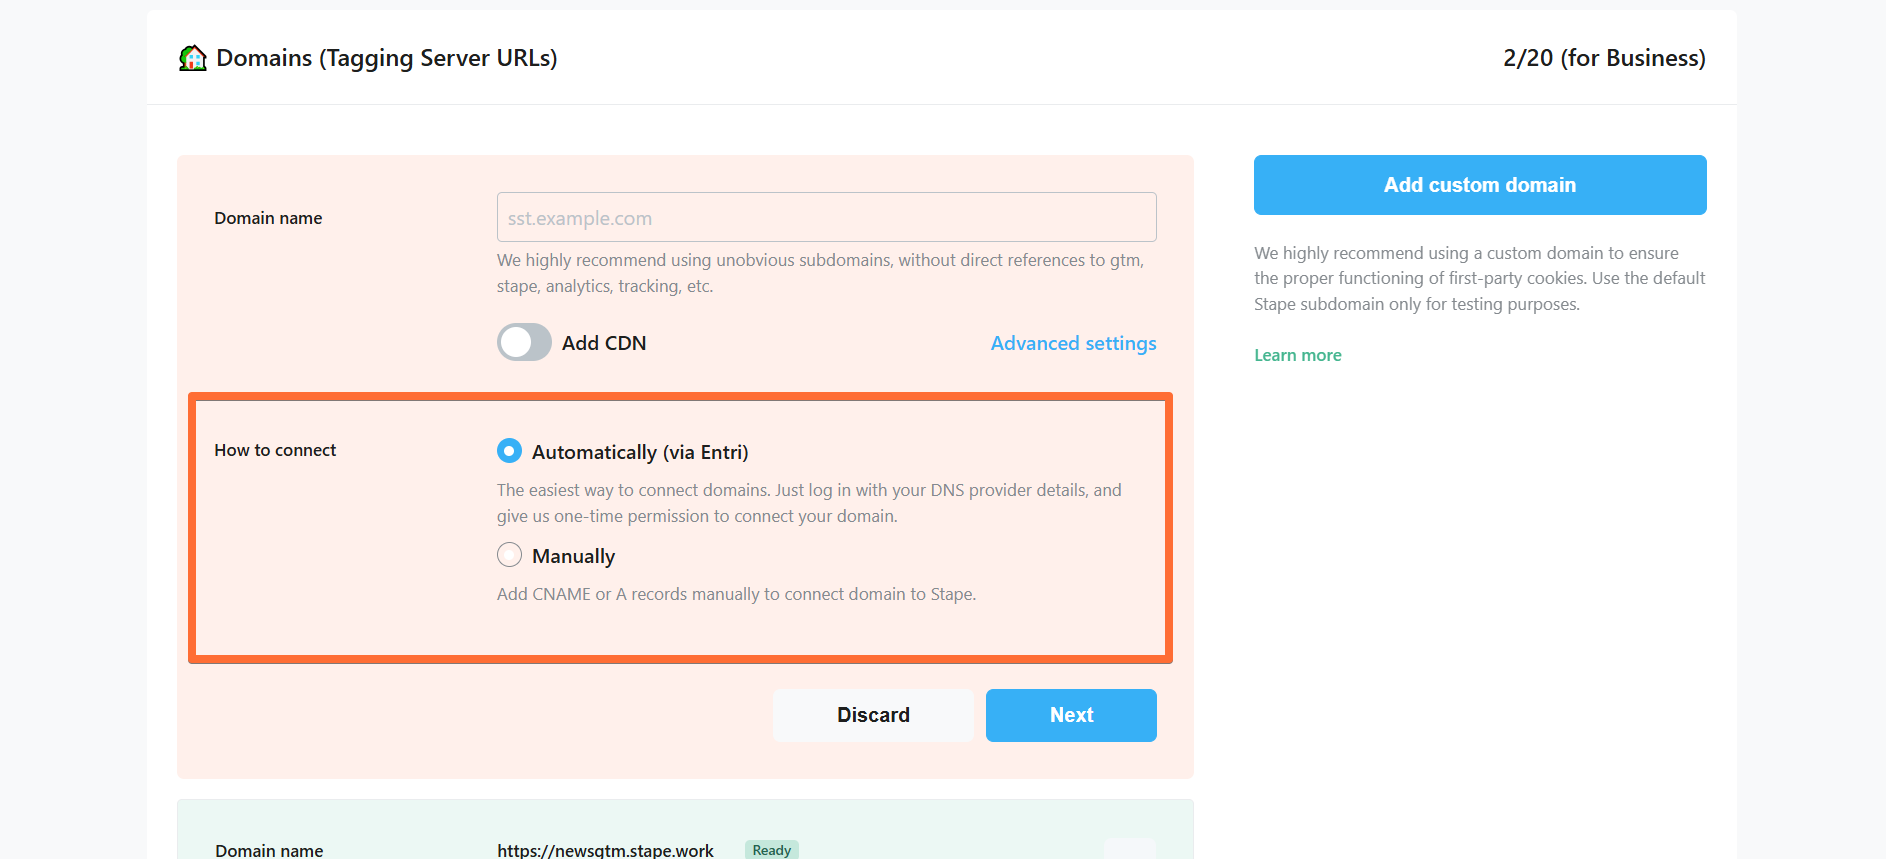
- Automatically (via Entri) - this option is incompatible with Own CDN, so we won’t cover it in this guide.
- Manually - After you add a custom domain to your Stape container, you will see DNS records that should be added to your DNS provider to verify the custom domain. The DNS records depend on the server location and which CDN options you choose.
Here are all available configurations for your custom domain (don’t worry, we’ll cover the configuration process later):
- Domain name - enter your tagging server domain (example: gtm.my-domain.com).
- Add CDN - toggle this switch if you want to load js files (gtm.js, gtag.js, analytics.js, etc.) from a server closer to your site’s visitors, resulting in a faster js file serving.
- Select the Own CDN option (please note that it’s incompatible with the Automatically (via Entri) connection option) - it routes sGTM custom domain and proxy sGTM traffic through the DNS provider of your website.
- Advanced settings - here you can tick the box to Use A records instead of CNAME records. If DNS providers restrict adding duplicate records, you should use CNAME record. If not, then choose A records. Please note that this setting is incompatible with the Add Global CDN setting.
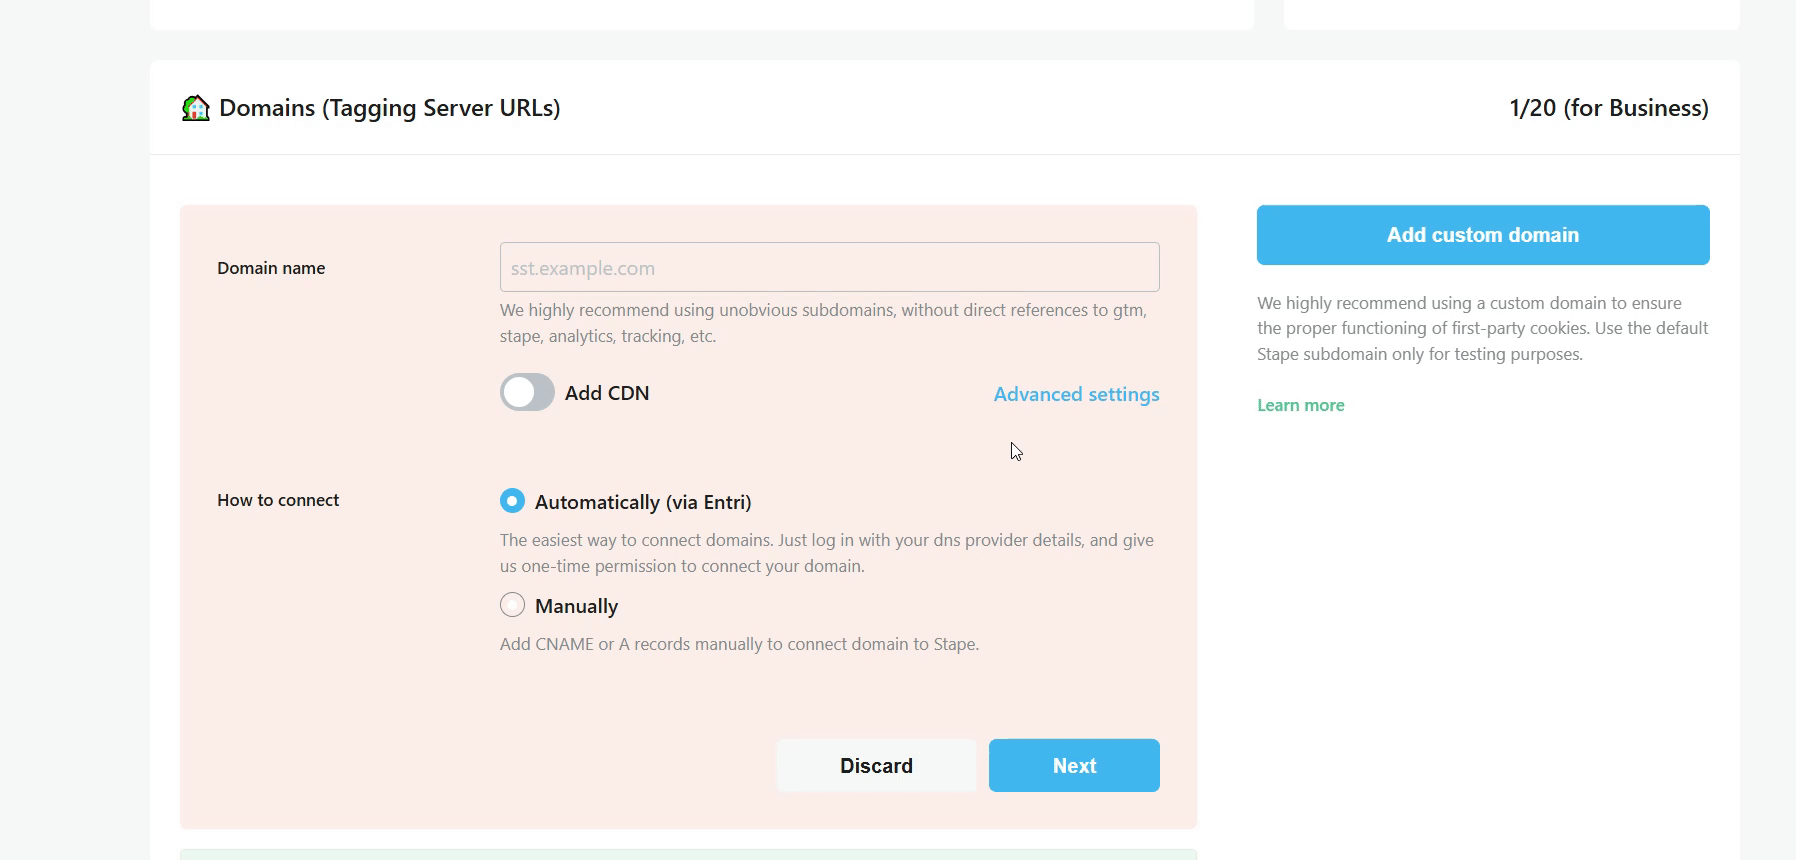
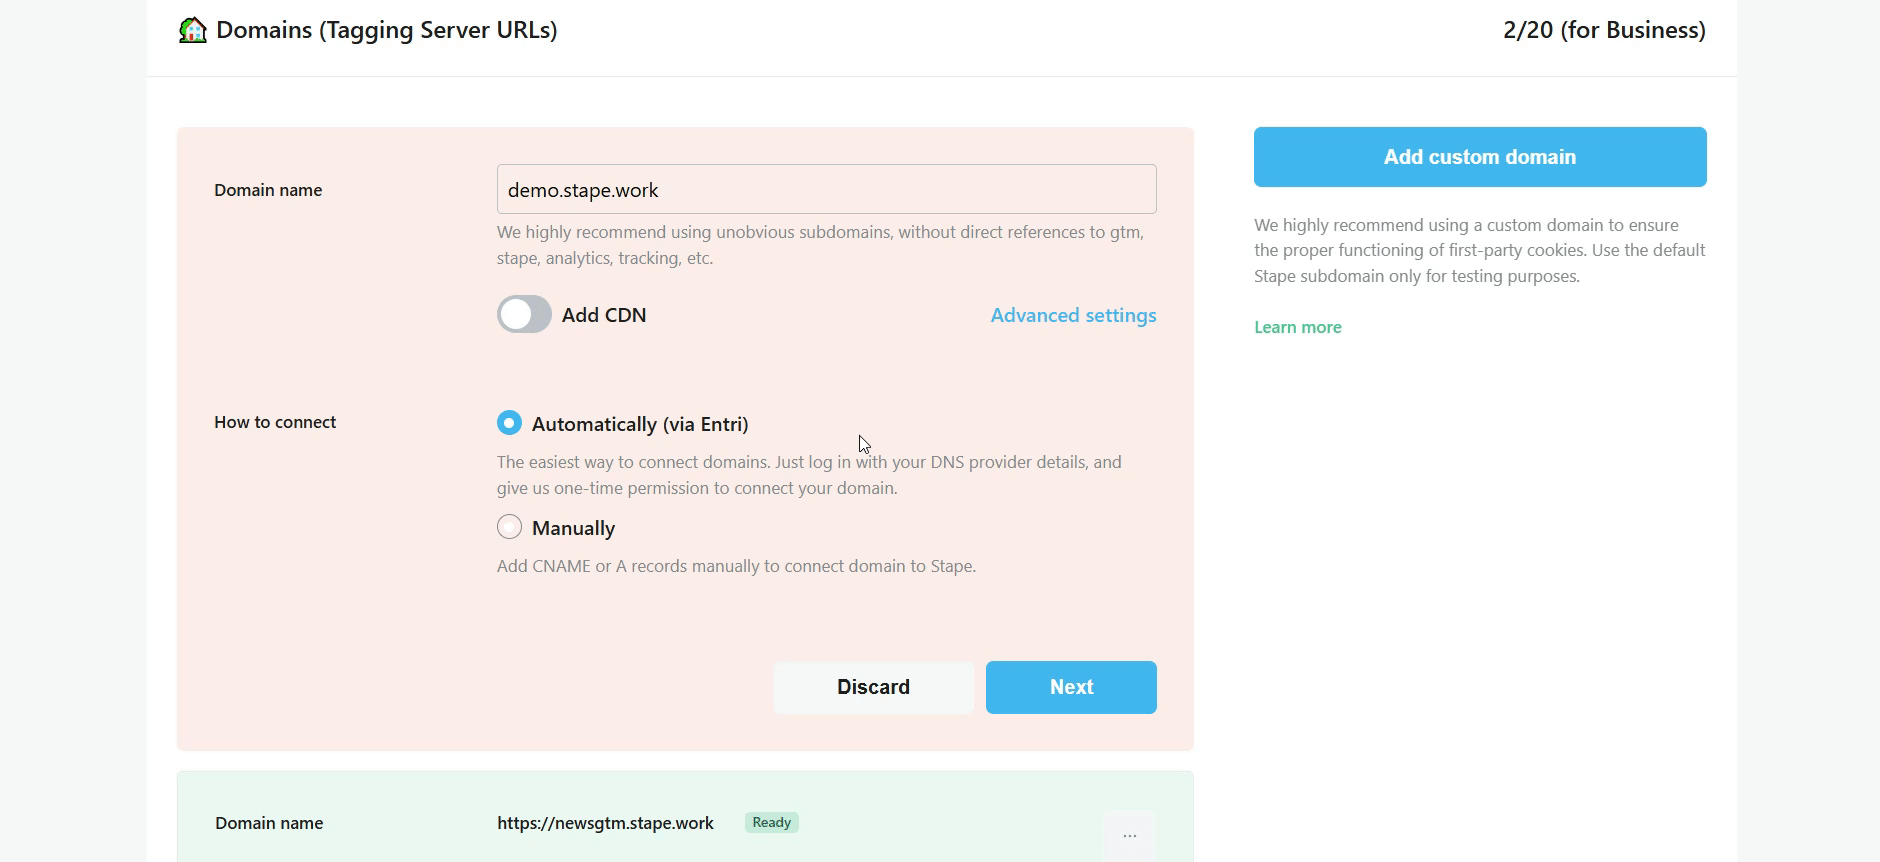
5. Enter your Domain name, toggle Add CDN → select Own CDN → select whether you want to connect Automatically or Manually → click Next.
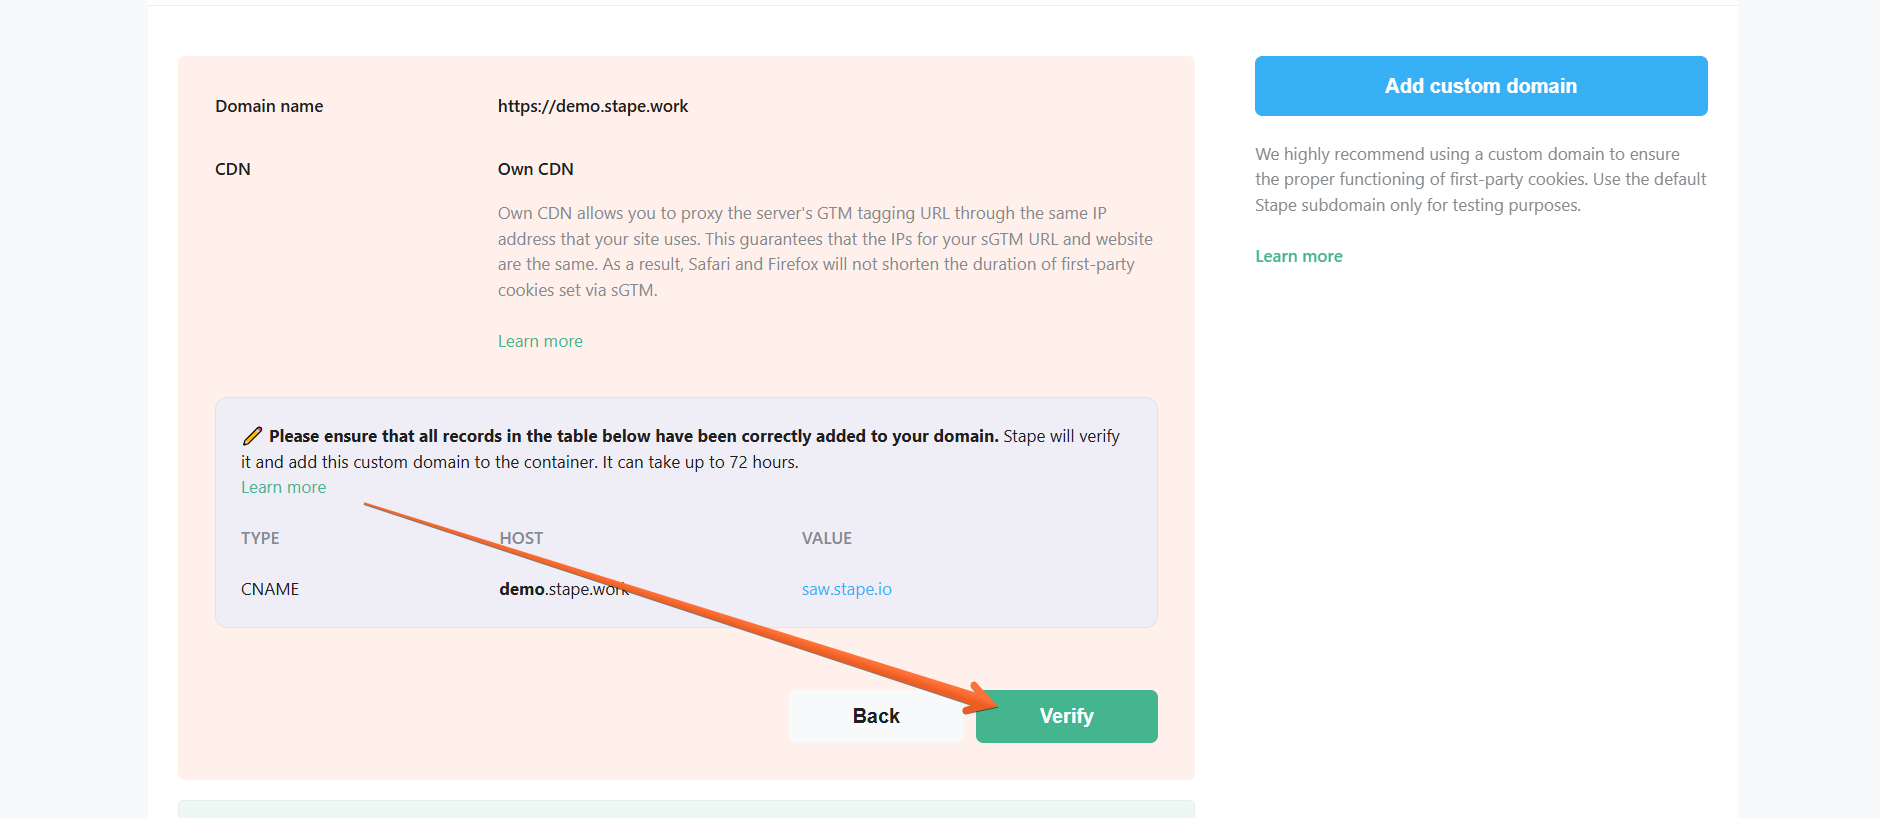
You will be provided with CNAME records. Here is an example of how to add these records to Cloudflare DNS provider, but you can do the same with any provider you use.
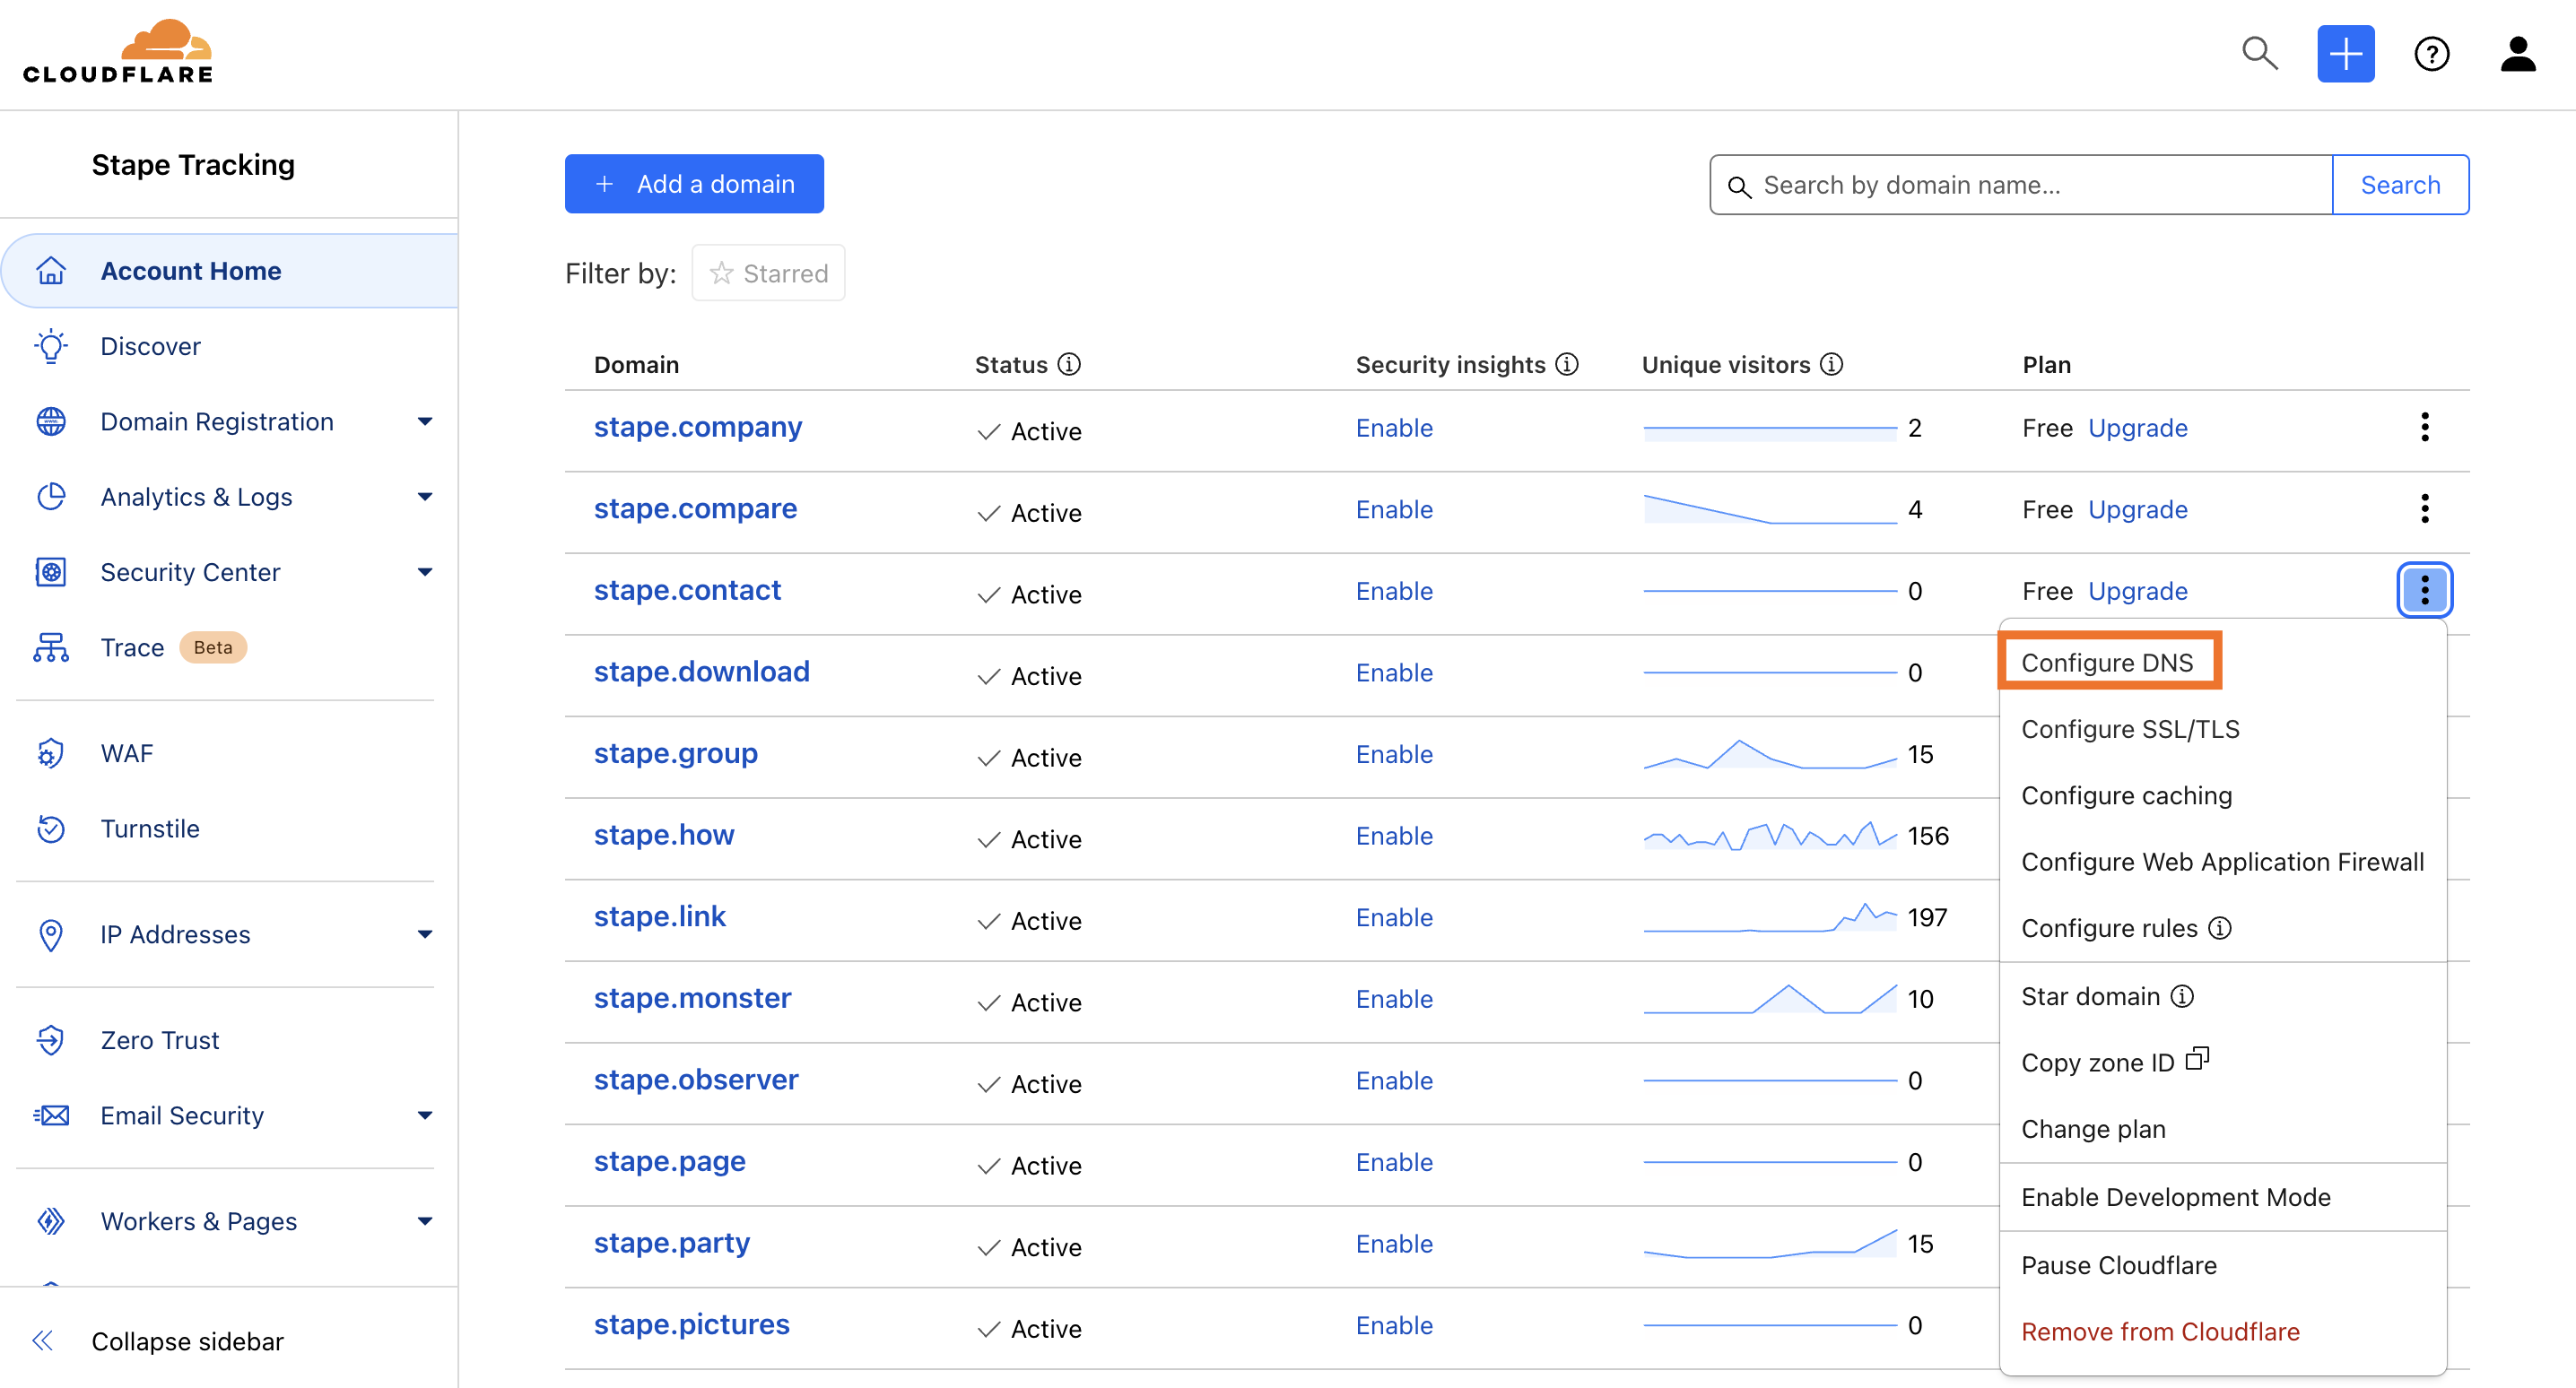
6. Visit your Cloudflare profile → next to your domain name click three dots open → click Configure DNS → click Add record.
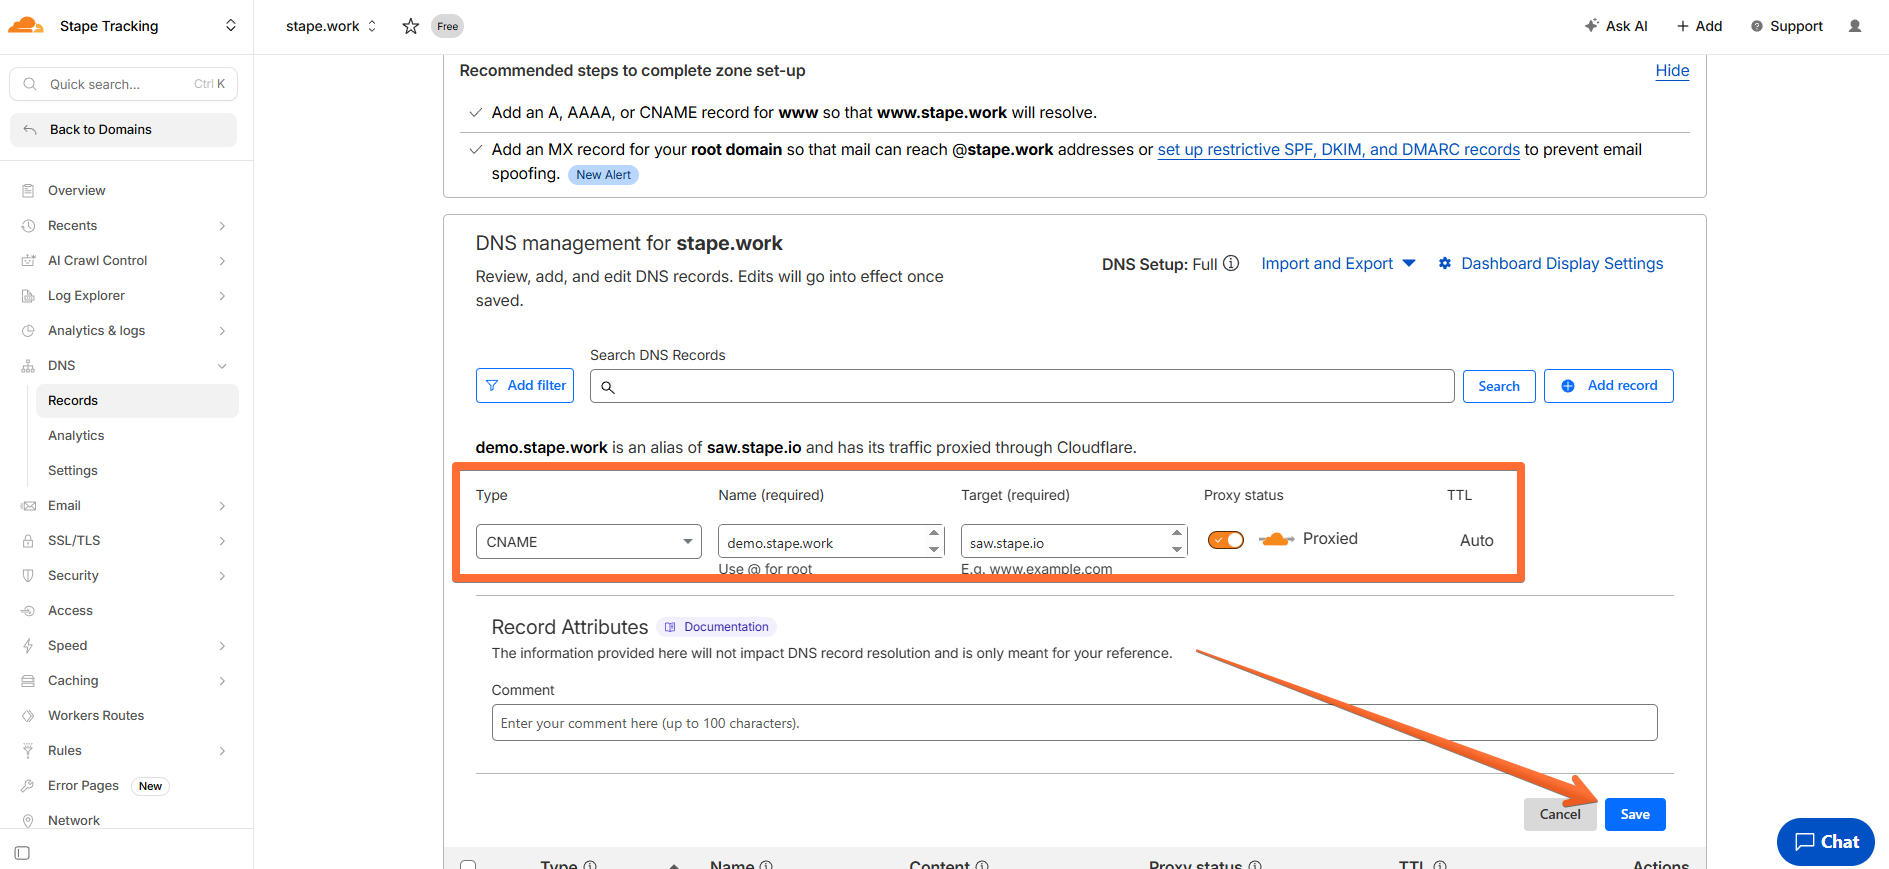
7. Enter the DNS records from Stape:
- Type - copy the TYPE parameter from Stape.
- Name - copy the HOST parameter from Stape.
- Target - copy the VALUE parameter from Stape.
- Proxy status - make sure to toggle this ON.
Click Save.
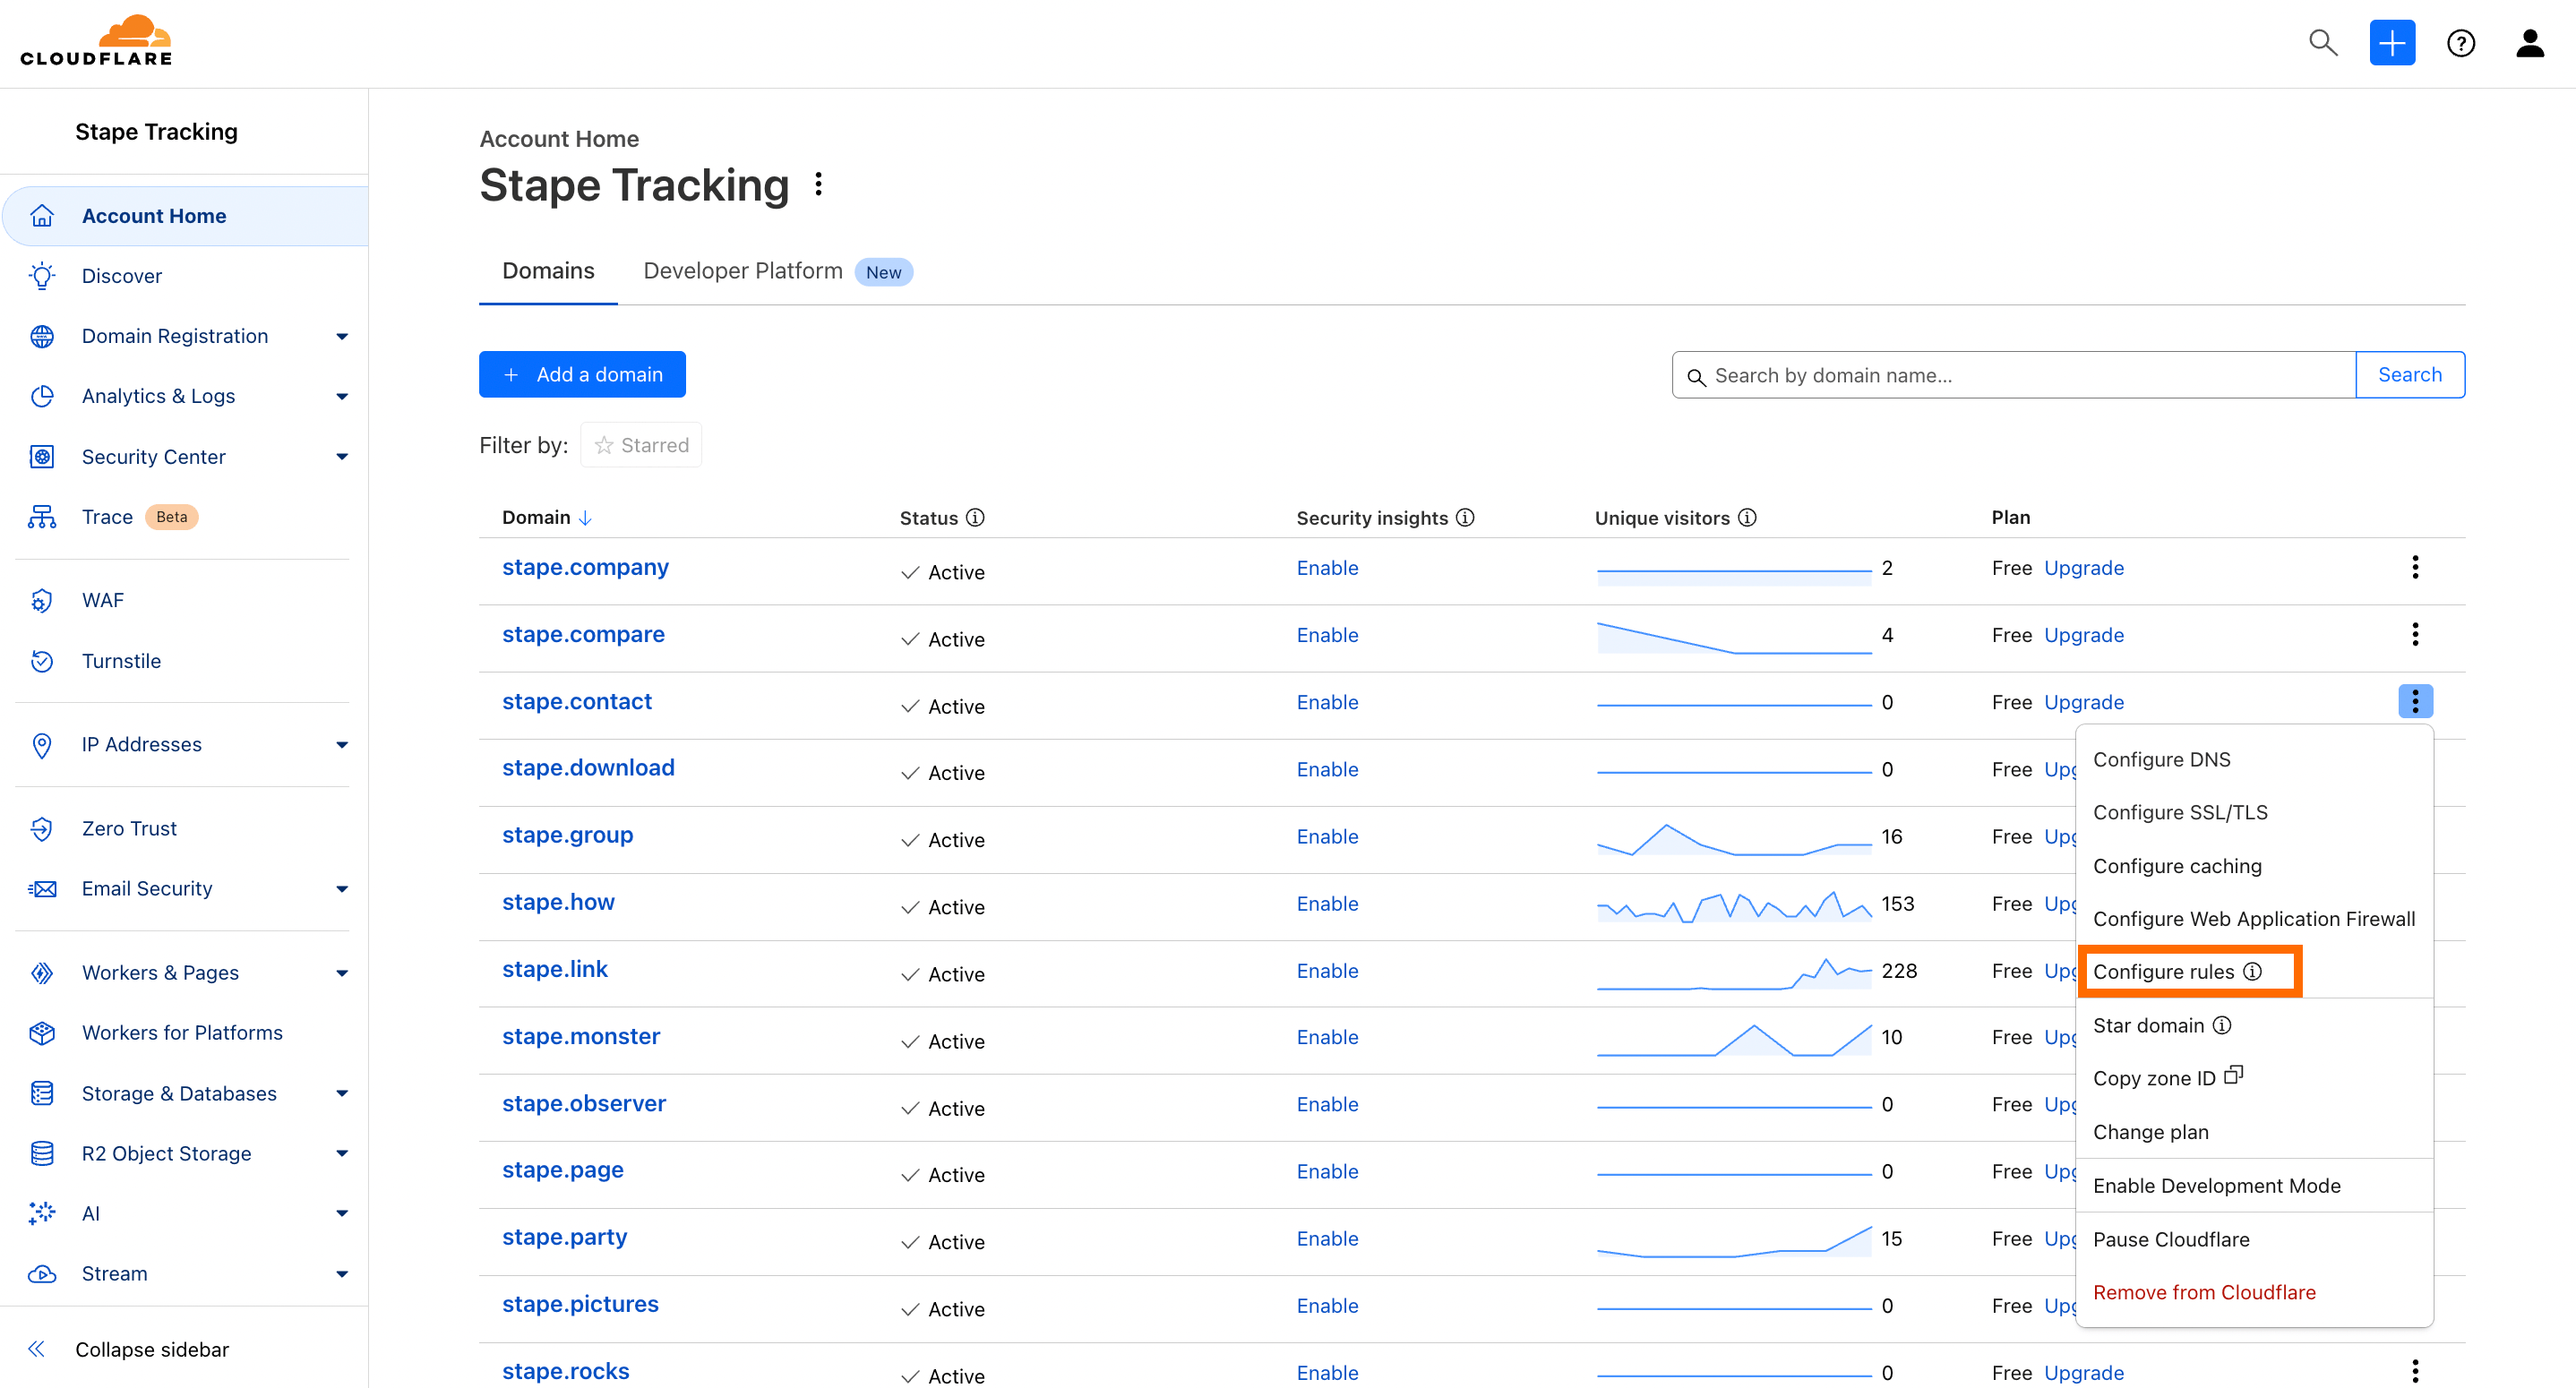
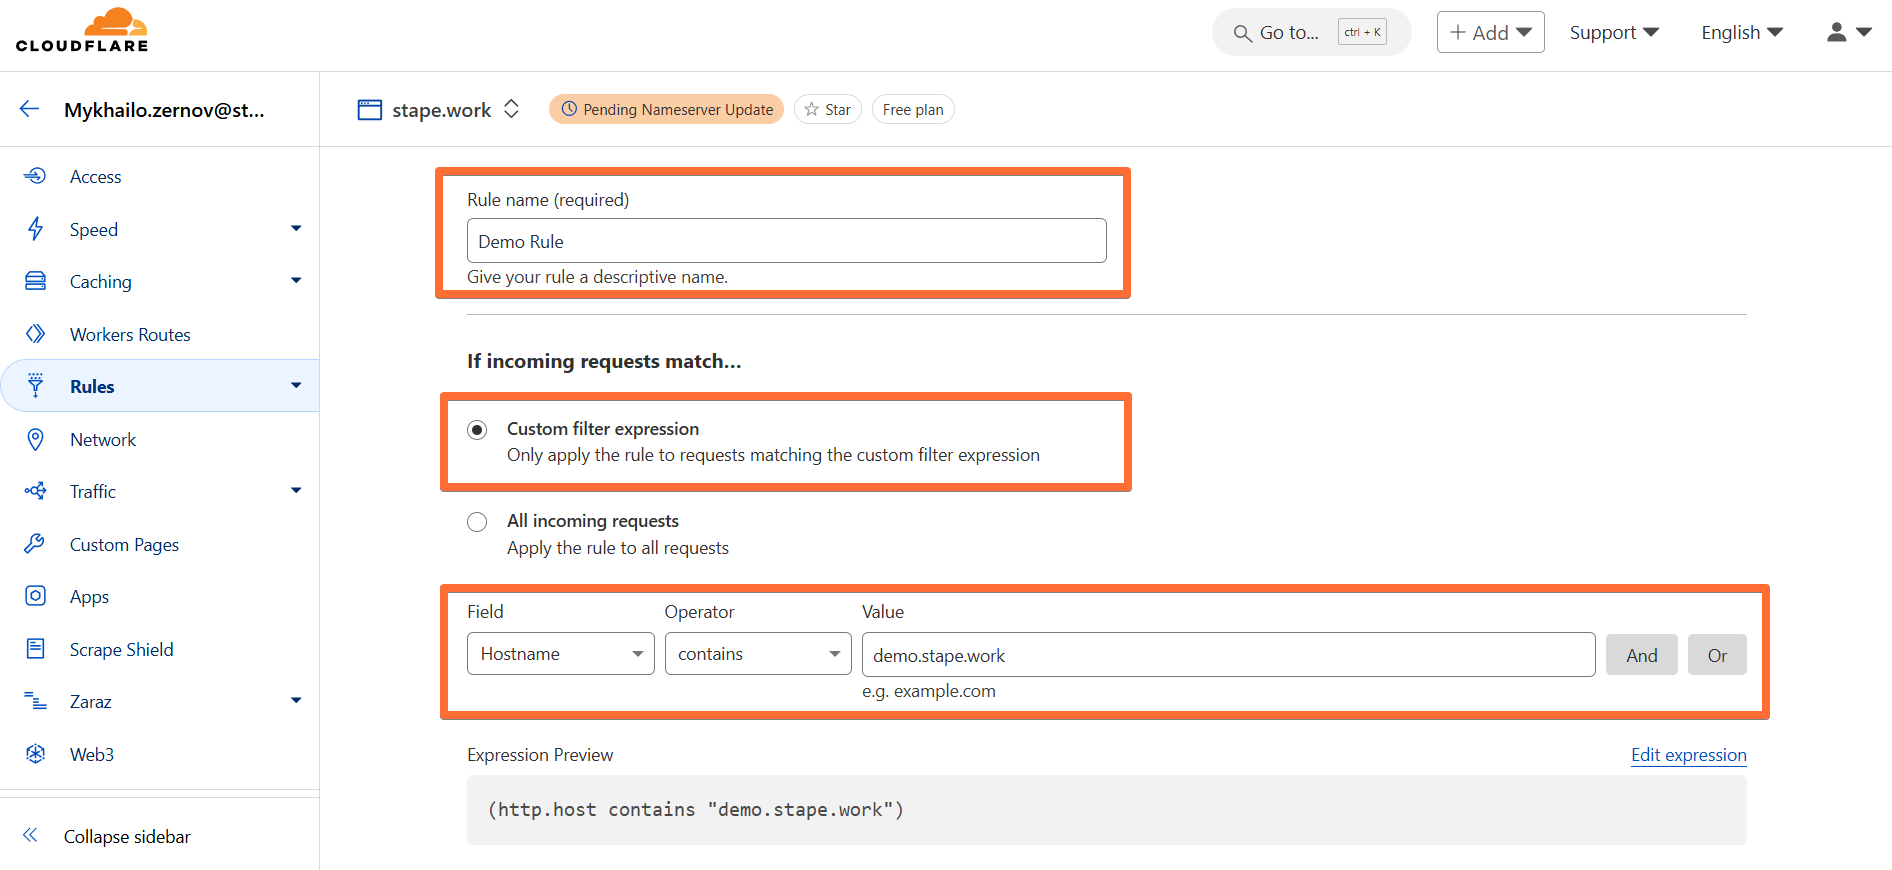
8. Next, click three dots near your domain name → click Configure rules → click Create Rule → click Configuration Rules.
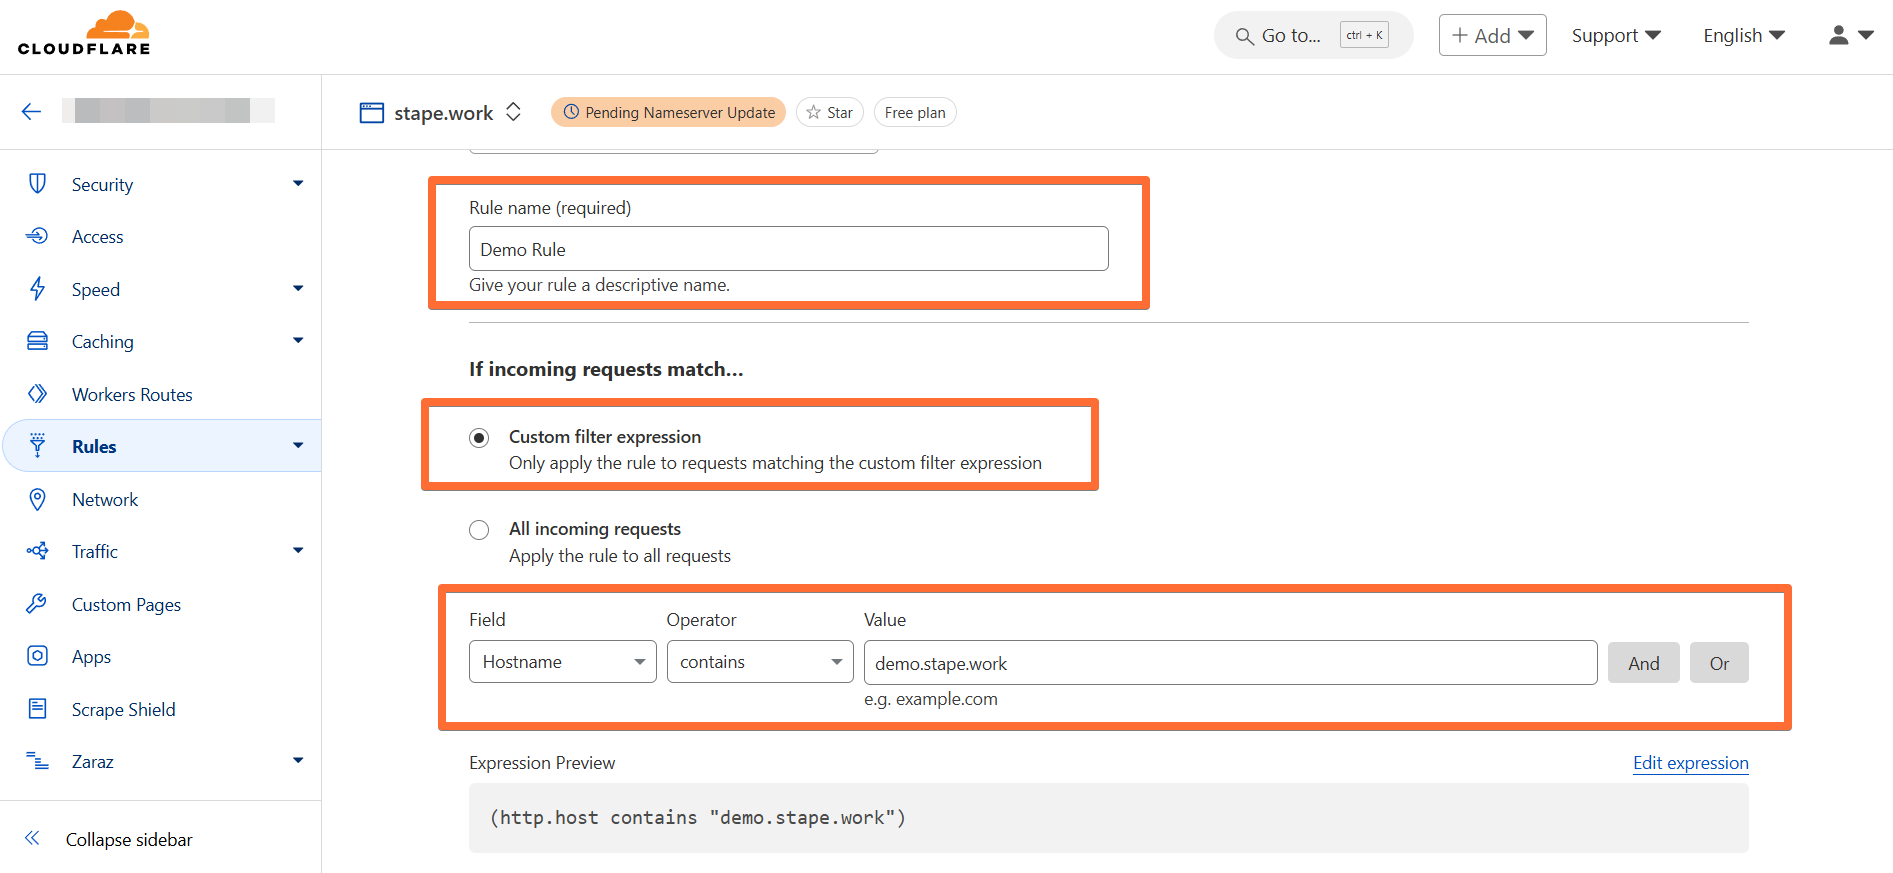
9. Fill in the required information:
- Enter a descriptive rule name.
- Select Custom filter expression and enter:
- Field - hostname.
- Operator - contains.
- Value - paste the custom domain that you configured with Stape.
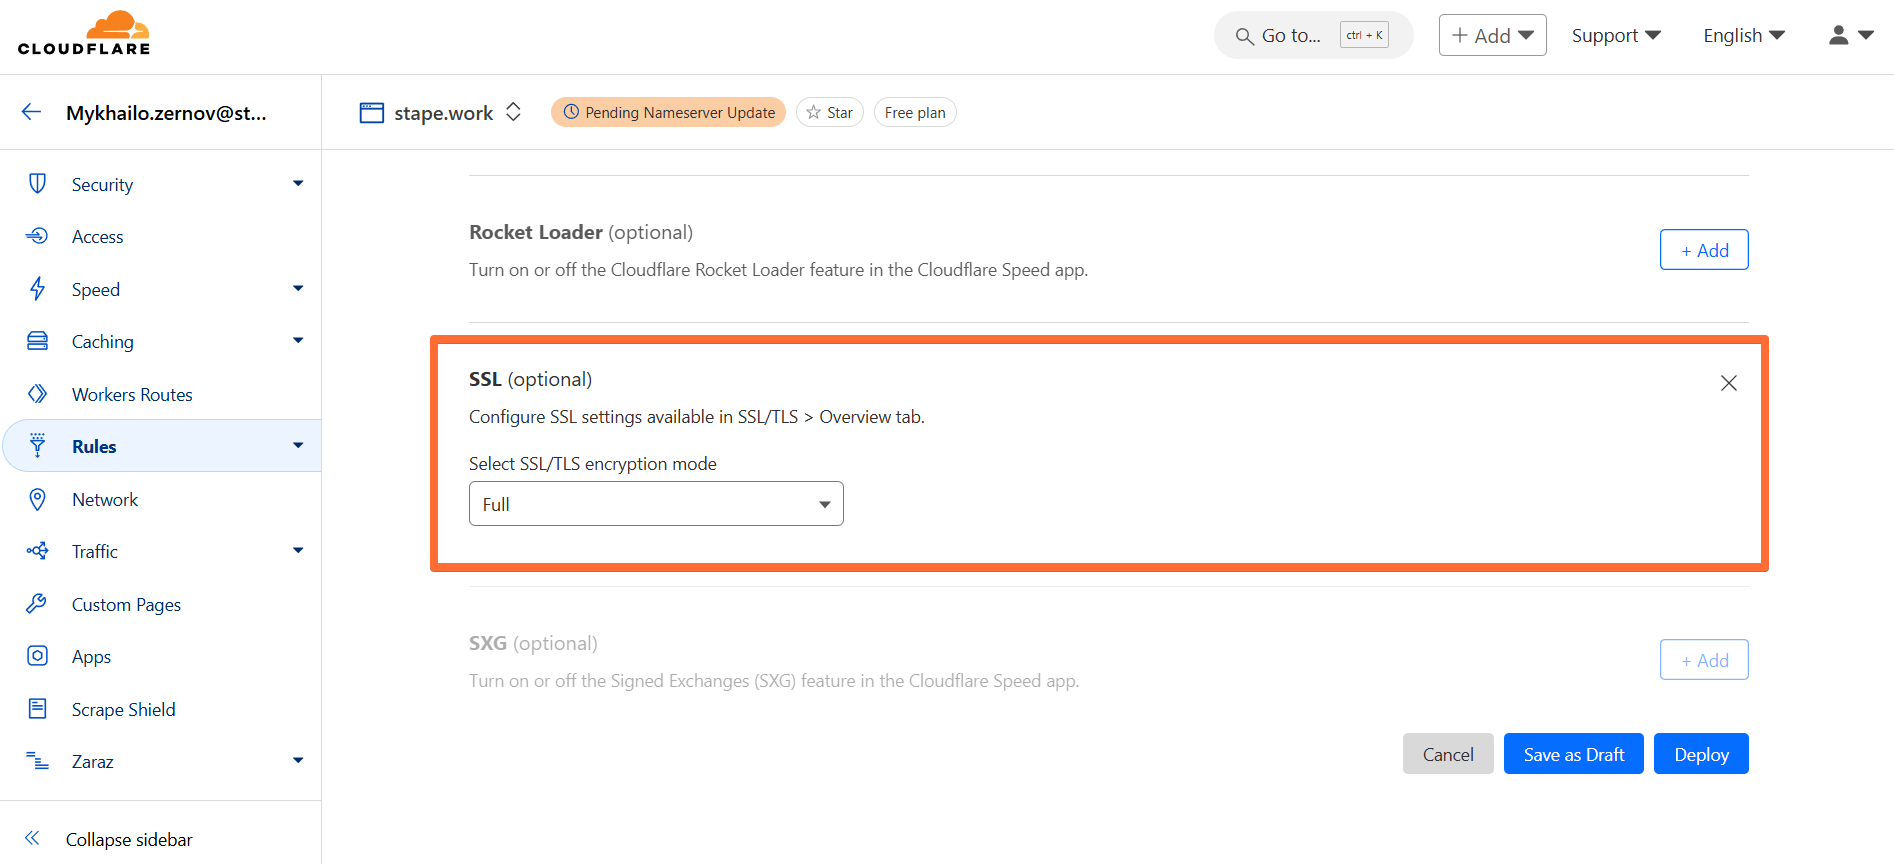
10. Scroll the page down to the SSL feature. Click Add next to it → select the Full option. Then click Deploy.
11. Once you’ve entered the DNS records to your DNS provider and created configuration rules, return to the Stape container page where you’ve been configuring the custom domain and click Verify.
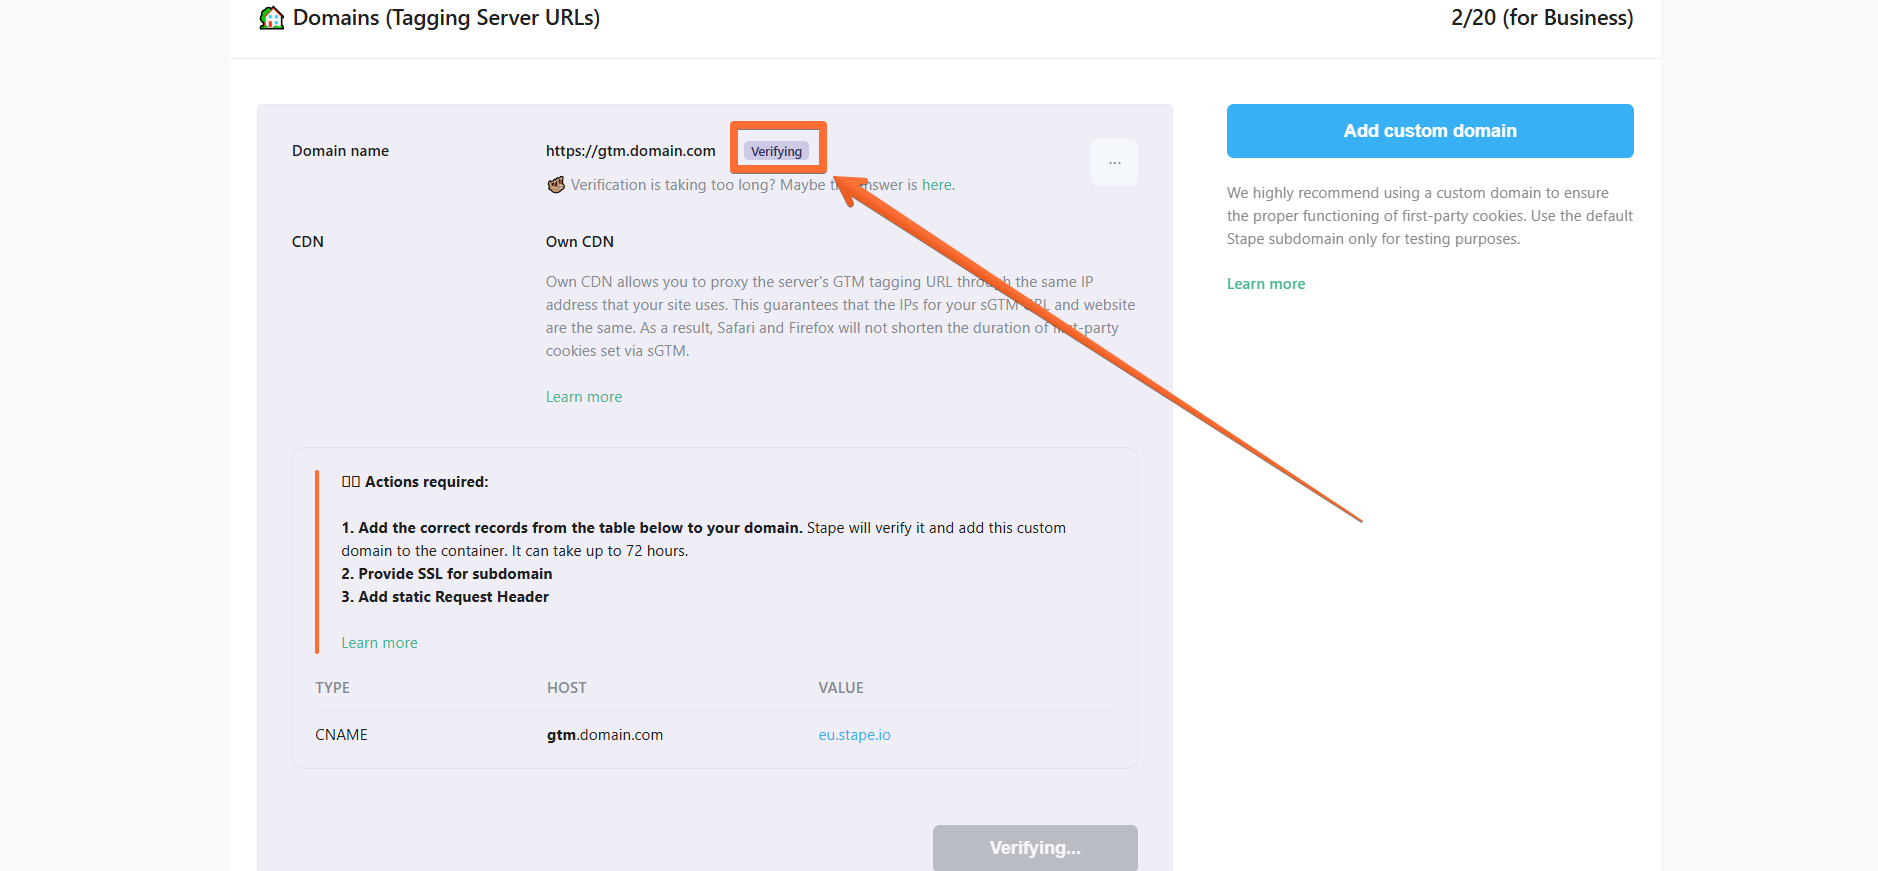
12. Wait for Stape to finish verifying your custom domain (when the container status bar changes from Verifying to Ready). Usually, it takes from 30 minutes to 2 hours, but in some cases it can take up to 72 hours.
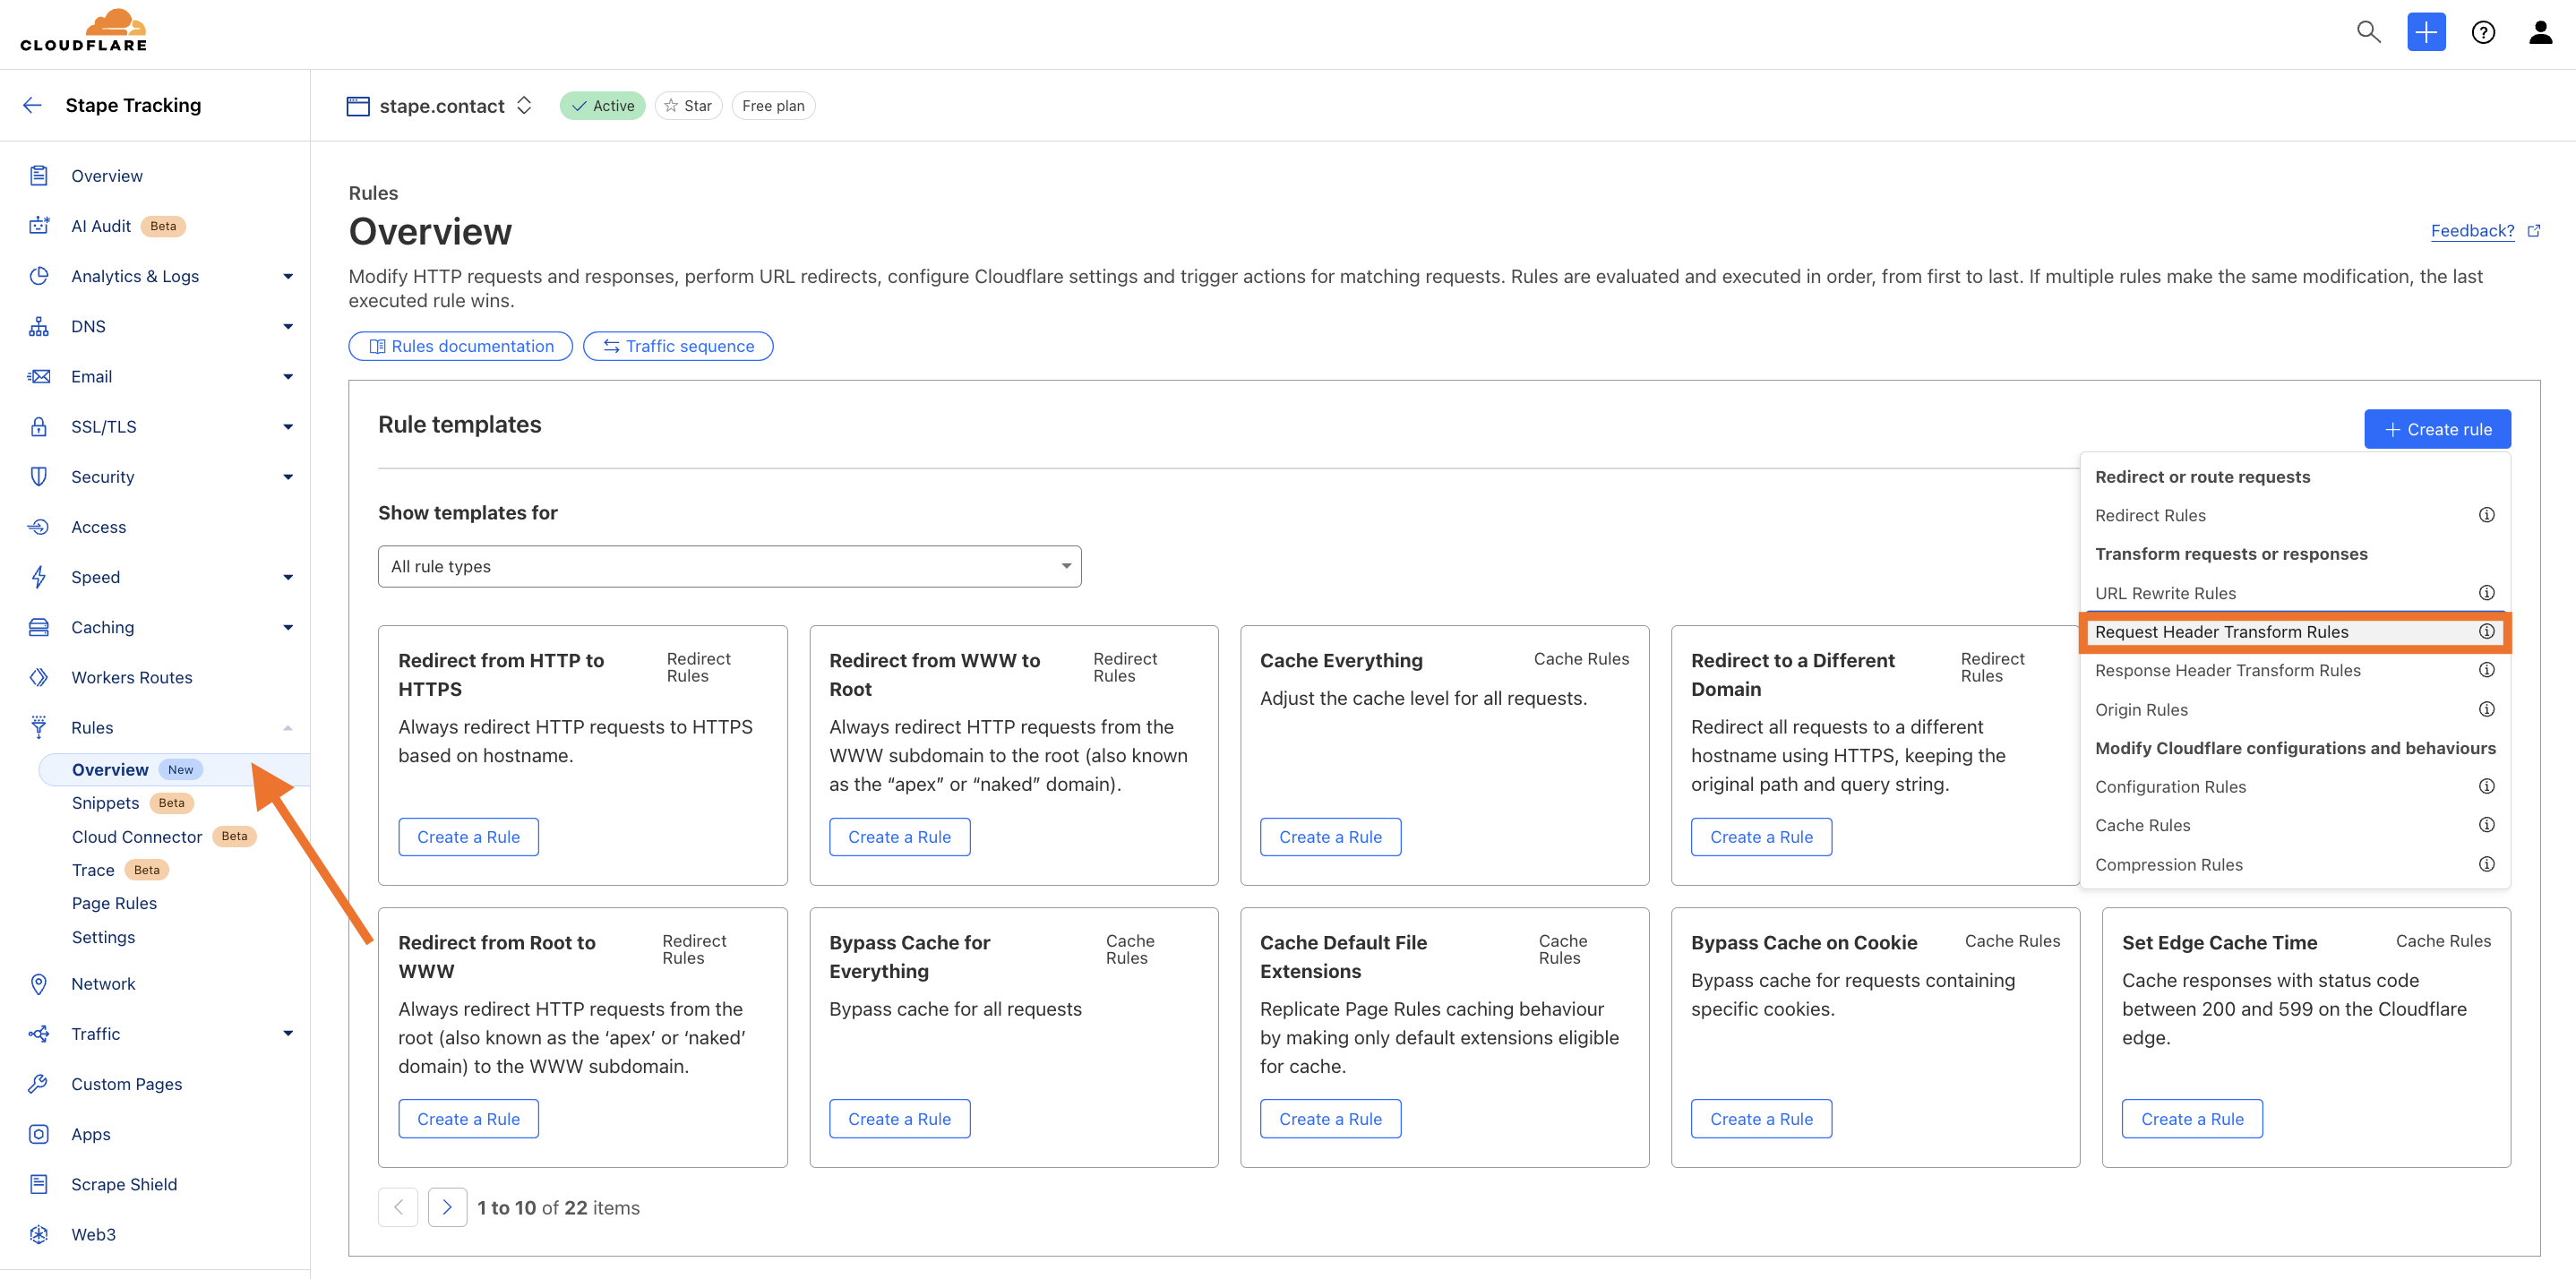
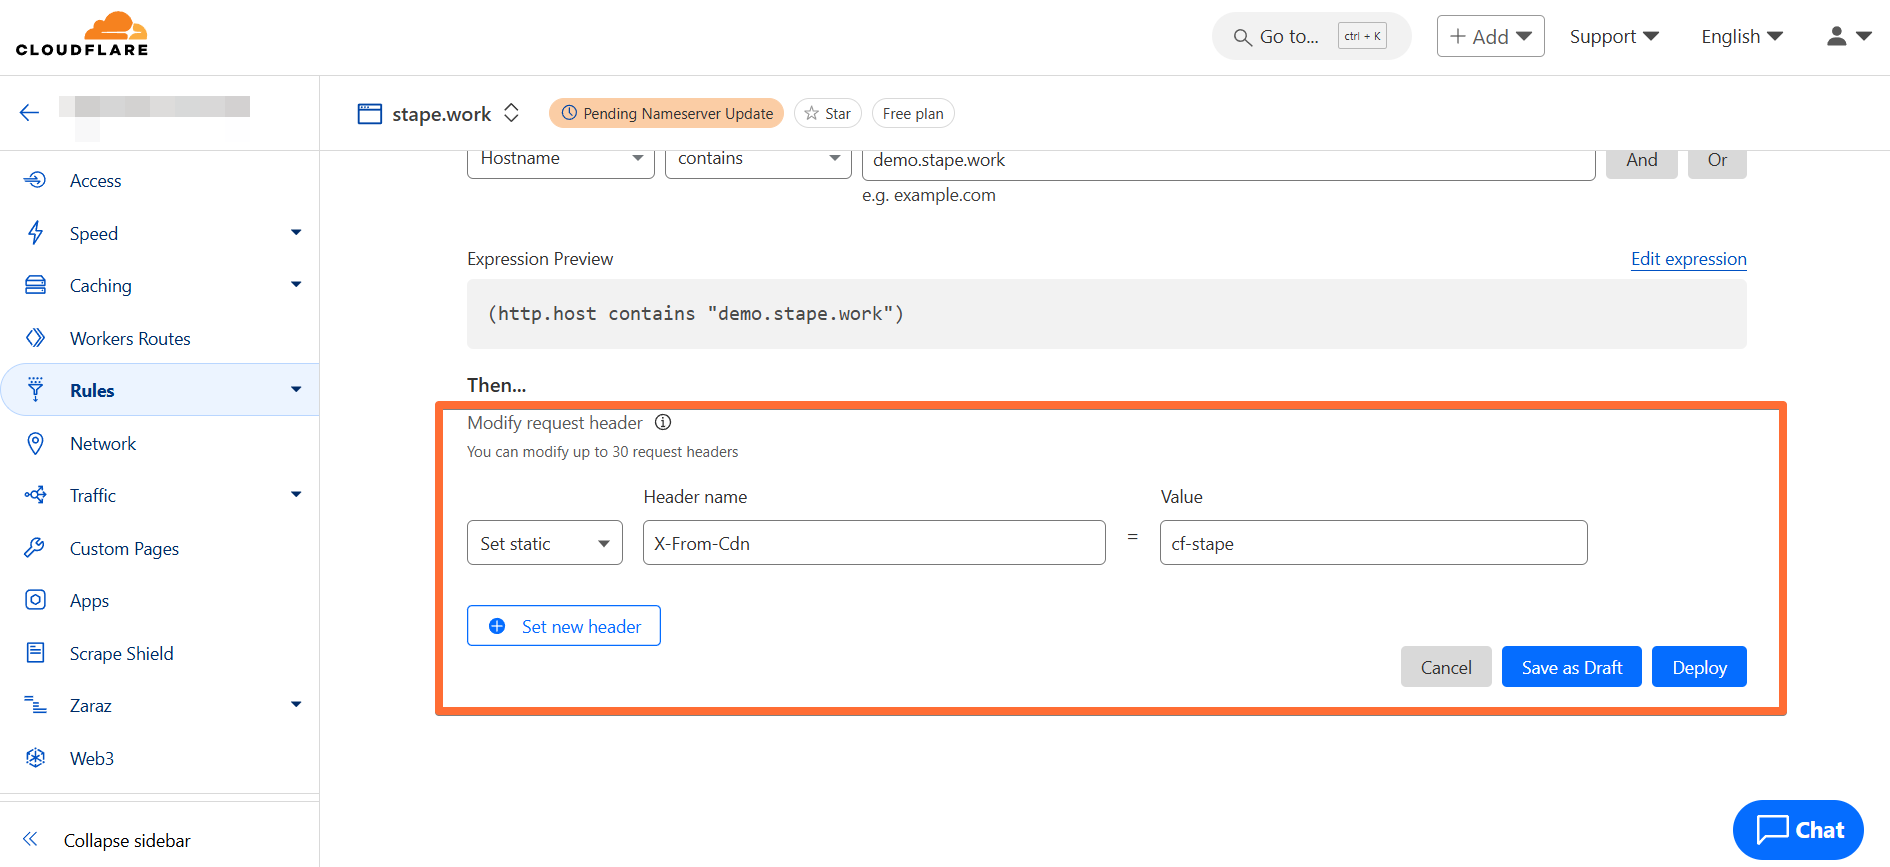
13. Next, return to Cloudflare and go to Rules → Overview → click Create Rule → click Request Header Transform Rule.
14. Fill in the required information:
- Enter a descriptive rule name.
- Select Custom filter expression and enter:
- Field - hostname.
- Operator - contains.
- Value - paste the custom domain that you configured with Stape.
15. Scroll down to the Modify headers section. Select Set static, then enter:
- Header name: X-From-Cdn.
- Value: cf-stape.
Then click Deploy.
16. Next, go to Rules → Overview → click Create Rule → click Cache Rule.
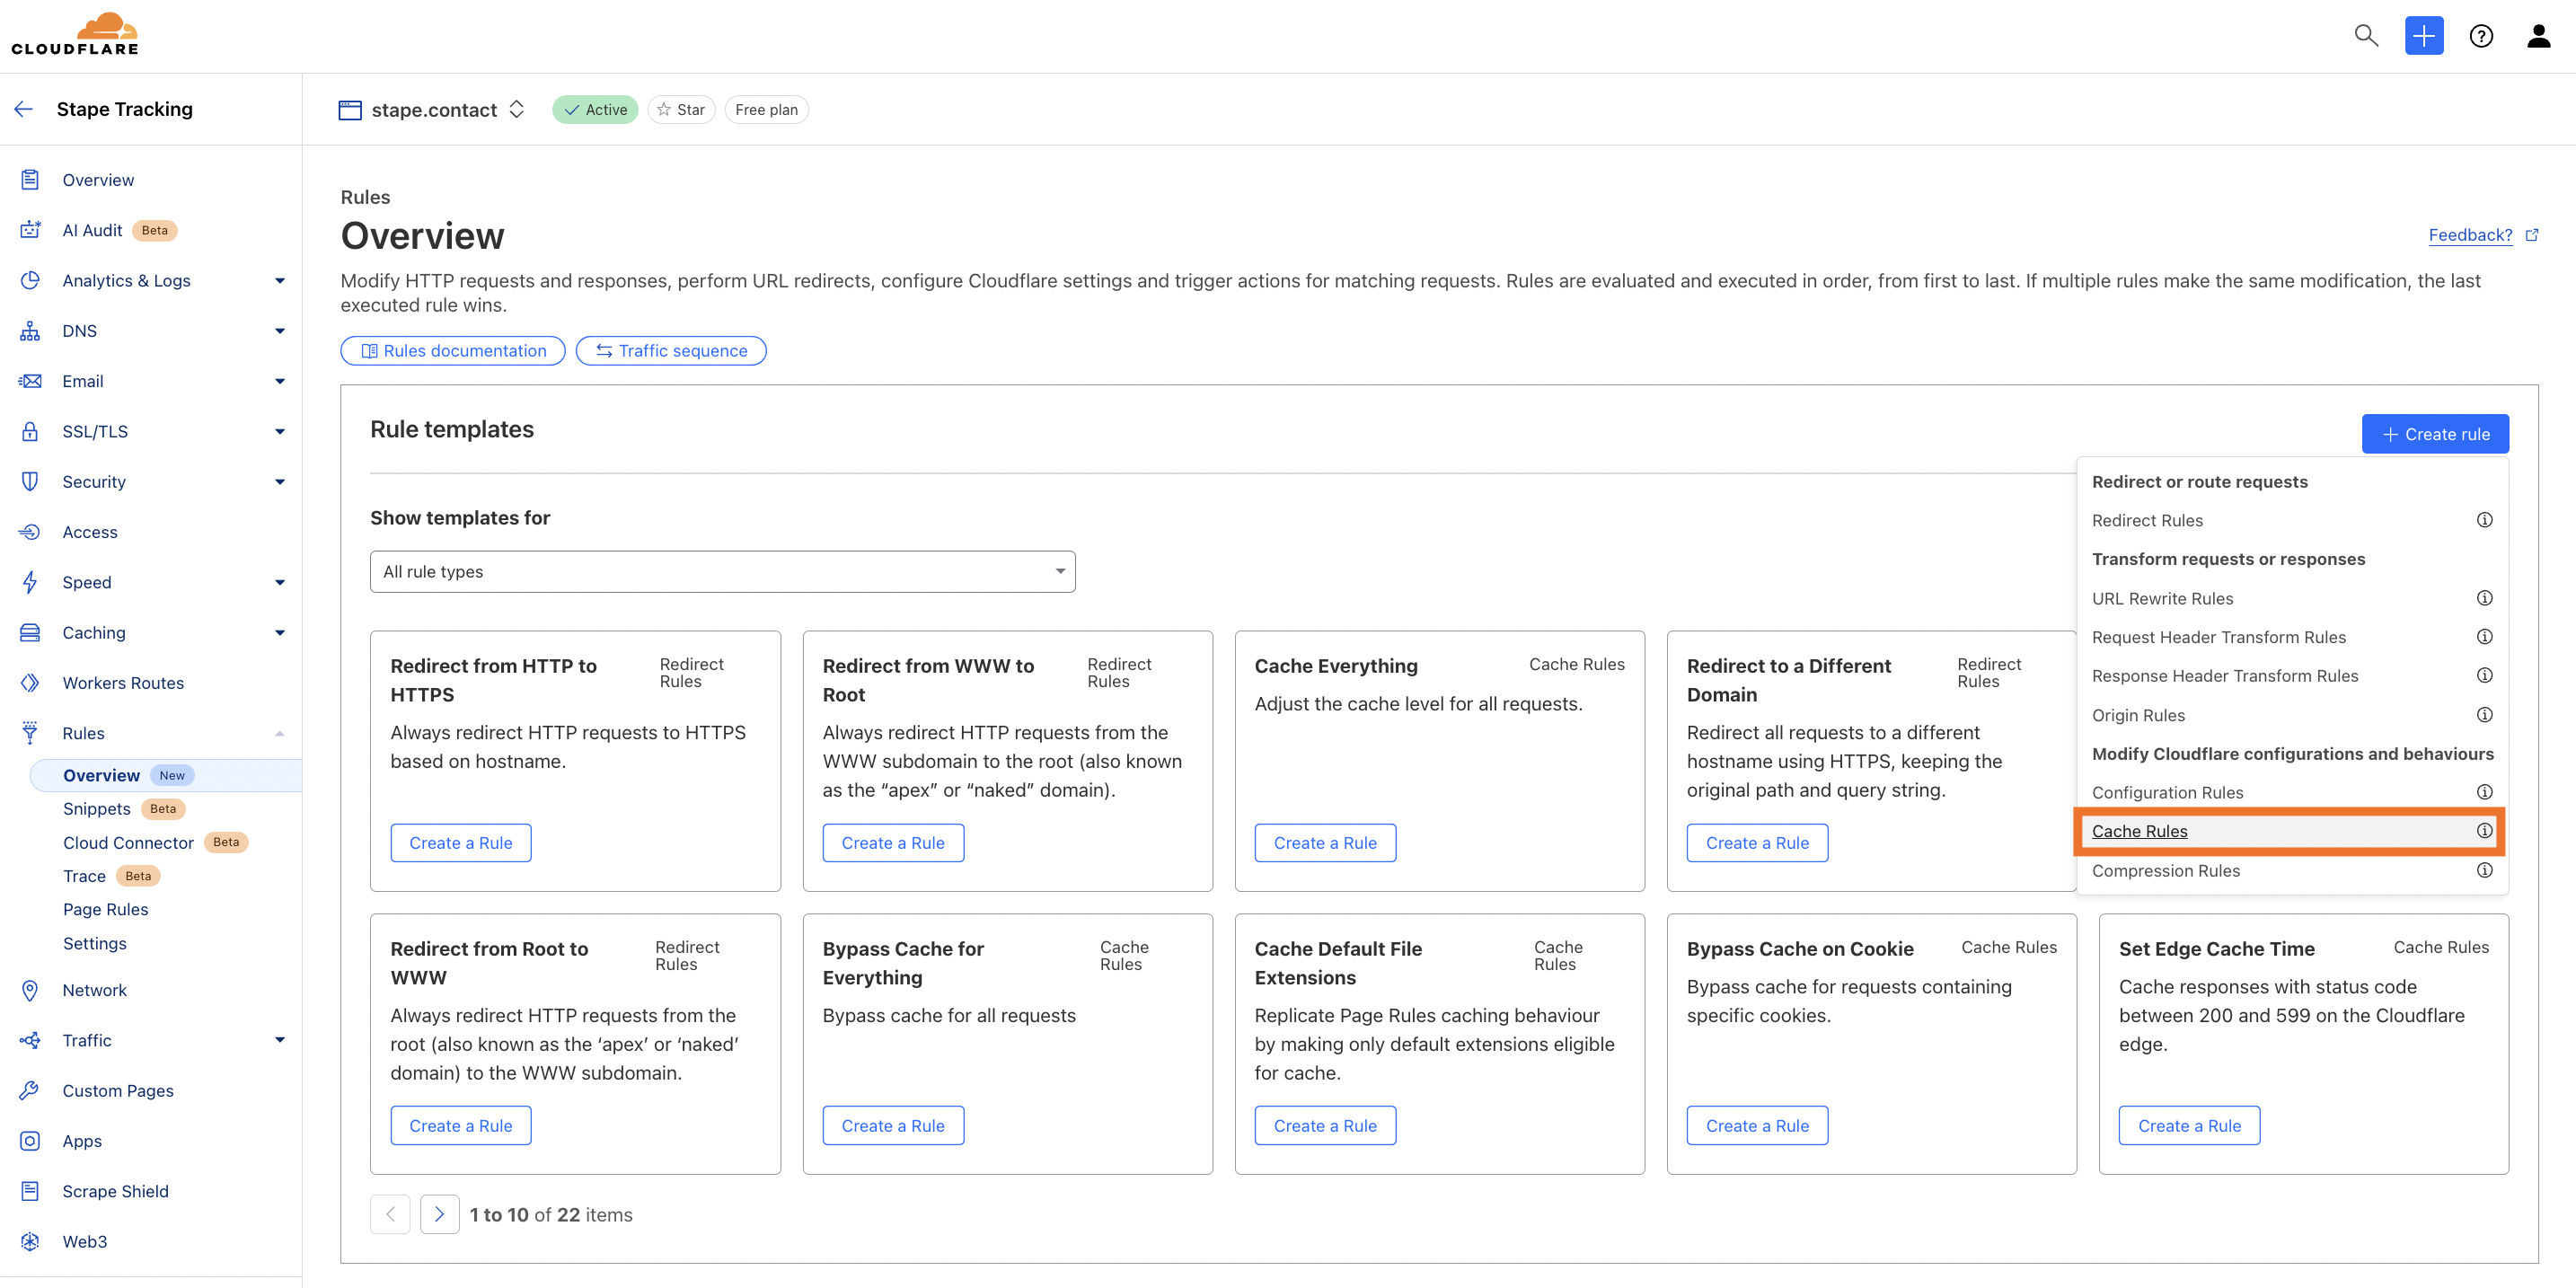
17. Fill in the required information:
- Enter a descriptive rule name.
- Select Custom filter expression and enter:
- Field - hostname.
- Operator - contains.
- Value - paste the custom domain that you configured with Stape.
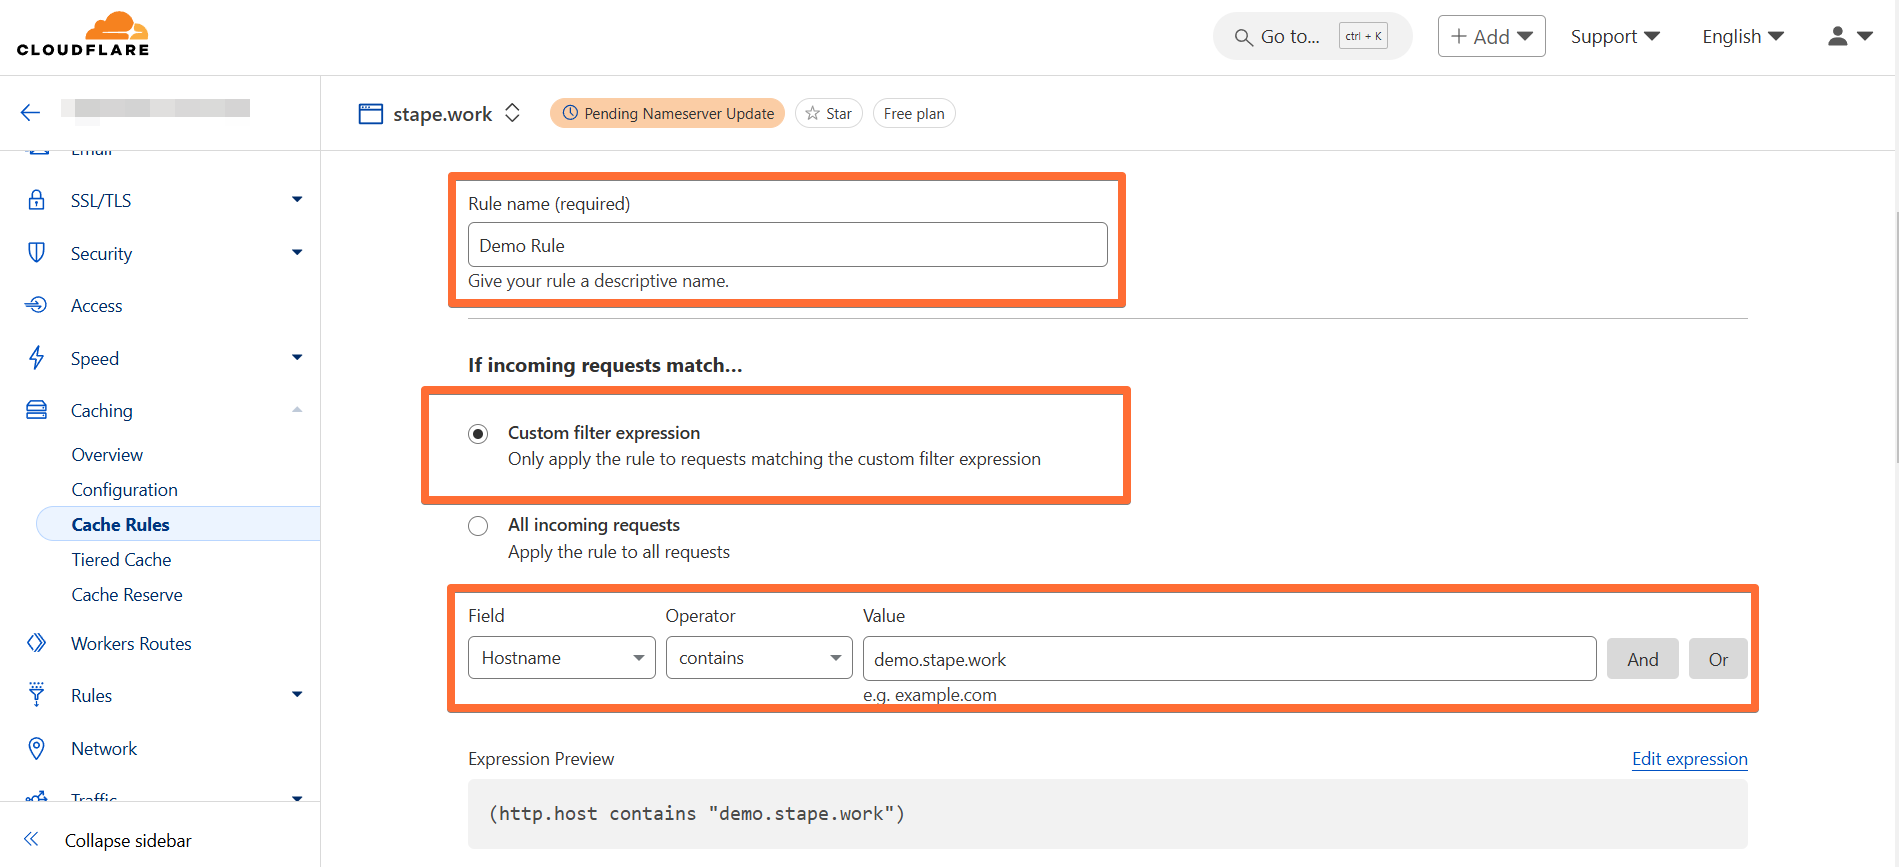
18. Scroll down to Cache eligibility and select Bypass cache.
Then click Deploy.

Congratulations, now all your requests to and from sGTM will be proxied through a CDN. Please note that if you are using a Web Application Firewall, make sure that it does not block these requests.
Problem with the ERR_TOO_MANY_REDIRECTS error
If you get this error after configuration it is usually due to one of two reasons:
- You have some additional rule that creates redirects, which causes this problem.
- Problems with DNS configuration for the whole site. Switching SSL/TLS to the Full option often helps in this case.
You can read more about this problem here: https://developers.cloudflare.com/ssl/troubleshooting/too-many-redirects/
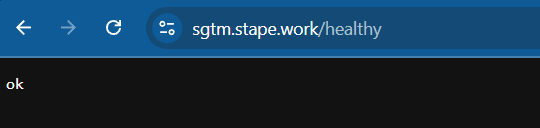
Testing Own CDN
To verify that the custom domain is working properly, open its URL and add /healthy at the end (e.g., https://sgtm.stape.work/healthy). If everything is correct, you should see the OK response.
Was this article helpful?
Comments