Monitoring overview
Updated Aug 6, 2026
The Monitoring feature is designed to track the health and performance of your server-side Google Tag Manager (sGTM) container. It lets you create custom rules and alerts based on event logs, so you are notified whenever anomalies occur before site events turn into lost tracking data.
This feature continuously monitors your container's incoming and outgoing request logs and evaluates them against the rules you define. When a rule's conditions are met, an alert is triggered and a notification is sent to your email. This gives you a real-time safety net for your tracking setup instead of discovering problems hours or days later.
The Monitoring feature is available on the Business subscription plan and higher. The number of monitoring alerts you can create depends on your plan:
- Business / Business+ – up to 5 alerts.
- Enterprise / Enterprise+ – up to 10 alerts.
- Custom – up to 20 alerts.
Note:
Monitoring sends an email notification only when an alert is first triggered. To prevent notification fatigue, subsequent occurrences of the same issue won’t trigger further emails while the status remains Not resolved. You’ll receive a new notification only after the issue is resolved and the alert status returns to green.
How to find Monitoring
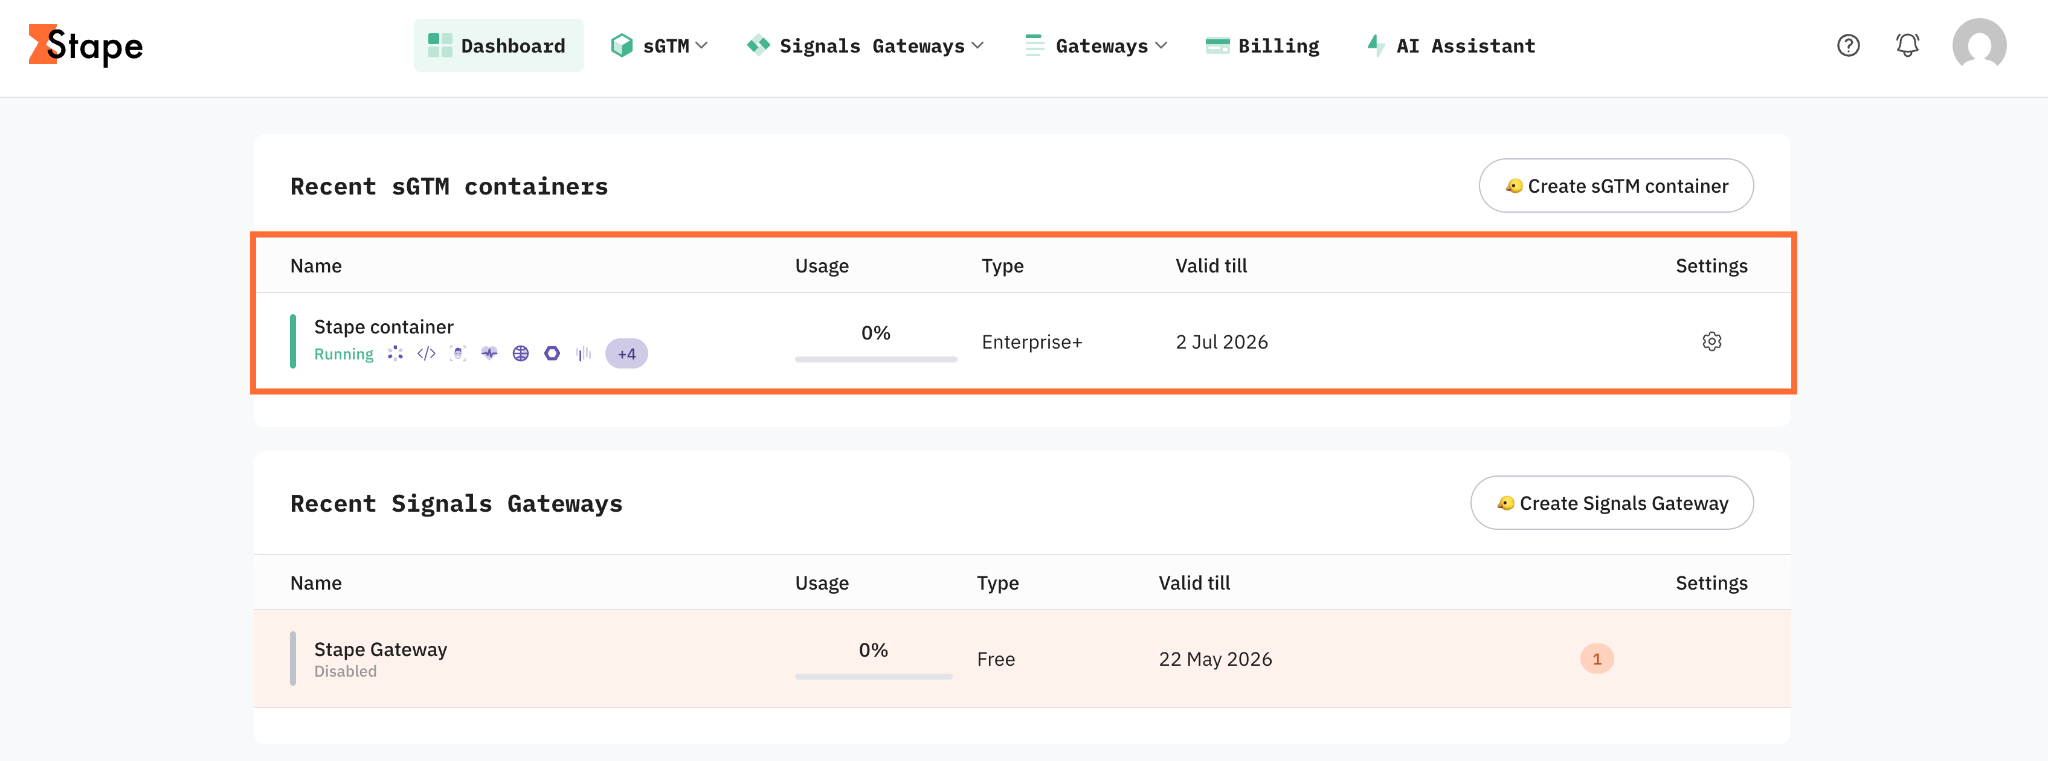
1. Log in to your Stape account and select your sGTM container from the dashboard.
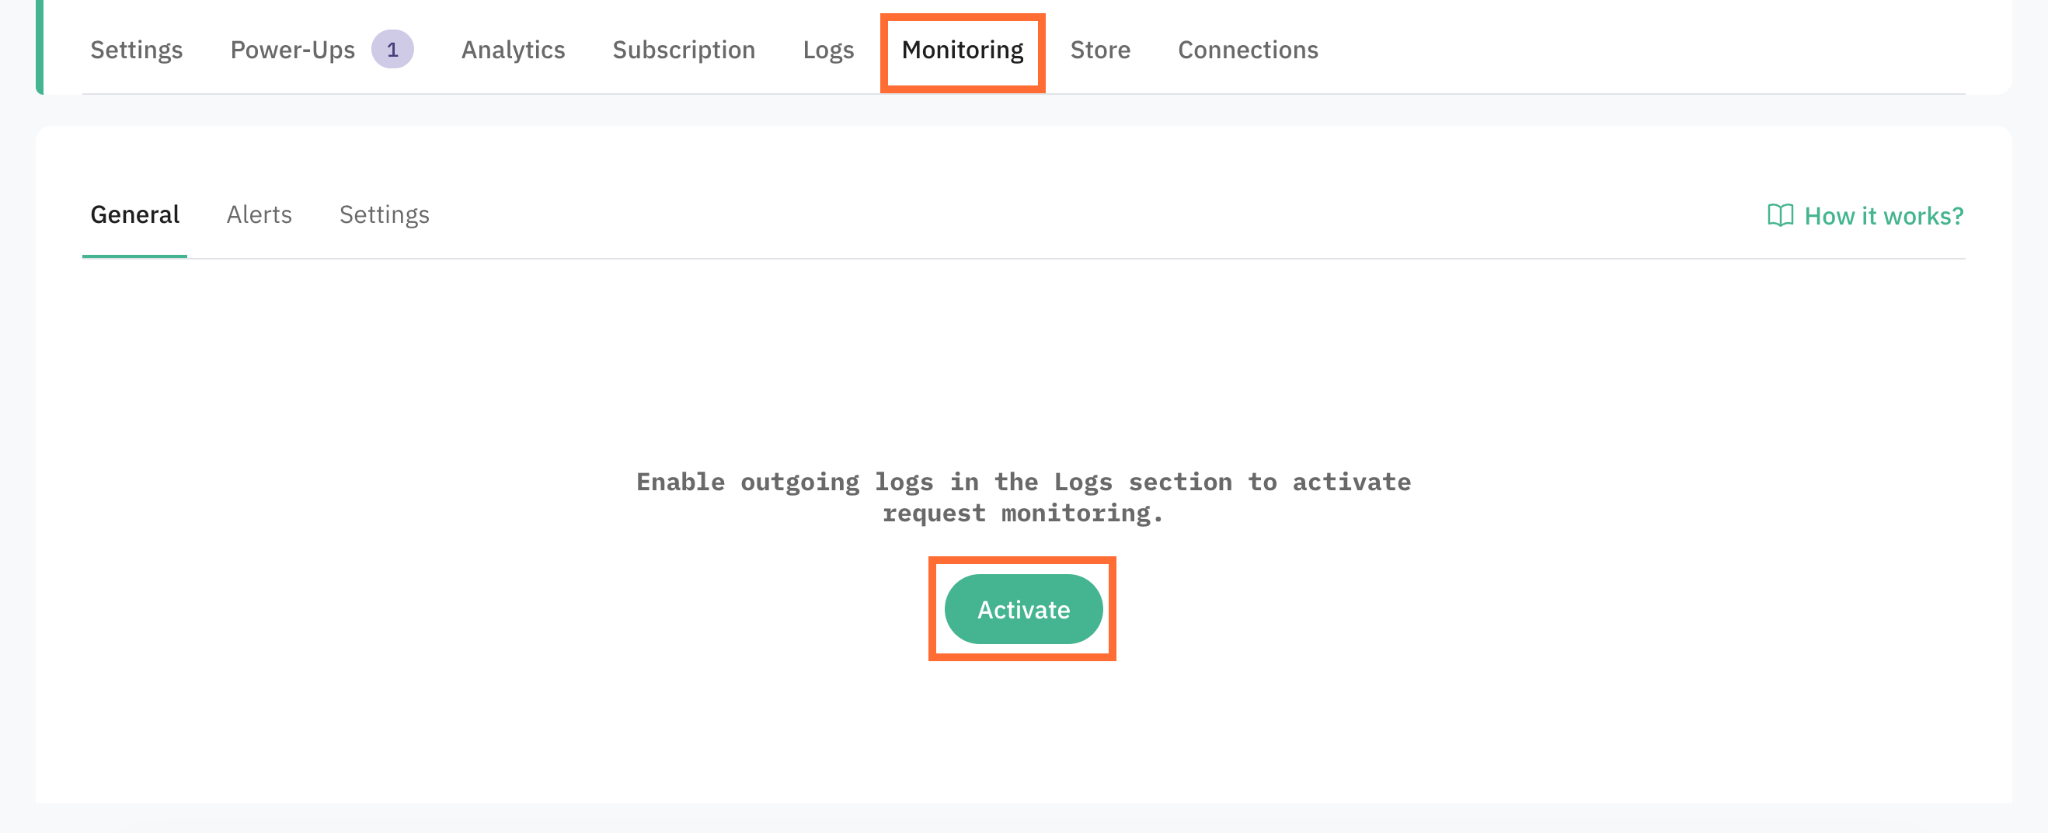
2. Click on the Monitoring tab. You’ll be asked to enable the outgoing logs, click Activate. If you already have outgoing logs enabled, then you’ll see the dashboard straight away.
Dashboard
General
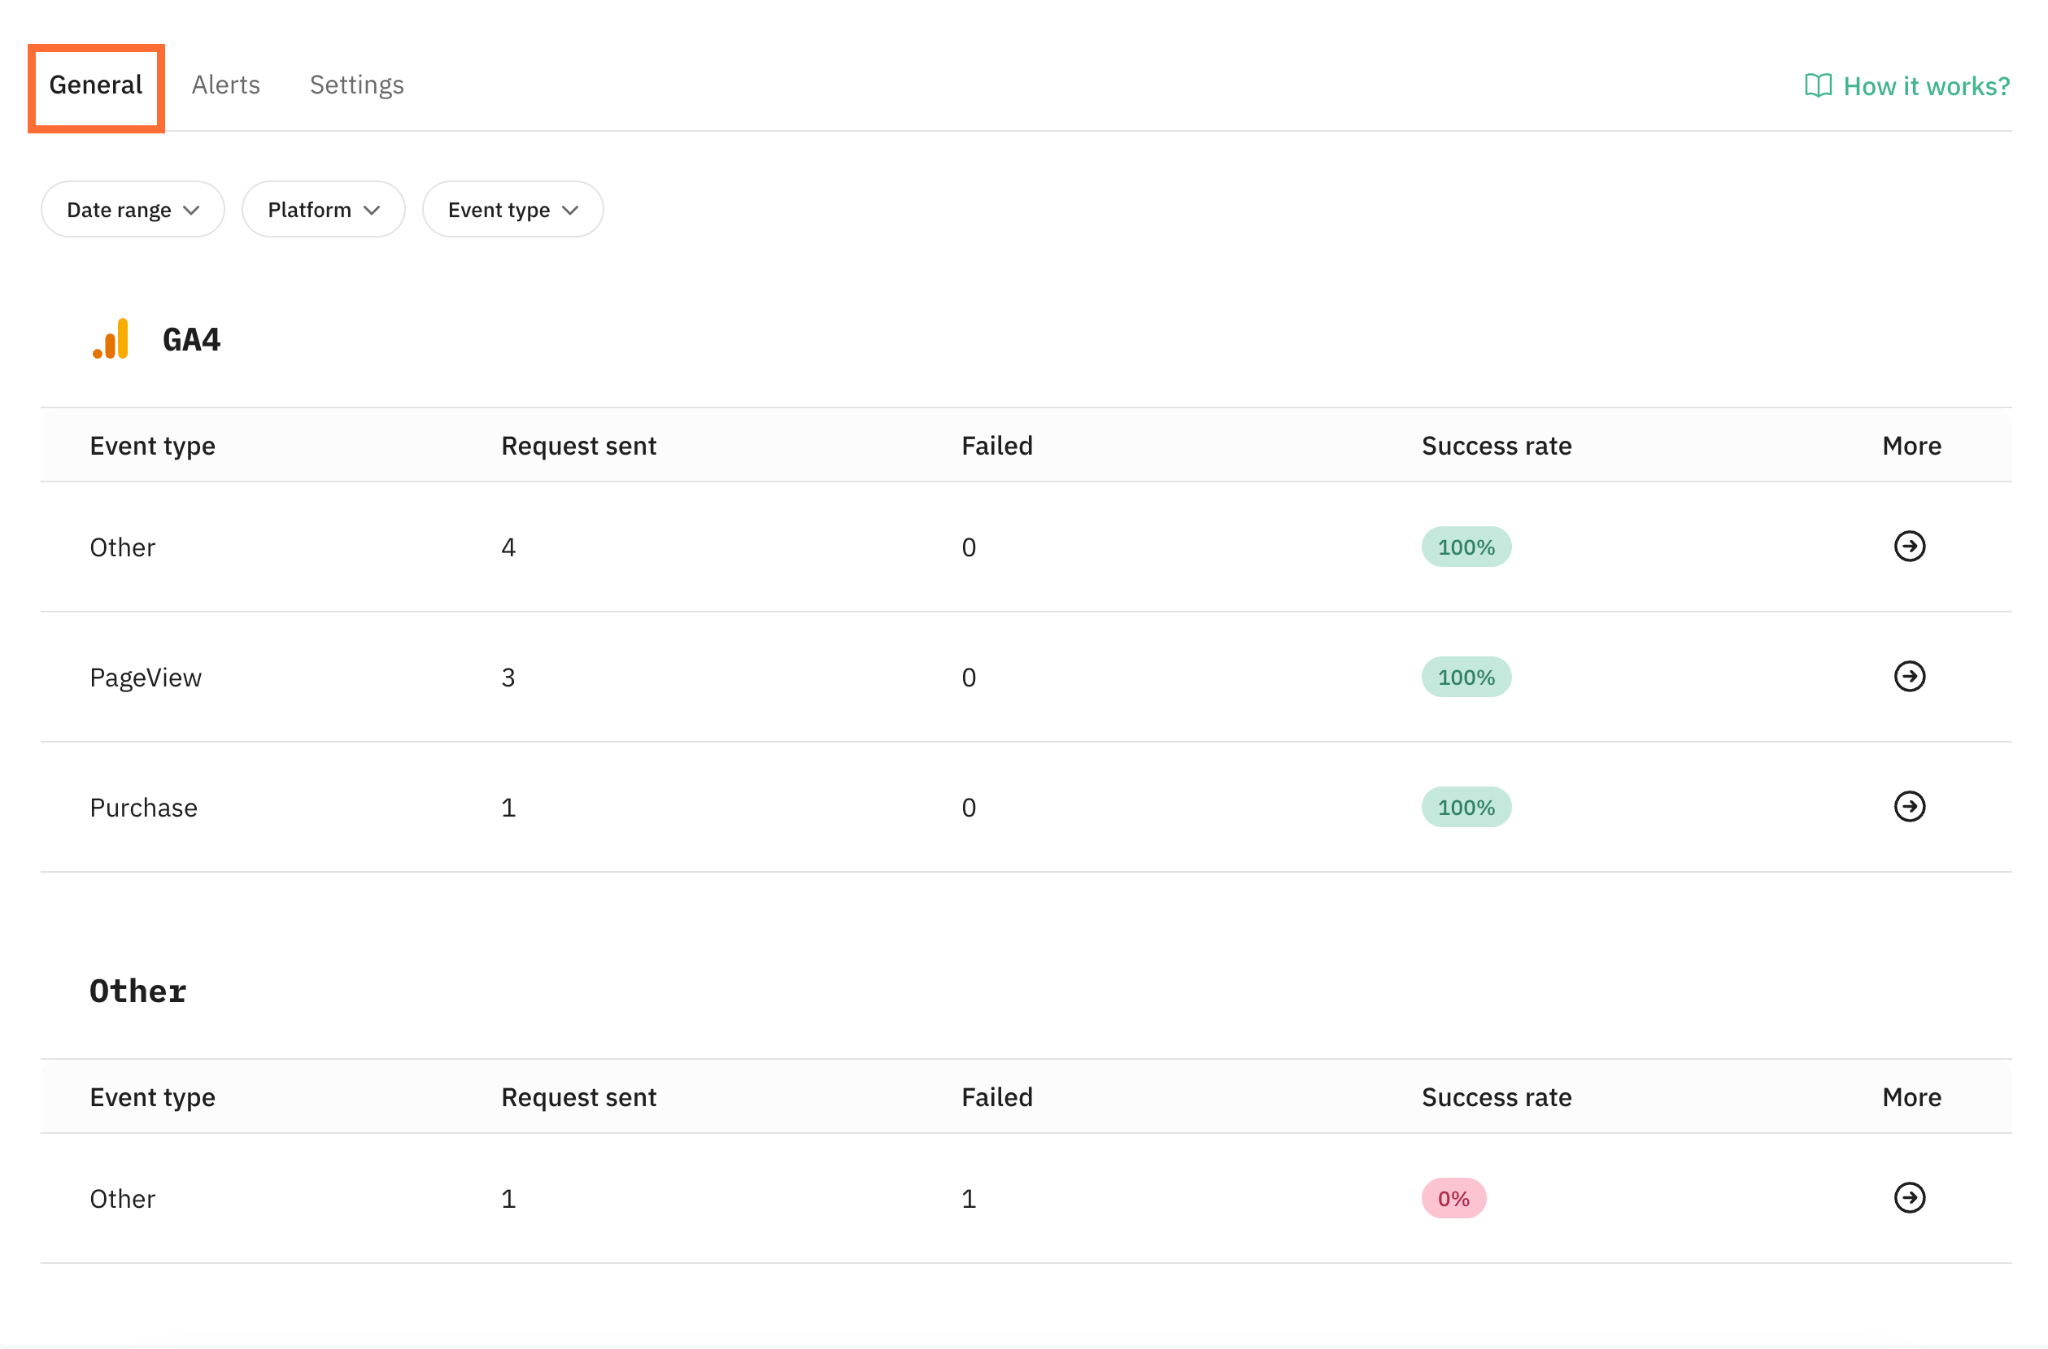
Here you can see a dashboard of your server-side tracking’s health and performance. Instead of displaying individual raw logs, it aggregates metrics to help you identify issues quickly.
The Monitoring feature automatically categorizes outgoing request URLs and payloads into specific platforms, including:
- Advertising & affiliate platforms – Meta (Facebook), Pinterest, Snapchat, TikTok, Twitter, Microsoft Ads Offline, Awin, etc.
- Google platforms – Google Analytics 4 (GA4), Google Conversion Events, Google Tag Manager.
- Other custom platforms – if a request doesn’t match one of these predefined patterns, it’s categorized as Other.
Note:
- The dashboard displays only the platforms for which you have configured tags.
- The General tab acts as a health tracker for your data deliveries to external destinations like Meta, GA4, and TikTok. Since the success of your tracking relies on these platforms receiving and accepting your data, the dashboard focuses exclusively on outgoing events. While this view doesn’t display incoming traffic, you can easily monitor that activity using your configured alert rules.
Each platform provides a detailed breakdown of performance metrics for every processed event. Below is an explanation of the metrics in each column:
- Event type – the name of the event captured and sent by your sGTM container. You can learn more about specific events in the Google documentation.
- Request sent – the total count of outgoing requests sent from your sGTM container to the target platform.
- Failed – the total count of outgoing requests that weren’t successfully reached or accepted by the destination platform.
- Success rate – the percentage of outgoing requests that returned a successful 2xx status code. The status is color-coded for quick reference:
- Green – optimal health and normal operation.
- Yellow – some requests are failing, which may indicate a minor configuration issue.
- Red – most or all requests are failing, indicating that the connection or tag may be broken.
You can filter the dashboard with the following filters:
- Data range – select a specific timeframe to view your metrics.
- Platform – the destination platform.
- Event type – the name of the event captured and sent by your sGTM container. You can learn more about specific events in the Google documentation.
Event details
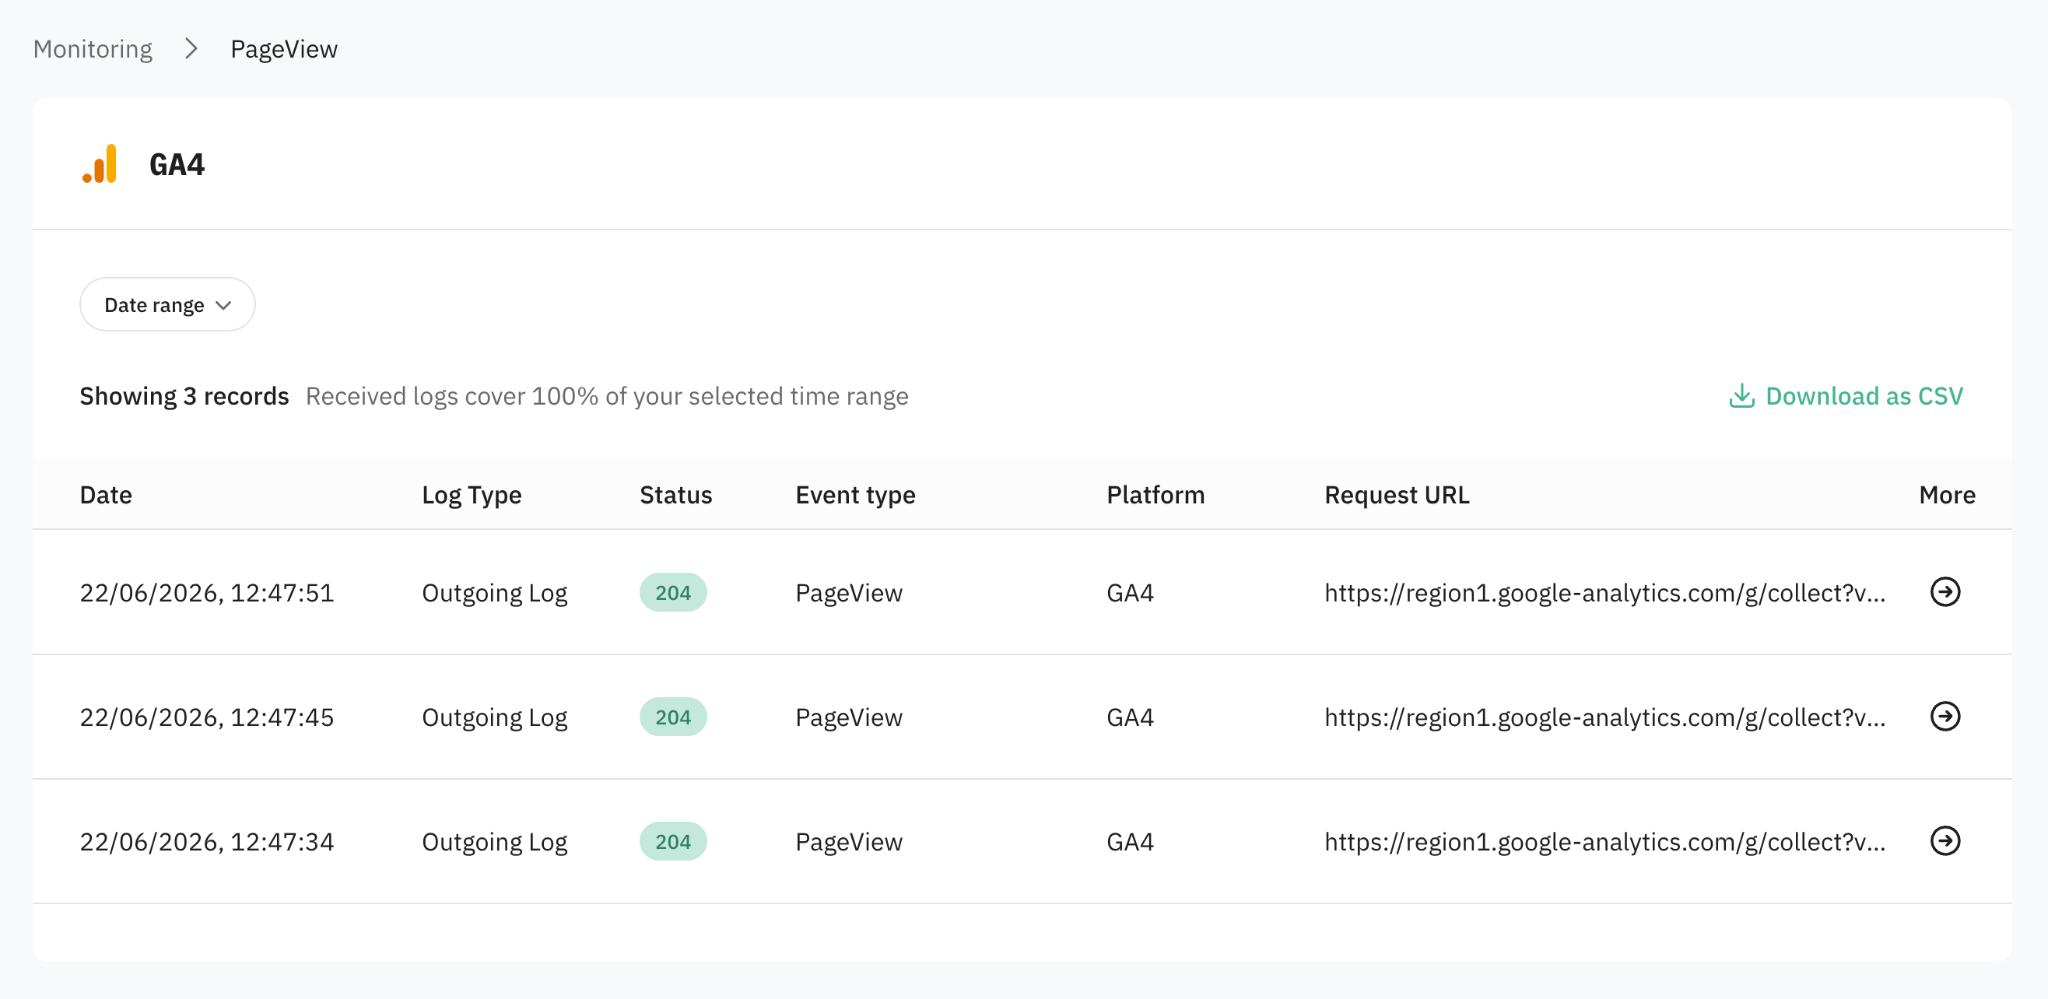
To view full event details, click the More icon.
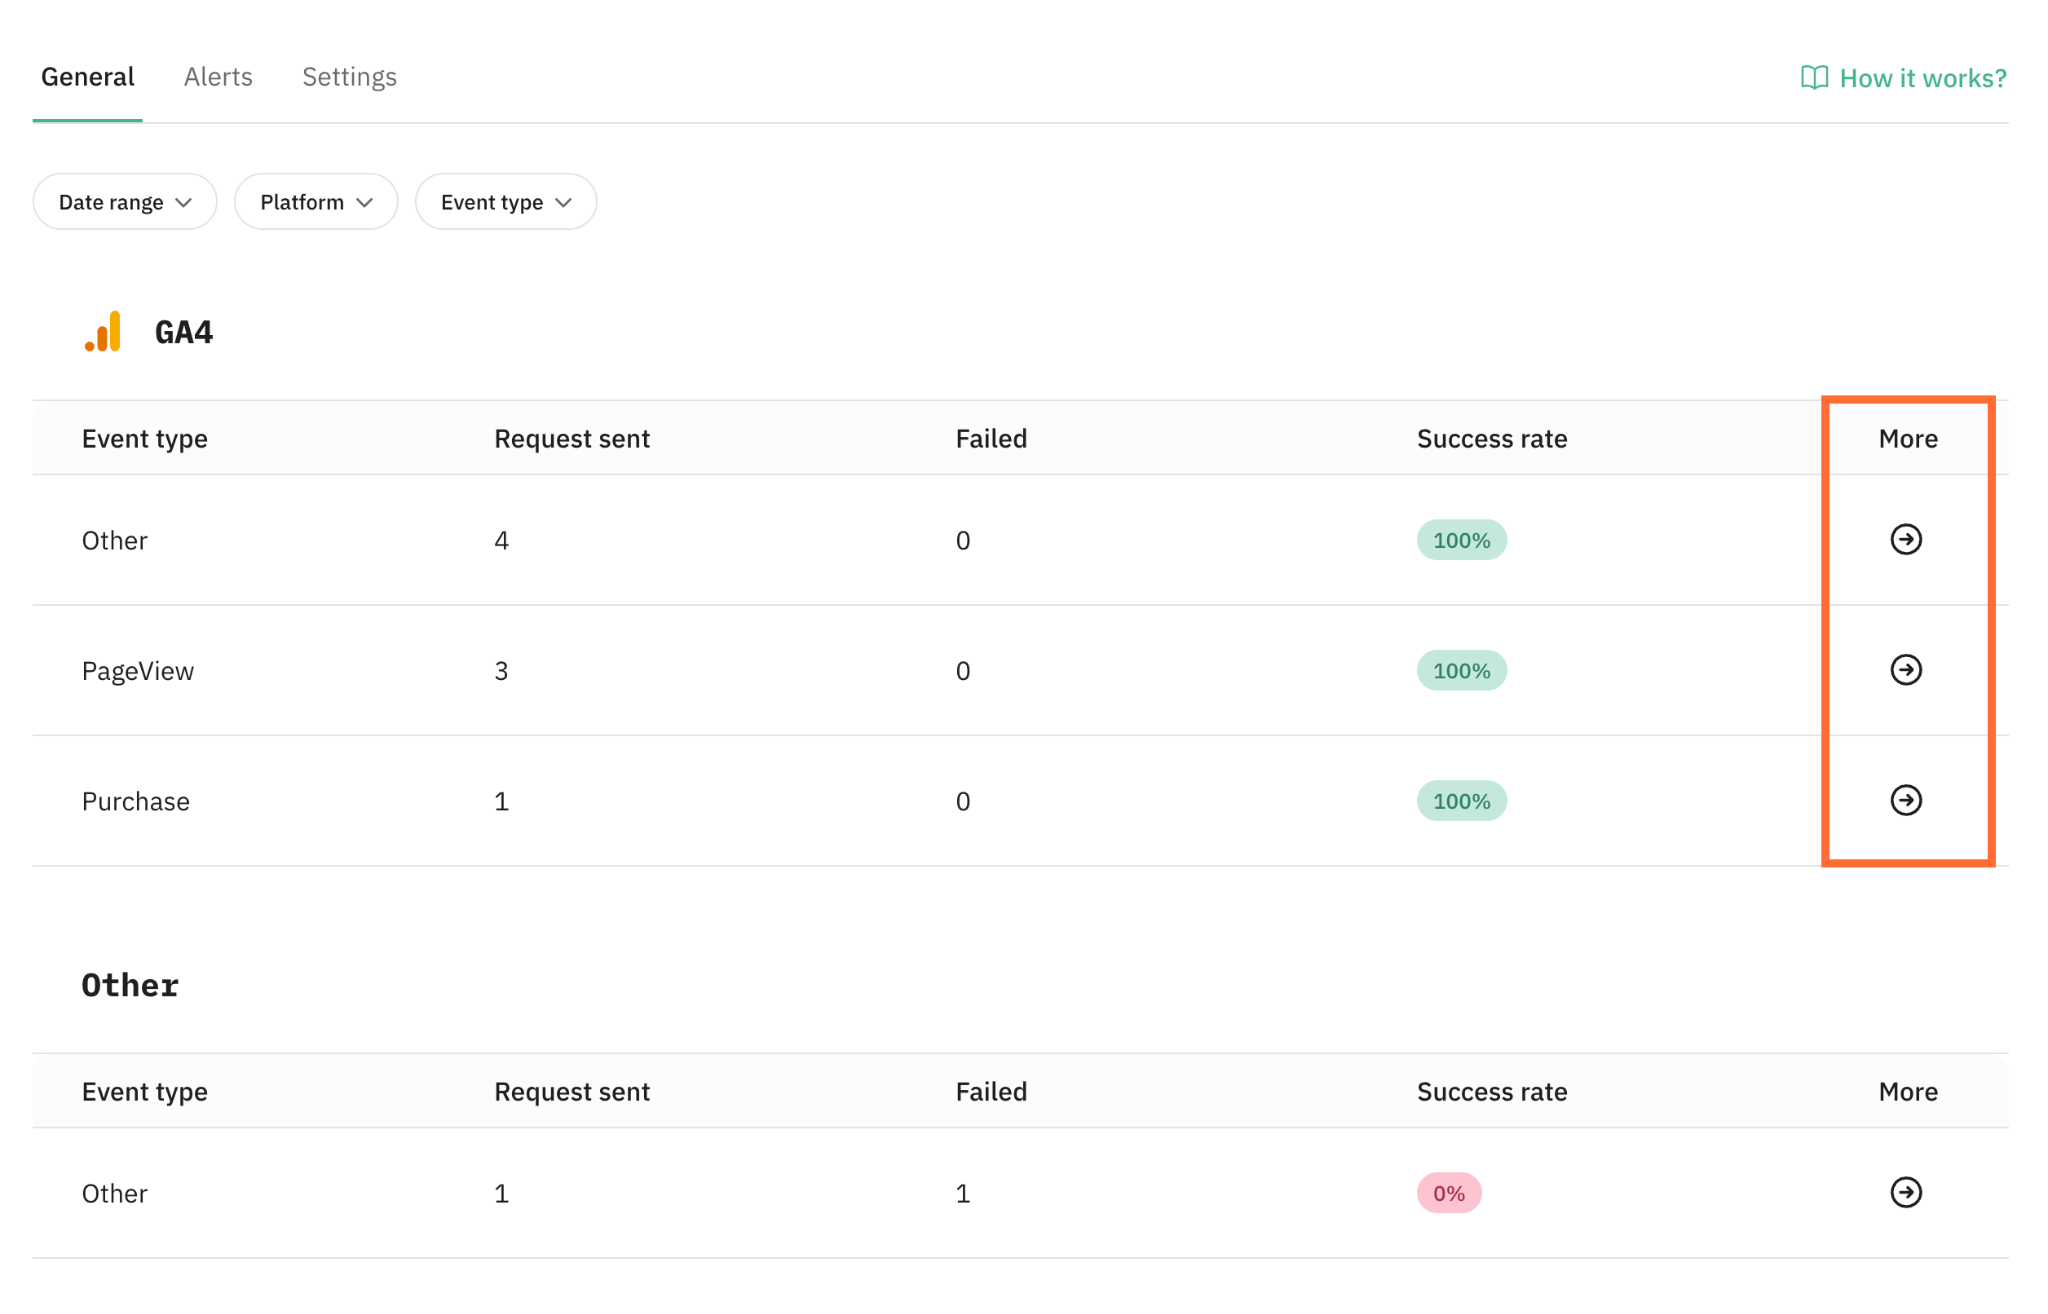
You’ll be redirected to the event details page for that specific event. On this page you can see:
- Detailed log table – a table listing every individual request for that specific event (e.g.,
PageView). The table includes the following columns:- Date – the date the request was sent.
- Log type – whether the log is incoming or outgoing. For more information on log types, read Log overview.
- Status – the response status code. For the detailed explanation read Log status codes.
- Event type – the name of the event captured and sent by your sGTM container.
- Platform – the destination platform where the request was sent.
- Request URL – the full web address of a request, including its path and query parameters.
- Date range filter – filter events by the date.
- Download as CSV – click the button to download the data.
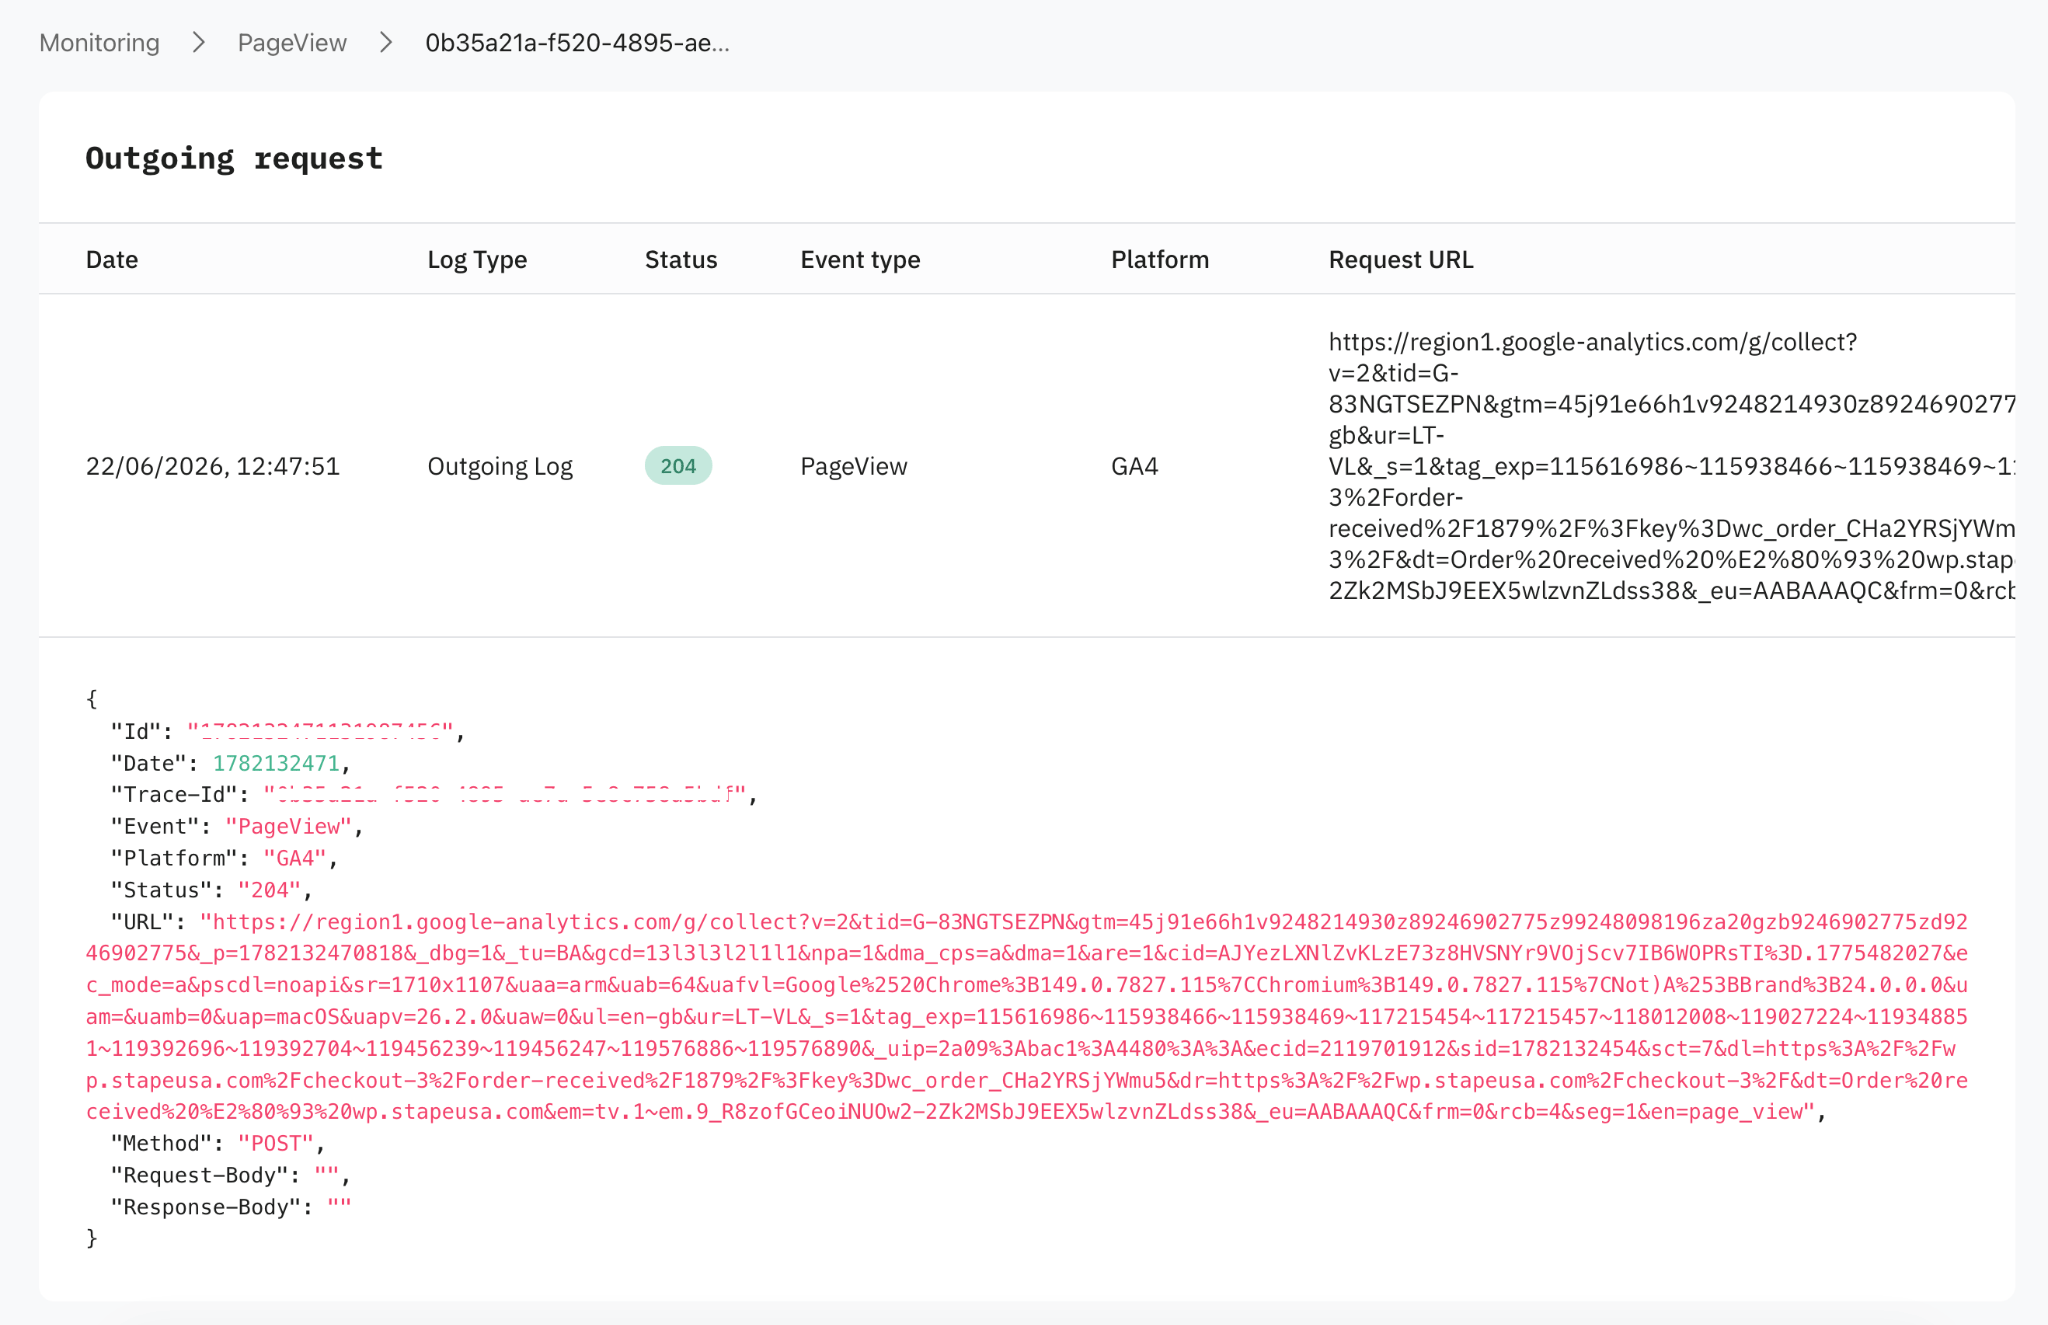
To view full log details, click the More icon. This view gives a comprehensive breakdown of the data payload sent to the destination platform, including its full JSON metadata. You’ll also see related incoming requests within the same flow under Associated logs, allowing you to trace exactly which event triggered the request. This page is a diagnostic tool, giving you visibility into your data transmission.
Alerts
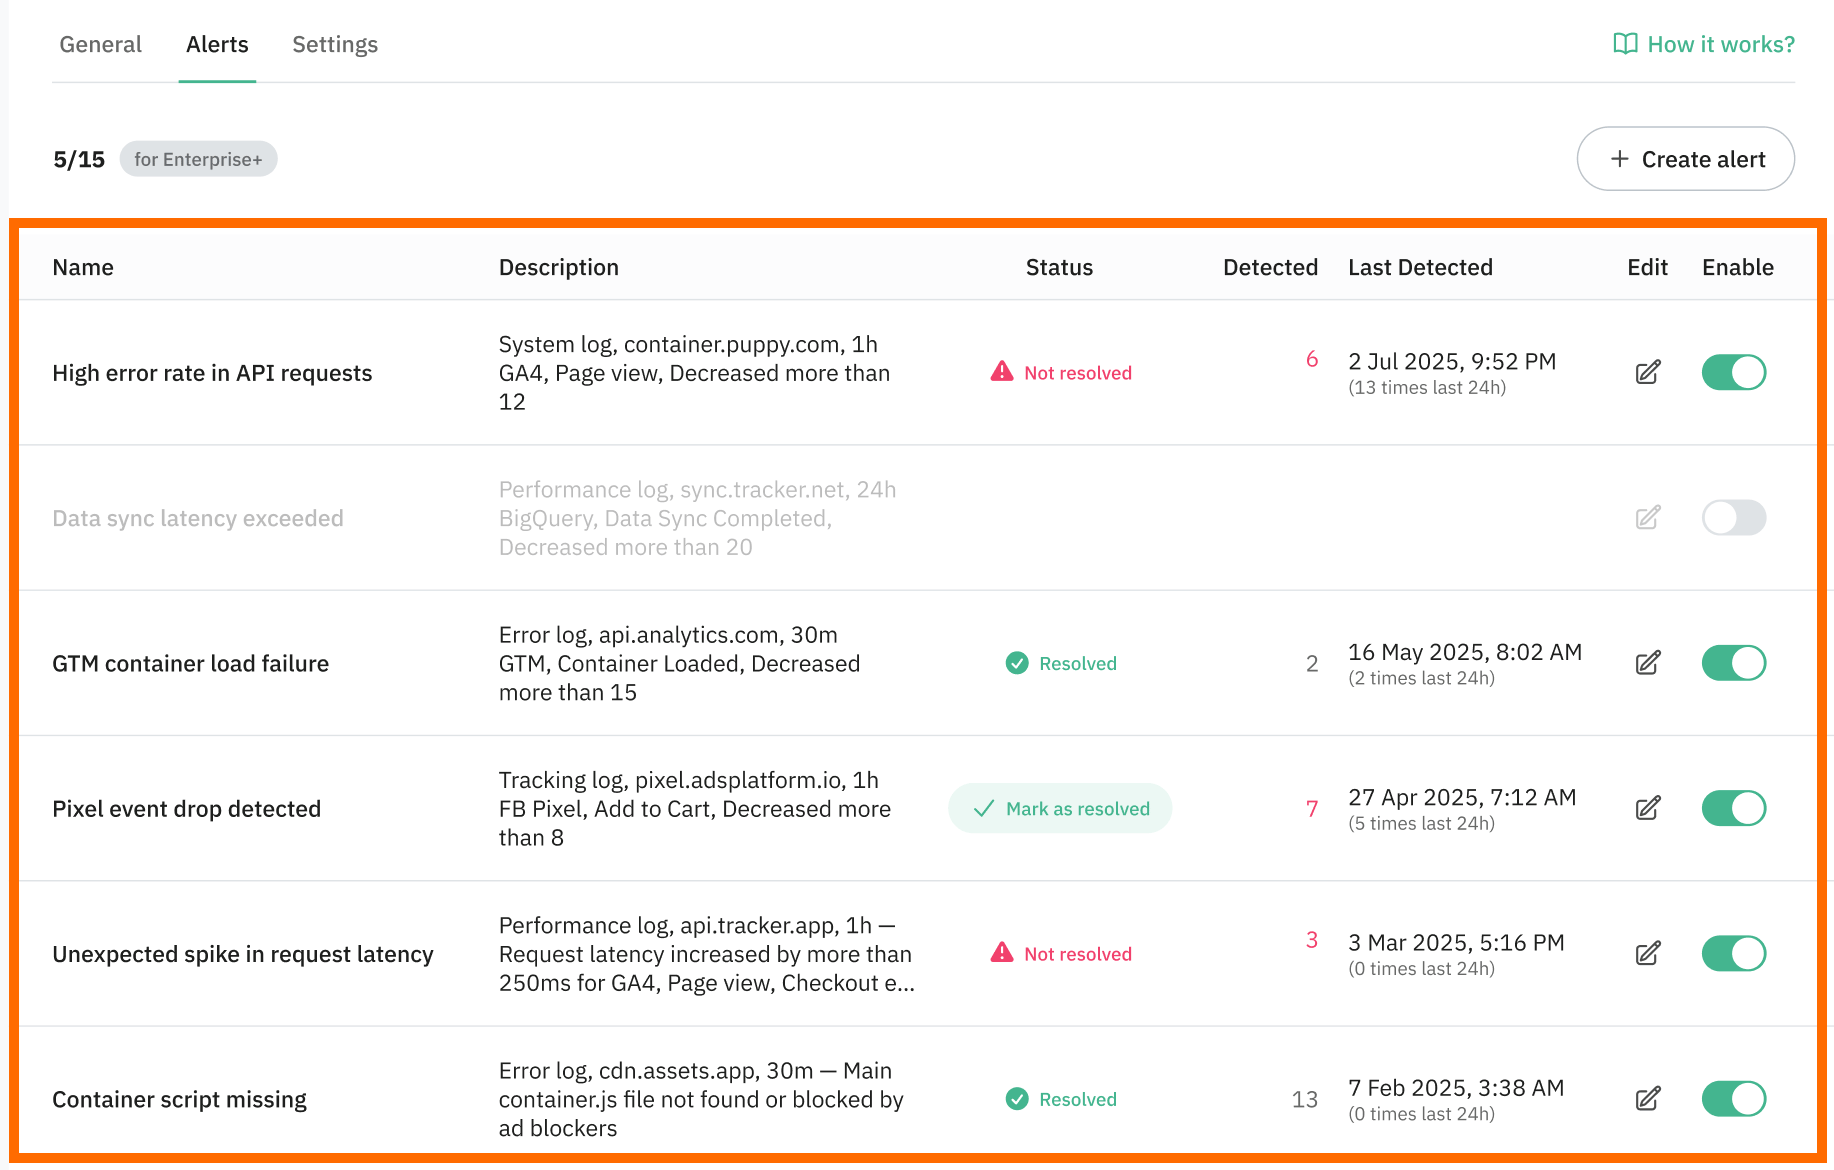
In the Alerts tab you can see your alerts, as well as create a new one.
Your alerts appear on the dashboard in a table with the following columns:
- Name – the name you assigned to the alert.
- Description – a summary of the conditions that trigger this alert.
- Status – the current health state of the alert:
- Resolved – metrics are within normal limits, or you have manually marked the incident as resolved.
- Mark as resolved – an action available when an alert is Not Resolved, allowing you to acknowledge the issue and clear the alert status.
- Not resolved – the alert’s threshold conditions have been met, and the incident is active.
- Detected – the total number of times this alert has been triggered.
- Last detected – the timestamp of the most recent alert trigger.
- Edit – allows you to modify the alert settings.
- Enable – a toggle to activate or deactivate the alert.
For the instructions on how to create an alert, read How to create monitoring alerts.
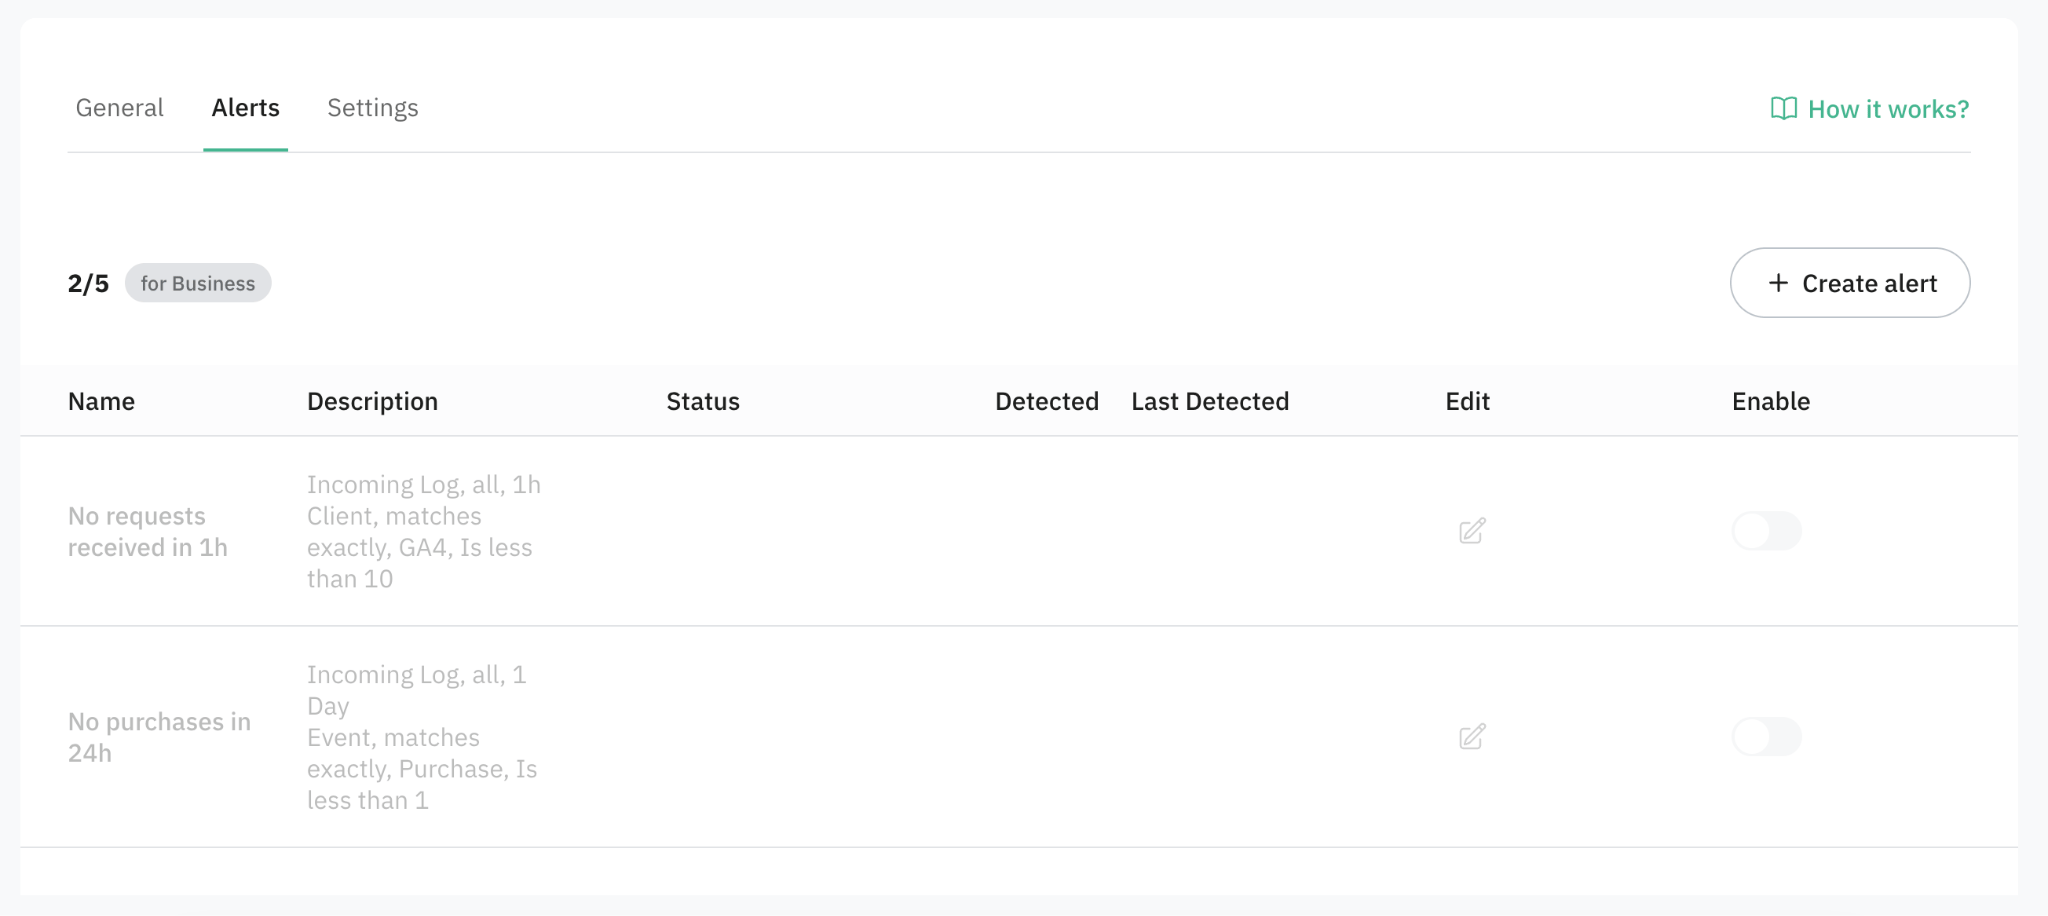
If you created an sGTM container after 3 Aug, 2026, you'll find a couple of pre-made alerts that are disabled by default and can be edited according to your needs:
- No requests received in 1h – the alert is triggered when incoming GA4 requests fall below 10 in 1 hour. This is an early-warning failure check for main traffic flows, letting you catch critical infrastructure issues before losing days of analytics data. For example, if a site update or code deployment accidentally removes or breaks the web GTM script, GA4 requests to your sGTM container will stop.
- No purchases in 24h – the alert is triggered when there’s only 1 purchase per 24 hours. This alert is designed to track e-commerce conversion health and notify you when purchase tracking stops flowing into your sGTM container. For example, if a site update or code deployment breaks the purchase event push in your data layer, no purchase events reach sGTM.
Tips:
- If your website naturally gets fewer than 10 GA4 requests during off-peak hours (for example, overnight), lower the threshold value or adjust the timeframe to prevent false positive alerts.
- If your store doesn’t consistently generate daily sales, adjust the evaluation period or threshold to avoid false alerts.
Settings
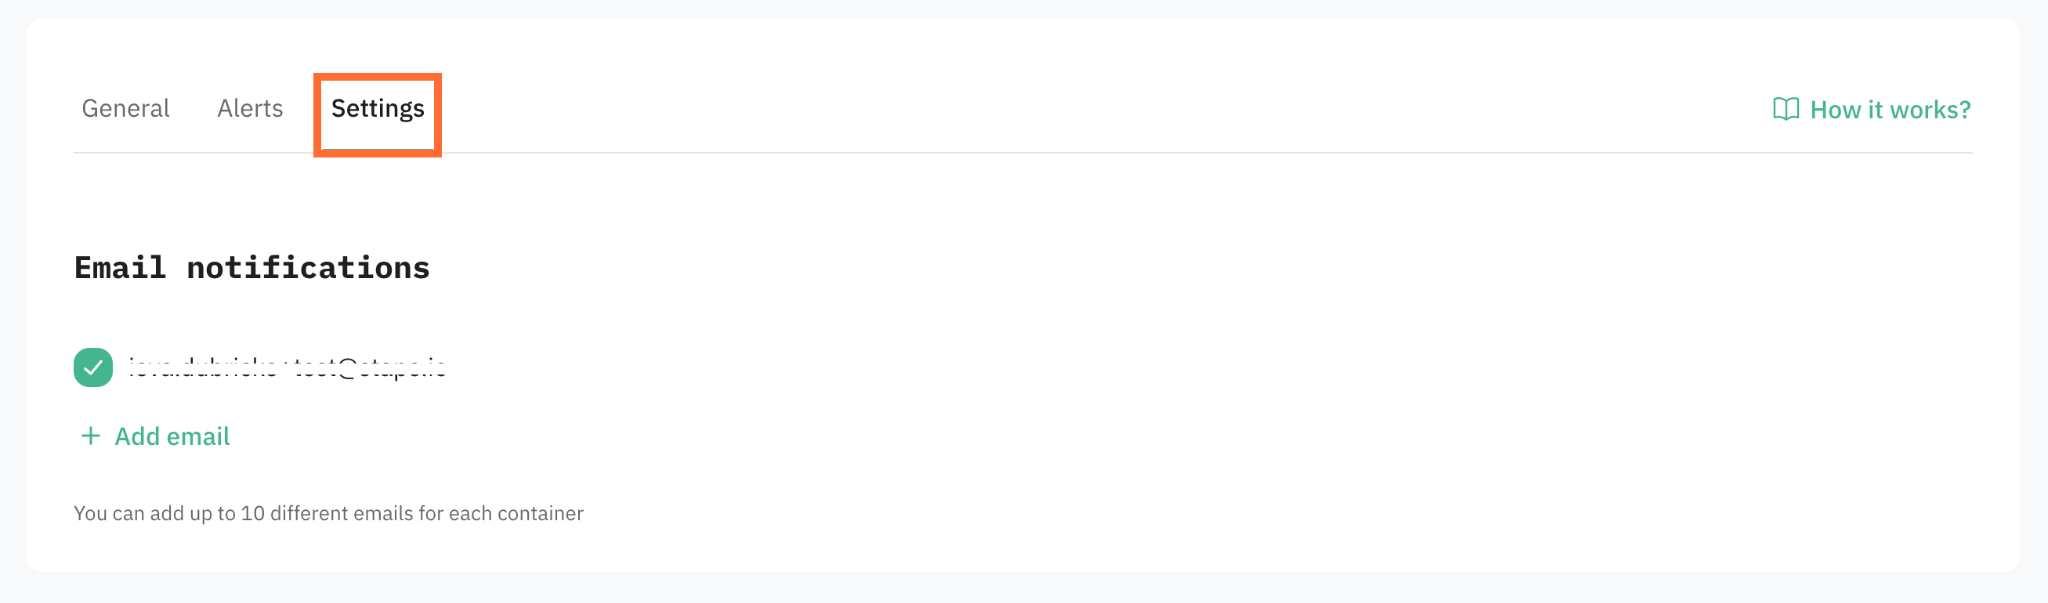
Here you can add up to 10 email addresses to receive alert notifications.
Click Add email to add a new email address.
Use cases
Take a look at the following use cases of the Monitoring feature:
Was this article helpful?
🍽 Table of content:
Comments