How to use subscription auto-upgrade
Auto-upgrade moves your Stape container/Signals Gateway up a plan tier automatically when you go over your current plan's limit. By enabling the auto-upgrade your container/Signals Gateway keeps working instead of being paused, and you don't lose analytical data in the meantime.
How to turn auto-upgrade on or off
You can set auto-upgrade on the following pages:
When you're choosing a subscription for a container or Signals Gateway: the plan selection page has the auto-upgrade toggle.
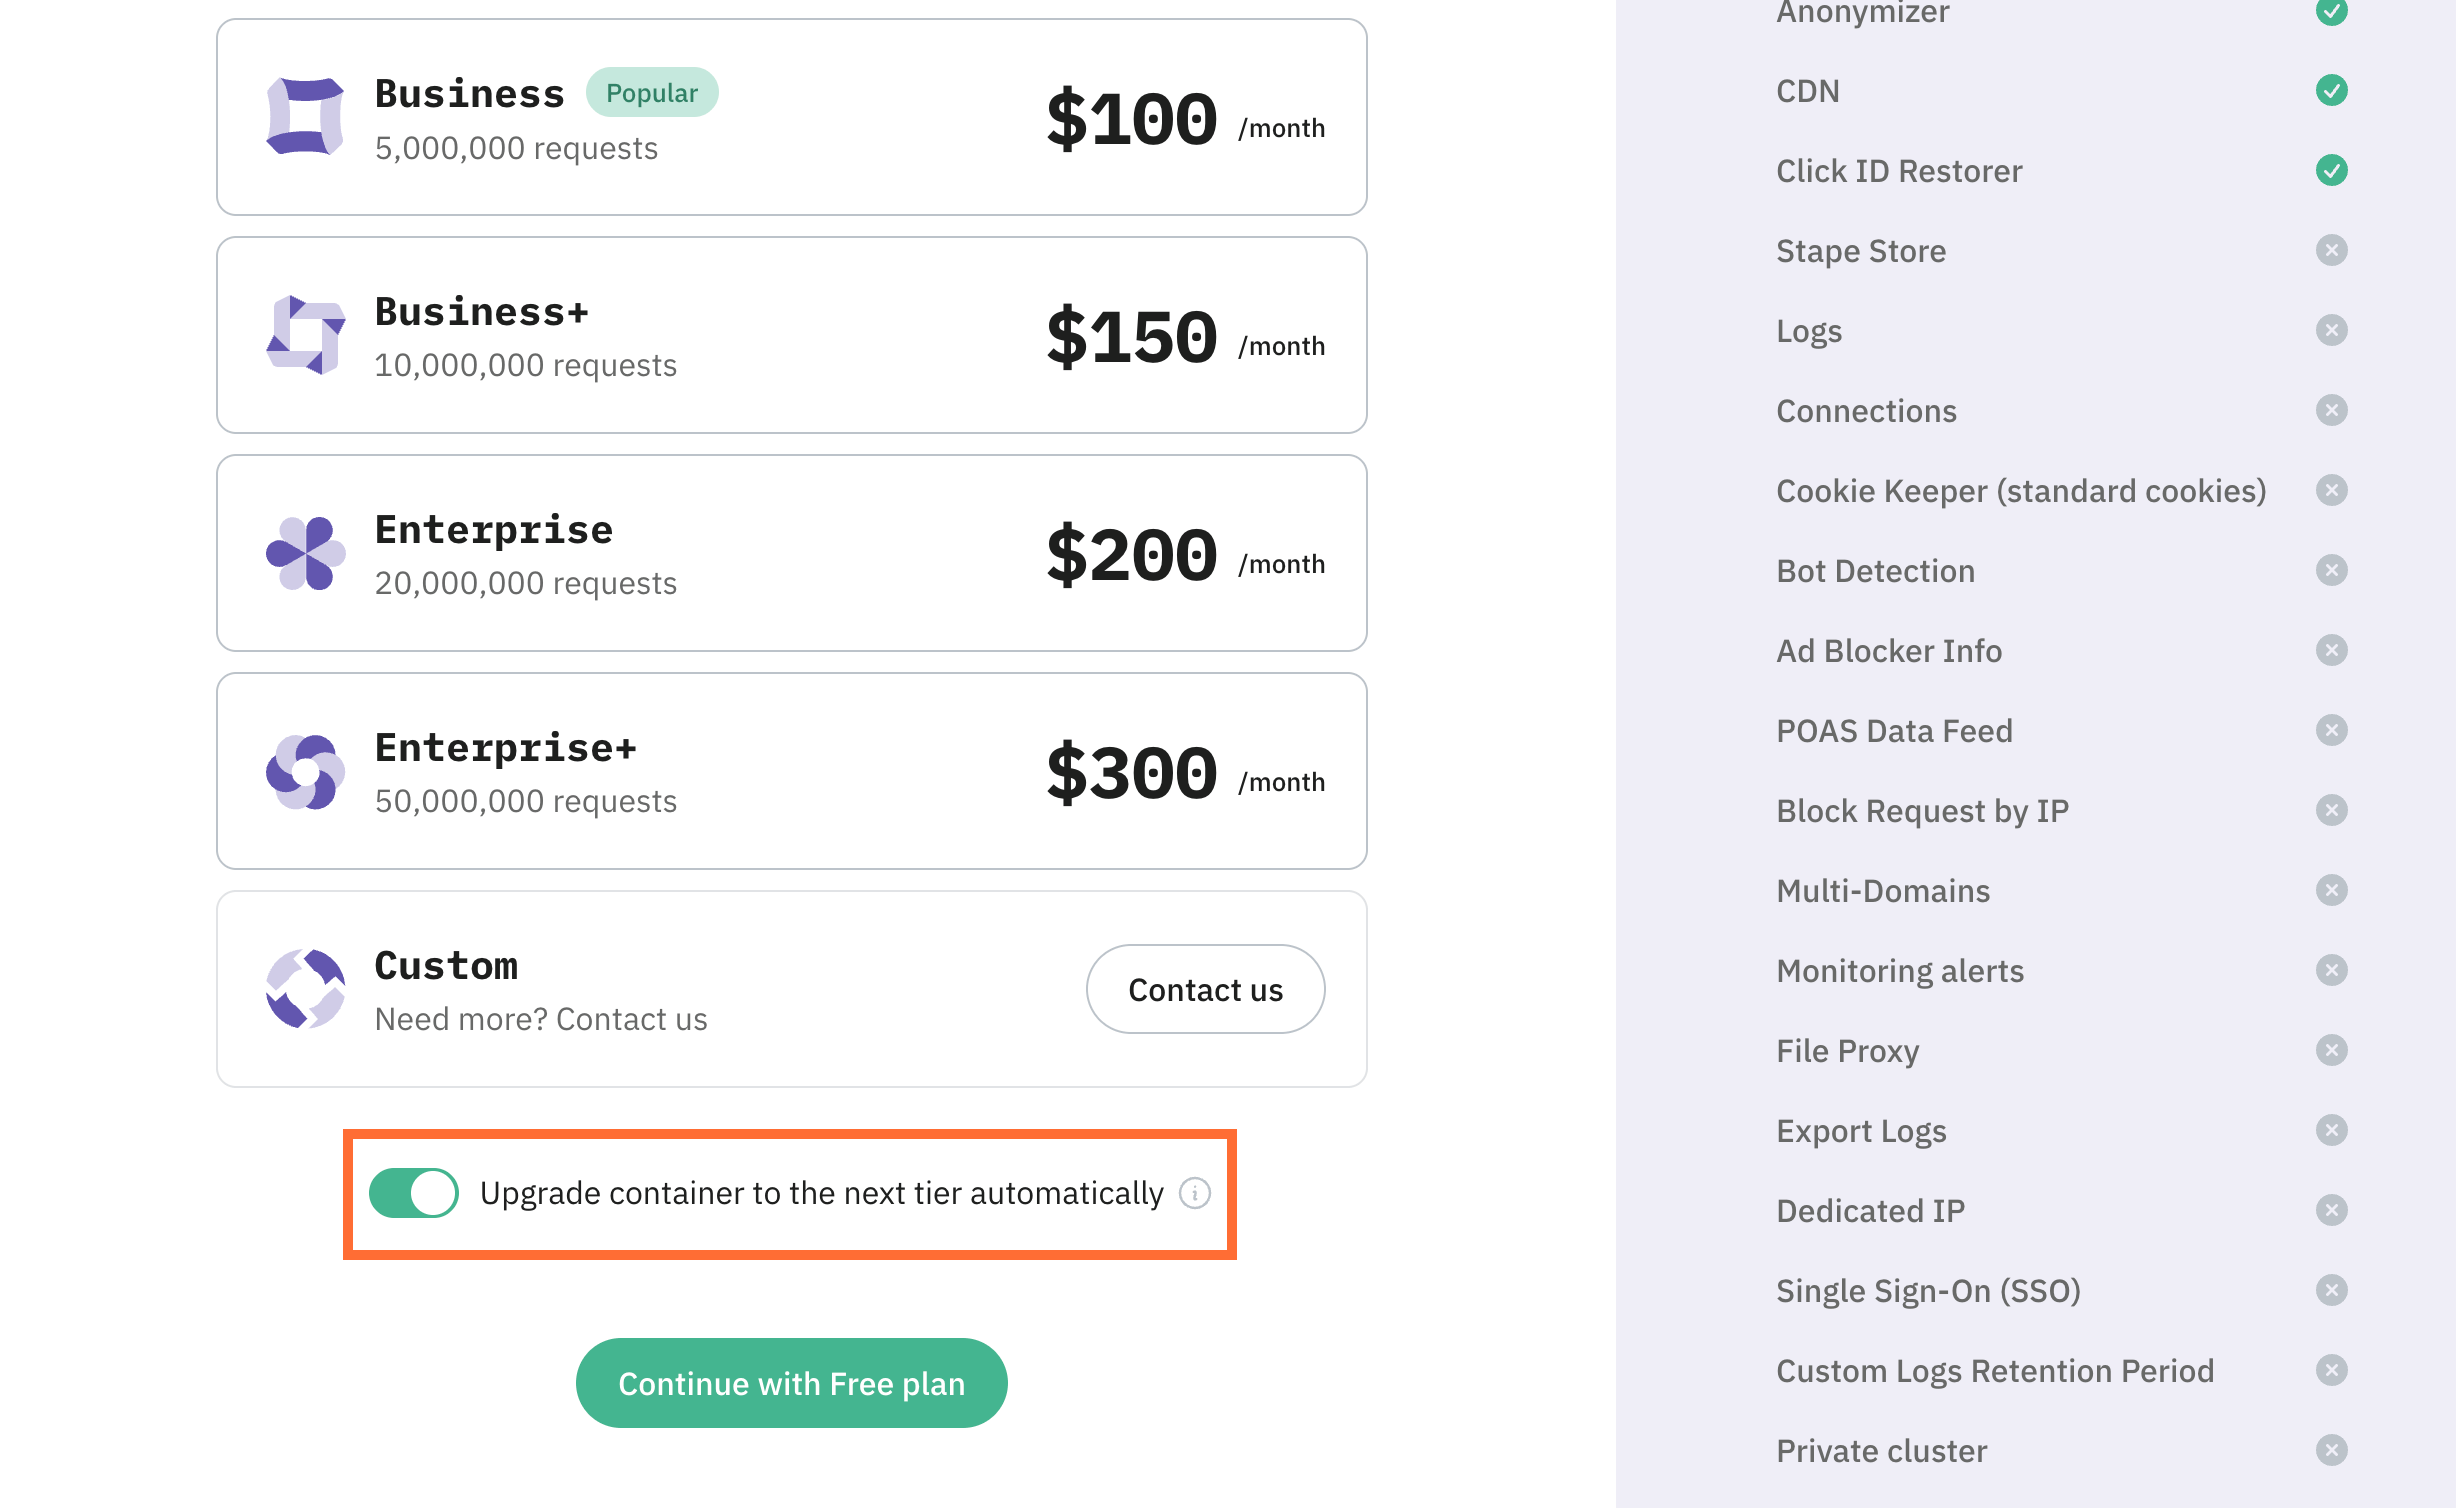
On an existing container or Signals Gateway:
- Open the container/Signals Gateway you want to change.
- Click the Subscription tab.
- Toggle Upgrade container to the next tier automatically on or off.

The change takes effect right away. You don't need to confirm anything else.
Note:
What changes after auto-upgrade
When auto-upgrade triggers, Stape charges your saved card for the new plan on the spot. See How to add billing info to your account if you haven't set one up yet.
A few things to know:
- Your container/Signals Gateway moves to the next plan up and keeps running. It's deployed automatically.
- Your card is charged for the new plan.
- Your request or event counter isn’t reset. It keeps counting against the new, larger limit.
- Your billing cycle stays the same. Your next renewal is on the same date, at the new plan's price.
Was this article helpful?
Comments