Step 2. [Recommended] Set up custom domain
Updated Mar 27, 2025
You can use a custom tagging server URL to set up first-party cookies. Custom tagging server URL or custom domain should share the same domain as your website. For example, if your website domain is example.com, then the tagging server URL should look like sst.example.com or example.com/sst depending on the setup method.
There are three ways to set up a custom domain:
- Same origin
- Subdomain
- Default domain
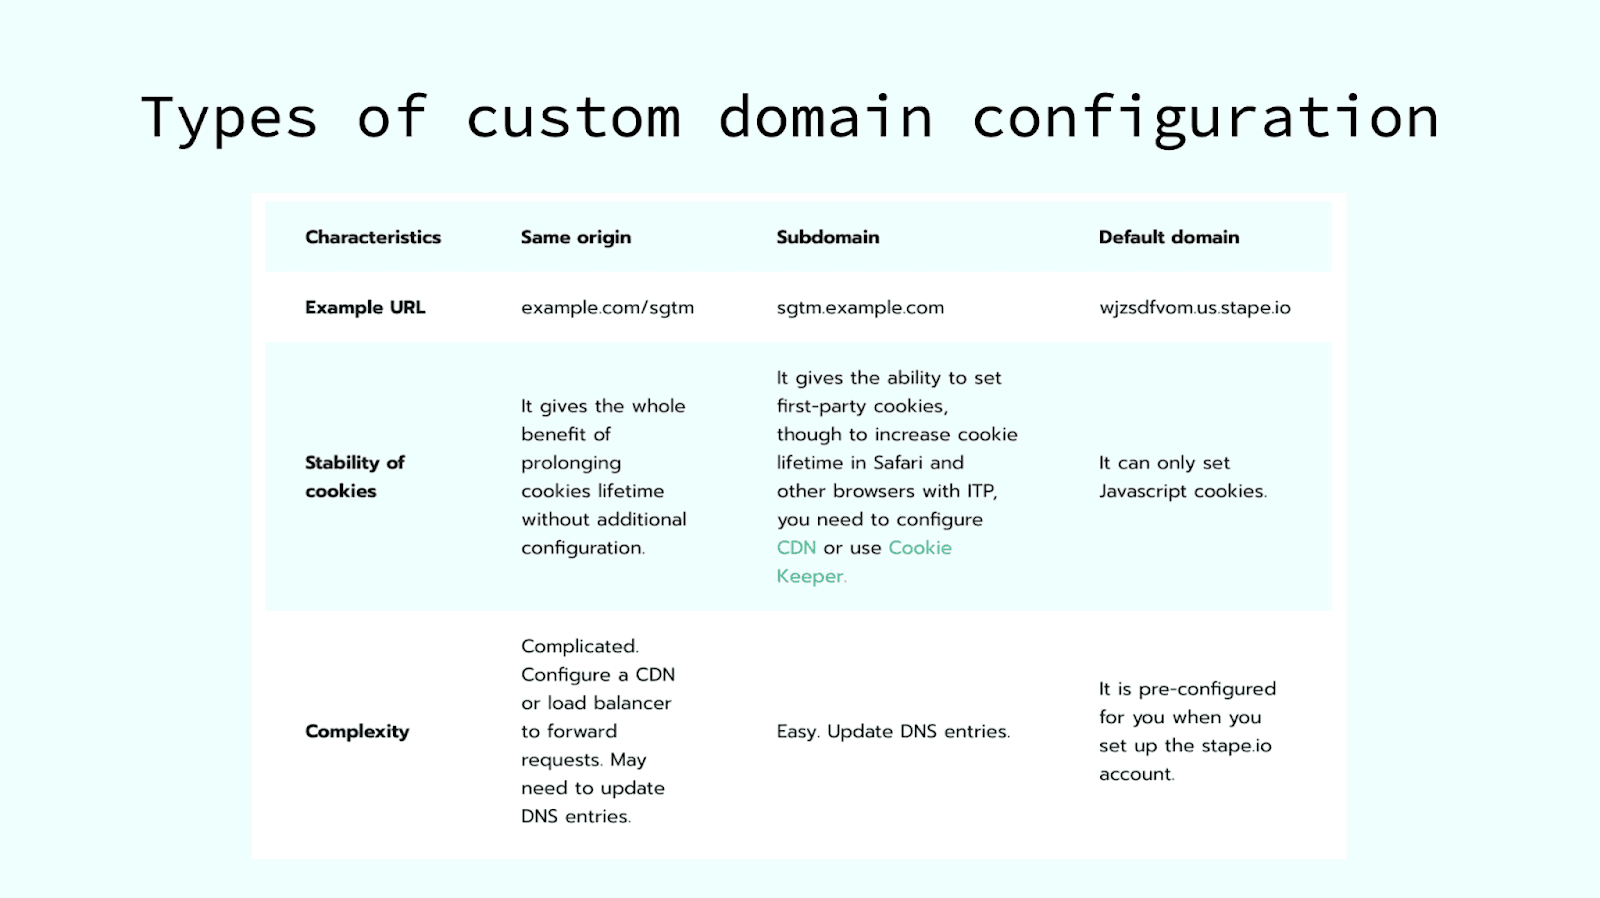
There is a detailed blog post where you can find a description of mapping a custom domain for the server Google Tag Manager container: using the same origin (Cloudflare and nginx).
But here, we will cover custom subdomain setup:
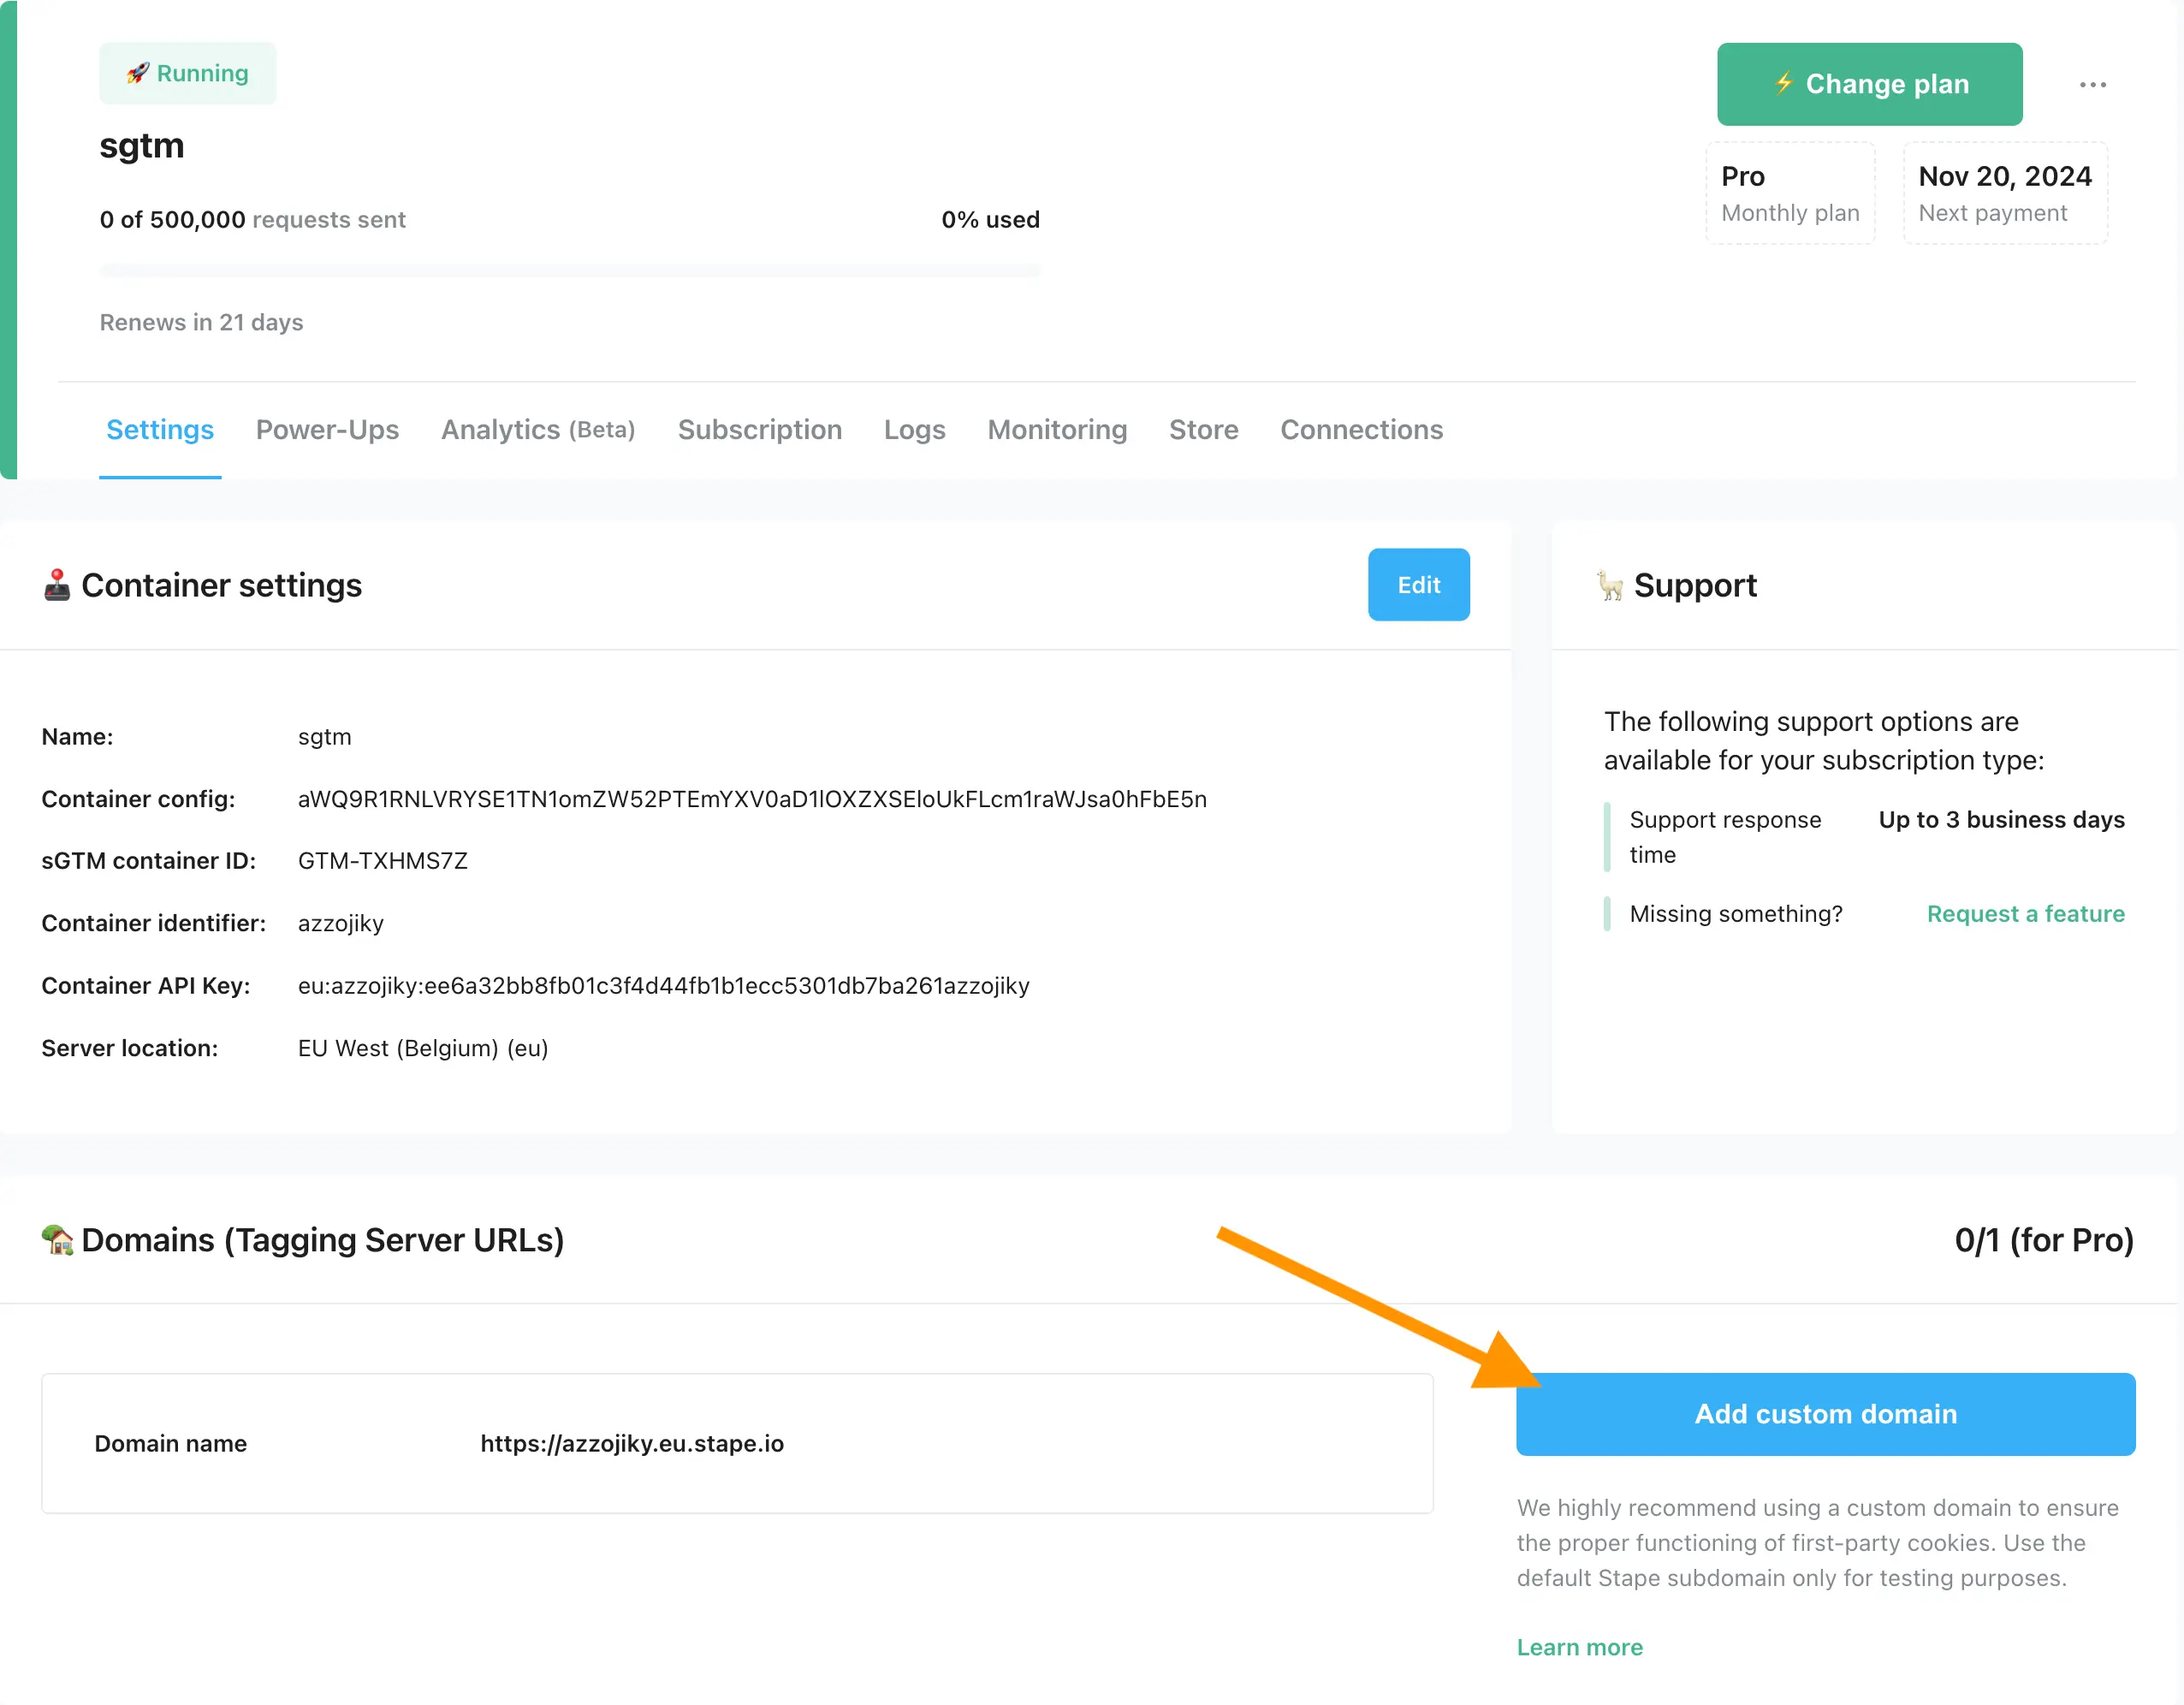
1. Open your sGTM container on Stape, scroll down to “Domains” and click Add custom domain.
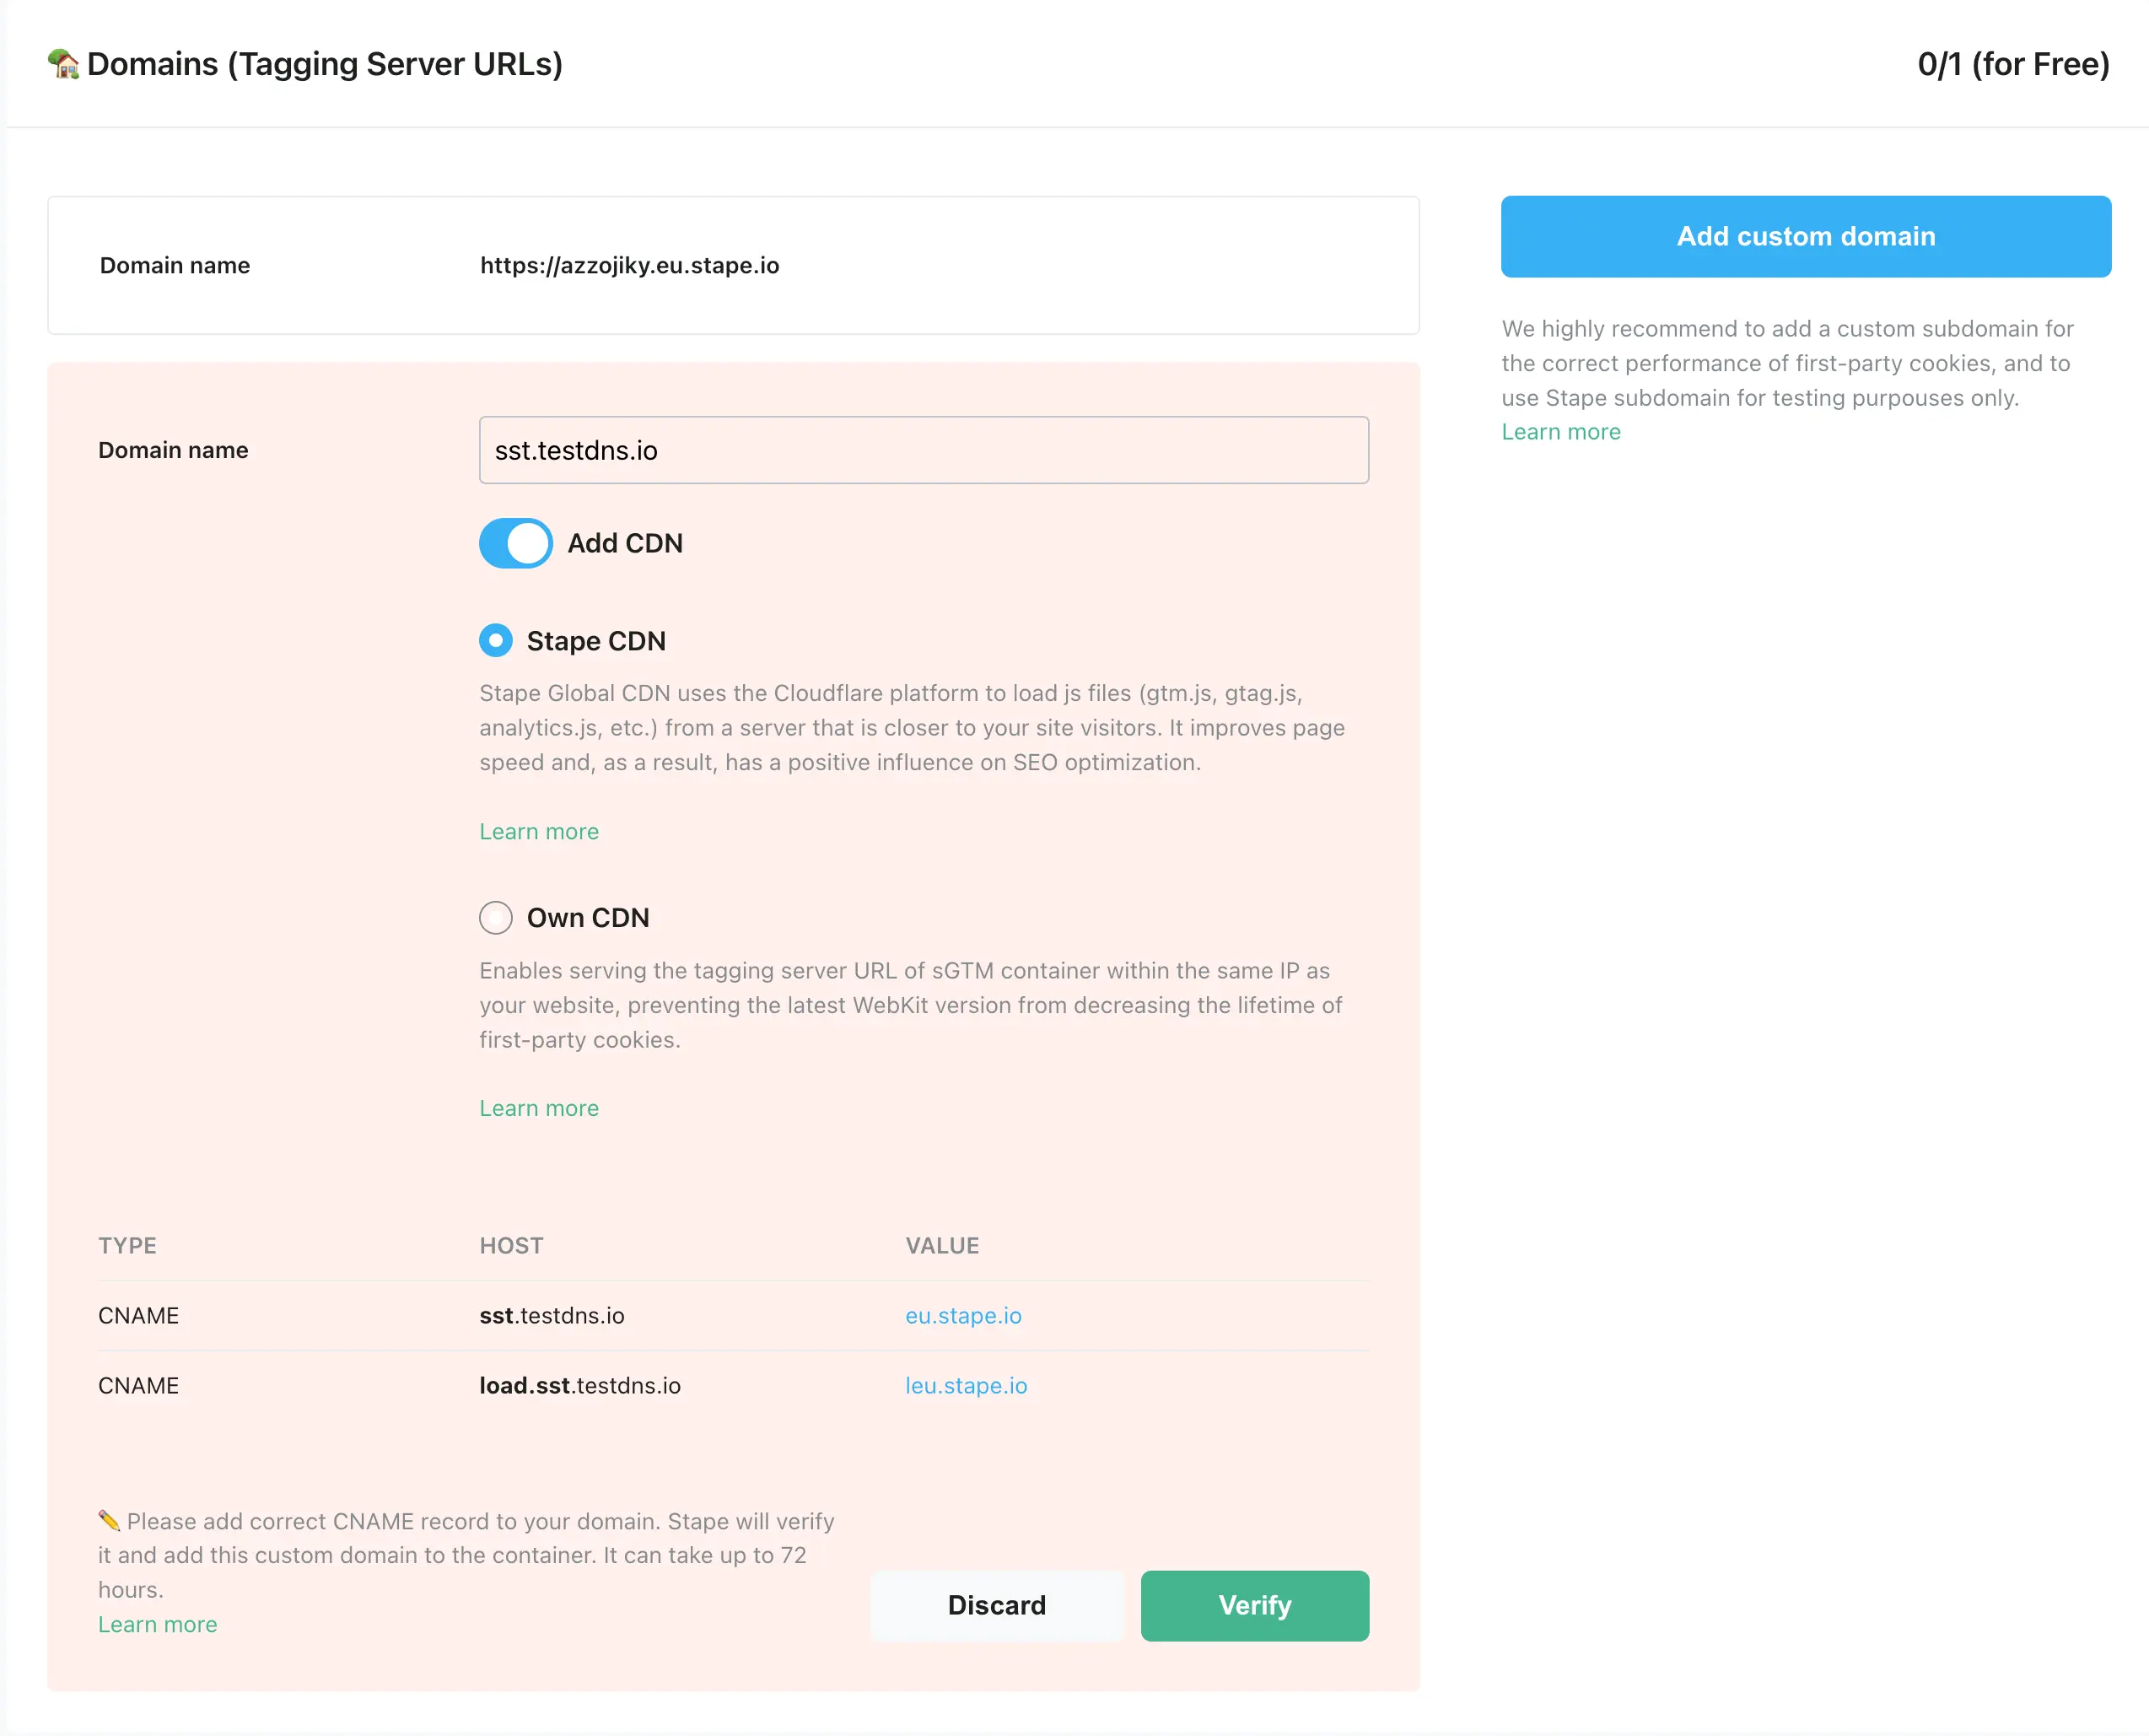
2. Write a custom domain.
3. Choose if you want to use CDN for the custom domain, there are three options:
- Disable CDN - choose not to use any type of CDN.
- Stape Global CDN - loads scripts from a server closer to a user visiting your website.
- Own CDN - helps to route sGTM custom domain and proxy sGTM traffic through the same IP as your website. It gives the ability to set cookies that Safari cannot shorten.
By default, subdomain verification is performed by CNAME records, but if you want to verify your subdomain by A and AAAA records, select Advanced settings when adding the custom domain and tick the "Use A records instead of CNAME record" checkbox.
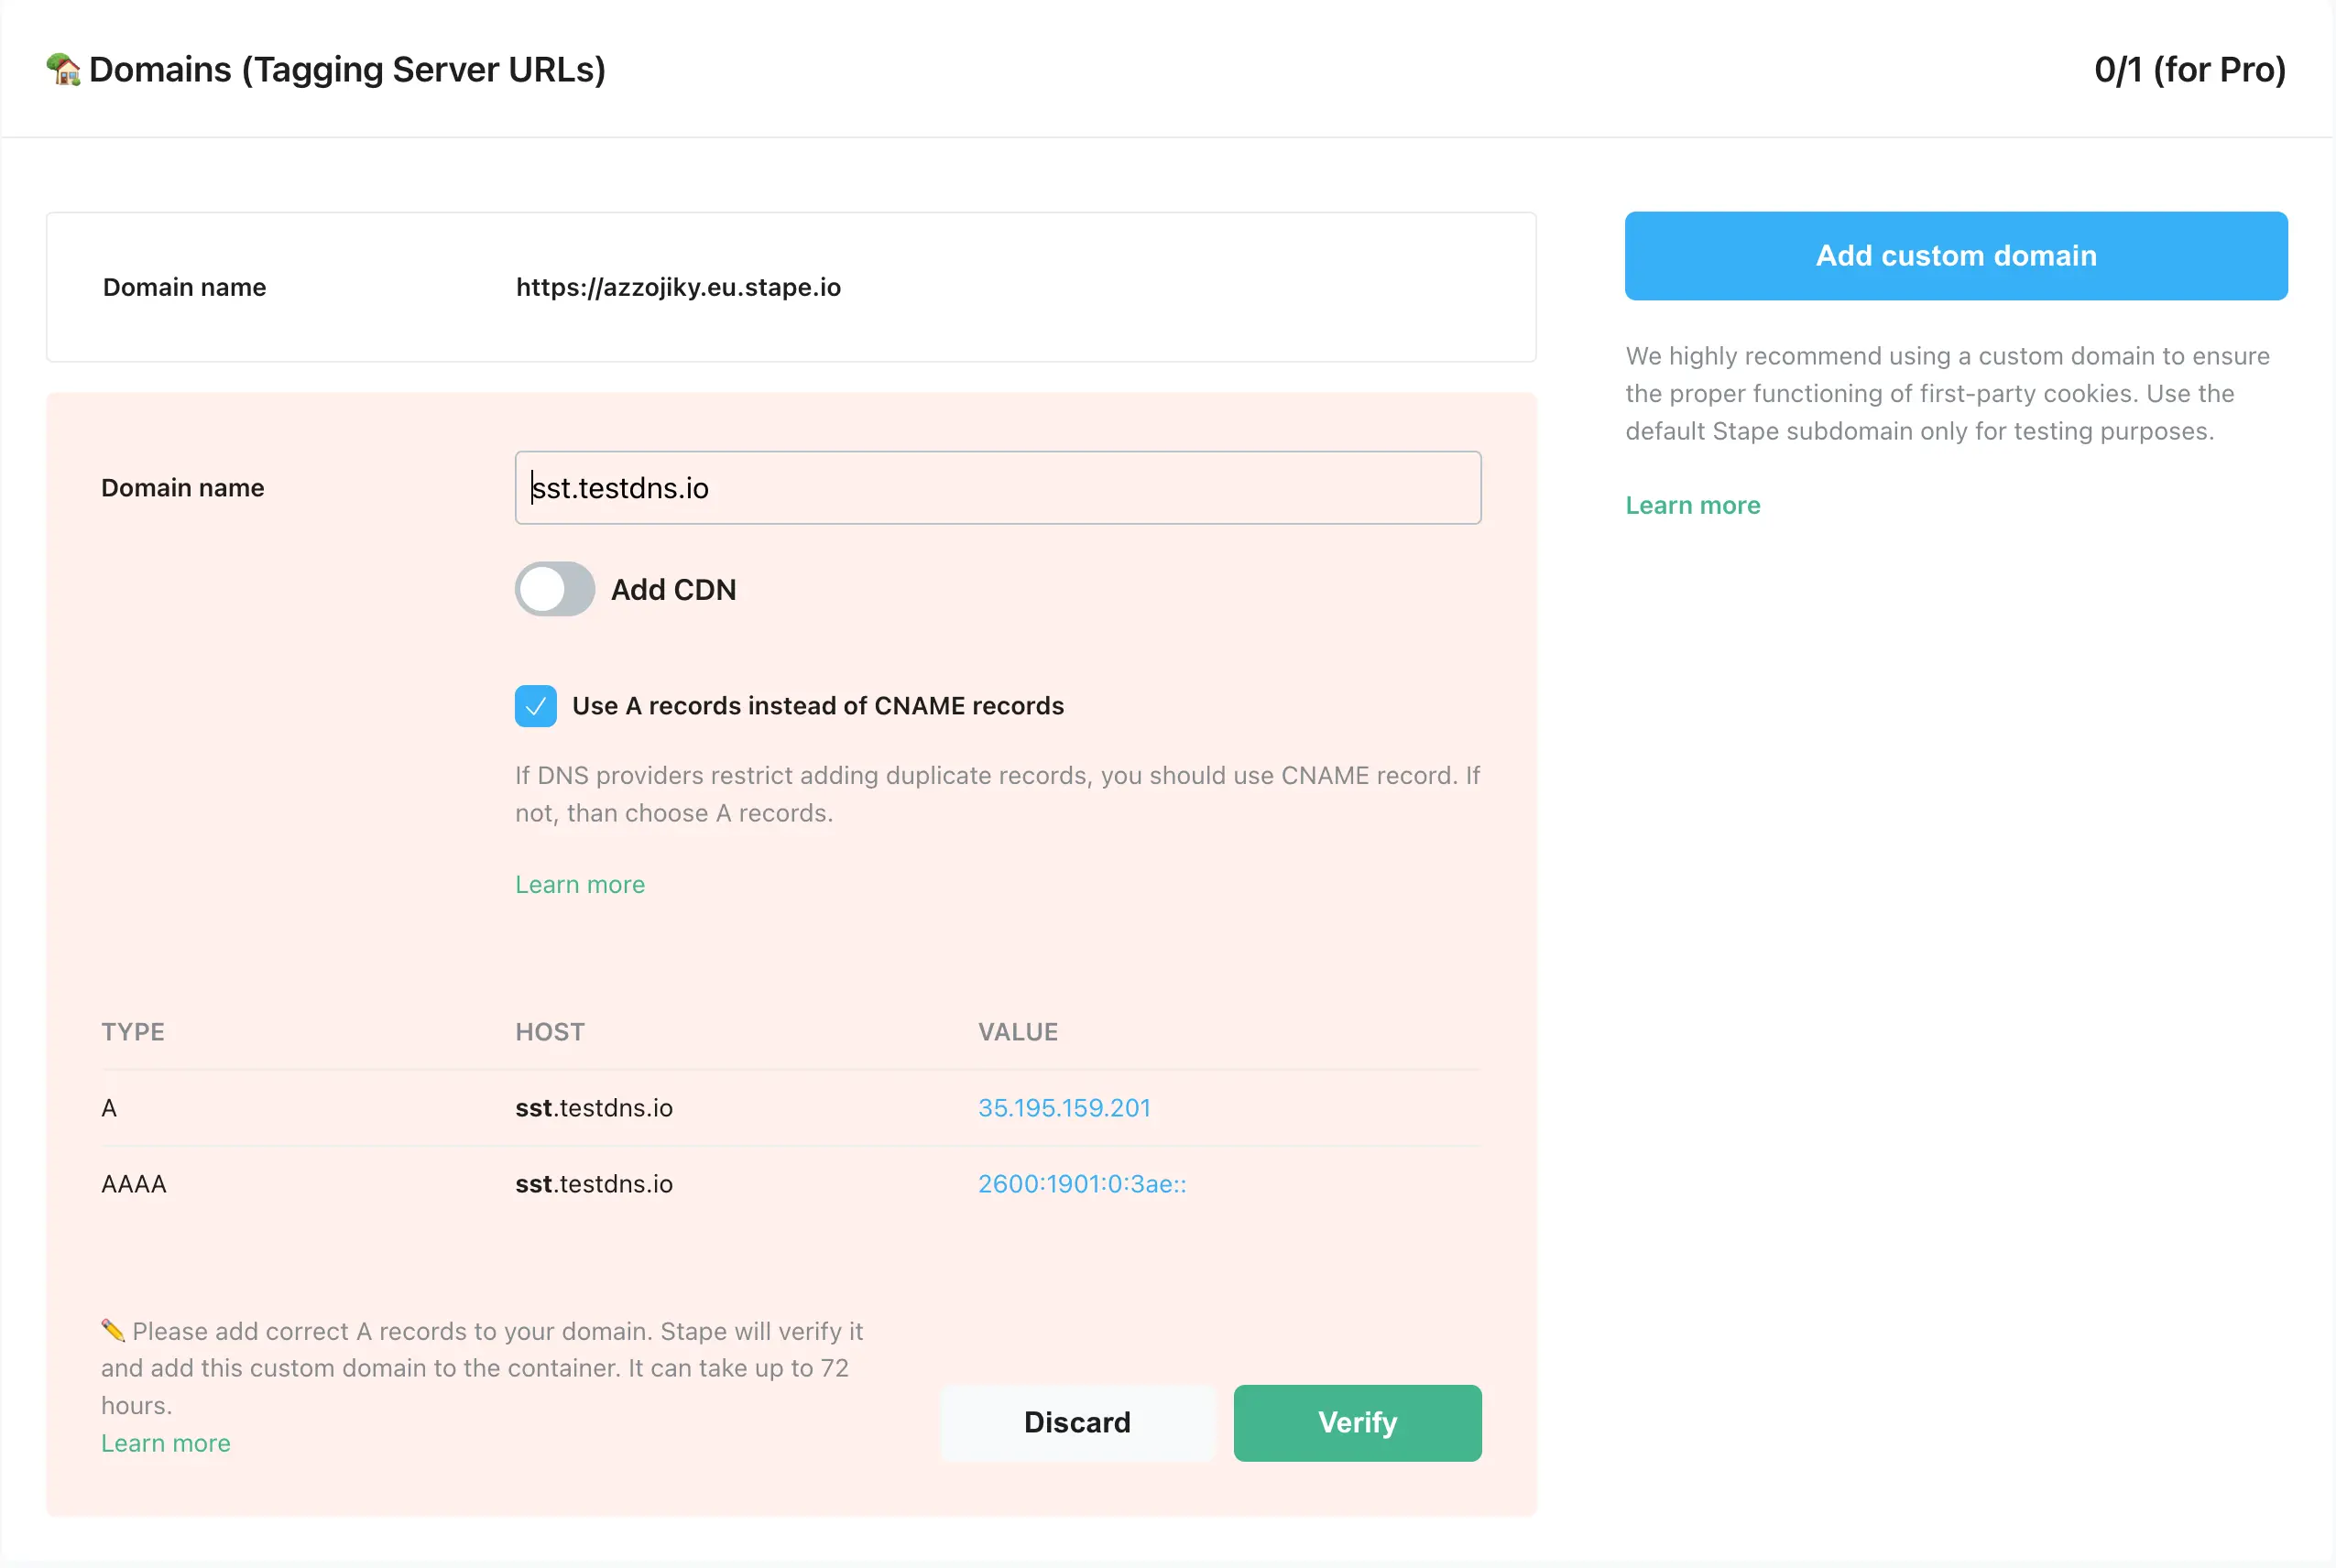
The DNS records you should configure vary depending on the server location and your selected CDN settings. You will see DNS records that you should add inside your stape.io container.
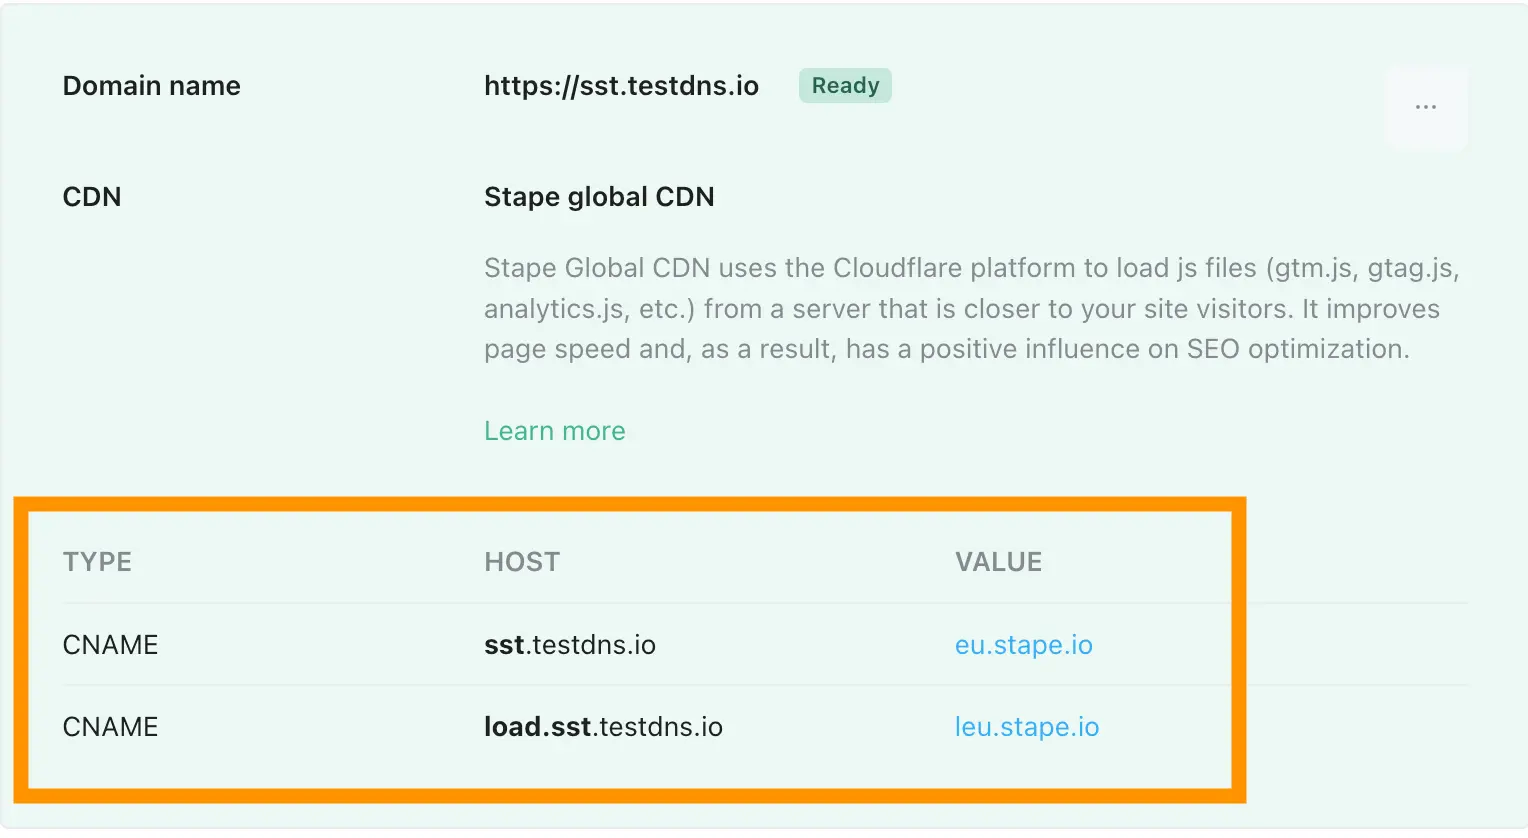
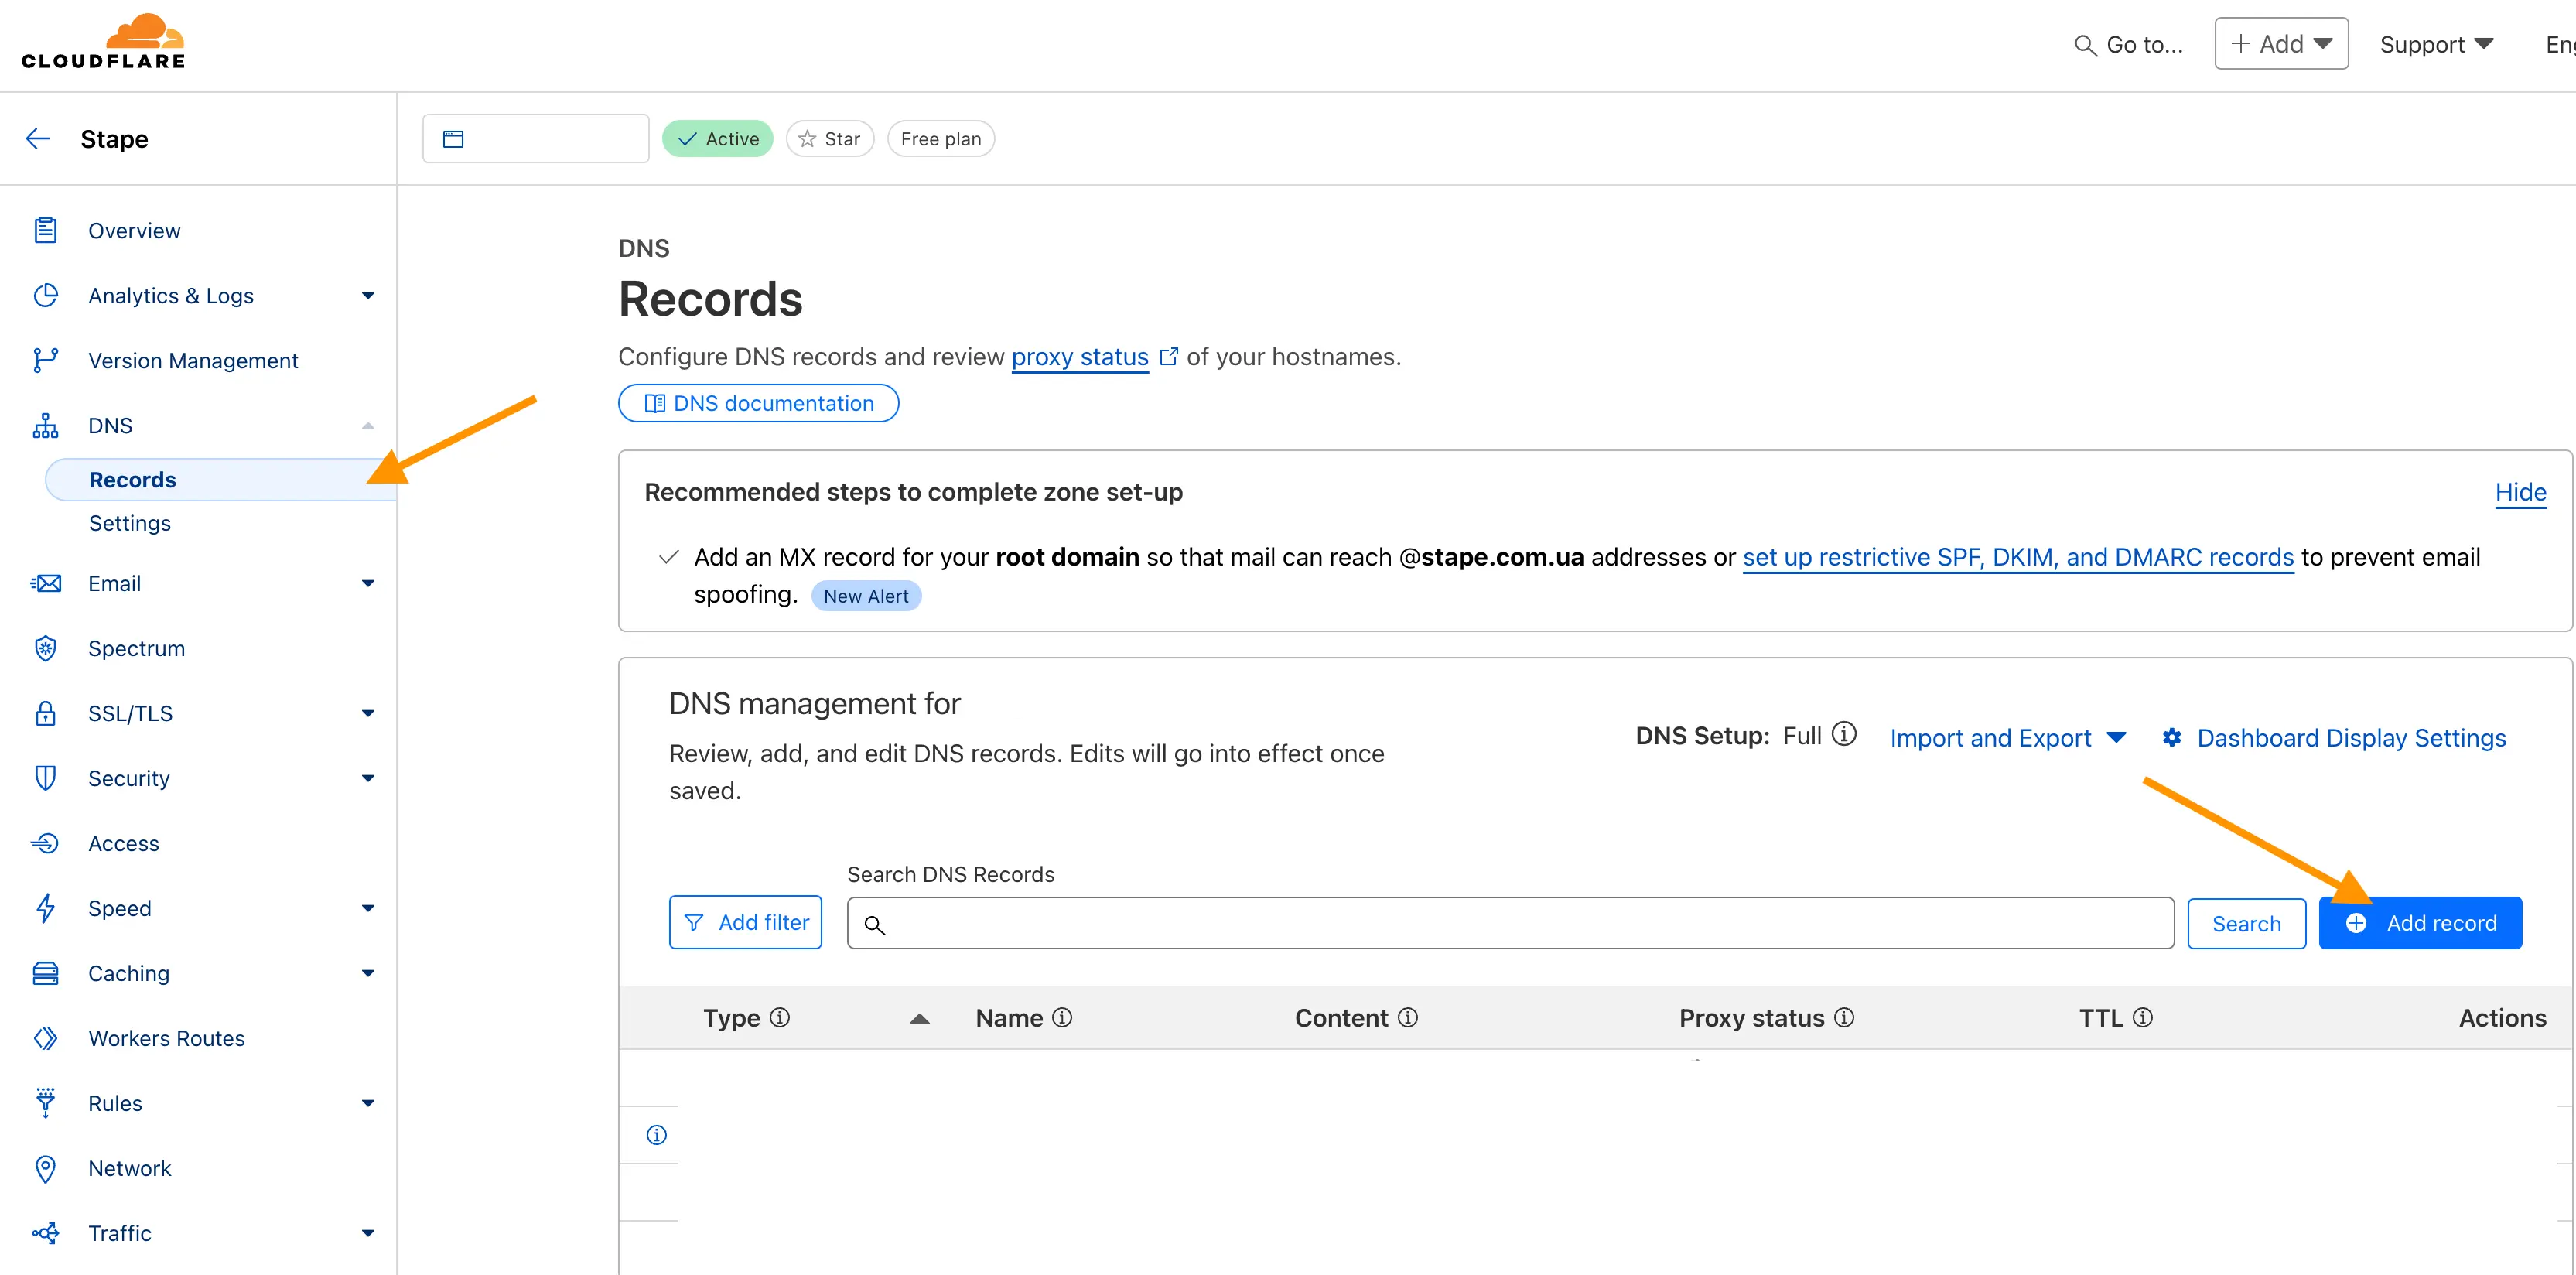
4. Log in to your DNS account and add the records you see in your stape.io account. Below is an example of the DNS setup for CloudFlare (check this blog post to see configuration details for other DNS providers). Open the DNS setting of the required domain and click Add record.
Then, write the records you see in your stape.io account. Ensure that the proxy is turned off.


Usually, it takes 2-3 hours to verify the custom domain. For some DNS providers, verifying records might take up to 72 hours. We will email you once the custom domain is verified or any error is detected. If there is an error with the verification, please follow this instruction on how to verify custom domain verification.
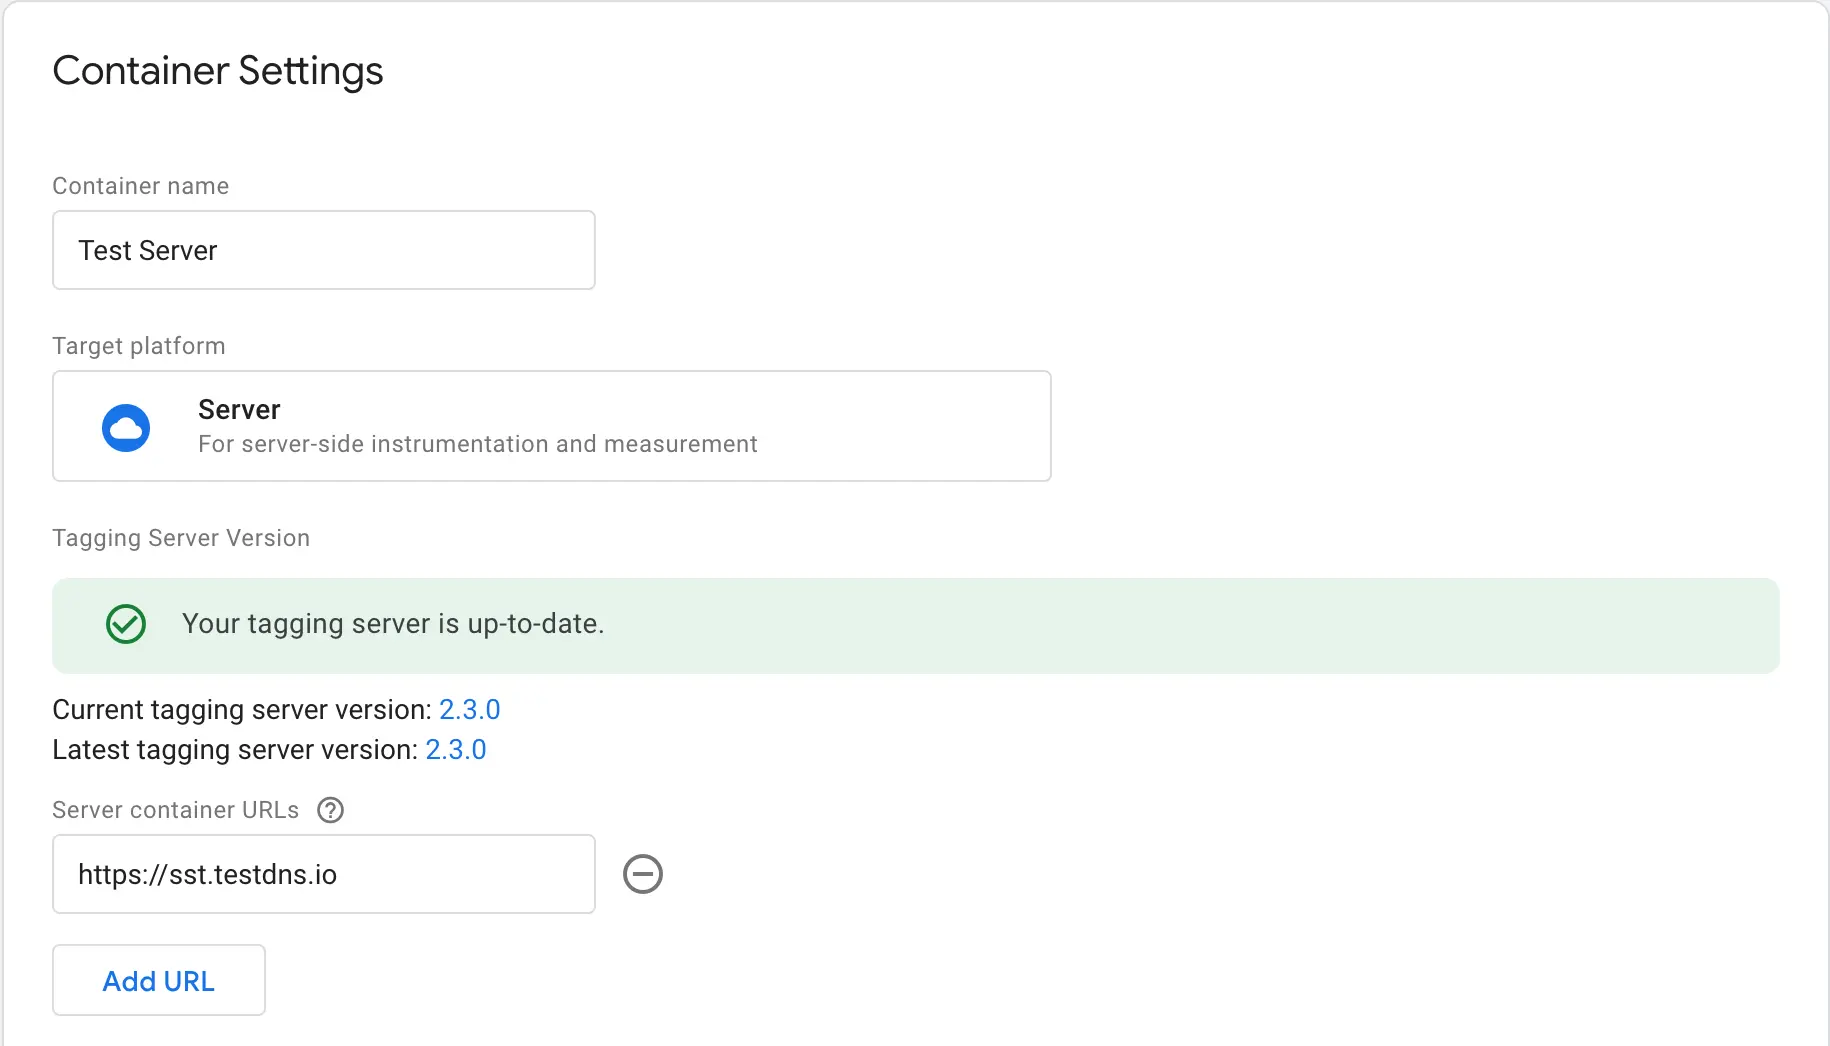
5. Once the custom domain is verified, go back to the Google Tag Manager Server container → Choose your server container → Admin → container settings → paste tagging server URL.
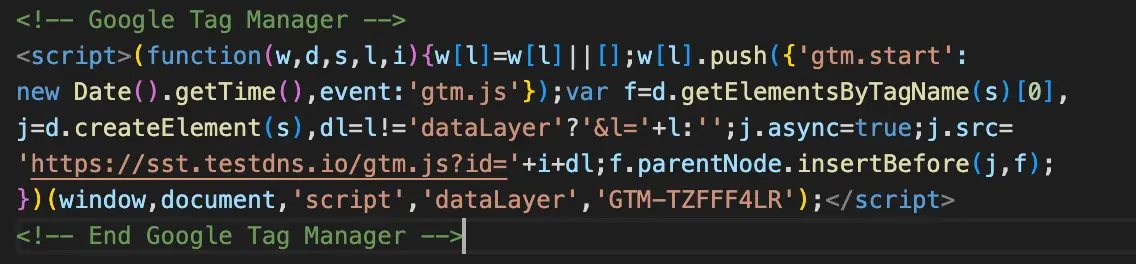
6. Updating the Web GTM script on your website is highly recommended. This tweak will load gtm.js from your domain. To do so, replace the default domain googletagmanager.com with the custom domain you set up in the previous step.
Comments