How to set up DNS configuration for Wix
Updated May 10, 2026
Your hosting provider manages all the DNS records, and you should add a record on the provider's side.
Before starting
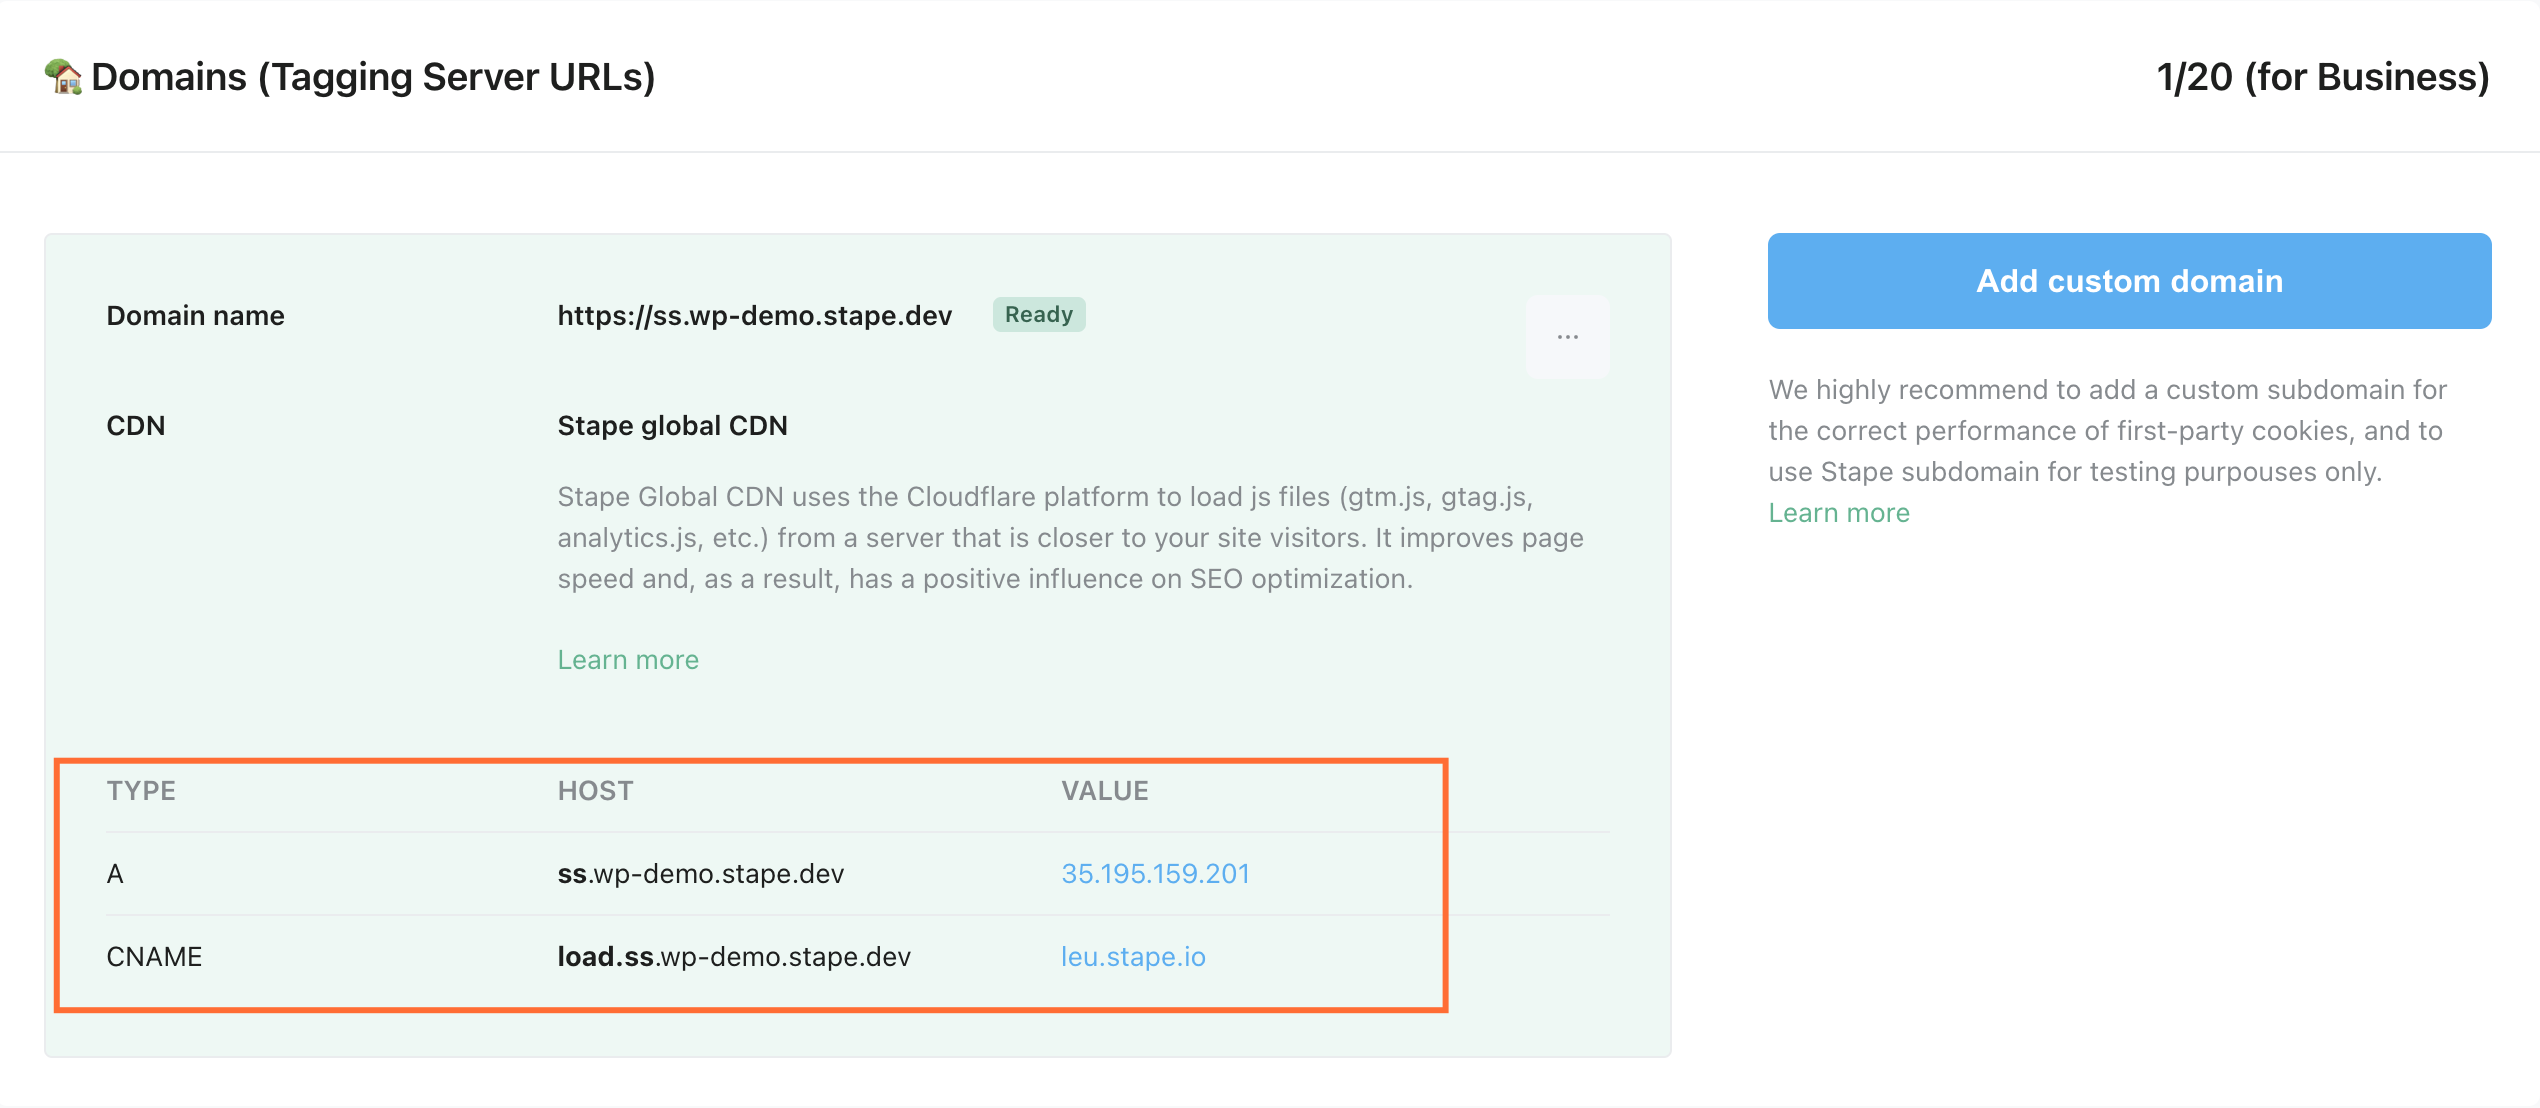
See the details required to create a DNS record
Go to Stape Admin → open container → click Settings → Domains (Tagging Server URLs). You will need data from columns Type, Host, and Value to create a DNS recording.
Configure DNS record for Wix
1. Log in to your Wix account and go to Domains.
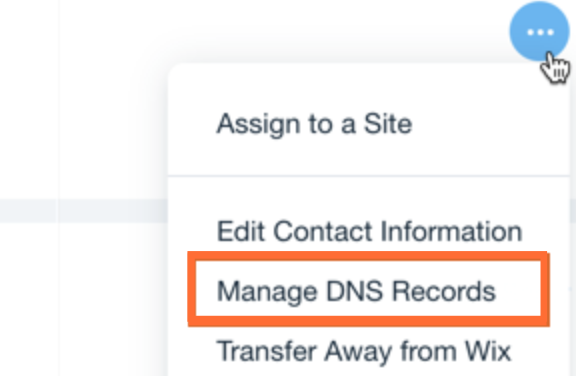
2. Click three dots (Domain Actions) → click Manage DNS Records → enter record type (A, CNAME, TXT) → Add Record.
3. Enter all the data required.
4. Click Save and then click Save Changes in a pop-up window.
For more details, please check Wix’s guide on configuring DNS records.
Check DNS records
DNS record verification usually happens within a few hours after adding the record but may take up to 72 hours in some cases.
To check if your record is verified, use Dig (DNS lookup):
1. Enter the hostname (without https:// and other extra characters)
2. Choose the type of report (e.g., A, CNAME).
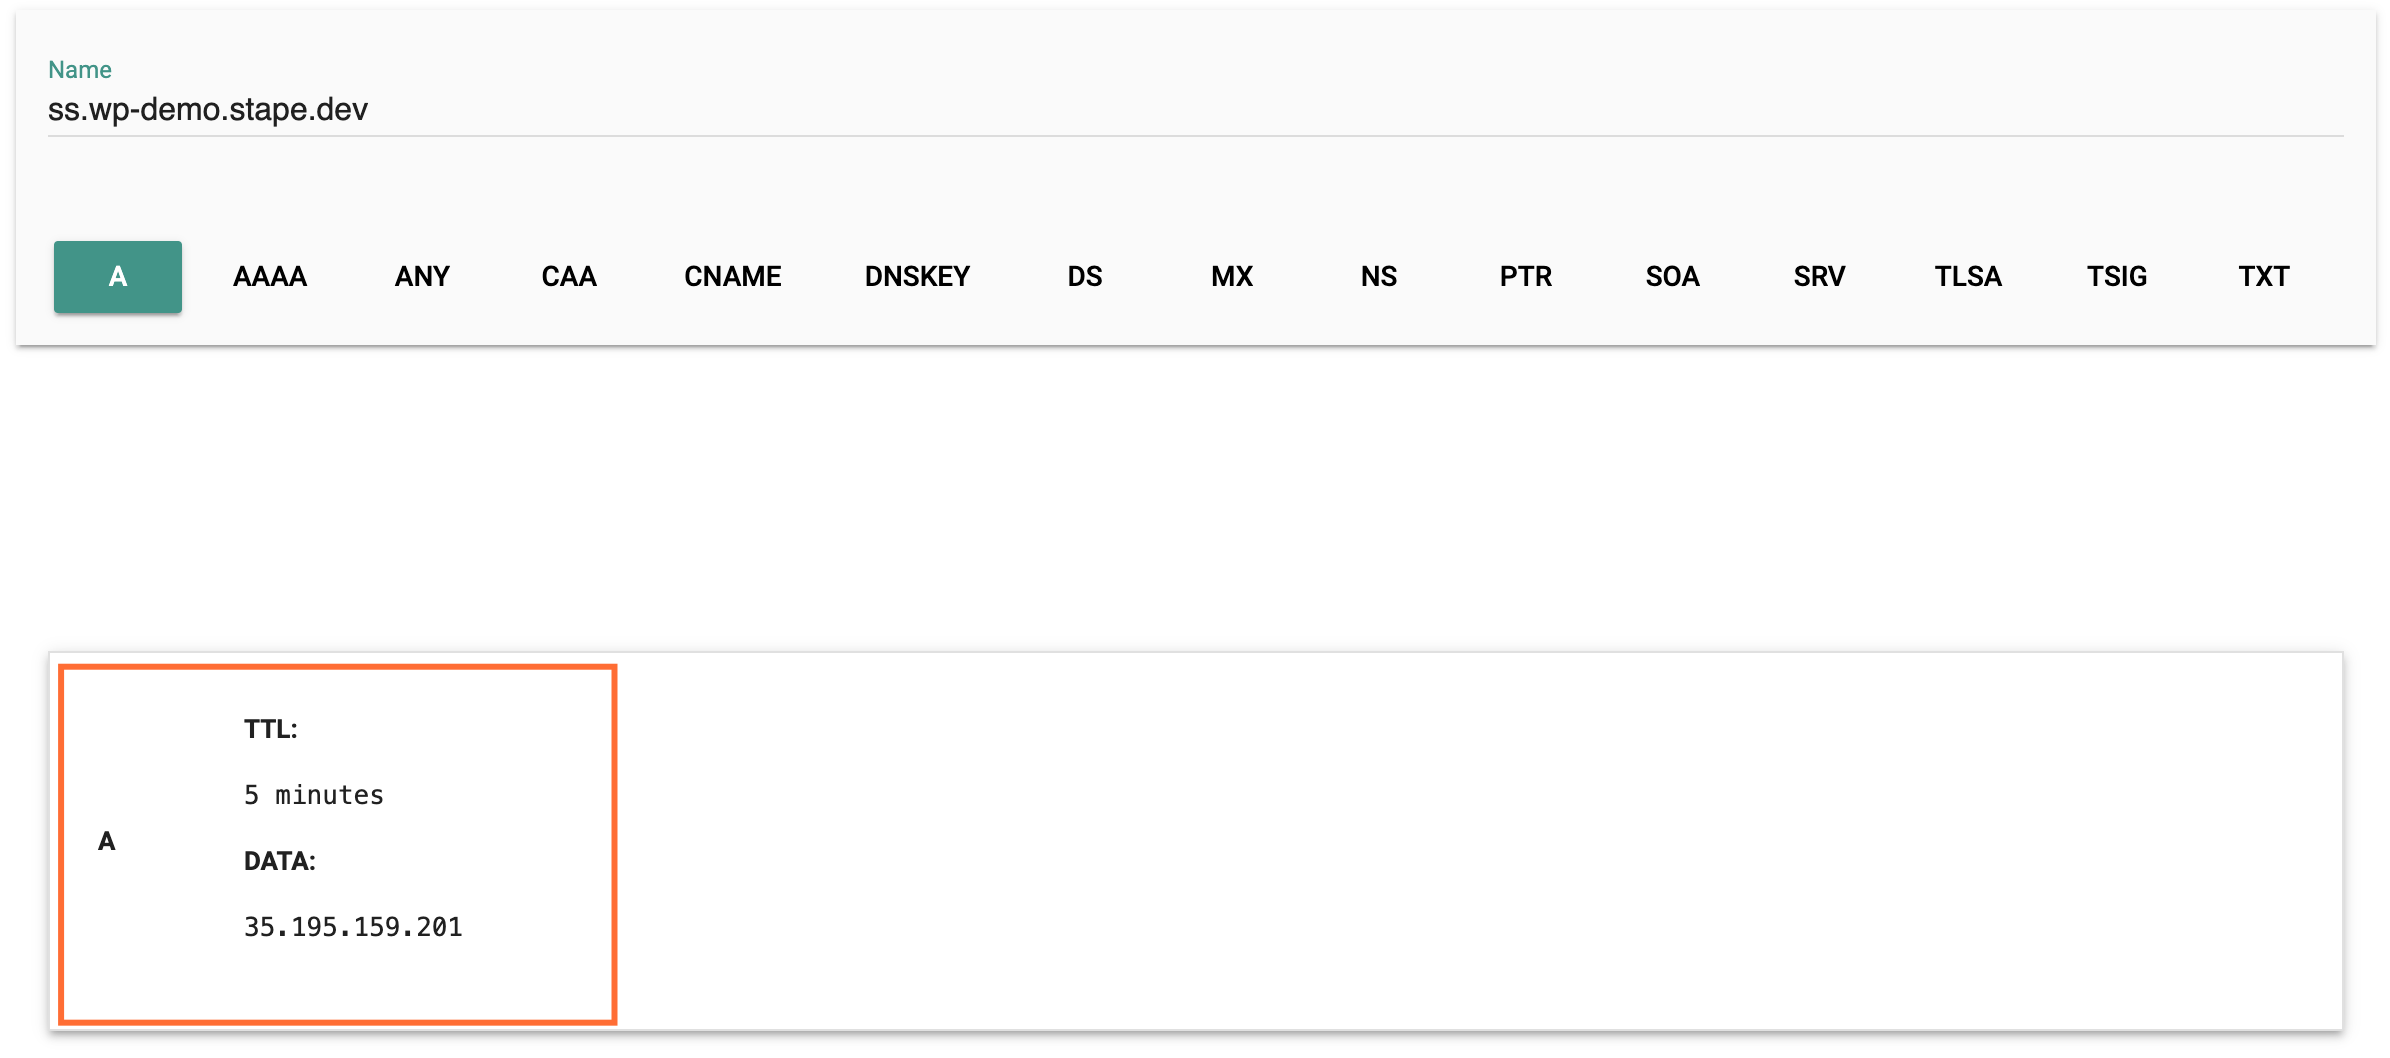
If the DNS record is verified, you will see TTL (Time to live) and Data on record, as shown in the screenshot below.
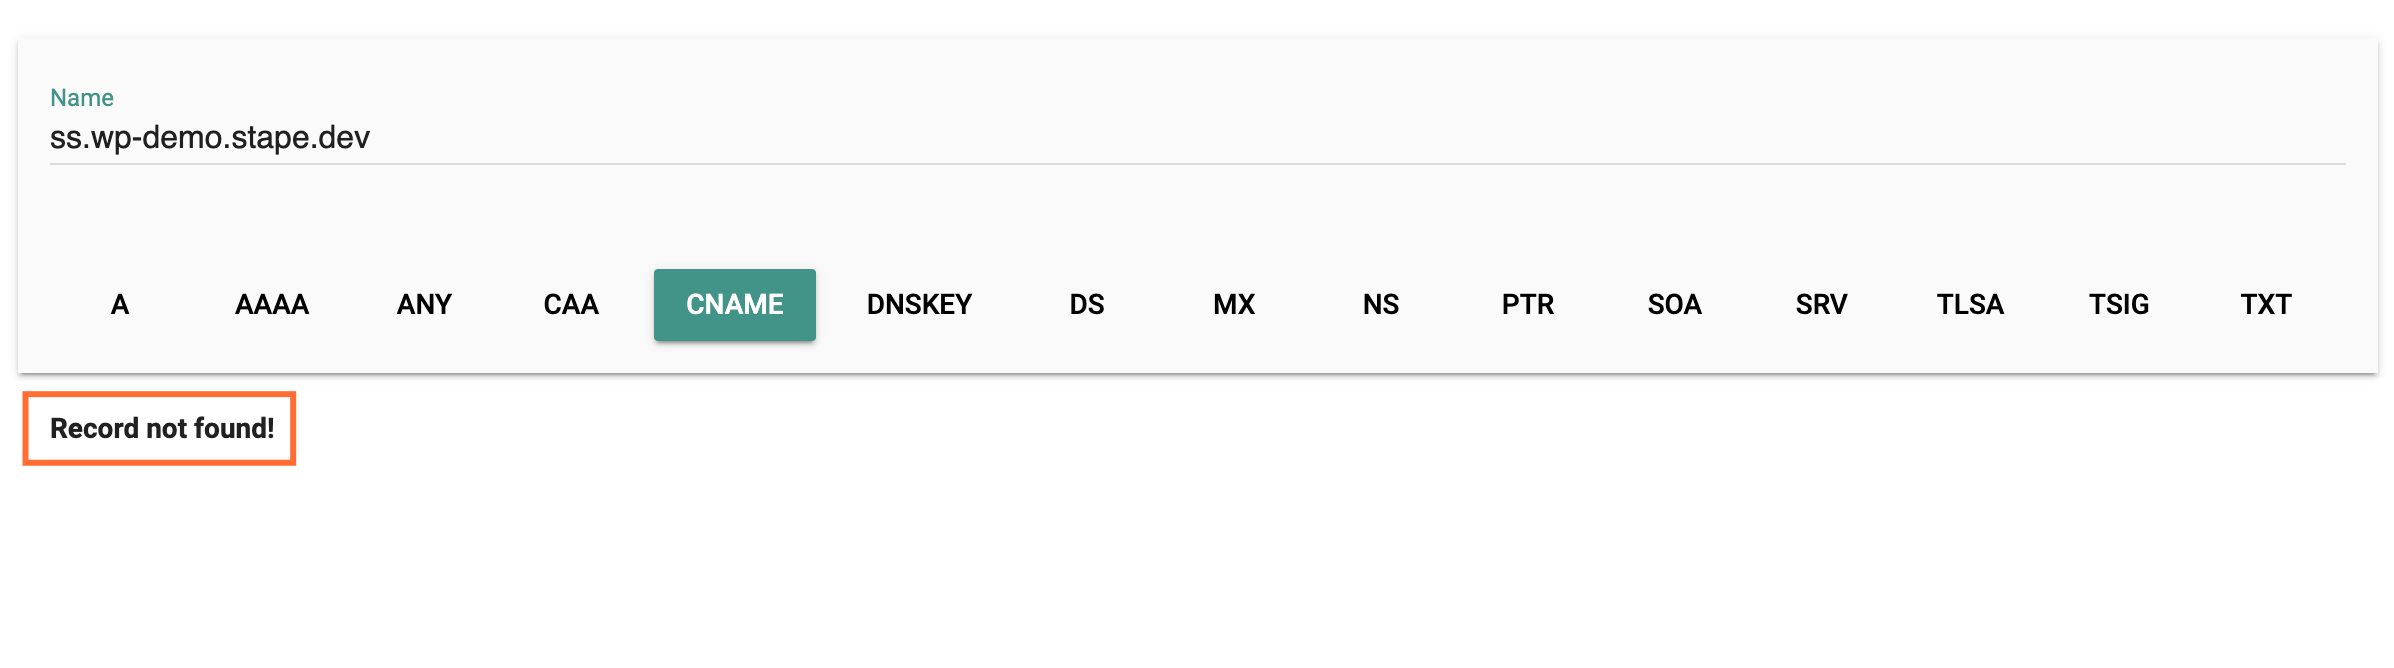
You will receive a Record not found message if the DNS record fails to verify (the screenshot below).
Troubleshooting DNS records for server-side tracking
If you encountered problems with DNS record verification, please see the section Main reasons why a subdomain is not verified in our other post.
Was this article helpful?
Comments