GTM Tools overview
Updated Aug 7, 2026
GTM Tools is a free tool for managing, auditing, and optimizing Google Tag Manager (GTM) containers. Originally created by Simo Ahava, it is now fully relaunched, maintained, and supported by Stape. The tool works directly with your Google account – you sign in with your Google credentials, pick a GTM account, and get instant access to a collection of container management tools. Any changes that you make in the tool are synced with GTM.
GTM Tools allows users to:
- Clone entire container configurations across accounts for faster setup and templating.
- Edit asset JSON directly in the browser without exporting or re-importing files.
- Audit containers by visualizing dependency paths and identifying "hermit nodes" – unused assets that can be safely removed to improve container size and page load performance.
You can use the following tools for managing GTM containers:
- Visualize – generates a visual map of your container, showing how every asset connects – great for debugging or explaining a setup to a client. For more information read How to use Visualize tool.
- Clone – duplicates a container version into your current account or another GTM account. For more information read How to use Clone tool.
- Workspace Mode – lets you edit, pause, rename, and mass-update assets (including JSON) directly from the tool, plus manage and update server-side Client templates. For more information read How to use Workspace Mode tool.
Note:
How to find GTM Tools
- Go to gtmtools.com.
- Sign in with your Google account that has access to your GTM container.
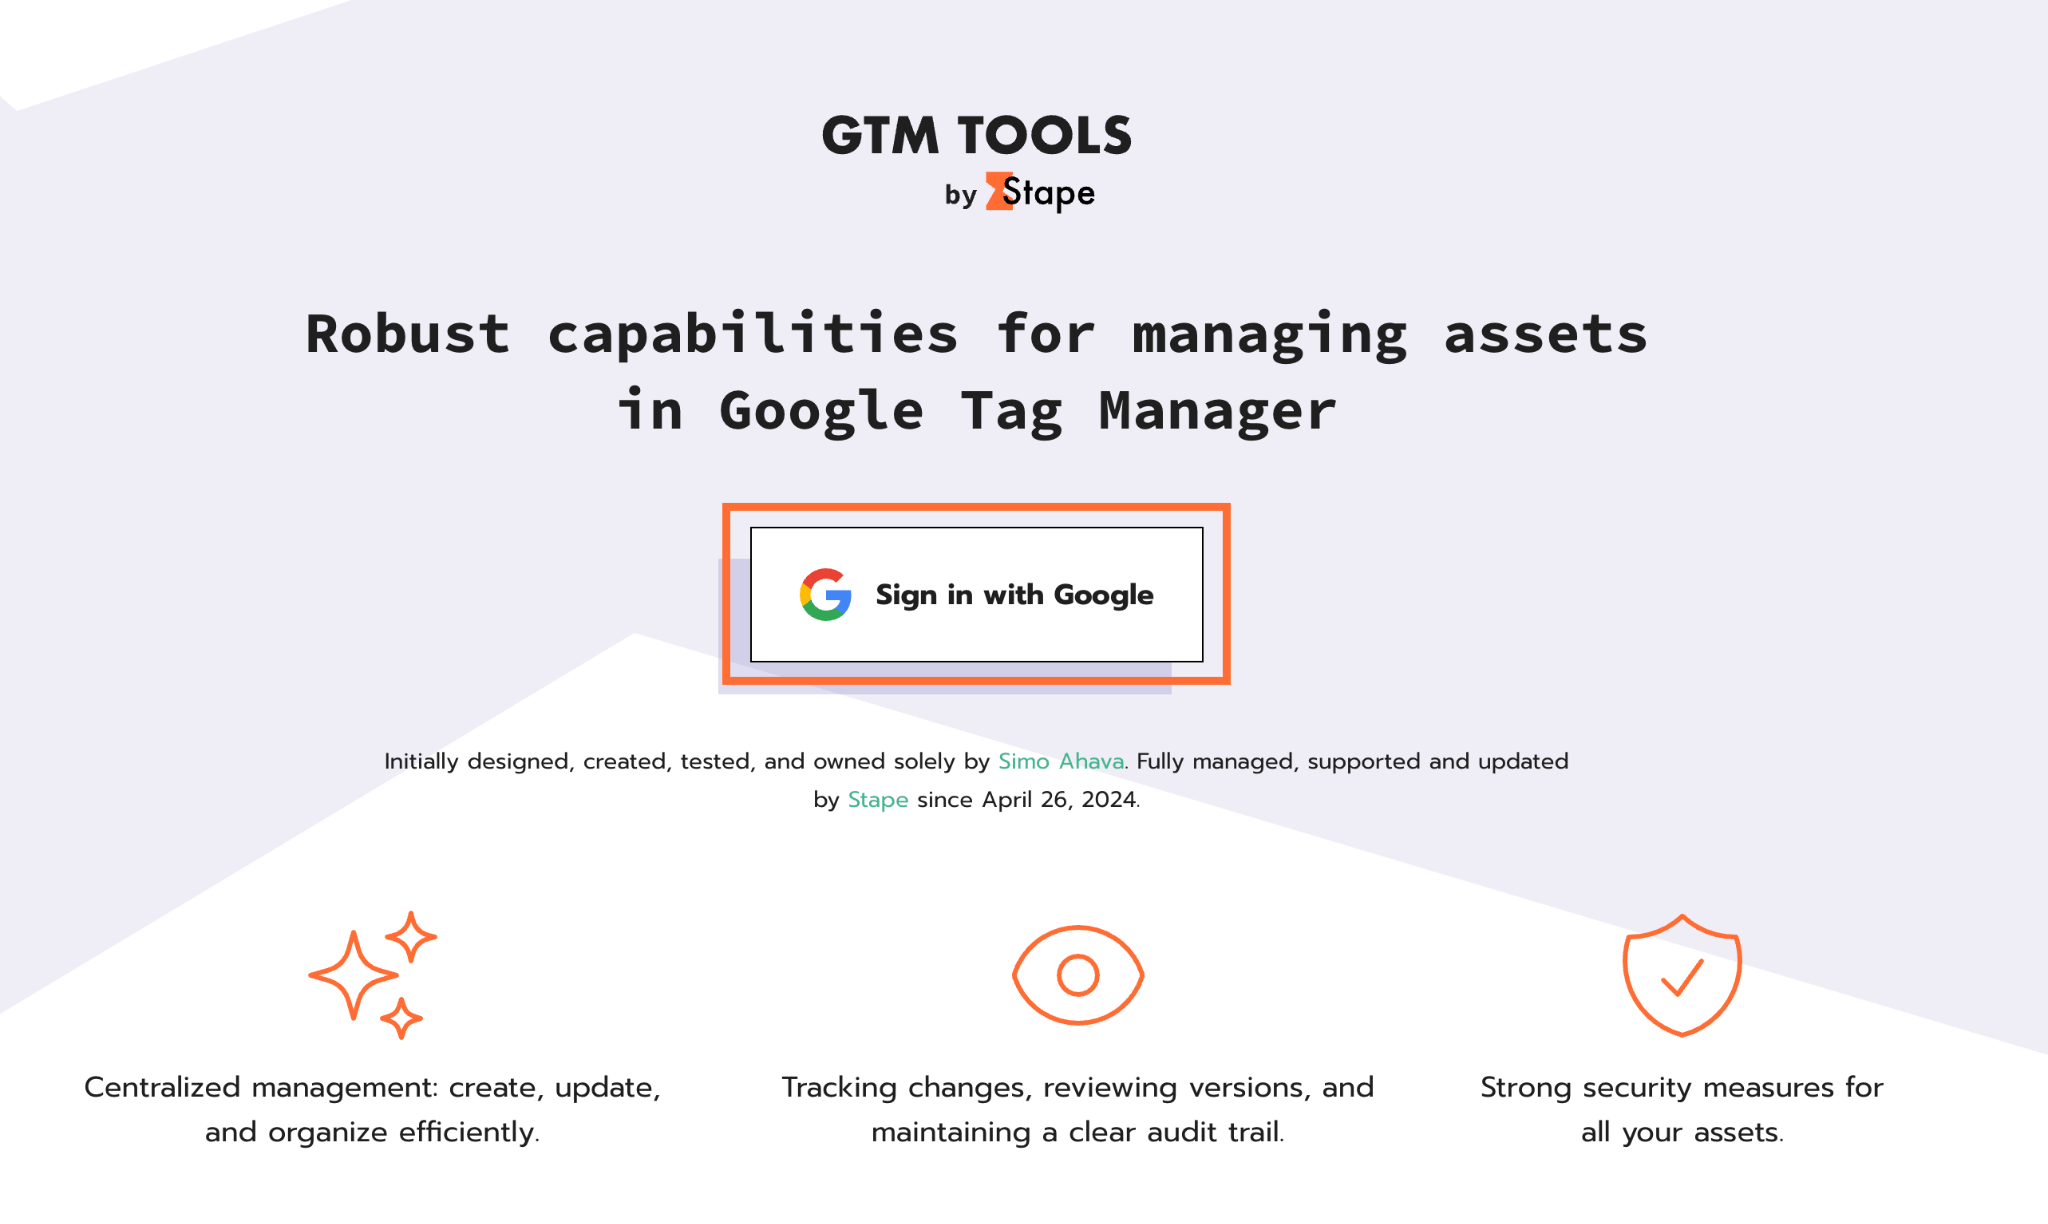
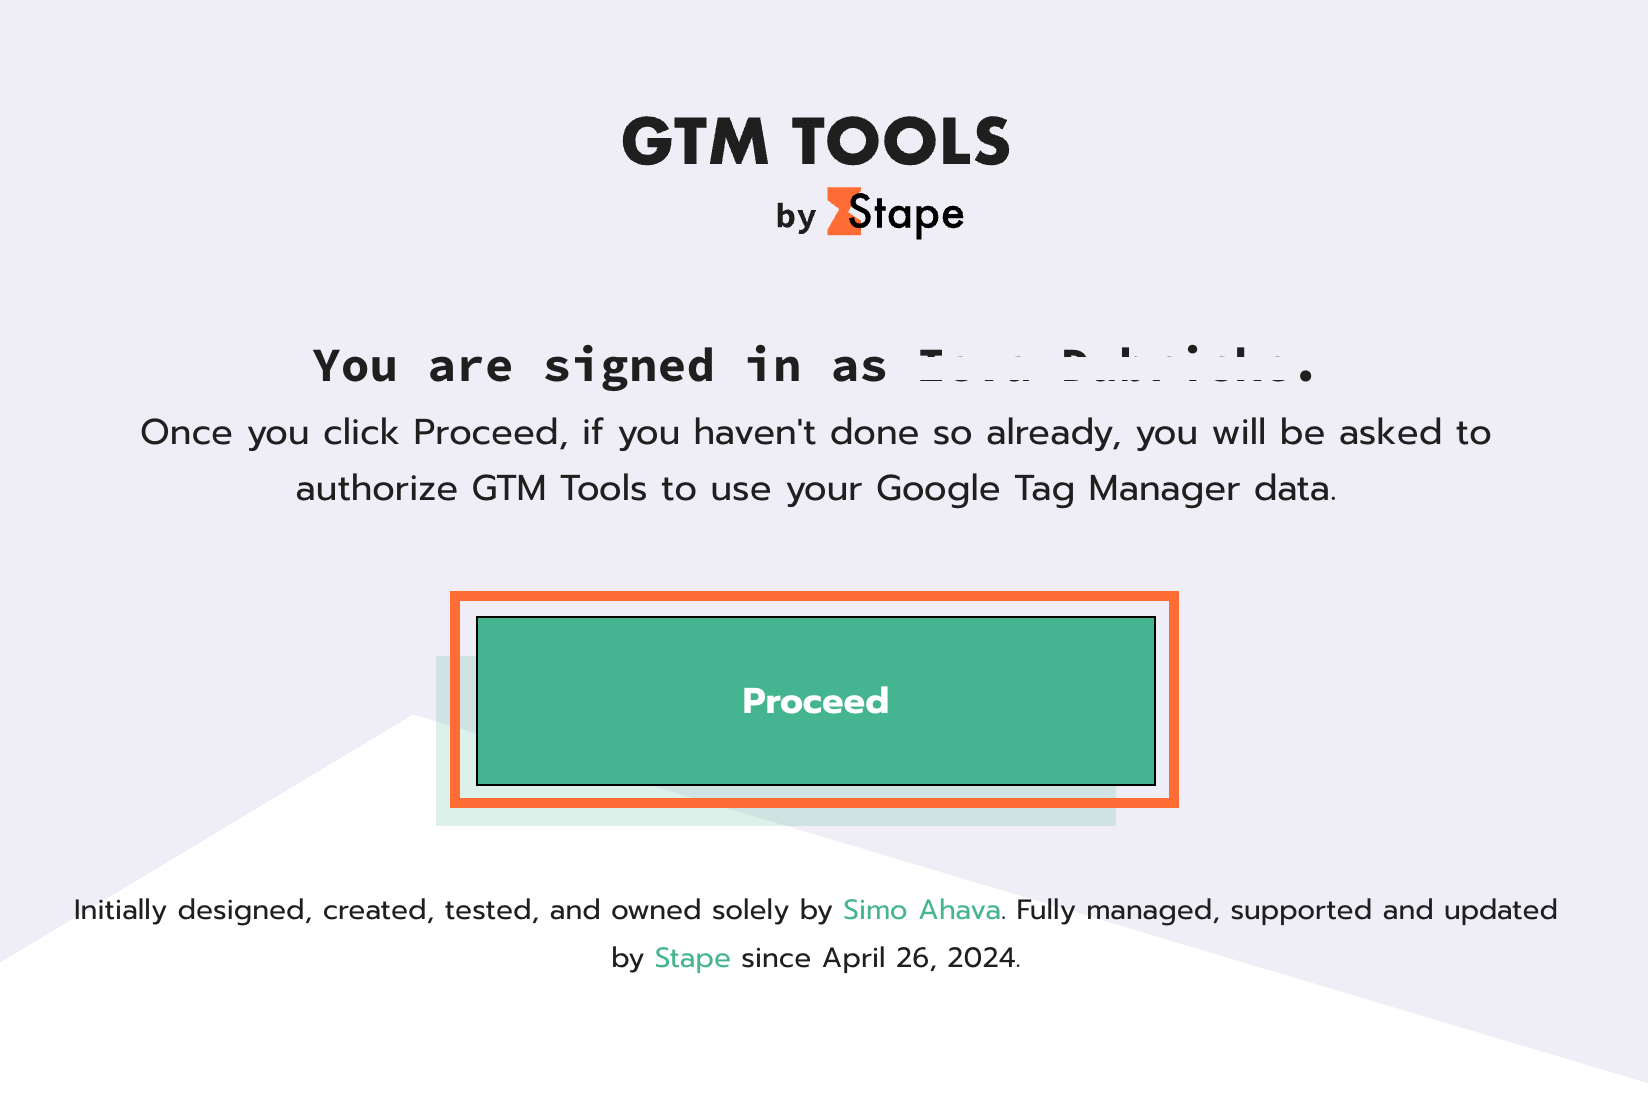
3. Click Proceed and allow the GTM Tools to access your containers.
Dashboard
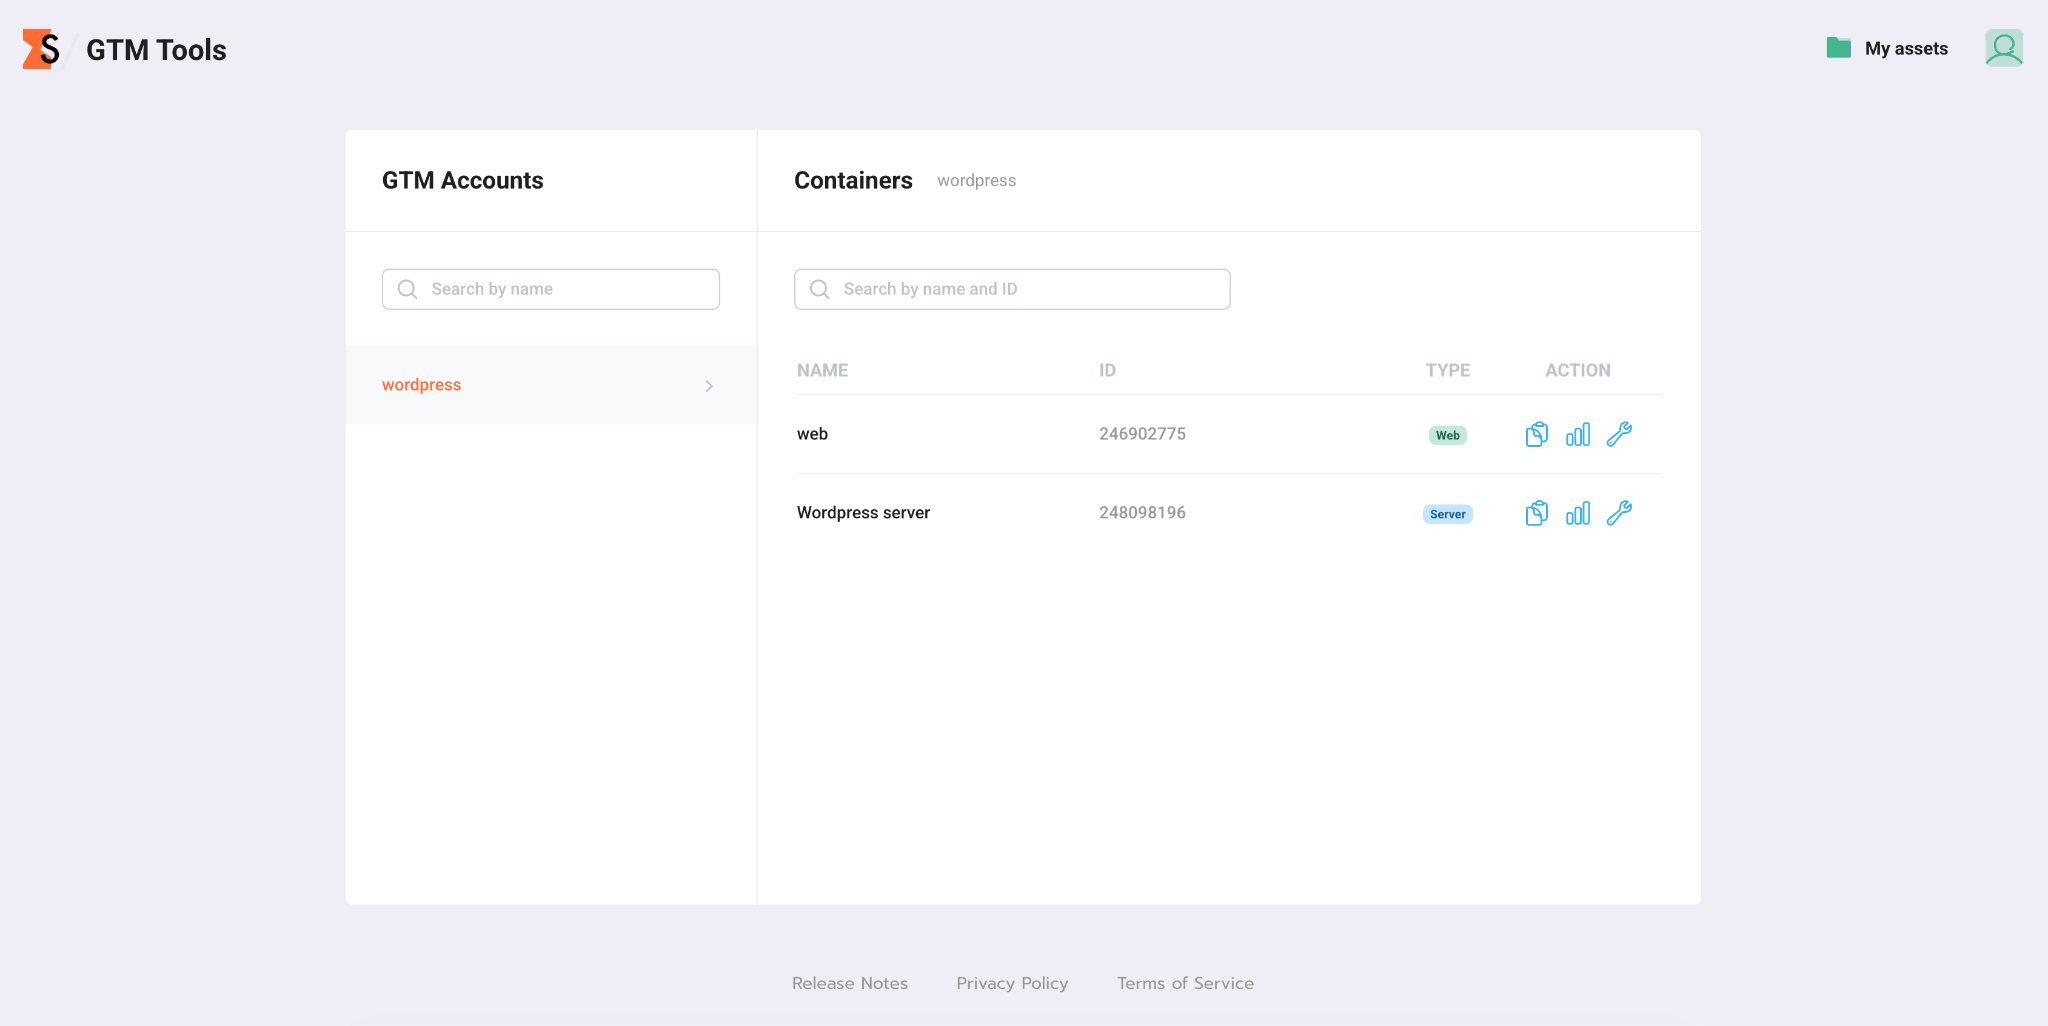
After signing in with your Google account, you can see the main GTM Tools dashboard, which is split into two sections:
- GTM Accounts – lists every GTM account connected to your signed-in Google credentials, with a search field to filter by name. Select an account to load its containers in the right panel.
- Containers – displays all containers belonging to the selected account, with a search field to filter by name or ID. Each container is listed with:
- Name – the container's display name.
- ID – GTM container ID.
- Type – a badge indicating whether it's a web or server container.
- Action – use these quick-access icons to clone, visualize, or inspect your container, allowing you to jump directly into the Clone, Visualize, and Workspace Mode tools.
At the top of the page you can find My assets and a profile icon. My assets is a workspace where you can manage your standalone saved GTM assets and build customized container collections. For more information read the My assets chapter.
If you click on a profile icon, you can either go to your Google account, or revoke GTM access.
At the bottom of the page you can find Release notes, Privacy policy, and Terms of Service.
Inspect container
Click on your desired container to see its detailed view. Here you can see the container's contents and manage them as you need.
The view is organized as follows:
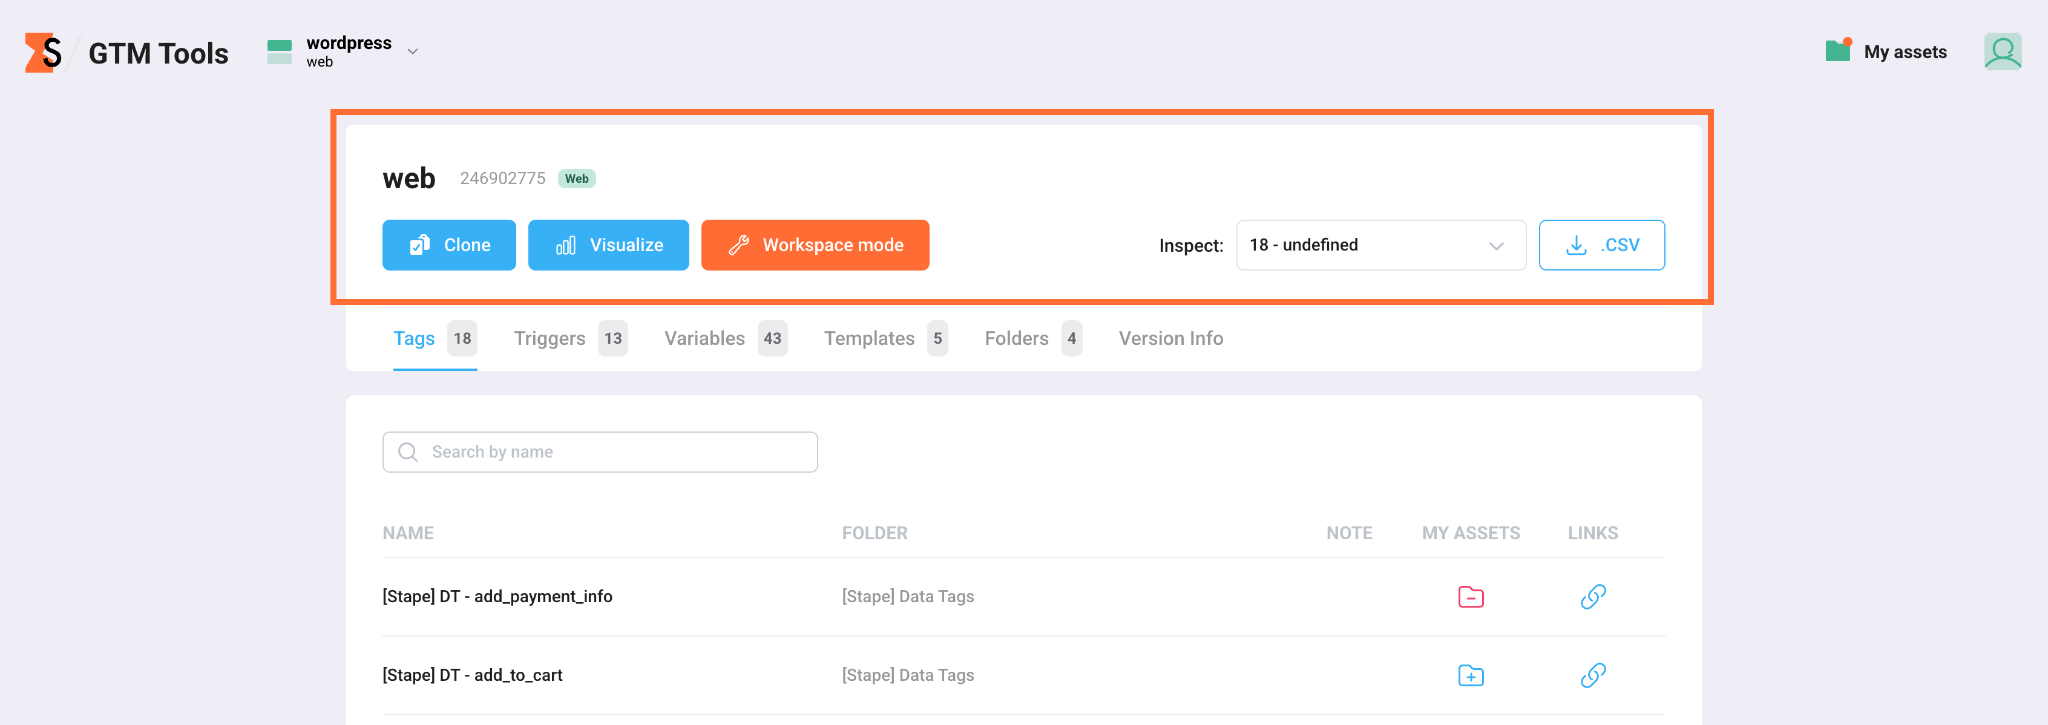
- Header – shows which account and container you're currently viewing, with a dropdown to quickly switch containers without going back to the dashboard.

- Container summary – displays the container's name, ID, and type badge, along with three buttons:
- Clone – duplicate this container's contents to another container or account. For more information read How to use the Clone tool.
- Visualize – generate a visual map of the container's tags, triggers, and variables. For more information read How to use Visualize tool.
- Workspace mode – enter edit mode to make and apply changes directly to GTM. For more information read How to use Workspace mode tool.
To the right, an Inspect dropdown lets you select which container version to inspect. By default, the latest version is selected.
Click the .CSV button to export the current view's contents.
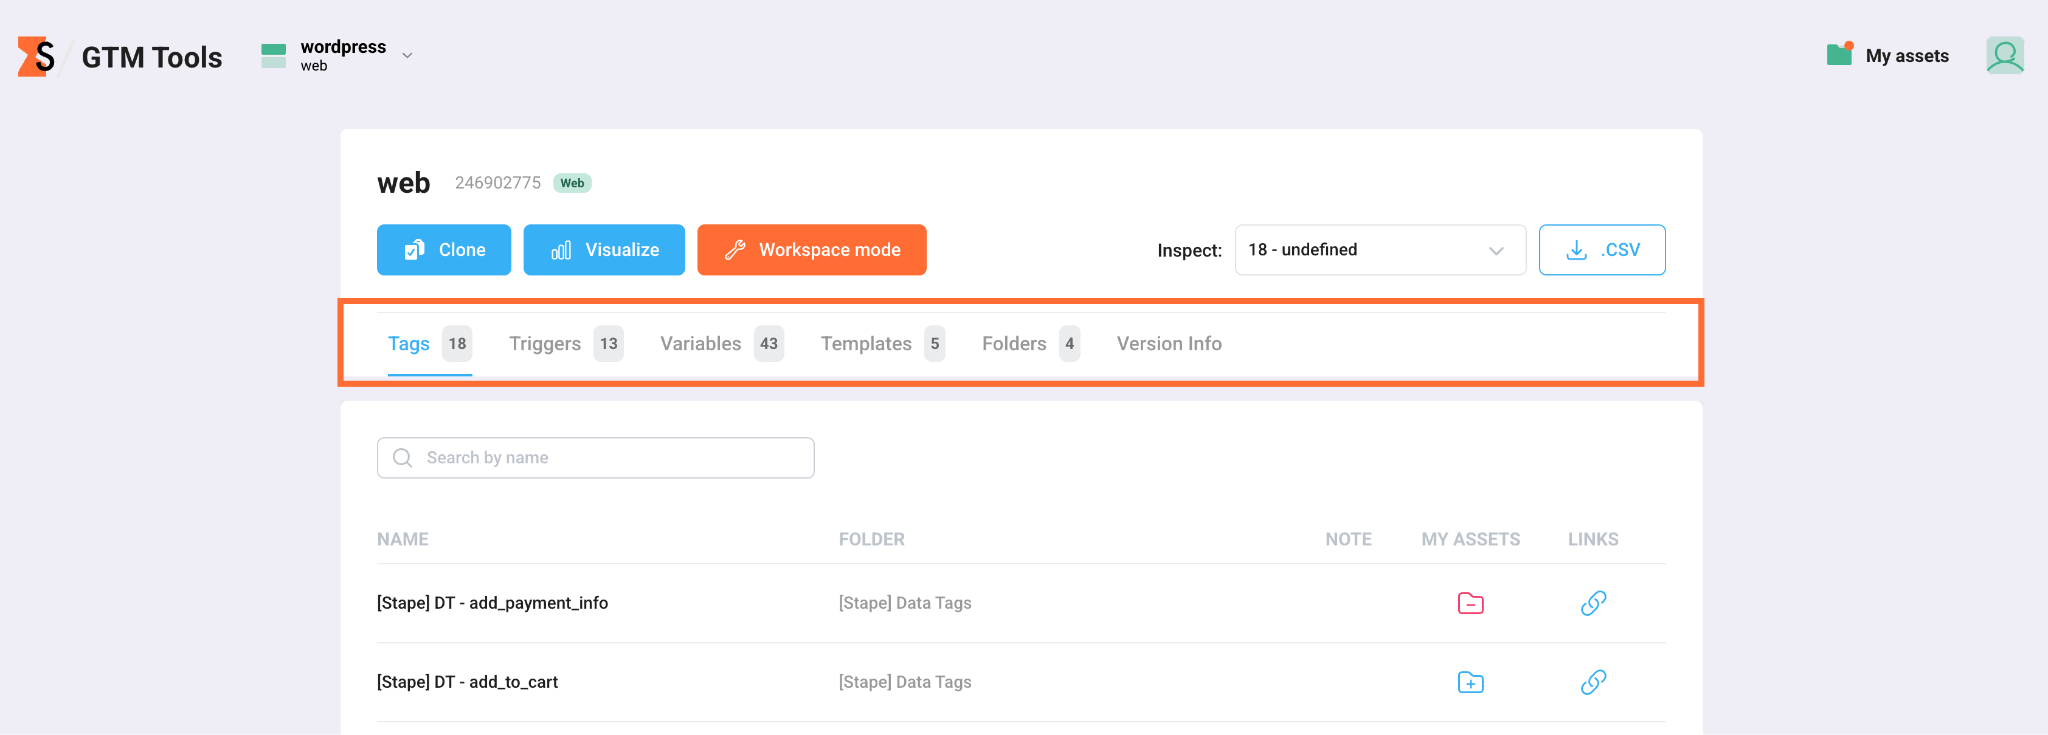
- Asset tabs – below the summary bar, the container's contents are broken into tabs, each showing how many specific assets a container has. Also, by clicking on the Version info, you’ll see some specific data about the container’s version.
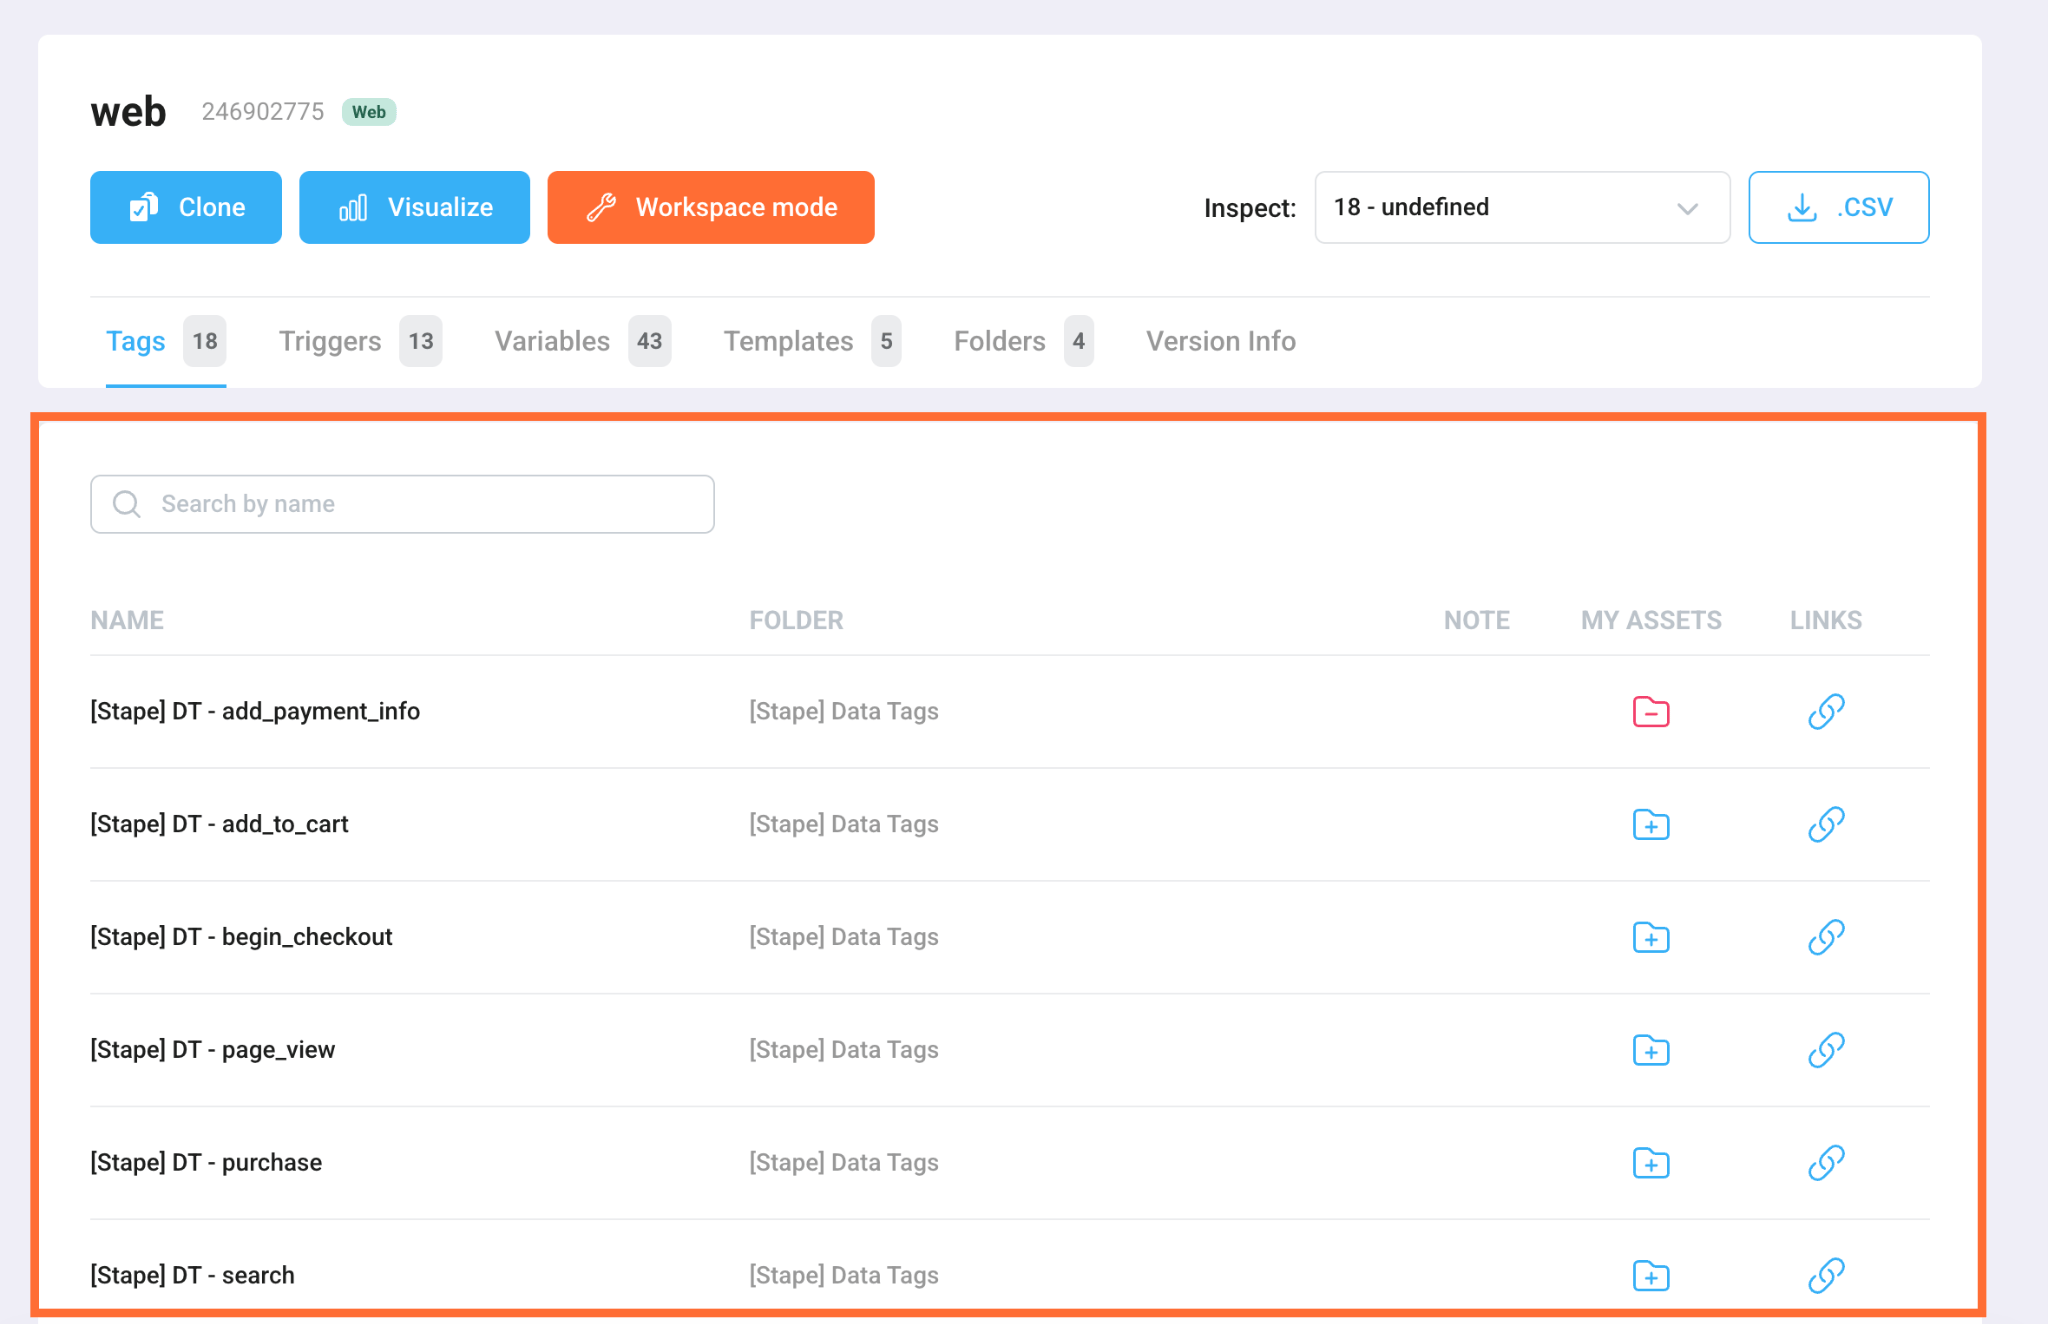
- Asset list – with any tab selected, a searchable table lists every asset in the container, with columns for:
- Name – the asset's name.
- Folder – which folder the asset is organized under.
- Note – any notes added to the asset.
- My assets – click an icon to save/remove the asset to/from your personal asset library.
- Links – click an icon to view the asset's dependencies/connections to other assets.
My assets
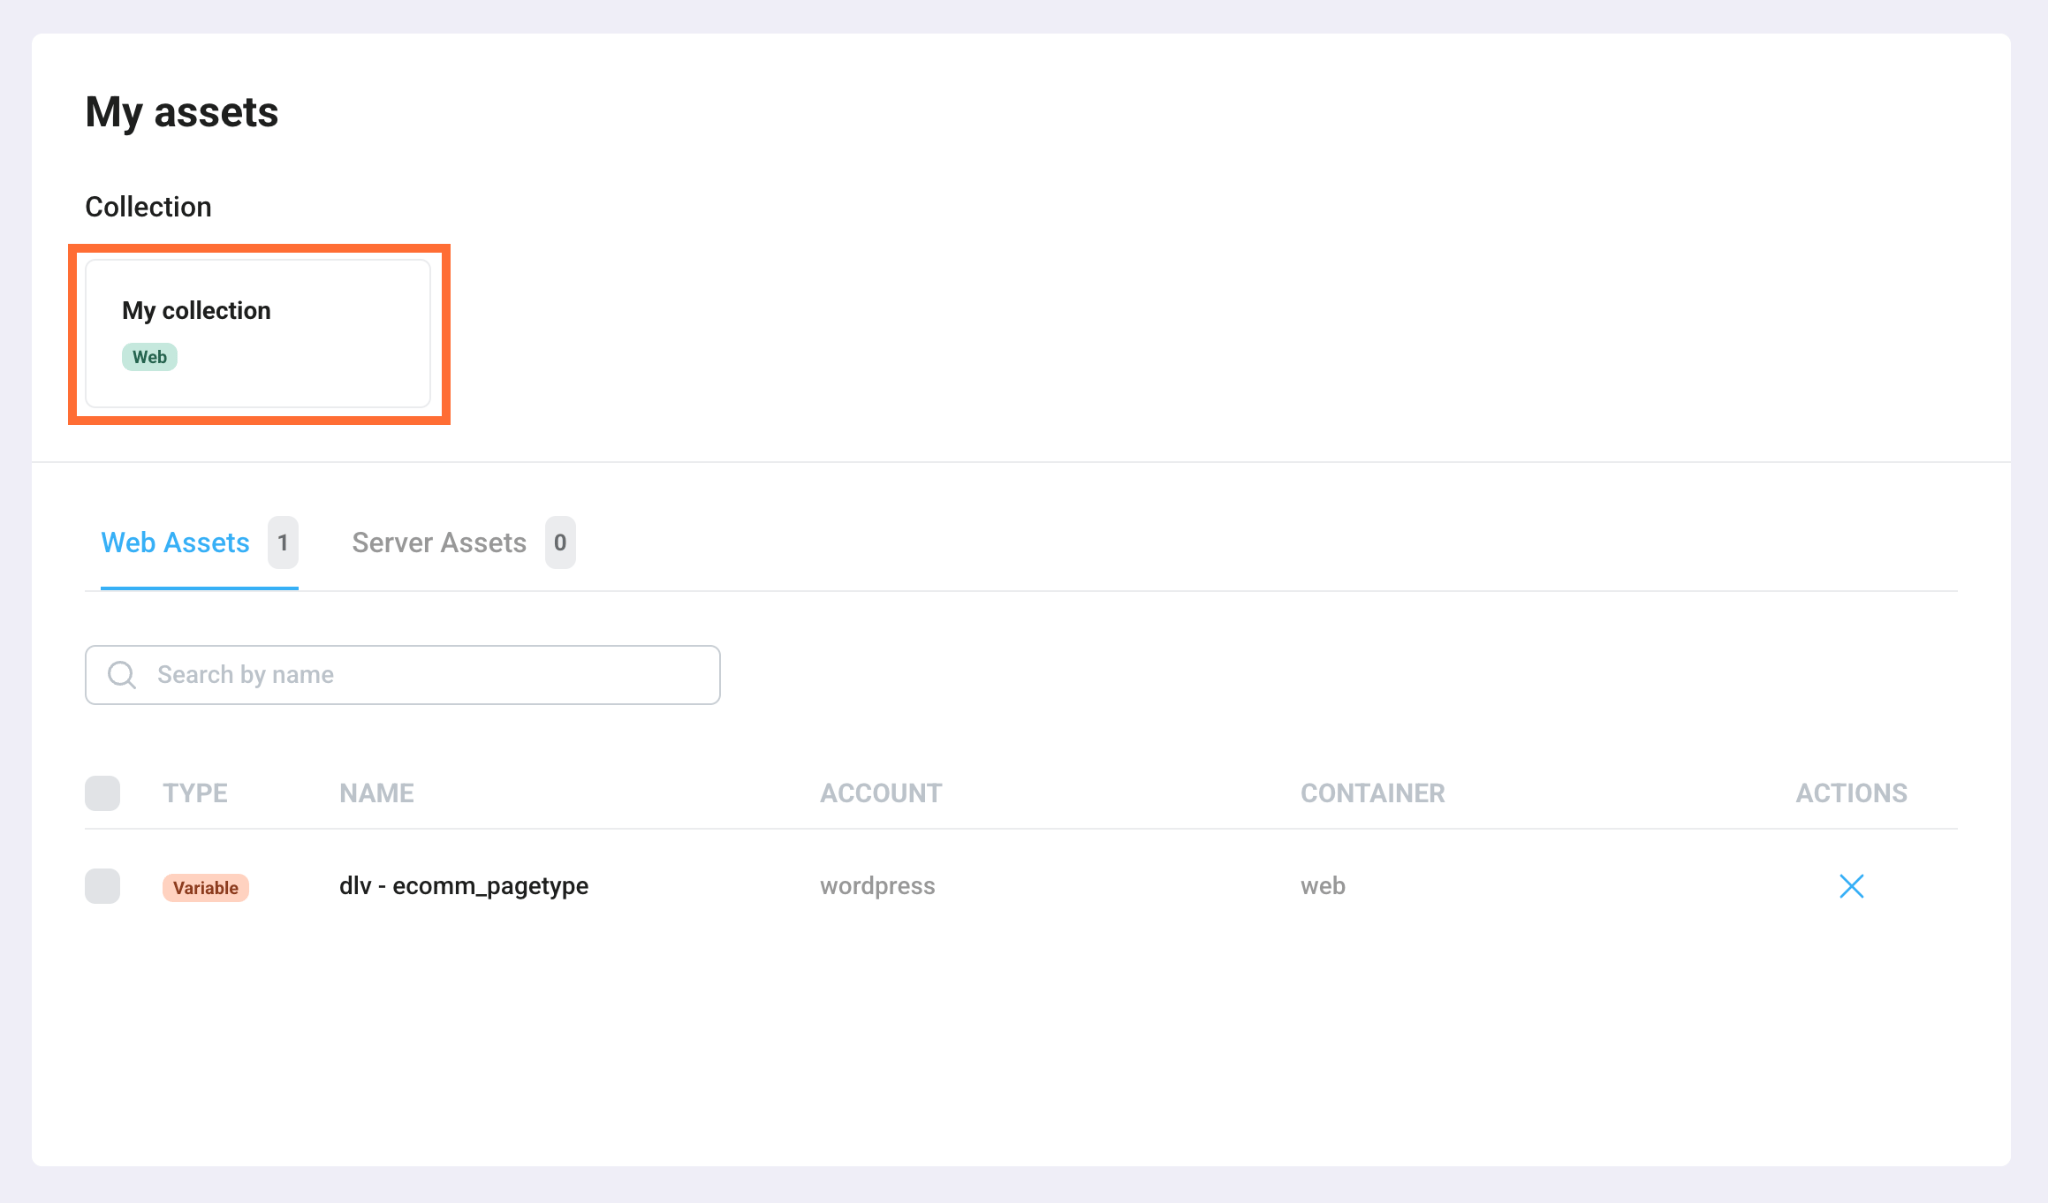
In the top-right corner, click the My assets icon and you’ll be redirected to a workspace, where you can access all your saved assets and create collections.
This is what you can do in this area:
- Cherry-pick specific assets – instead of cloning an entire GTM container, you can save only the specific tags, triggers, or variables you need. They are held in My Assets, so you can review the full list before doing anything with them.
- Create collections – if you frequently deploy the same tracking configurations for different clients (such as a standard Meta Pixel setup, a standard GA4 base setup, or a set of custom utility variables), you can save those assets into a custom collection. This creates a reusable template library you can deploy to any container in the future without having to deal with local JSON files.
- Bulk clone to selected containers – once you have curated the perfect combination of assets, you can clone them all at once directly into any destination workspace of your choice.
The workspace is organized into two tabs:
- Web Assets – assets saved from web containers.
- Server Assets – assets saved from server containers.
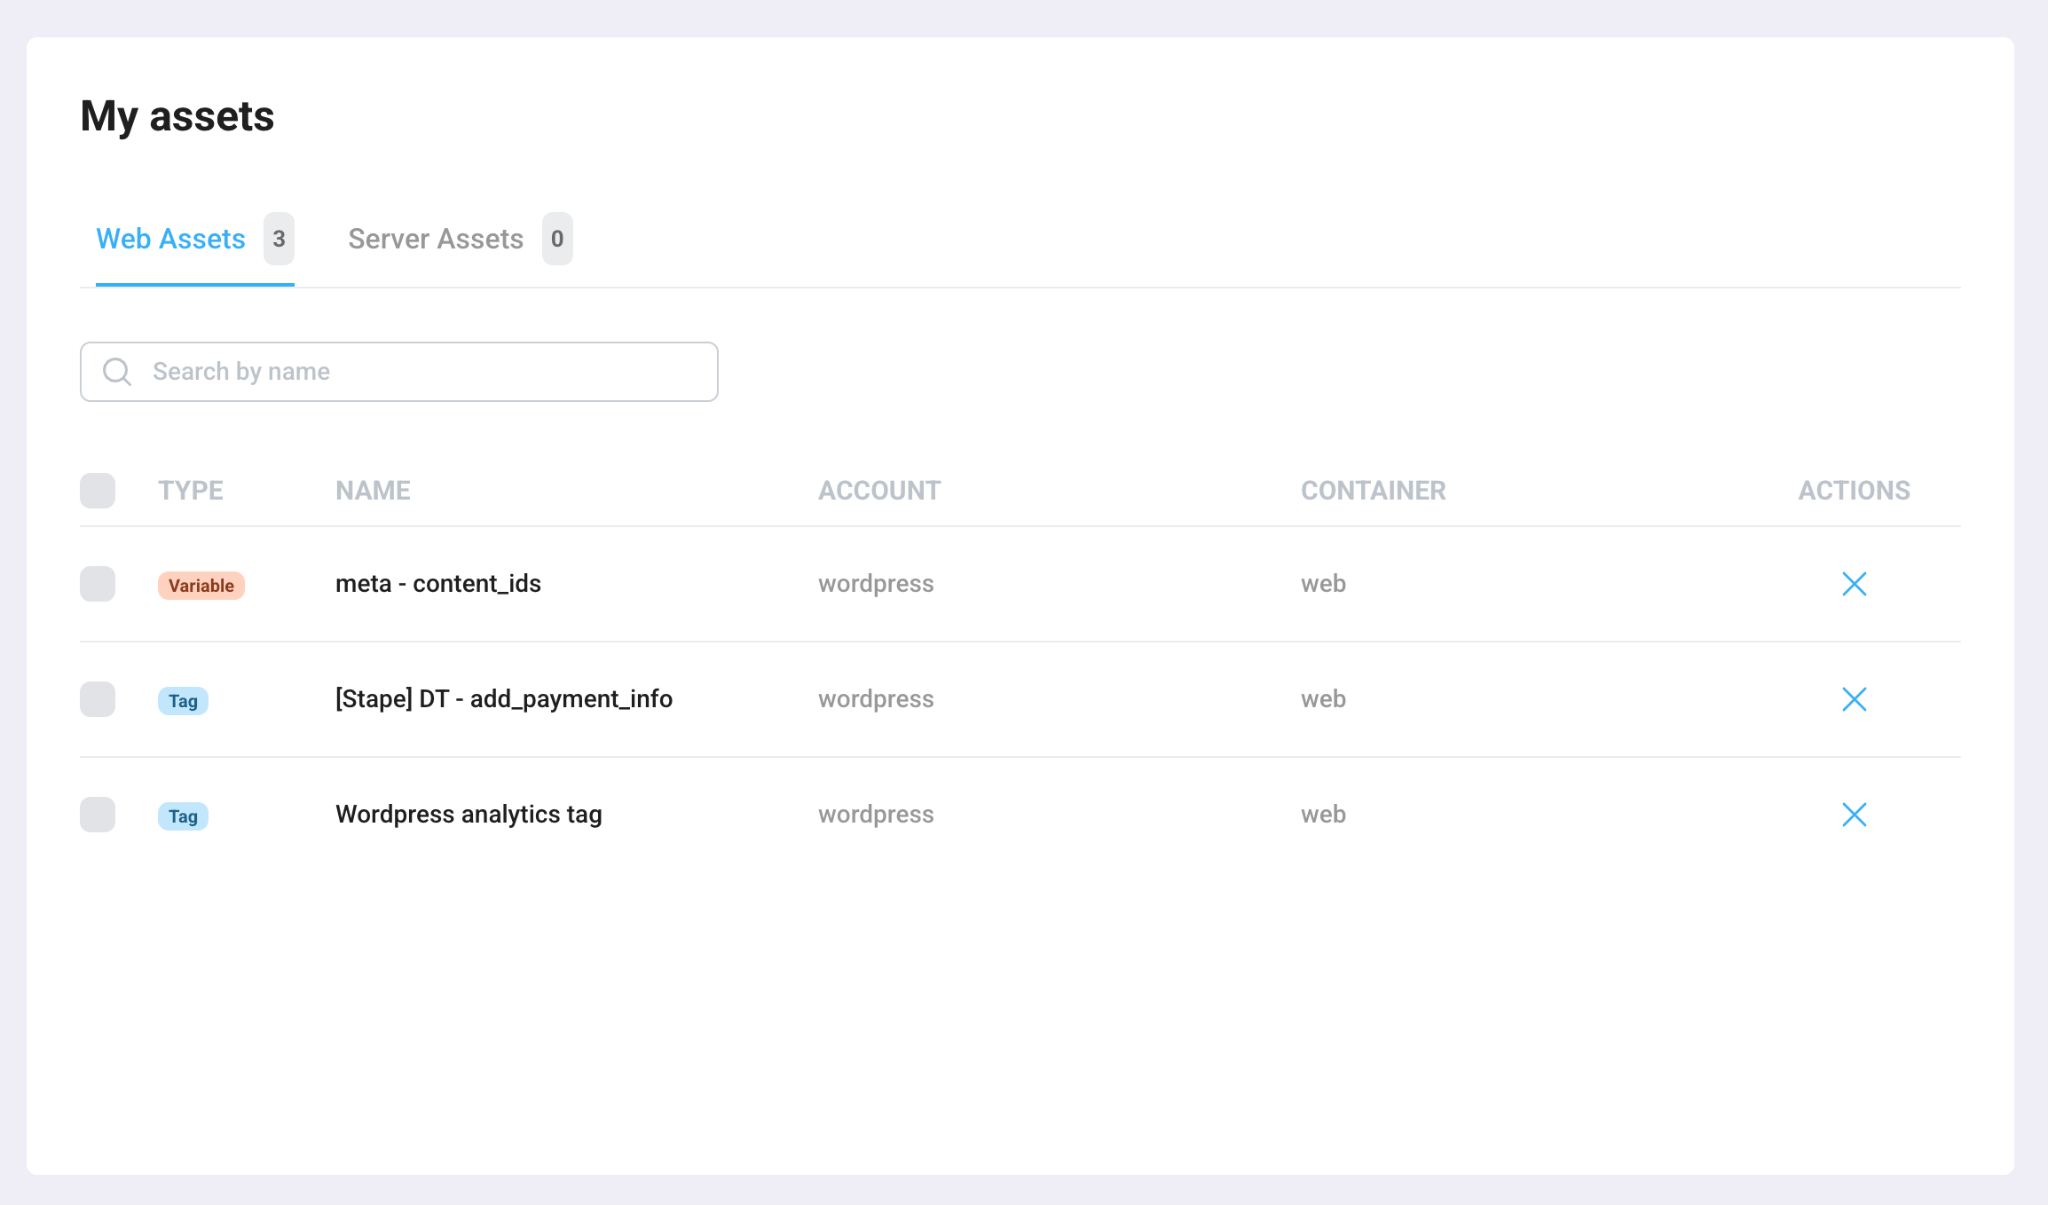
A search field lets you quickly filter your saved assets by name.
Below that, a table lists every saved asset with the following columns:
- Type – a colored badge indicating the asset type.
- Name – the asset's name.
- Account – which GTM account the asset was saved from.
- Container – which container the asset was saved from.
- Actions – click the icon to remove the asset from your saved list.
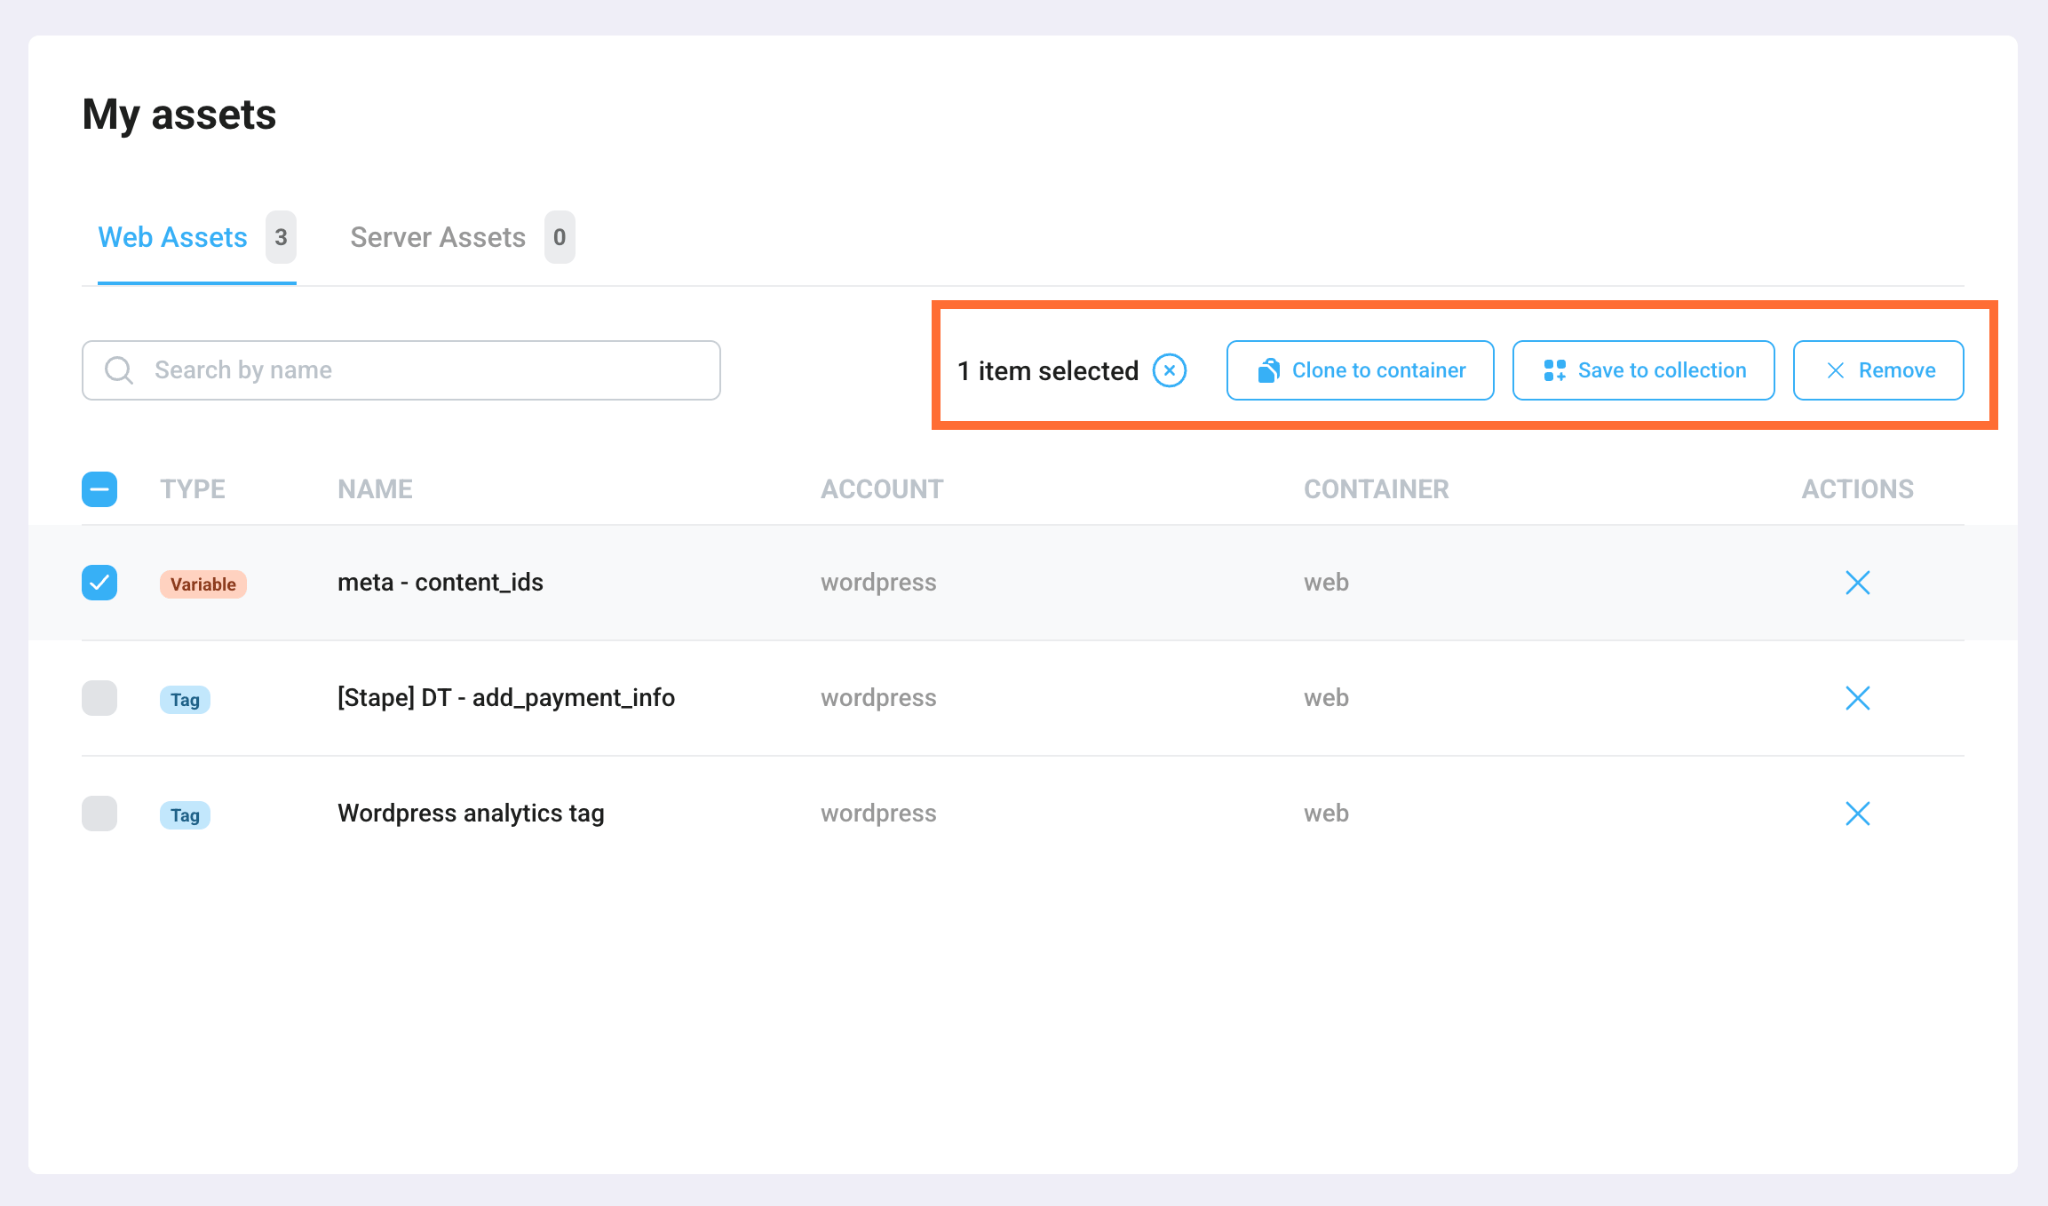
Once you select one or more assets by ticking the checkboxes, the toolbar updates to show bulk actions for the selected items:
- Clone to container – duplicates the selected assets into a destination container of your choice.
- Save to collection – saves the selected assets into a set to be used later.
- Remove – removes the selected assets in bulk.
Clone to container
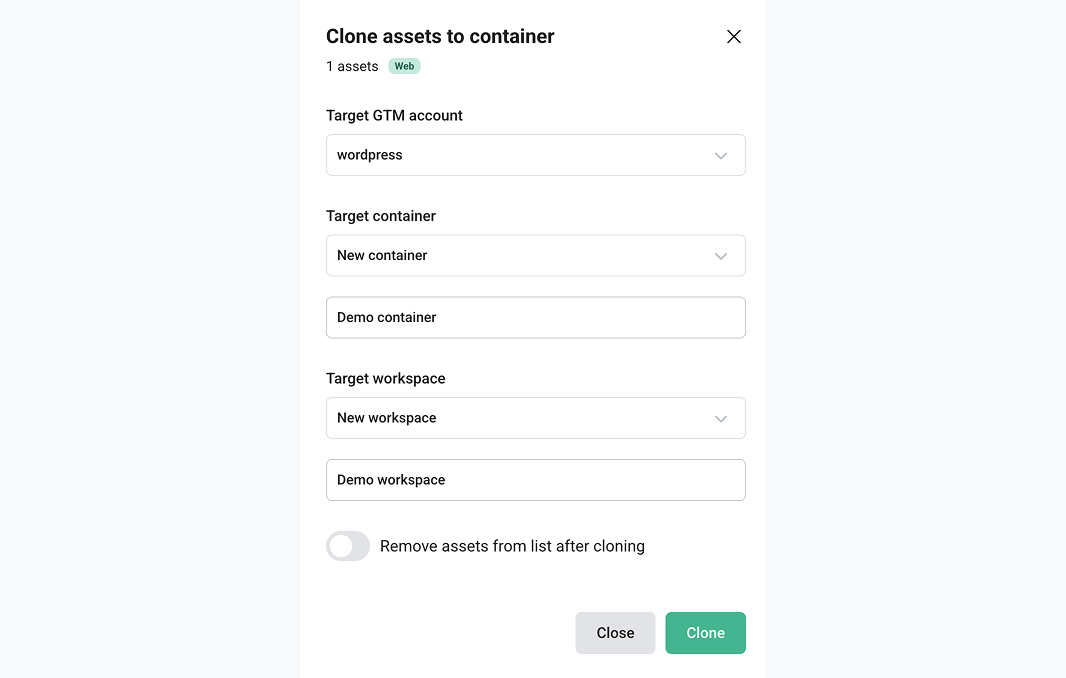
Click the Clone to container button to clone an asset to another container or workspace. This opens the pop-up, which shows a summary of what you're about to clone along with three dropdown fields to configure the destination:
- Target GTM account – the account to clone the assets into.
- Target container – the specific container within that account to receive the asset. Select from the existing container, or choose to create a new container. In this case you’ll be asked to enter a name.
- Target workspace – the workspace inside that container where the asset will be added. If you’re creating a new container, you’ll be asked to create a new workspace as well. You can also create a new workspace inside the existing container.
Below the dropdowns, the Remove assets from list after cloning toggle lets you decide whether the cloned assets should automatically be removed from your My assets list once the clone completes.
Important:
Click Clone.
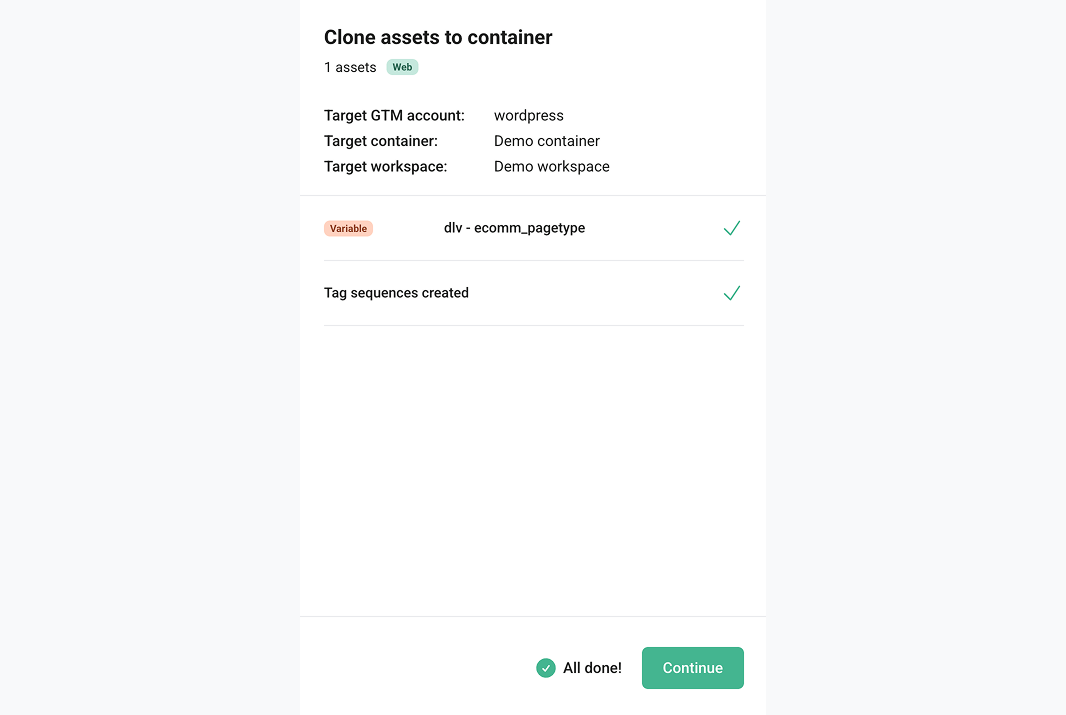
The pop-up will show whether the cloning was successful. After finishing, click Continue.
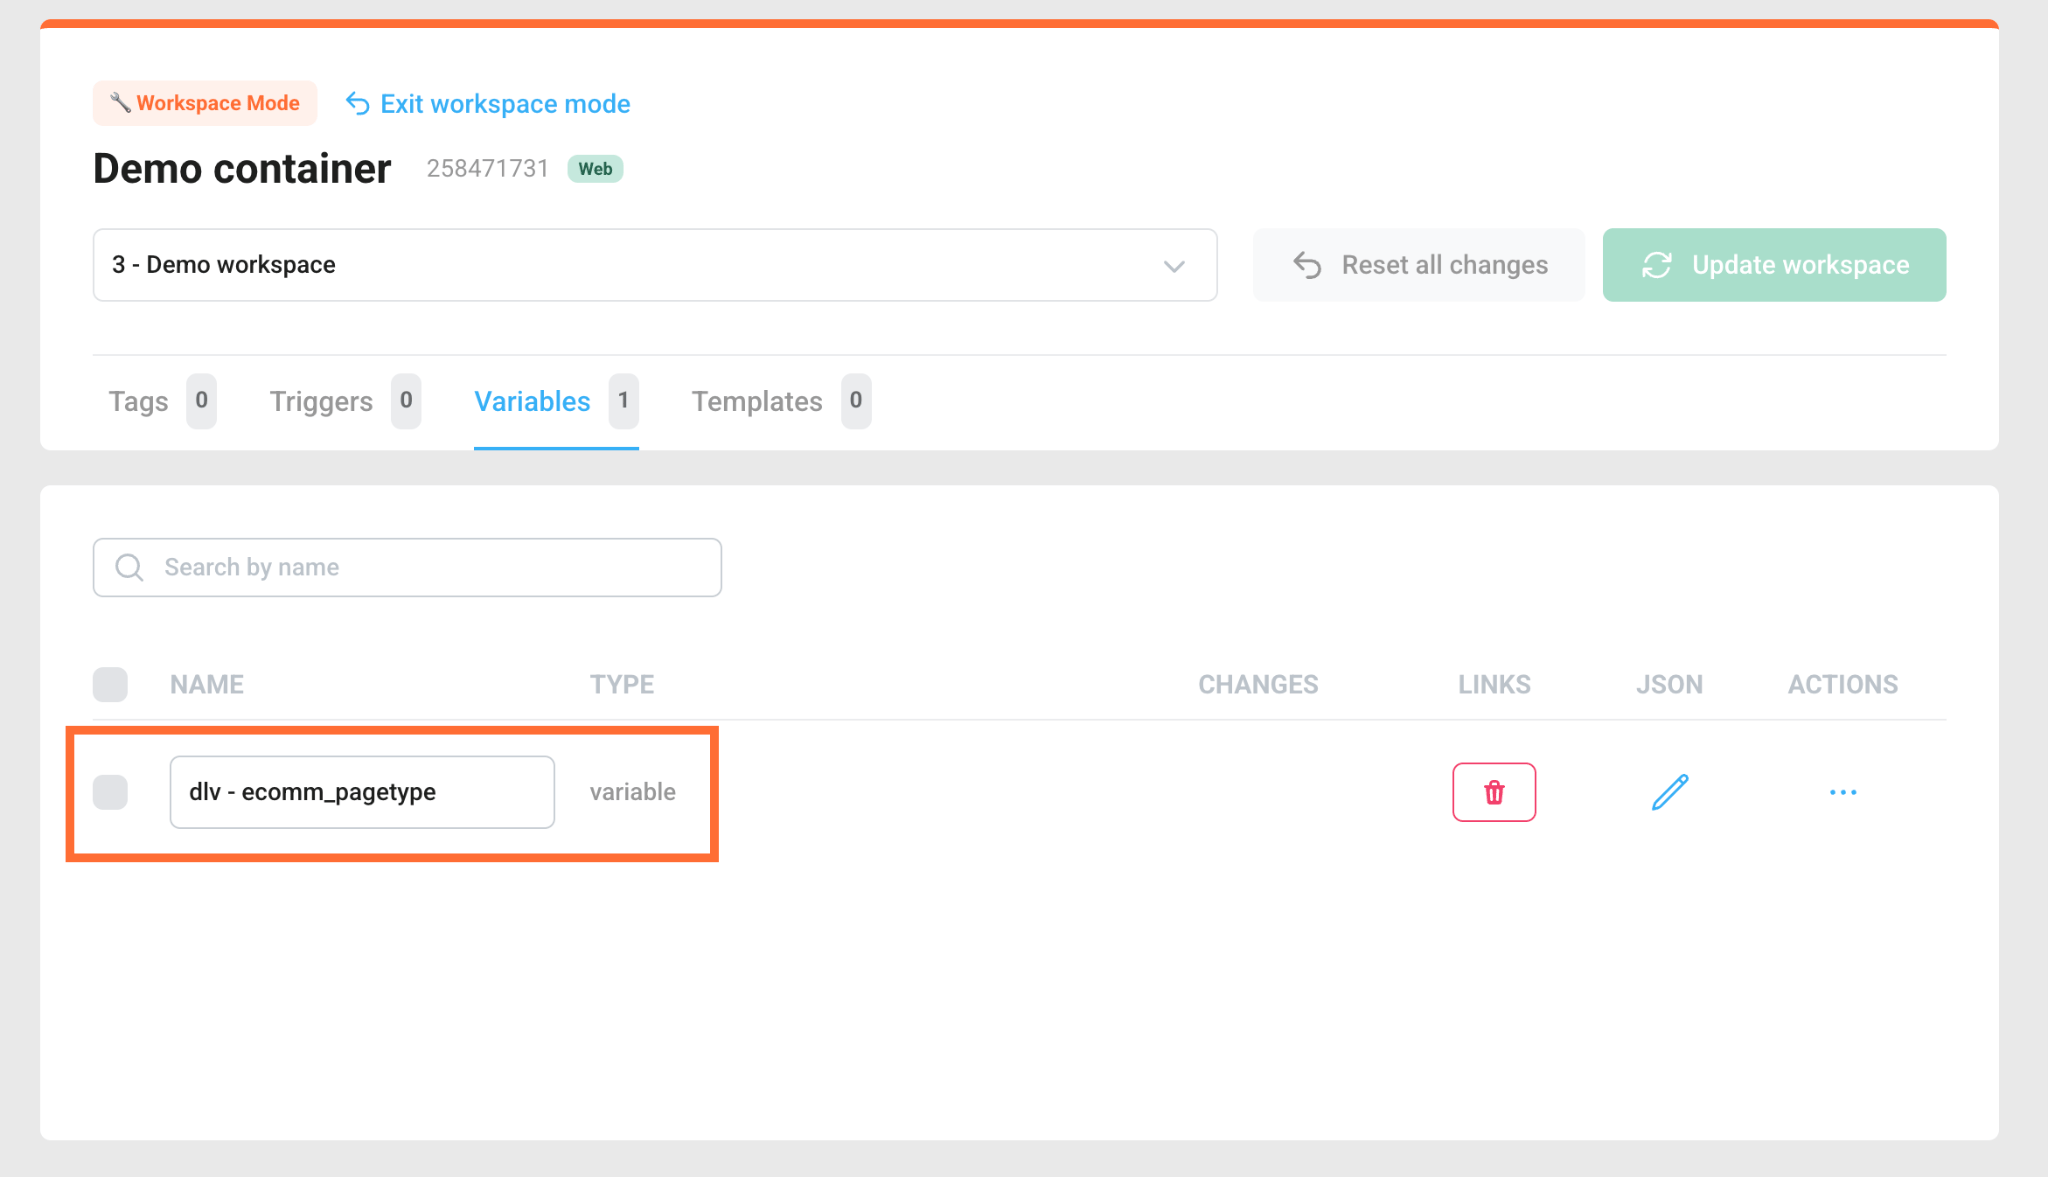
You should see your new asset in a workspace:
Save to collection
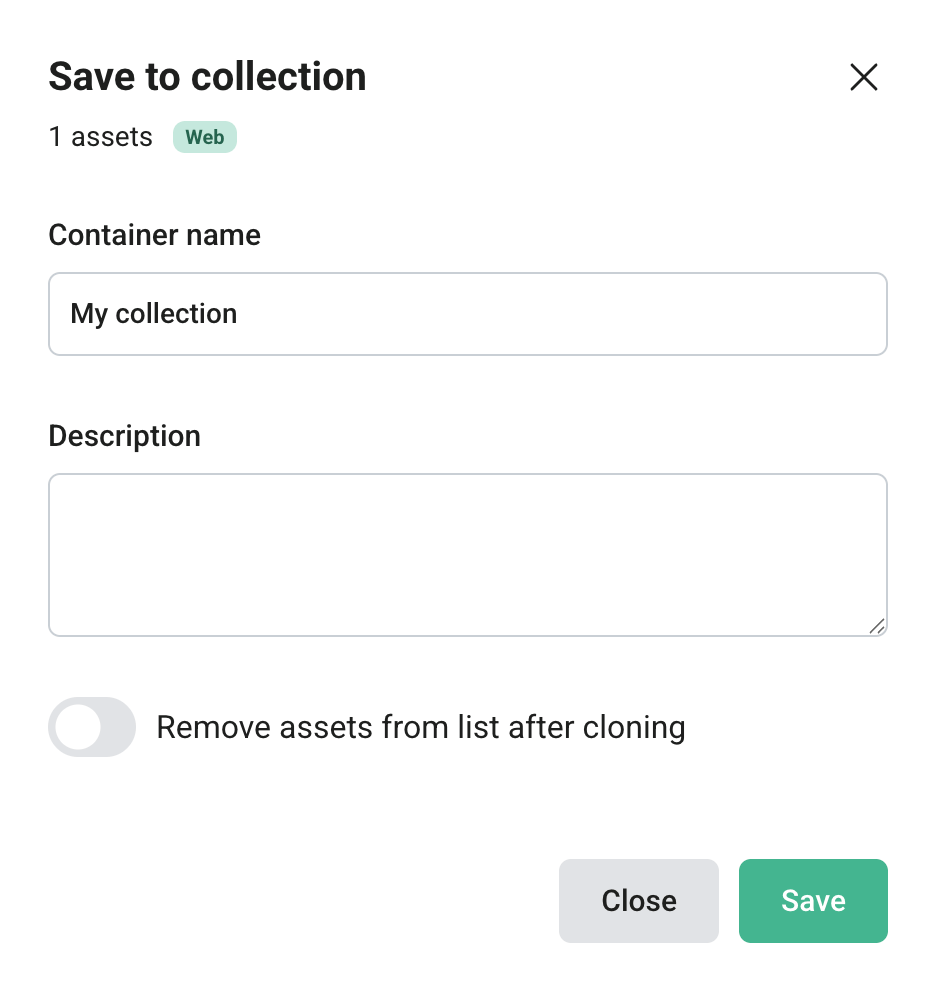
Click the Save to collection button to create a collection out of your assets. This opens the pop-up, which shows a summary of what you're about to save, along with the following fields:
- Container name – a text field to name your collection.
- Description – an optional text area to add more detail about what the collection contains or when to use it.
Below the fields, the Remove assets from list after cloning toggle lets you decide whether the cloned assets should automatically be removed from your My assets list once the clone completes.
Click Save.
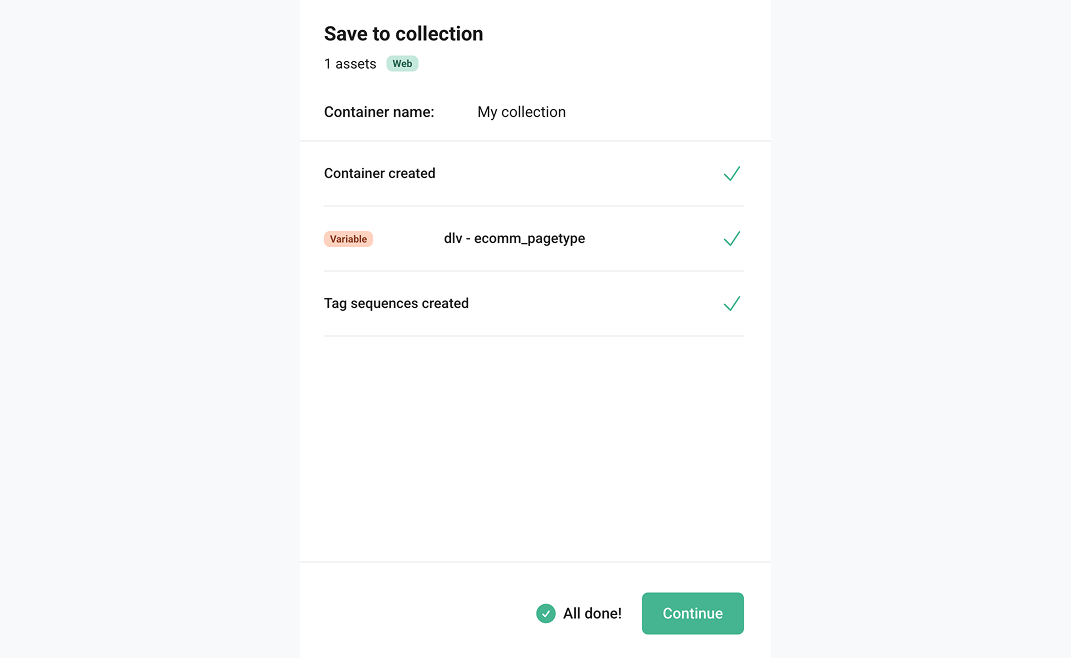
The pop-up will show whether the saving was successful. After finishing, click Continue.
How to delete a container/asset
You can’t delete a container inside the tool, you can do this only in the Google Tag Manager. For the container, read the Google documentation for instructions.
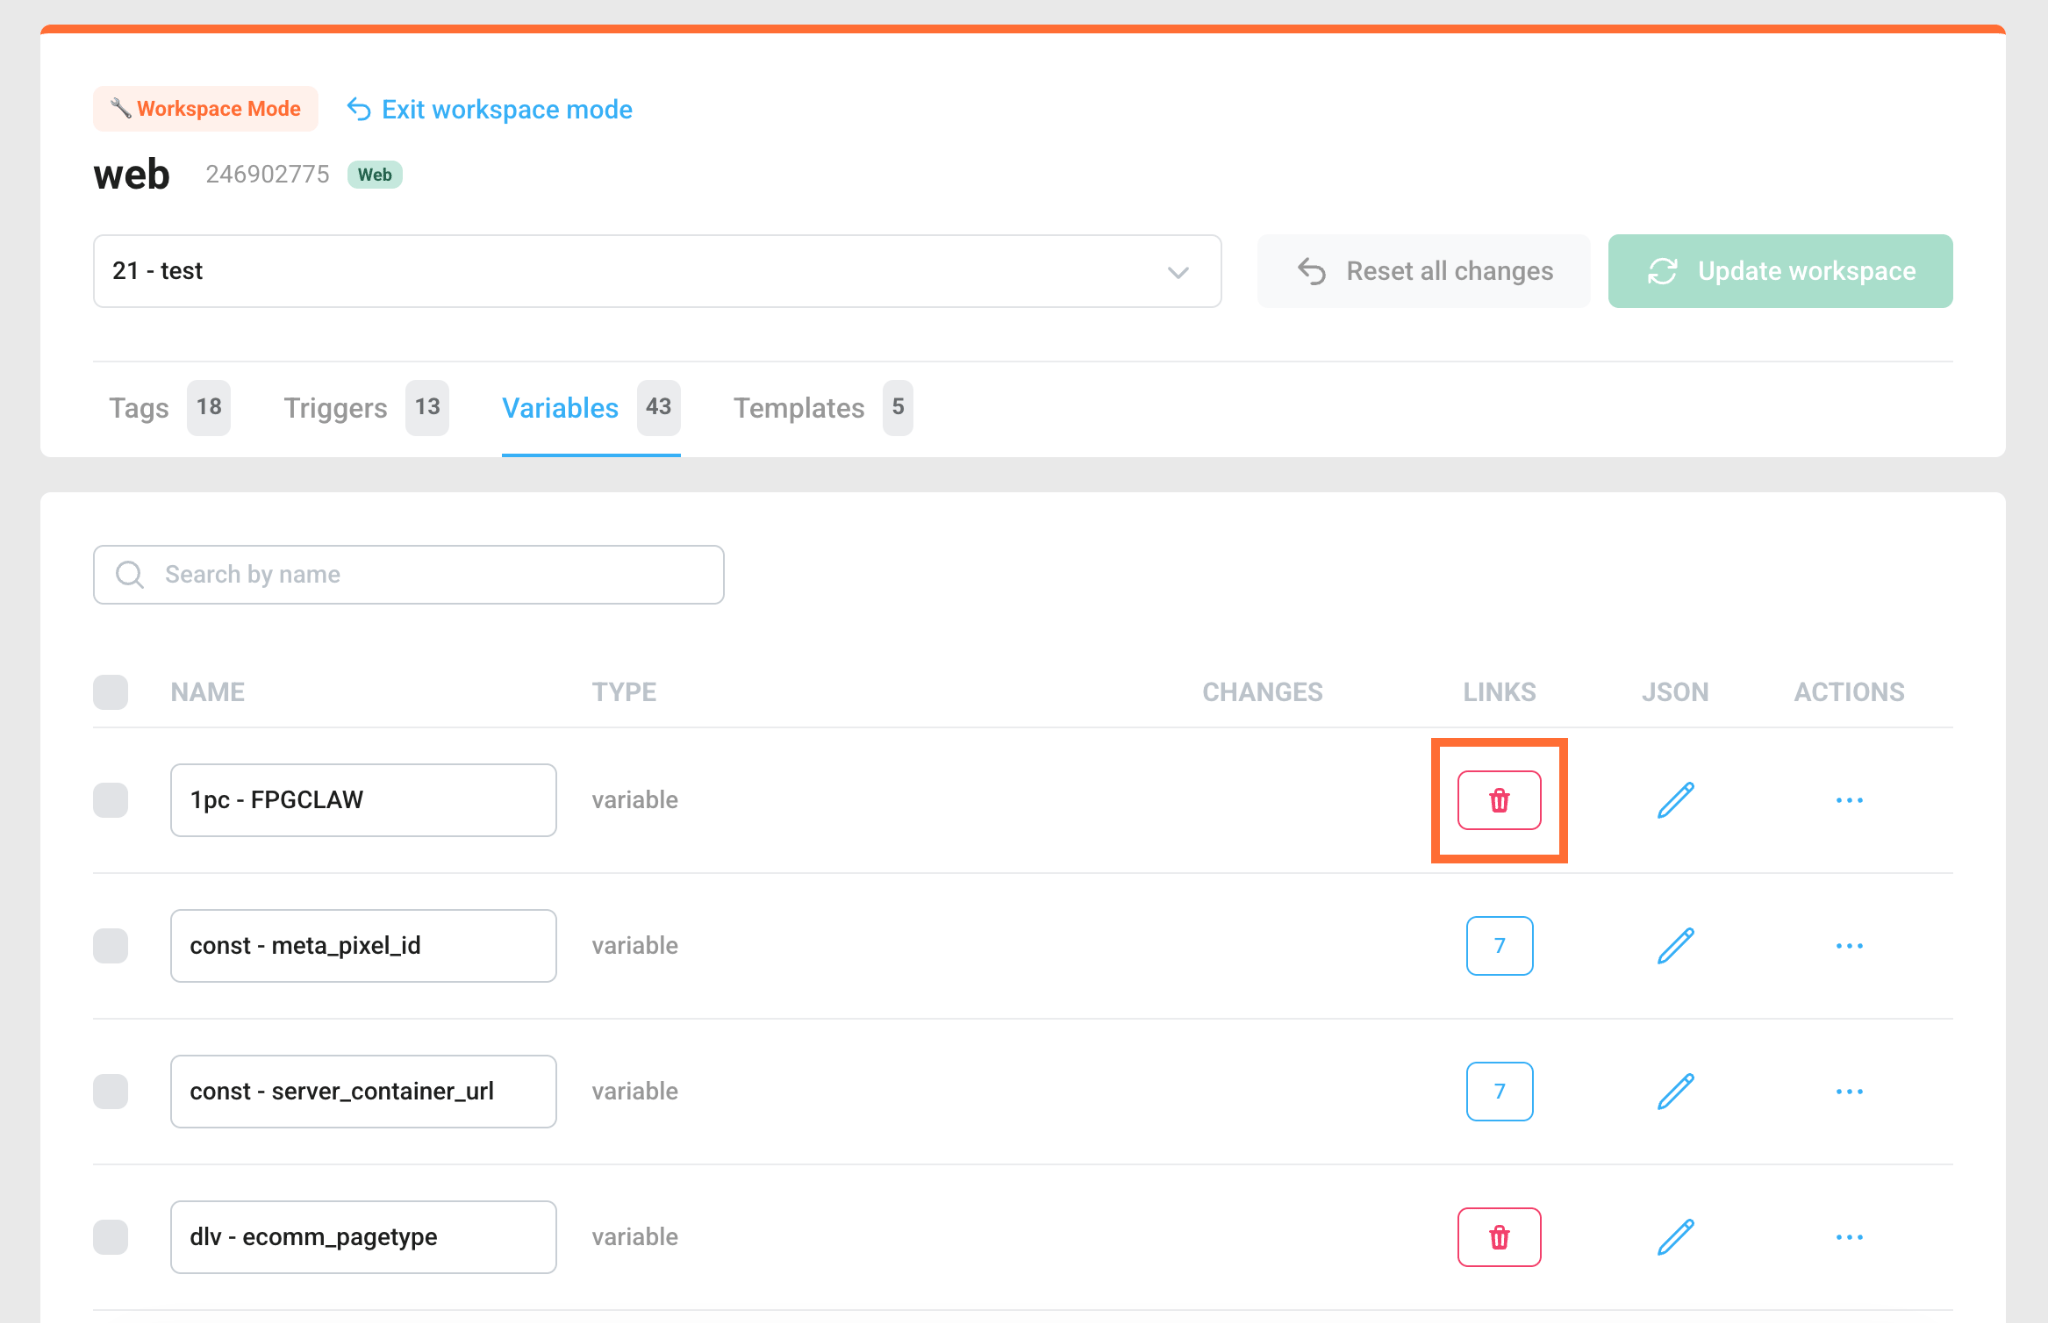
To delete an asset, go to the Workspace Mode, and find the Links column. If the asset has no links, you’ll see a trash bin icon that you can click. Click Update workspace to apply the changes.
To revoke the access, click on your profile icon, and then click Revoke access.

Use cases
1. Replicating a tracking setup for a new website.
If you already have a well-tested GTM container on one site – with all your tags, triggers, and variables configured – you don't need to rebuild it from scratch for a new project. Use the Clone tool to copy the entire container structure into a new GTM account or container, giving your new site the same tracking foundation in minutes.
2. Standardizing client onboarding for agencies and freelancers.
If you manage multiple clients with similar tracking needs (for example, a standard GA4 base setup, a Meta Pixel configuration, or a common set of utility variables), you can save these to a collection. When onboarding a new client, deploy that collection directly into their container instead of manually rebuilding the same tags and variables every time.
3. Auditing a container before a site migration or redesign.
Before migrating a website or restructuring a container, use the Visualize tool to map out every tag, trigger, and variable and their dependencies. Turning on "Highlight hermit nodes" quickly surfaces orphaned assets that are no longer connected to anything. They're safe to remove, helping shrink container size and reduce page load overhead.
4. Editing configuration without leaving the browser.
If you need to tweak a tag or variable's JSON parameters (for example, updating a hardcoded value or adjusting a firing condition) you can edit it directly within Workspace mode's JSON editor, instead of exporting the container, editing a file locally, and re-importing it.
5. Cleaning up a draft workspace before publishing.
While actively building out a new workspace, use Workspace mode to review the Links column for each asset. Any tag, trigger, or variable with zero connections is flagged, letting you catch and remove unused or leftover elements before publishing the workspace – avoiding clutter in the published container.
Was this article helpful?
Comments