How to migrate from Meta CAPIG to Signals Gateway
Updated Apr 10, 2025
Important! Before you begin, ensure that Meta web tracking is already configured on your site, whether it's implemented through a GTM container, embedded directly in the website code, or integrated via a plugin. This setup allows you to use existing web events.
How to migrate from Meta CAPIG to Signals Gateway
Step 1. Create Signals Gateway on Stape
1. Log in to your stape.io account.
2. Open the Signals Gateway page.
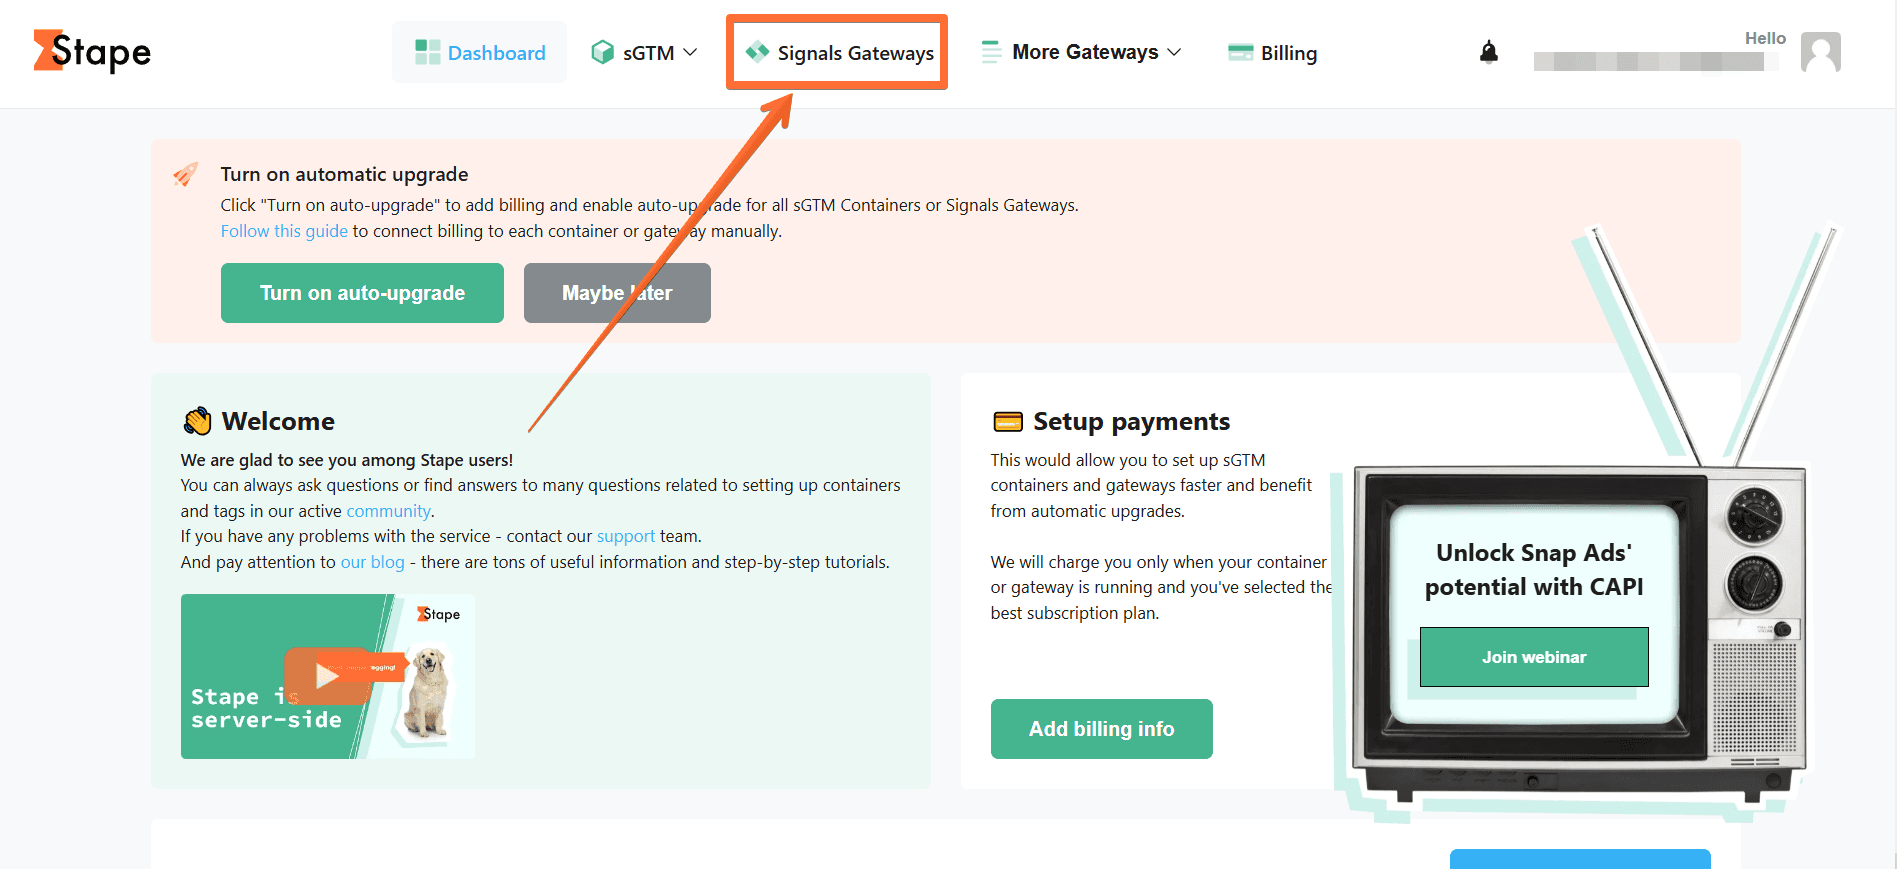
3. Click Create Signals Gateway.

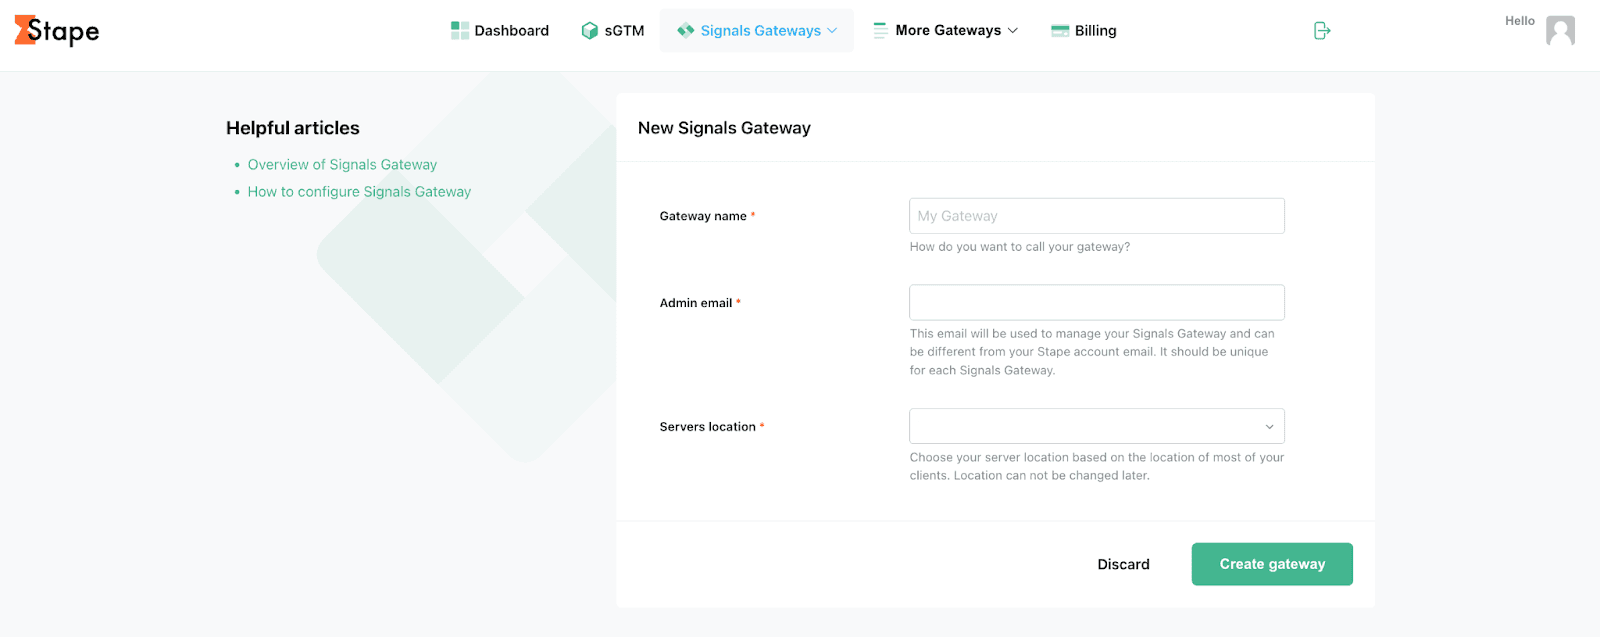
4. Add the requested information:
- Gateway name - give your gateway a descriptive name.
- Admin email - the email address you'd like to use for managing the Gateway environment (it can differ from your Stape login.)
- Servers location - choose the location closest to where your clients are.
Then click Create gateway.
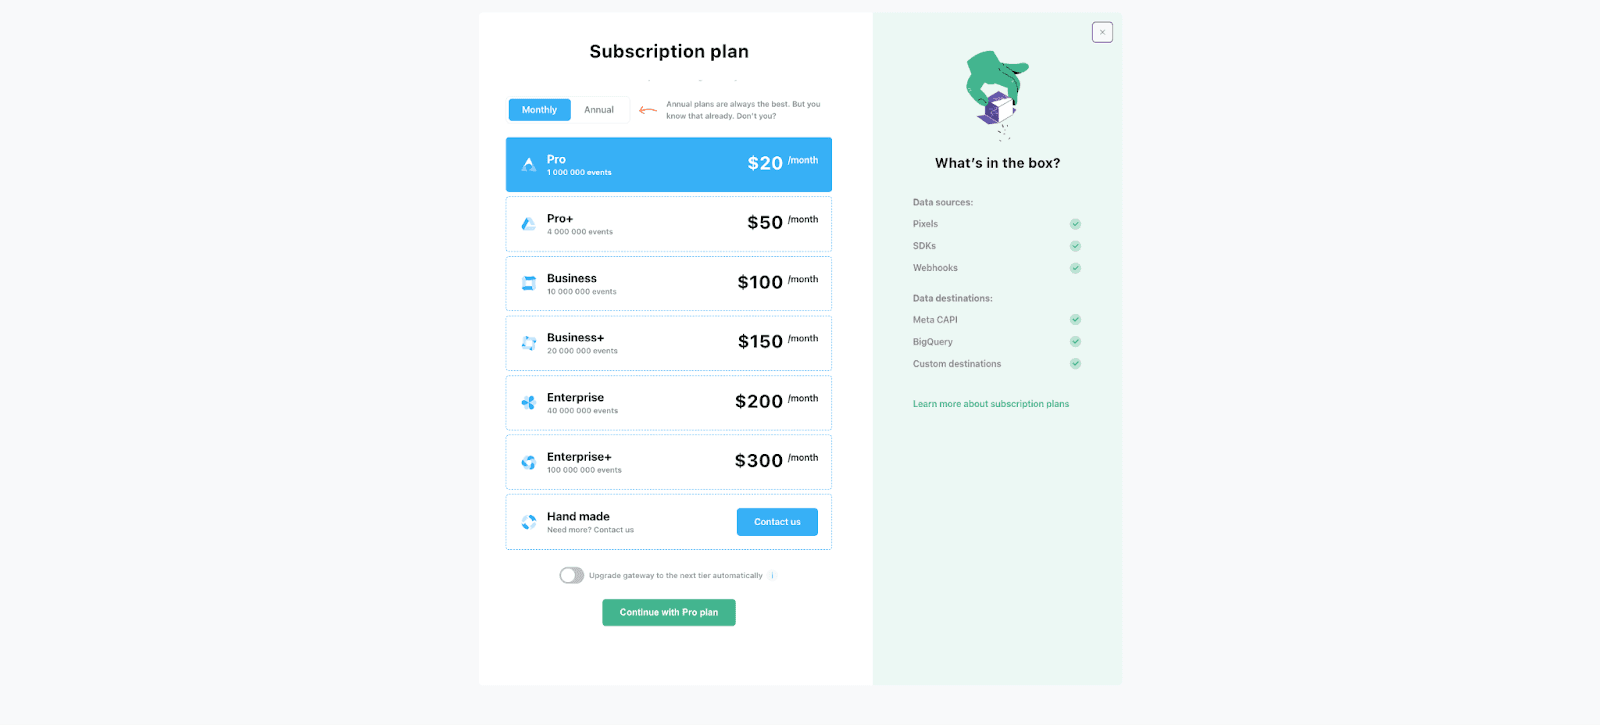
5. Select a subscription plan or click Add card later to activate a 7-day free trial.
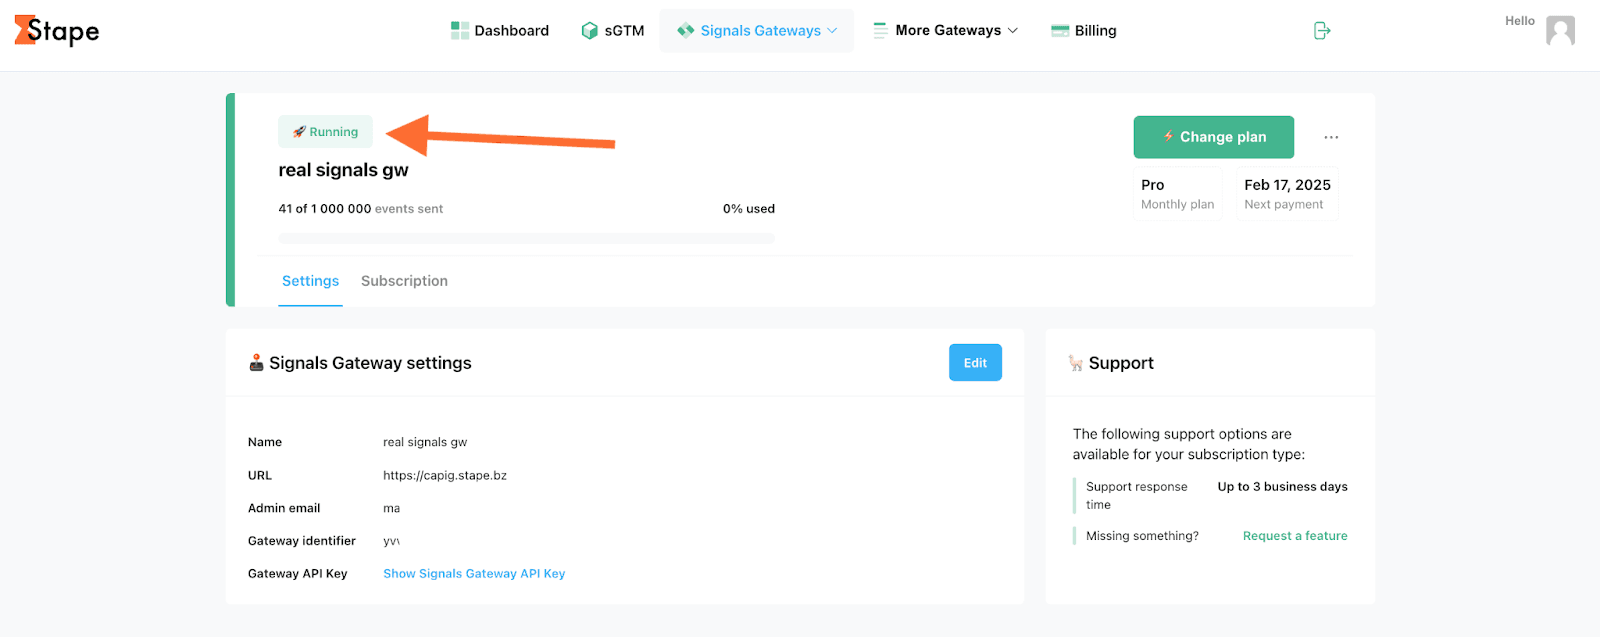
6. Wait until the Gateway is deployed (the status changes to Running.)
7. Check out your email. You should have been sent an invitation letter to create an account in Signals Gateway to the email address you provided during registration. Click Accept invitation.
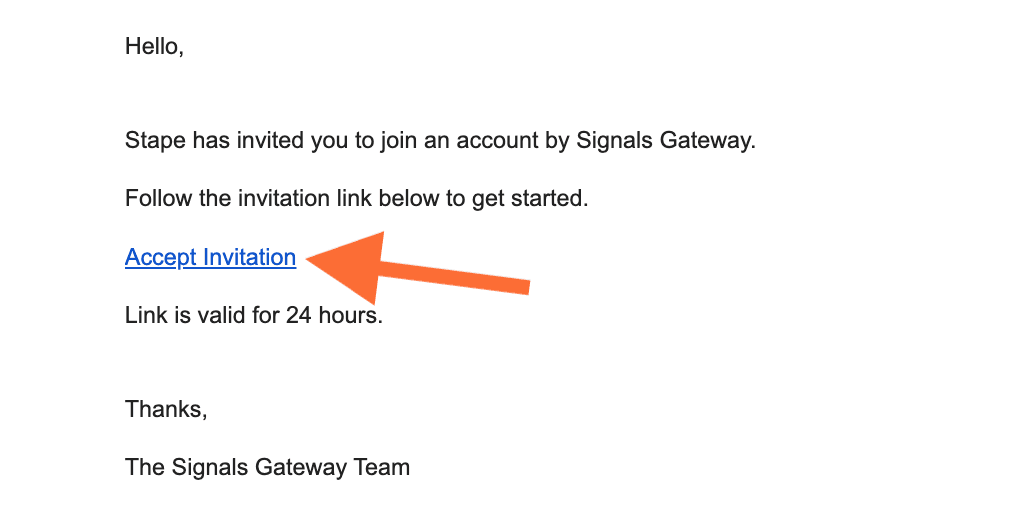
If you haven't received the email, please click Finish Signals Gateway Setup in the Signals Gateway menu back on Stape.

Important: in the future, to access your Signals Gateway, copy the URL in your Signal Gateway menu and paste it in your browser to log in.
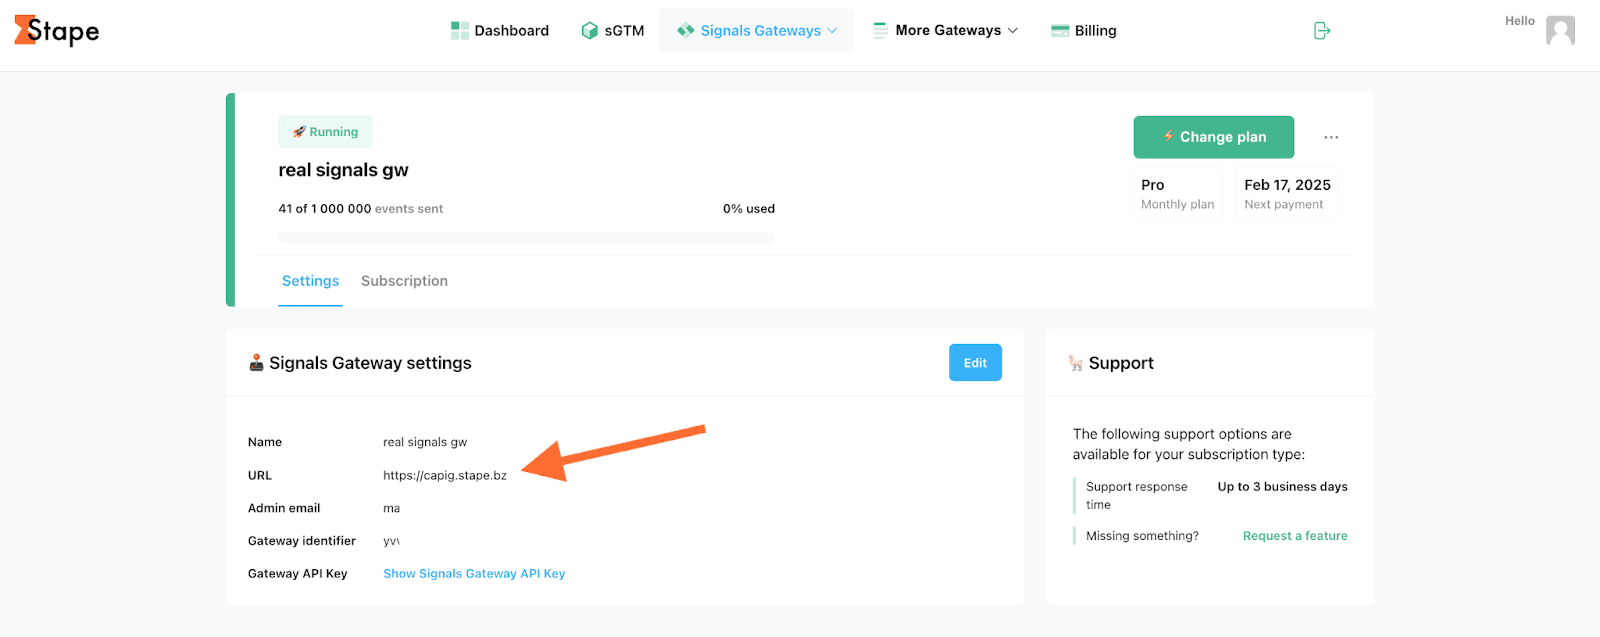
Step 2. Configure Signals Gateway
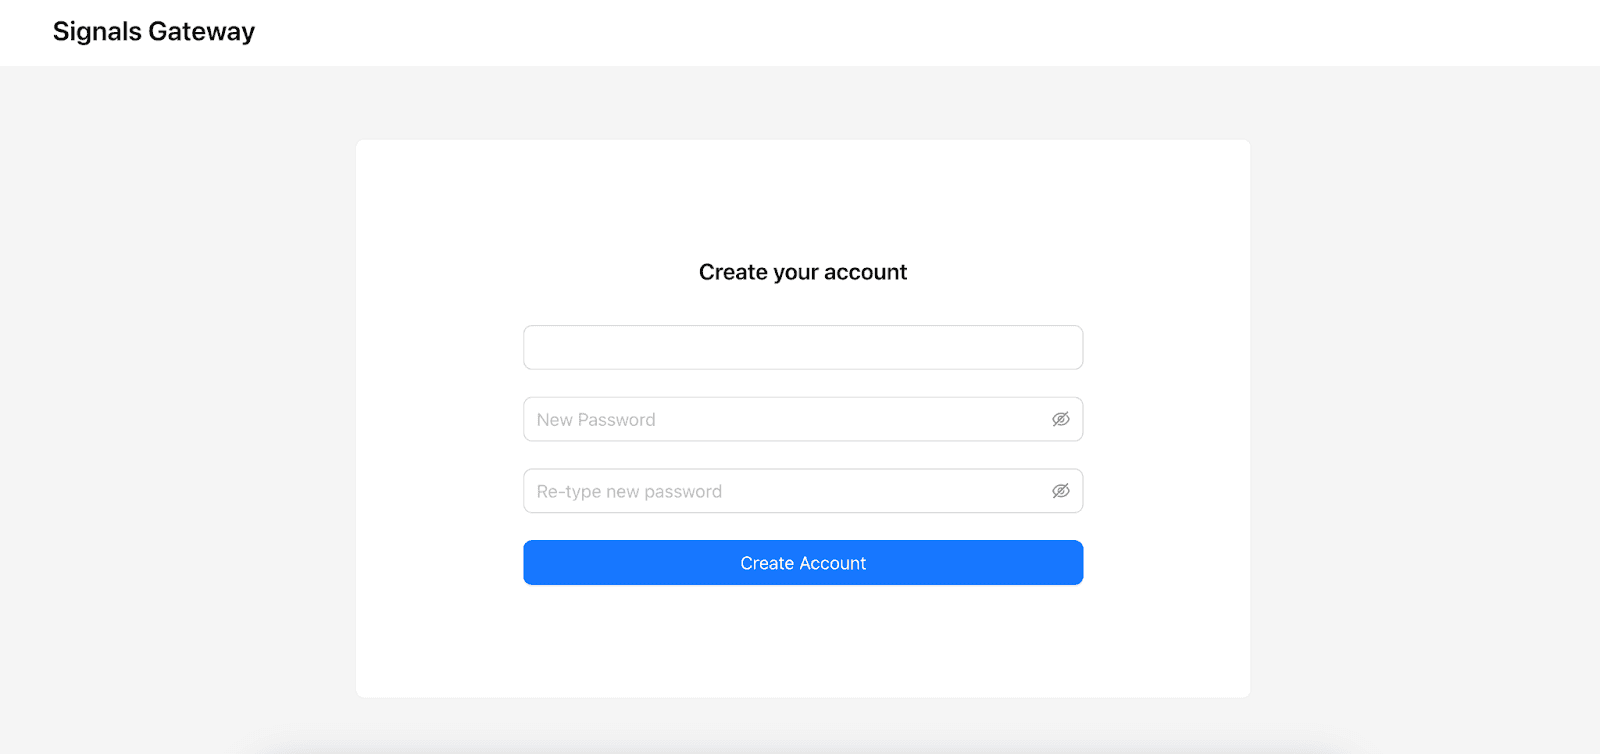
1. Enter the email address that you've previously assigned as the Admin email and set a password. Stape does not store passwords to Signals Gateway; please make sure to save it to a secure place. Then click Create Account.
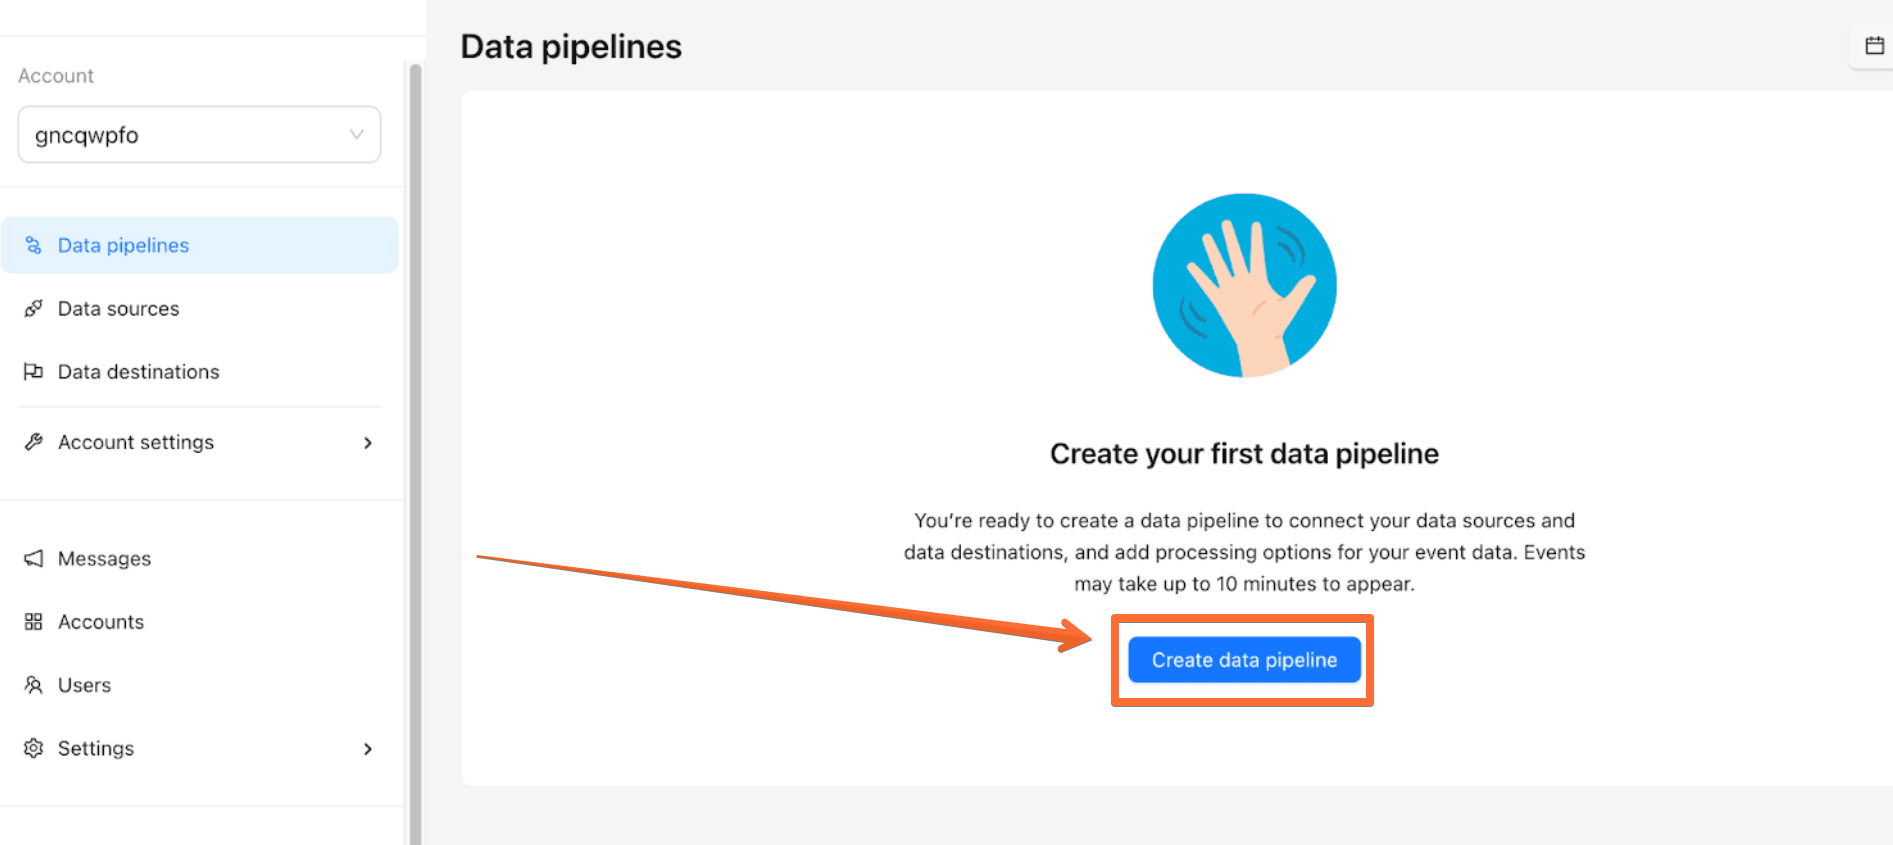
2. Click Create data pipeline.
3. Select the type of pipeline you’d like to create → click Create. In this guide, we will show you how to create a Signals Gateway pipeline through Signals Gateway Pixel with a destination to Meta. For your Signals Gateway setup, you can use destinations other than Meta.
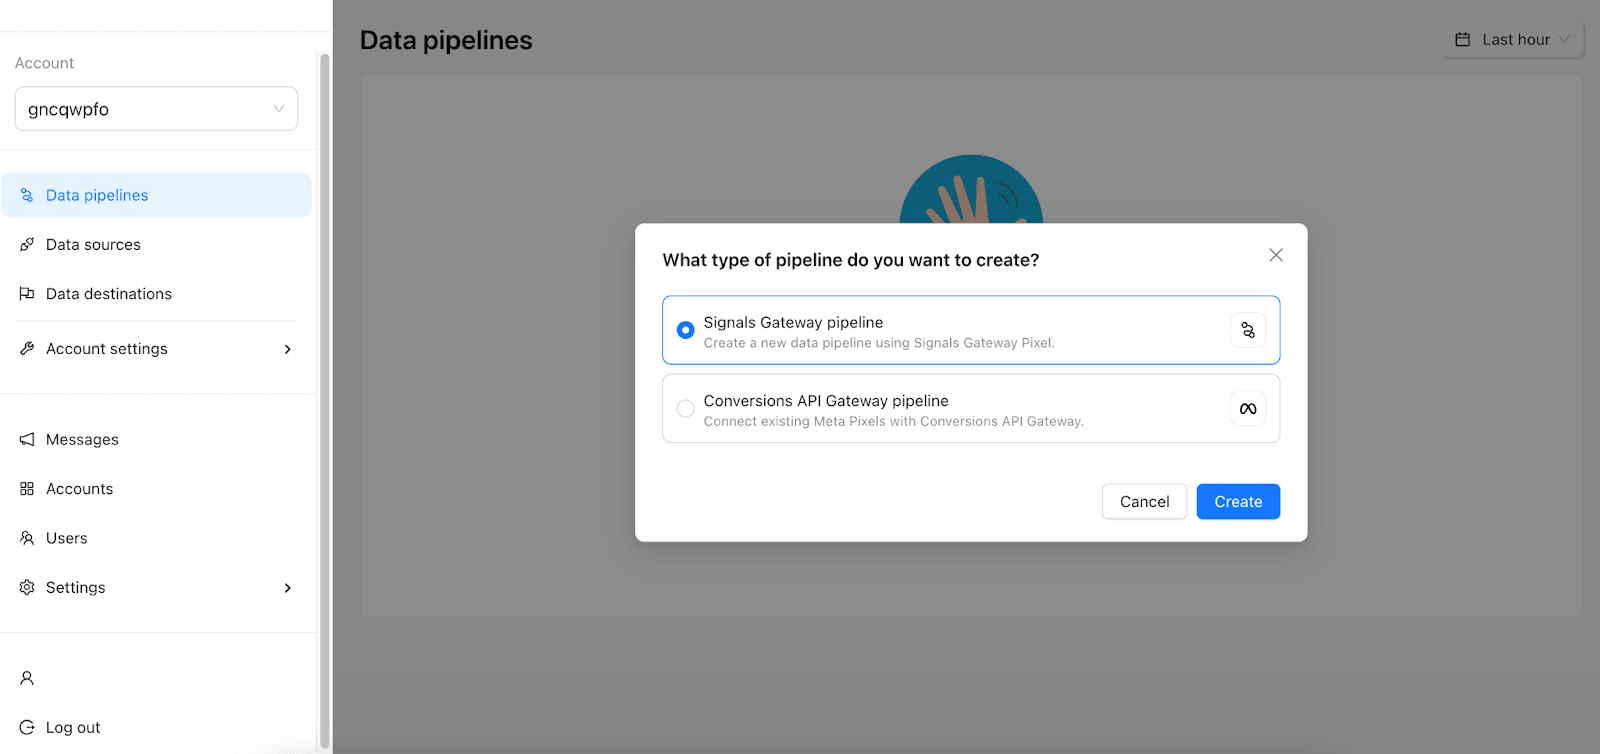
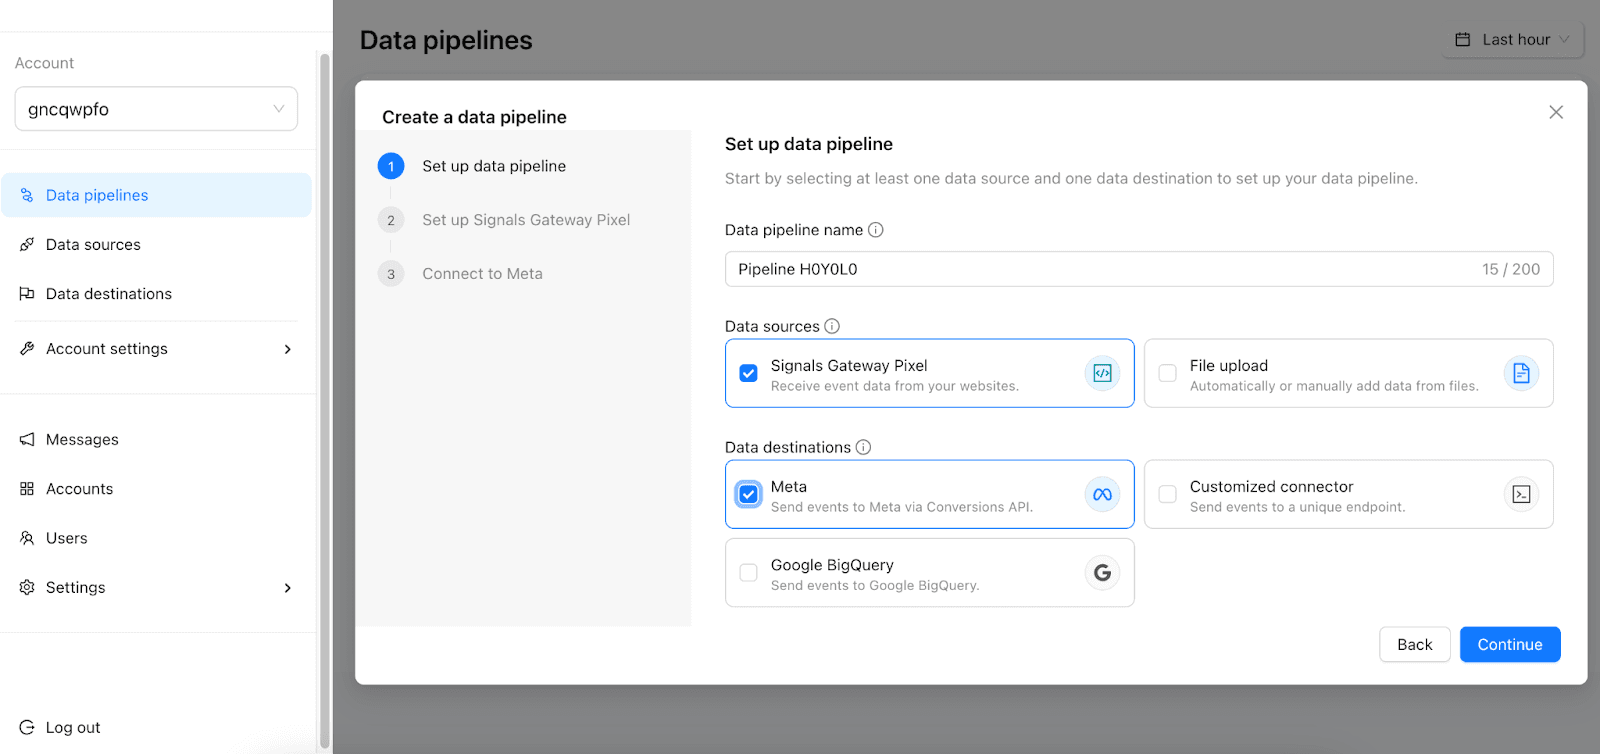
4. Set up data pipeline:
- Data pipeline name - enter a descriptive name.
- Data sources - inbound events come through data sources associated with websites, apps, and data files.
- Data destinations - outbound events data is sent to a pre-selected destination once it’s been processed.
Then click Continue.
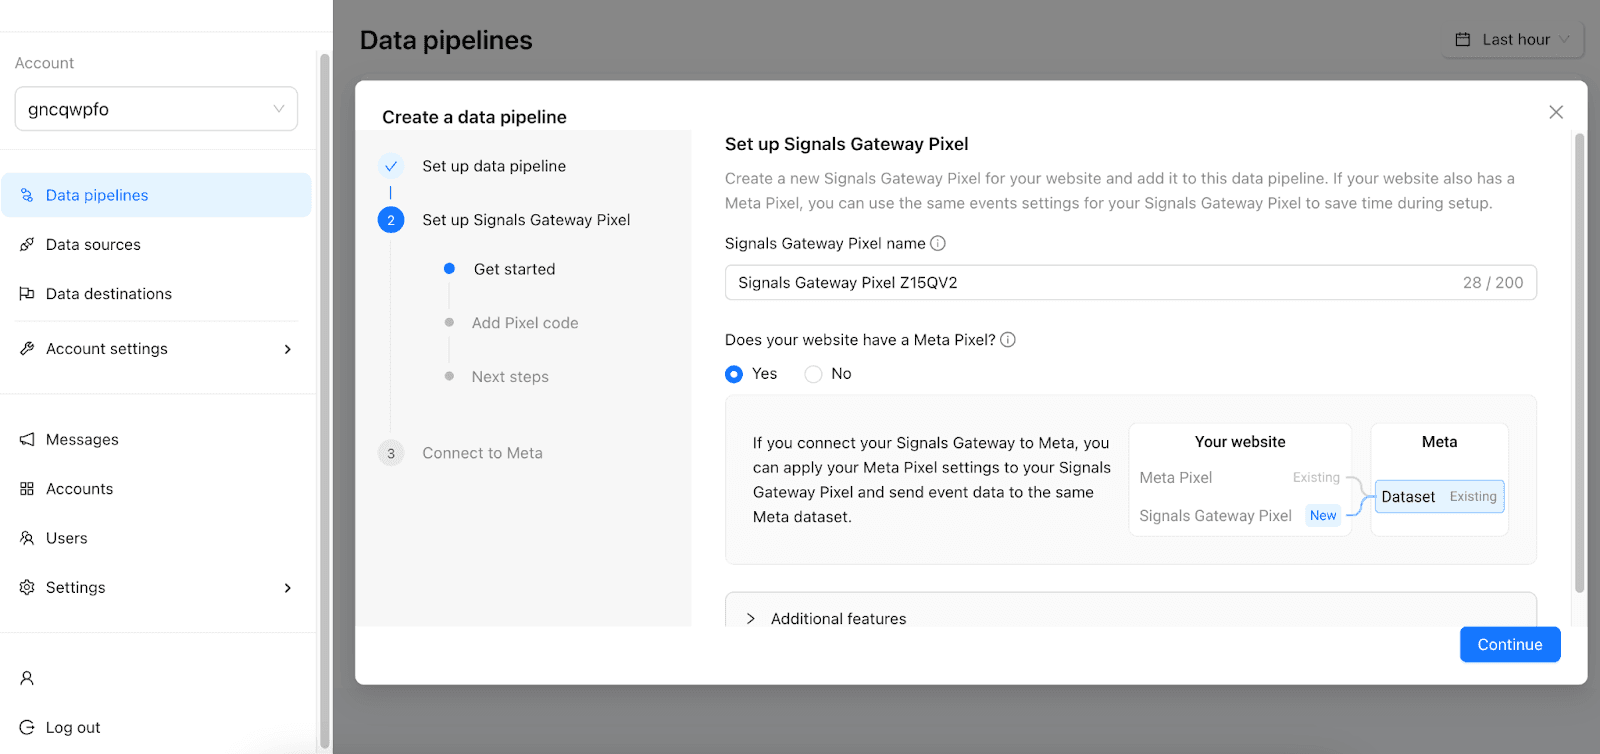
5. Set up Signals Gateway Pixel - enter a name for your new Pixel and indicate whether your website has a Meta Pixel (if you have a Meta dataset that receives events from your website, a Meta Pixel is installed on the website.)
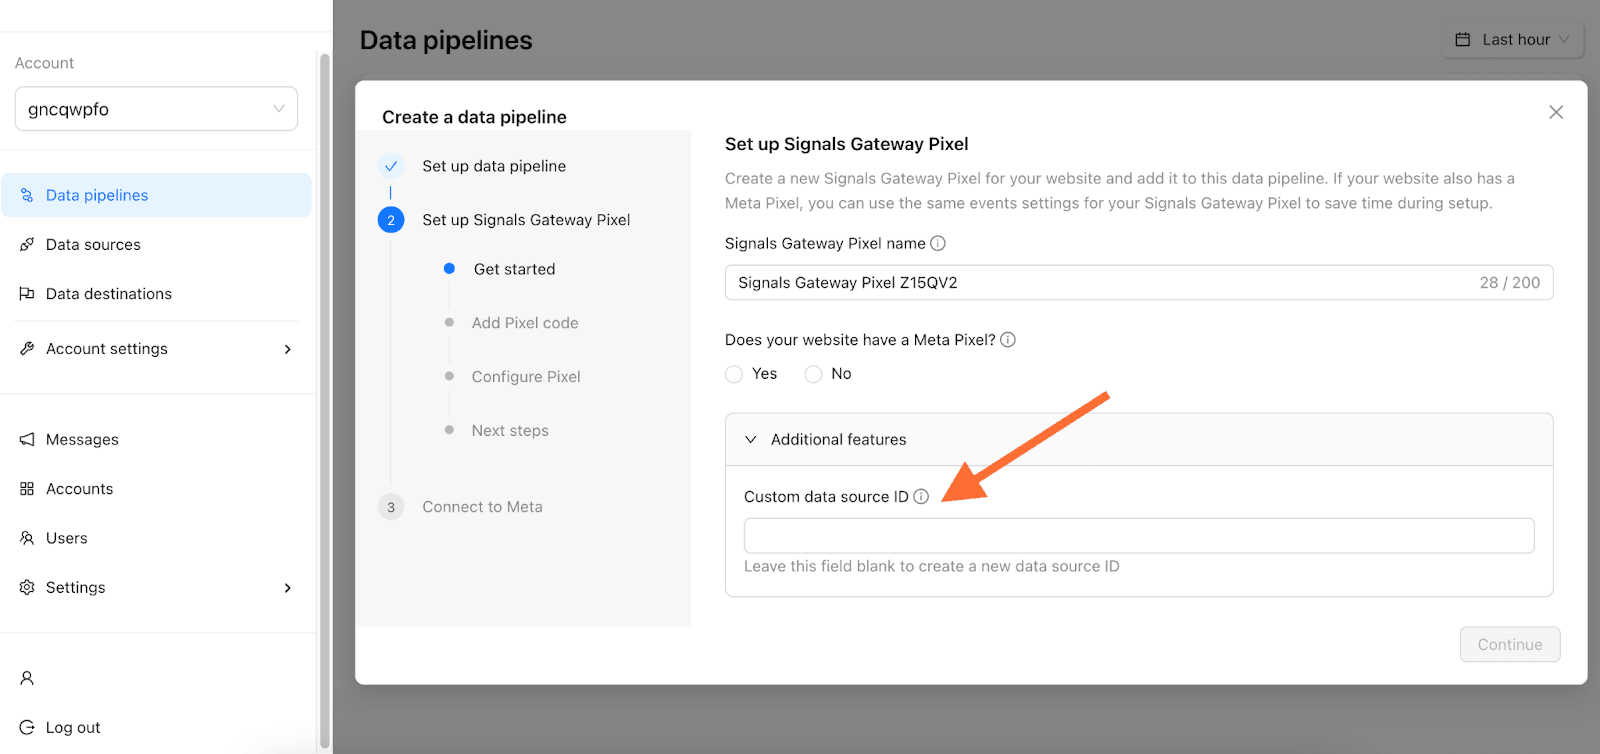
In Additional features, you can add Custom data source ID. If you already have a Signals Gateway Pixel code installed on your website, you can enter its ID here to continue using its pixel code.
5.1. Add Signals Gateway Pixel and events codes. There are two ways to do that:
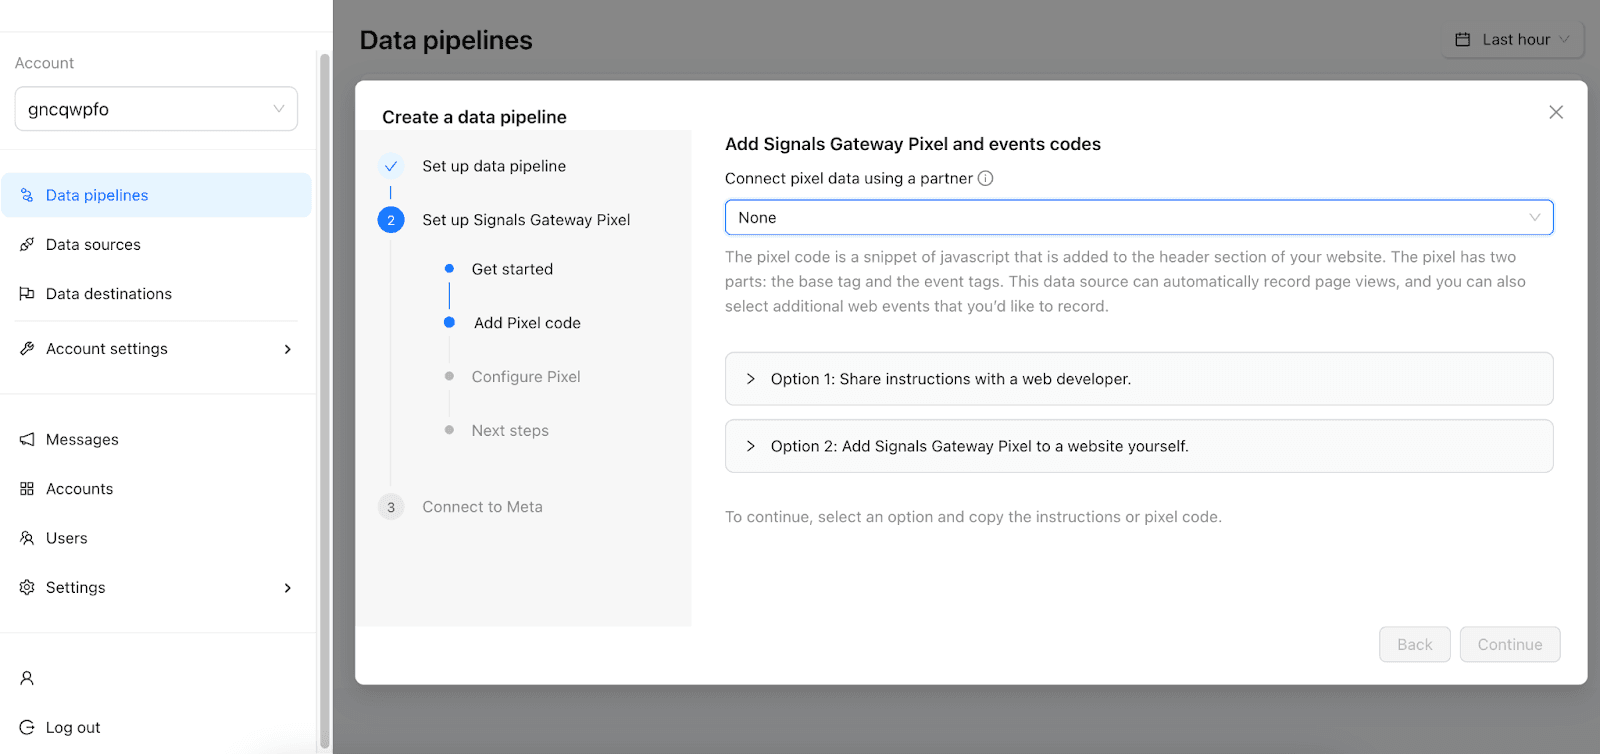
- Option 1: Share instructions with a web developer. Simply click Copy instructions and send them to your developer to configure.
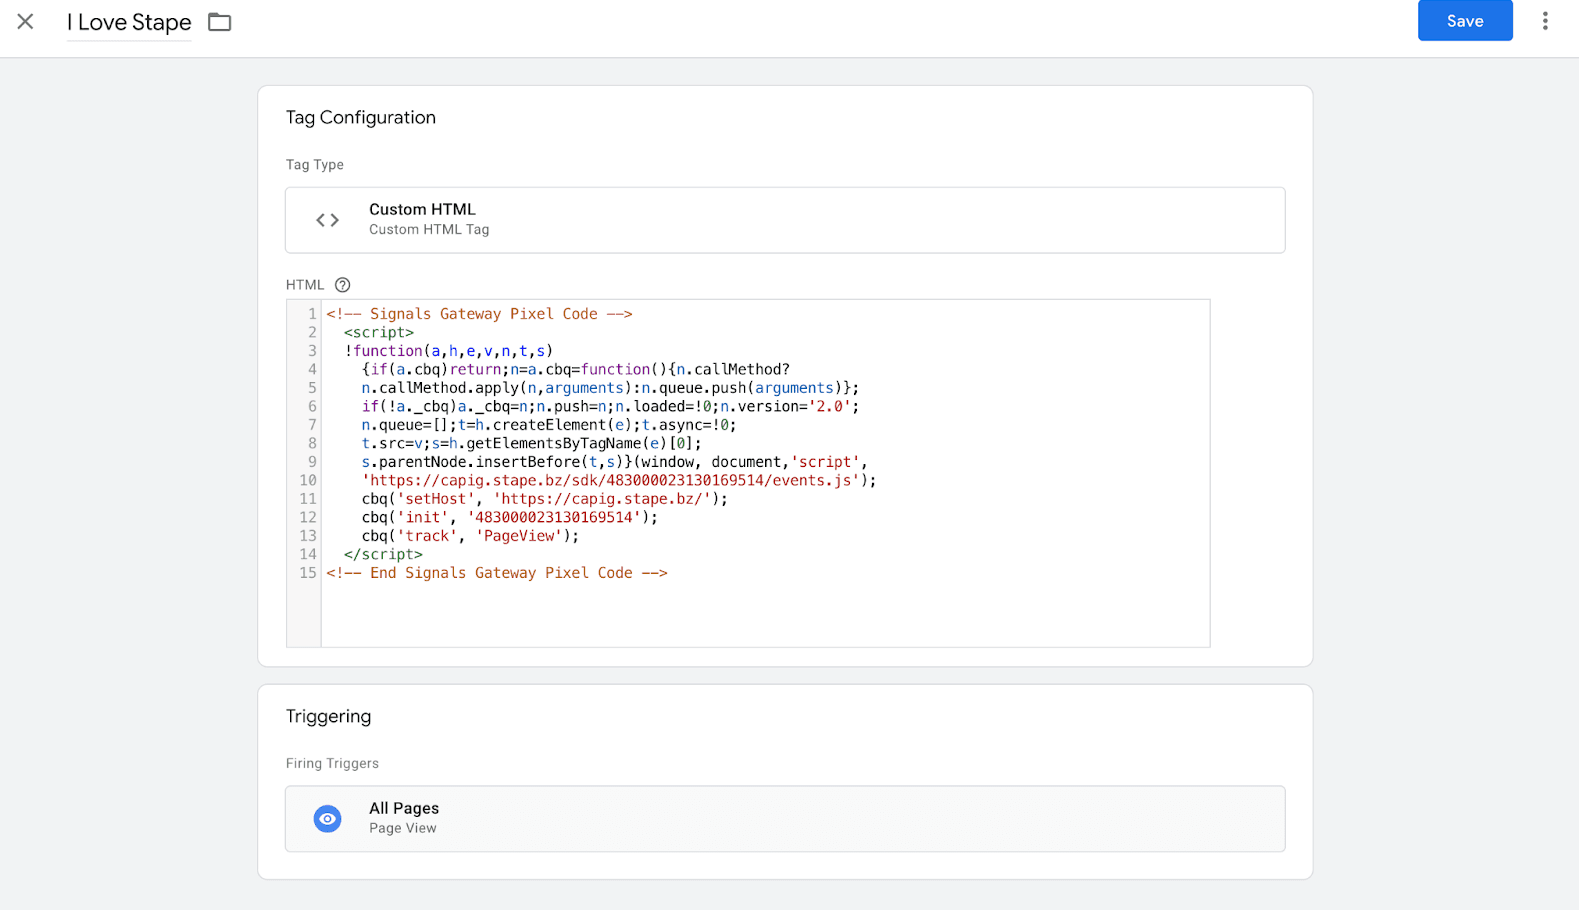
- Option 2: Add Signals Gateway Pixel to a website yourself. This is an advanced option. Copy and paste the base code to your website → configure conversion events on your website by specifying event names and tagging them in your code. We recommend using Google Tag Manager for this task:
- Add a Custom HTML Tag → paste your Signals Pixel base code → give it a trigger and publish.
6. Configure how data for this Pixel is gathered and processed:
- Data enhancement - send advanced matching data with your events.
- Contact data treatment - hash the collected contact data using the SHA-256 format. Data that is hashed cannot be reverted to its original form and cannot be used by certain data destinations or for audience creation.
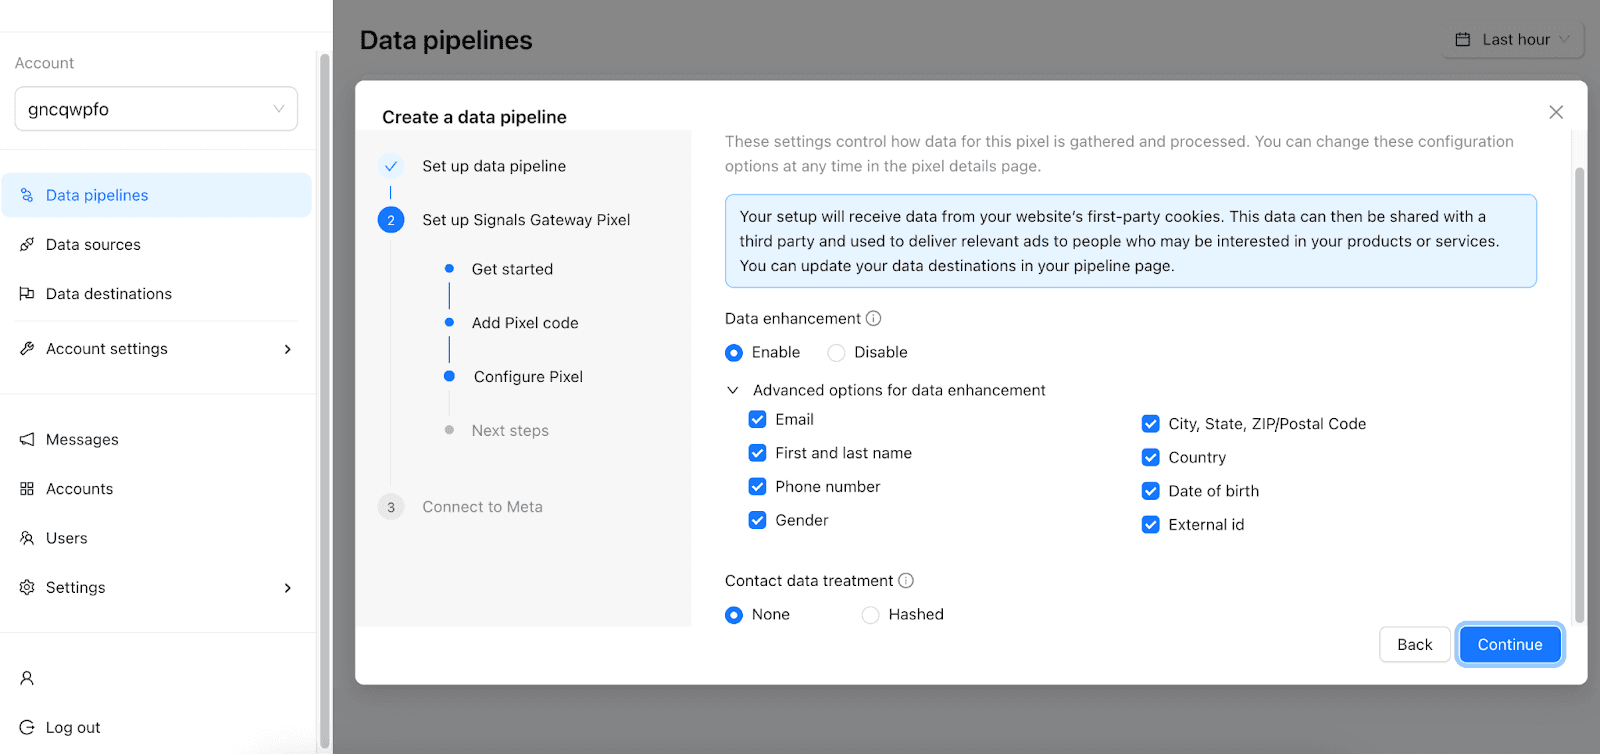
Then click Continue. You’ve successfully started the setup for your Signals Gateway Pixel.
7. Connect to Meta with Conversions API. There are two ways to do that:
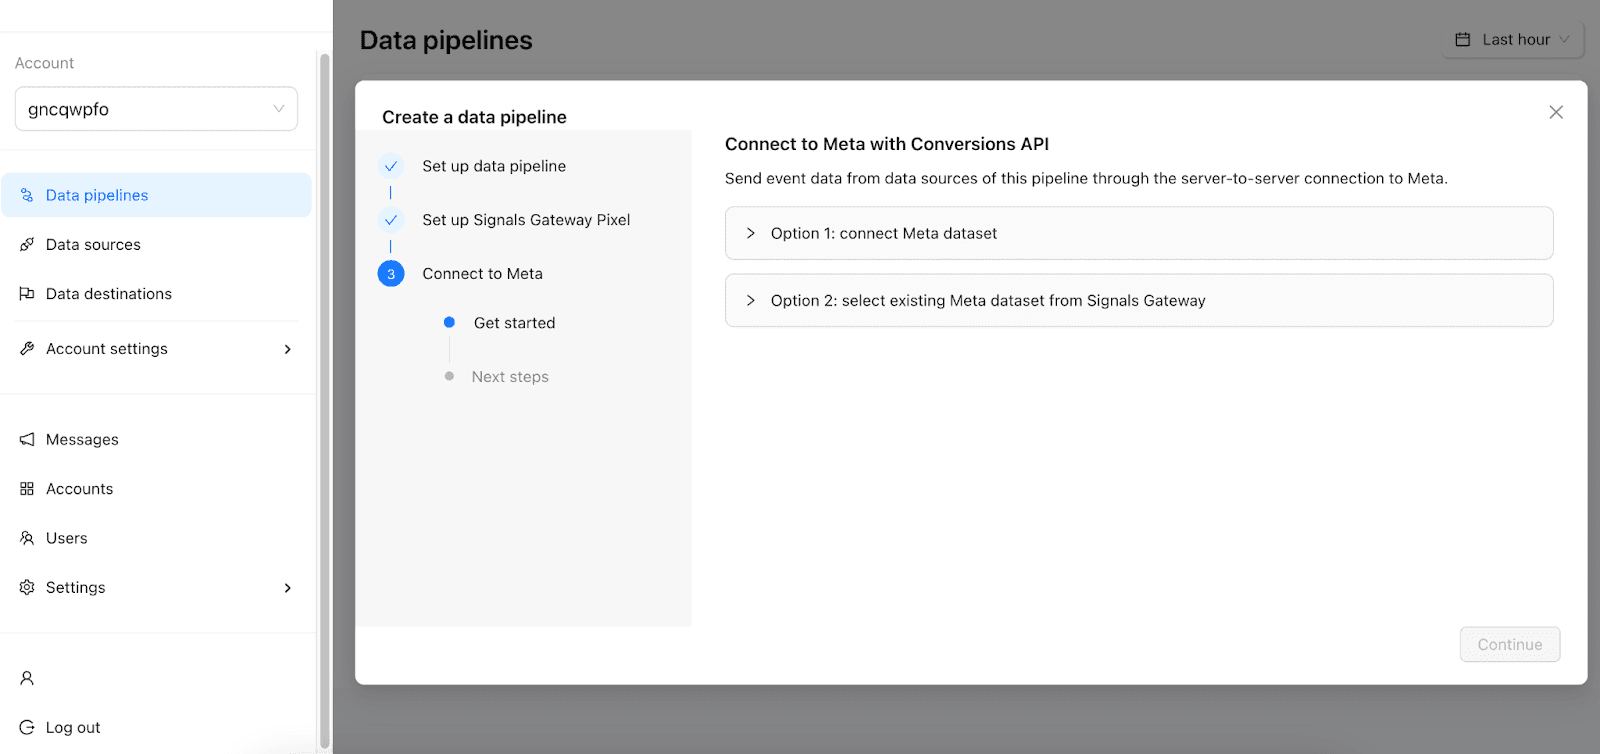
Option 1: connect Meta dataset. You can use Facebook Login to automatically connect your Signals Gateway to your Meta Business Account. Or you can Manually connect your Meta Pixel by filling our the fields using the information from the pixel’s dataset in Events Manager.
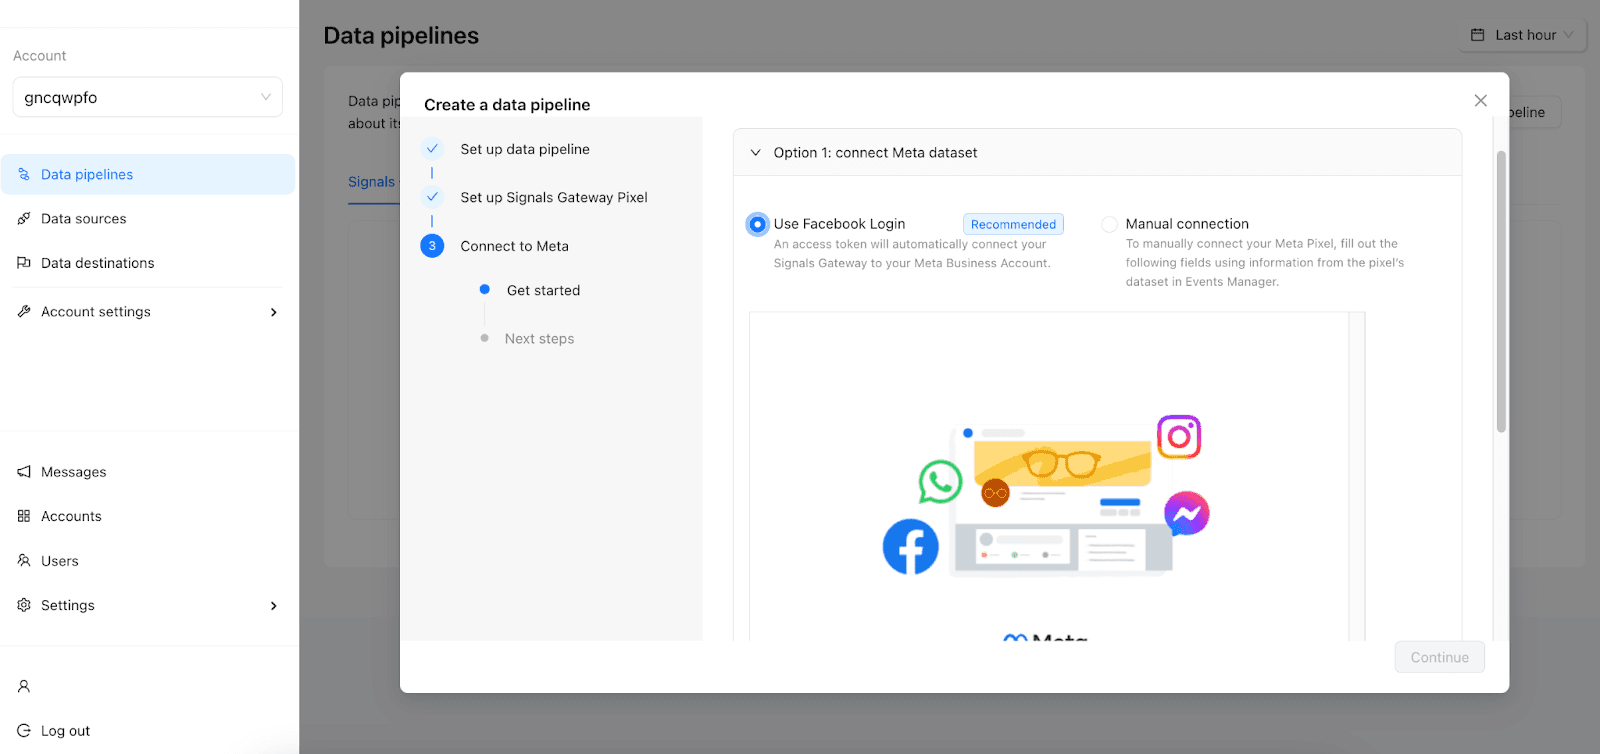
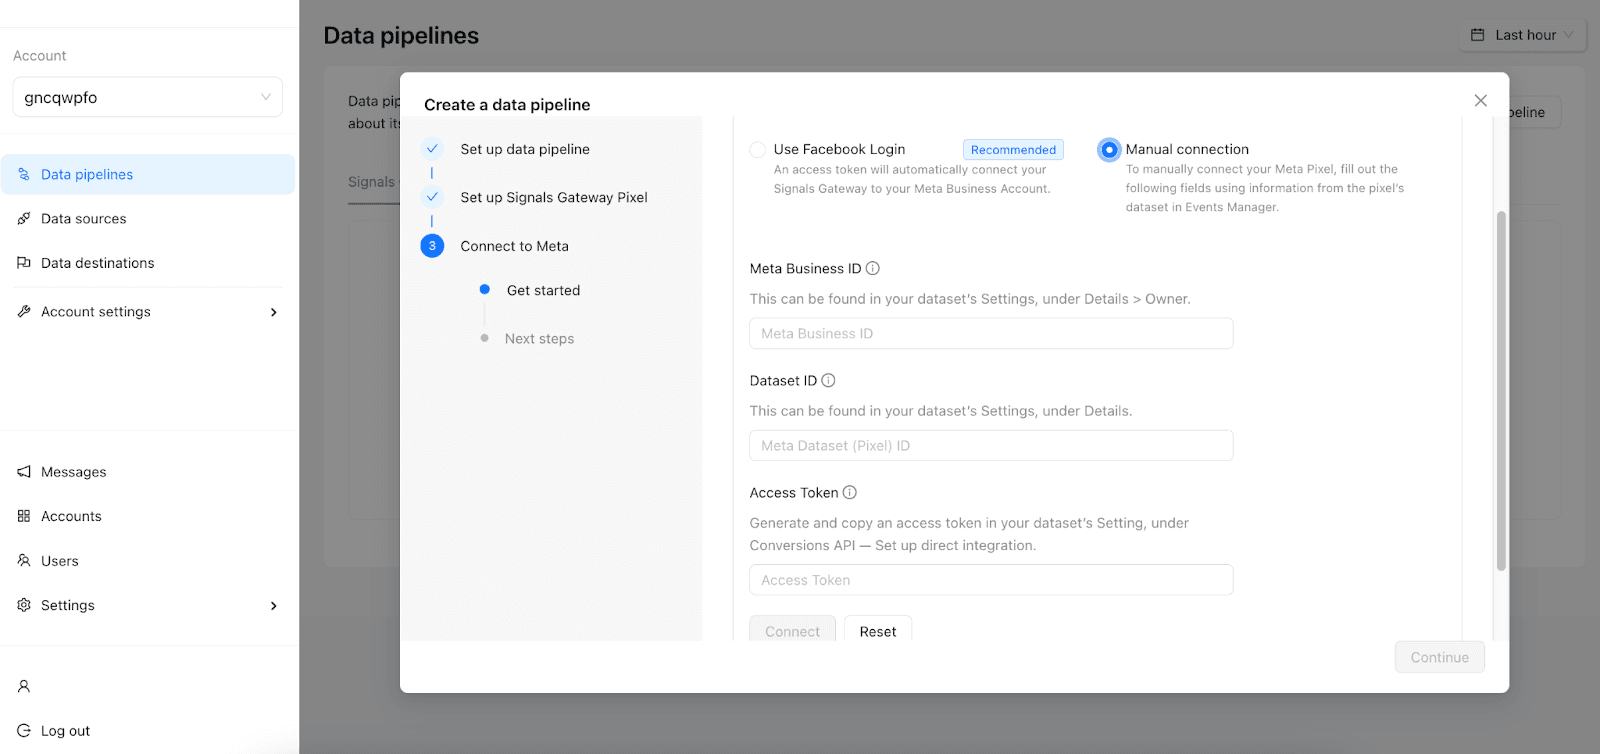
To connect Manually, enter:
- Meta Business ID - the unique number used to identify a groupd of Meta business assets, such as ad account, managed by a business.
- Dataset ID - the unique number associated with a dataset in Meta Events Manager. The Meta Pixel associated with the dataset will share the same ID.
- Access Token - the code which is generated automatically to help establish a secure connection with your dataset.
Option 2: select existing Meta dataset from Signals Gateway. To use this option, enter your existing Meta dataset's ID.
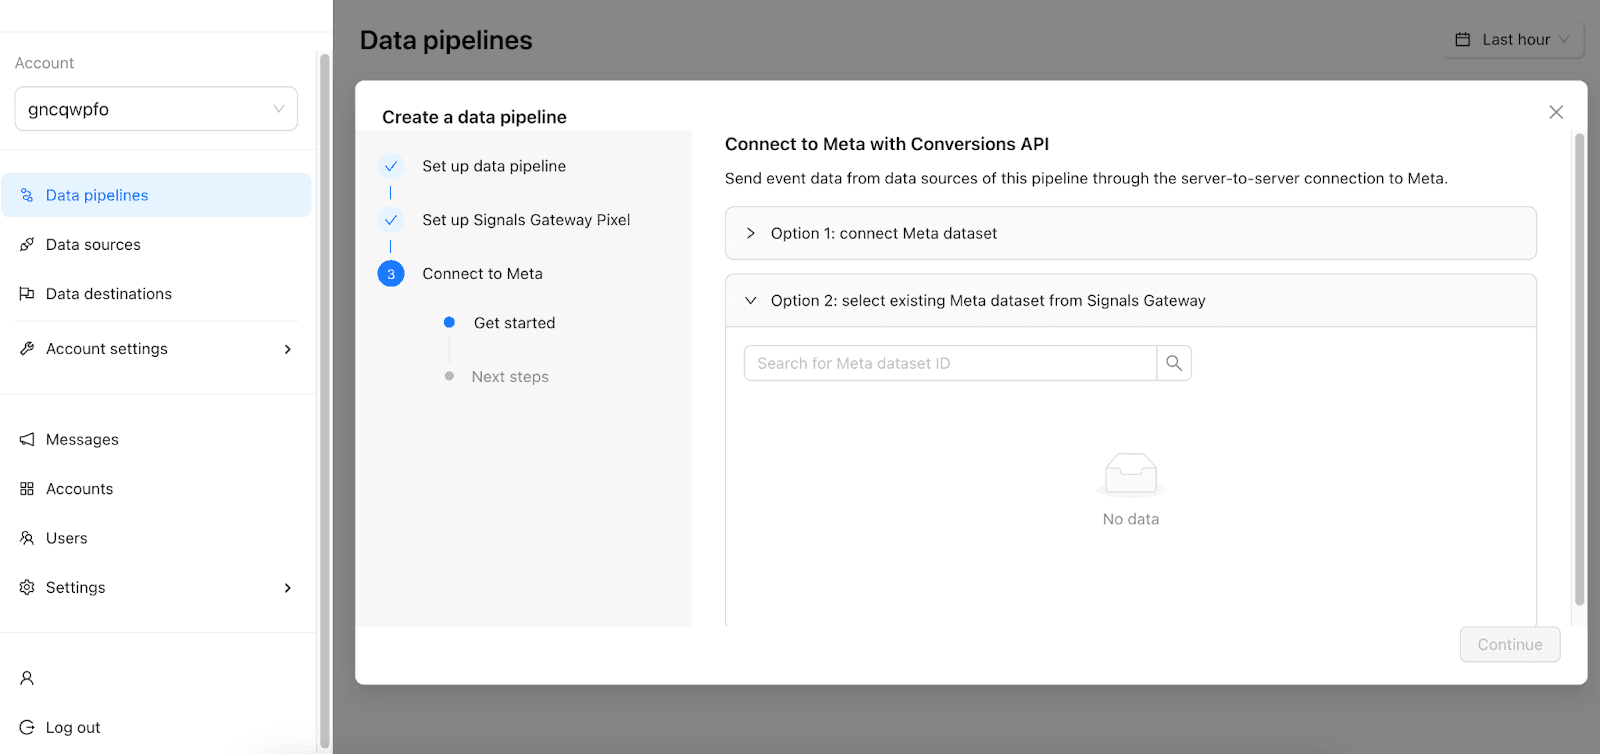
Then click Continue to complete your setup.
Once you're done, you will be able to see your Signals Gateway dasboard, edit Data sources and Data destinations, or and Pipeline filter.
Step 3. Delete your old Meta CAPI Gateway
The following guide assumes that you hosted your old Meta CAPIG with Stape. If you’re using a different provider, please refer to their instructions.
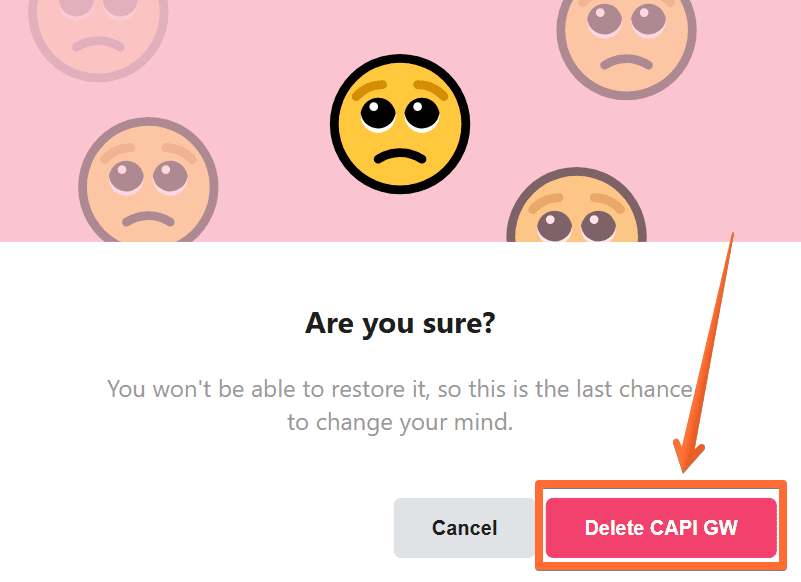
1. Open your Meta CAPI Gateway, click three dots in the top right corner, and click Delete CAPI GW.
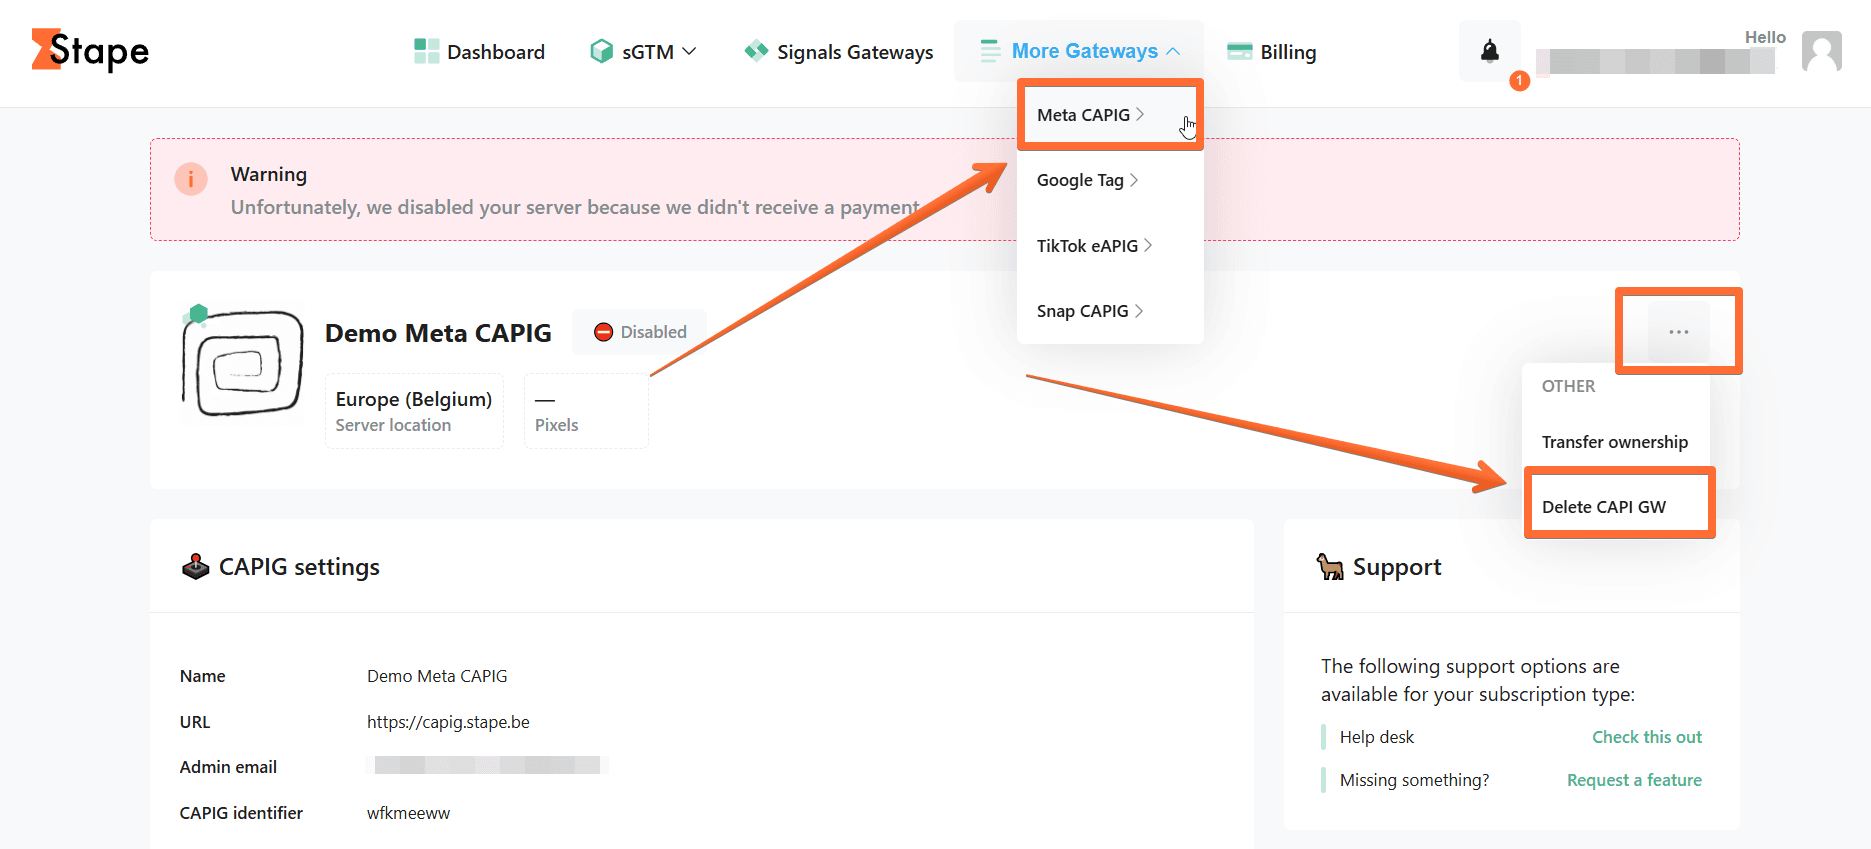
2. In the pop-up, confirm the deletion.
And that’s it! You’ve successfully switched from your old Meta CAPI Gateway to Signals Gateway. You’ve deleted your old setup and configured the new endpoint to process your tracking correctly.
Comments