How to configure Snapchat Conversions API Gateway
Updated May 10, 2026
Important! Before you begin, ensure that Snapchat web tracking is already configured on your site, whether it's implemented through a GTM container, embedded directly in the website code, or integrated via a plugin. This setup allows you to use existing web events.
Step-by-step guide to configure Snapchat Conversions API Gateway
Create a Snapchat Conversions API Gateway container on Stape
1. Log in to your stape.io account.
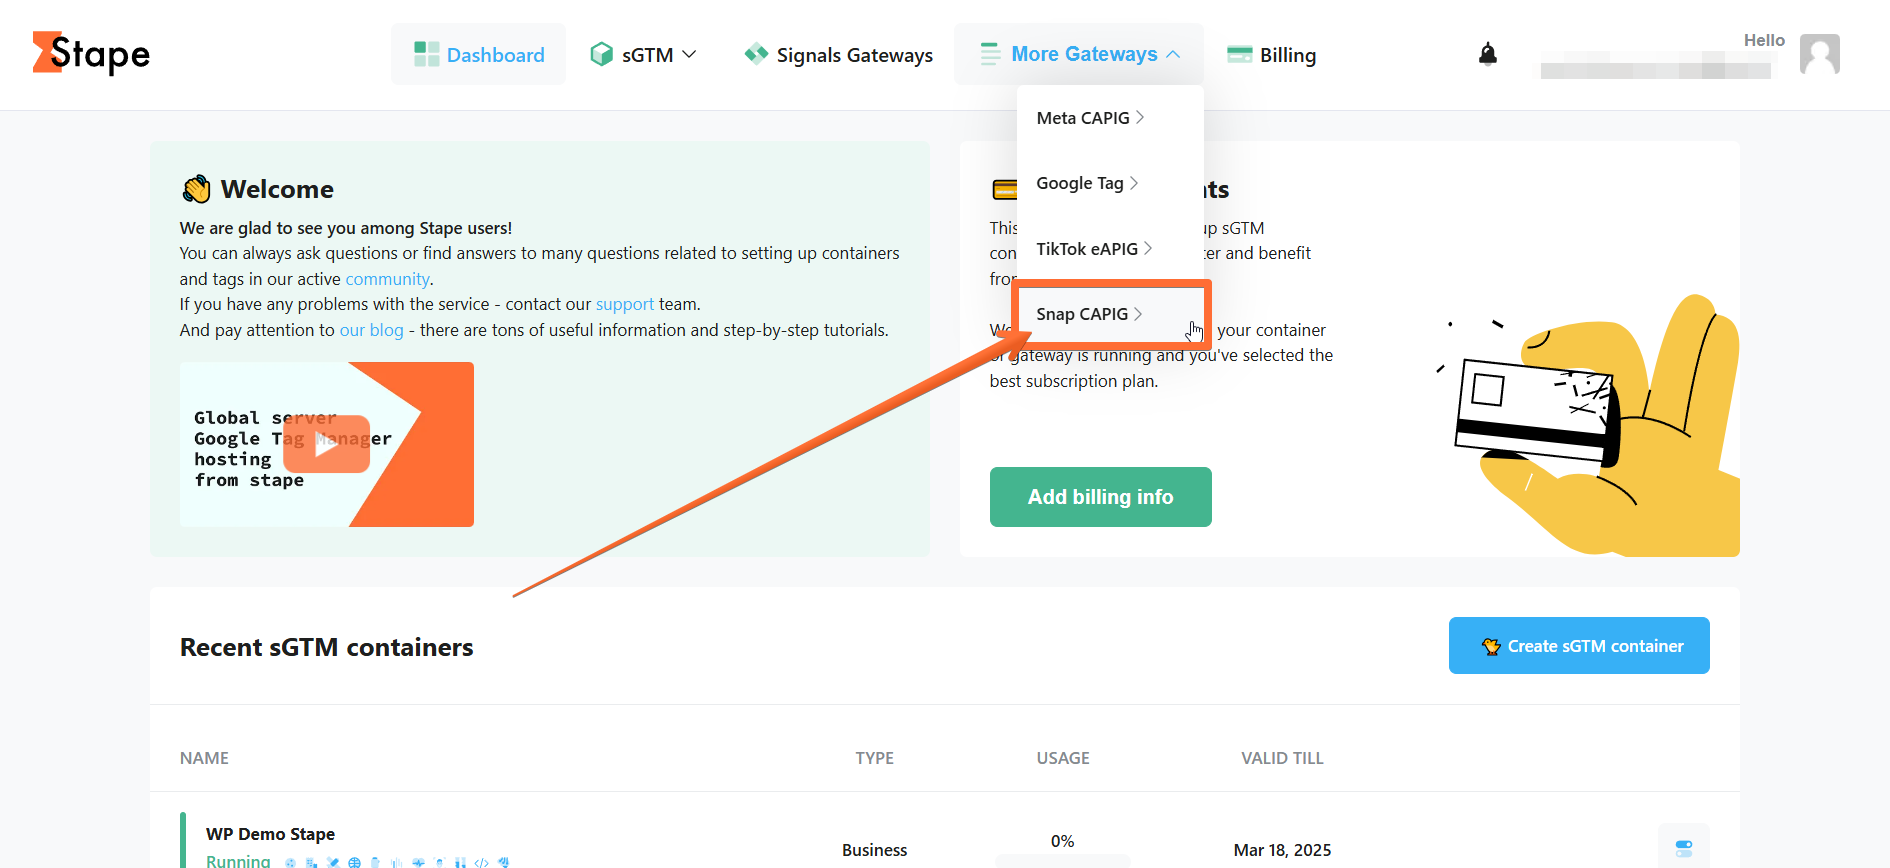
2. Open the Snapchat Conversions API Gateway page.
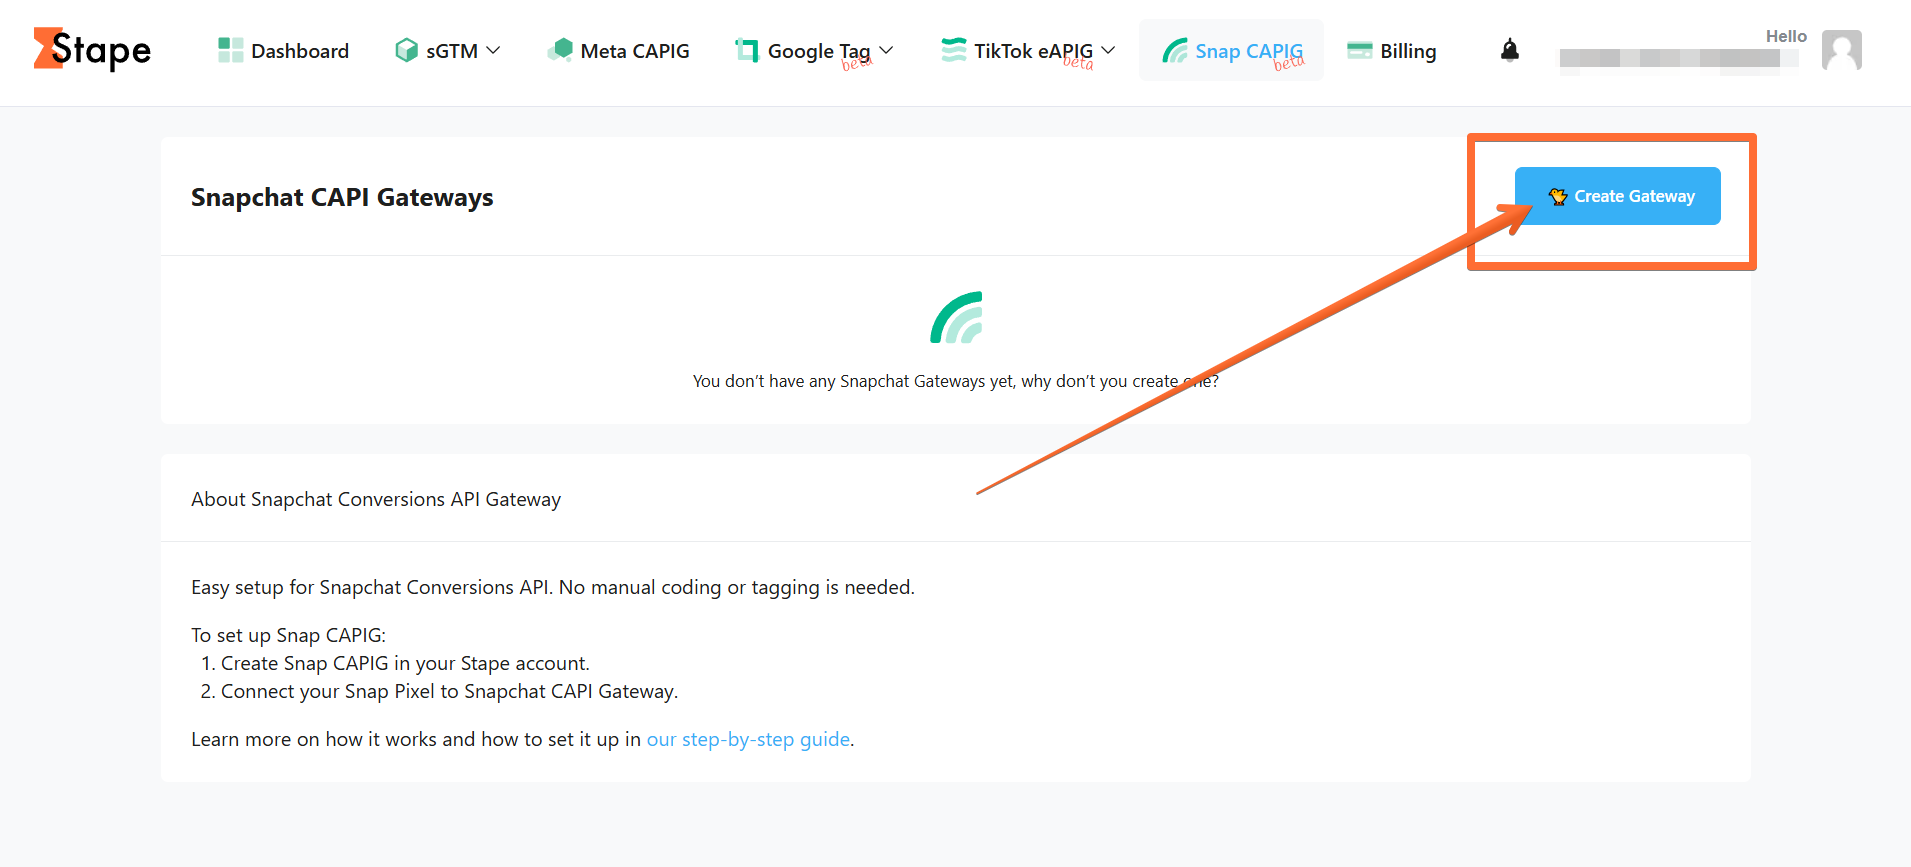
3. Click Create Gateway.
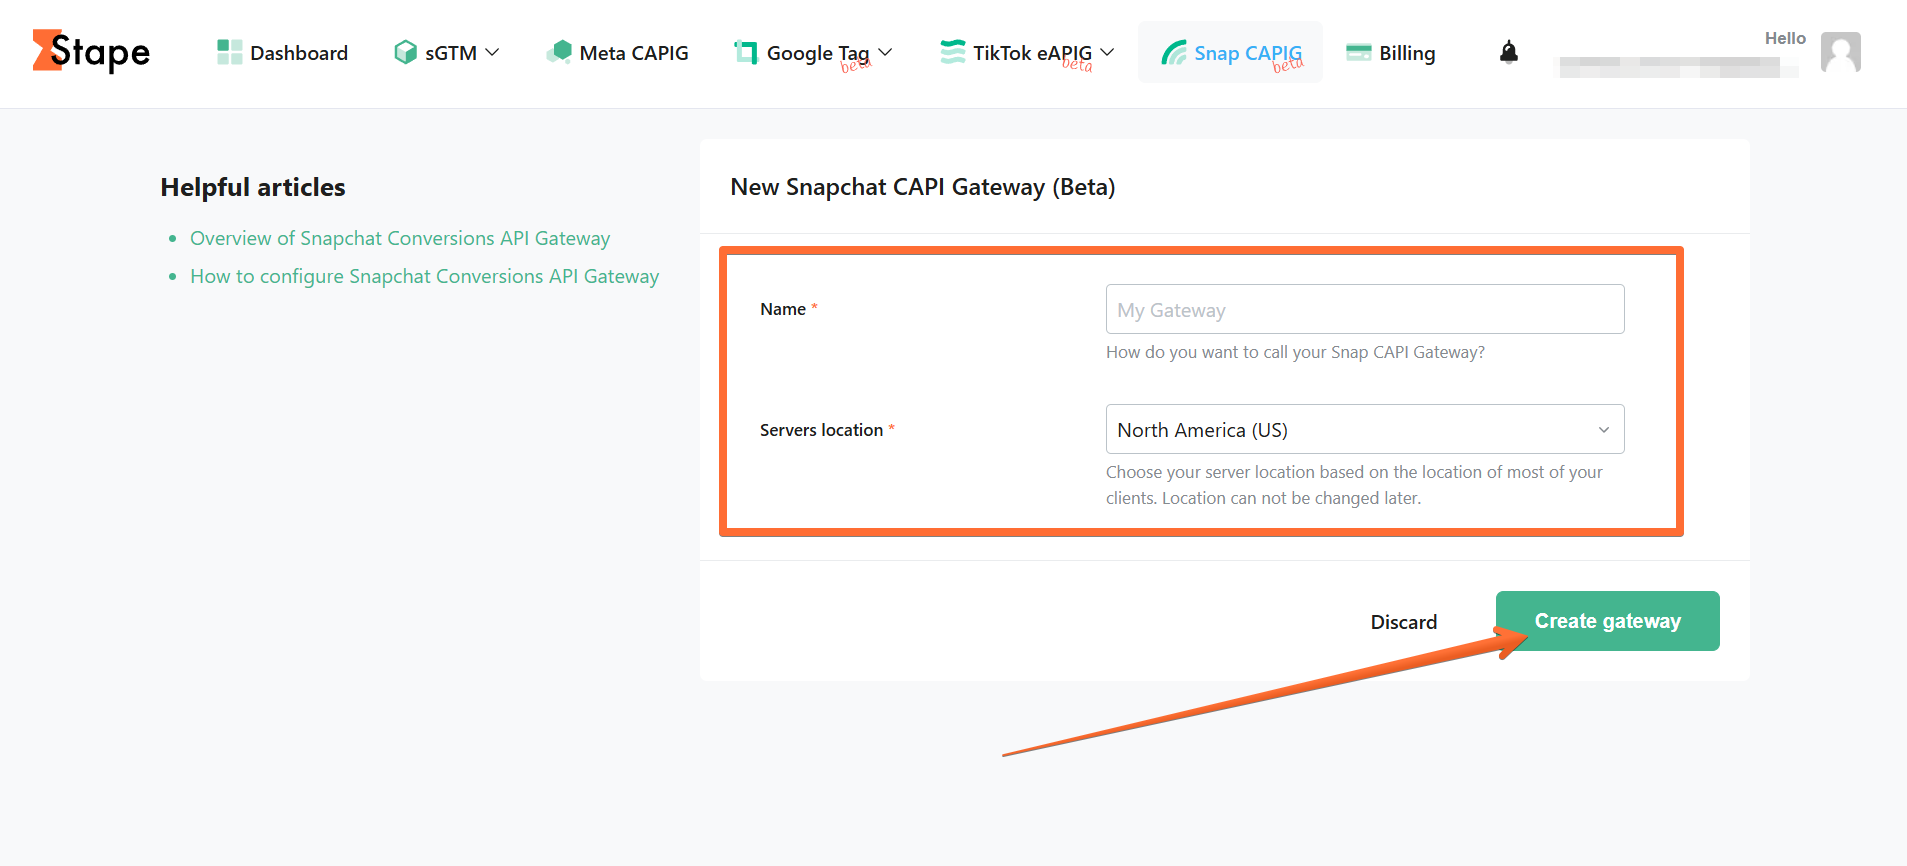
4. Fill in the required fields:
- Name. Enter a descriptive name for this Gateway.
- Servers location. For better performance, select a location closer to your website’s visitors.
Then click Create gateway.
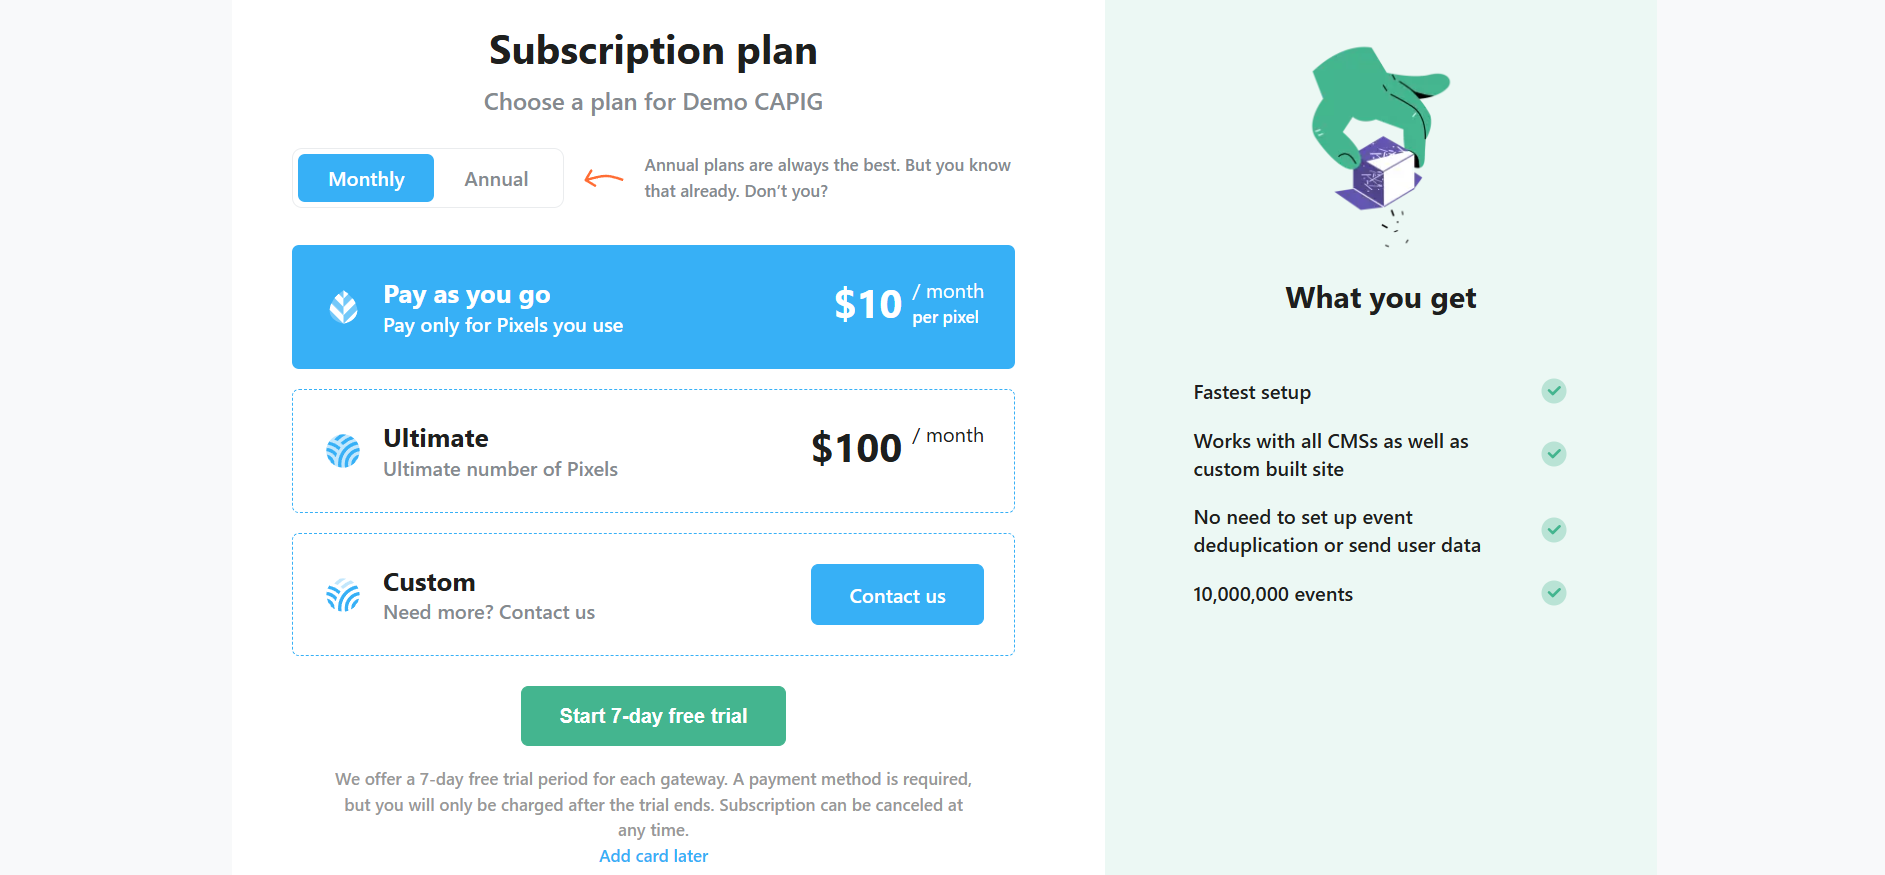
5. Select a subscription plan or click Add card later to activate a 7-day free trial.
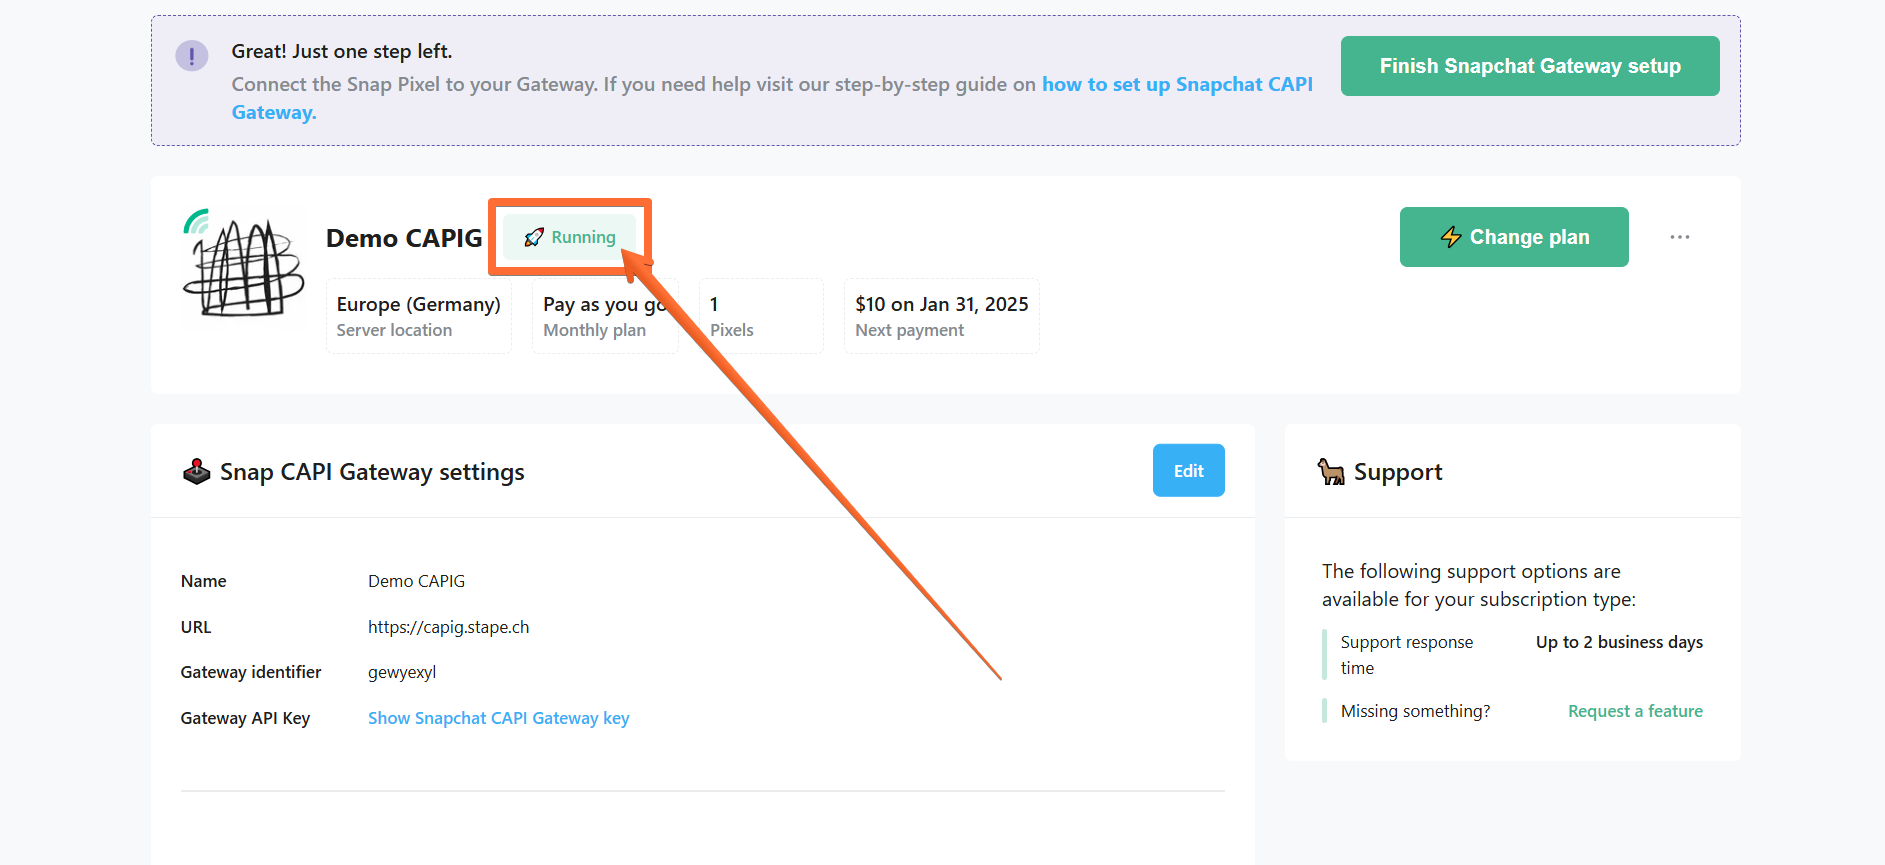
6. Wait until the Gateway is verified (the status changes to Running.)
Connect your Pixel
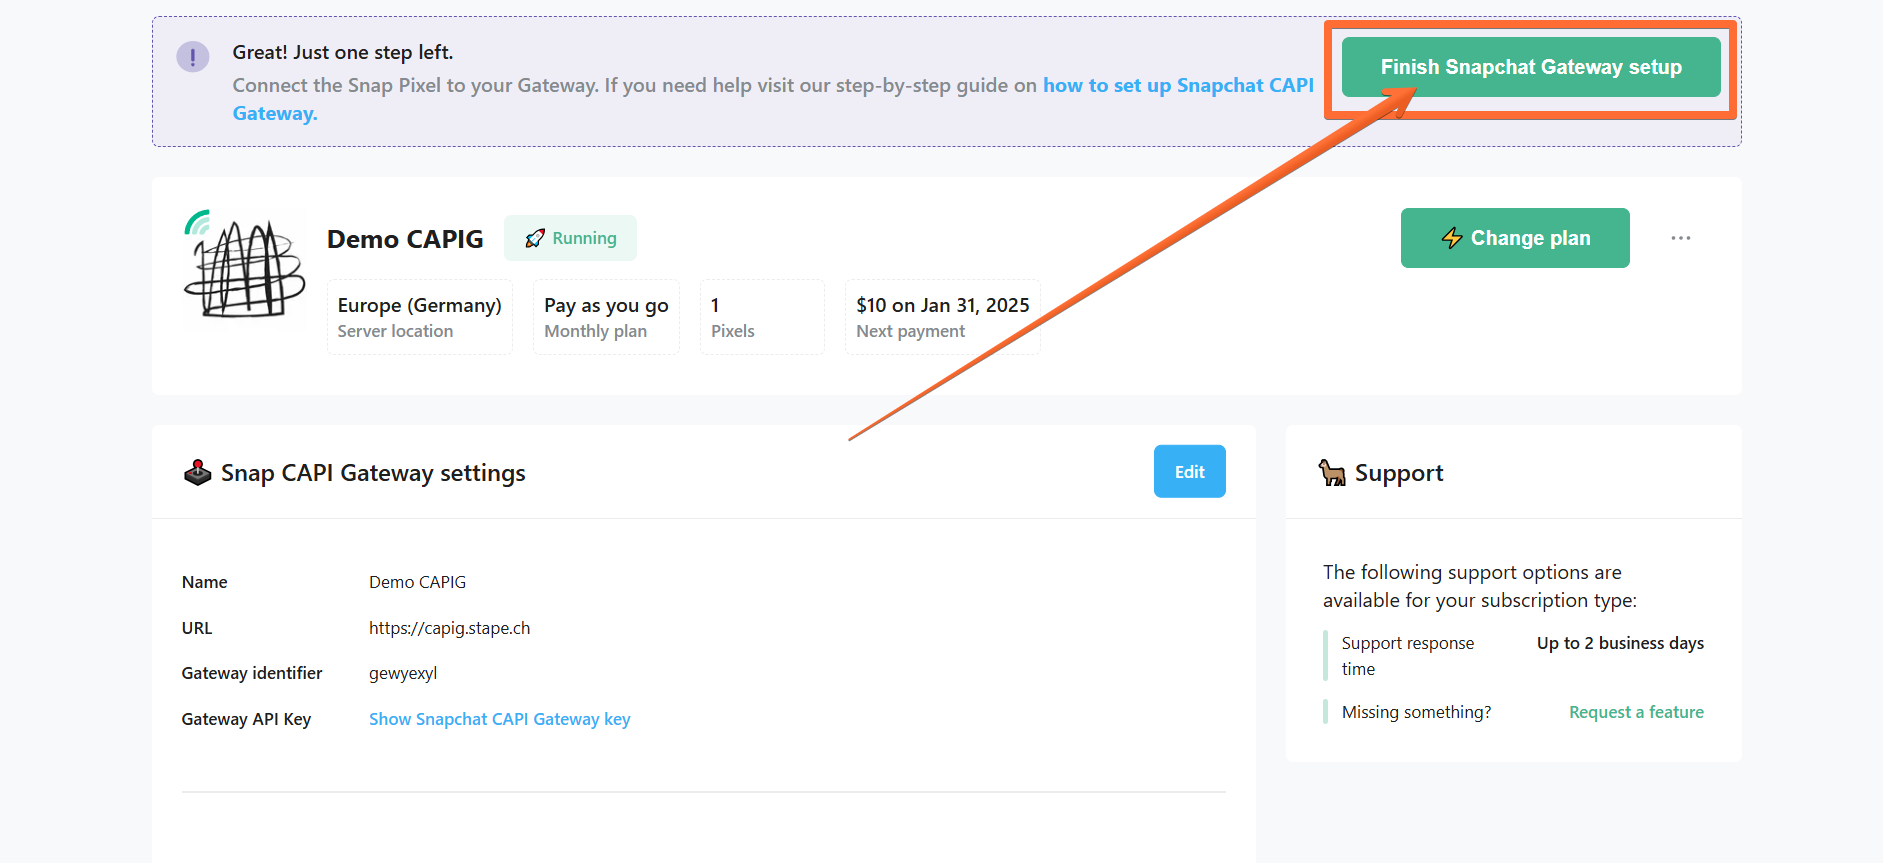
1. Click Finish Snapchat Gateway setup.
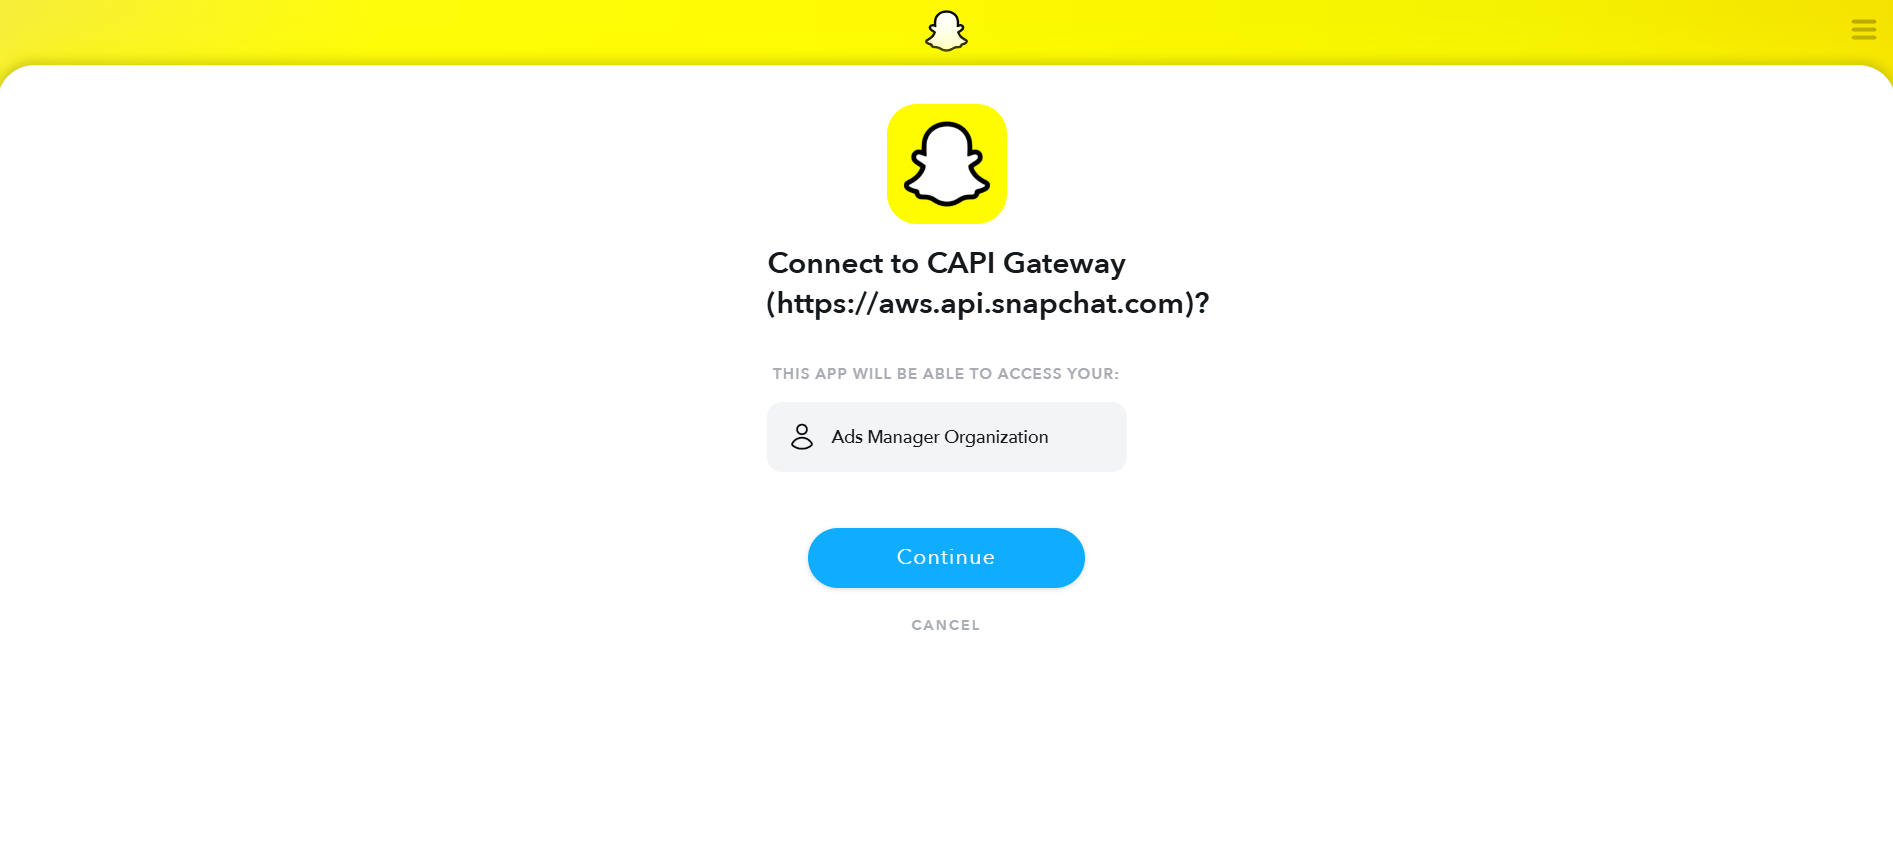
2. You will be redirected to the login interface of Snapchat Gateway. Log in using your credentials.
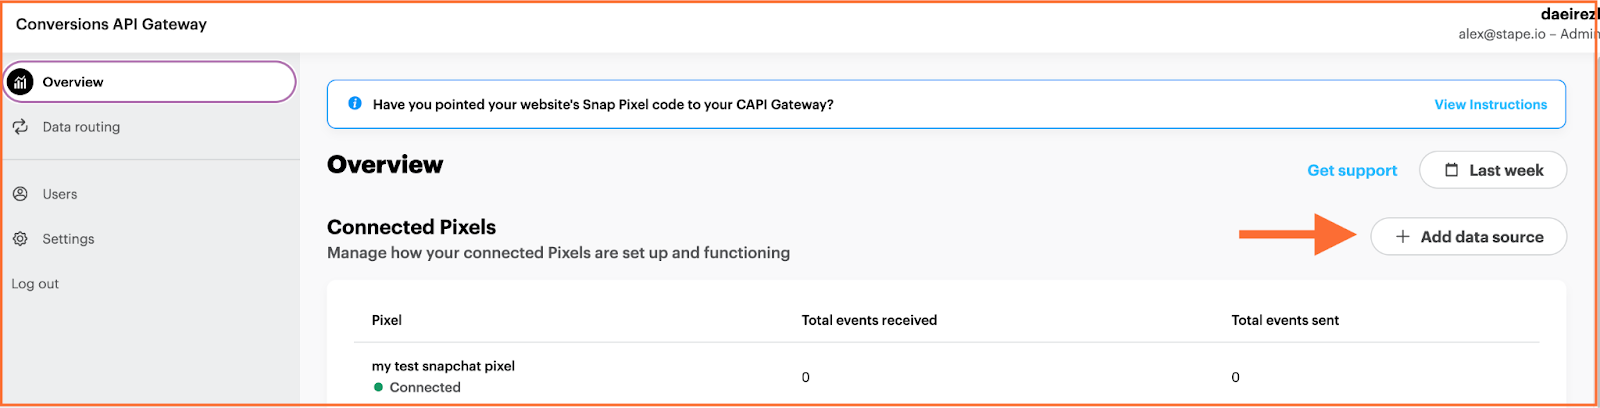
3. In the Conversions API Gateway hub, click Add data source.

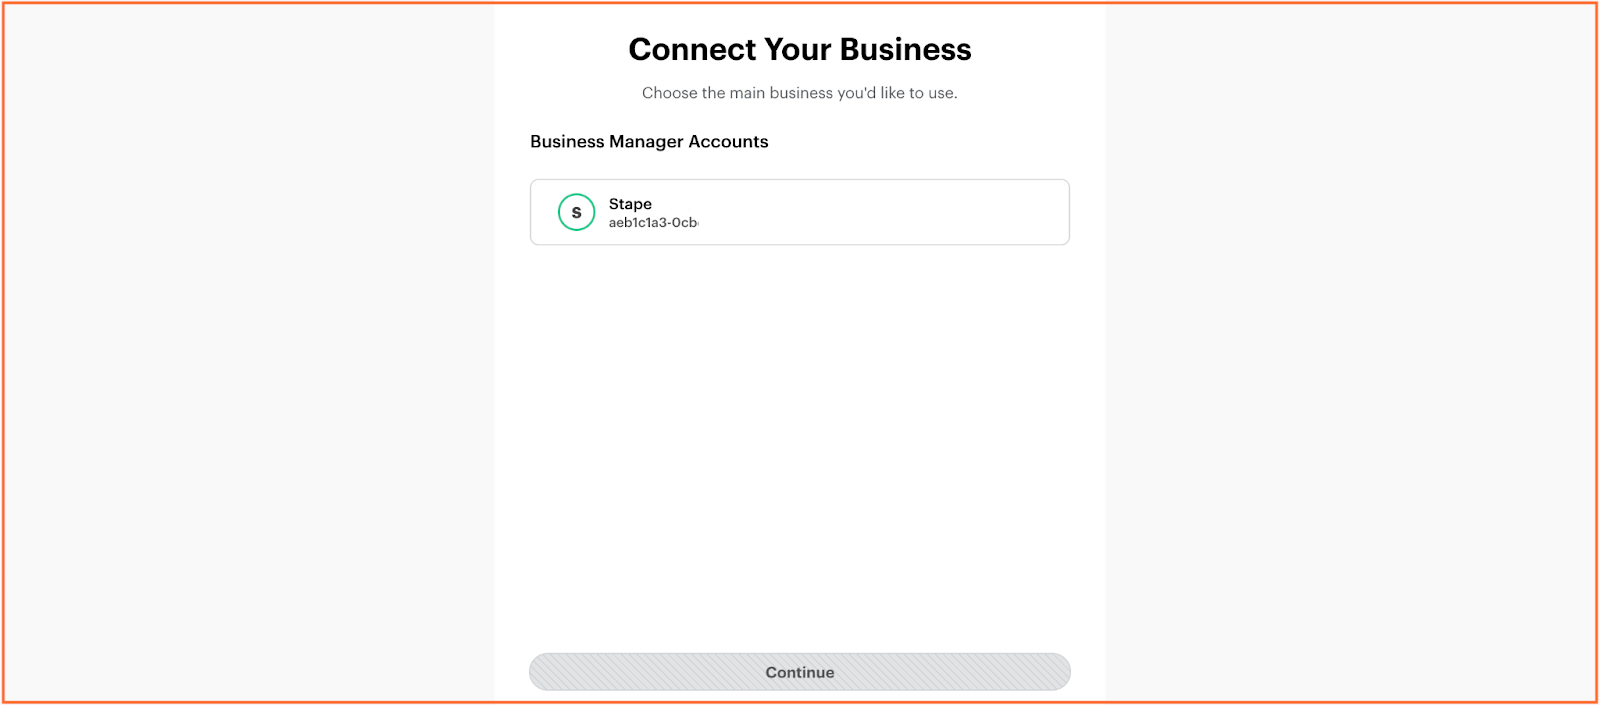
4. Choose the account and Pixels you’d like to connect and confirm your choices.
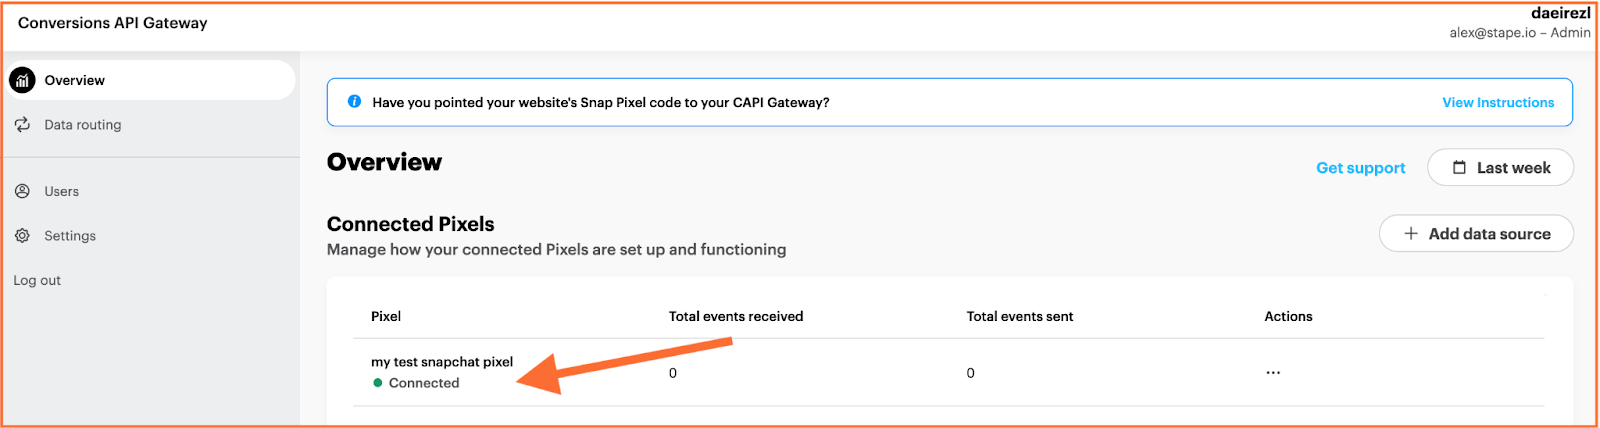
You will see the added Pixel on your dashboard.
5. (Optional) Add new Pixels. You can use a single Snapchat Conversions API Gateway to set up multiple Snapchat Pixels. Additionally, Pixels from various Snapchat Business Accounts can be connected to the same Events API Gateway, provided you have admin access to all the Pixels.
To do that, once you’ve configured your Snapchat Conversions API Gateway, add new Pixels through the hub interface by clicking Add data source.
Configure a custom domain
Using a custom domain in your Snapchat Conversions API Gateway is highly recommended. It can improve measurement performance, allowing you to choose the subdomain for the Pixel's communication with the Conversions API Gateway. This custom domain should match the subdomain used for firing the Snapchat Pixel.
1. In your Snapchat Conversions API Gateway hub, click Data routing → click Add Subdomain.

2. You will be provided with DNS records that you should add to your DNS provider.

Here’s how to add these records to your DNS provider, using Cloudflare as an example:
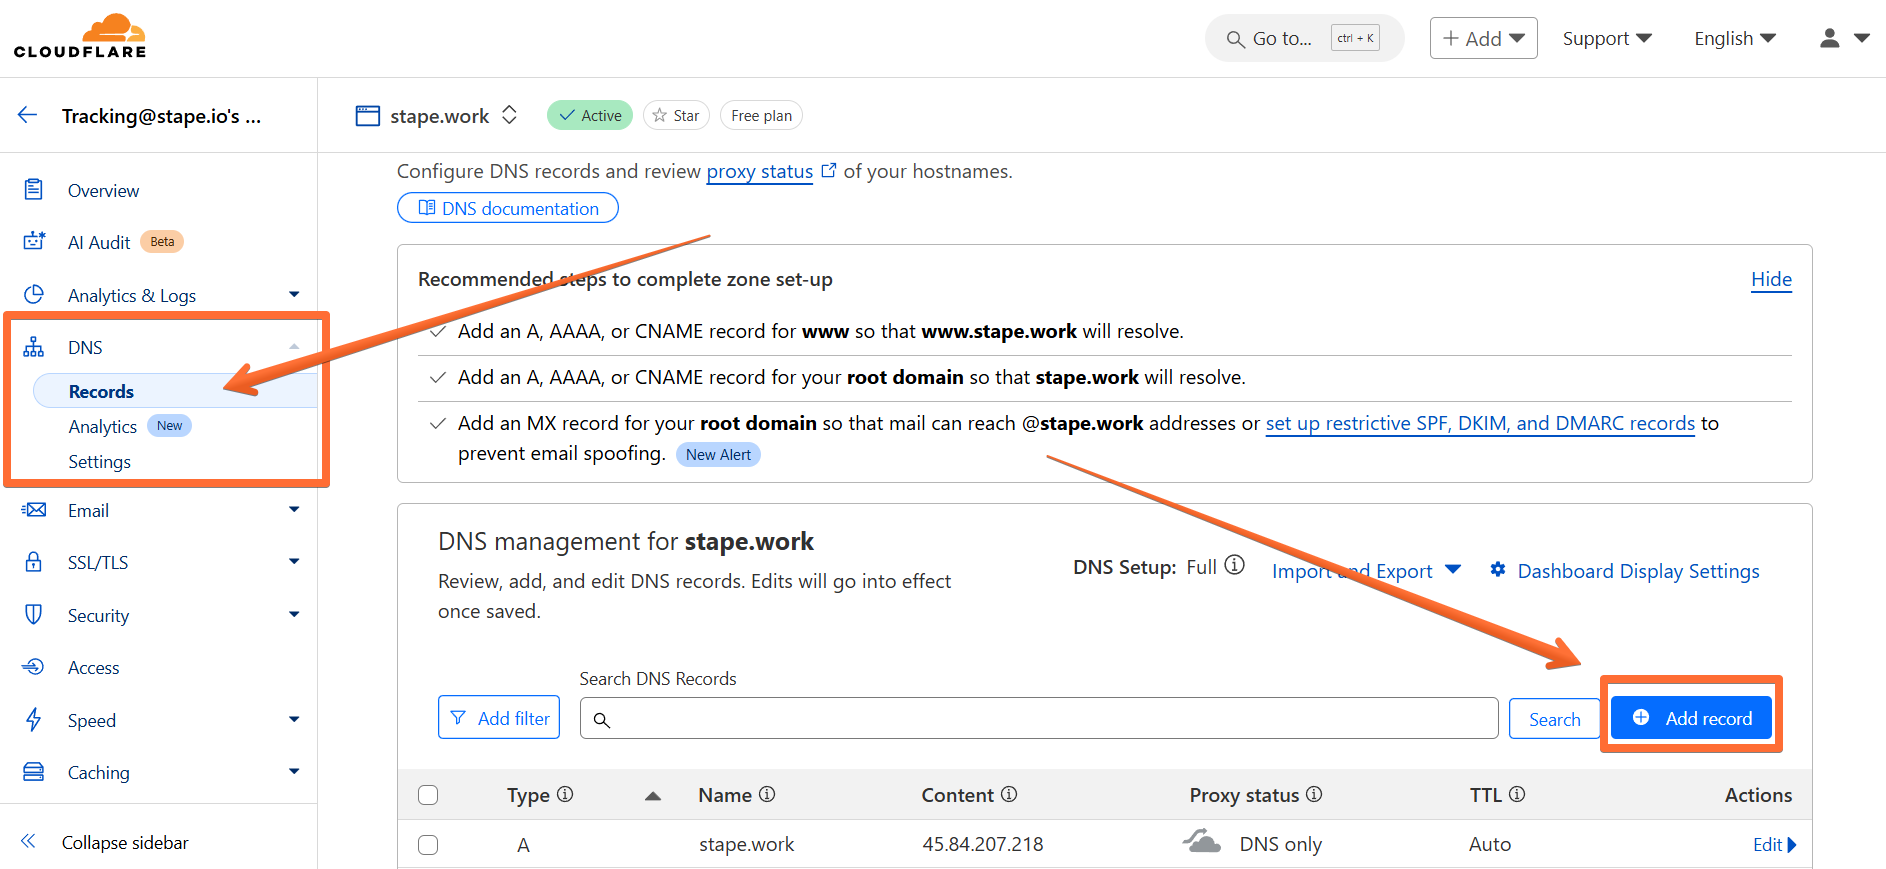
2.1. Visit your Cloudflare profile → open the DNS tab in the side menu → open the Records screen → click Add record.
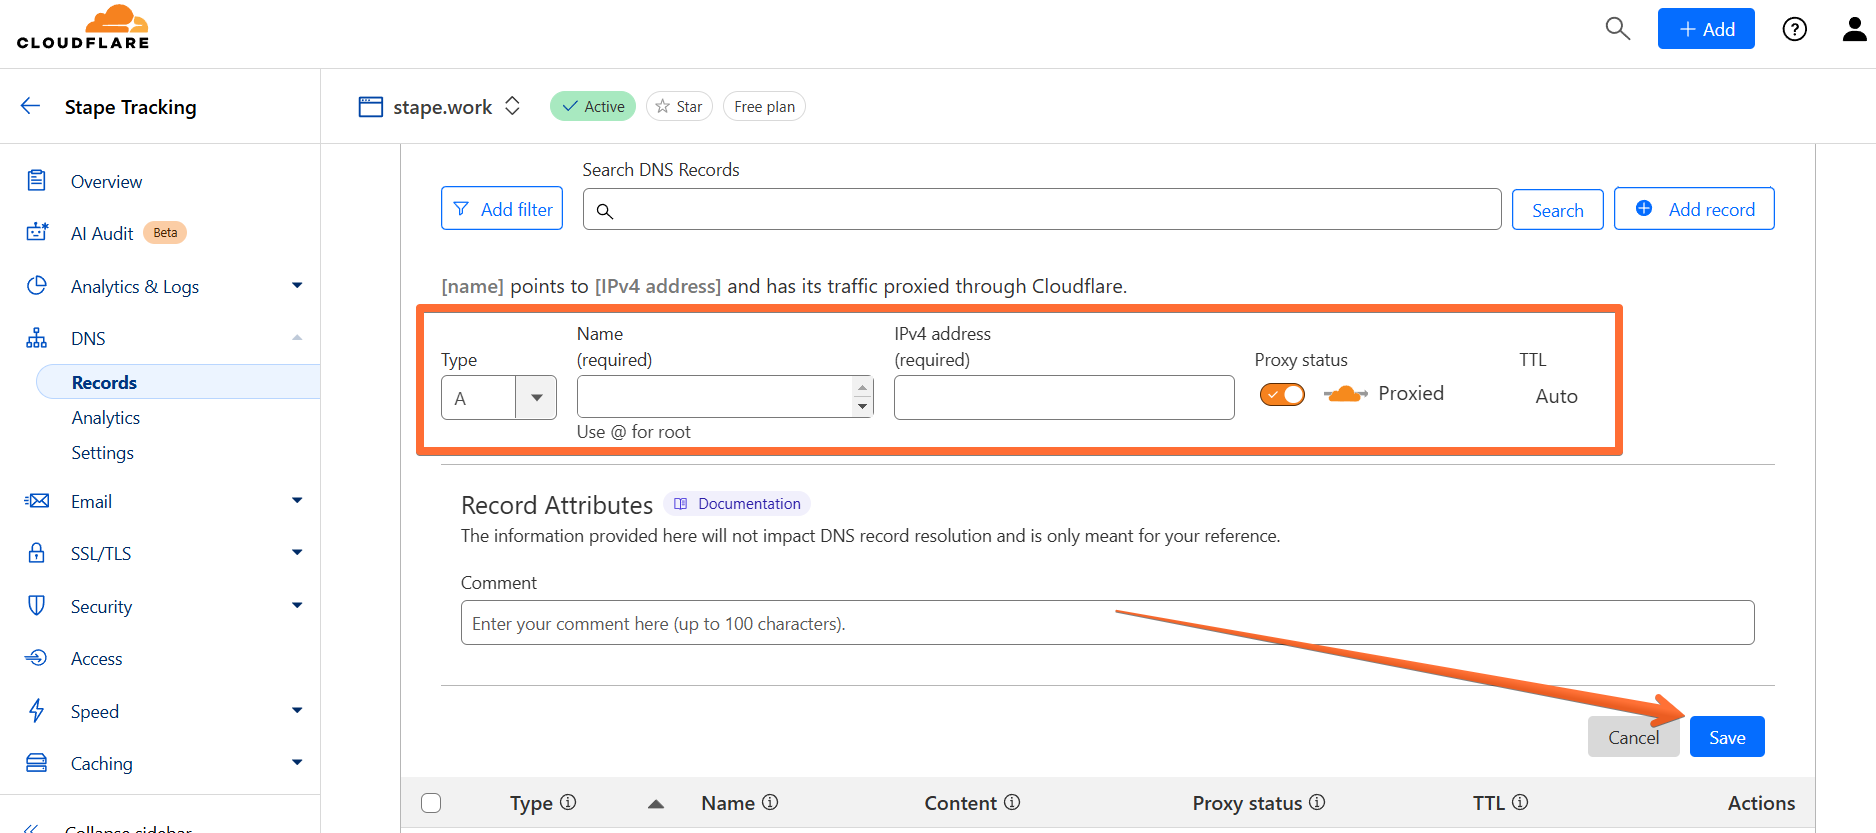
2.2. Enter the DNS records from the Snapchat Conversions API Gateway hub:
- Type - copy the Type parameter from the Snapchat Conversions API Gateway hub (typically, CNAME).
- Name - copy the Name parameter.
- Target - copy the Value parameter.
- Proxy status - make sure to toggle this OFF.
Click Save.
4. Once you’ve entered the DNS records to your DNS provider, return to the Snapchat Conversions API Gateway hub page and wait until your custom domain is verified.
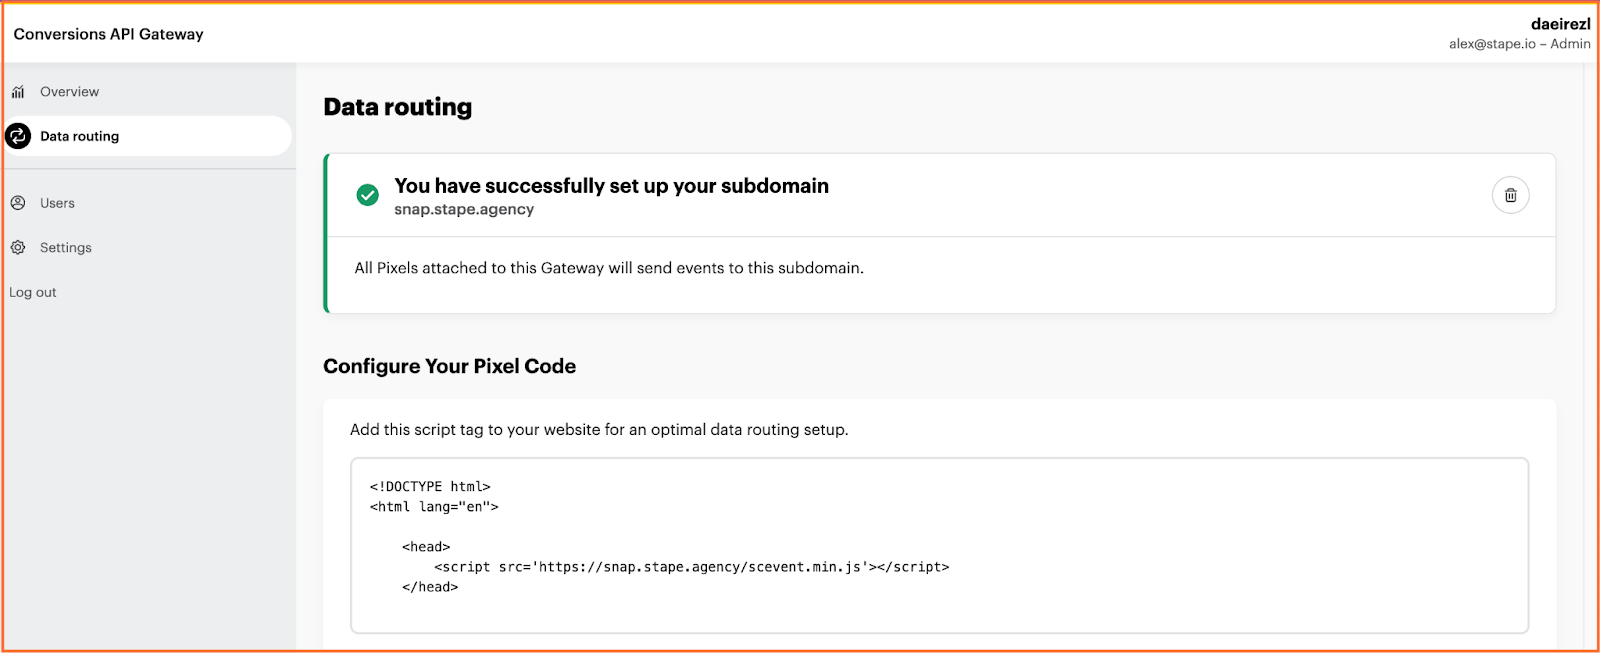
5. (Optional) You may want to load Snap js from your subdomain to increase the protection of your events from ad blockers.
To do this, copy the script tag under the Configure Your Pixel Code section.
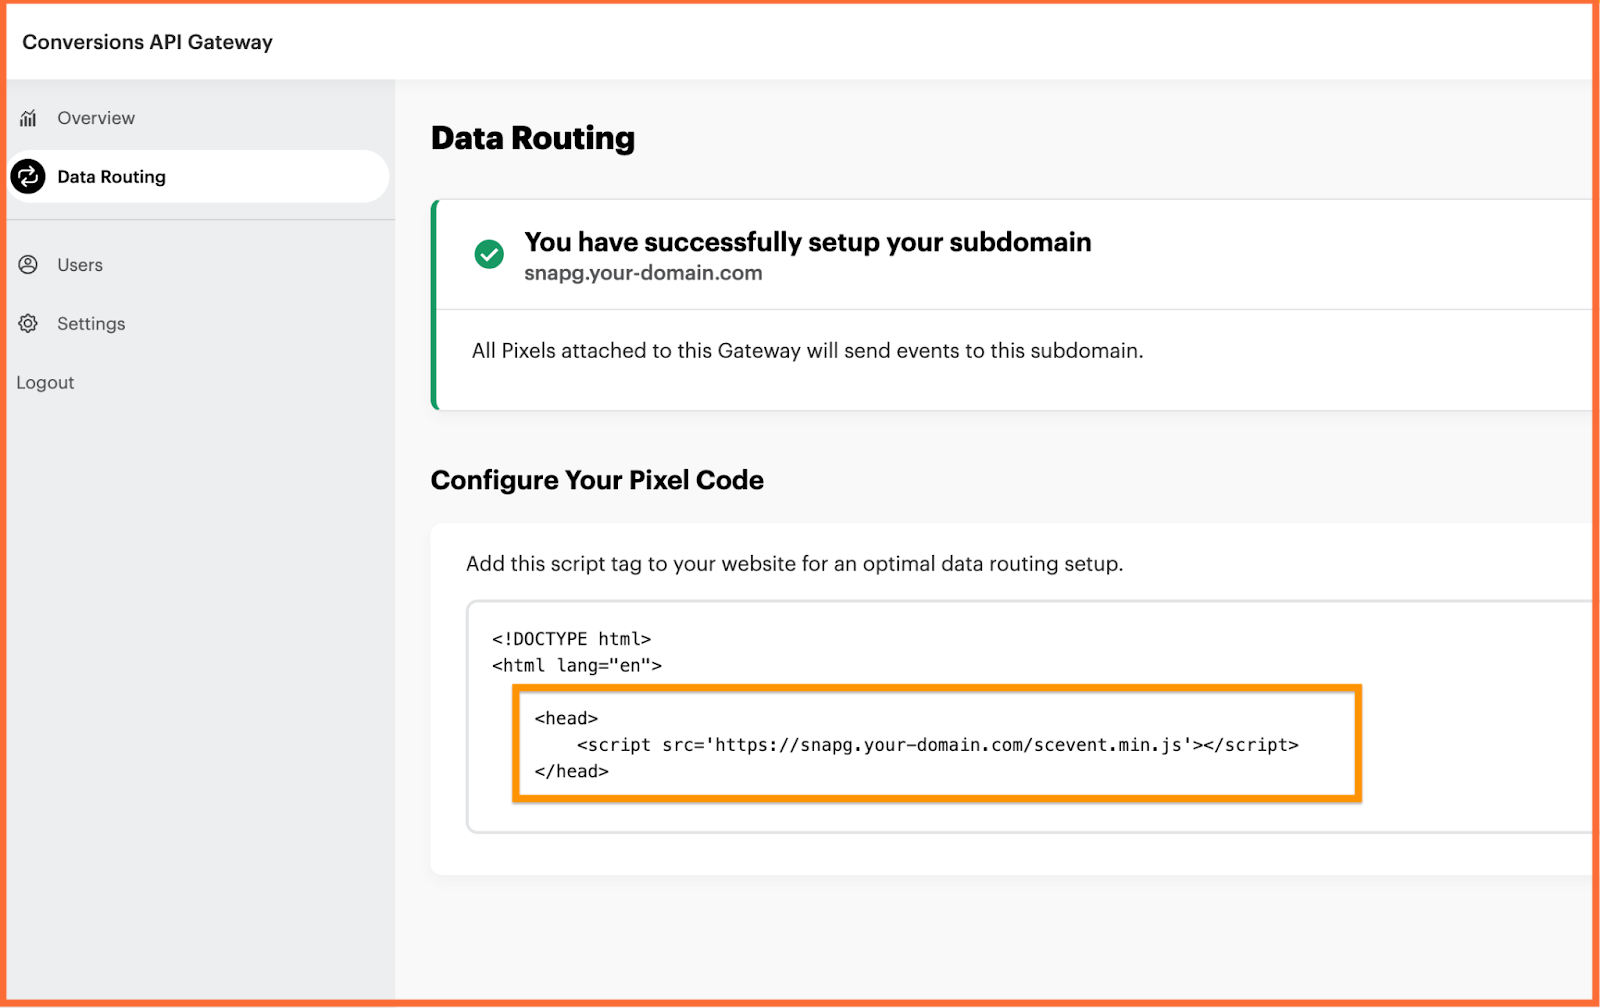
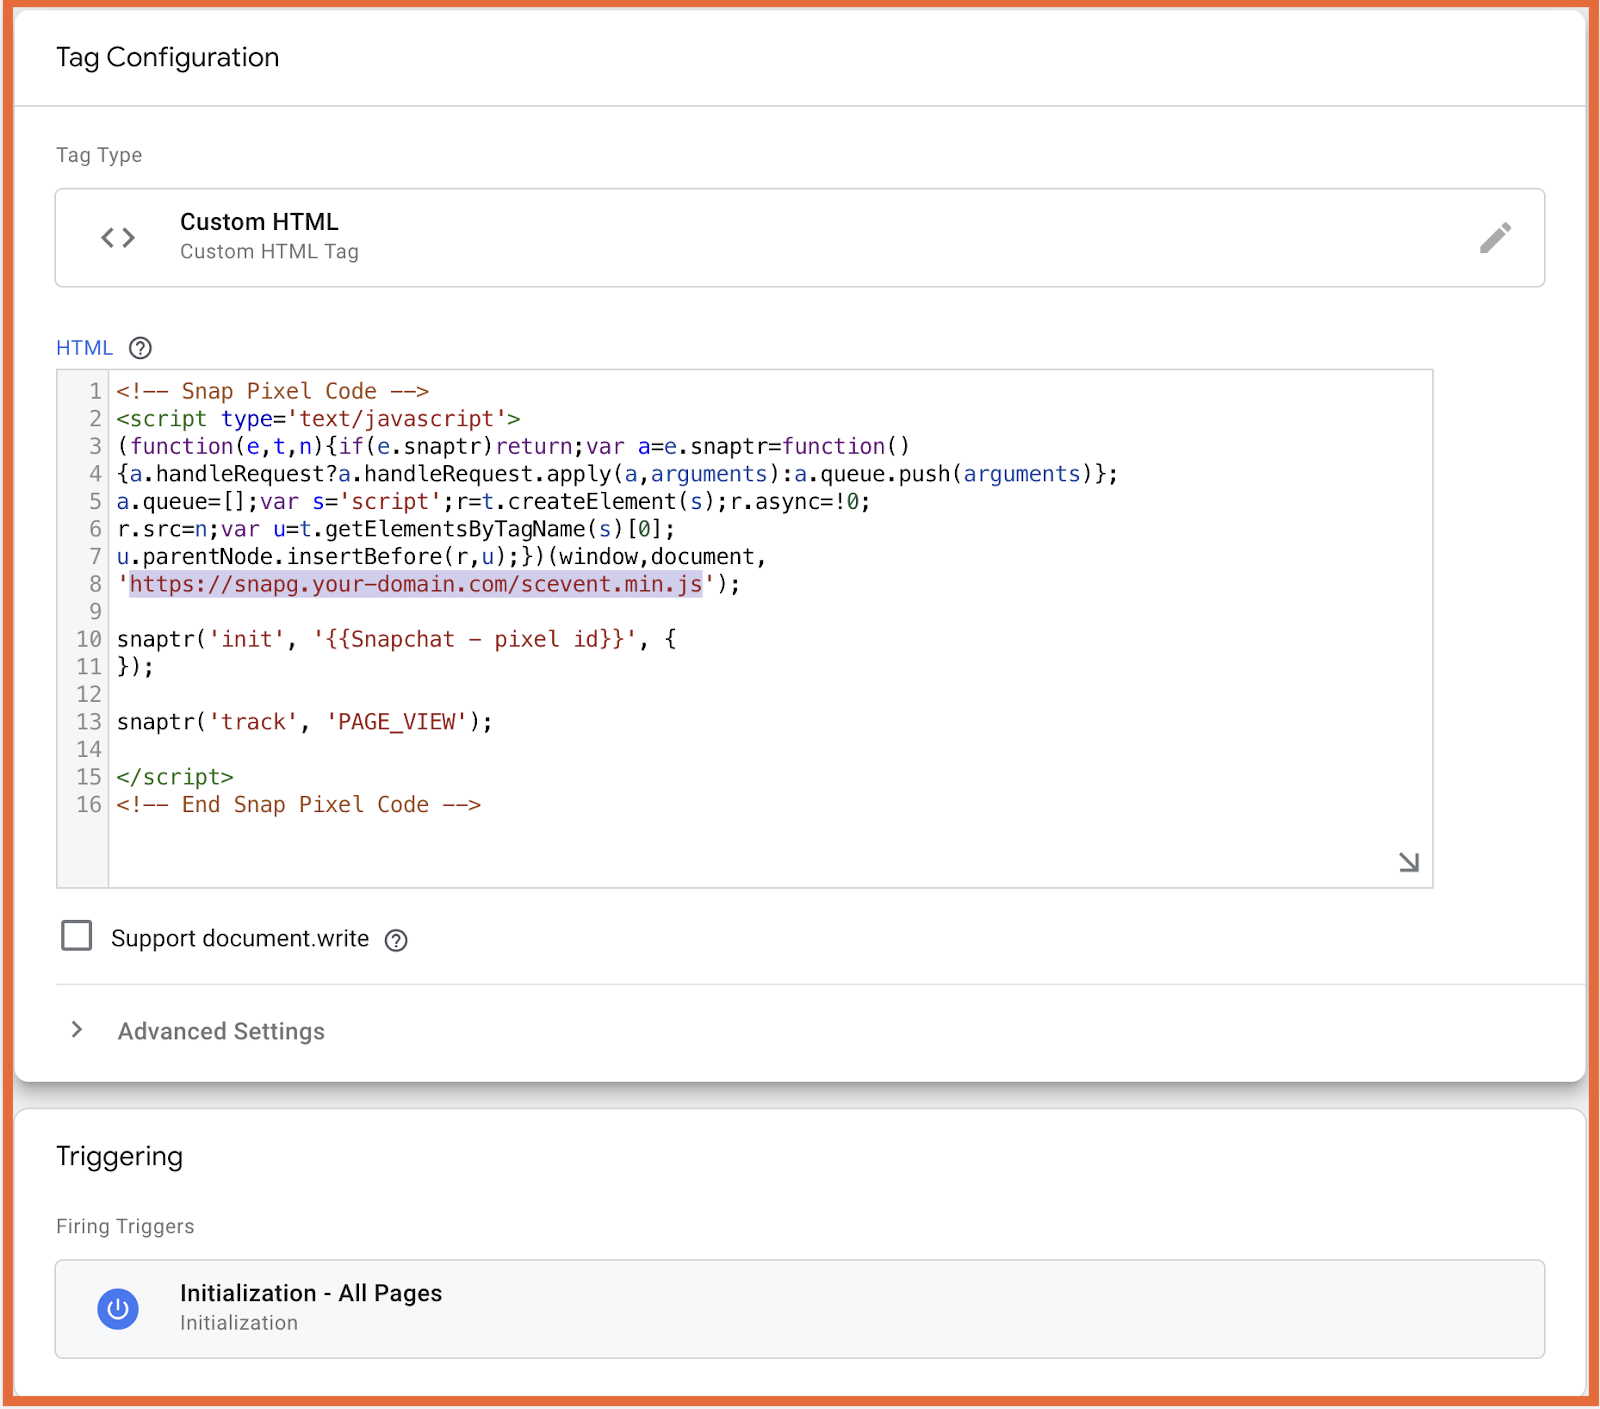
Next, add it to your site's code or change it in the default Snap js snippet.
Custom subdomain is not verified - what to do
Domain verification can take up to 72 hours, but it usually happens within 30-60 minutes if your DNS records are correct. If it takes more time for you, there may be a problem with your configurations.
1. Open the Google Admin Toolbox service called Dig: https://toolbox.googleapps.com/apps/dig/
2. Enter the subdomain you created for Snapchat Conversions API Gateway (without https:// or any extra characters). Then, select the record type you want to check.
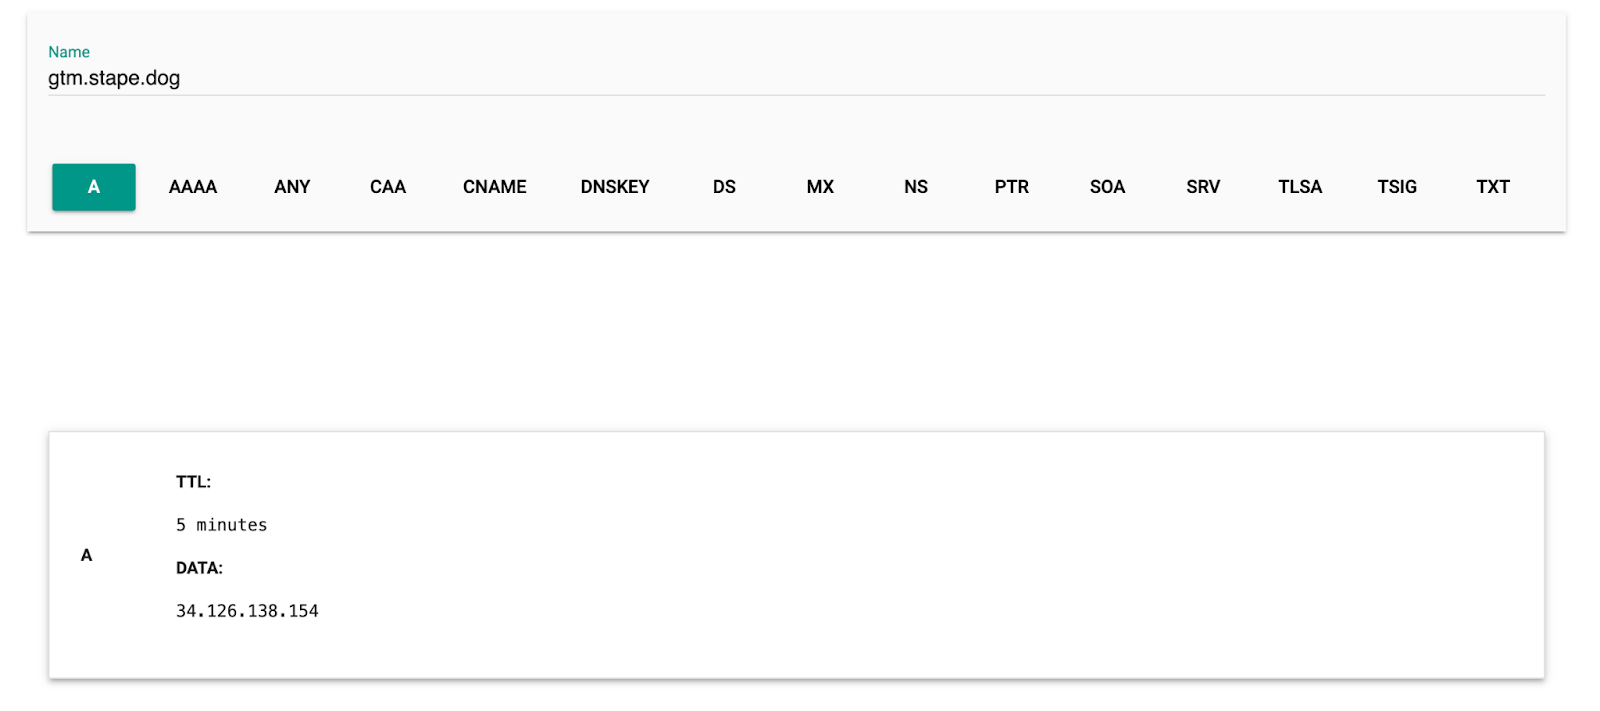
Using this tool, check your DNS records. There are three main reasons why a subdomain may not verified:
- Missing DNS records - make sure that you added all the records specified in your Gateway on Stape.
- Incorrect DNS records - if all entries exist, check that their values match those in your Gateway.
- Extra DNS records - see that there are no extra DNS records for your TikTok Events API Gateway subdomain, only those provided by Stape. Extra records can interfere with domain verification, so you should remove them.

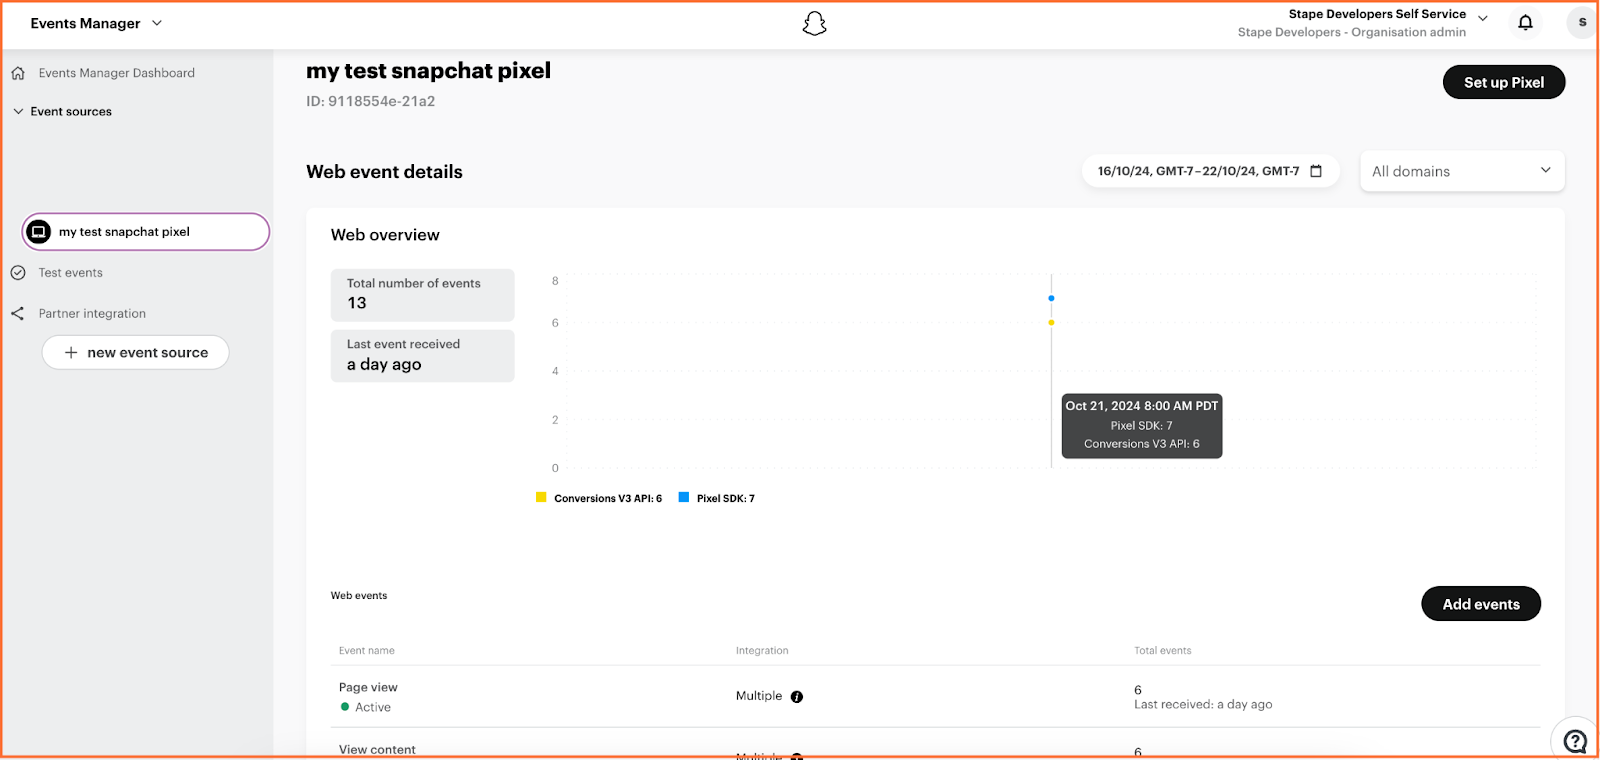
Testing Snapchat Conversions API Gateway
Snapchat Conversions API Gateway uses web events to route them via the server.
Within 30 minutes of connecting your Pixel to the Snapchat Conversions API Gateway hub, you should notice that the event count is no longer zero, and you should also see the names of the events that have been received.
You can also verify that events are sent correctly to the Snapchat Conversions API Gateway hub by checking the website console:
- Open your browser developer network tab on your site.
- Check that events were sent to your Snapchat Conversions API Gateway URL.

Was this article helpful?
Comments