Meta CAPI for Wordpress via server GTM
Ivanna Holubovska
AuthorStep 1. Configure server Google Tag Manager container.
1.1. Open your WEB Google Tag Manager container.
Click Admin. Under the container column, click +
1.2. Type the container name, choose Server, and click Create.
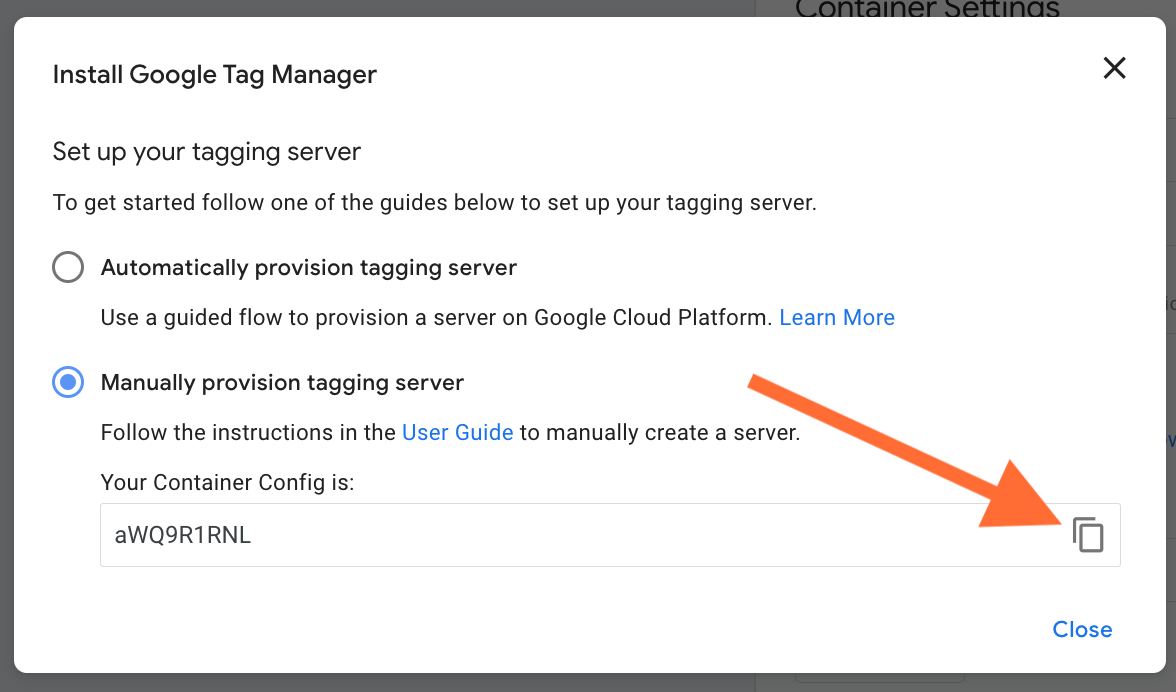
1.3. Choose Manually provision tagging server, copy your container config and paste it in any text editor. We will need it for the next steps.
1.4. Create a stape.io account or log in to your existing one.
1.5. In Stape’s admin dashboard click Create container on the top right.

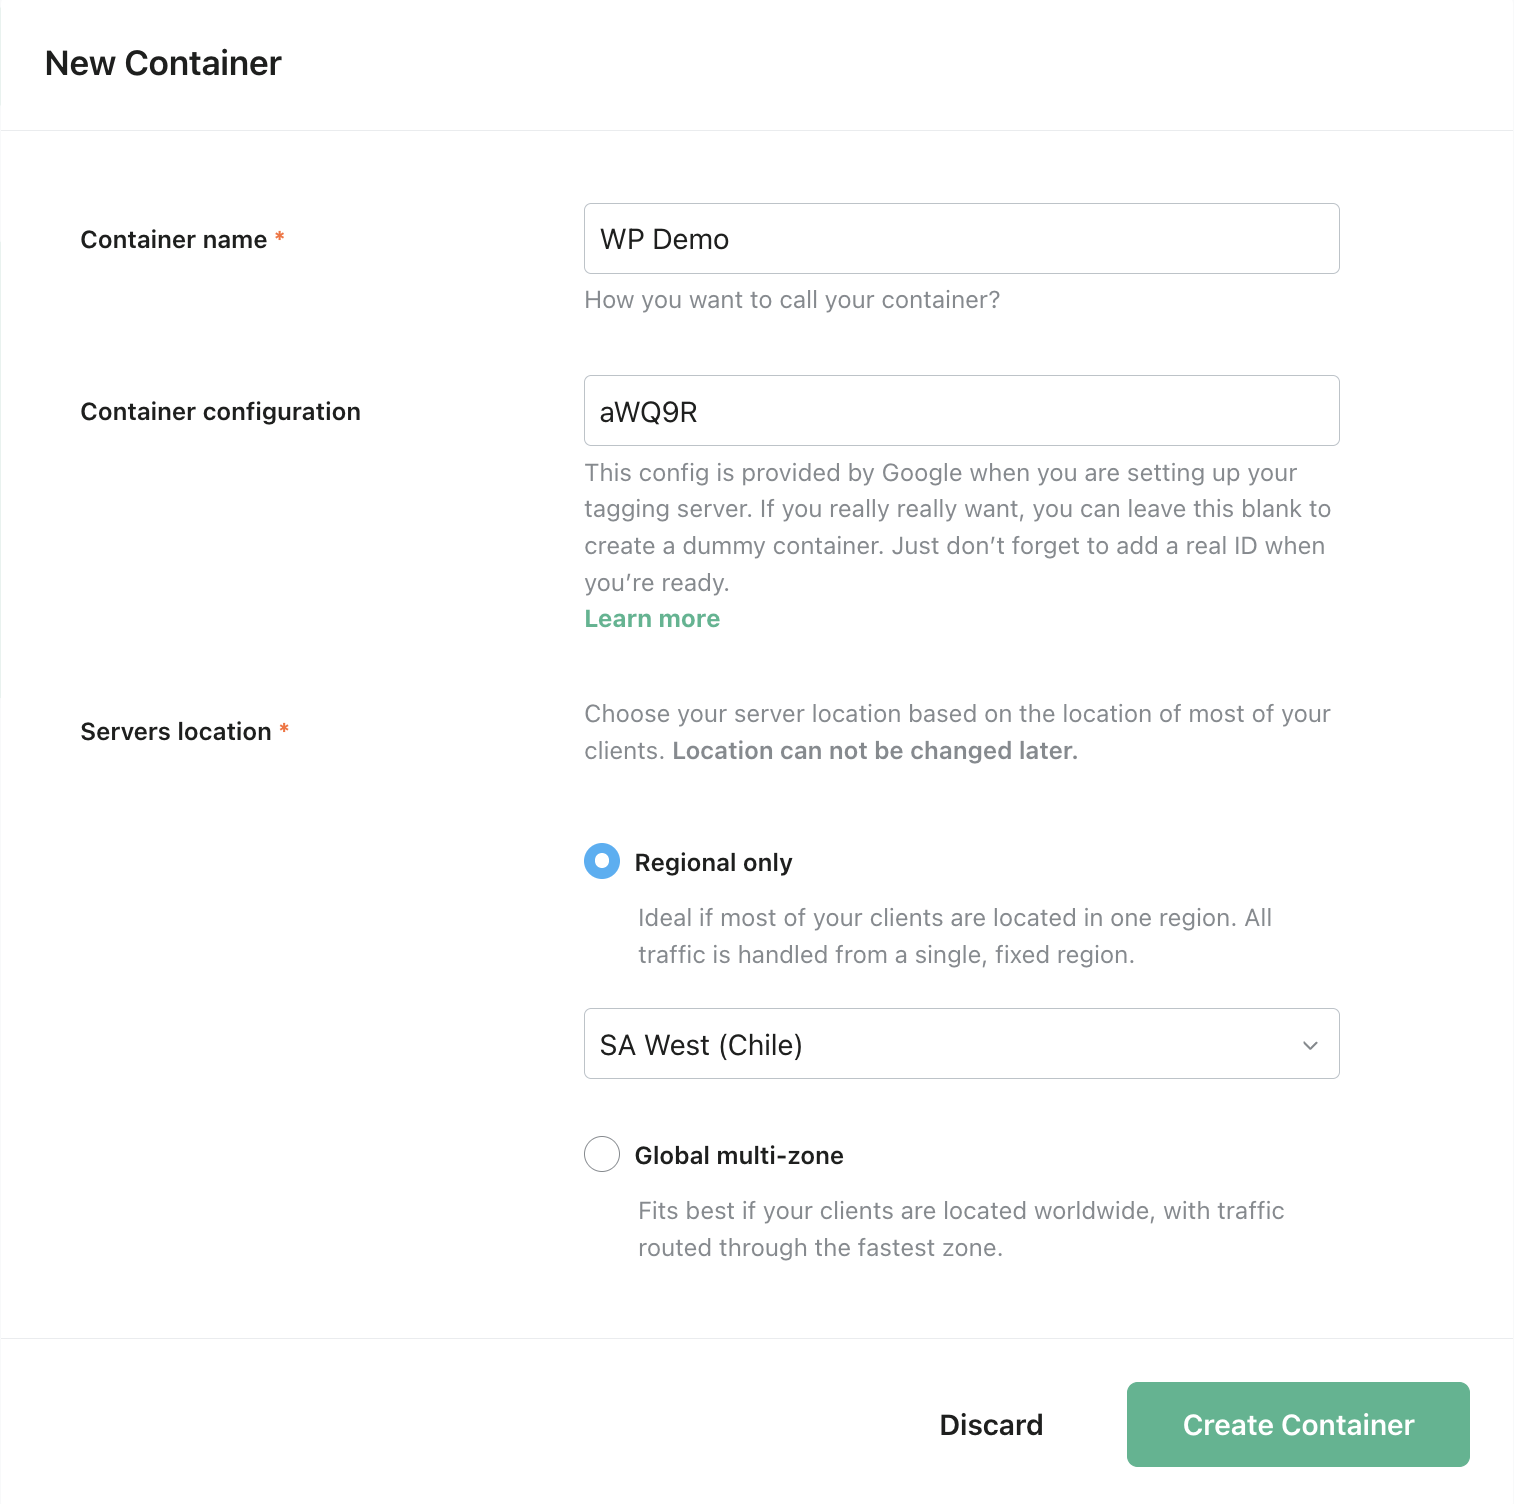
1.6. Enter your container details:
- Container name. The name does not necessarily have to be the same as the container name in your server GTM.
- Container configuration - paste Container Config that you copied from your Google Tag Manager Server Container.
- Server location - for best performance, choose the server location that’s closest to where most of your clients are. See the list of available server locations here. If you have traffic from different regions, you can select the Global multi-zone server location option. It will automatically route incoming requests to the nearest available zone based on the user’s IP address.
Then click Create Container.
1.7. Choose a plan for your container. You can start with a Free plan.

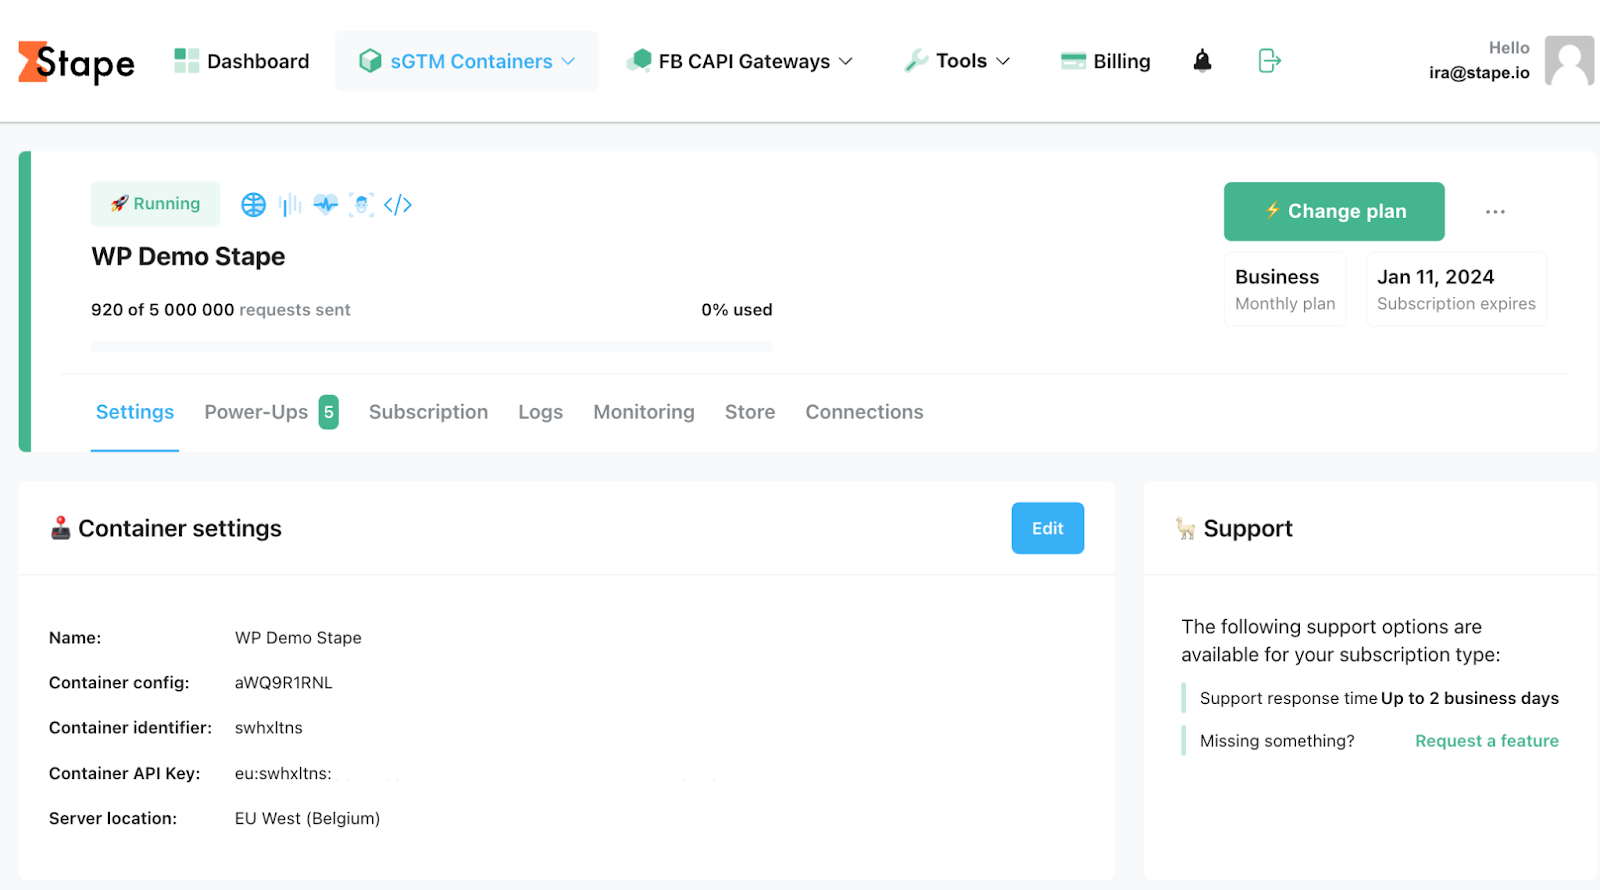
1.8. You will see the status of your container, container config, and plan name.
It takes around 5 minutes to deploy a server container. Please reload the page to update the status. If the Google Tag Manager server-side setup was done correctly, you should see the status “Running”.
Step 2. Set up Custom Loader in Stape admin.
| Custom Loader modifies gtag.js and gtm.js loading paths to resist ad blockers and ITPs, potentially increasing data volume by up to 40%. |
2.1. Find and copy your WEB GTM ID in GTM.
To find GTM ID log in to your Google Tag Manager account and open a Web GTM container. In the top right corner (next to the Submit and Preview buttons) you’ll see some short text that starts with "GTM-" and then contains some letters/numbers.

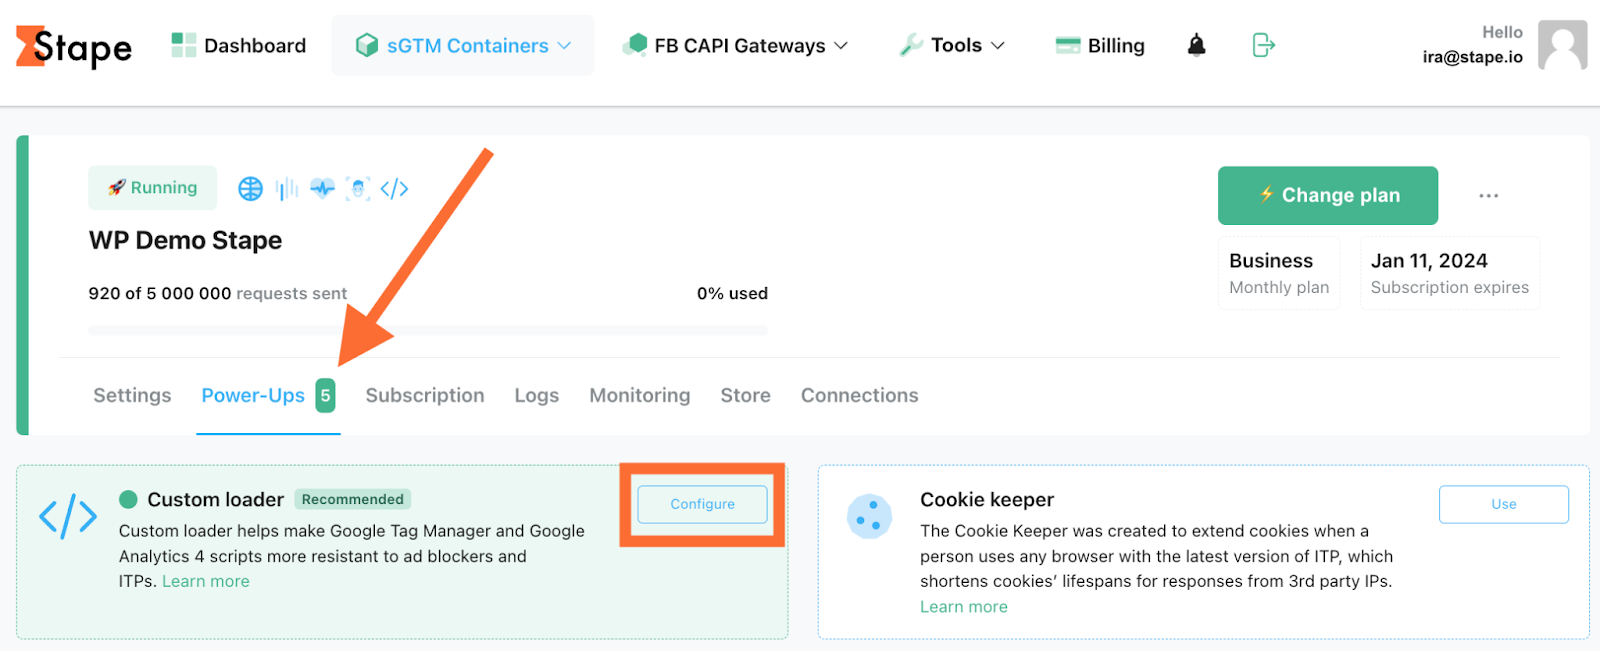
2.2. Open your sGTM container on Stape → Click Power-Ups.
Find Custom Loader and click Configure.
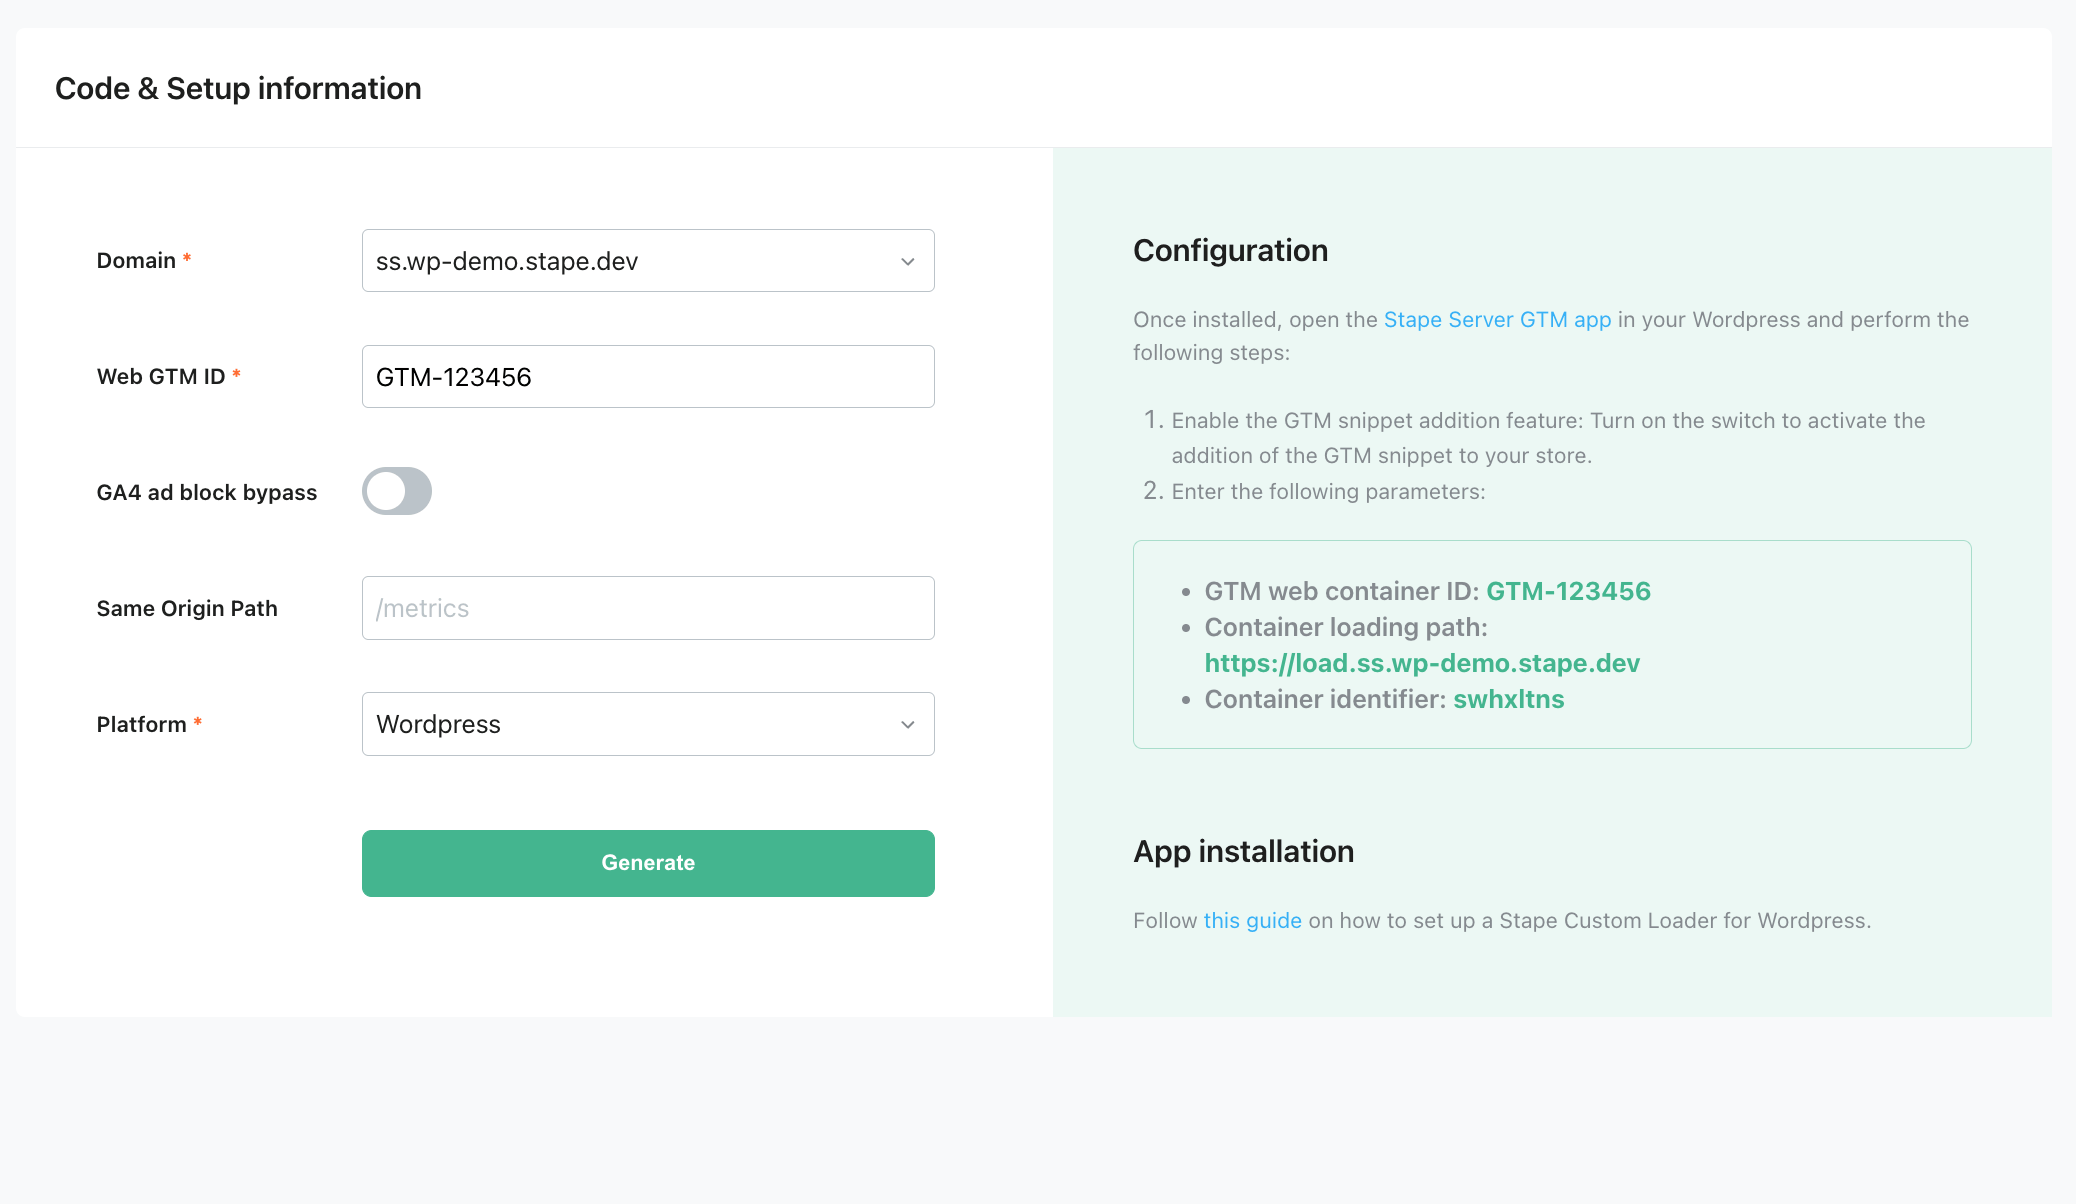
2.3. Add the following settings:
Domain - from the list of domains connected to your container, select the necessary ones.
Web GTM ID - add web Google Tag Manager ID. Check out how to find web GTM ID in our guide.
GA4 ad block bypass - enables bypassing adblockers' impact on the GA4 tracking code. Note that this setting will affect all container domains. Be sure to debug both the web and server GTM containers after enabling this toggle.
Same Origin Path - if you are using same origin approach for configuring custom domain, please specify the proxy path for requests. Learn more.
Platform - the custom loader code differs for each platform. Select Wordpress, click generate and follow the steps on the right.
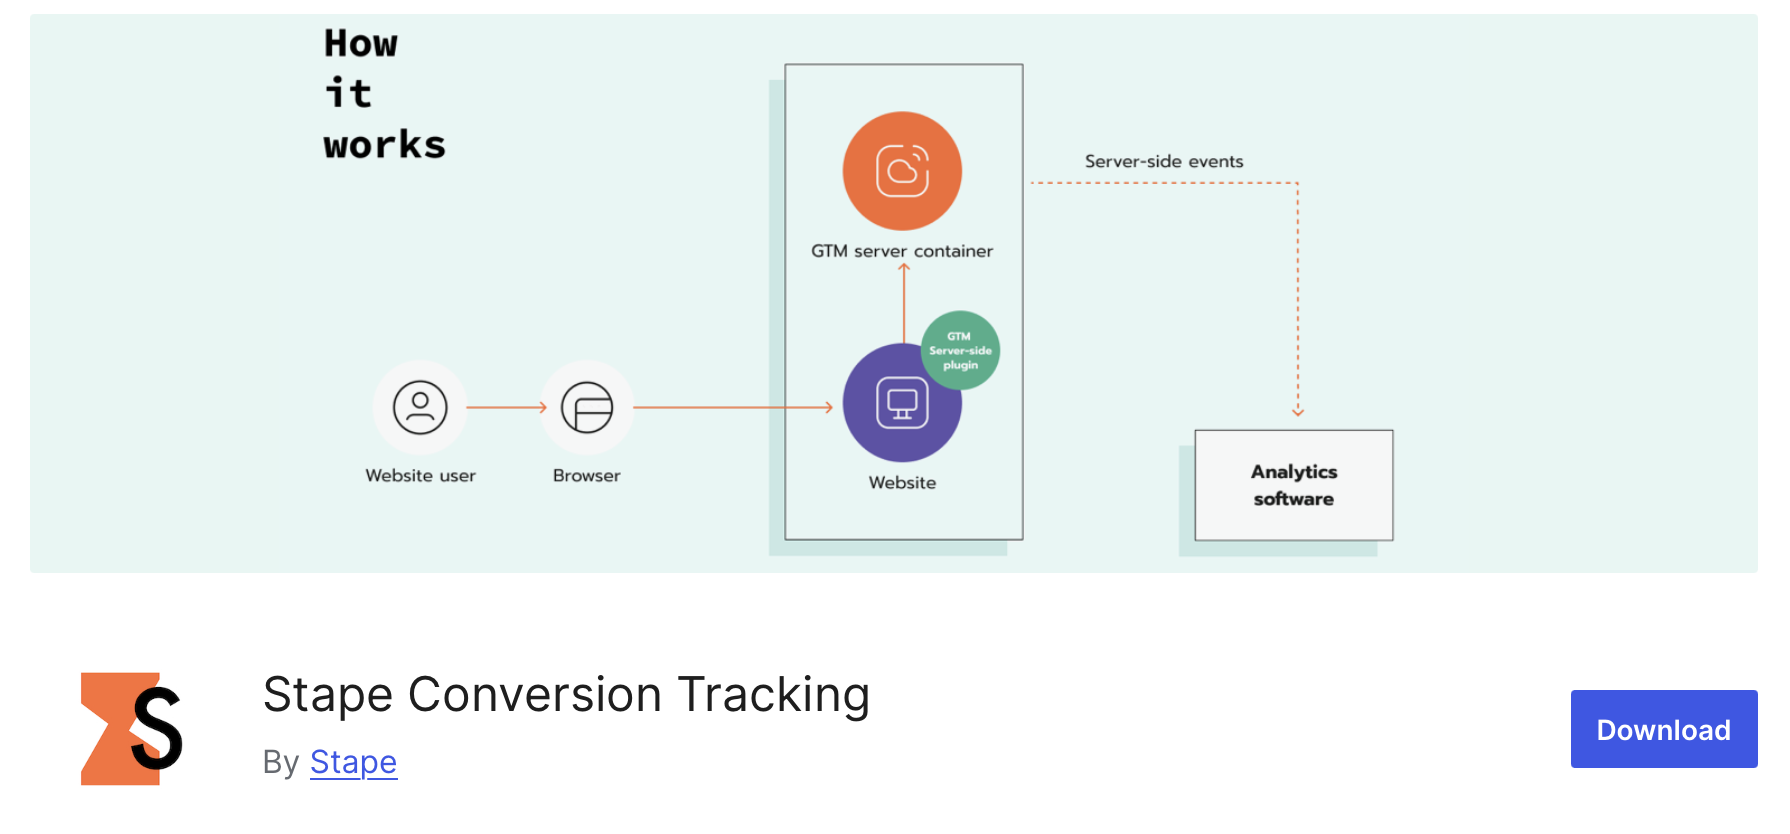
Step 3. Configure Stape Conversion Tracking plugin for WordPress.
Stape has a YouTube video on how to set up server-side tagging for WordPress which you can watch here: https://www.youtube.com/watch?v=d-fo7U3pOEo&ab_channel=Stape
3.1. Log into your WordPress Admin, and go to the plugins. Then, click Add New, type “Stape Conversion Tracking,” choose this plugin, and click Install now. Once established, click Activate.
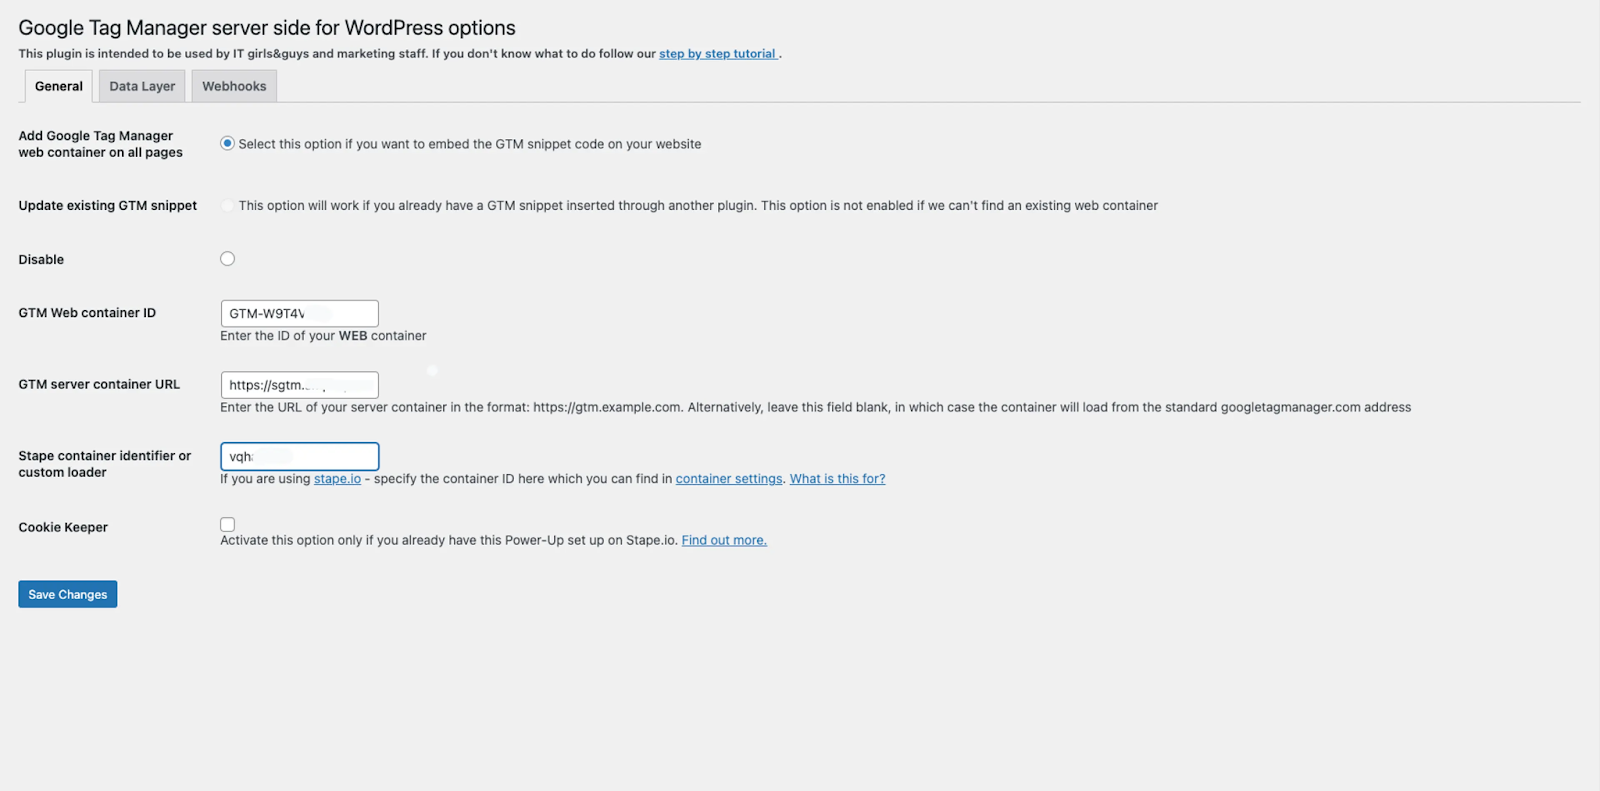
3.2. Open the Stape Conversion Tracking plugin. In the General tab, select if you want to add web GTM to all site pages or just add plugin functionality without adding GTM script (this option should be used in case you are using any other plugin that inserts GTM script on the site).
Next, add WEB Google Tag Manager ID, tagging server URL, and Stape container identifier if you use a Custom Loader.
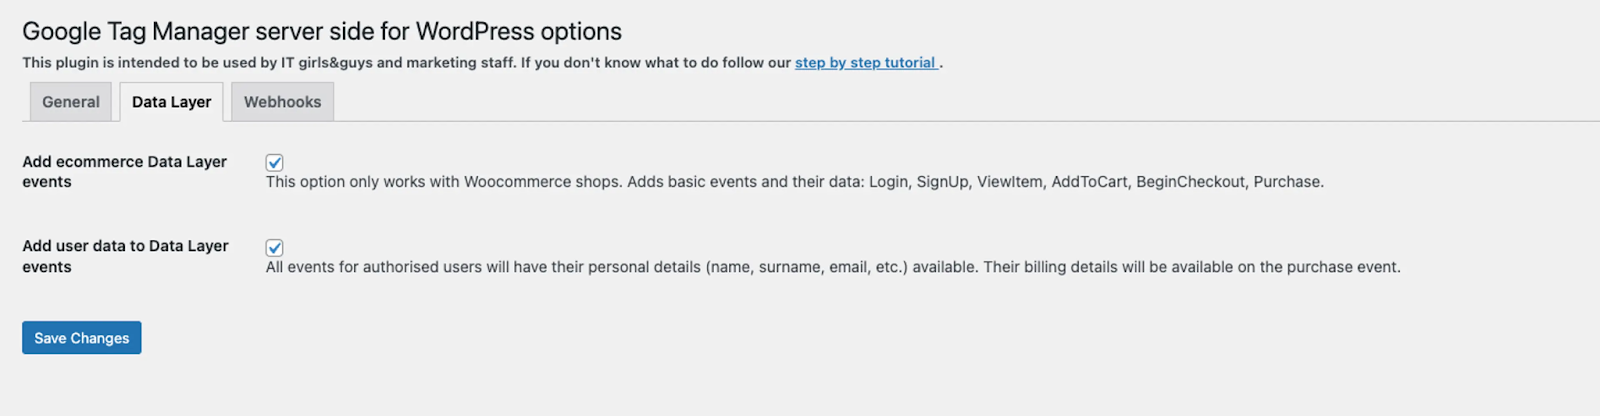
3.3. To integrate eCommerce events and user data into the Data Layer from your eCommerce website, navigate to the second tab of the plugin and enable the two checkboxes provided. Please note that this functionality is exclusively compatible with WooCommerce shops.
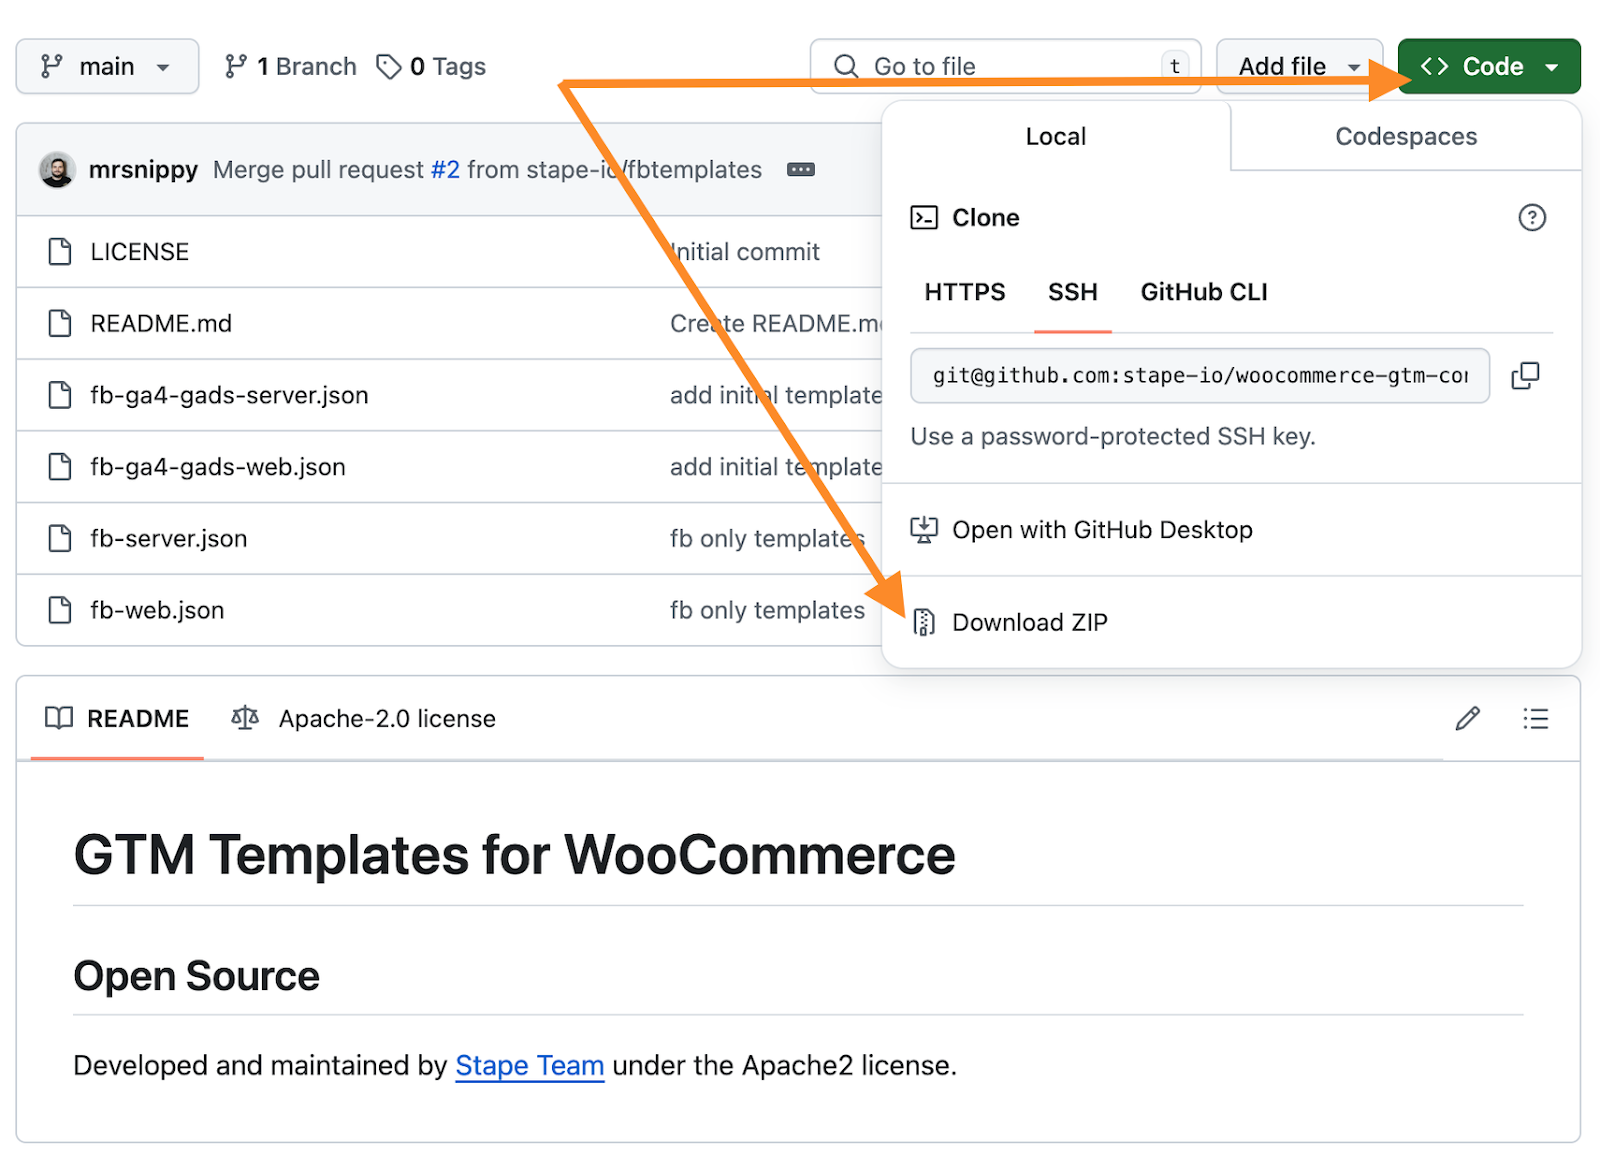
Step 4. Download and Import container templates from our GitHub.
4.1. Download GTM templates for Wordpress on our GitHub.
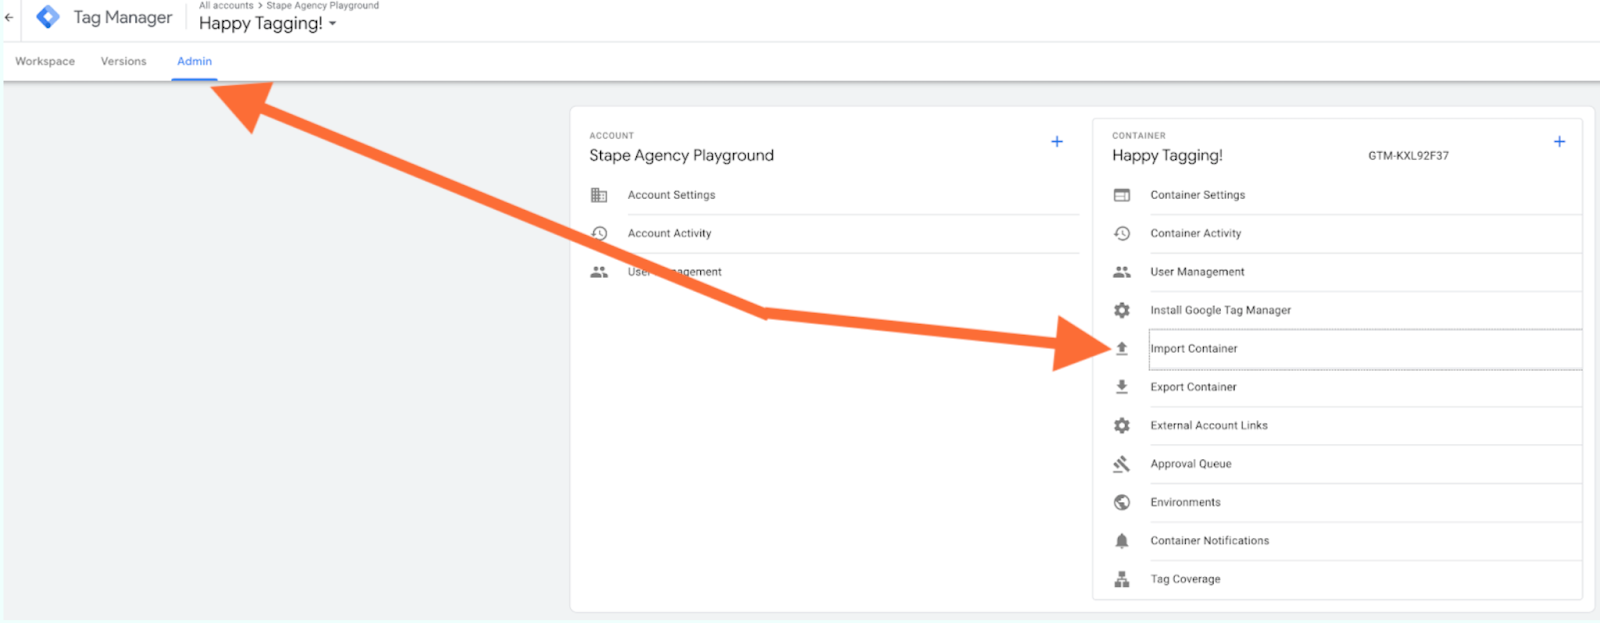
4.2. You should import the templates in both your web and server container on GTM (process is the same across the two). You need to go Admin → Import Container:
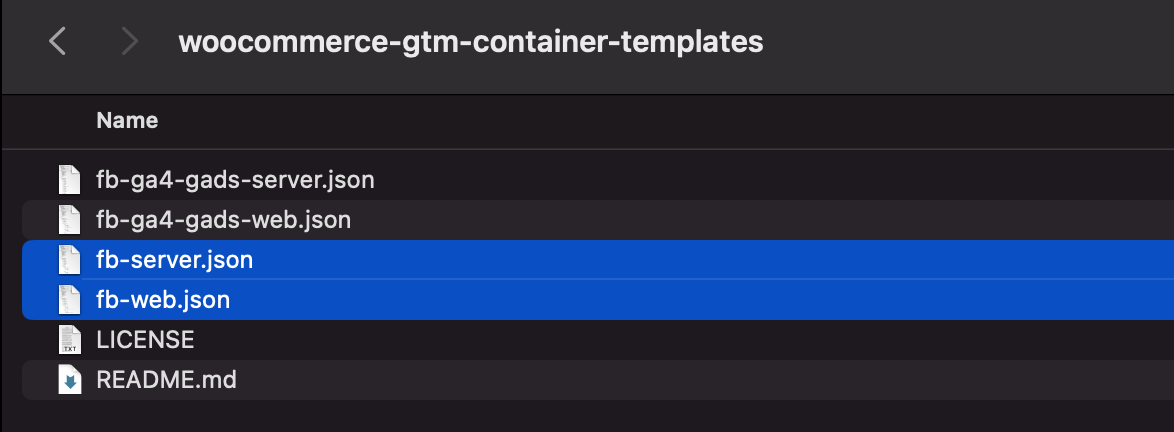
4.3. Select your template file (make sure the template matches the container type - web/server).
4.4. Pick a workspace for this import (you can create a new one for this specific purpose).
4.5. Select Overwrite or Merge.
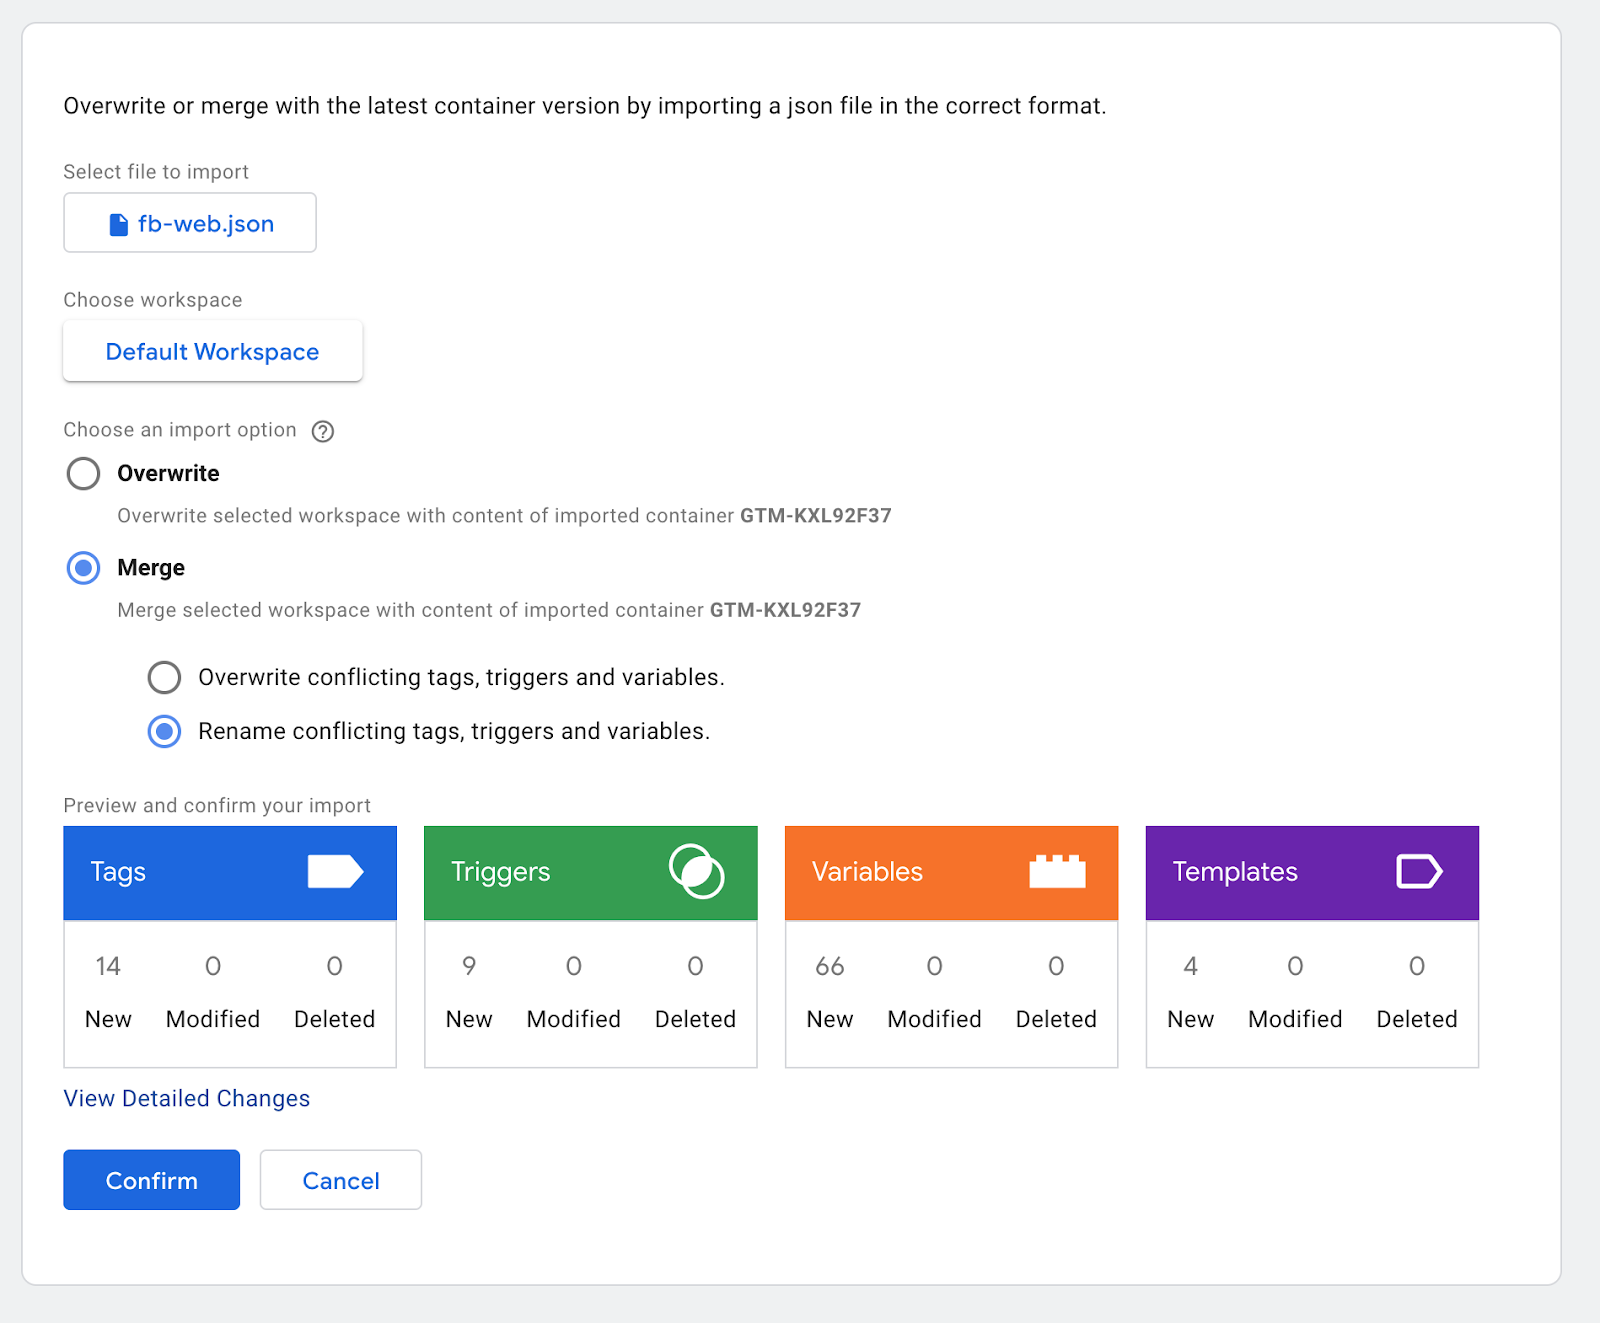
| “Overwrite” option should only be used in a fresh, empty container or if you are absolutely certain you want to do it. For this demo we’re using Merge, with “Rename conflicting tags, triggers and variables” option selected. This way, if there are any conflicts - GTM will just rename the tags, thus not touching any of the existing entities you have in your container. |
Step 5. Сonfigure GTM container templates.
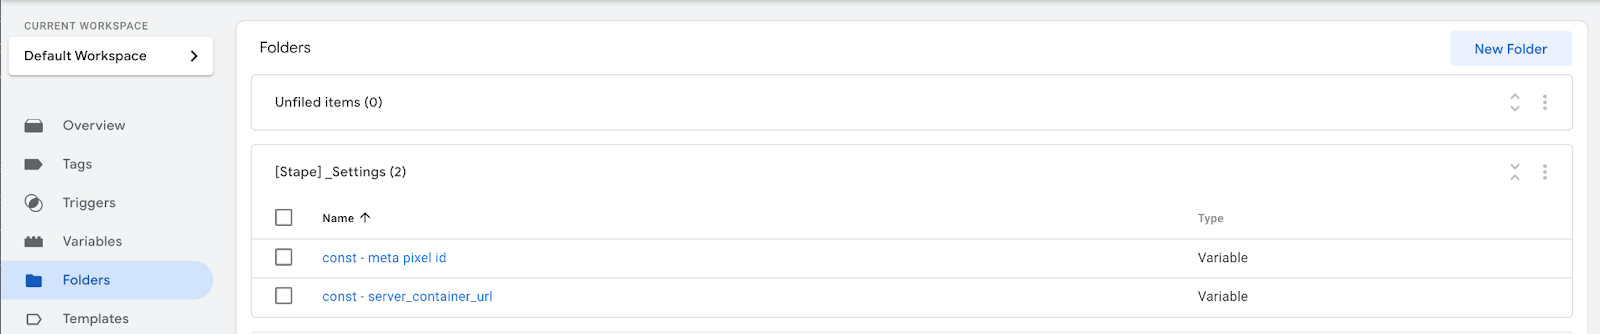
5.1. Templates are fully built, so triggers, payloads, and event names are all taken care of for you.
You just need to input your specific destinations, ids, API keys etc. We’ve tried to make it as comfortable as possible, so in both containers (web and server), you will find a folder called “[Stape] _Settings”.
Web
Server
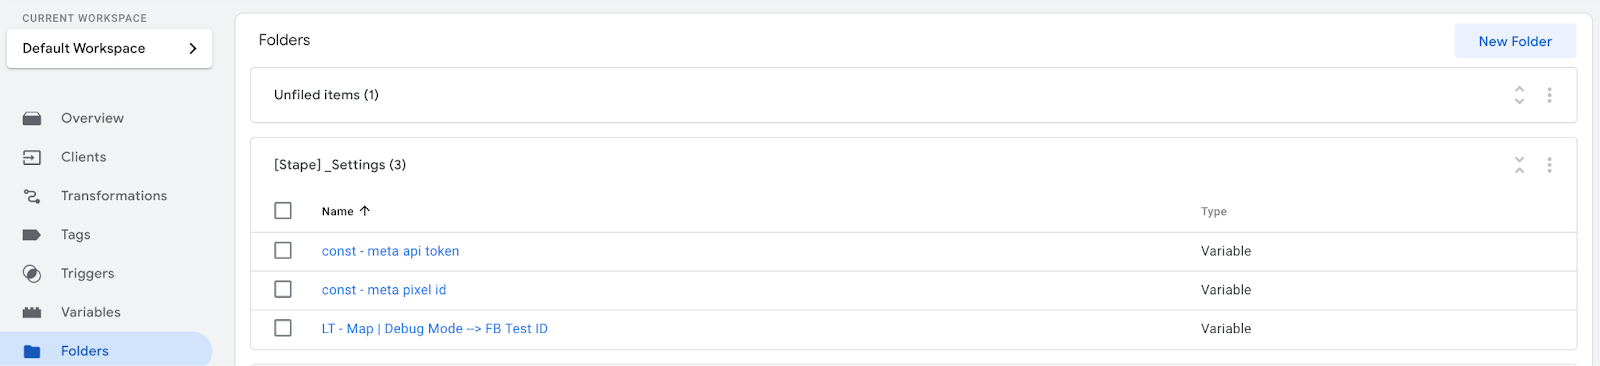
All these variables are already referenced in tags that use them; you just need to give them proper values, for example:
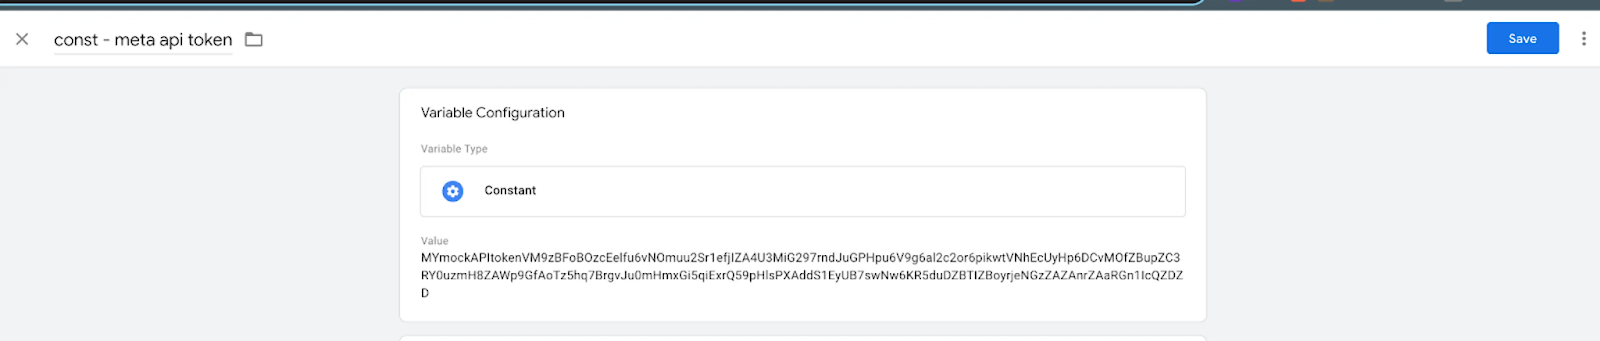
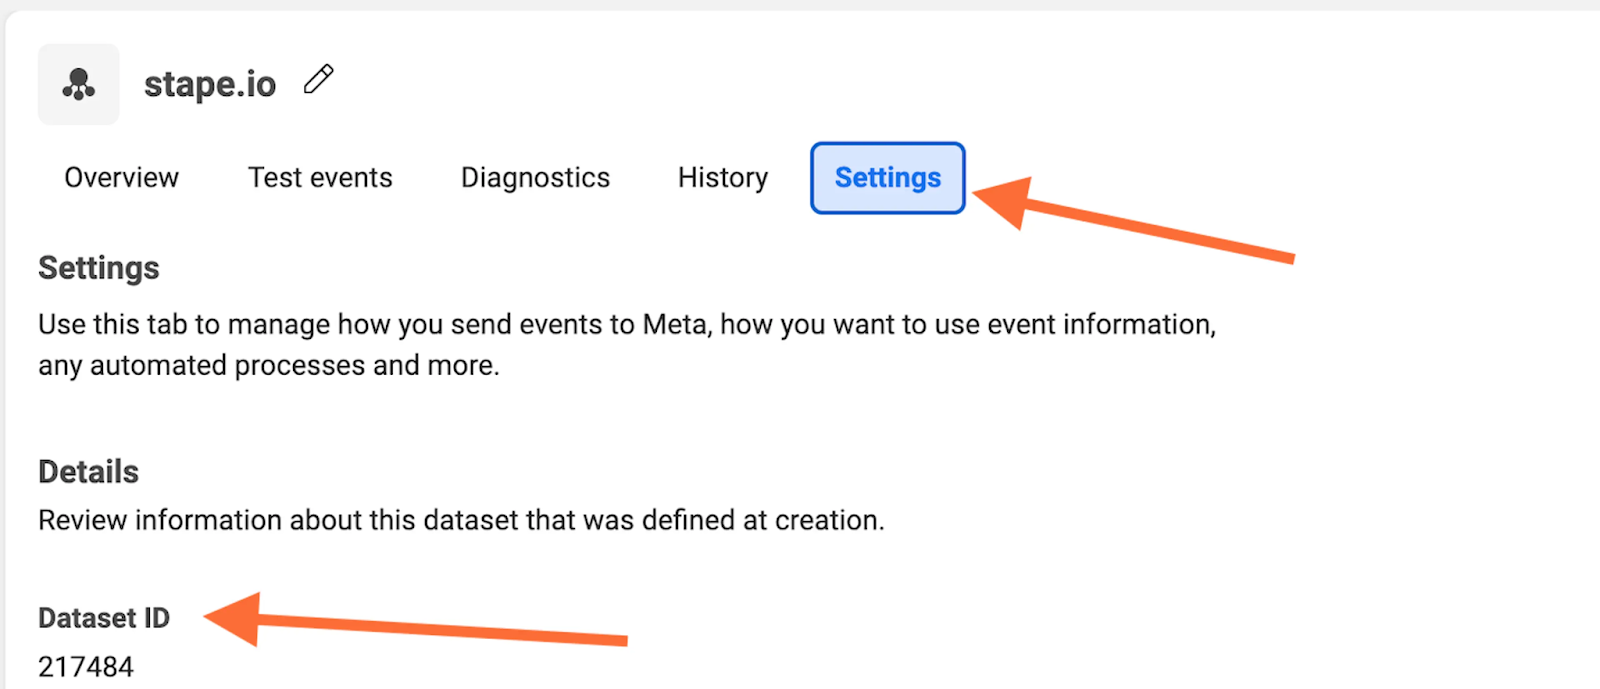
5.2. Pixel ID and API token can found in your pixel settings:

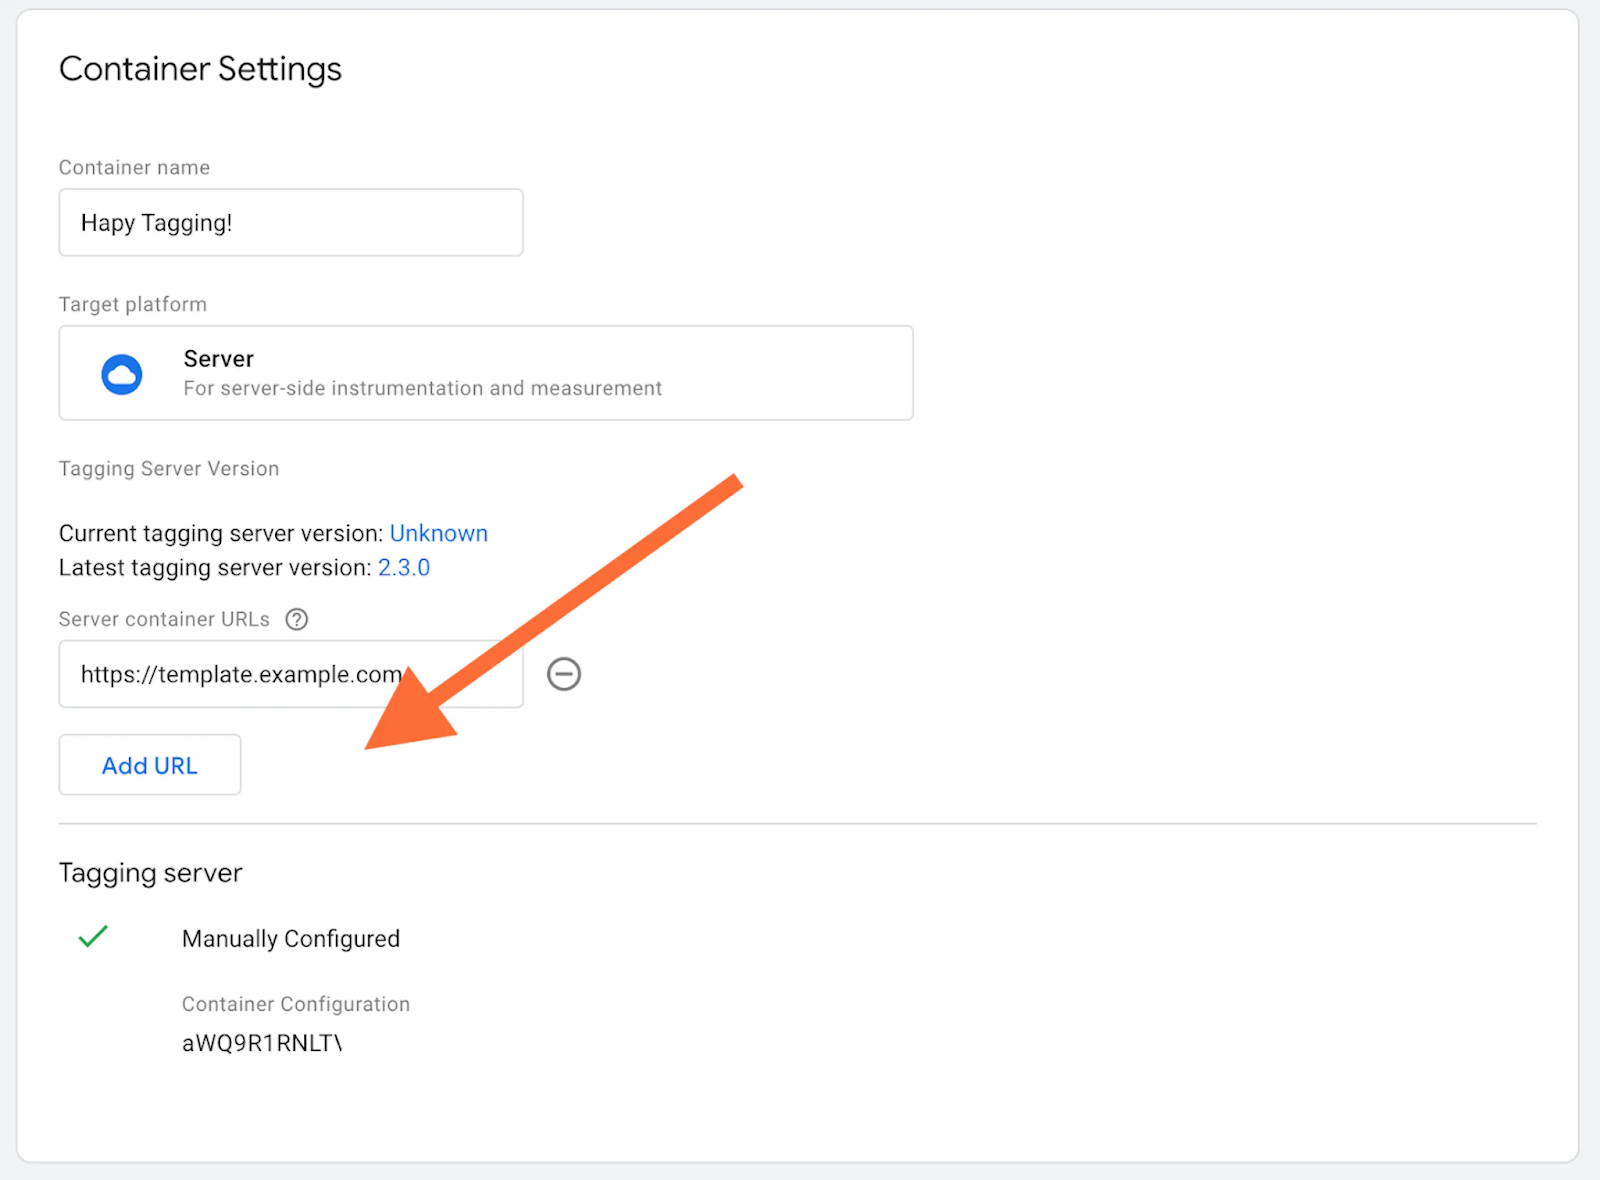
5.3. Once you’ve changed all these variables and saved them, your last step (assuming this a new container) is to add a preview URL in your server container by going to Admin → Container Settings. If the container is not new, just skip this step.
Step 6. Test the setup.
Facebook provides the ability to test Browser and Server events. That is very useful if you set up Facebook pixel using GTM Server for the first time and wish to check that all data tracked correctly.
6.1. First, you need to obtain test_event_code. For this, you need to log into your Facebook manager, choose the data source that you liked to test, and open the tab “Test events”. There you will find the test event code. It can look like this: TEST2120
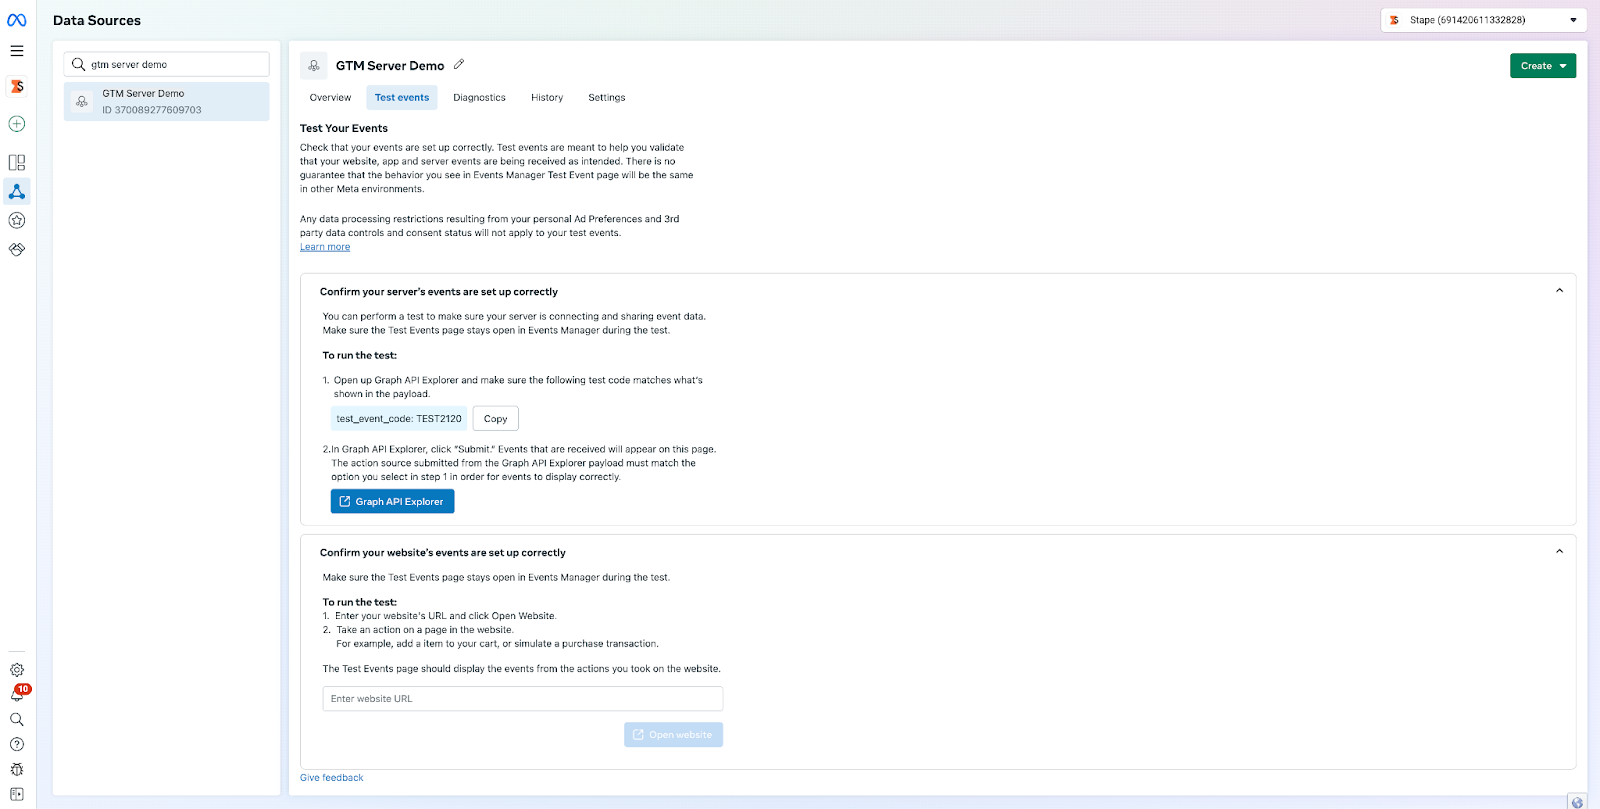
Note: TEST id will change once in a couple of hours, if your debug sessions are spread in time make sure to check the value you’re using is still valid.
6.2. Fill the LT - Map | Debug Mode → FB Test ID variable, in your server container, with the test event code that you get from the previous step.
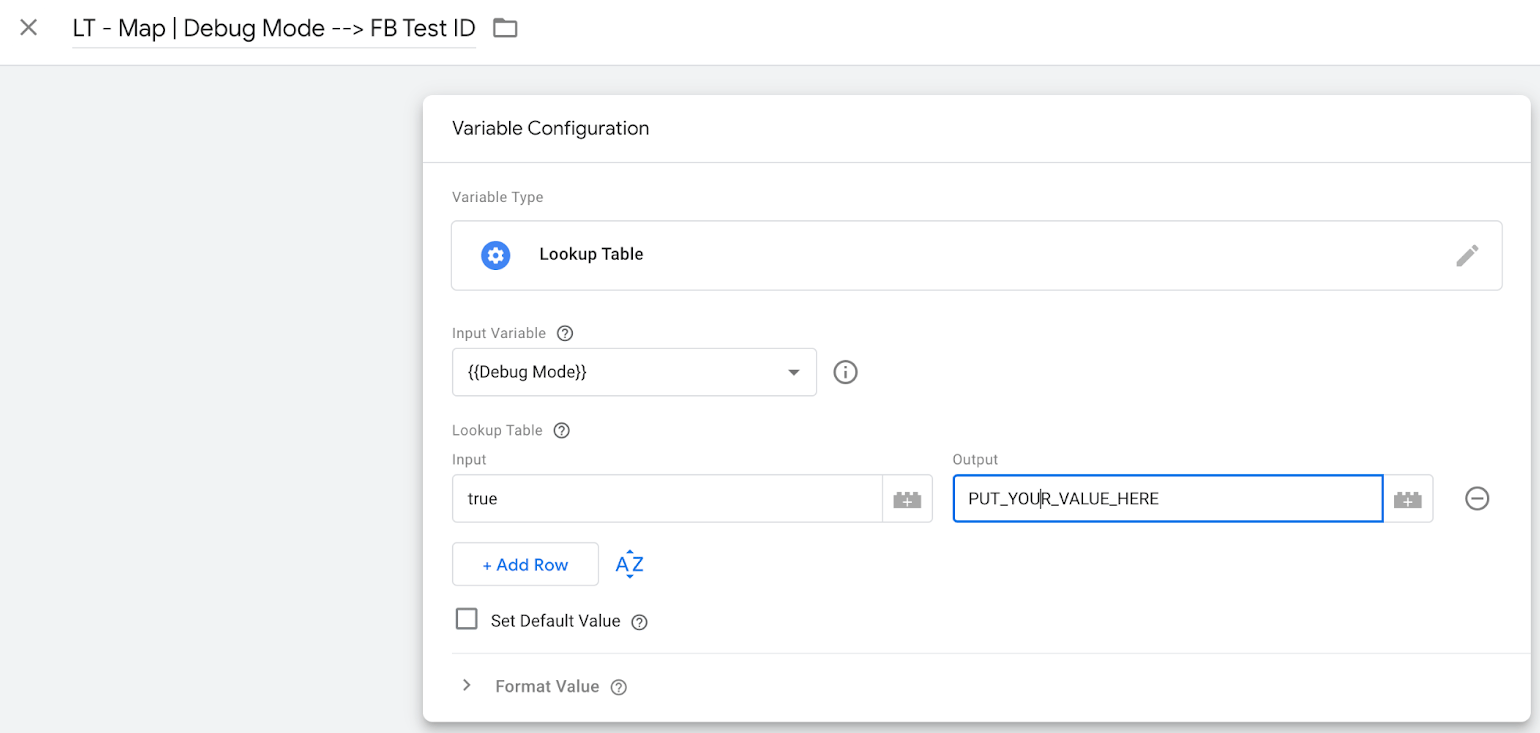
This variable is already referenced in all Facebook tags. Variable will also only populate the tag in preview mode, so you don’t necessarily need to remove it before going live.
6.3. Launch preview mode on both your containers (web & server) If done right, you will see both web and server test events on the Facebook Test Event page.

Ready to start with server-side?
You are awesome! Click on Try for free to sign up and explore all the benefits.

Comments