End-to-end guide for Google Tag Manager integration for LinkedIn advertisers
Updated Jul 23, 2026
With LinkedIn's Conversions API (CAPI), advertisers can send conversion data directly from their server, instead of relying solely on browser-based tracking. This helps LinkedIn receive more reliable conversion signals for campaign measurement, attribution, and optimization, while reducing the impact of browser restrictions and ad blockers.
To simplify the setup, LinkedIn supports a guided Google Tag Manager (GTM) server-side integration powered by Stape. Advertisers can create and connect a server-side GTM container directly from LinkedIn Campaign Manager through an embedded setup flow.
In this guide, we will walk you through the setup process in LinkedIn Campaign Manager, as well as recommended configurations for Stape sGTM container.
Before you begin
If you haven’t already:
- 1.
- 2.Configure a trigger in the web container that fires the Google Analytics 4 (GA4) event that you want to track as a conversion.
Setup in LinkedIn Campaign Manager
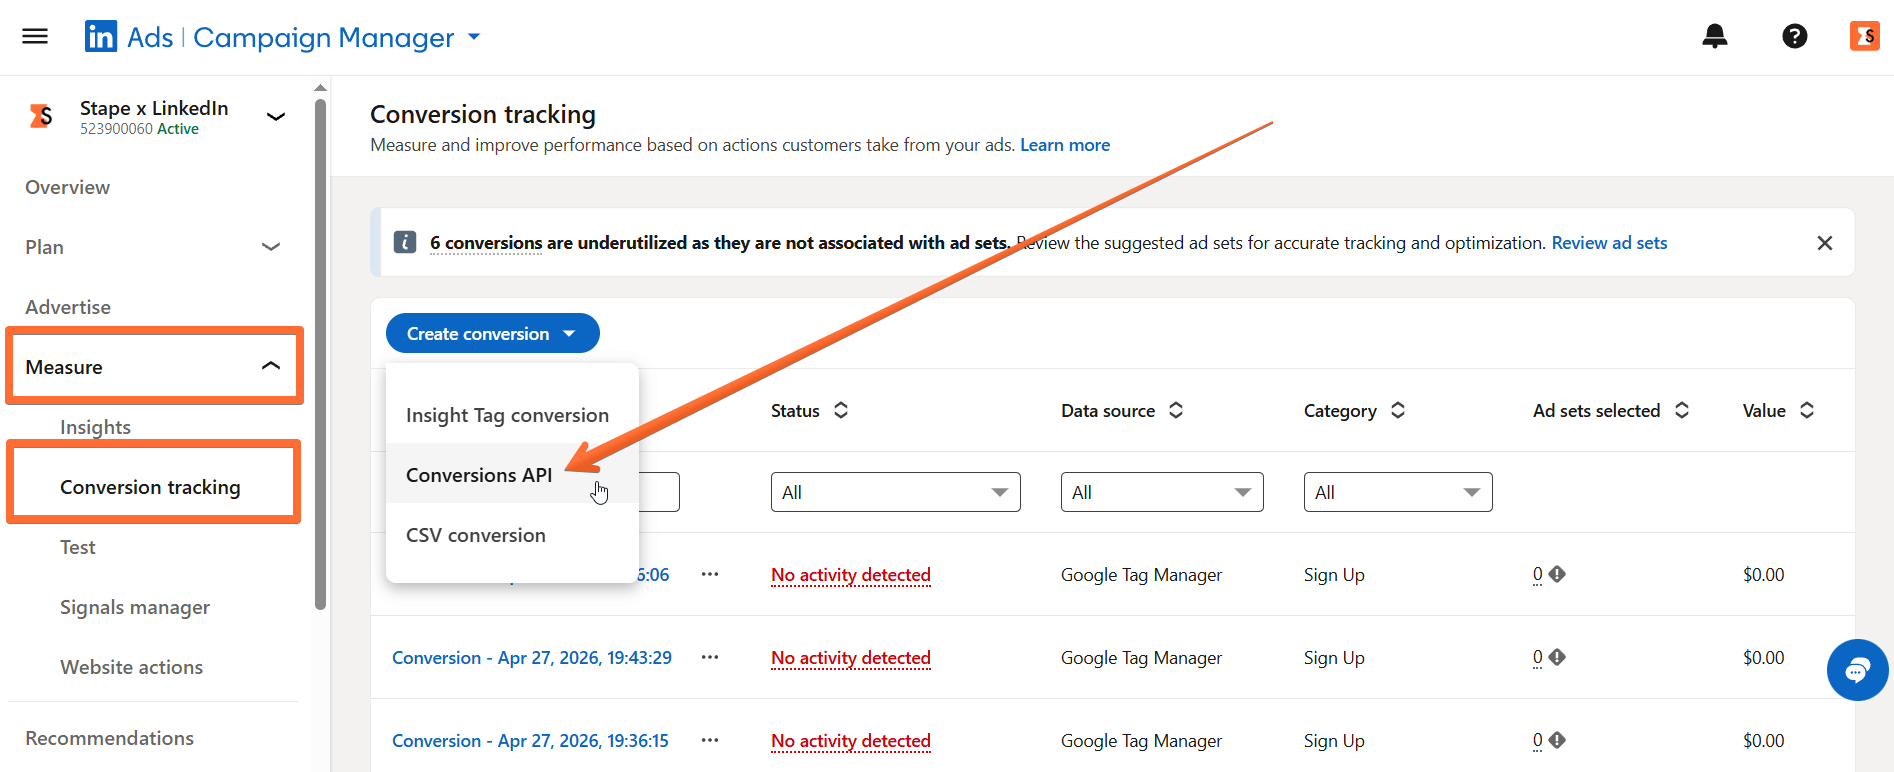
1. Log in to your LinkedIn Campaign Manager. Click Measure → Conversion Tracking and begin creating your conversion in Campaign Manager. Choose Conversions API as your conversion data source and create your conversion rule.
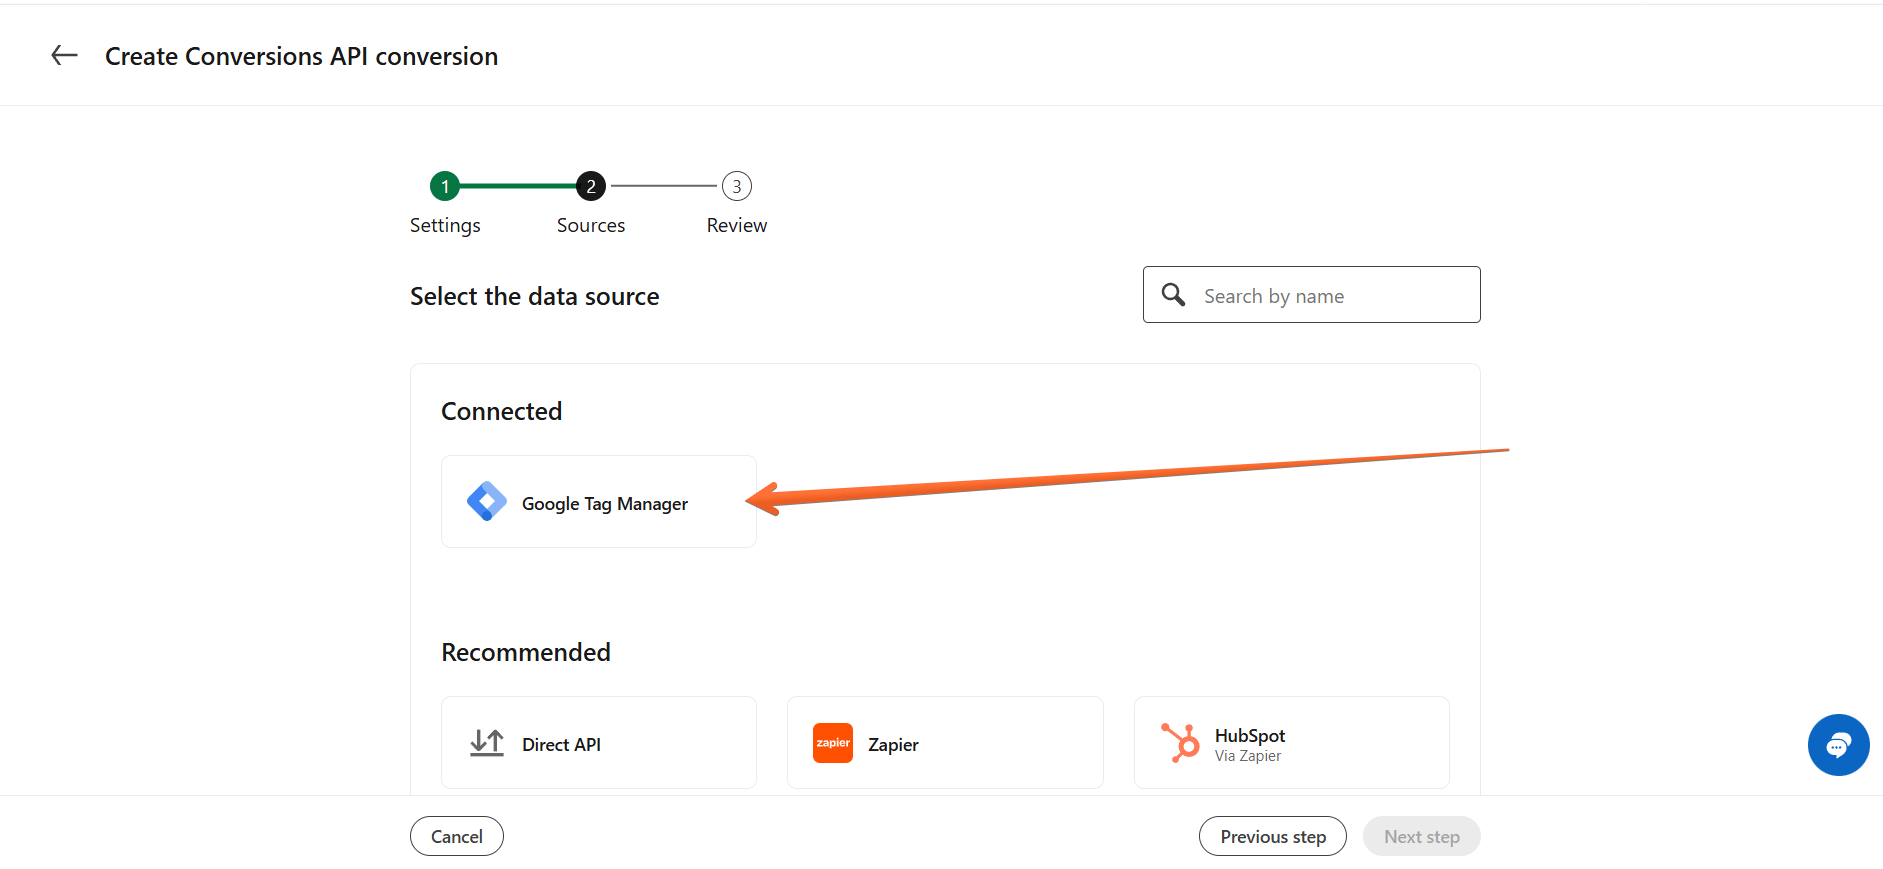
2. On the Sources page, select Google Tag Manager.
3. (Optional) If you haven’t set up Google Tag Manager, follow the instructions in the dialog to connect your account:
- Click Continue to connect to Google Tag Manager.
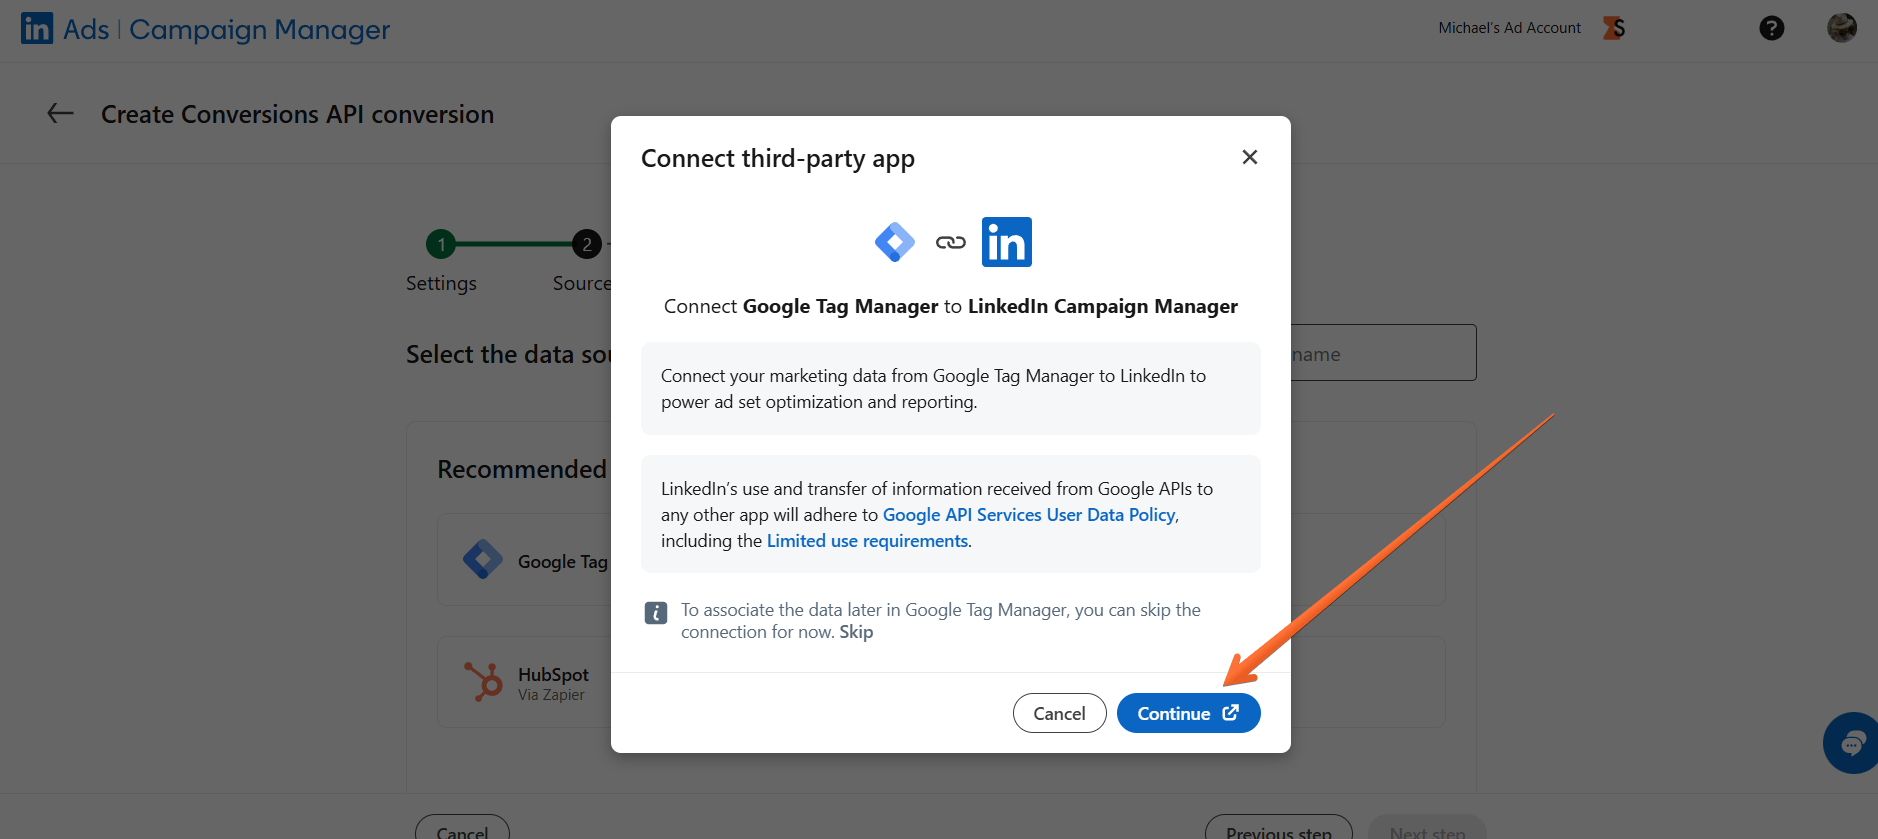
- Log in to your Google Tag Manager account and authorize the connection.
4. Set up the data from Google Tag Manager to send to Campaign Manager.
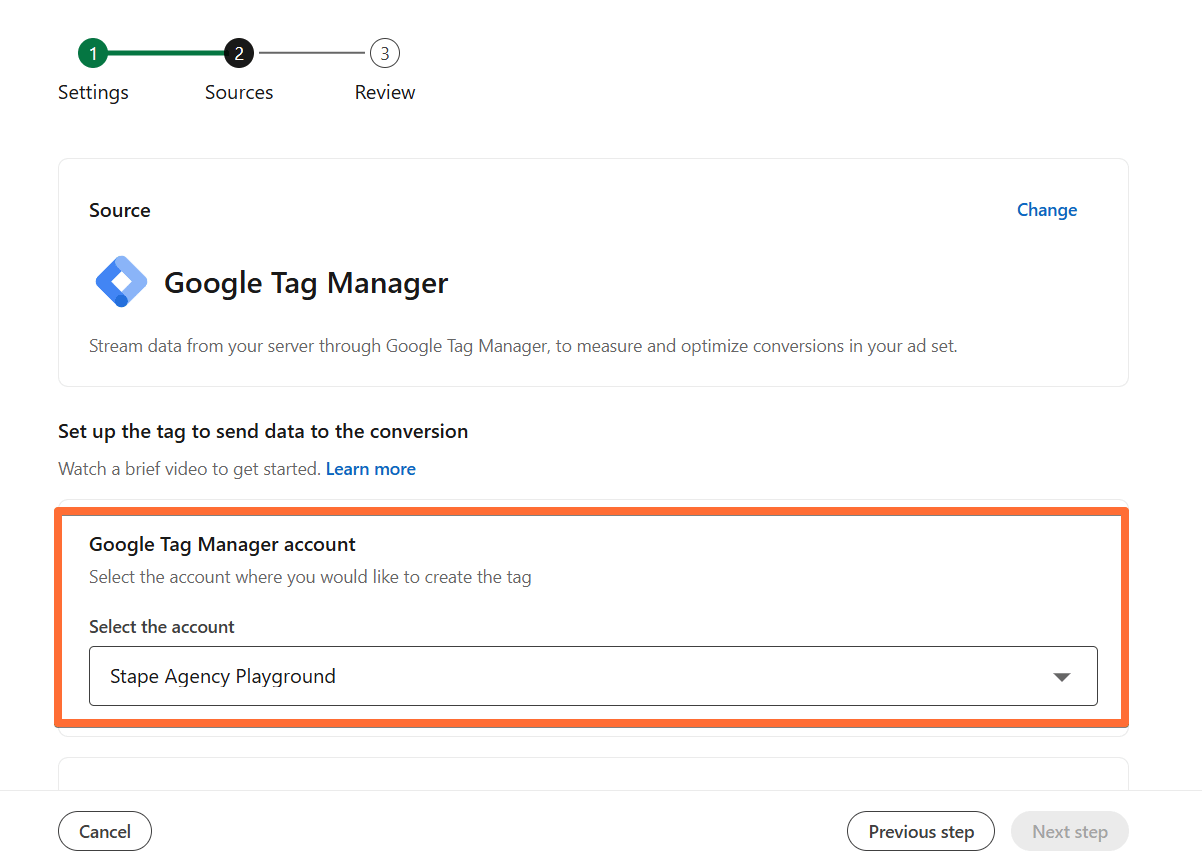
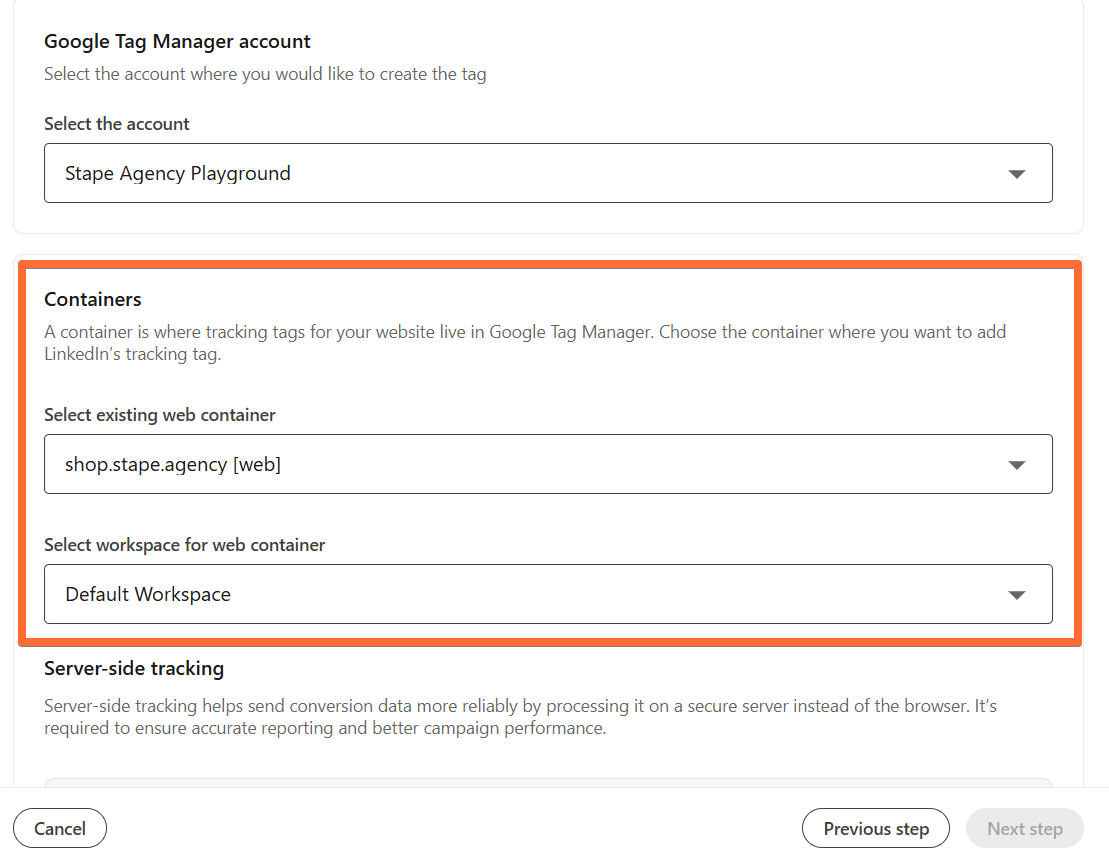
- In the Google Tag Manager account section, click the Select the account dropdown menu and select your account name.
- In the Containers section, click the dropdown menus to select:
- Your existing web container.
- A workspace for the web container.
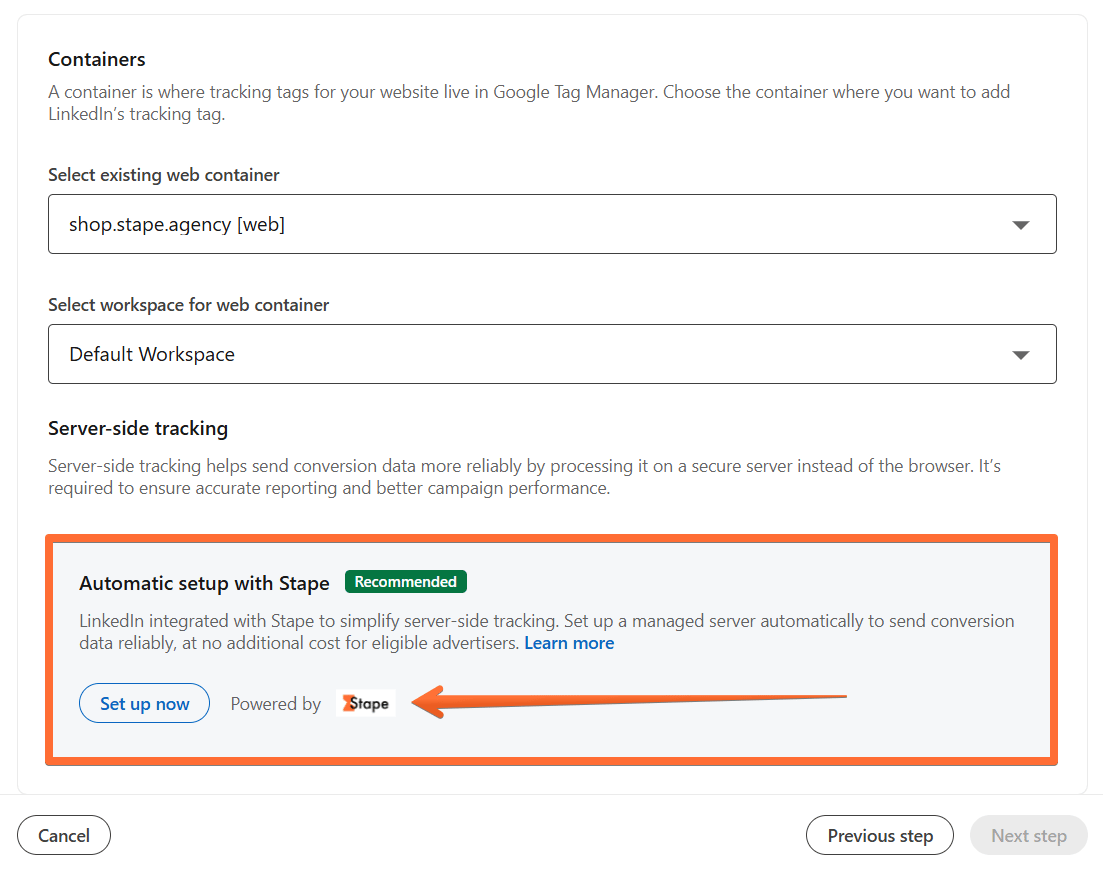
- In the Server-side tracking section, select the option Automatic setup with Stape. Click the Set up now button and follow the on-screen instructions to connect your account.
- In the Token section, paste your LinkedIn API access token. If you don’t have a token, you can generate one by clicking the Generate token button. Then click Next step.
5. Review and update the ad sets selected for your conversion.
After you set up your conversion, LinkedIn automatically selects ad sets to associate with your conversion (or offers to create an ad set if you don’t have one yet). You can review, add, or remove ad sets as needed. Learn how to review and update the ad sets selected for your conversion.
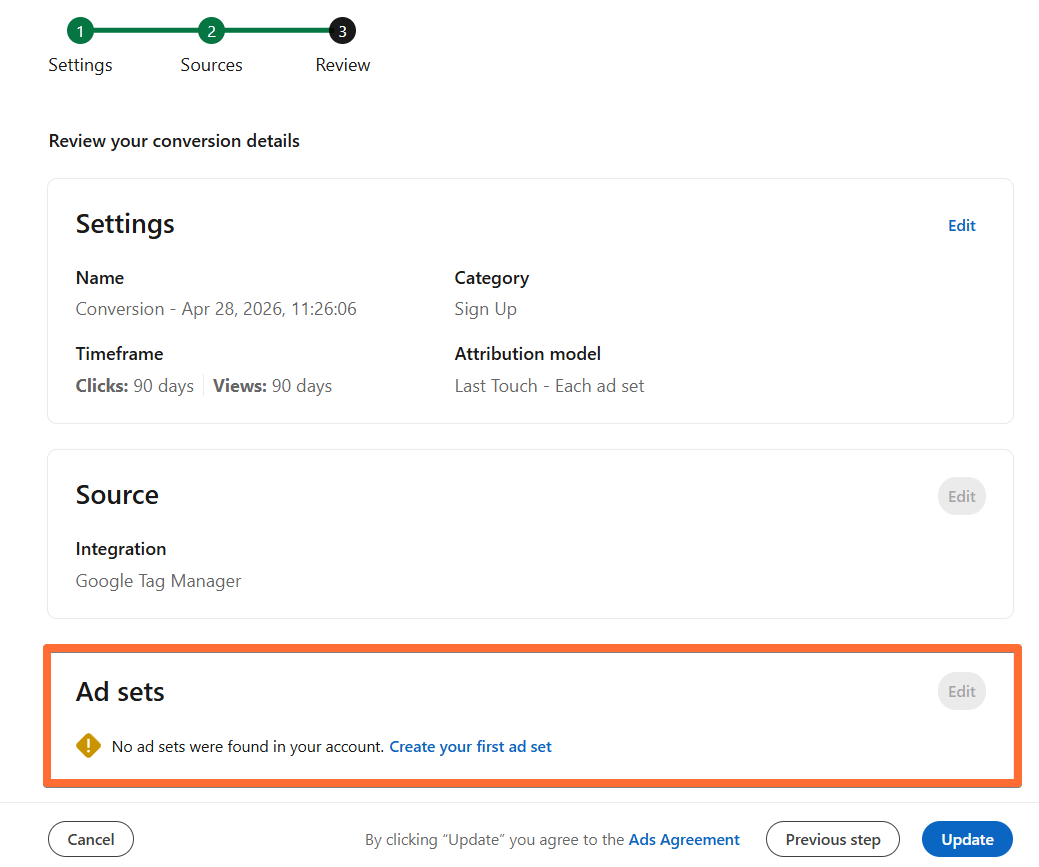
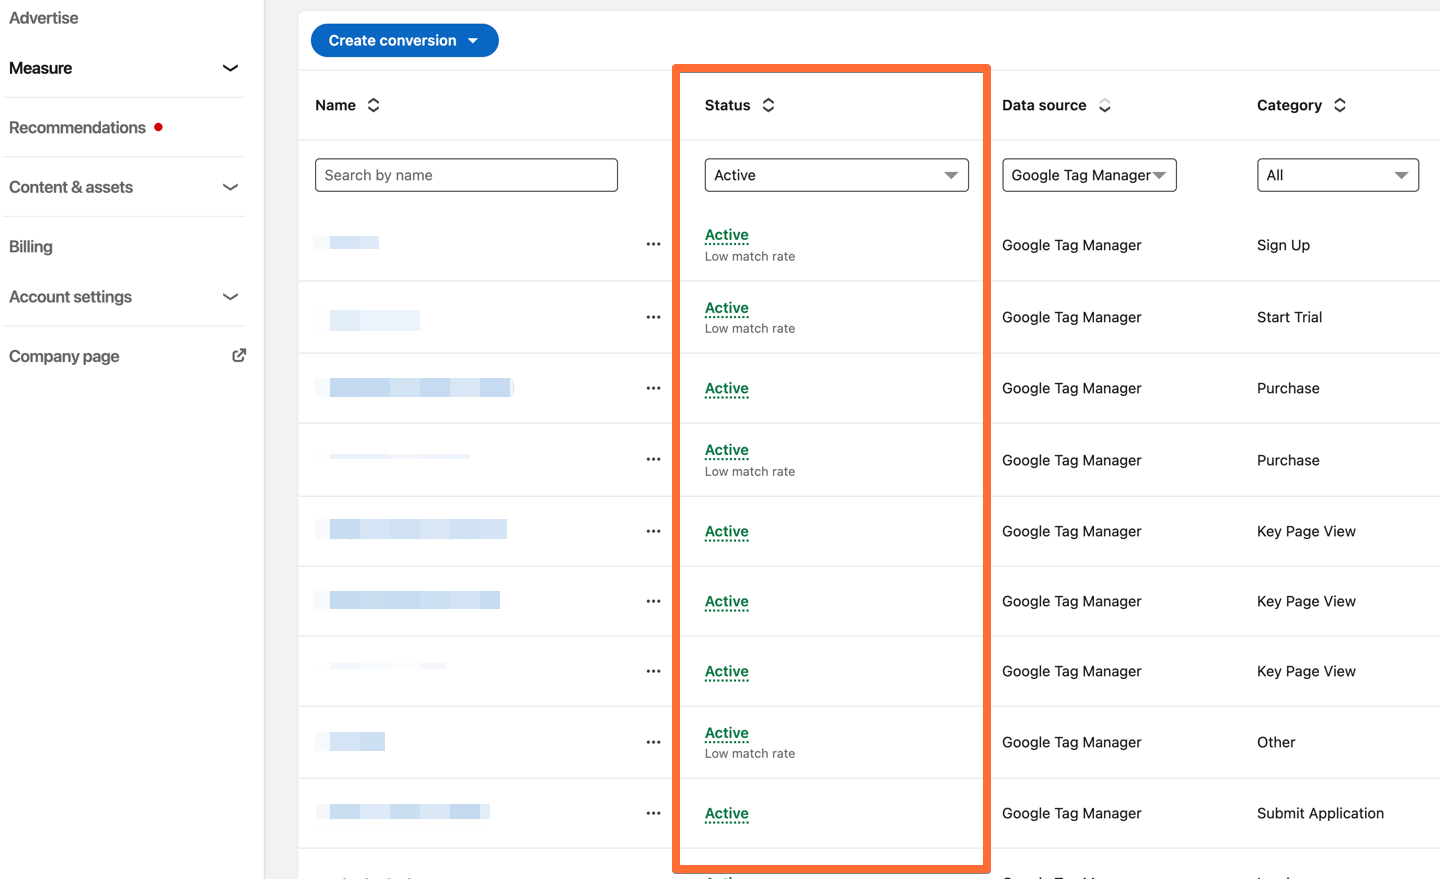
6. Confirm that your conversion data is being sent and your conversion is active, and publish the containers.
Before publishing your changes, use GTM Preview mode to verify that your setup is working correctly. Trigger the conversion event on your website and confirm that the appropriate tags fire as expected.
Once you've confirmed everything works correctly, don’t forget to publish your web and server GTM containers. This step is required because LinkedIn's Conversions API won't start sending conversion data to Campaign Manager until both containers are published.
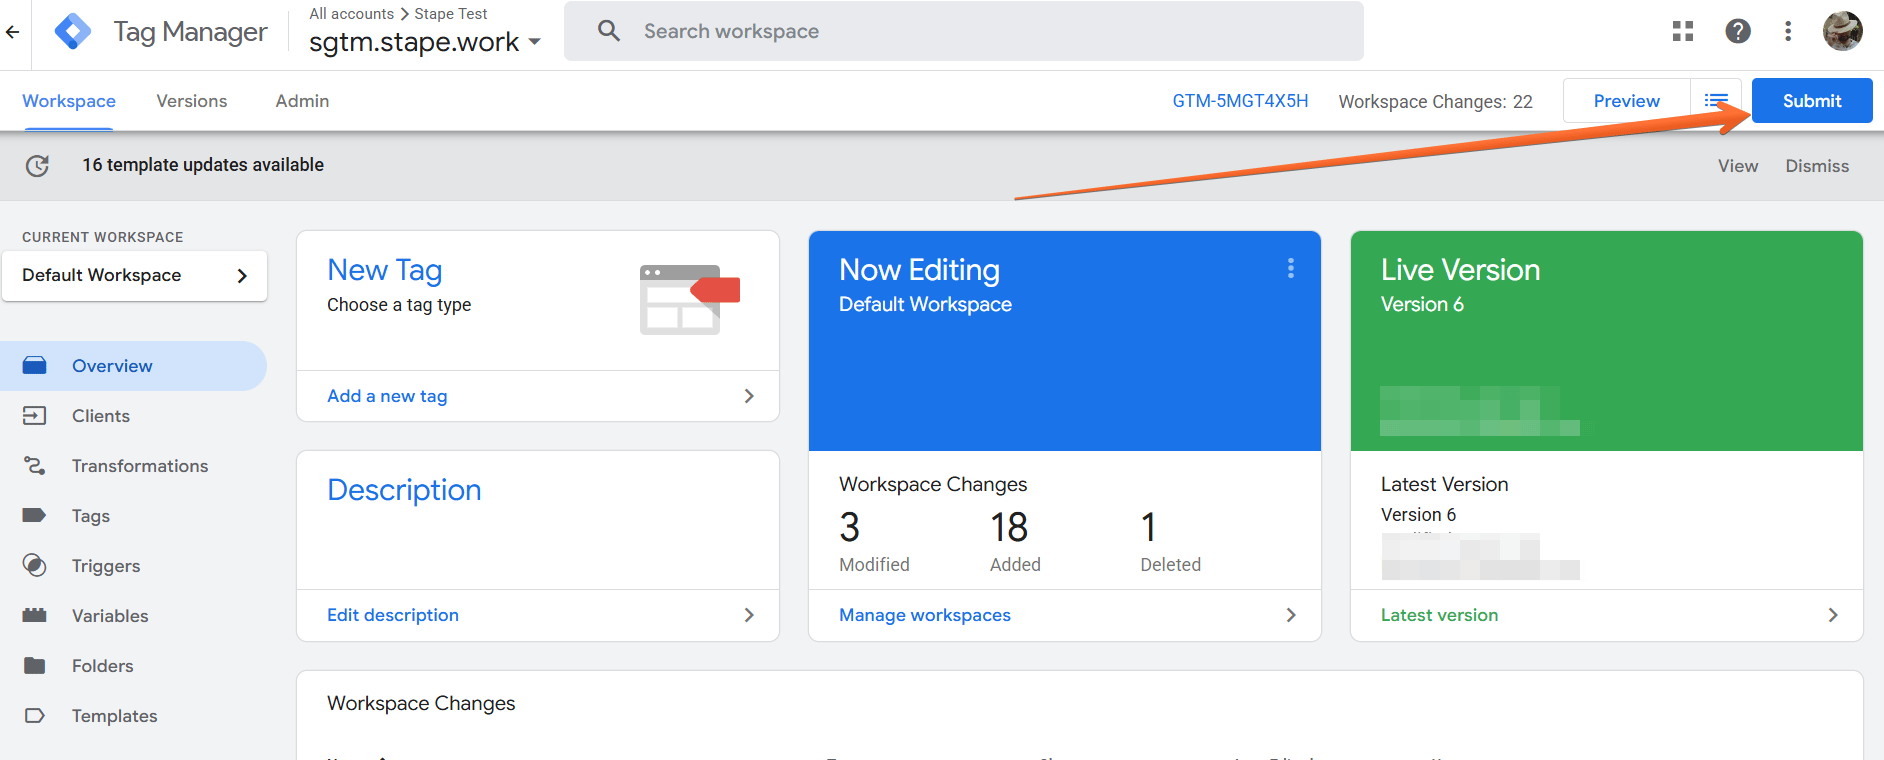
After publishing, it may take a few hours before conversions appear in LinkedIn Campaign Manager. You can then view the conversion status in Campaign Manager to verify that your setup is active and receiving conversion data. Learn how to check your conversion status.
Recommended setup in the Stape container
Once you complete the Conversions API setup in LinkedIn Campaign Manager, your server container is created and connected through the embedded Stape flow. You can follow LinkedIn’s setup guide to confirm that everything works correctly. If you’d like to further improve your conversion data quality and make use of the features included with your LinkedIn-sponsored container offer, consider these recommended configurations in your Stape container.
Step 1. Add a custom domain
When creating your Stape container, we have already provided you with a randomized technical domain (for example, wjzsdfvom.us.stape.io). You could use it as a tagging server URL, but it’s recommended to use a custom domain.
When your tagging server is situated on the same domain as your business website (e.g., if your website is example.com, then your tagging server URL could be sst.example.com). In that case, your cookies will be considered first-party, which bypasses ITP limitations of browsers like Safari and significantly increases the cookie lifetime.
With a LinkedIn-sponsored Stape account, you can configure a custom domain automatically or manually. You can enter a domain name, either use the No CDN or Own CDN option (Stape Global CDN is unavailable to LinkedIn-sponsored accounts), as well as configure advanced settings.
Step 2. Set up Custom Loader
It’s highly recommended to enable Custom Loader as part of your server-side tracking configuration. This power-up minimizes the impact of ad blockers on your GTM and GA4 scripts. It routes requests through a path that turns all cookies first-party, increasing their lifetime.
What you need to know about the LinkedIn-sponsored accounts
- 1.It can be created only via LinkedIn Campaign Manager.
- 2.It is sponsored by LinkedIn, meaning that it is free for eligible advertisers. You cannot upgrade or change your plan manually - it scales automatically based on your container usage.
- 3.You can have 1 Stape server container per LinkedIn ad account (and, by extension, per Stape account).
- 4.You can add up to 3 custom domains per container.
- 5.Your Stape container has usage limitations:
- 5.1.It is automatically disabled if it has fewer than 2,000 incoming requests/month.
- 5.2.It can have up to ~190M incoming requests/month.
- 5.1.
- 6.The following Stape features are not available for this type of account:
- 6.1.Stape Store.
- 6.2.Stape CDN.
- 6.3.File Proxy power-up.
- 6.4.Enricher power-up.
- 6.1.
- 7.You cannot transfer this container or attach it to Partner/Agency accounts.
Learn more in the detailed overview of GTM integration for LinkedIn advertisers.
Was this article helpful?
🍽 Table of content:
Comments