How to set up the Model Context Protocol (MCP) server for GA4
Updated Jun 15, 2026
The following guide demonstrates configuring an MCP server for GA4. You can alternatively configure the MCP server for Stape or for GTM.
Requirements for setting up MCP for GA4
To set up the GA4 MCP server, you will need:
An AI app or agent (in our case, it is the Claude app).
Set up Google Analytics 4 MCP Server step-by-step
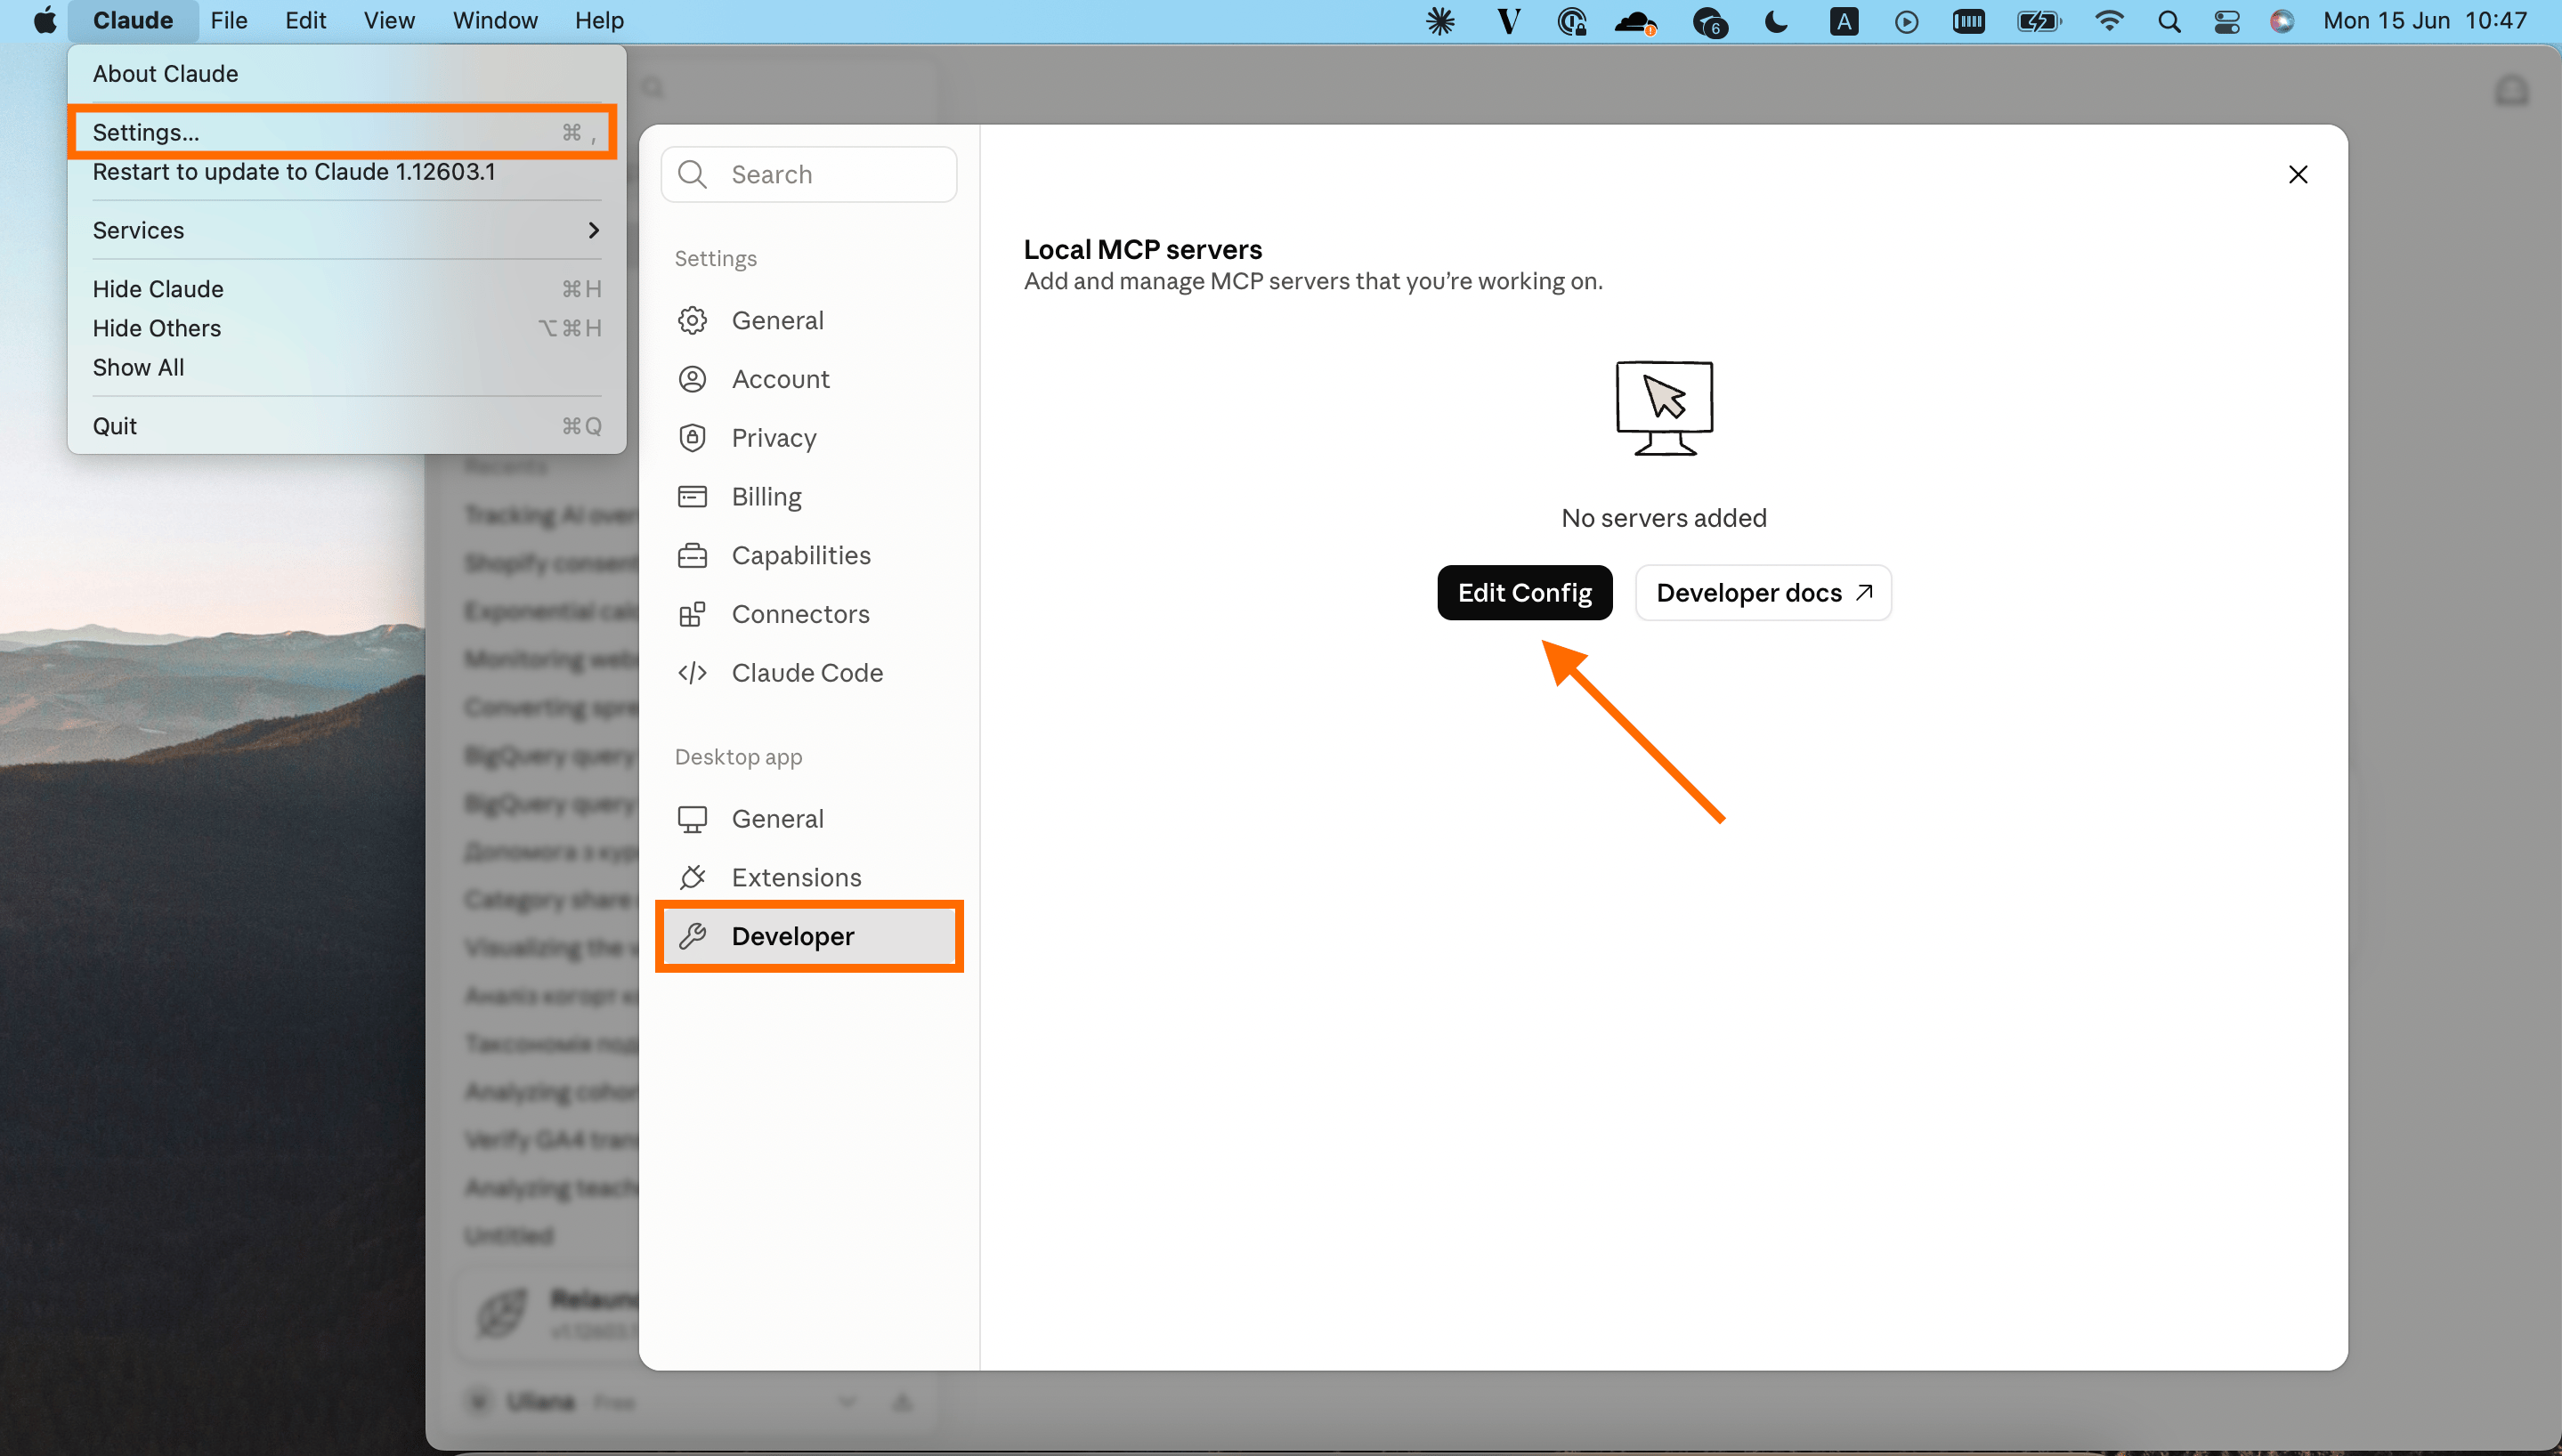
1. Open Claude Desktop and go to Settings → Developer → Edit Config.
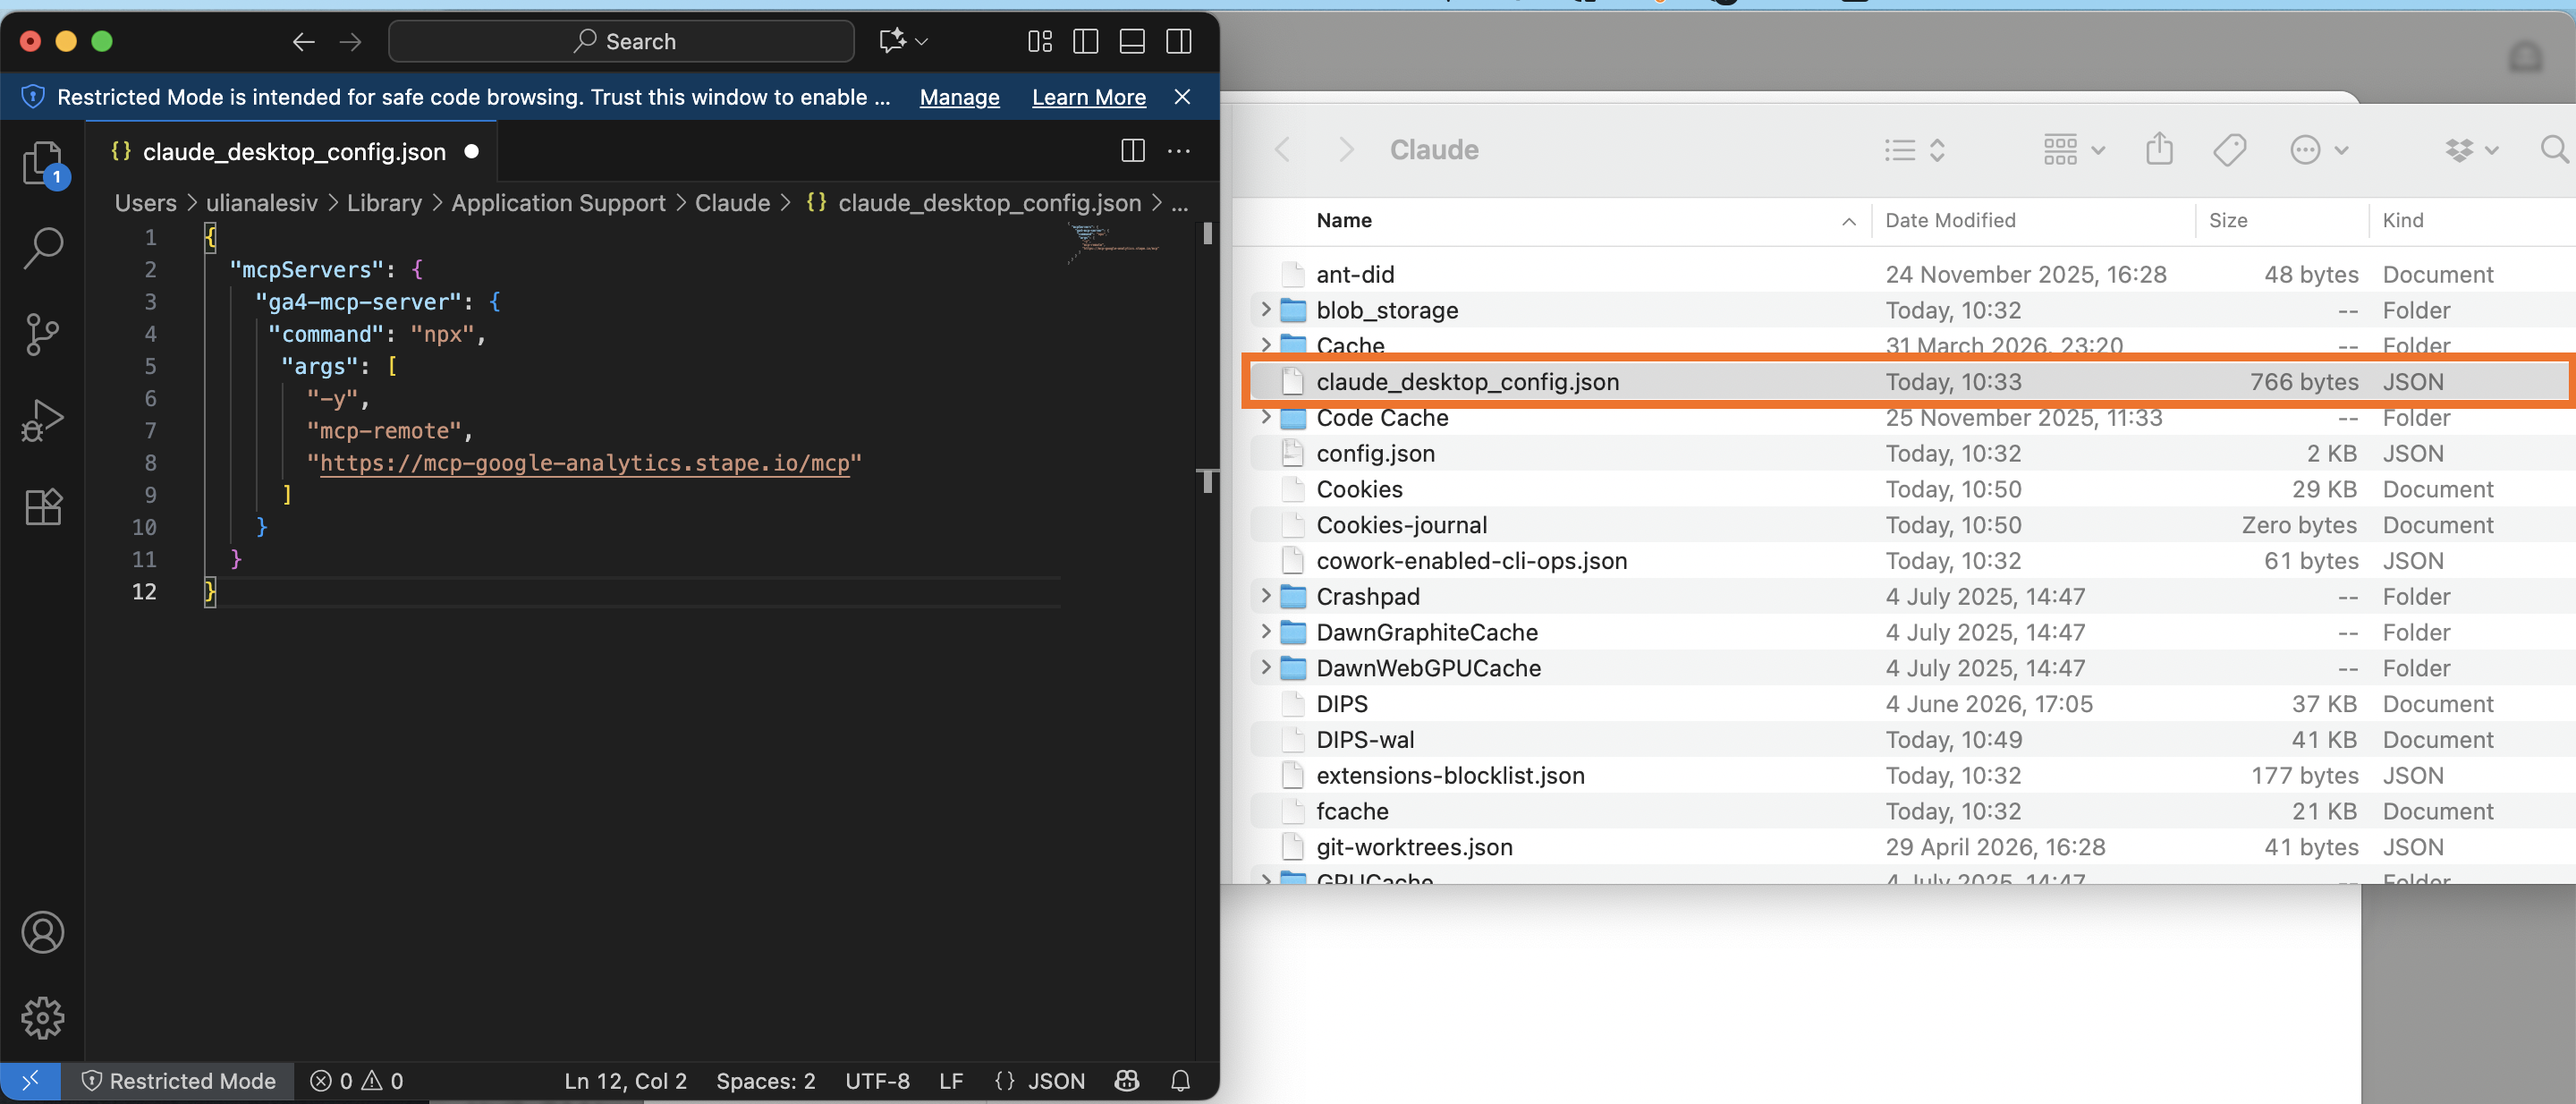
2. Open the configuration file that controls what MCP servers Claude can access and add the following configuration:
{
  "mcpServers": {
    "ga4-mcp-server": {
     "command": "npx",
      "args": [
        "-y",
        "mcp-remote",
        "https://mcp-google-analytics.stape.io/mcp"
      ]
    }
  }
}
Save the changes (Command + S).
3. Restart Claude Desktop.
4. After restarting, a browser window will open.
Choose the Google account that has access to the Google Analytics property you want to modify using the MCP server by Stape. Complete the authentication process to grant Claude access to your MCP server.
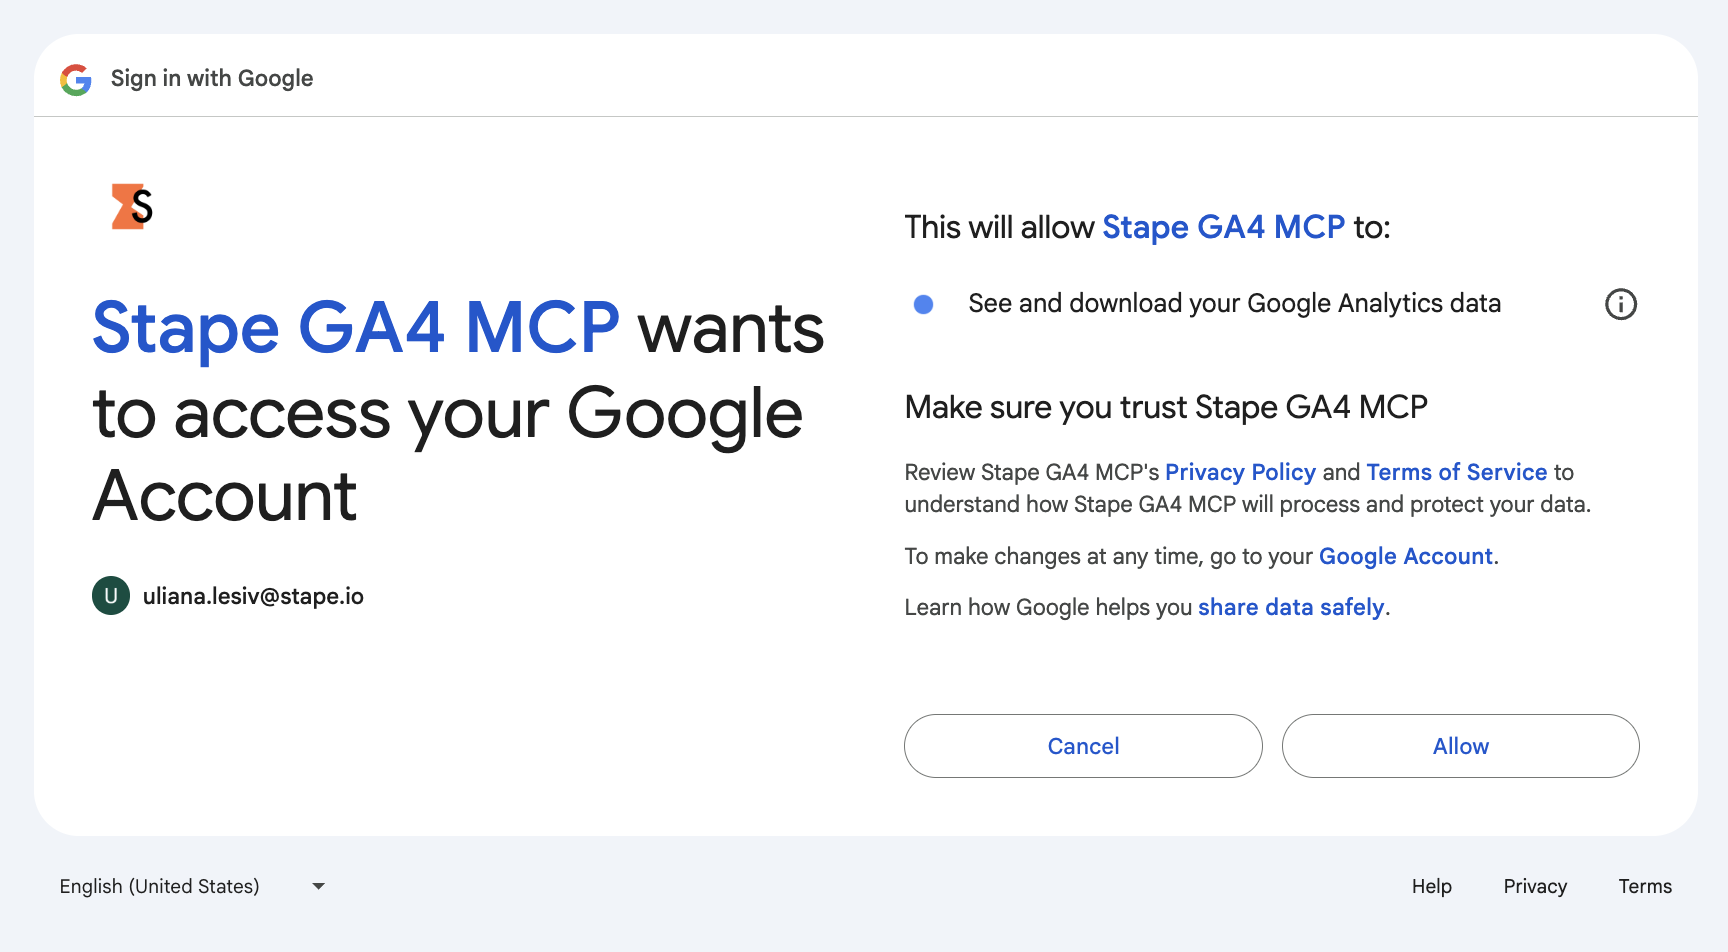
After the access is granted, the tool will be available for your use.

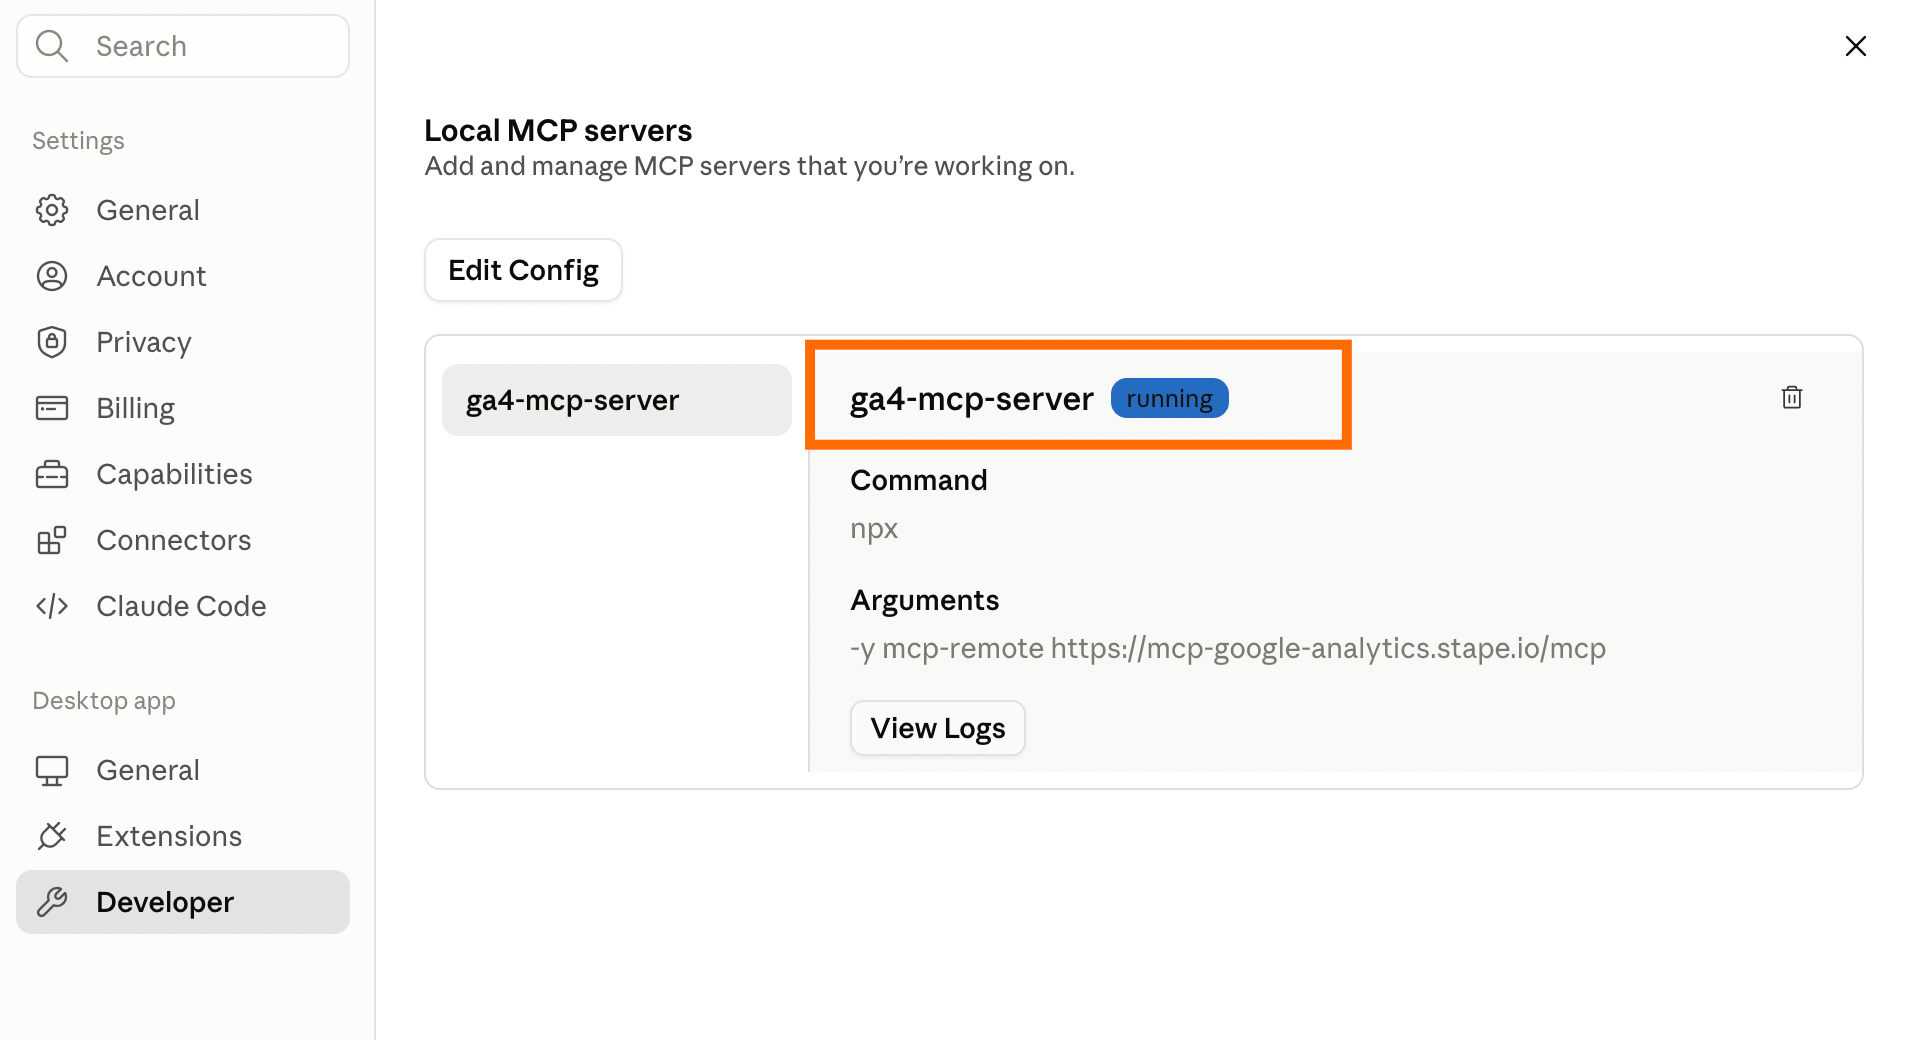
In Settings → Developer, you will see the status Running next to ga4-mcp-server. If you face any problems with configuration, refer to the troubleshooting section below in this guide.
Troubleshooting GA4 MCP server configuration
MCP Server name length limit
Some MCP clients, like Cursor AI, enforce a 60-character limit on the combined length of the MCP server name and the tool name. If your configuration uses a long server name (e.g., ga4-mcp-server-your-additional-long-name), this may cause specific tools to be hidden or filtered out by the client.
Action: to ensure all tools are visible, configure your MCP server with a shorter name (e.g., ga4-mcp-server).
The MCP cache
mcp-remote stores credential data in ~/.mcp-auth (or the location defined by the $MCP_REMOTE_CONFIG_DIR$ environment variable). If you run into persistent issues, you should try clearing this cached state and tokens.
Use this command to clear the cache:
rm -rf ~/.mcp-authAfterward, restart your MCP client.
Was this article helpful?
Comments