How to configure Stape Gateway
Updated Nov 13, 2025
Important! Before you begin, please ensure that web Google Analytics 4 and/or Google Ads tracking is configured for your website. Stape Gateway works only based on data that web GA4 and/or gAds requests send.
Step-by-step guide to configure Stape Gateway
Create a Stape Gateway container on Stape
1. Log in to your stape.io account.
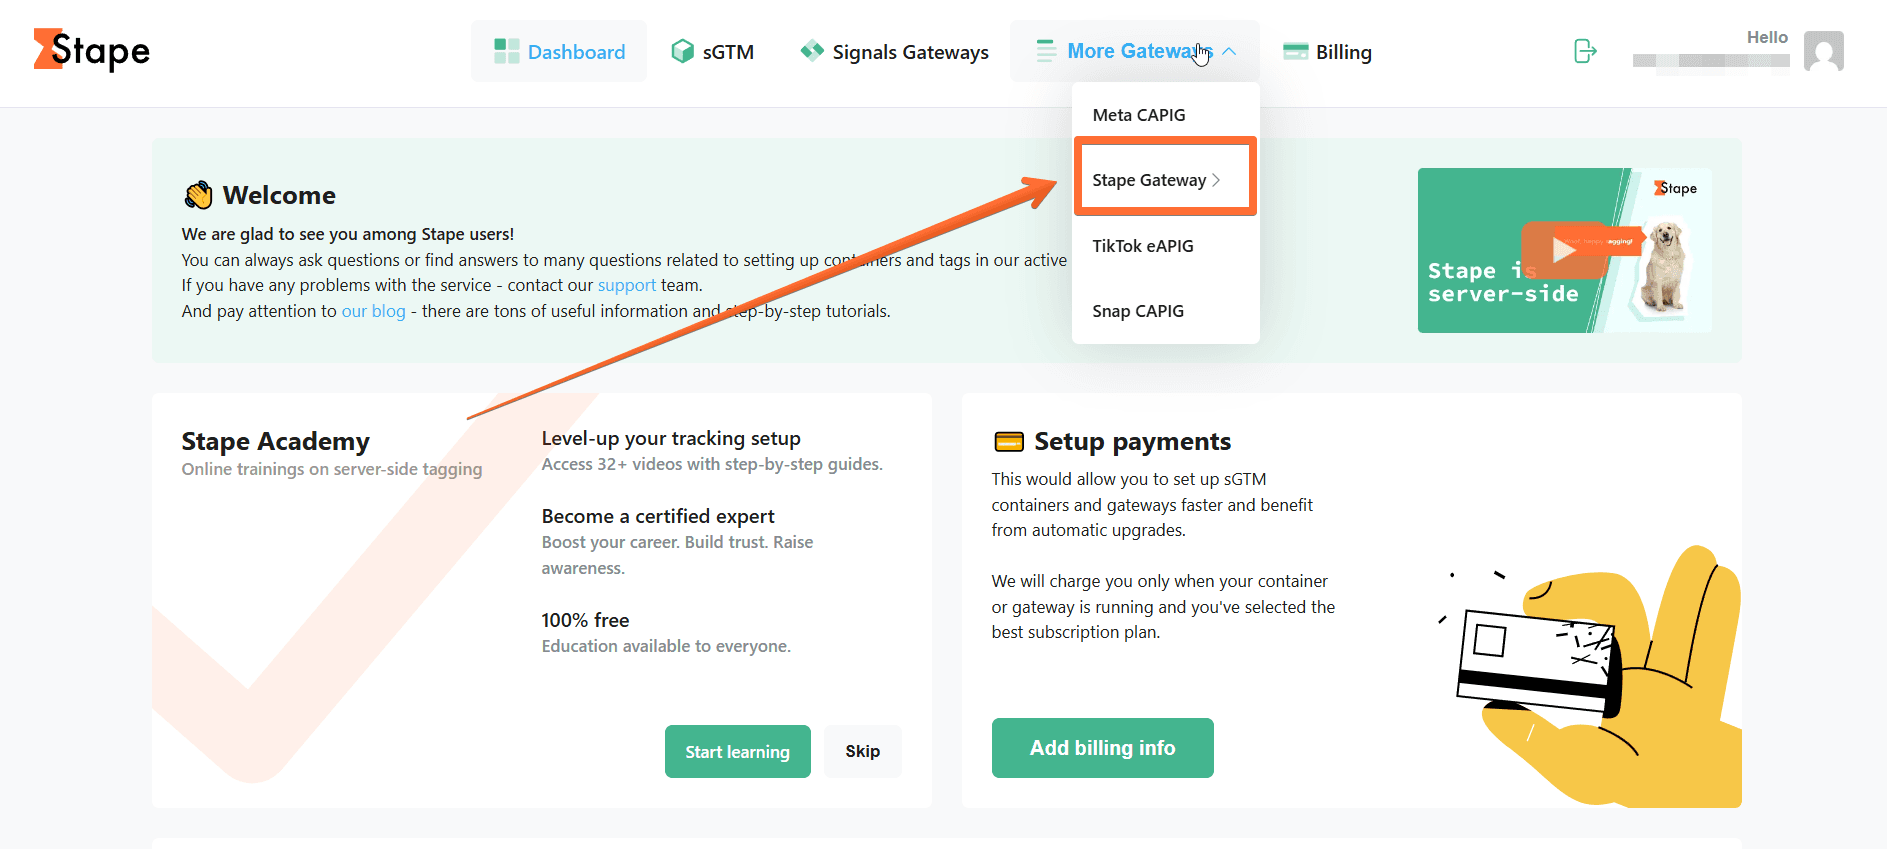
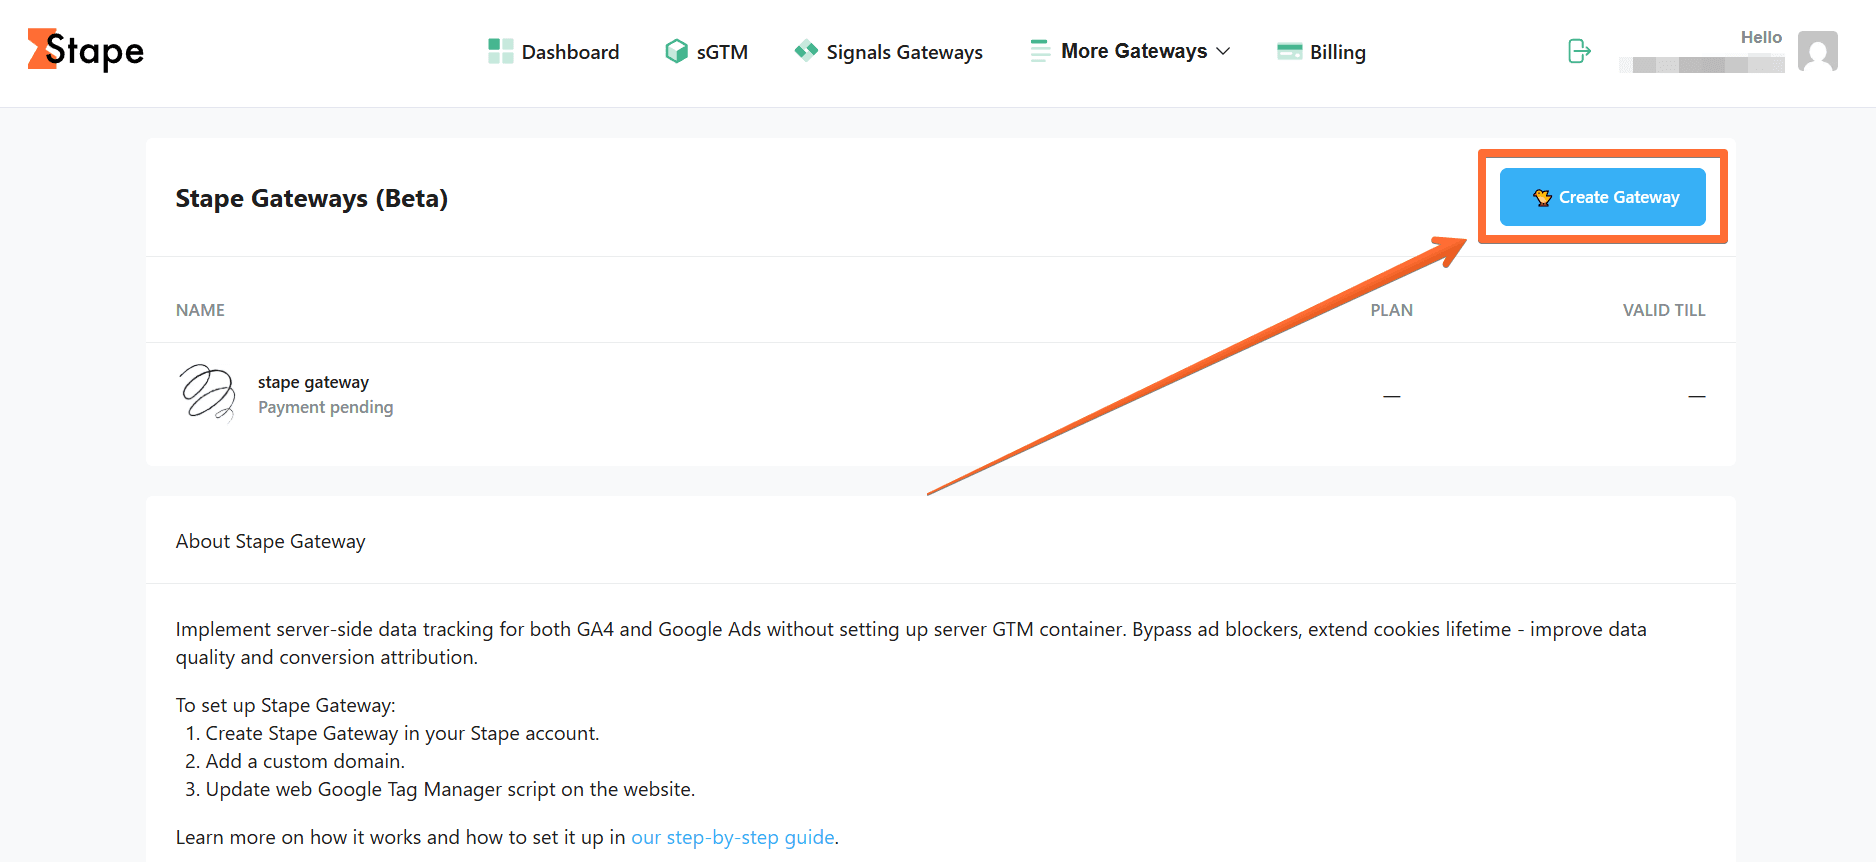
2. Open the Stape Gateway page.
3. Click Create Gateway.
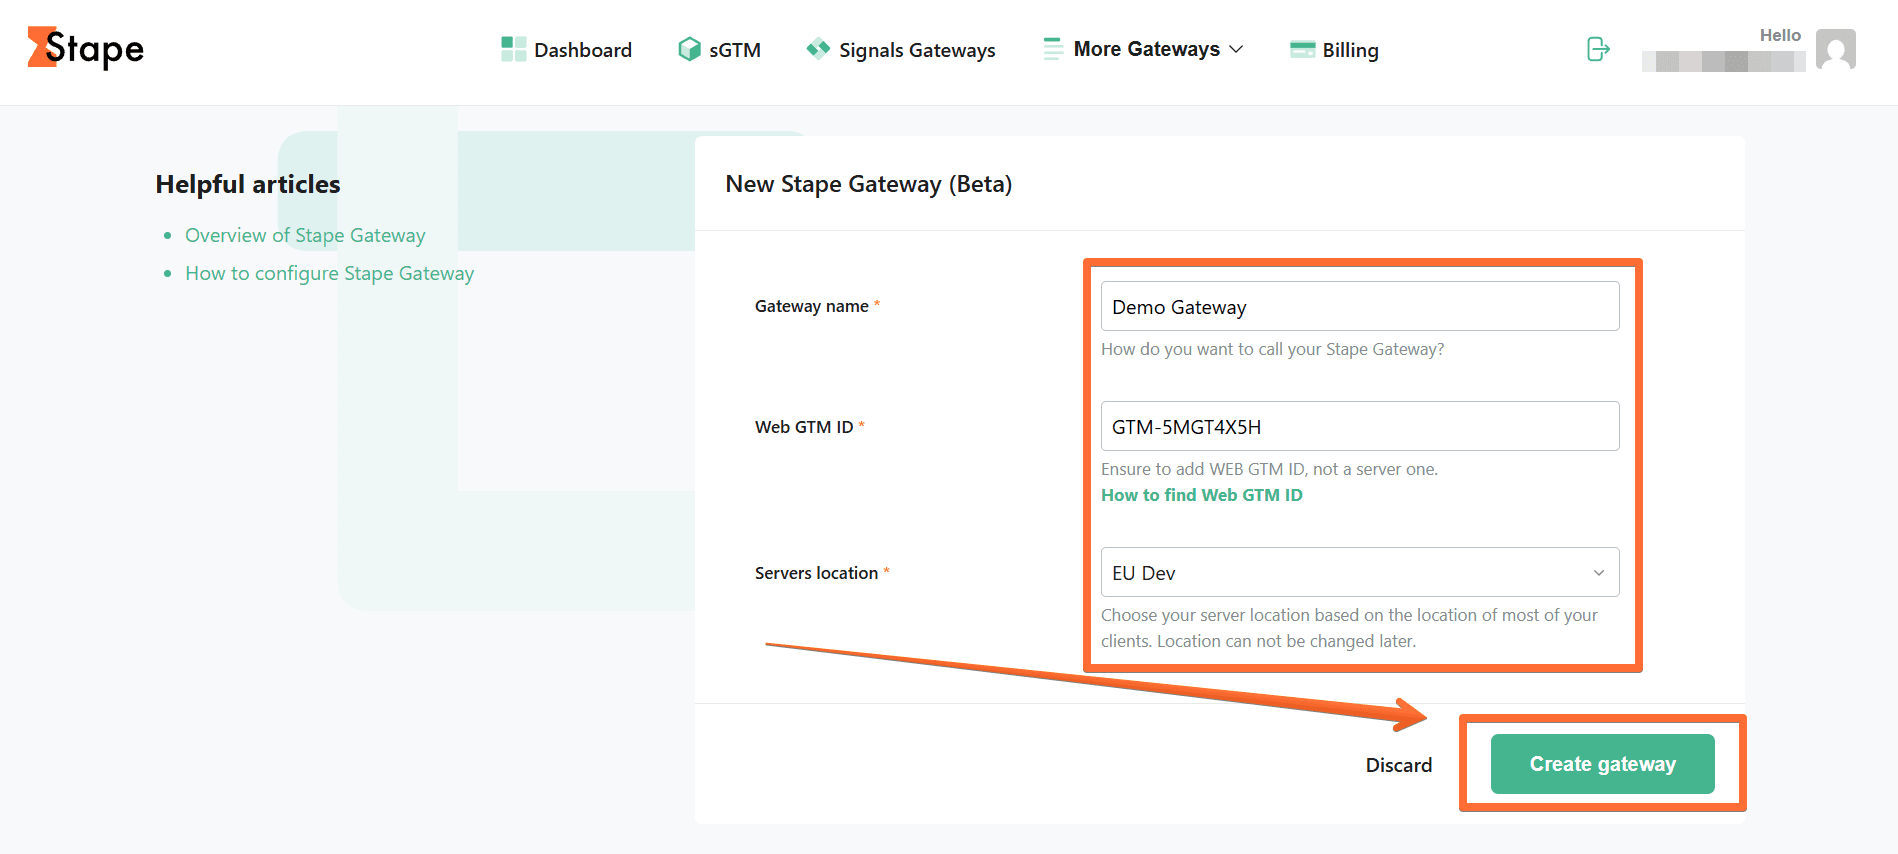
4. Fill in the required fields:
- Gateway name. Enter a descriptive name.
- Web GTM ID. See here how to find web Google Tag Manager (GTM) ID.
- Servers location. For better performance, select a location closer to your website’s visitors.
Then click Create gateway.
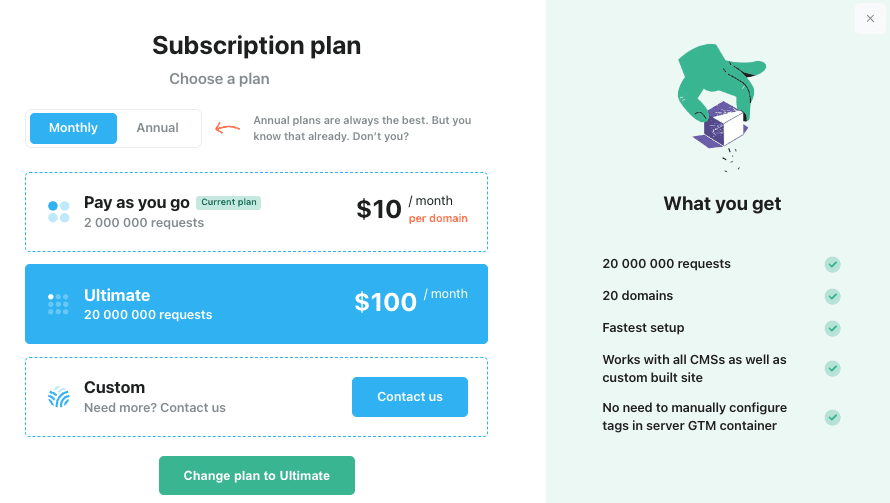
5. Select a subscription plan or choose to add payment later to activate a 7-day free trial.
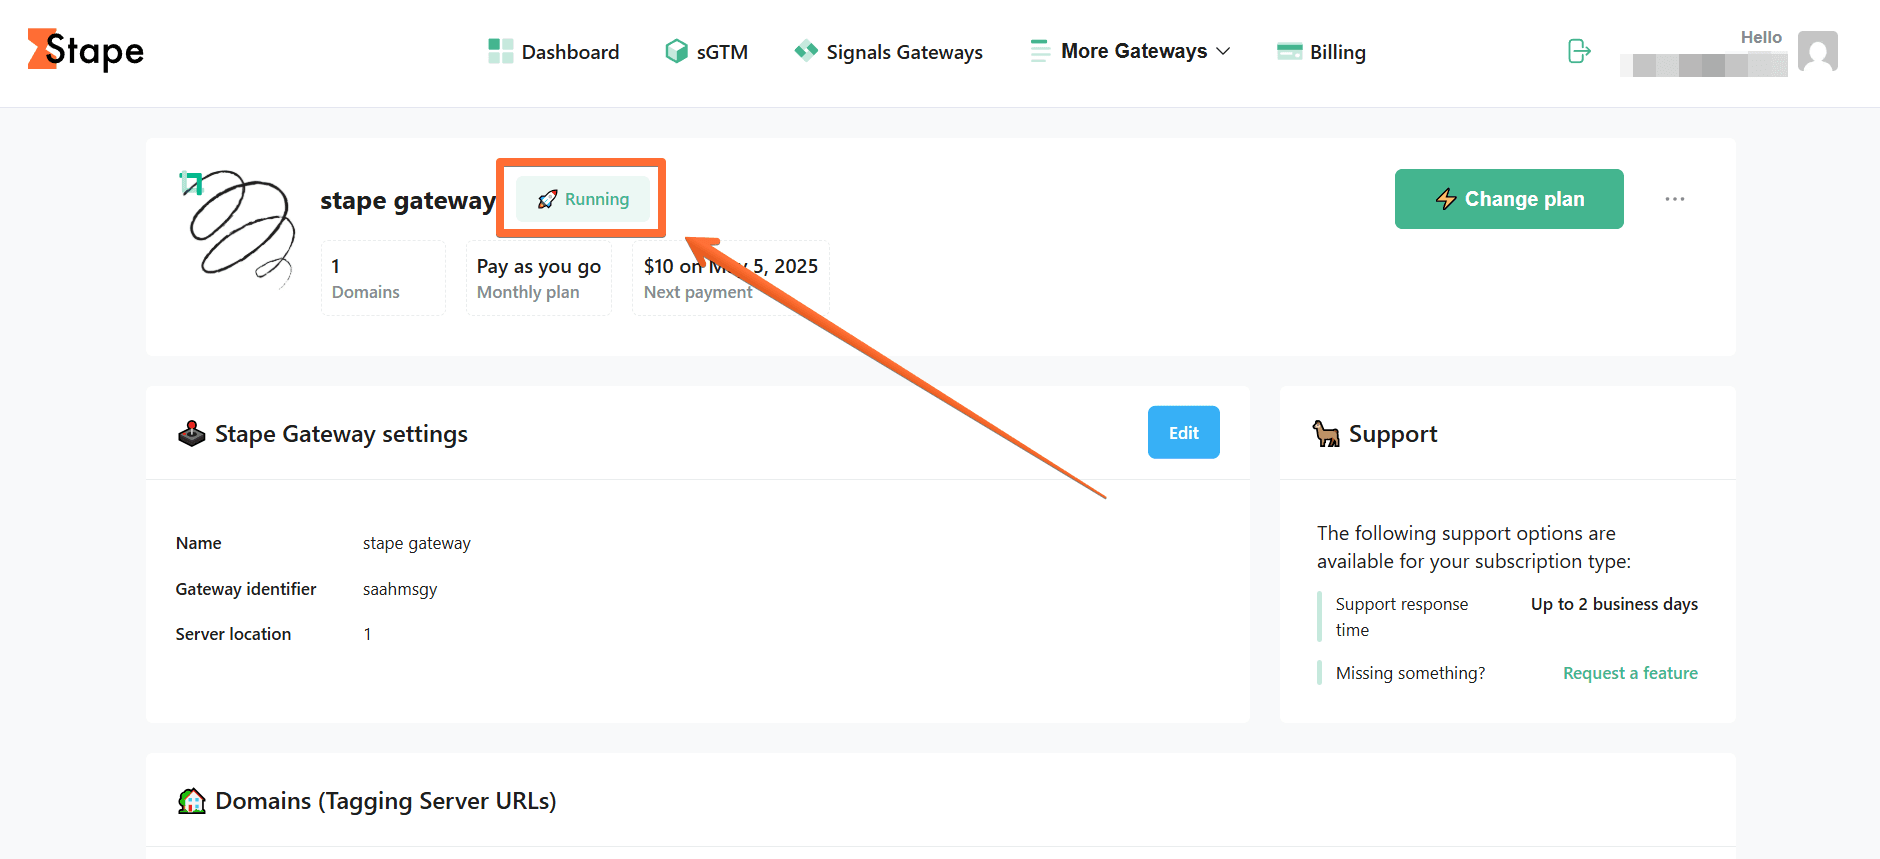
6. Wait until the Gateway is verified (the status changes to Running.)
Configure a custom domain
Configuring a custom domain is highly recommended because it allows you to serve your Google Tags from the first-party context and prolongs the lifetime of first-party cookies.
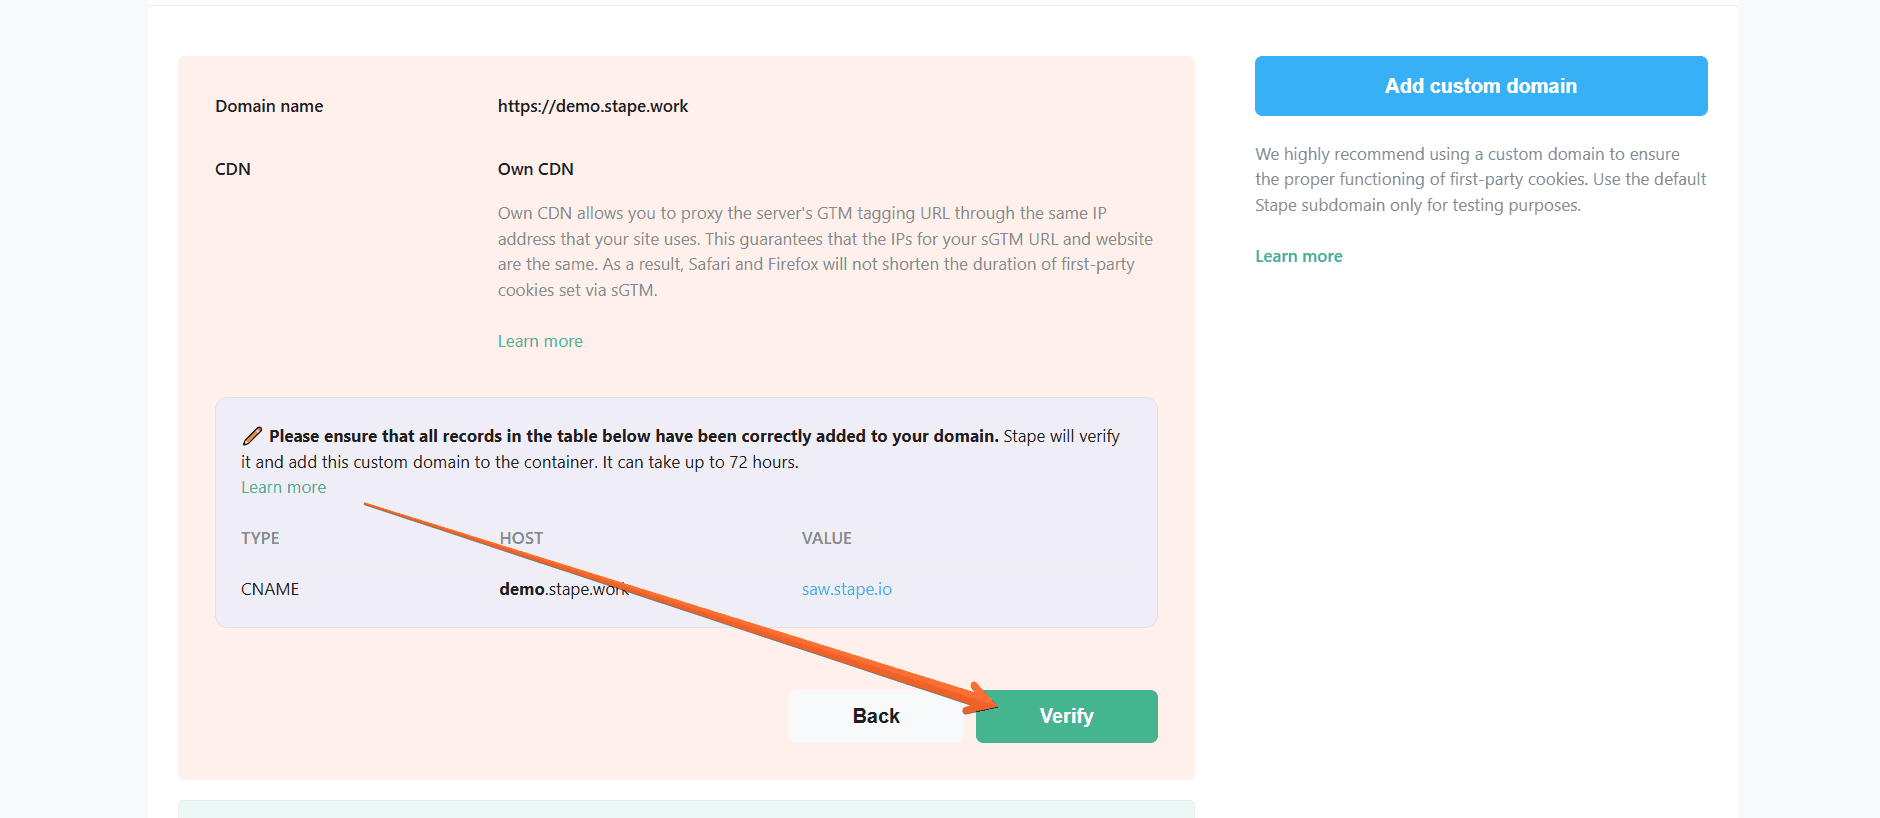
1. Open your newly created Stape Gateway on Stape → click Add custom domain.

2. There are two ways of adding a custom domain:
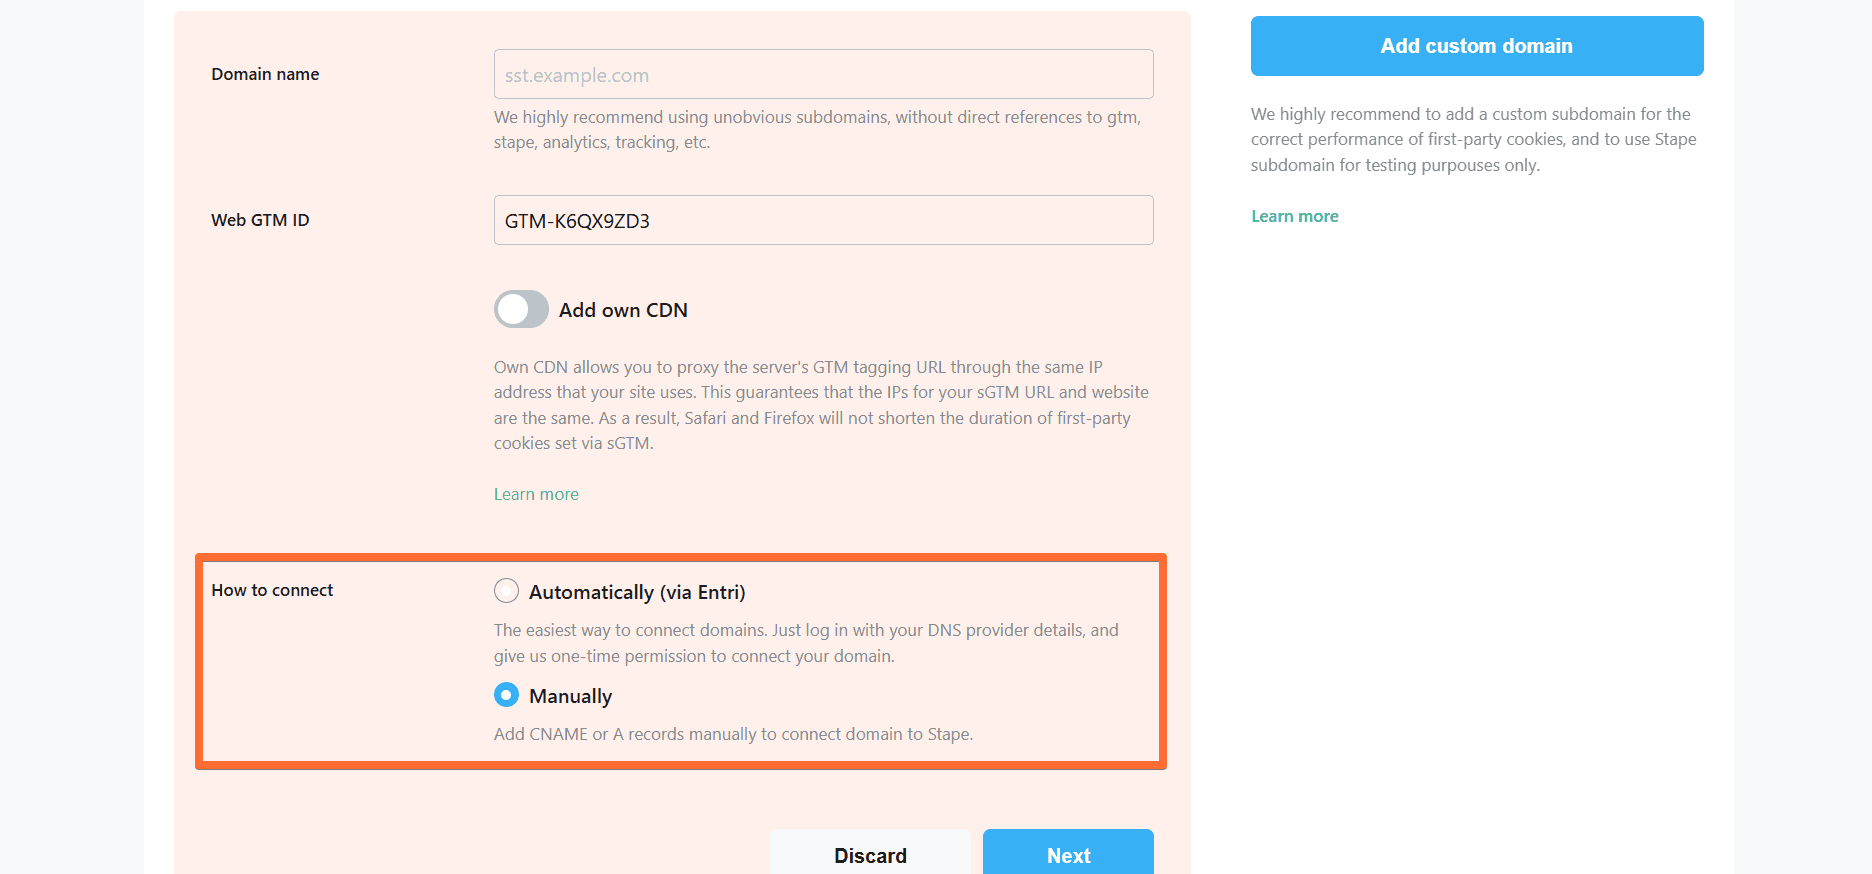
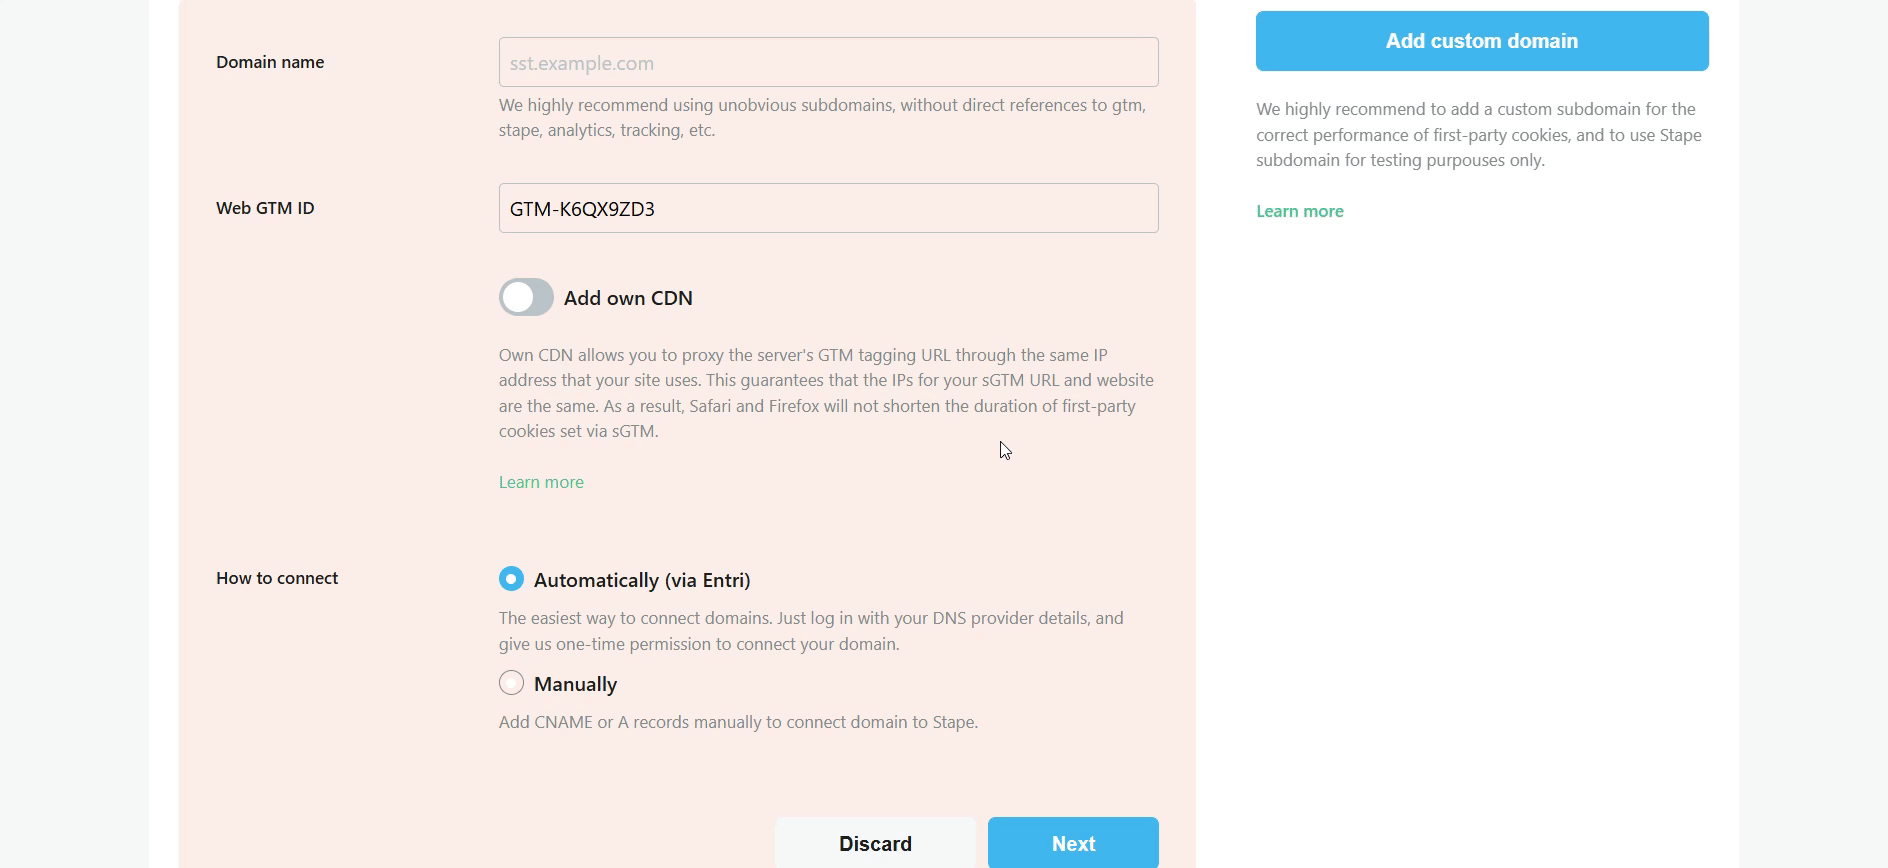
- Automatically (via Entri) - the easiest way to connect domains. Log in with your DNS provider details via Entri, and give us one-time permission to connect your domain. Check the full list of supported DNS providers by Entri.
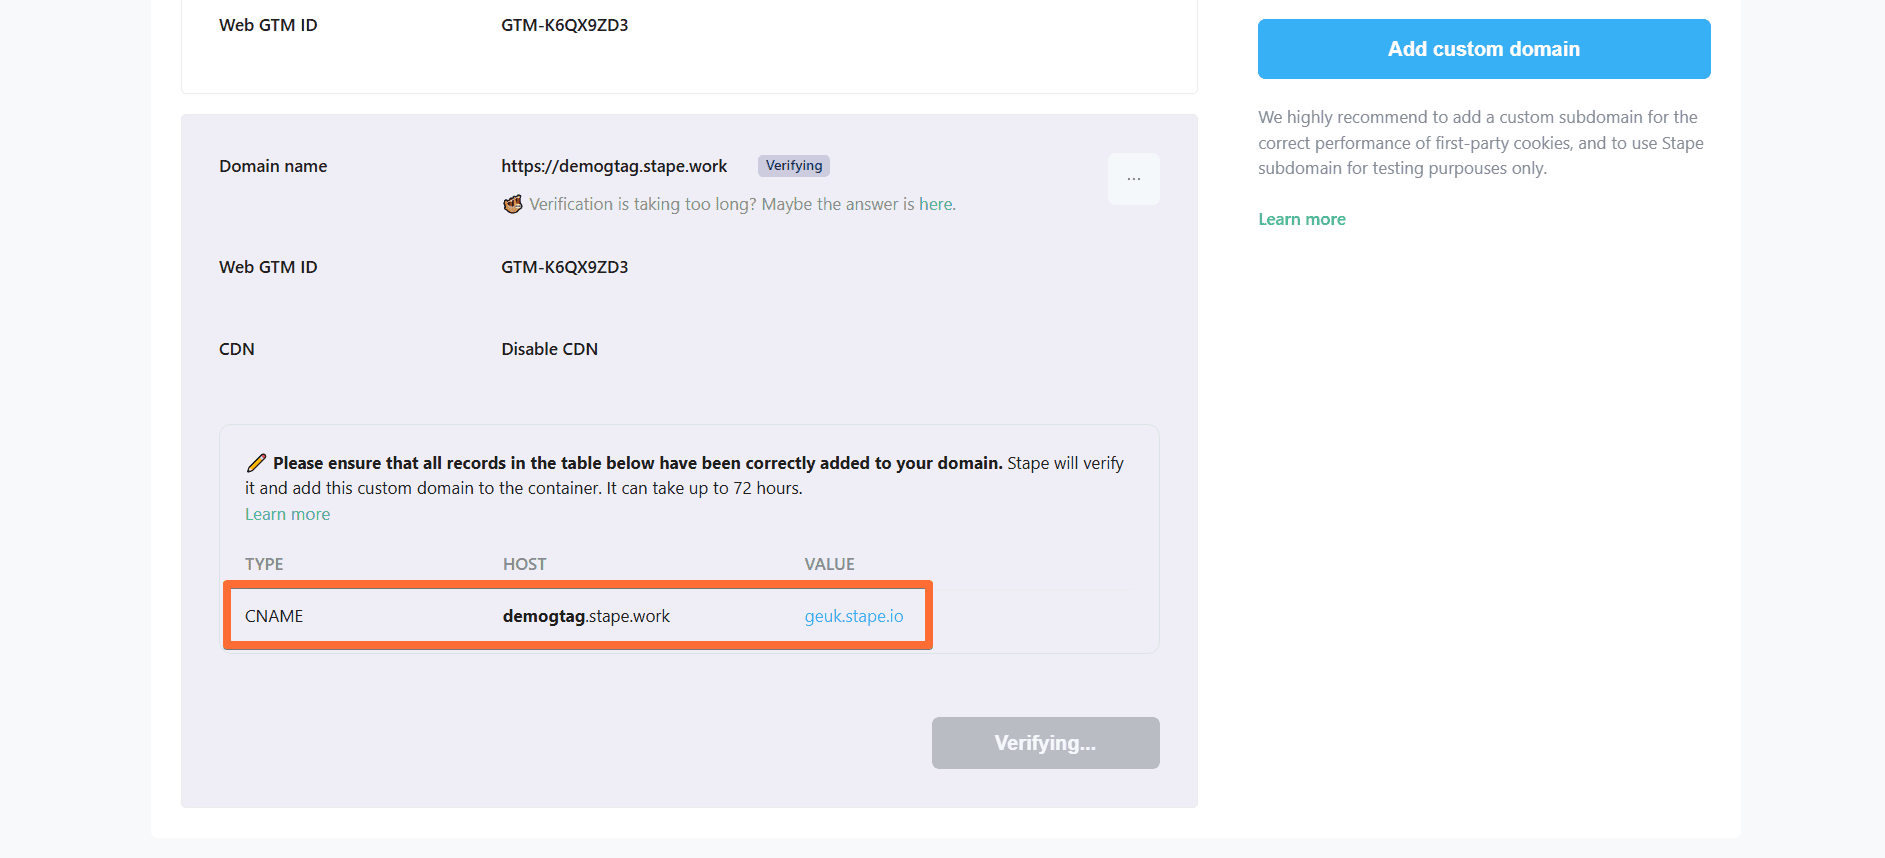
- Manually - After you add a custom domain to your Stape container, you will see DNS records that should be added to your DNS provider to verify the custom domain. The DNS records depend on the server location and which CDN options you choose.
Here are all available configurations for your custom domain (don’t worry, we’ll cover the configuration process in later sections):
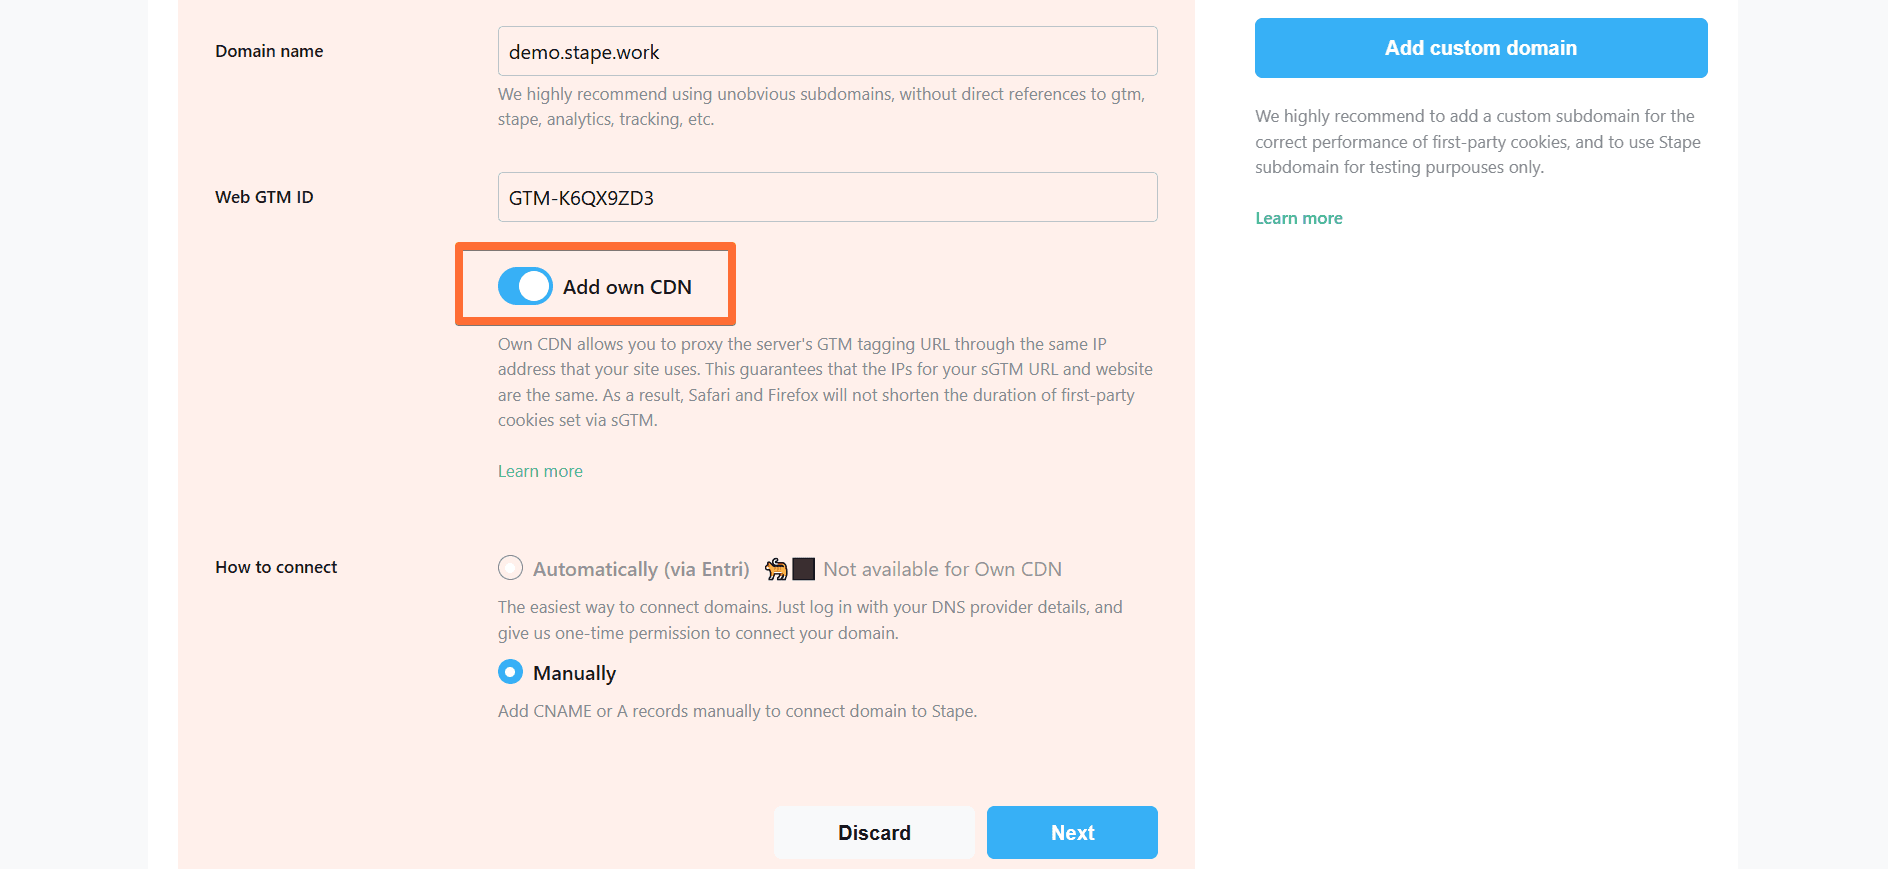
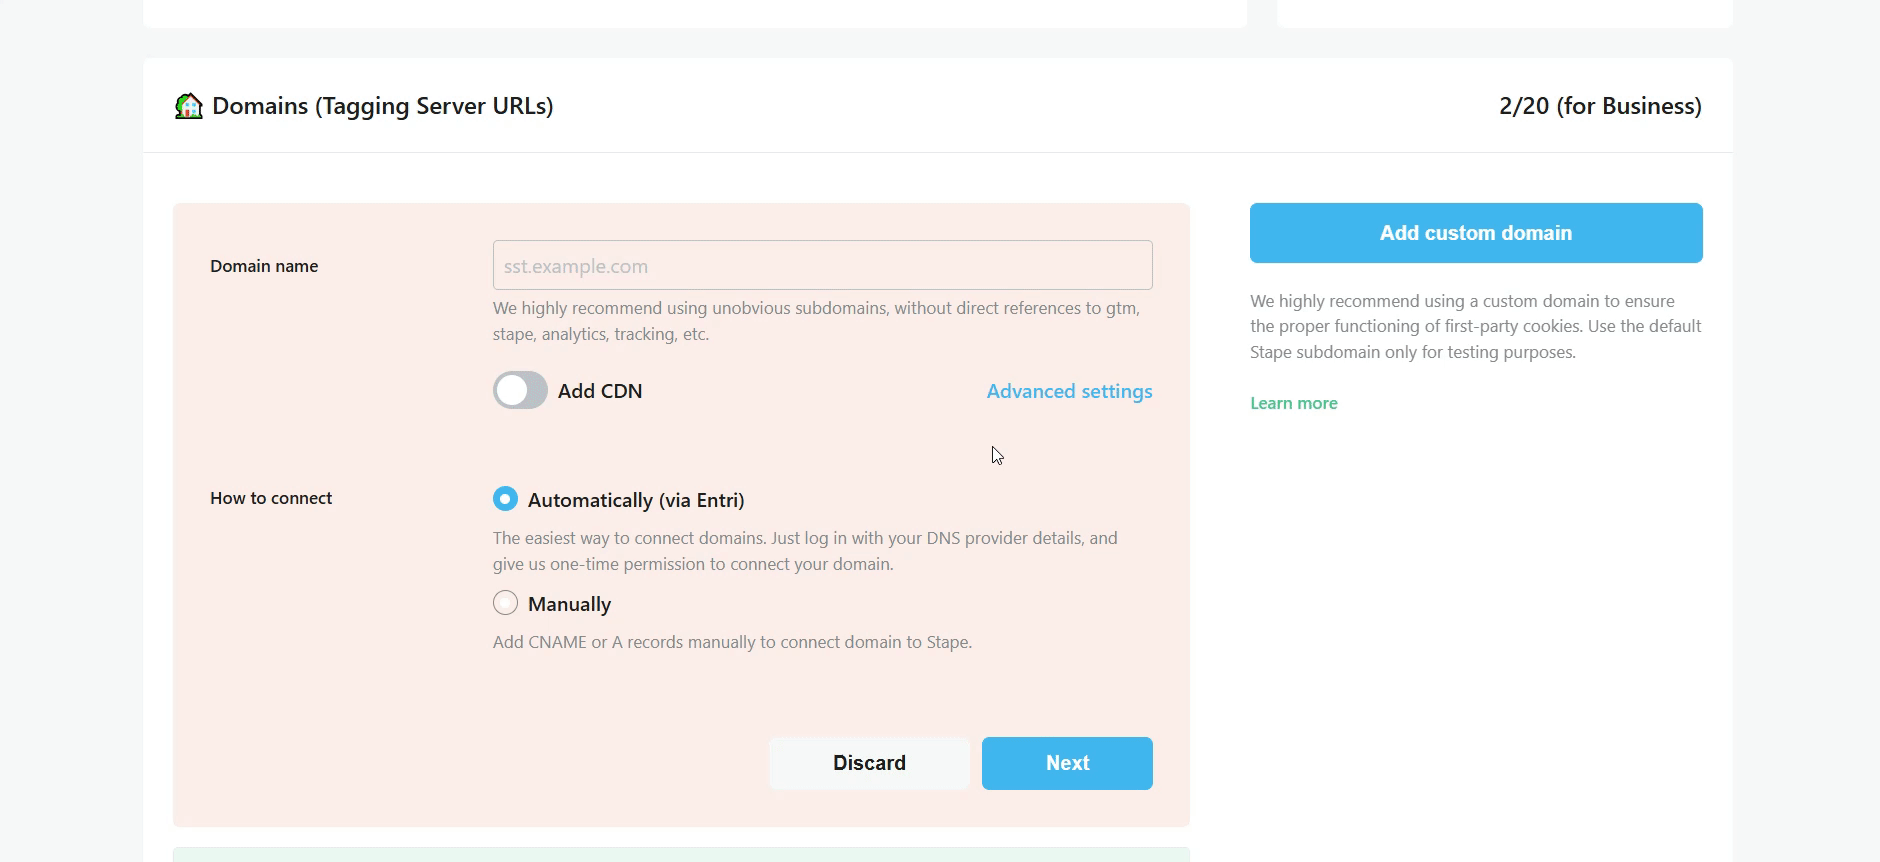
- Domain name - enter your tagging server domain (example: gtm.my-domain.com).
- Web GTM ID - normally, it’s the one that you provided when configuring you Stape Gateway.
- Add Own CDN (incompatible with the Automatically (via Entri) connection option) - toggle this switch if you want to load js files (gtm.js, gtag.js, analytics.js, etc.) from a server closer to your site’s visitors, resulting in a faster js file serving. Routes sGTM custom domain and proxy sGTM traffic through the DNS provider of your website. IP addresses of your website and the custom domain will match, and server-side cookies will be considered first-party. As a result, it gives the ability to increase cookie duration.
- How to connect - choose the way you want to connect domains.
- Automatically (via Entri) - the easiest way to connect domains - you simply log in with your DNS provider details via Entri and give us one-time permission to connect your domain.
- Manually - this option will provide you with DNS records that should be created within your DNS provider to verify the custom domain.
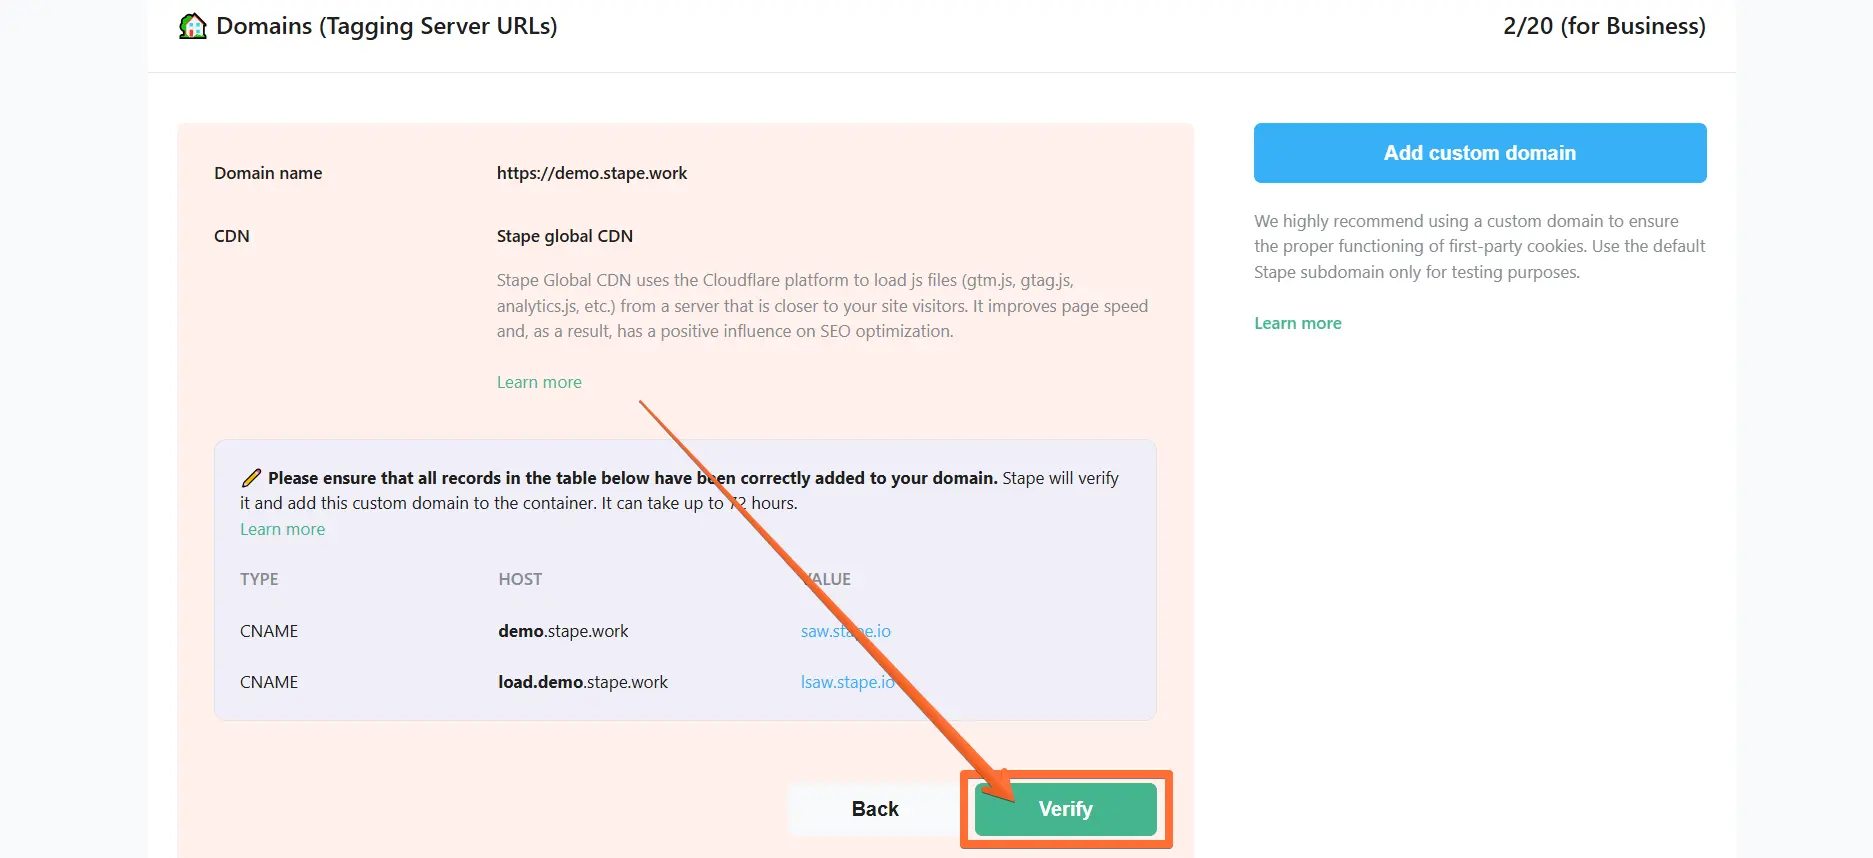
3. Enter your Domain name and Web GTM ID, select if you want to Add Own CDN or not, and whether you want to connect Automatically or Manually → click Next.
You will be provided with DNS records to add to your DNS provider.
Configuring a custom domain WITHOUT adding own CDN
This section describes adding DNS records to your provider when the Add Own CDN option is toggled OFF. See next section for the instructions on how to add Own CDN for Stape Gateway.
This example describes adding these records to Cloudflare DNS provider, but you can do the same with any provider you use.
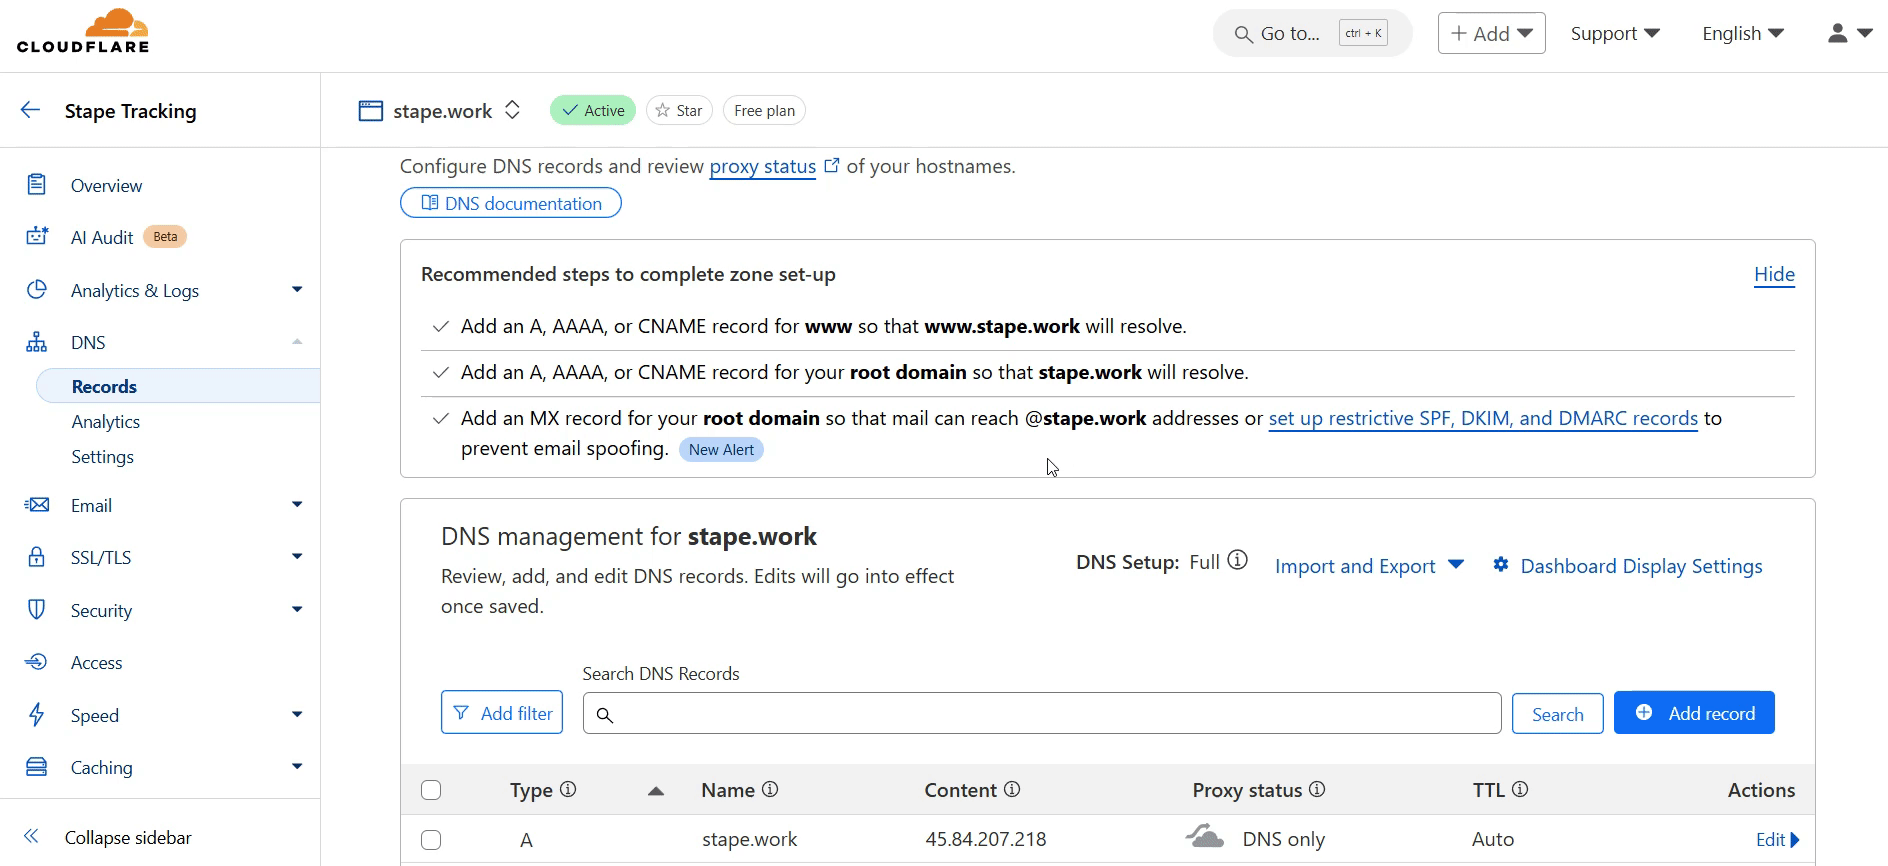
1. Visit your Cloudflare profile → open the DNS tab in the side menu → open the Records screen → click Add record.
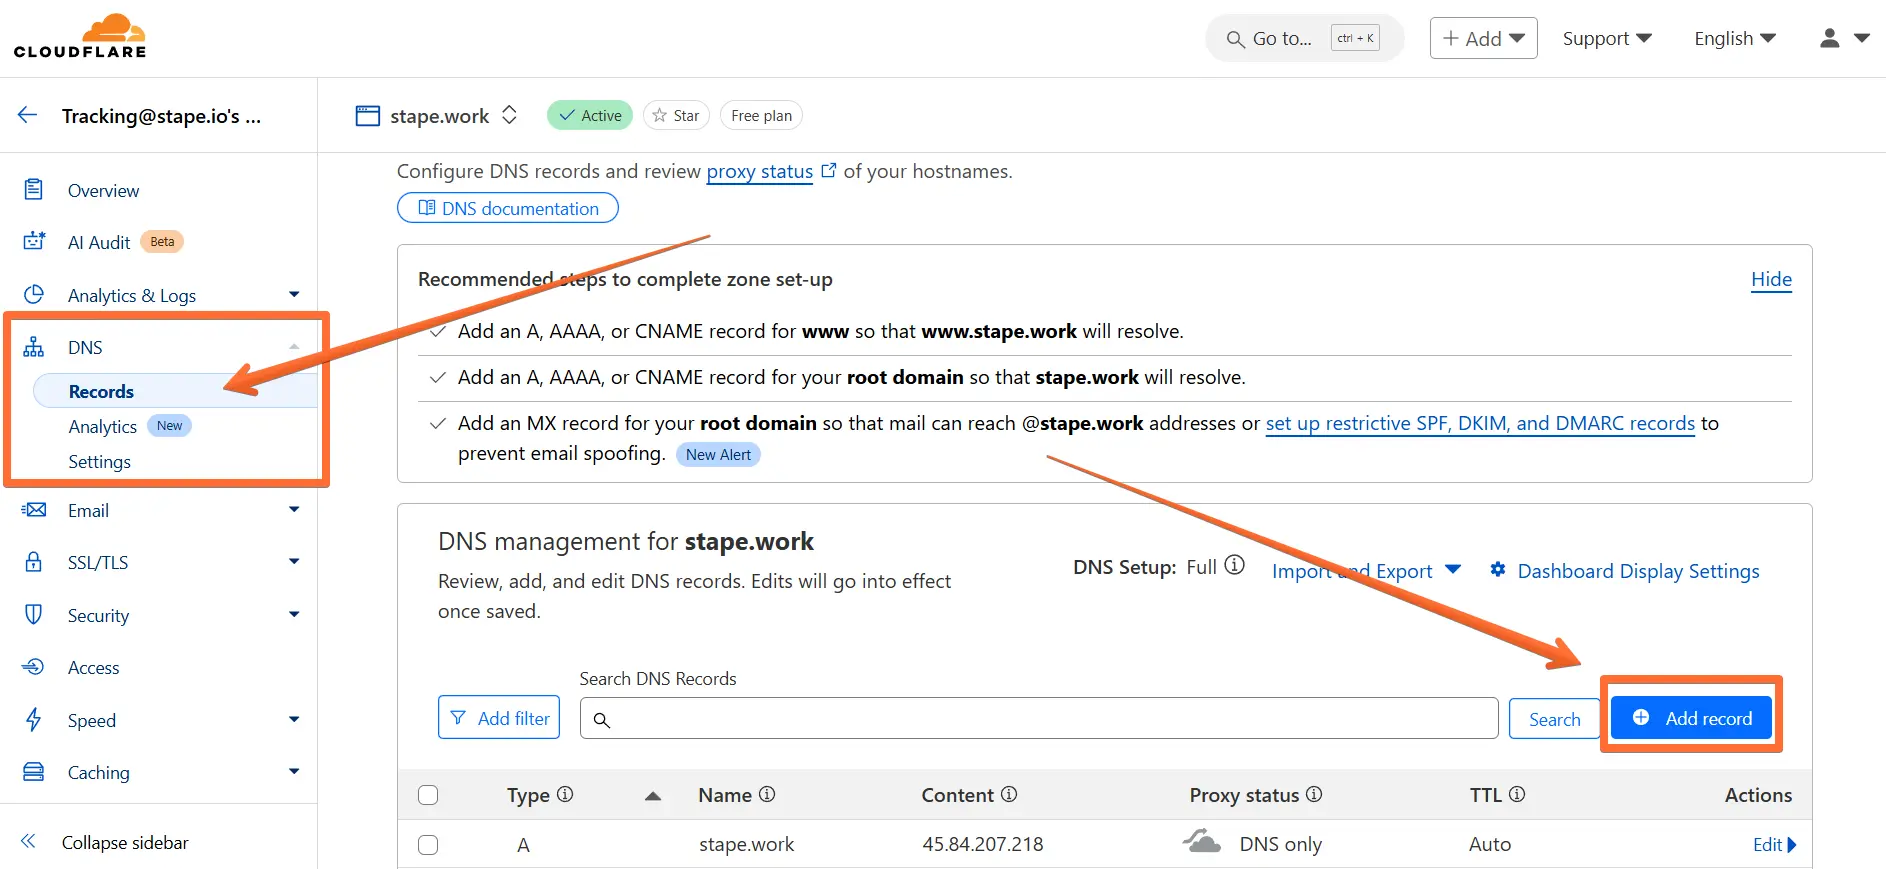
2. Enter the DNS records from Stape:
- Type - copy the TYPE parameter from Stape.
- Name - copy the HOST parameter from Stape.
- Target - copy the VALUE parameter from Stape.
- Proxy status - make sure to toggle this OFF.
Click Save.
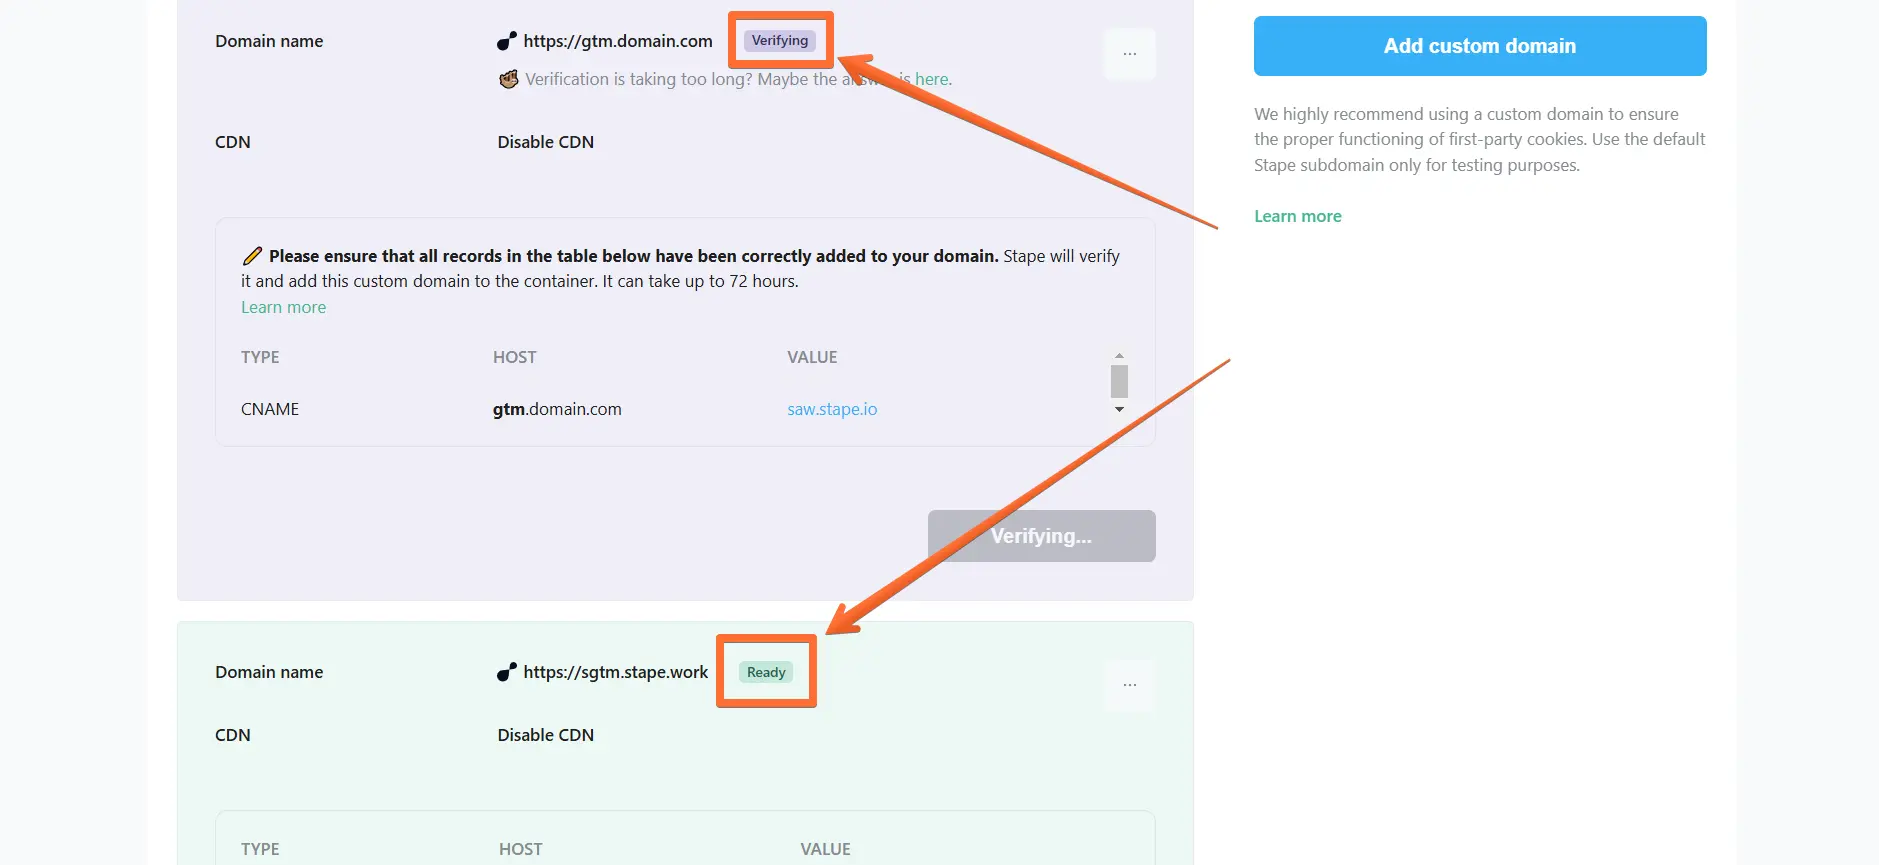
3. Once you’ve entered the DNS records to your DNS provider, return to the Stape domain settings page and click Verify.
4. Wait for Stape to finish verifying your custom domain (when the container status bar changes from Verifying to Ready). Usually, it takes from 30 minutes to 2 hours, but in some cases it can take up to 72 hours.

Configuring a custom domain WITH adding own CDN
Own CDN allows serving custom domains (tagging server URL) from the same IP address as your website domain. It allows to prolong the lifetime of cookies in browsers with ITP, like Safari and Firefox.
This example describes adding these records to Cloudflare DNS provider, but you can do the same with any provider you use.
1. Visit your Cloudflare profile → open the DNS tab in the side menu → open the Records screen → click Add record.

2. Enter the DNS records from Stape:
- Type - copy the TYPE parameter from Stape.
- Name - copy the HOST parameter from Stape.
- Target - copy the VALUE parameter from Stape.
- Proxy status - make sure to toggle this ON.
Click Save.
3. Once you’ve entered the DNS records to your DNS provider, return to the Stape container page where you’ve been configuring the custom domain and click Verify.
4. Wait for Stape to finish verifying your custom domain (when the container status bar changes from Verifying to Ready). Usually, it takes from 30 minutes to 2 hours, but in some cases it can take up to 72 hours.
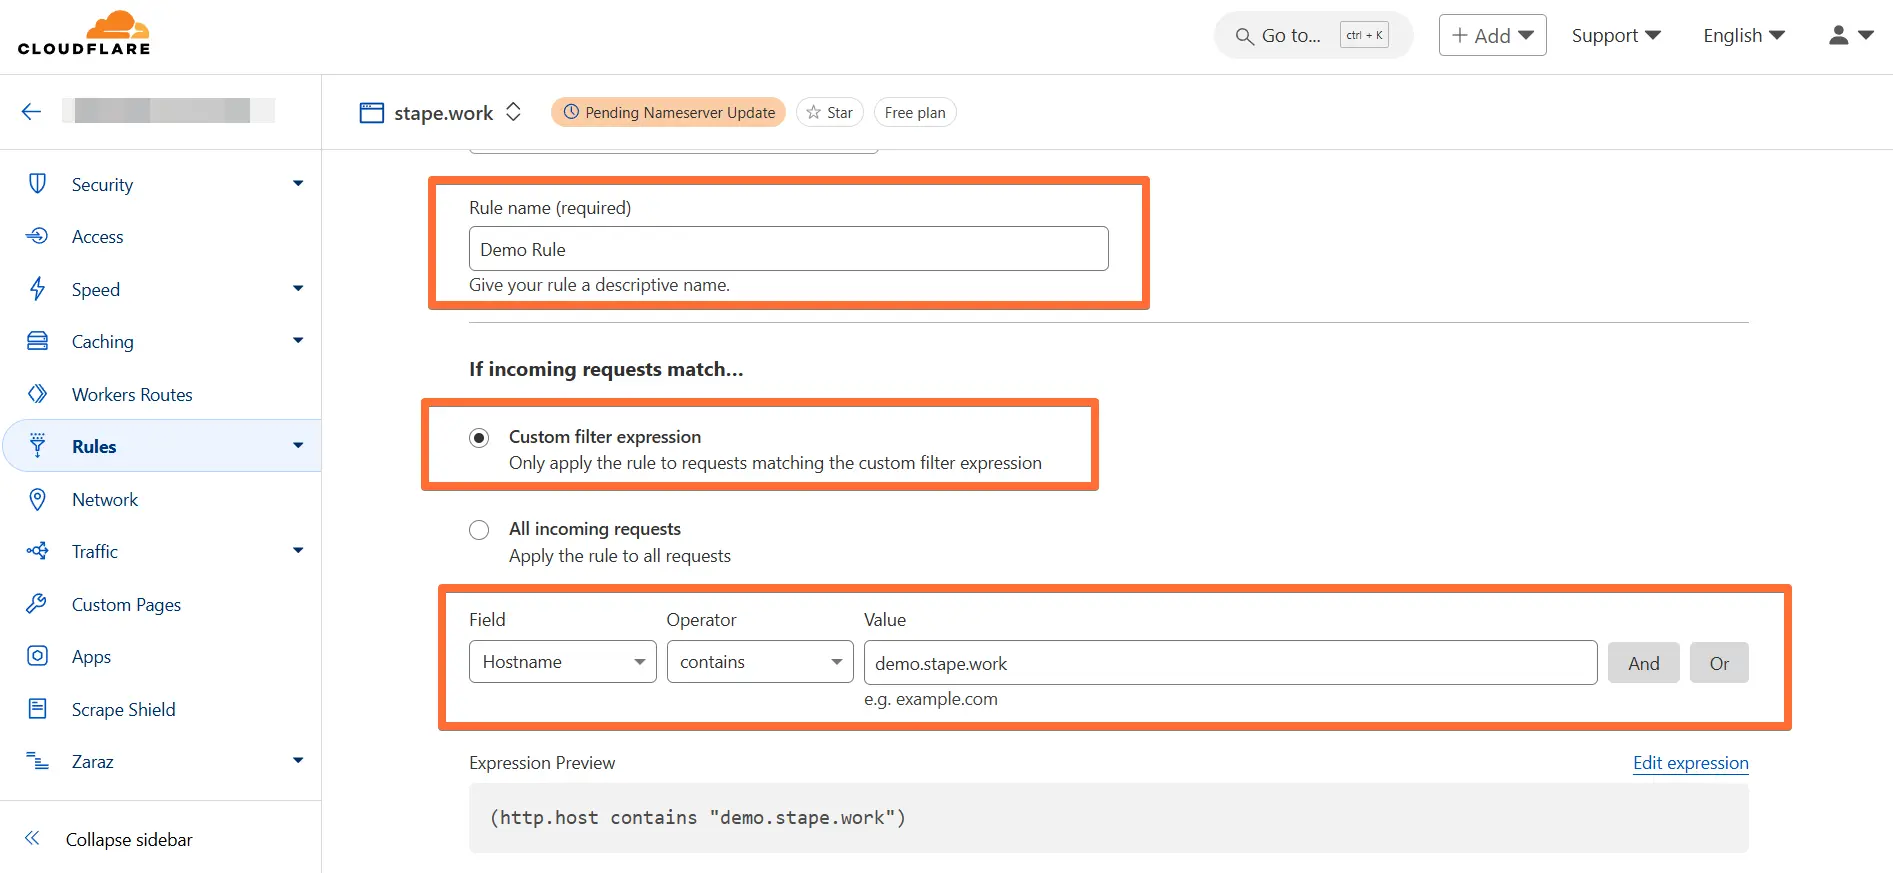
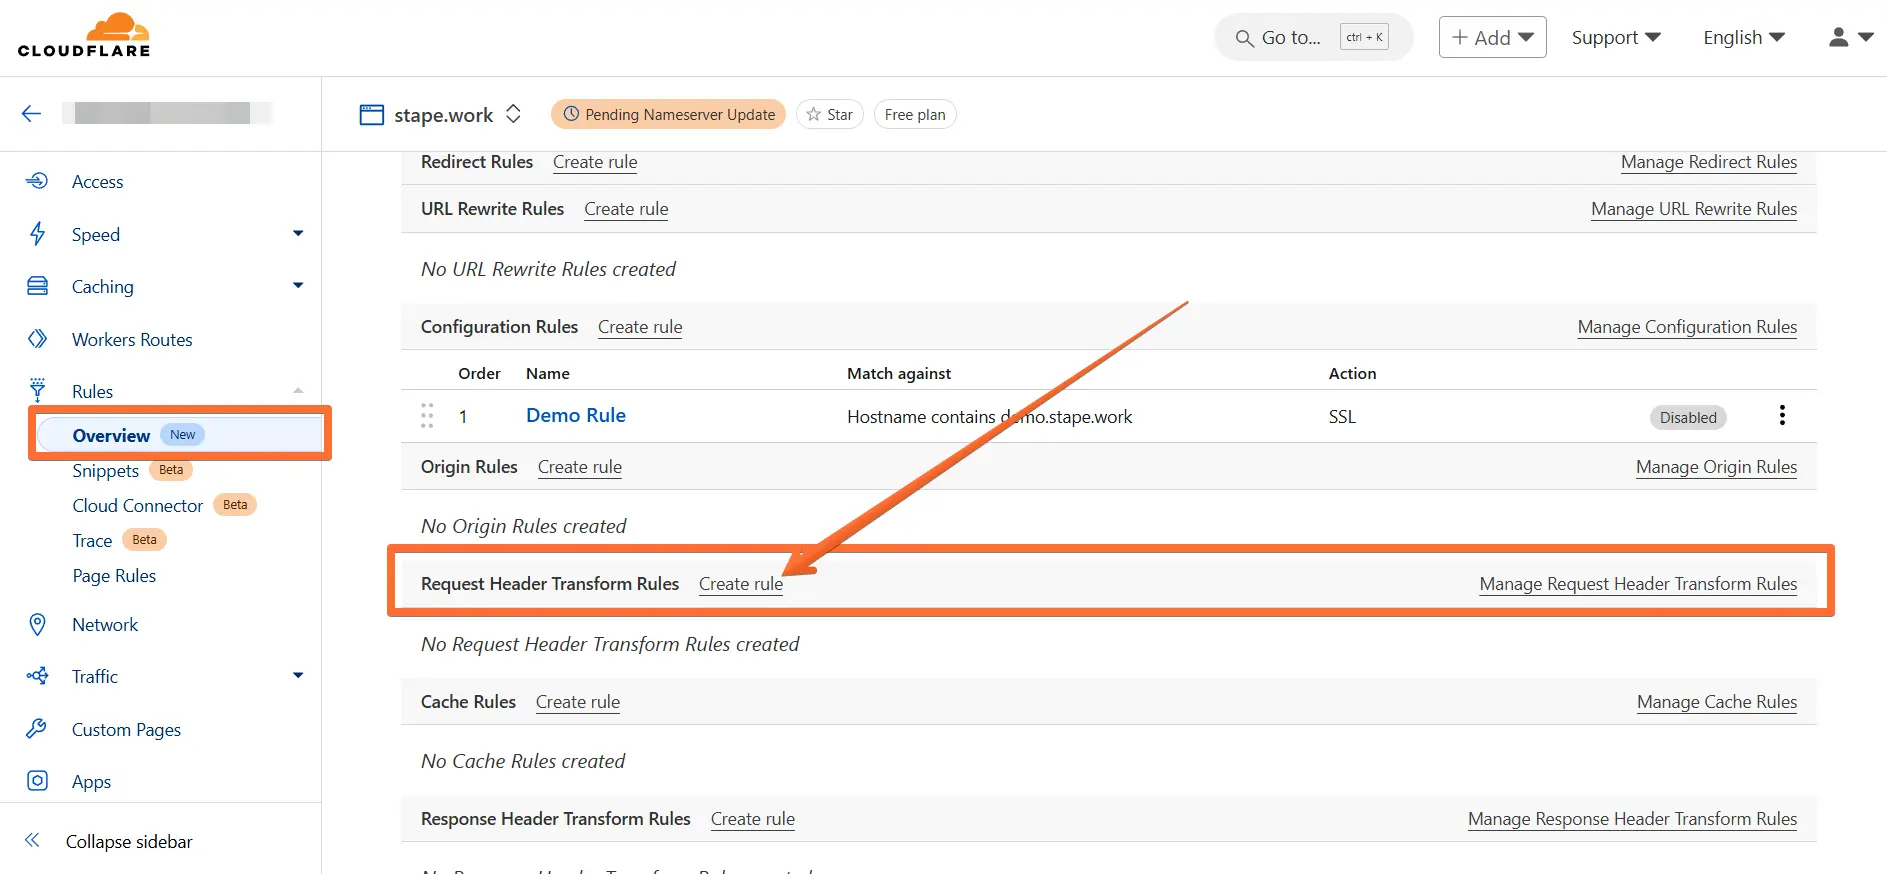
5. Next, return to Cloudflare and click Rules → click Overview → Create rule → Configuration Rules.

6. Fill in the required information:
- Enter a descriptive rule name.
- Select Custom filter expression and enter:
- Field - hostname.
- Operator - contains.
- Value - paste Gateway subdomain that you configured with Stape.
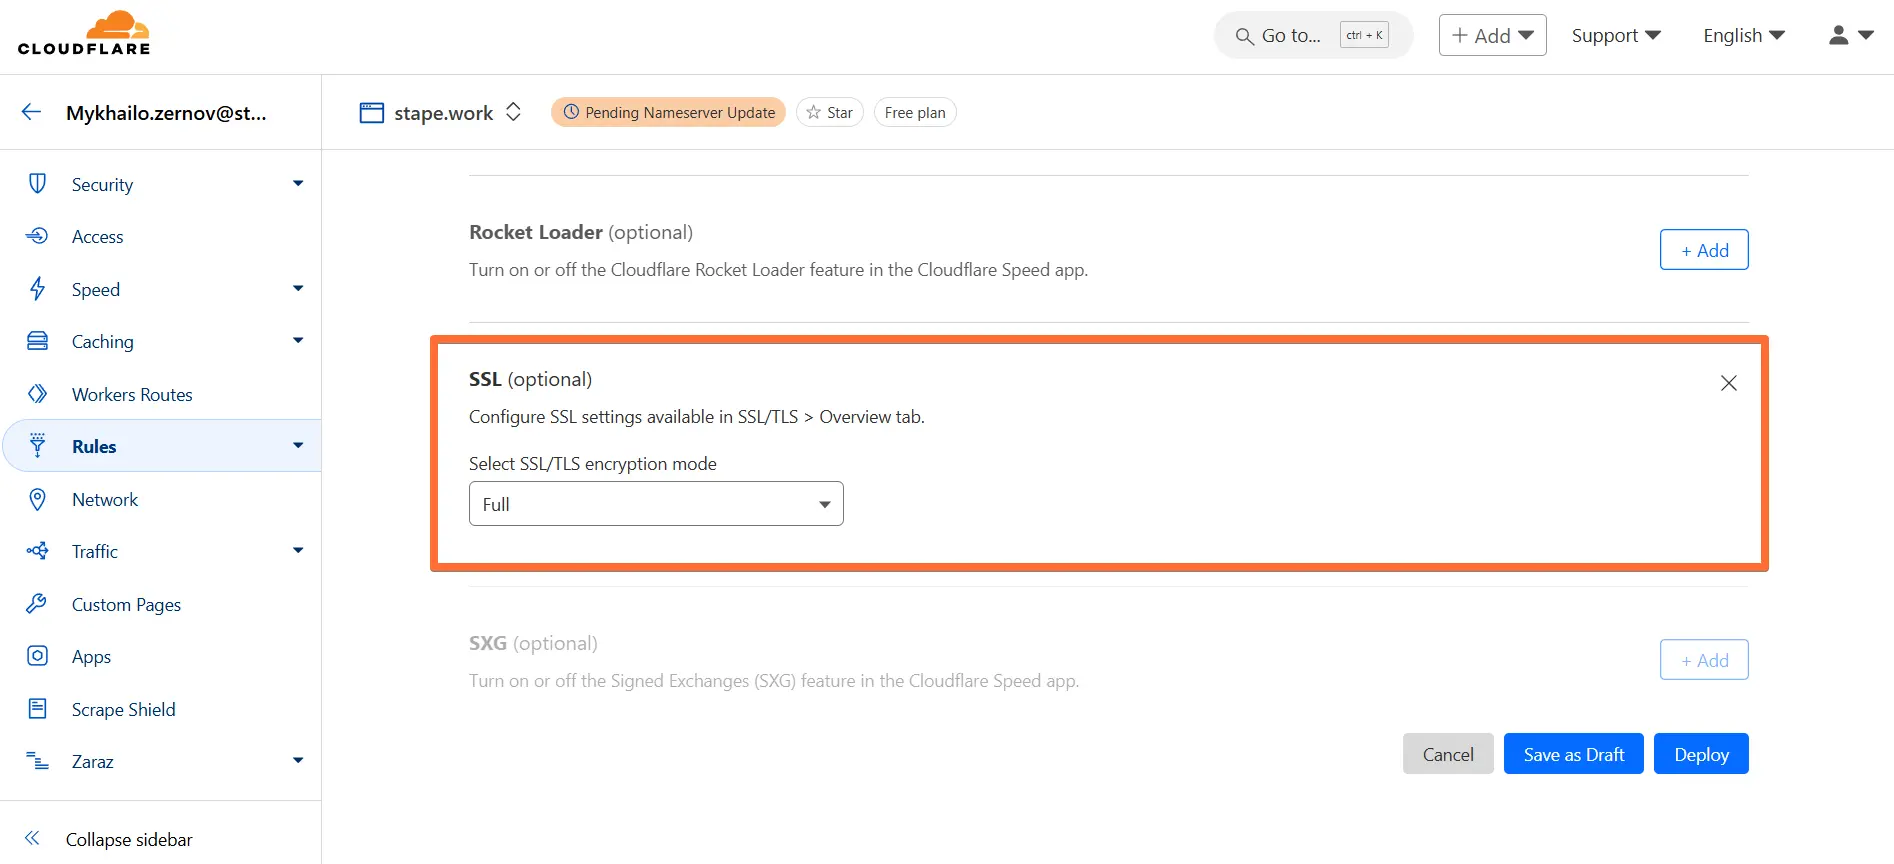
7. Scroll the page down to the SSL feature. Click Add next to it → select the Full option. Then click Deploy.
8. Next, go to the Rules → scroll to Request Header Transform Rules → click Create rule.
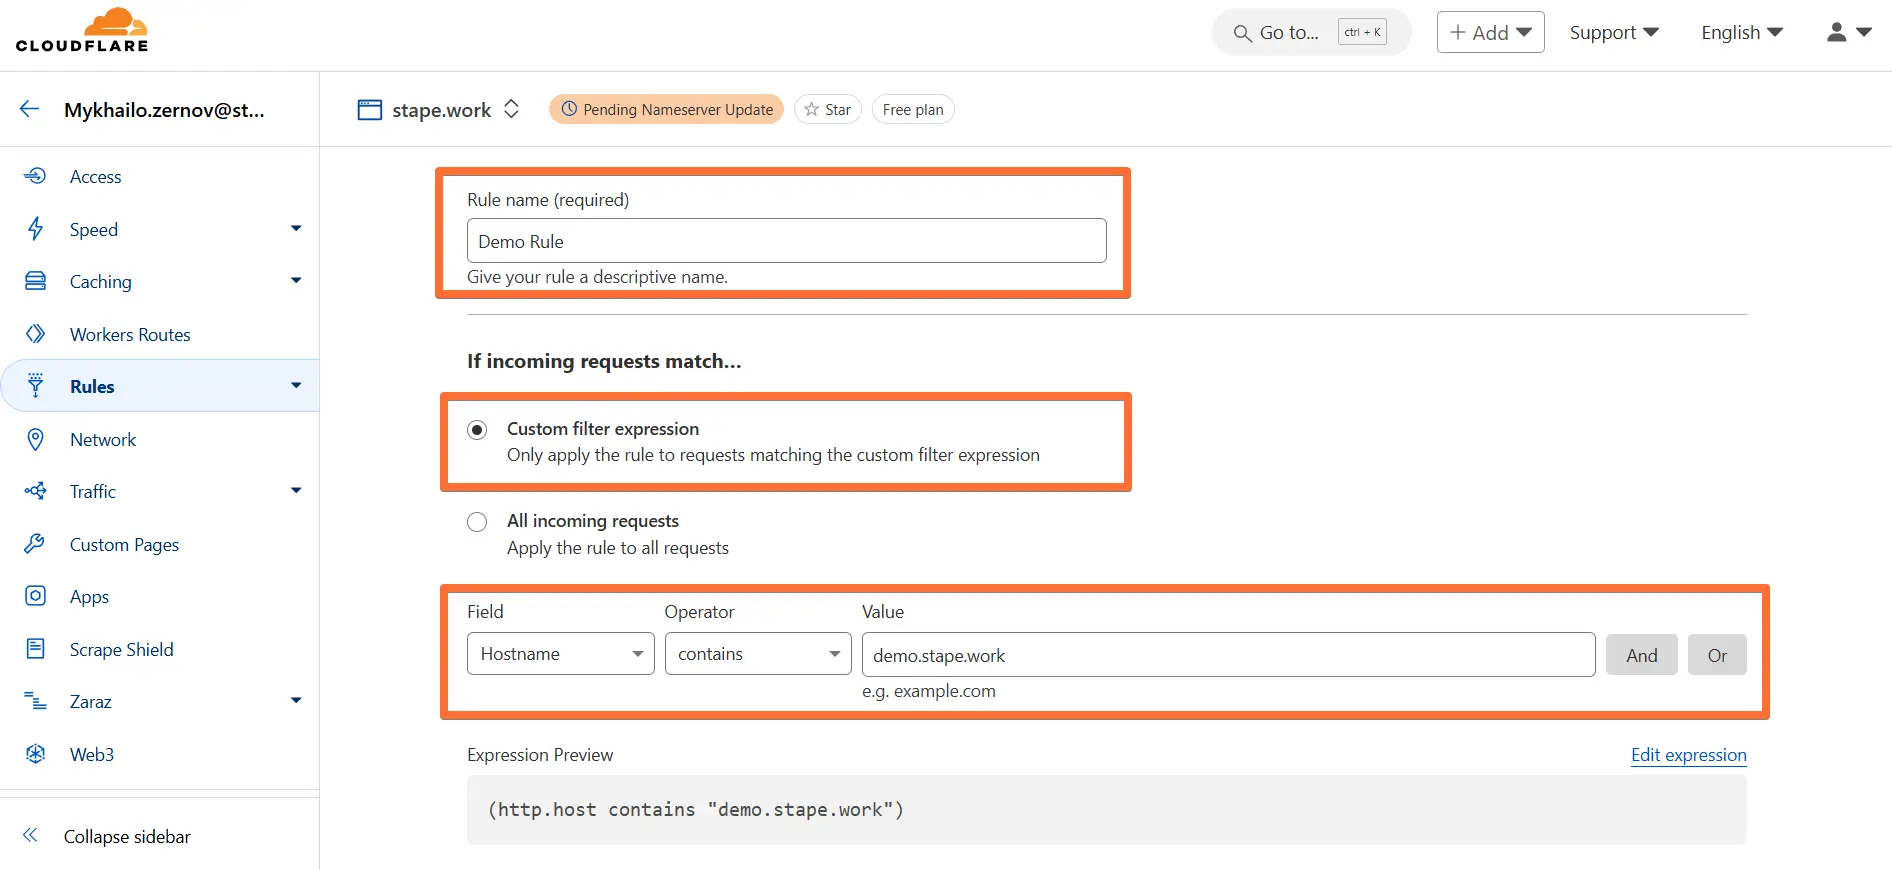
9. Fill in the required information:
- Enter a descriptive rule name.
- Select Custom filter expression and enter:
- Field - hostname.
- Operator - contains.
- Value - paste your Gateway subdomain that you configured with Stape.
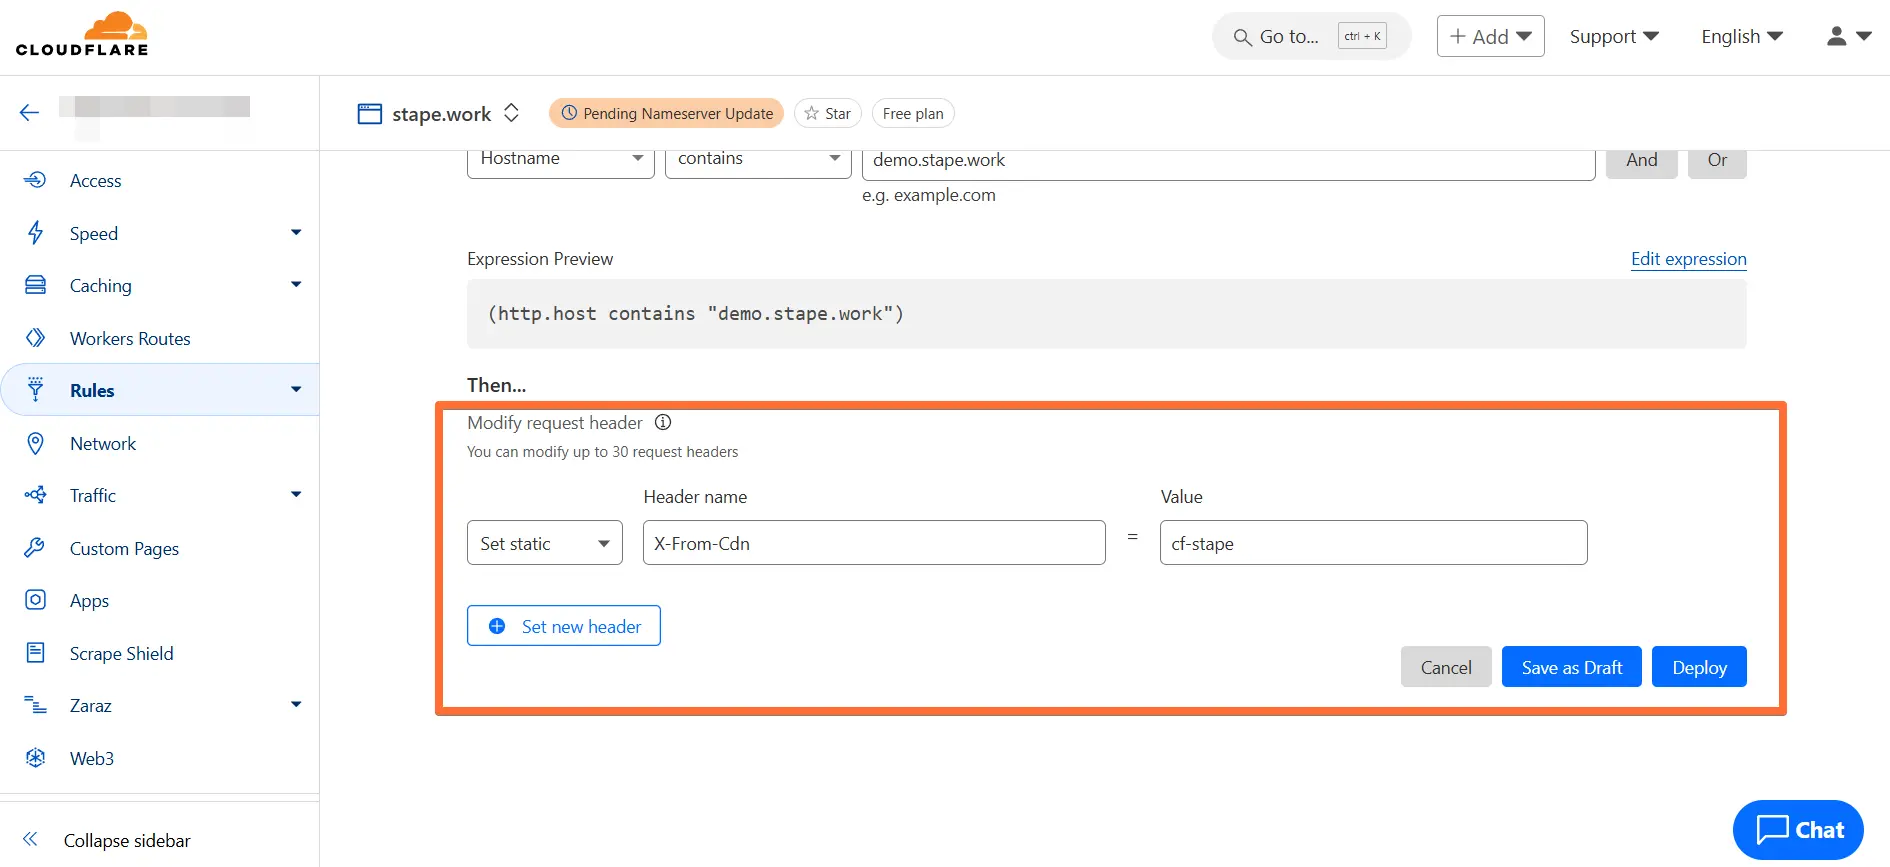
10. Scroll down to the Modify request headers section. Select Set static, then enter:
- Header name: X-From-Cdn
- Value: cf-stape
Then click Deploy.
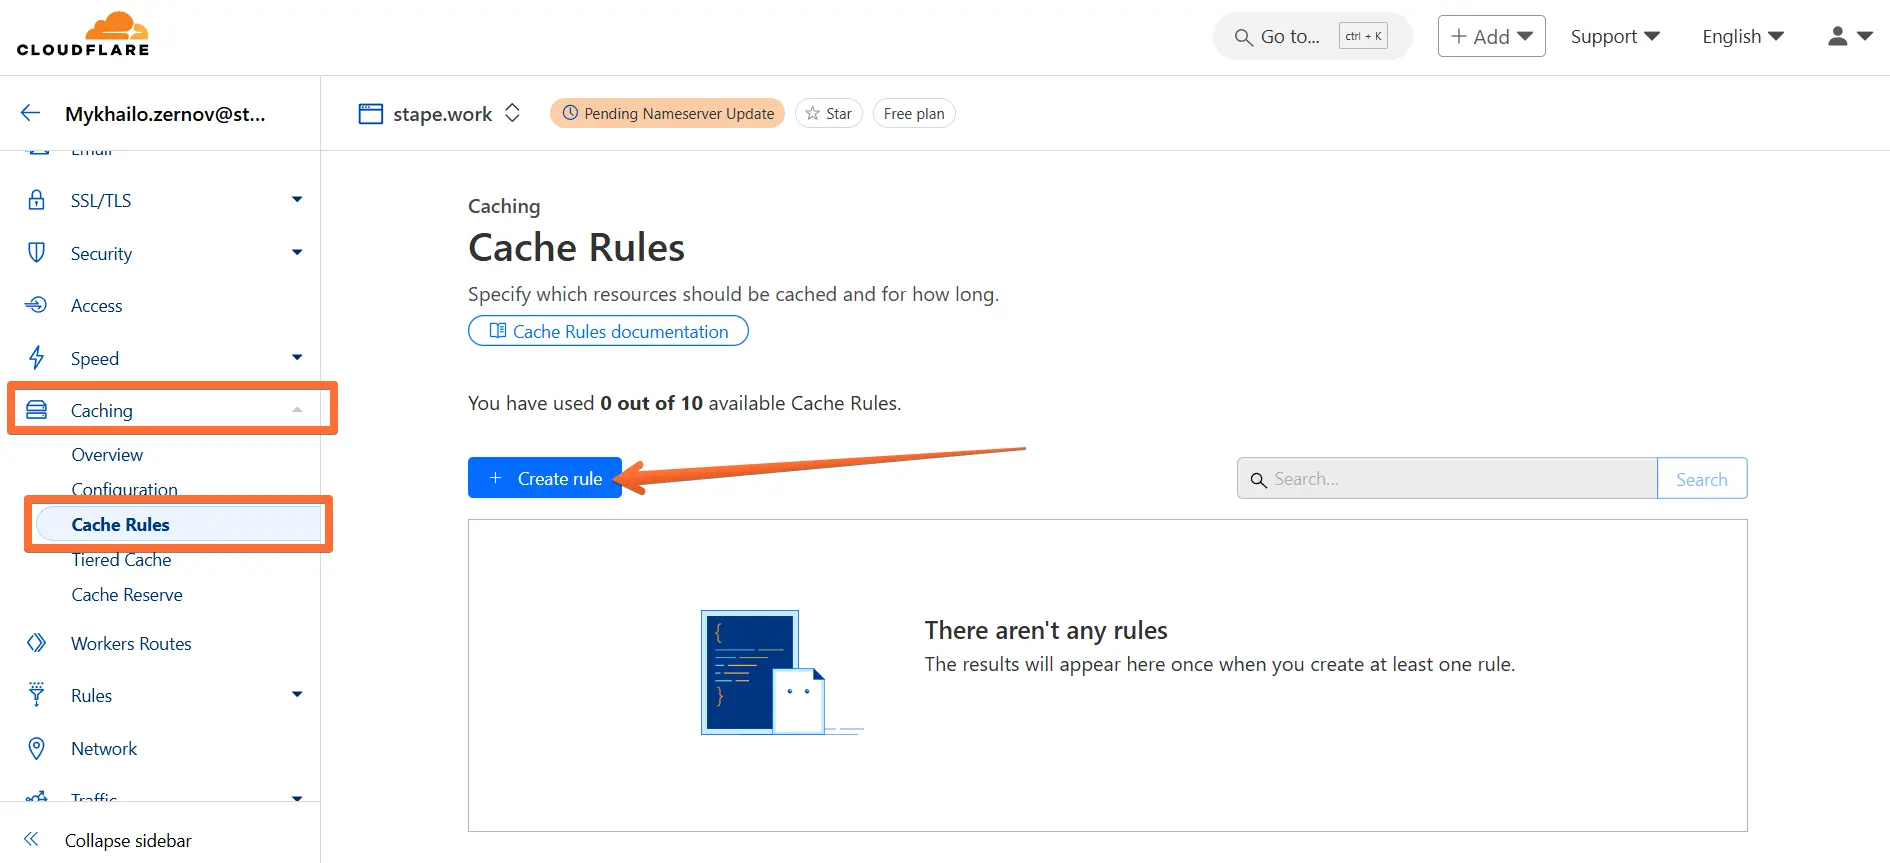
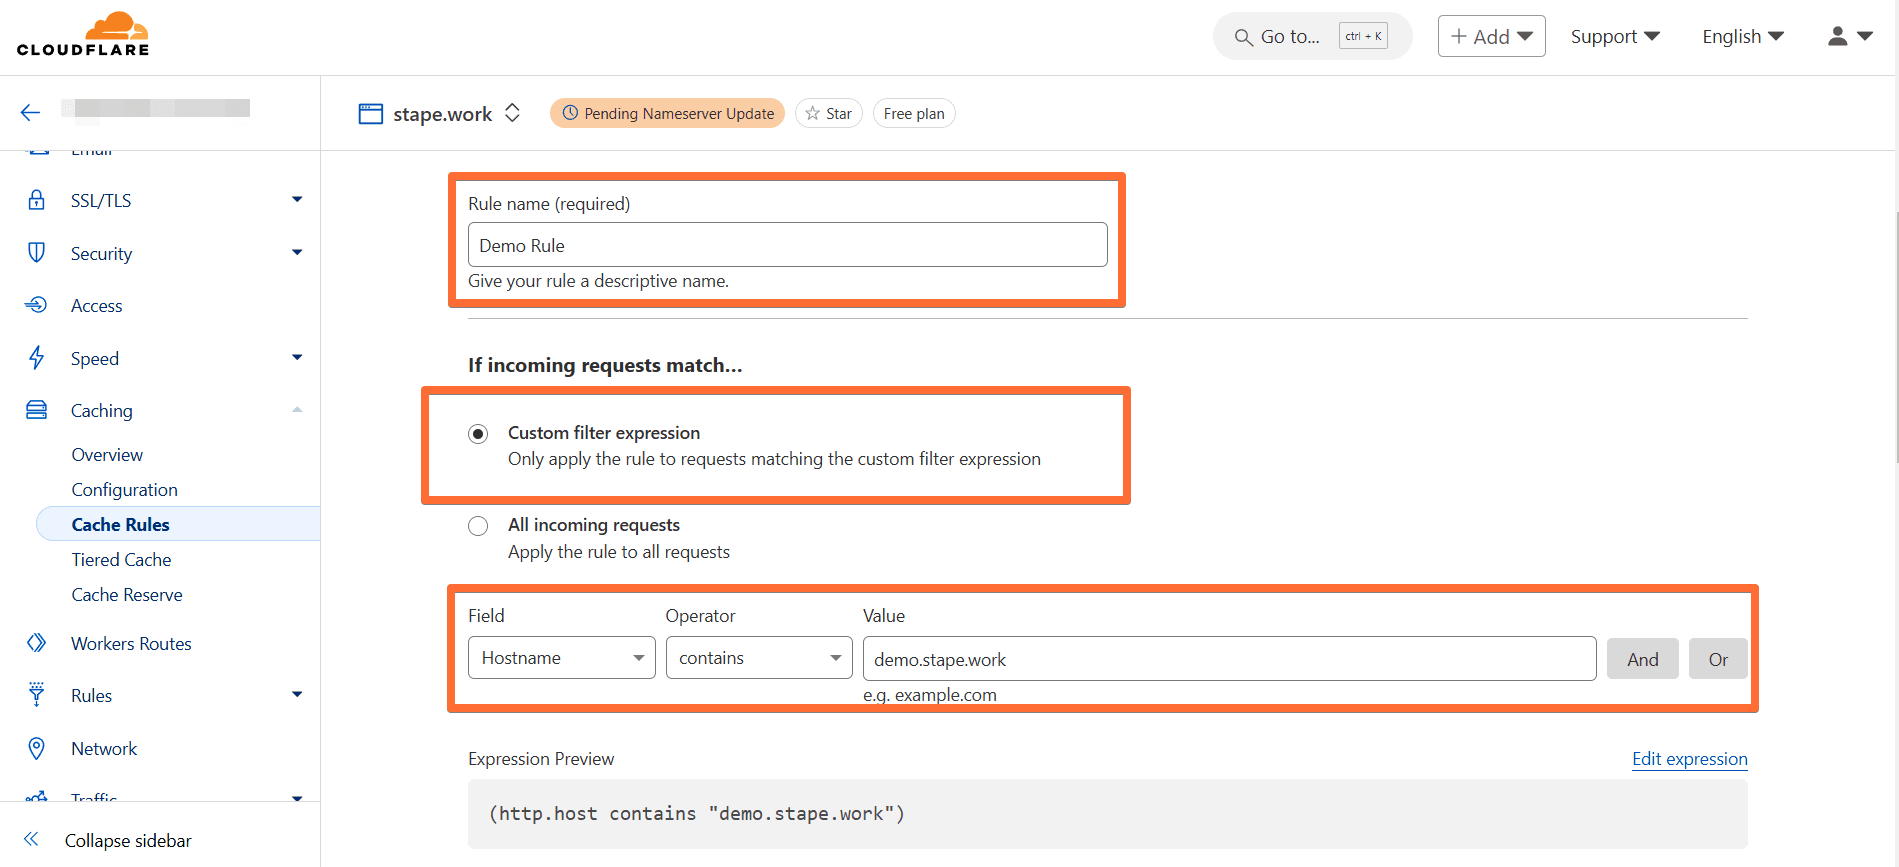
11. Next, go to Caching → click Cache Rules → click Create rule.
12. Fill in the required information:
- Enter a descriptive rule name.
- Select Custom filter expression and enter:
- Field - hostname.
- Operator - contains.
- Value - paste your Gateway subdomain that you configured with Stape.
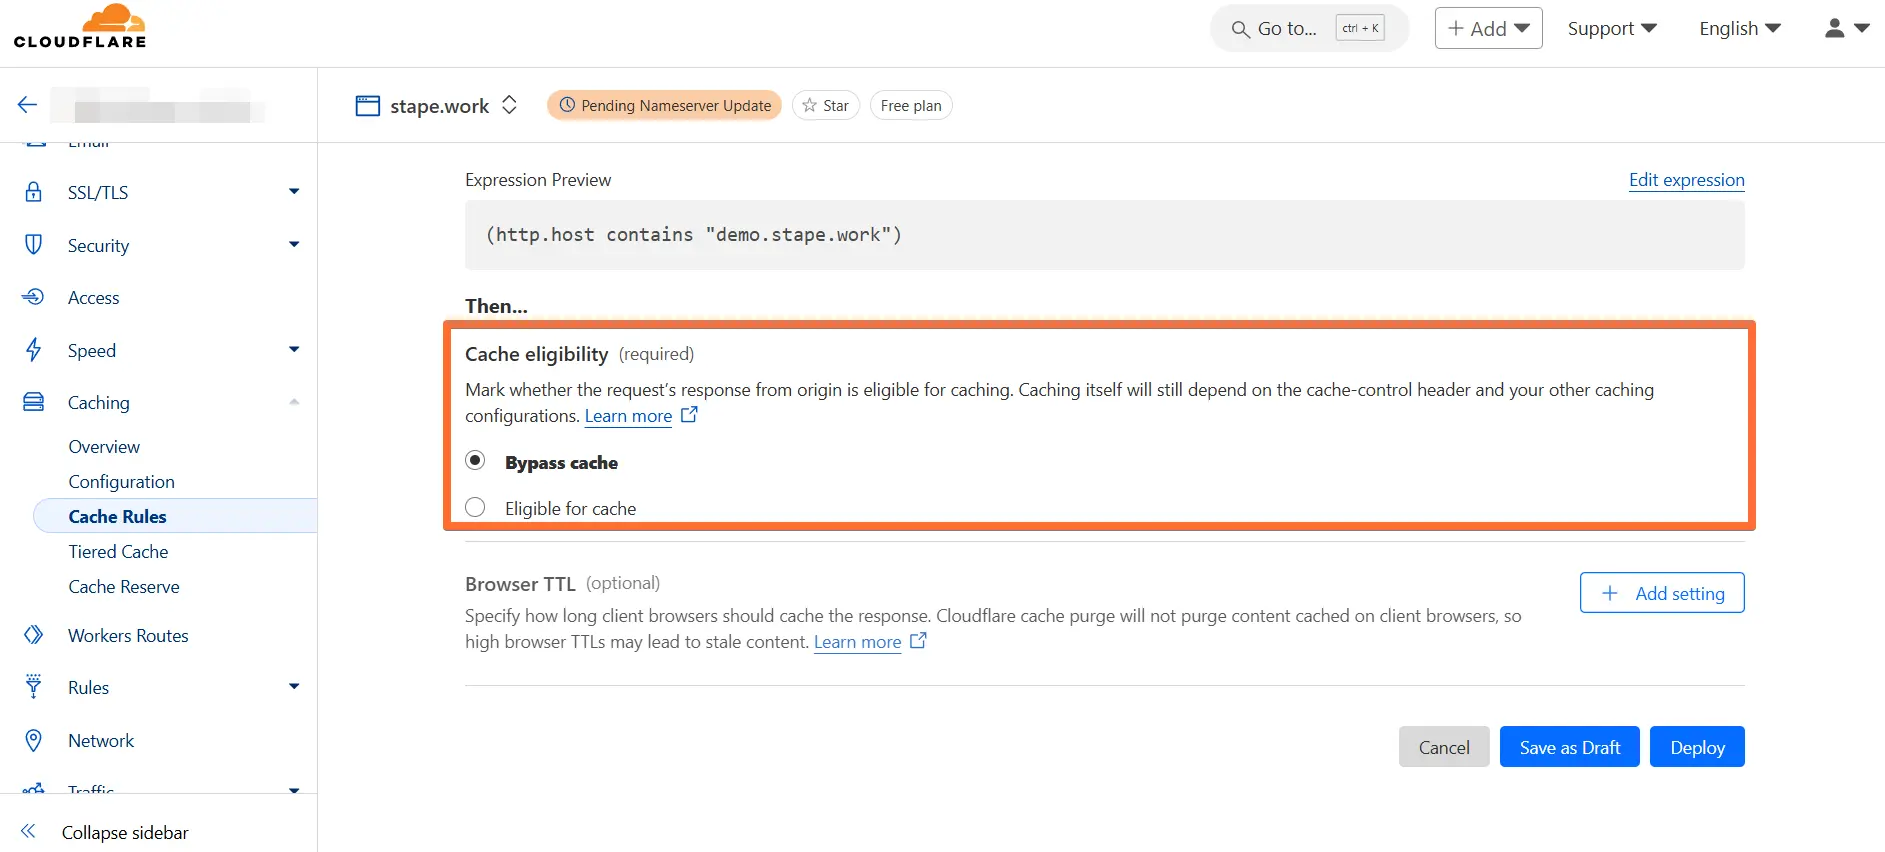
13. Scroll down to Cache eligibility and select Bypass cache.
Then click Deploy.
Congratulations, now all your requests to and from sGTM will be proxied through Cloudflare. Please note that if you are using a Web Application Firewall, make sure that it does not block these requests.
Configure Custom Loader
Important! This is a mandatory step - without adding Custom Loader to your website, Stape Gateway will not work.
1. Open your newly created Stape Gateway on Stape → scroll down to the Custom loader section.
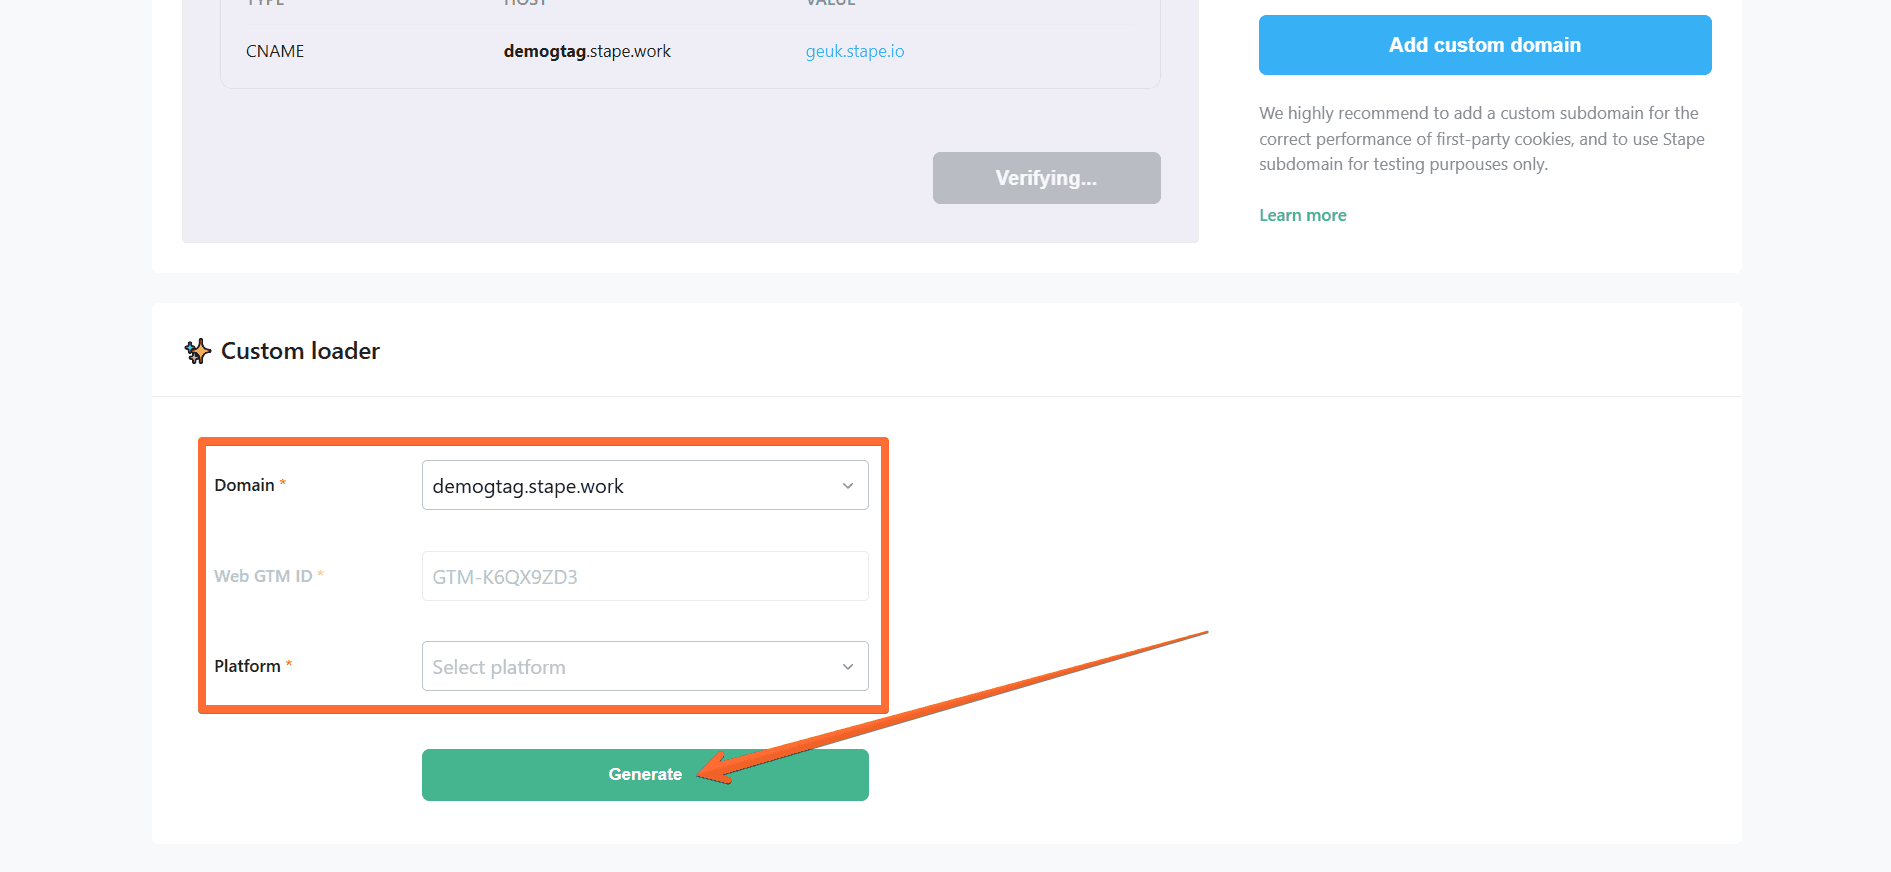
2. Fill in the required fields:
- Domain - if you’ve configured a custom domain (see previous section), select it here.
- Web GTM ID - will be based on the previous setting.
- Platform - select the CMS that your website uses. If your website is custom-built or a CMS is not listed in the dropdown, select Other.
Next, click Generate.
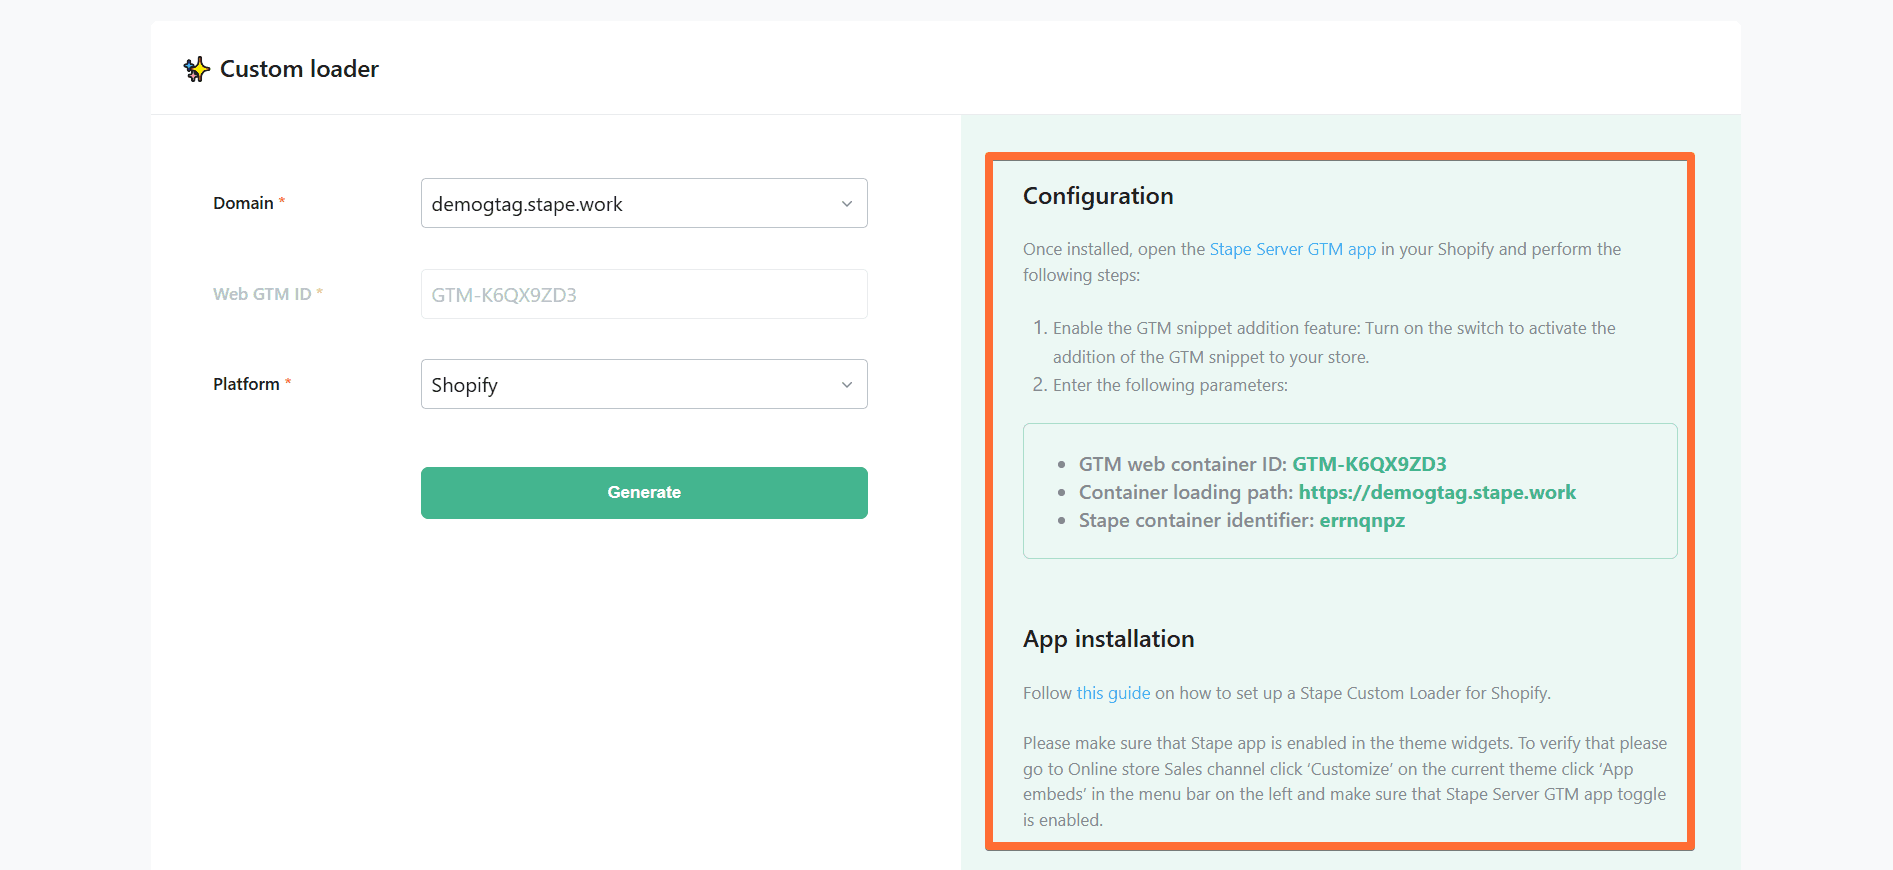
3. Follow the instructions in the Configuration and App installation sections to finish setting up Custom Loader.
Custom subdomain is not verified - what to do
Domain verification can take up to 72 hours, but it usually happens within 30-60 minutes if your DNS records are correct. If it takes more time for you, there may be a problem with your configurations.
1. Open the Google Admin Toolbox service called Dig: https://toolbox.googleapps.com/apps/dig/
2. Enter the subdomain you created for Stape Gateway (without https:// or any extra characters). Then, select the record type you want to check.
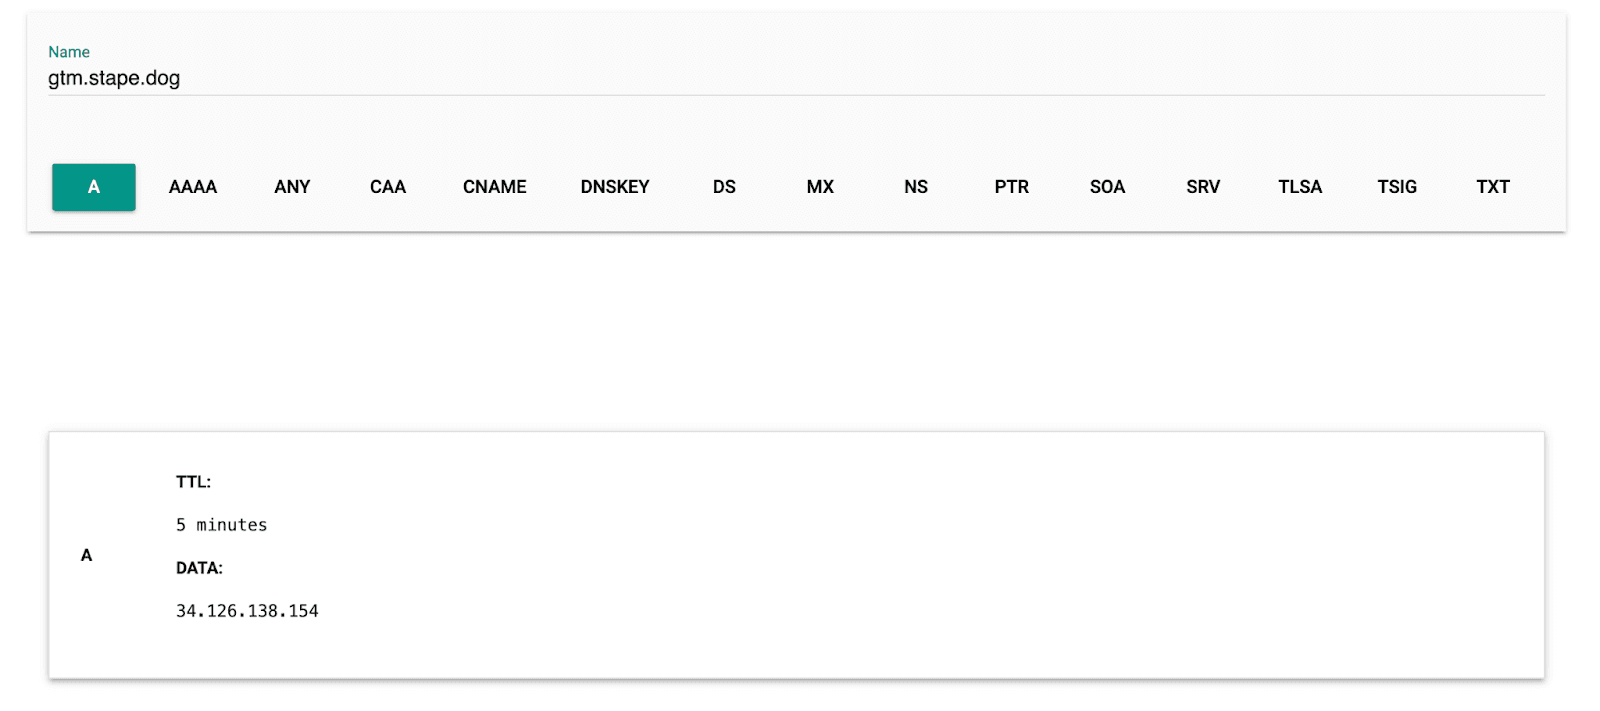
Using this tool, check your DNS records. There are three main reasons why a subdomain may not verified:
- Missing DNS records - make sure that you added all the records specified in your Gateway on Stape.
- Incorrect DNS records - if all entries exist, check that their values match those in your Gateway.
- Extra DNS records - see that there are no extra DNS records for your Stape Gateway subdomain, only those provided by Stape. Extra records can interfere with domain verification, so you should remove them.
Testing Stape Gateway
To verify that events are sent correctly to Stape Gateway, open a URL of your Stape Gateway and add /healthy at the end (e.g. https://demogtag.stape.work/healthy). If everything works correctly, you should see the OK response.

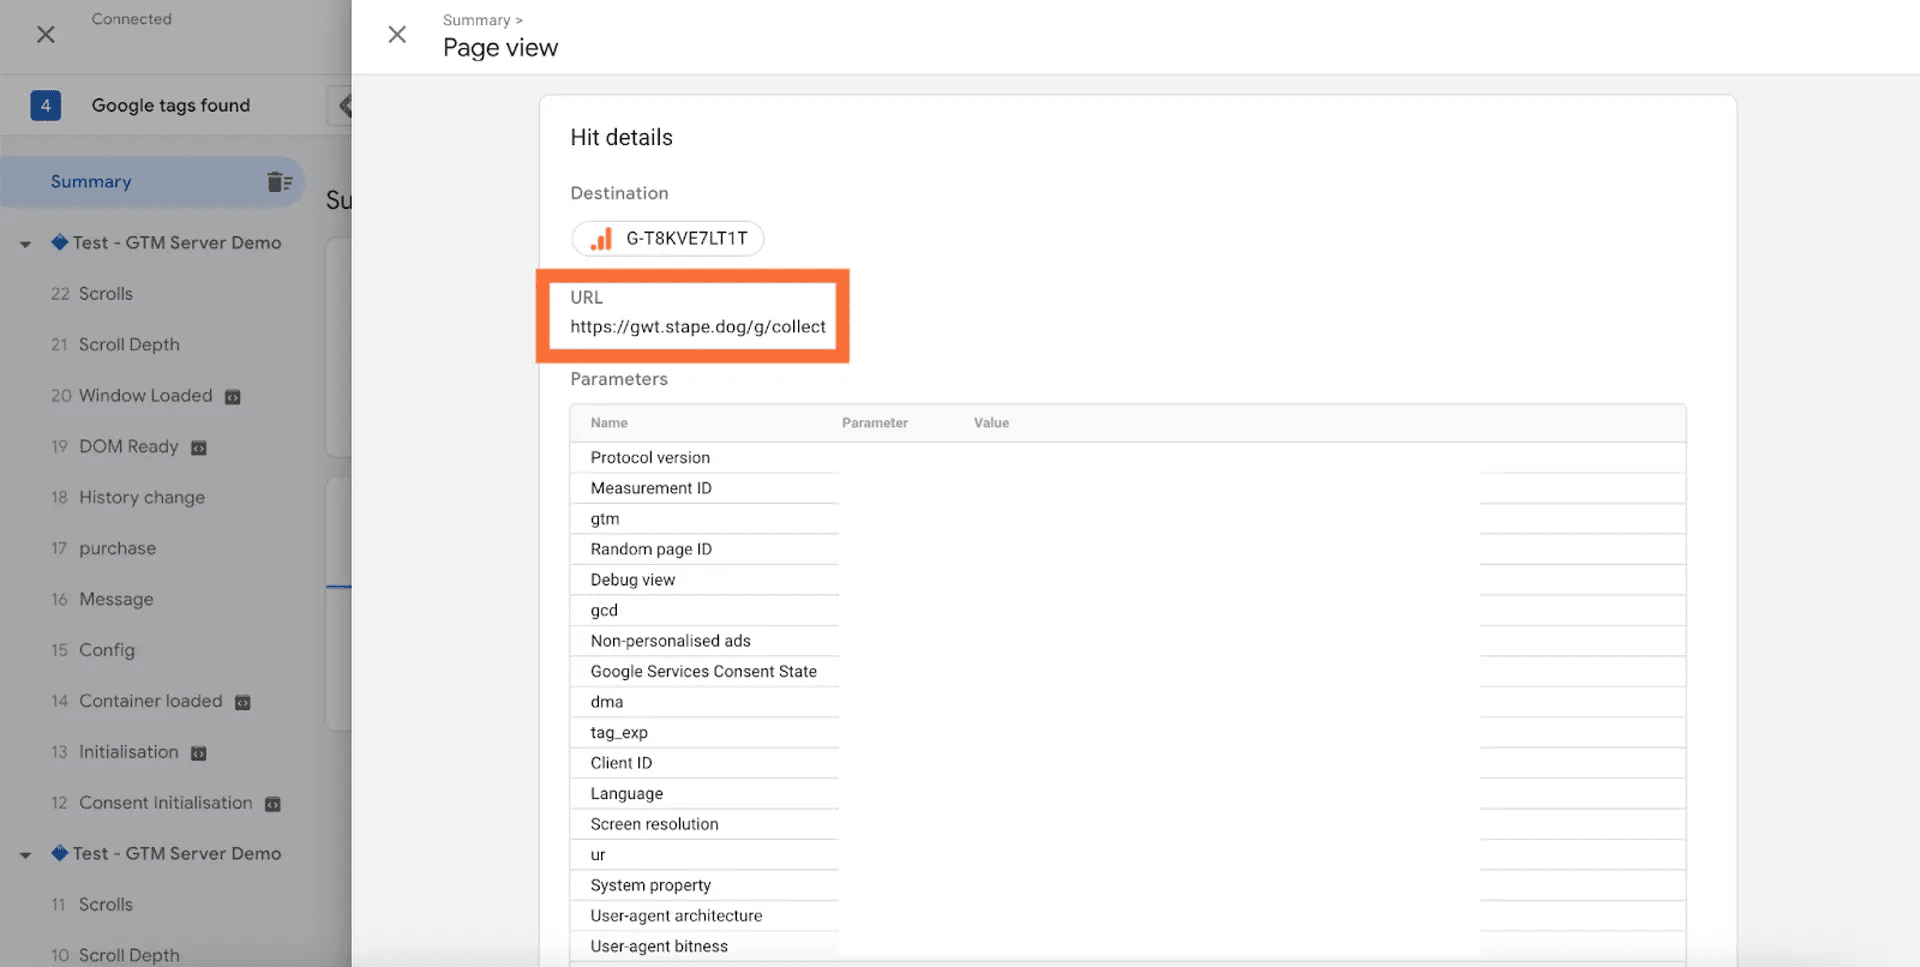
Another way is to open the Web Google Tag Manager debugger, click through your website to activate GA hits, and select GA in the GTM preview.

After that, open Summary → Output → Hits Sent, and verify that hits are routed to the correct tagging URL (the one you’ve added when configuring Stape Gateway on Stape.)
Comments