Step 5.2. Data Tag/Data Client
Updated Mar 24, 2025
If you choose to use GA4 to send data from web to server GTM, skip this step.
1. Open your Web Google Tag Manager container Template section and add Data Tag from the template gallery.
2. Open Tags section and click New and configure the Data Tag.
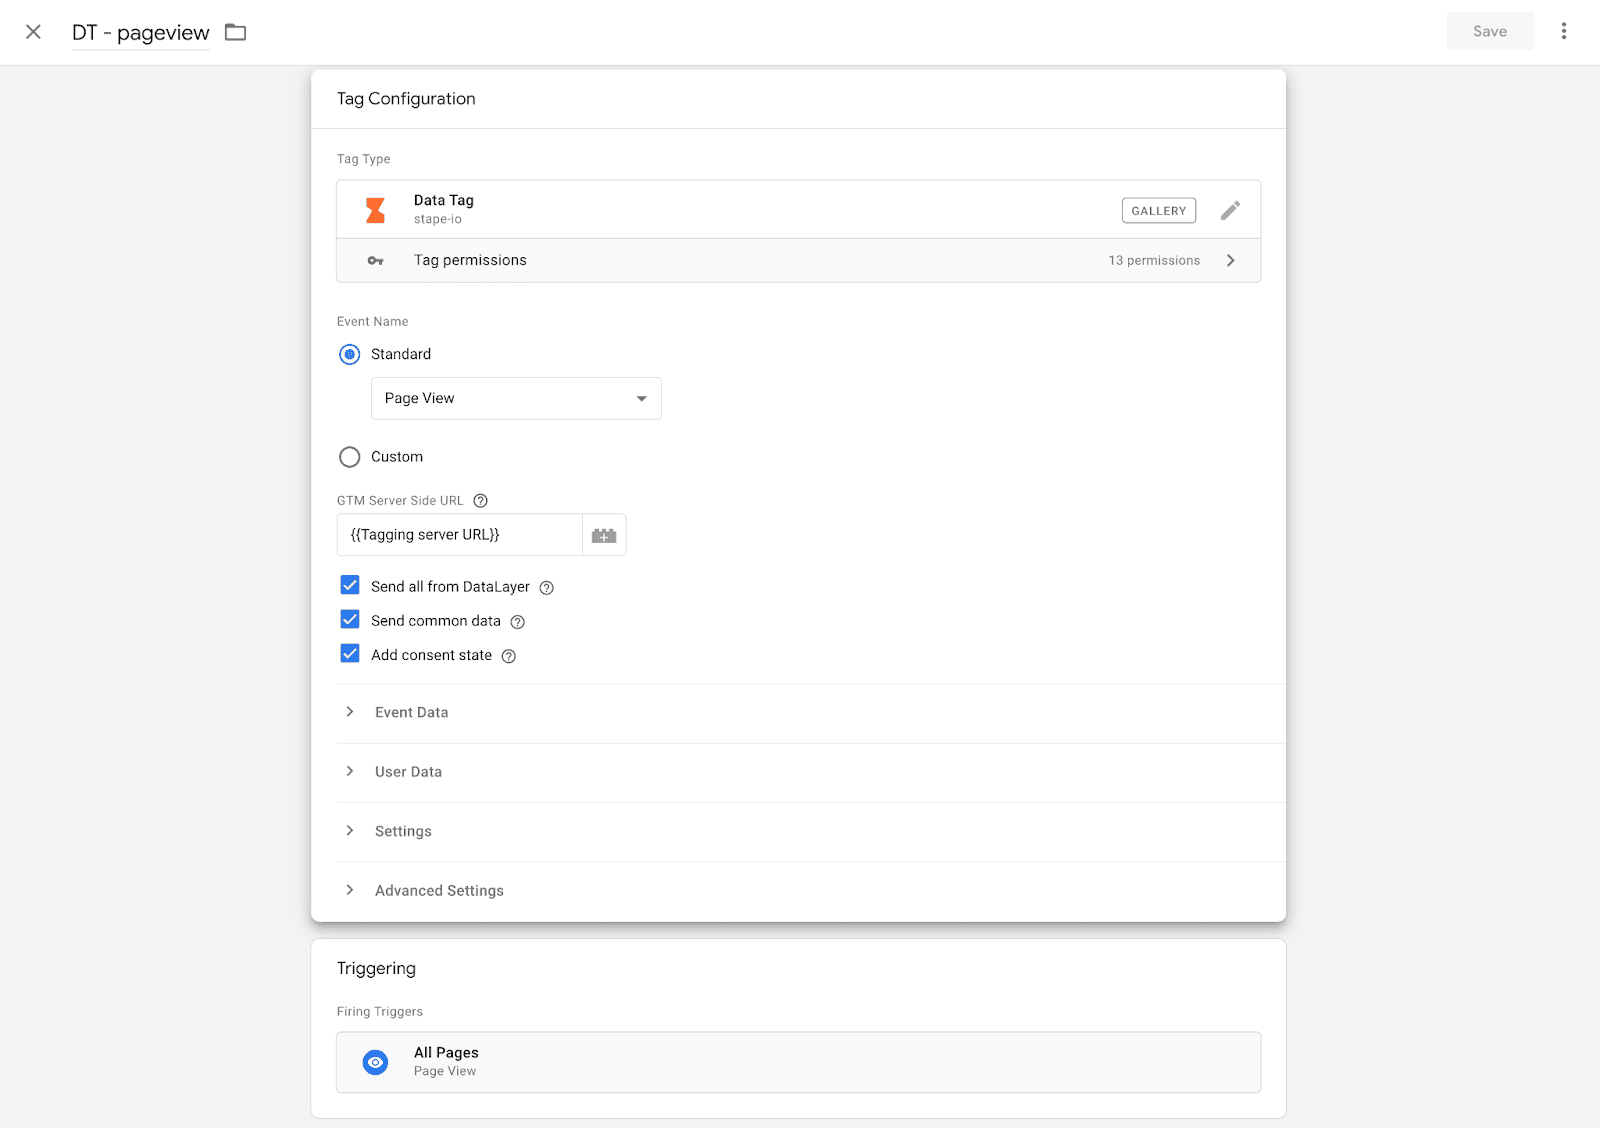
3. Configure Data tag for the pageview event:
- Select the event name pageview.
- Add GTM Server Side URL and click Save. You can find your GTM server-side URL inside the stape.io account by opening the sGTM container and checking the Domain section.
- Send all from the DataLayer will send all the information you have in the web GTM data layer to server GTM events data.
- Send common data. Adds to request page_location, page_path, page_hostname, page_referrer, page_title, page_encoding, screen_resolution, viewport_size
- Add consent state. Adds consent_state object to the request. Including following properties: ad_storage, analytics_storage, functionality_storage, personalization_storage, security_storage.
- Event Data. Allows adding any manual data to the request. You can also apply transformation (like hashing, trimming, etc) or store data.
- User data. Allows sending user parameters and apply transformation or store data.
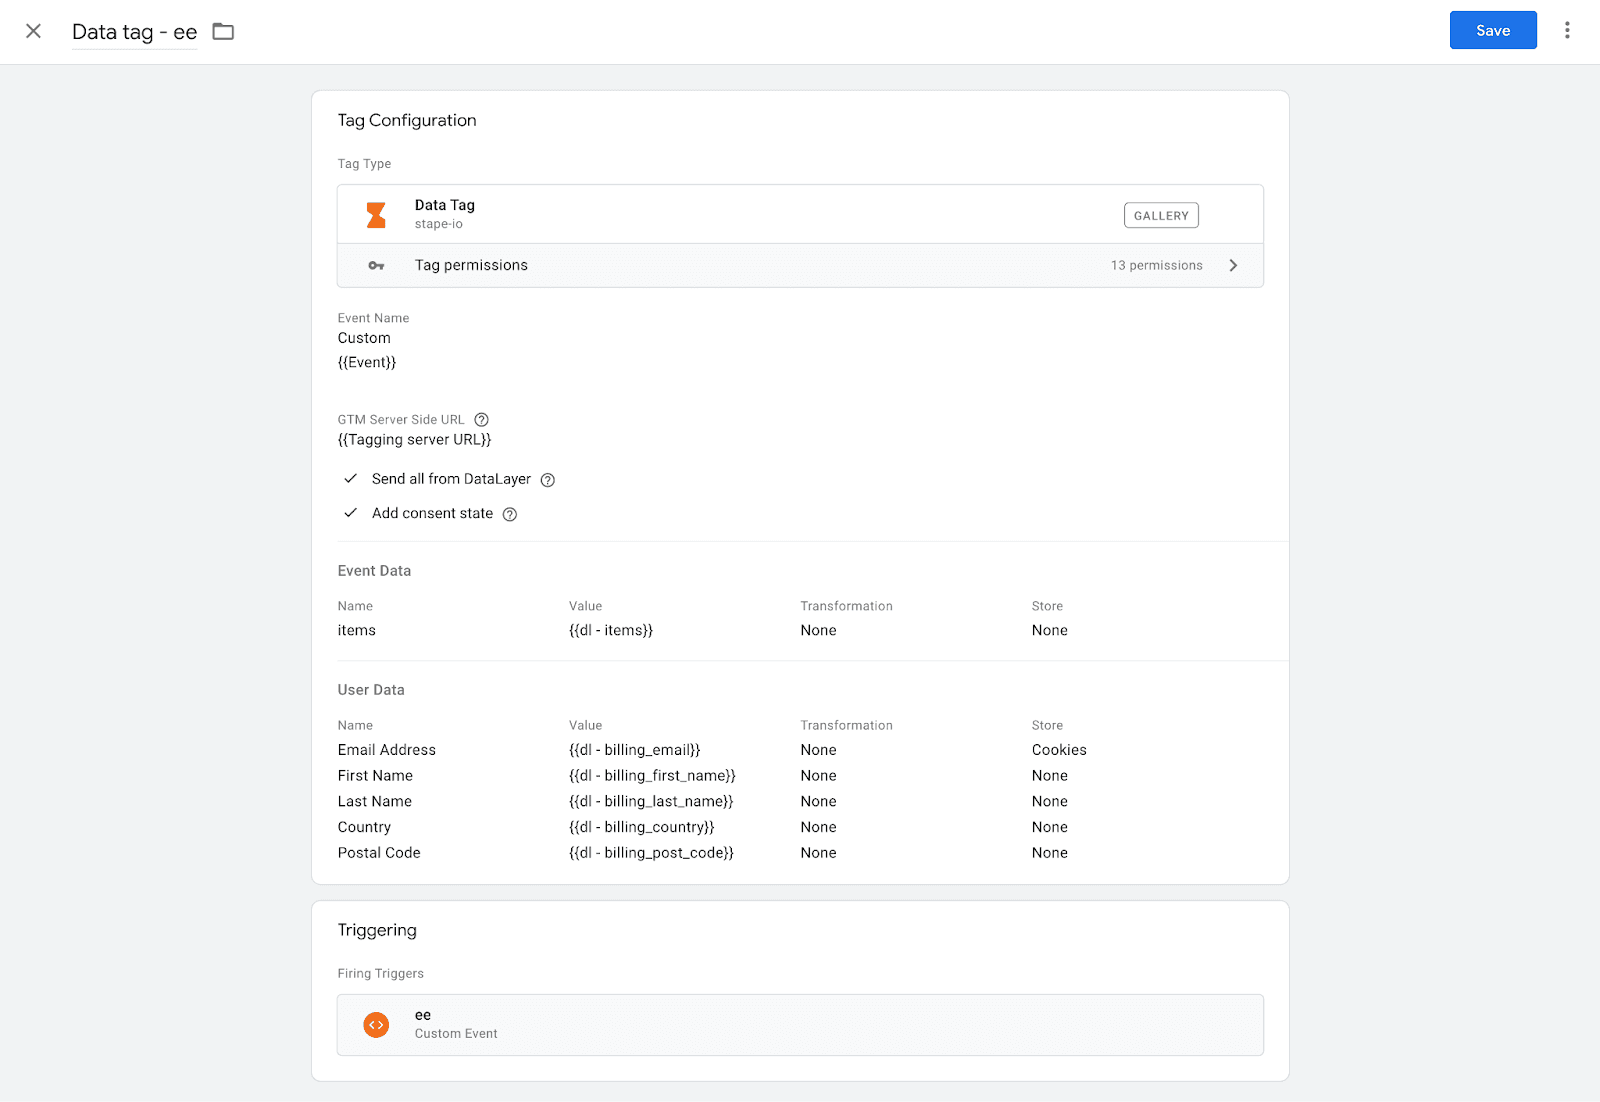
4. Configure Data tag for other events. The example below shows how to configure e-commerce events when Data Layer is available.
- Select event name manually or choose to inherit it from the {{event}} variable.
- The checkbox Send all from Data Layer will help to deliver all information in web GTM data layer to server GTM event data.
- In the event data I’m sending the array of products in my datalayer.
- In the user data I’m sending user parameters from the data layer.
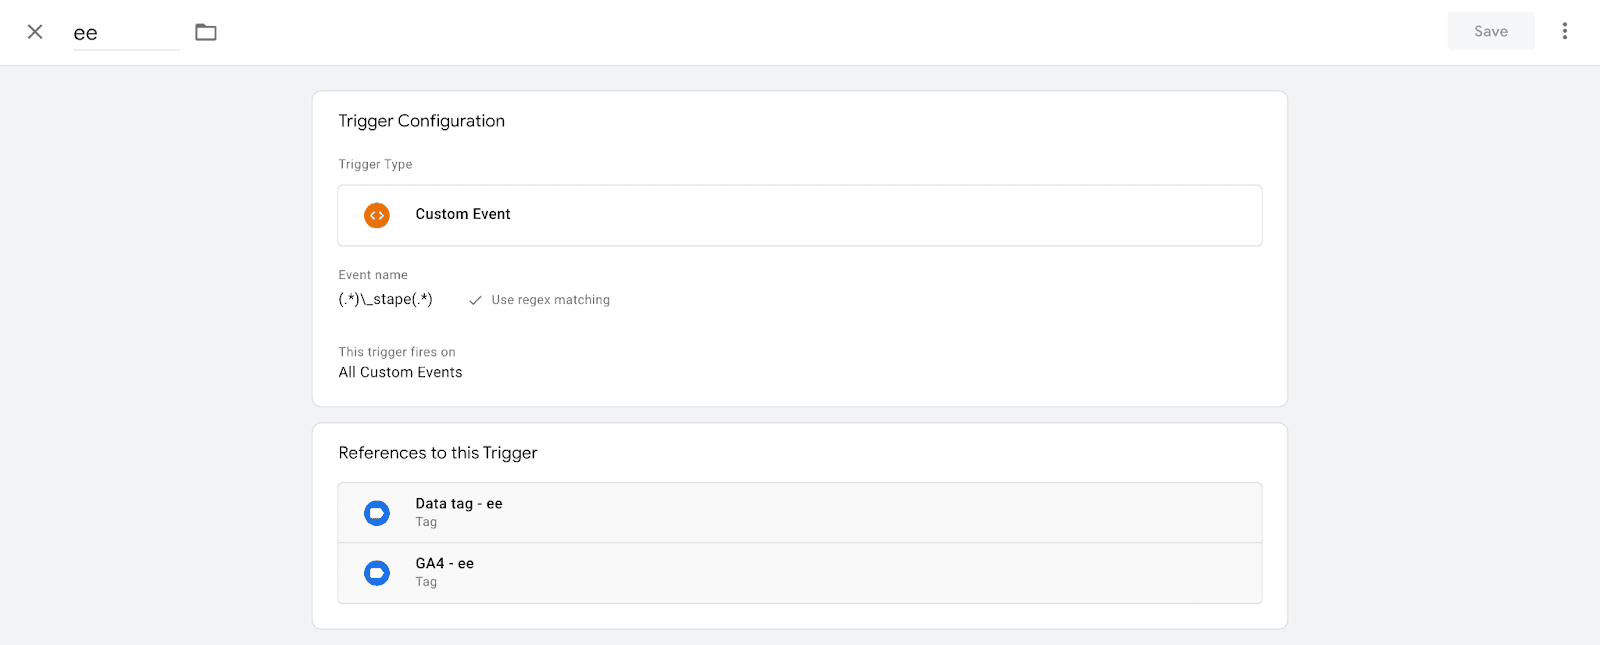
This tag triggers each e-commerce event in the Data Layer. Since all my e-commerce events end with _stape, I’m using a regex that includes all events that contain _stape.
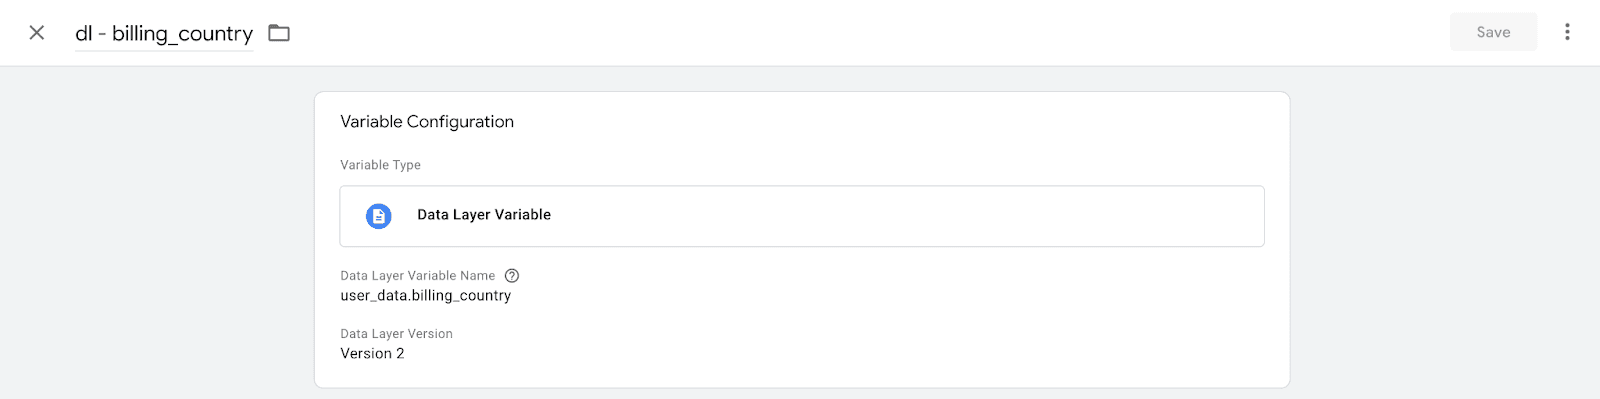
Example of the variable that extracts user data from the Data Layer.
6. Open your Server Google Tag Manager container. Go to Templates tab → Click New under the Clients section.
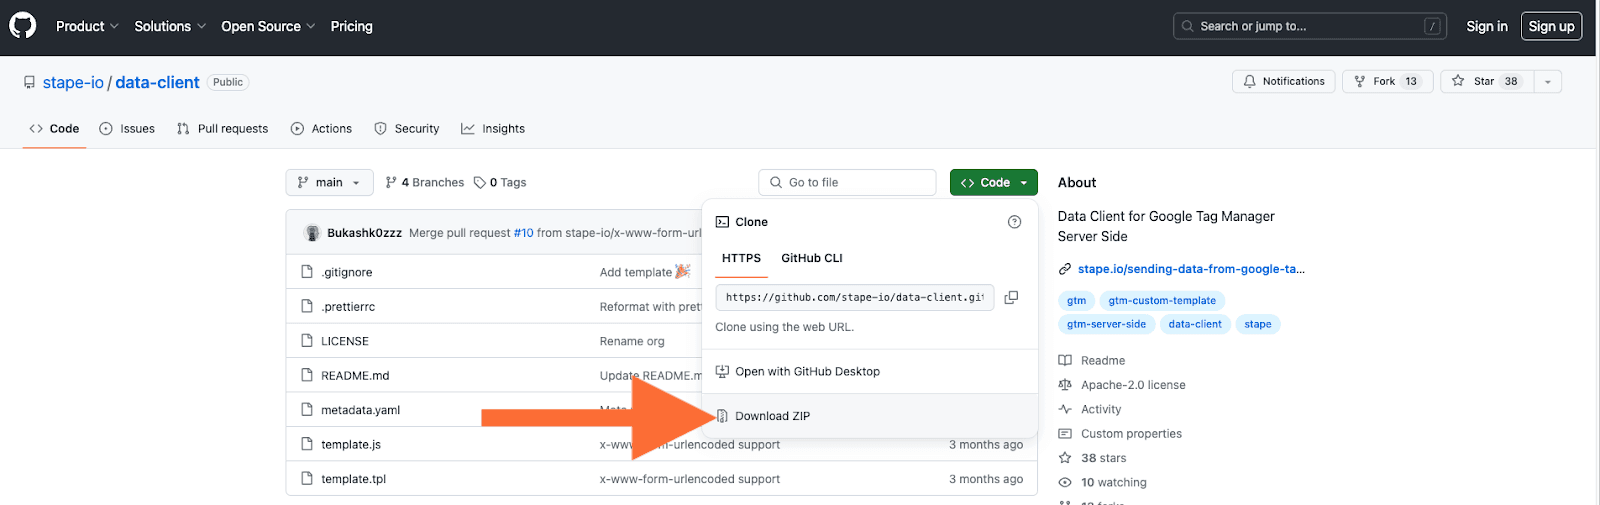
7. Click three dots on the top right corner → Import Data Client (downloaded from GitHub) → Click Save.

8. Go to the Clients tab and click New. Choose Data Client. Click Save.

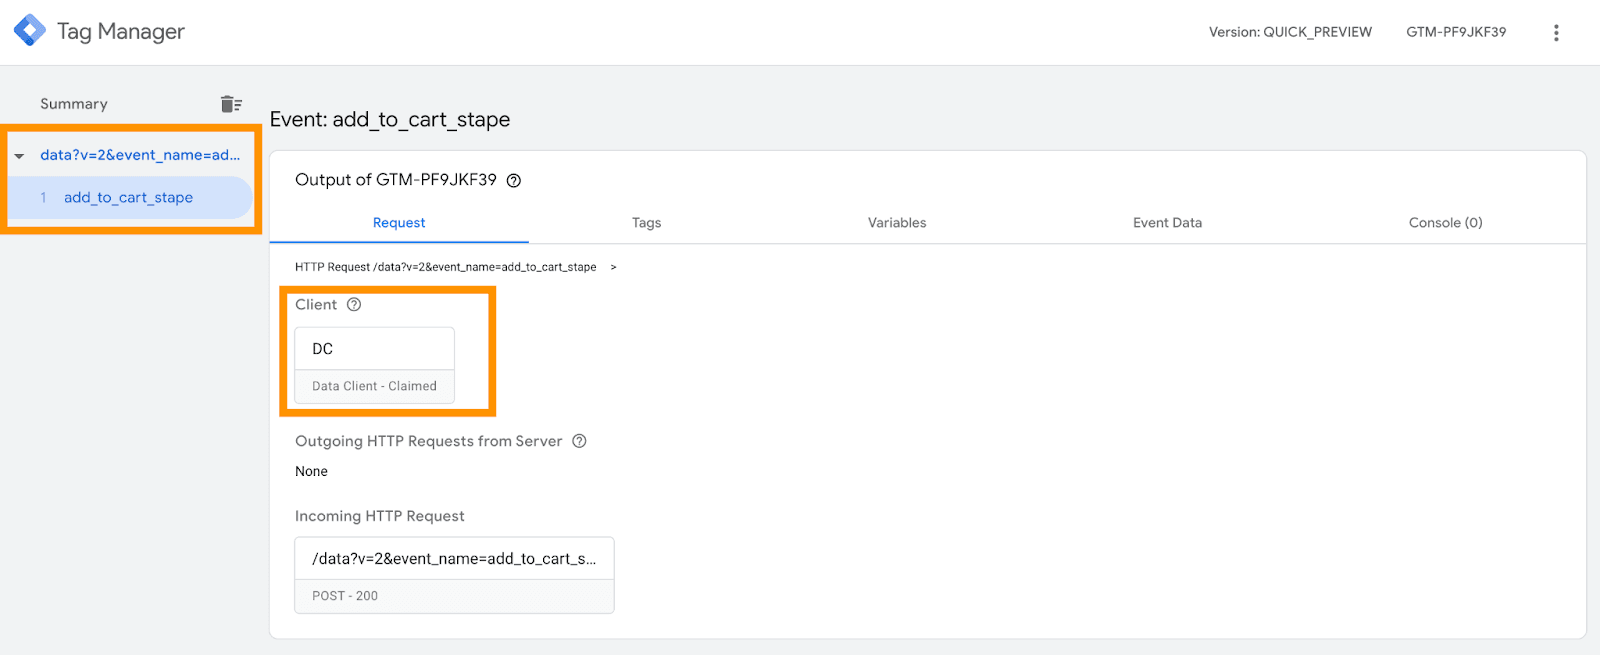
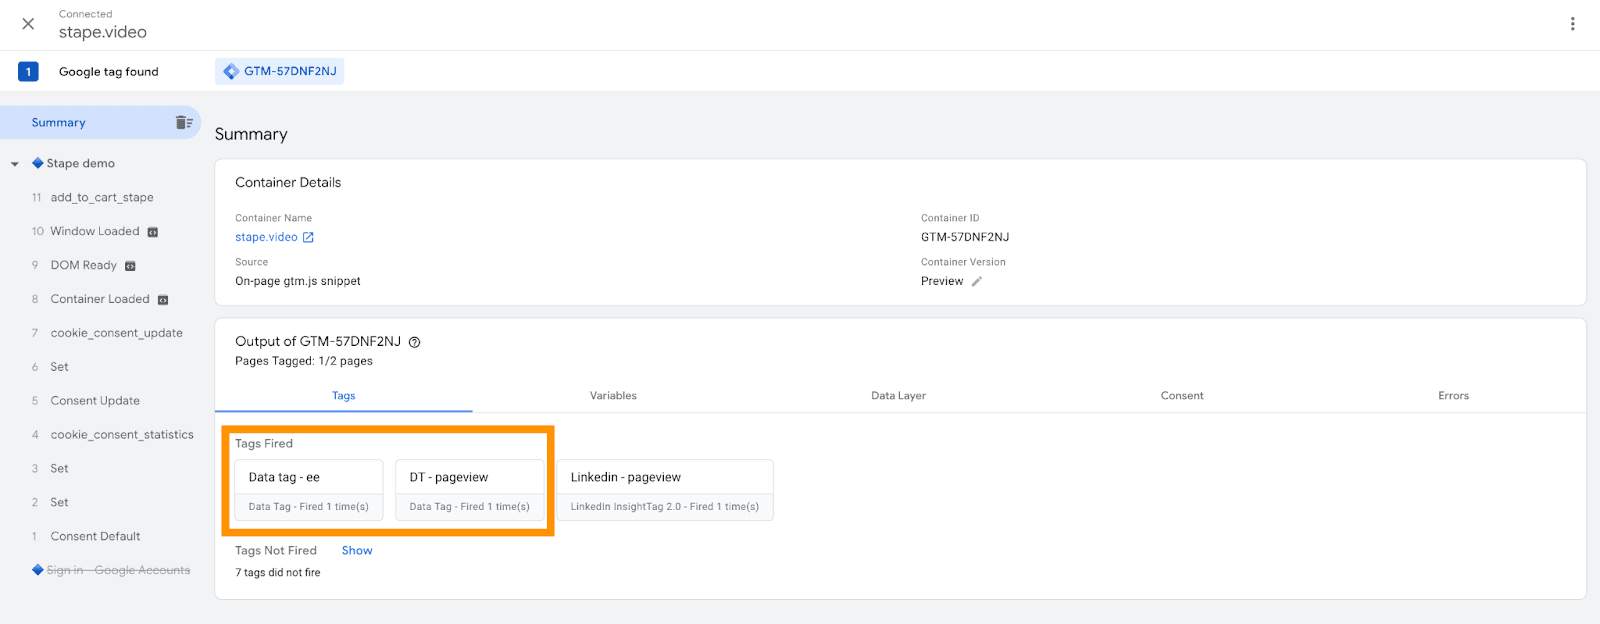
9. Open web and server GTM debuggers and test the setup. You should see Data Tag triggered in the web GTM container and Data Client parsed Data Tag requests in the sGTM.
Comments