How to set up ActiveCampaign app
Updated Aug 27, 2026
Stape's Conversion Tracking app makes it easy to send user progress and conversion events to your CAPI Gateway, Signals Gateway, or server GTM container.
After setup, the app automatically tracks users as they move through your defined conversion stages and sends the corresponding conversion events to your selected destination. This helps ensure accurate and reliable conversion tracking.
The app can also sync customer data with Google Ads Customer Match and automatically keep Meta Custom Audiences up to date based on your deals' progress.
App installation
To install the app, you need to have an ActiveCampaign account.
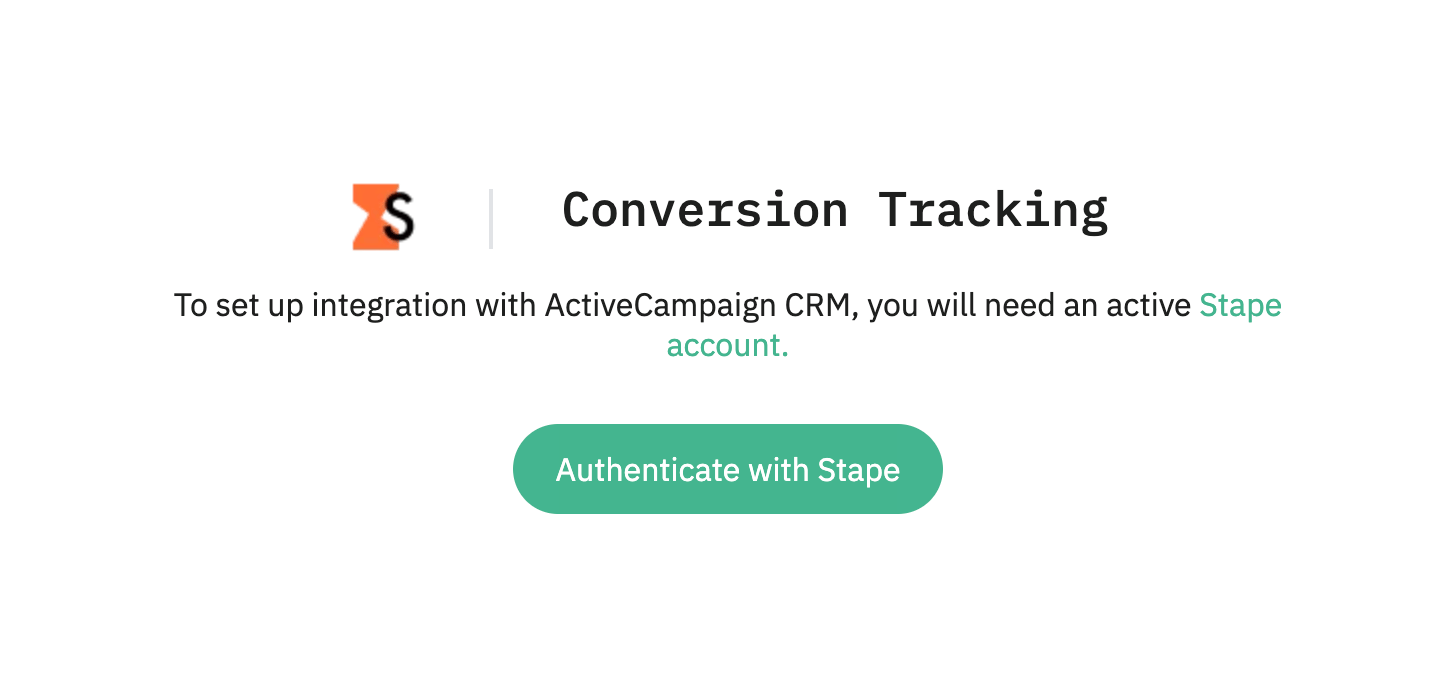
Open the app and click Authenticate with Stape. If you don't have a Stape account yet, create a free account.
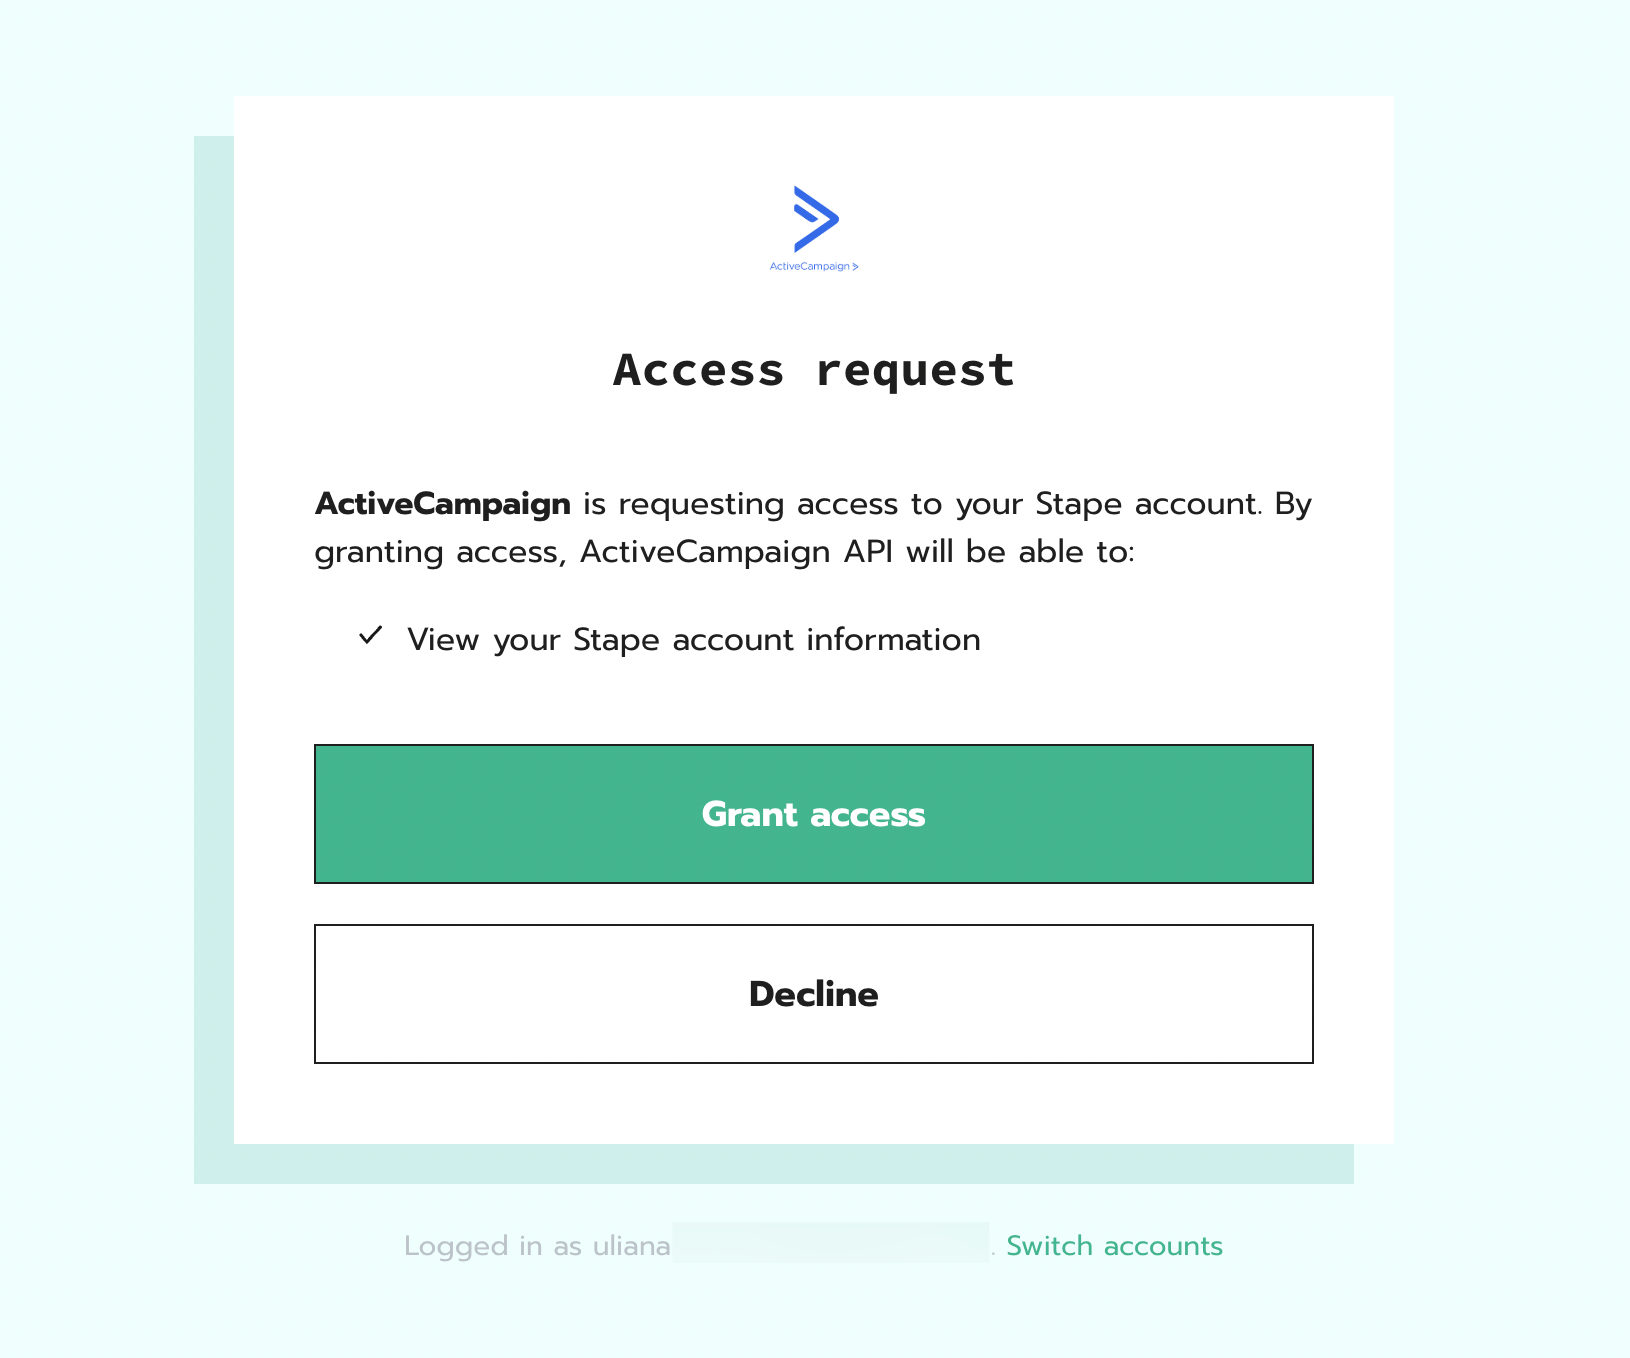
Give the app the scopes it requires:
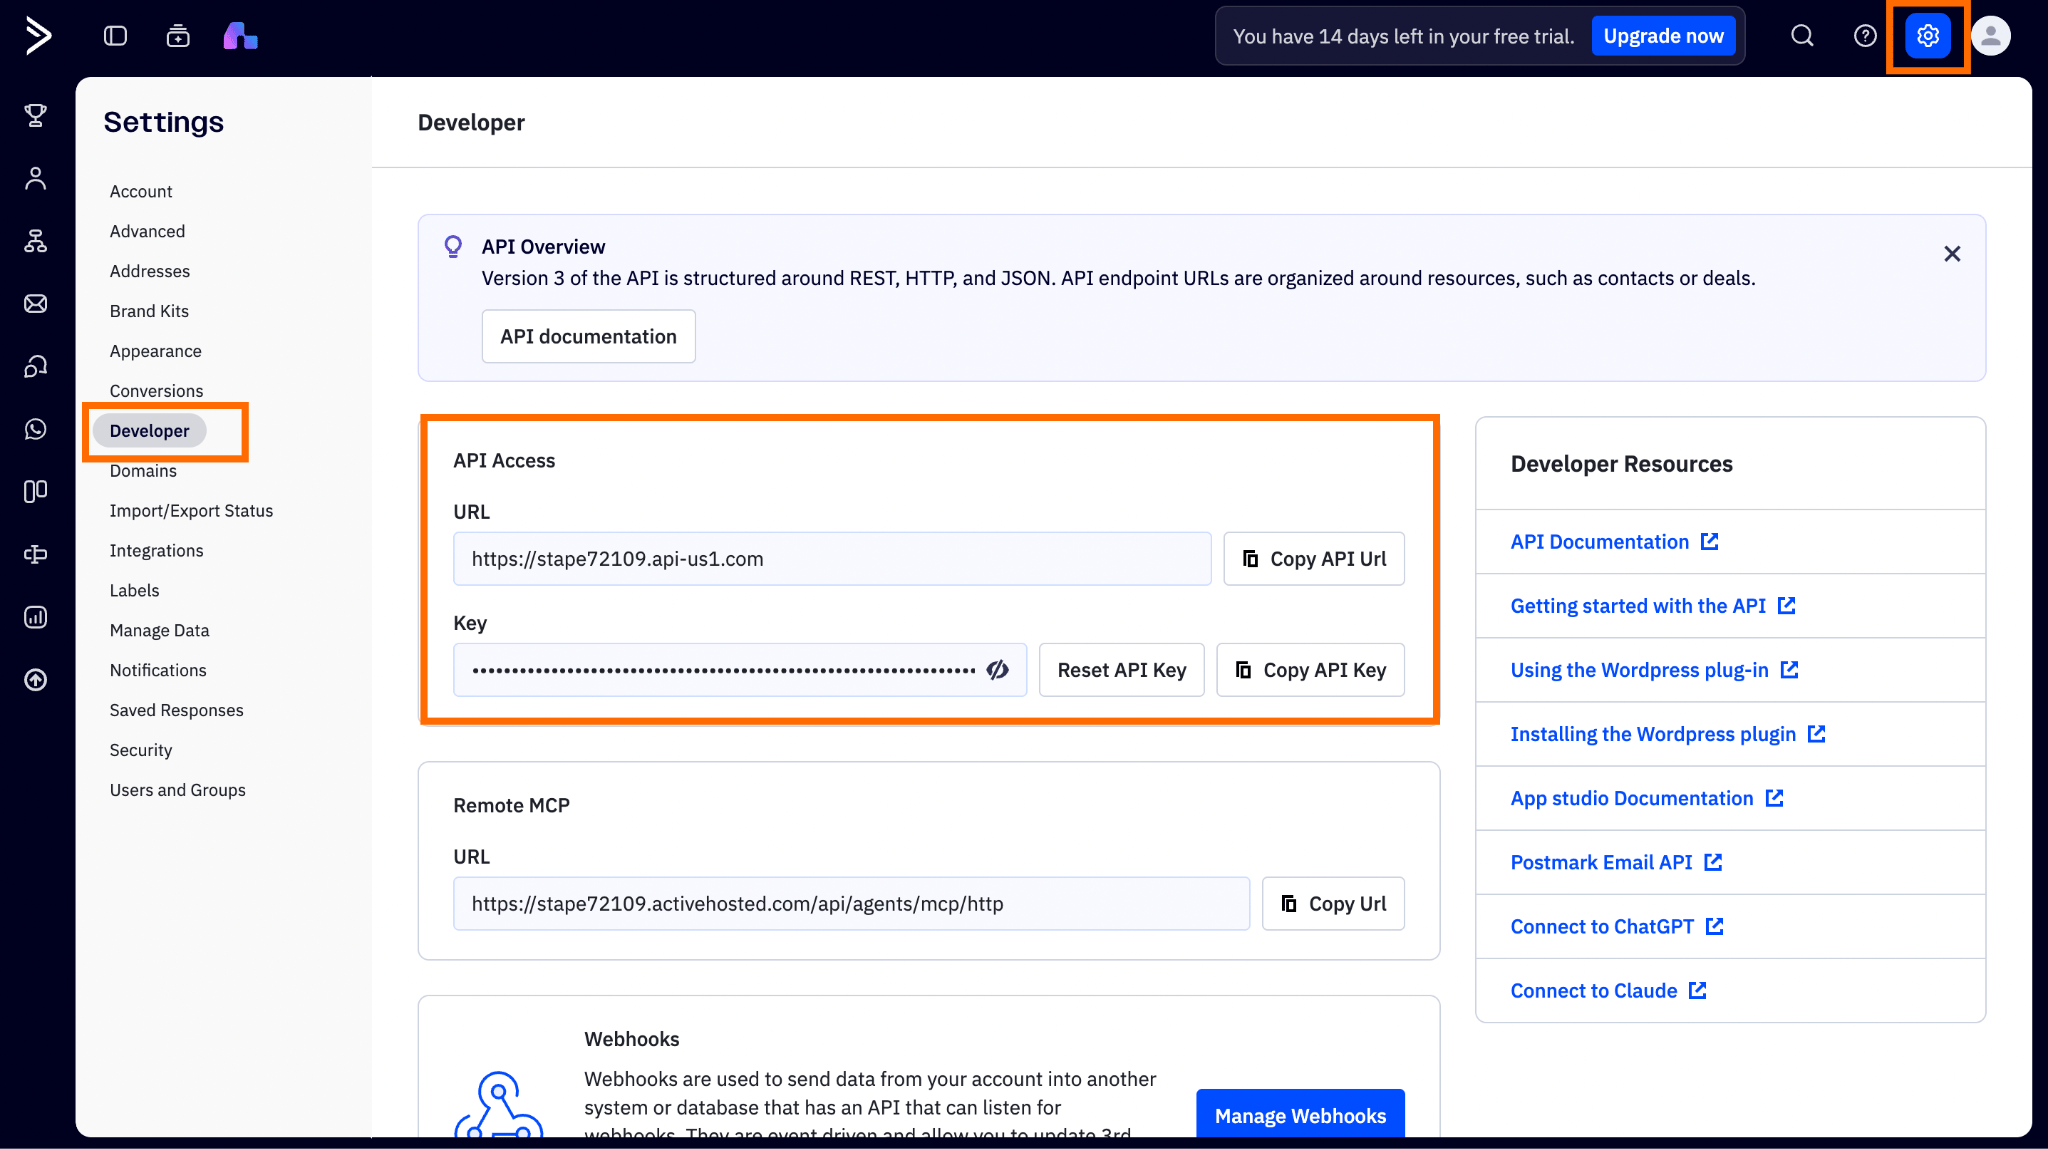
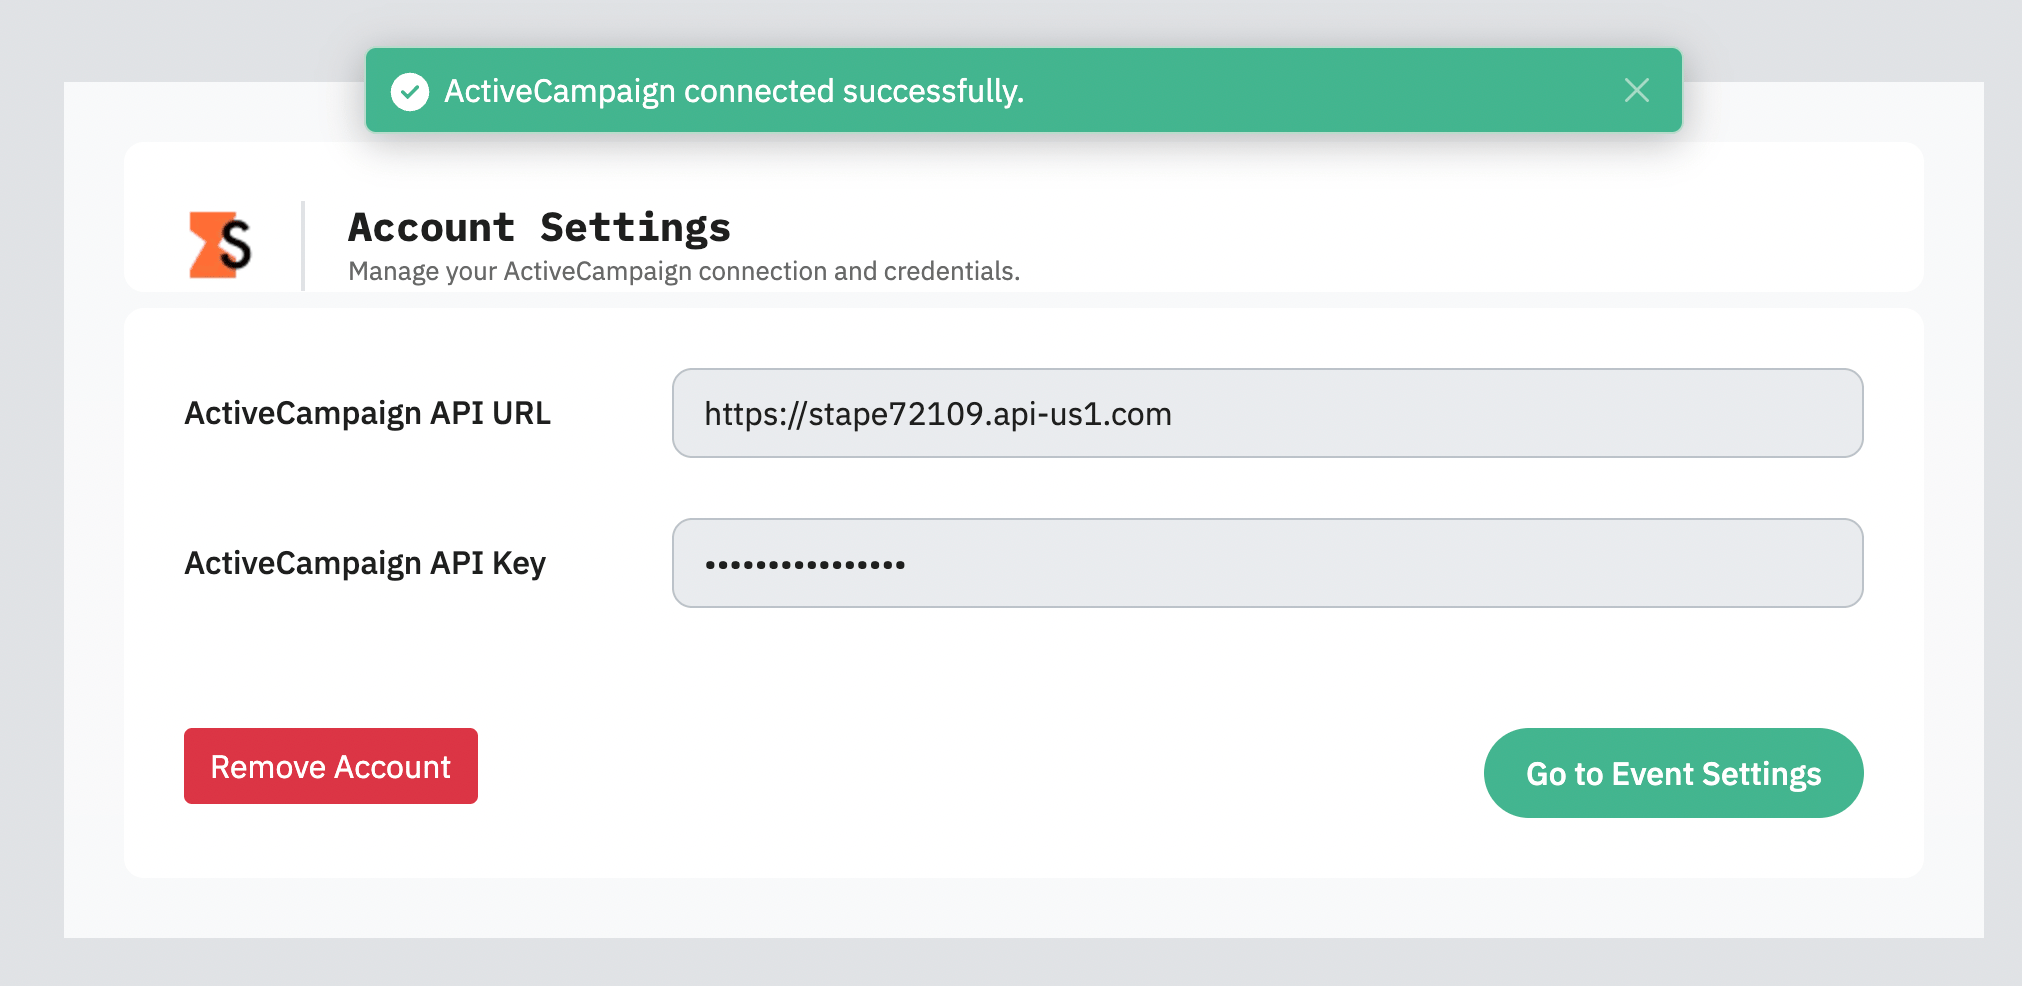
On the next step, specify the ActiveCampaign API URL and API Key.
To find the values, go to your ActiveCampaign account → click Settings (gear icon) → click the Developer tab → copy and paste your API URL and Key.
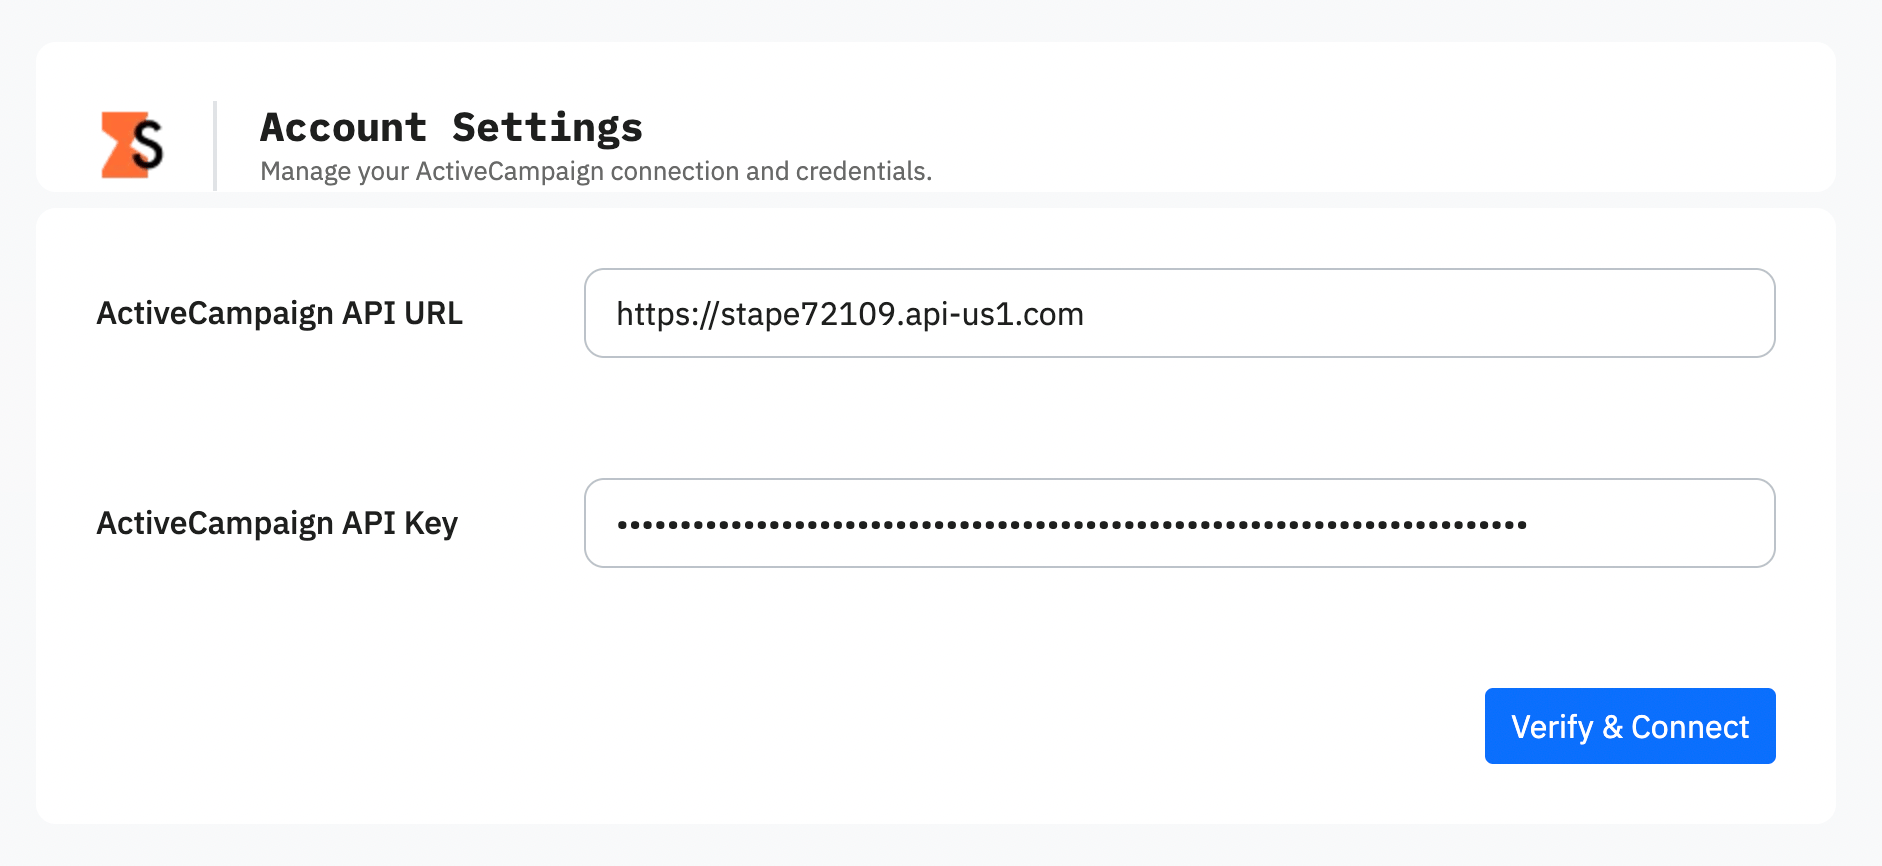
Paste the values into the app and click Verify & Connect.
After the app is successfully connected to your ActiveCampaign account, click Go to Event Settings.
Integration methods and their differences
The ActiveCampaign CRM app by Stape provides 5 different integration methods for sending profiles' progress status to your marketing platforms.
Note: you can configure multiple tabs/methods; each one runs on its own.
Server Google Tag Manager (sGTM)
This method integrates directly with your server-side Google Tag Manager container. It gives you full control over how data is processed and routed.
Server GTM is best for tracking setups that require custom logic or integrations with other platforms that Signals Gateway doesn't provide. It offers the highest level of customization and control, but requires more technical setup and ongoing management.
Customer Match (Google Ads)
It sends CRM audience and contact data directly into Google Ads, where it is used to create and update Customer Lists for targeting and remarketing.
Customer Match is best for users who run Google Ads campaigns and want to build and automate Google Ads audiences based on CRM activity, such as leads, opportunities, and customer lifecycle stages.
Meta Custom Audiences
The method focuses on syncing CRM data to Meta Custom Audiences for retargeting and segmentation. Once configured, it sends data about users who have already interacted with your website or CRM into Meta, so you can target them based on their stage in the customer journey.
Meta Custom Audiences is best for advertisers who want to retarget and re-engage users who have already interacted with their business.
Meta Conversions API Gateway (CAPIG)
This integration is built for Meta platforms such as Facebook and Instagram. It sends CRM event data directly to the Meta Conversions API.
Meta CAPIG is best for users who only need to track offline conversions and events in Meta. It is the most direct and simplest way to connect CRM data to Meta, but it is limited to Meta's ecosystem.
Signals Gateway
Signals Gateway is the unified routing solution. Instead of sending data separately to each platform, you send it once to Stape and then distribute it to multiple destinations.
Signals Gateway is best for users who, besides Meta, want to connect a few other platforms and look for a balance between simplicity and flexibility. Signals Gateway is more powerful than CAPIG (as it provides the option to add other platforms), and easier to configure than server-side GTM.
Configure the app based on the configuration method
❗Please note before starting:
Stape's app supports multiple integrations simultaneously. Each integration method has its own tab with an Activate integration toggle; switch it on for the integrations you want to send data to.

The integration method depends on your tracking setup and goals, and/or on your current experience with Stape. Click on the section below that corresponds to the tracking method you use:
Server GTM
Before you start
Make sure you have an active Stape account with a server GTM container hosted on Stape.
Log in to your Stape account → in the main menu, click sGTM → Create container on the top right.
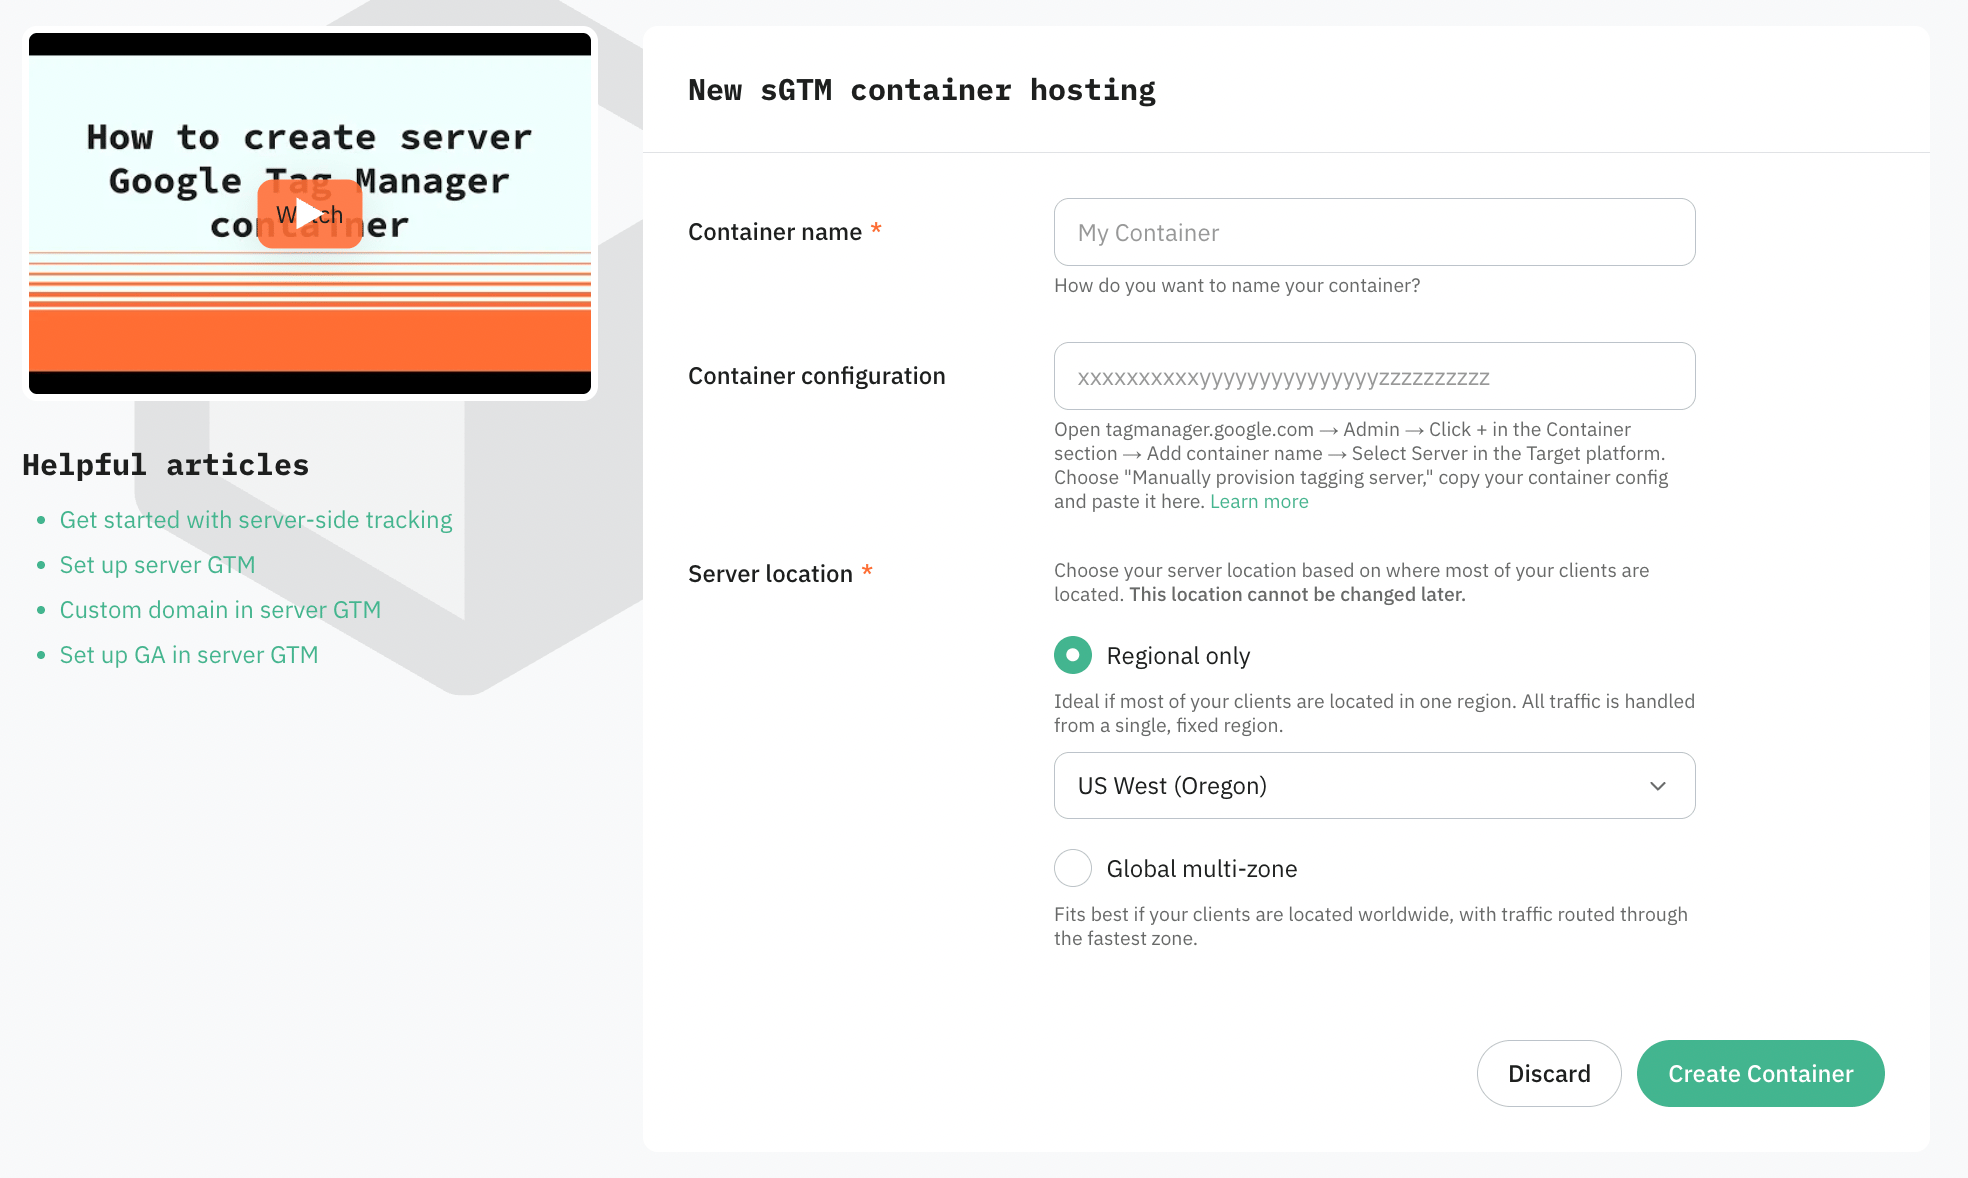
Add your container name, the Container Configuration that you copied from your Google Tag Manager Server Container, and select the server location. Click Create Container.
For more detailed instructions, check Stape's article on how to set up a Google Tag Manager server container.
App setup
The setup process can be divided into two parts:
- Stape account data
- ActiveCampaign CRM fields
Stape account data
You will need to fill in the following fields:
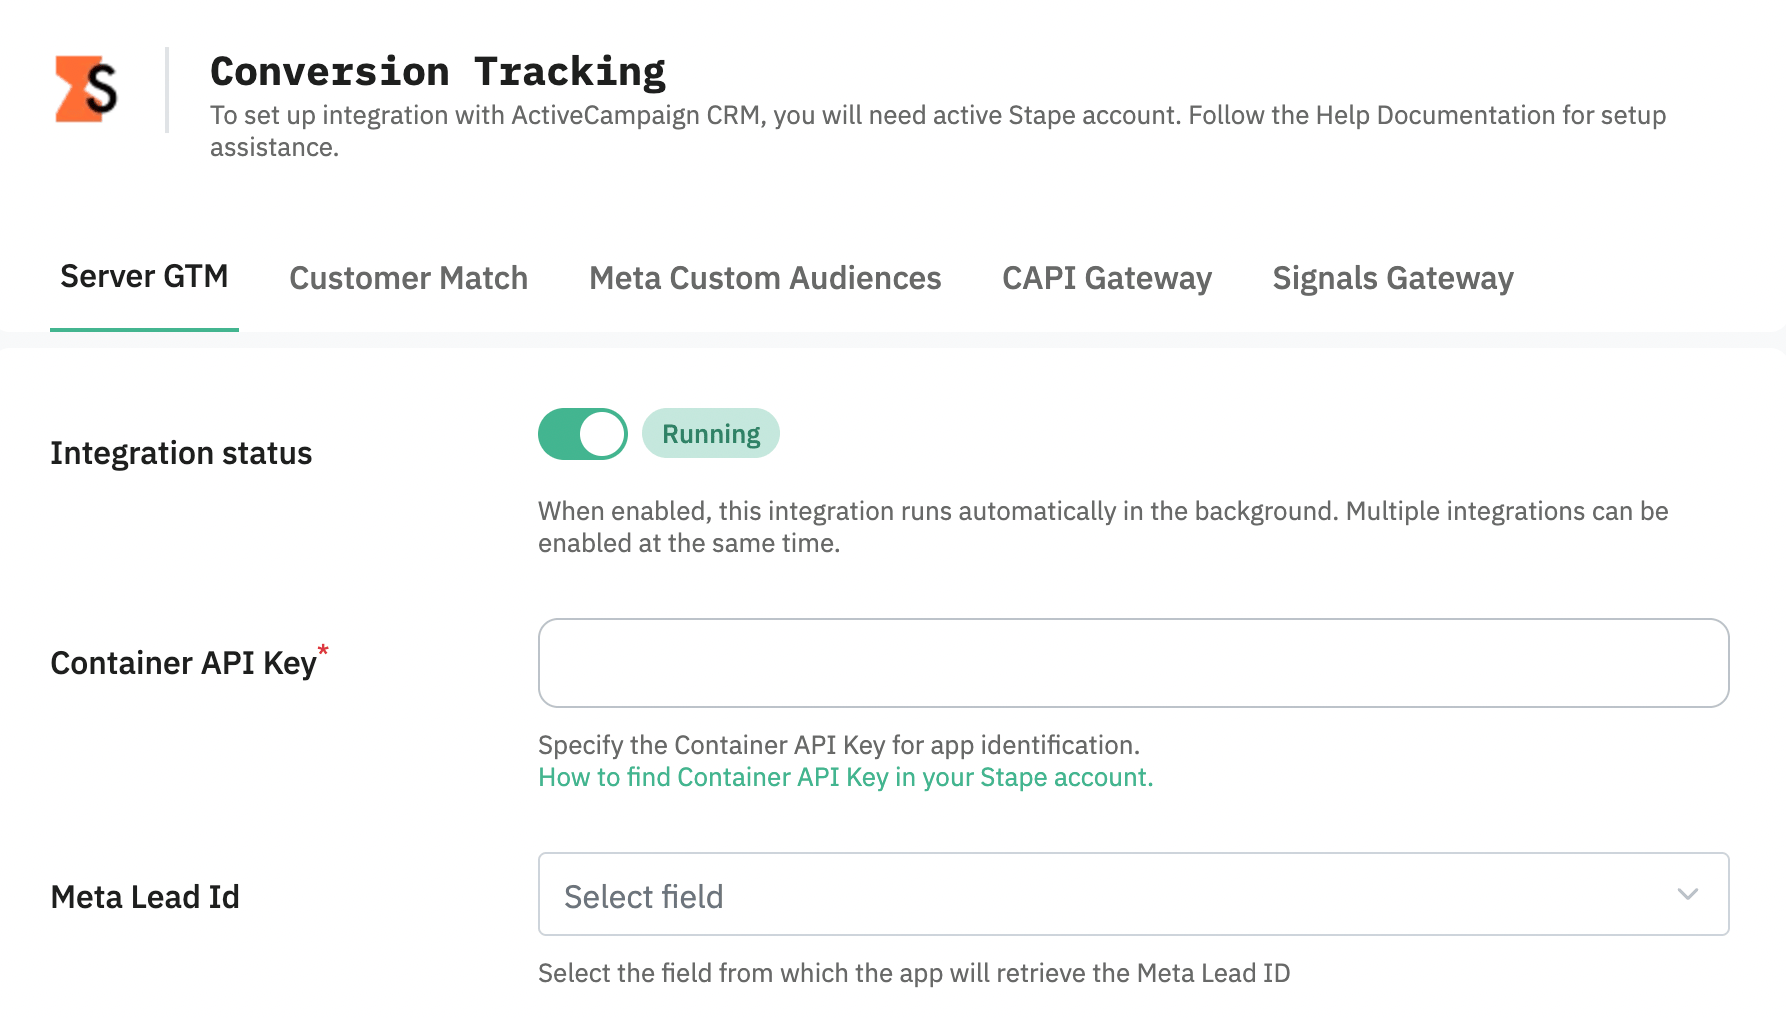
- Integration - turn on the Activate toggle to allow the current integration (tab) to run in the background.
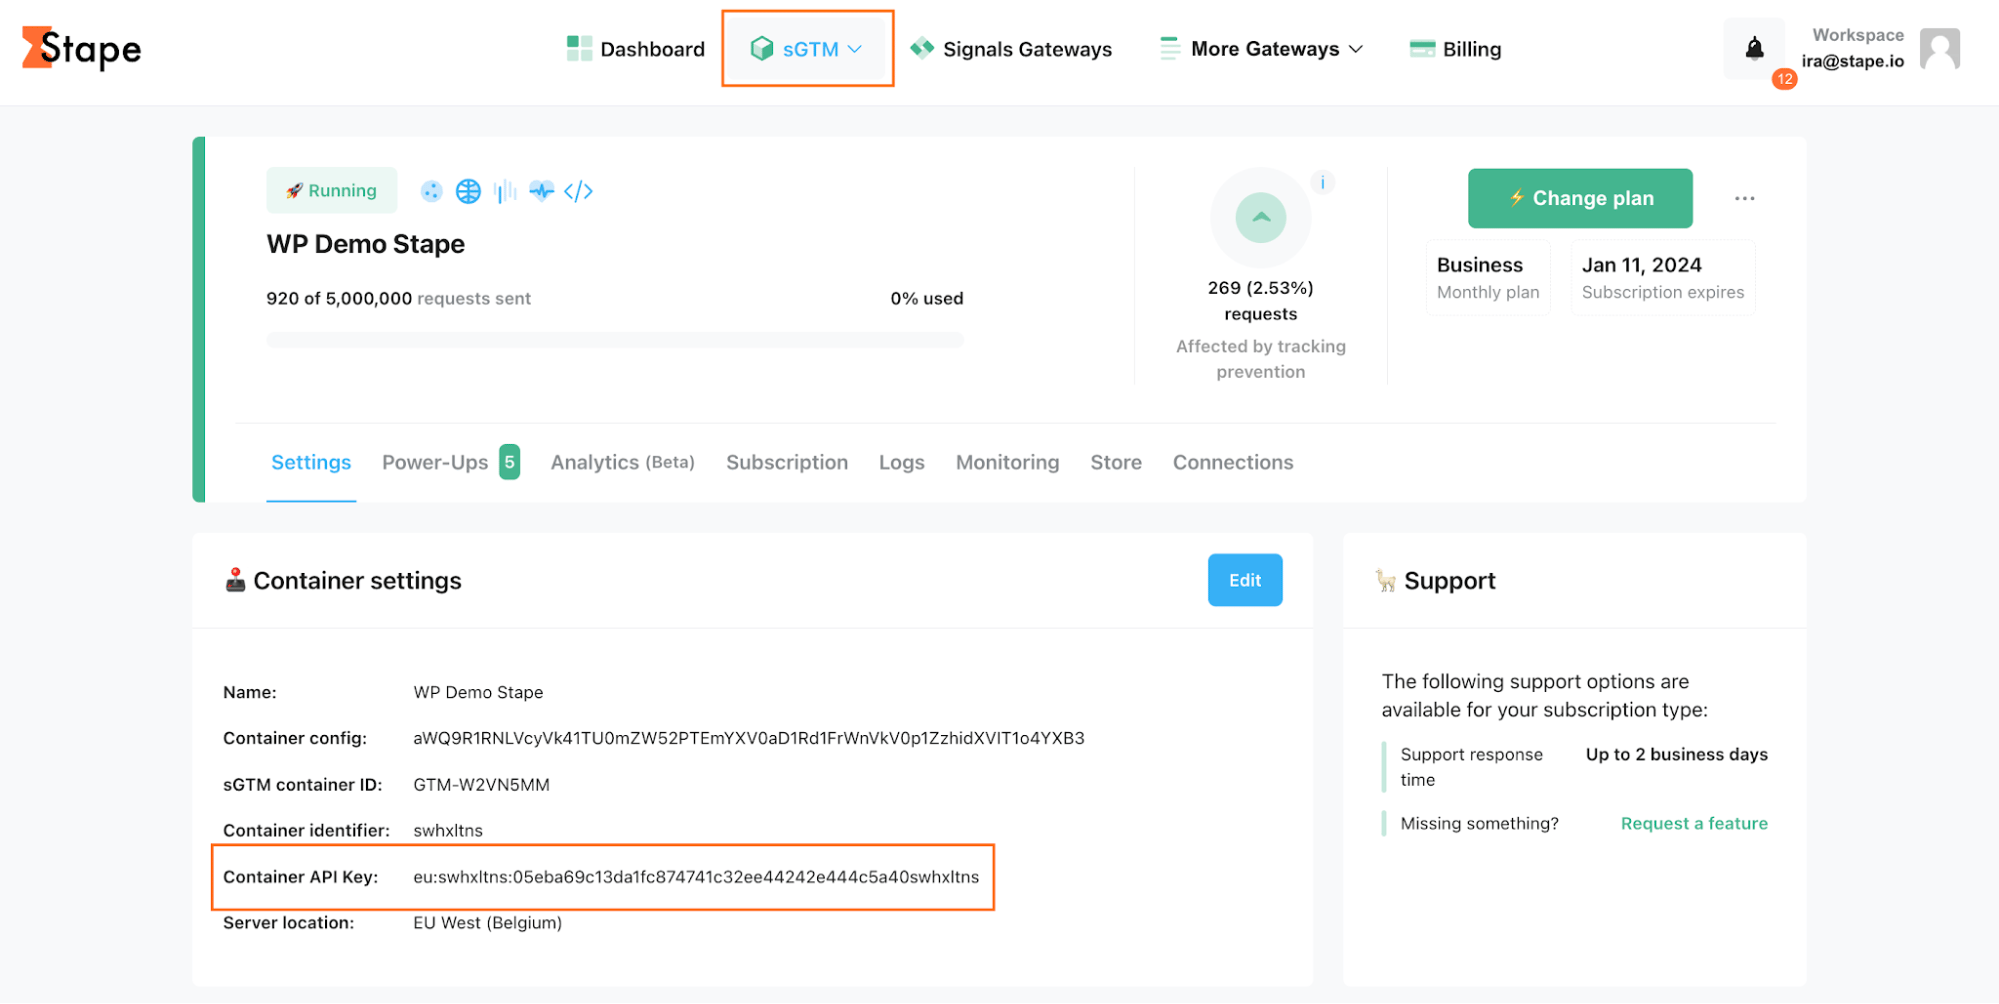
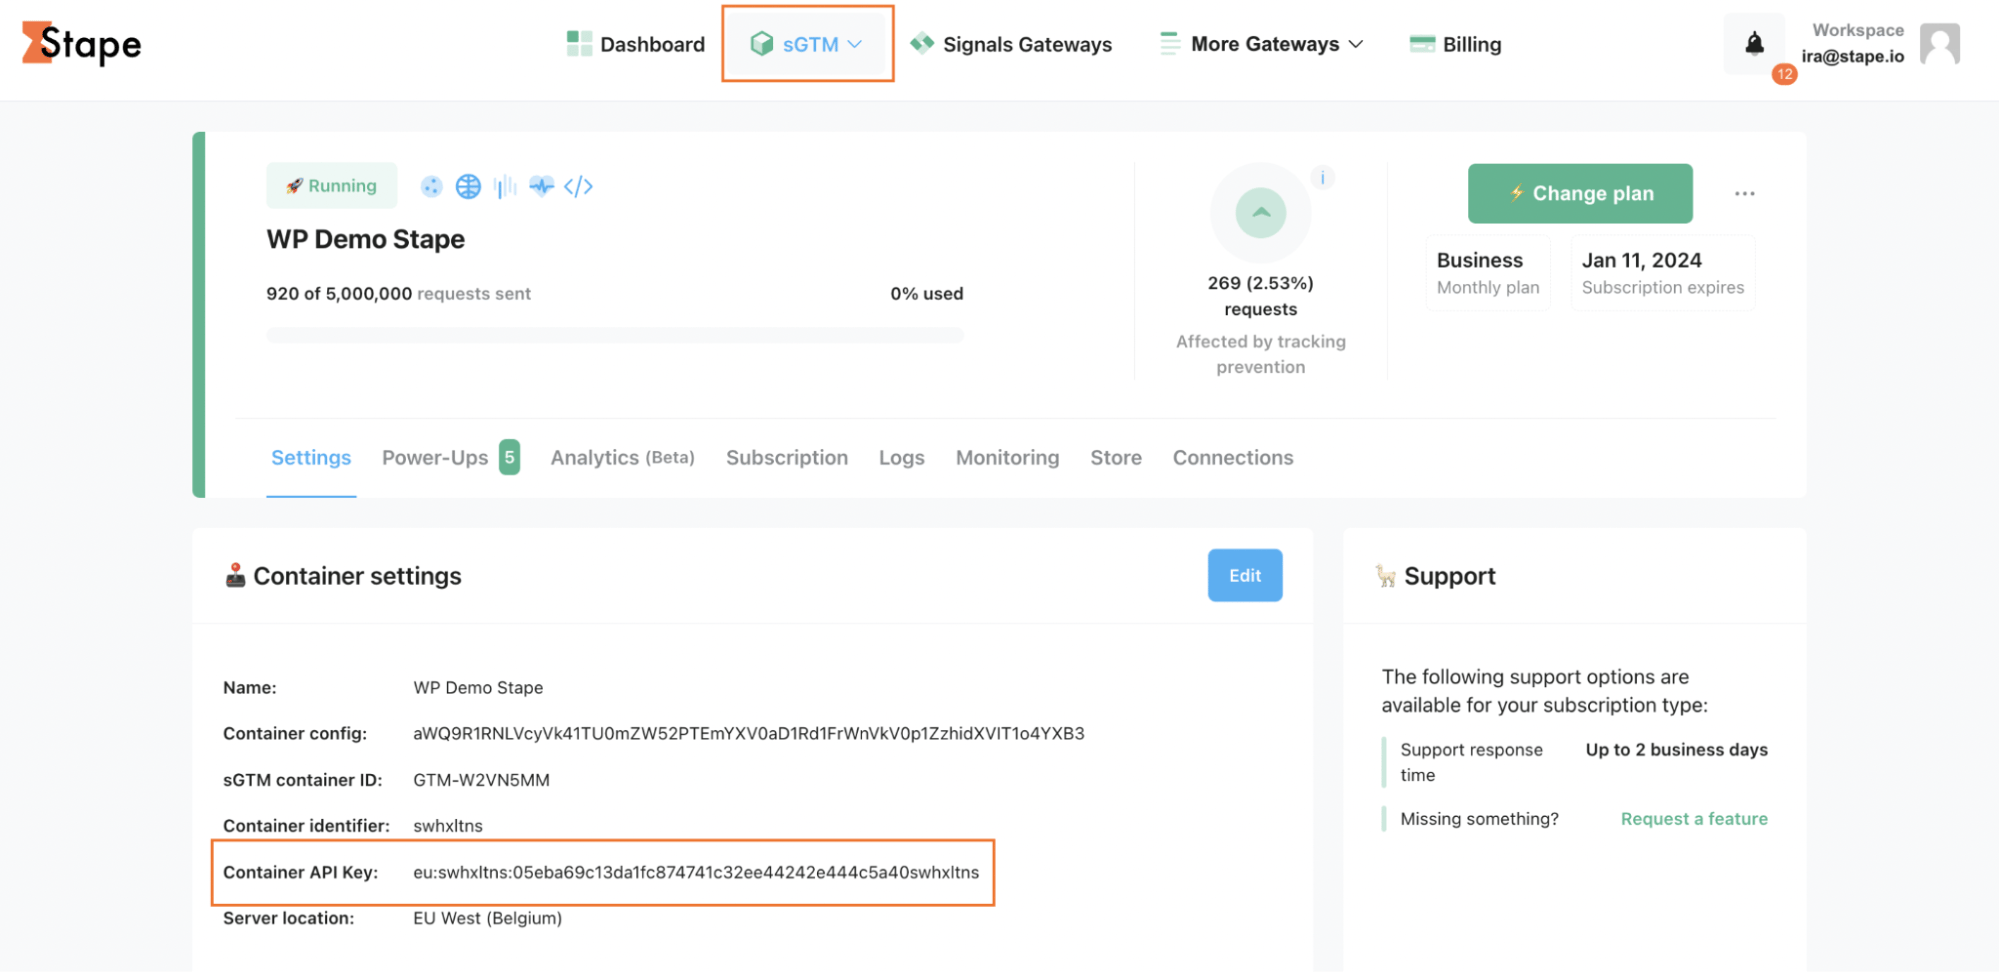
- Container API Key - an alphanumeric string value that is needed for app identification. Find the Container API Key in the Container settings section of your Stape account. See the detailed instructions on where to find the Container API Key.
ActiveCampaign CRM fields
Next, you need to map your CRM fields to conversion event parameters.
- (Optional) Pick a field where Meta Lead ID is stored.
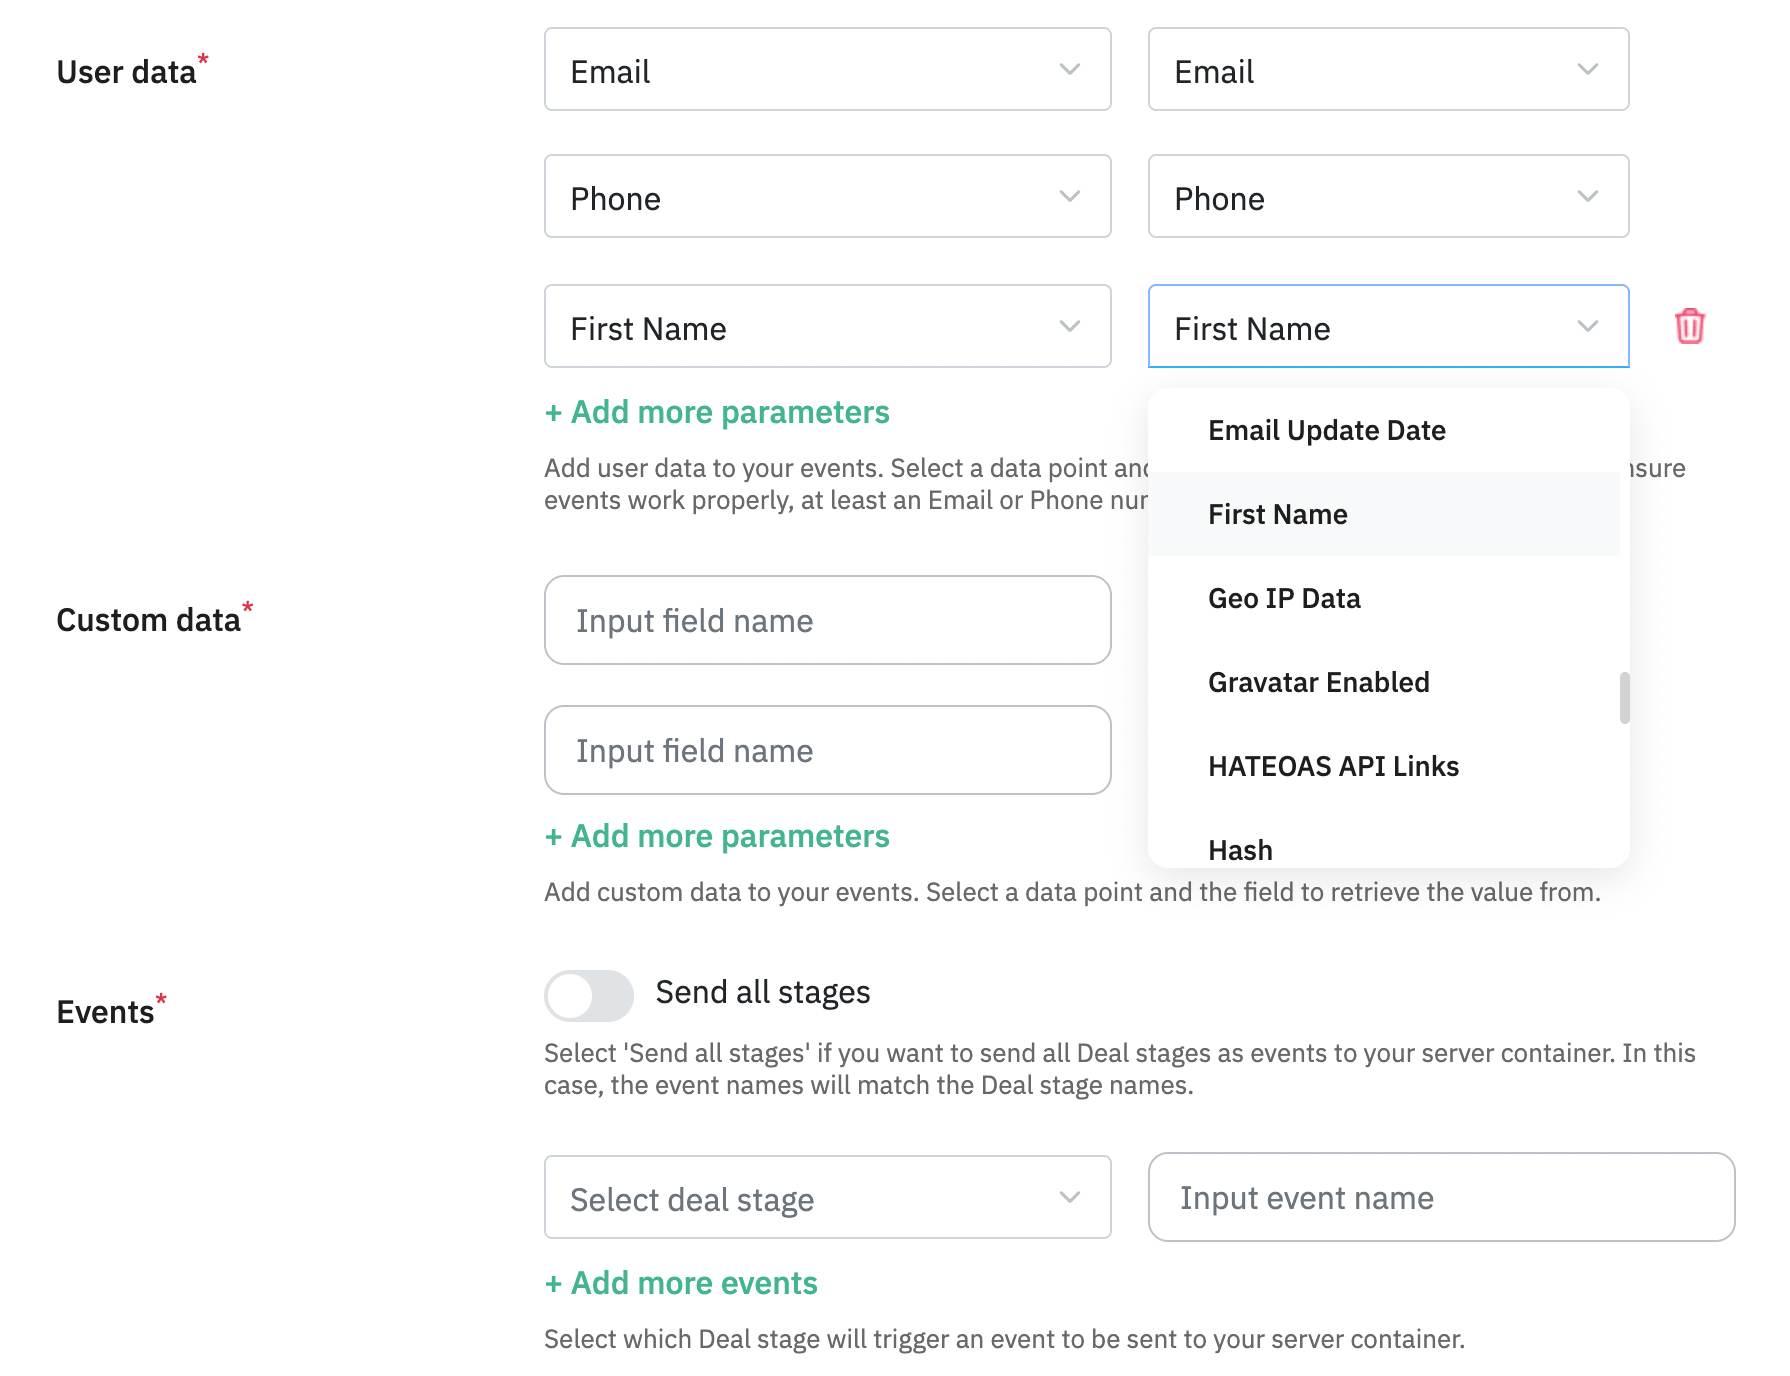
- Configure additional User data you'd like to send to server GTM by choosing a parameter in the left dropdown and selecting an appropriate field in the right-side one.
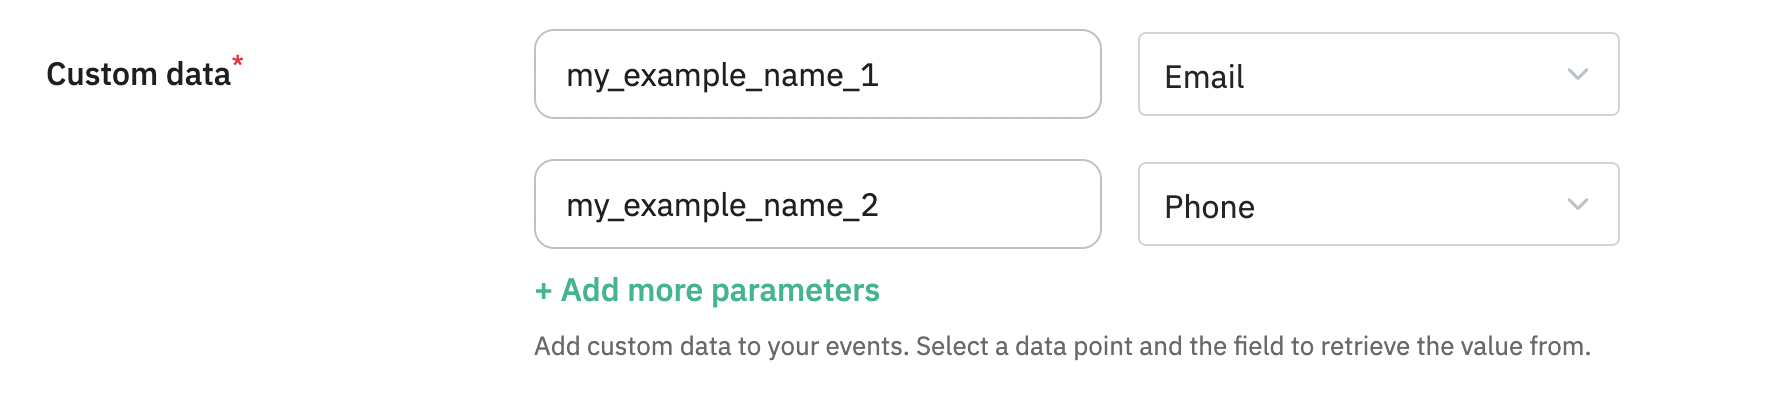
- Custom data – add custom data to your events. Select a data point and the field to retrieve the value from.
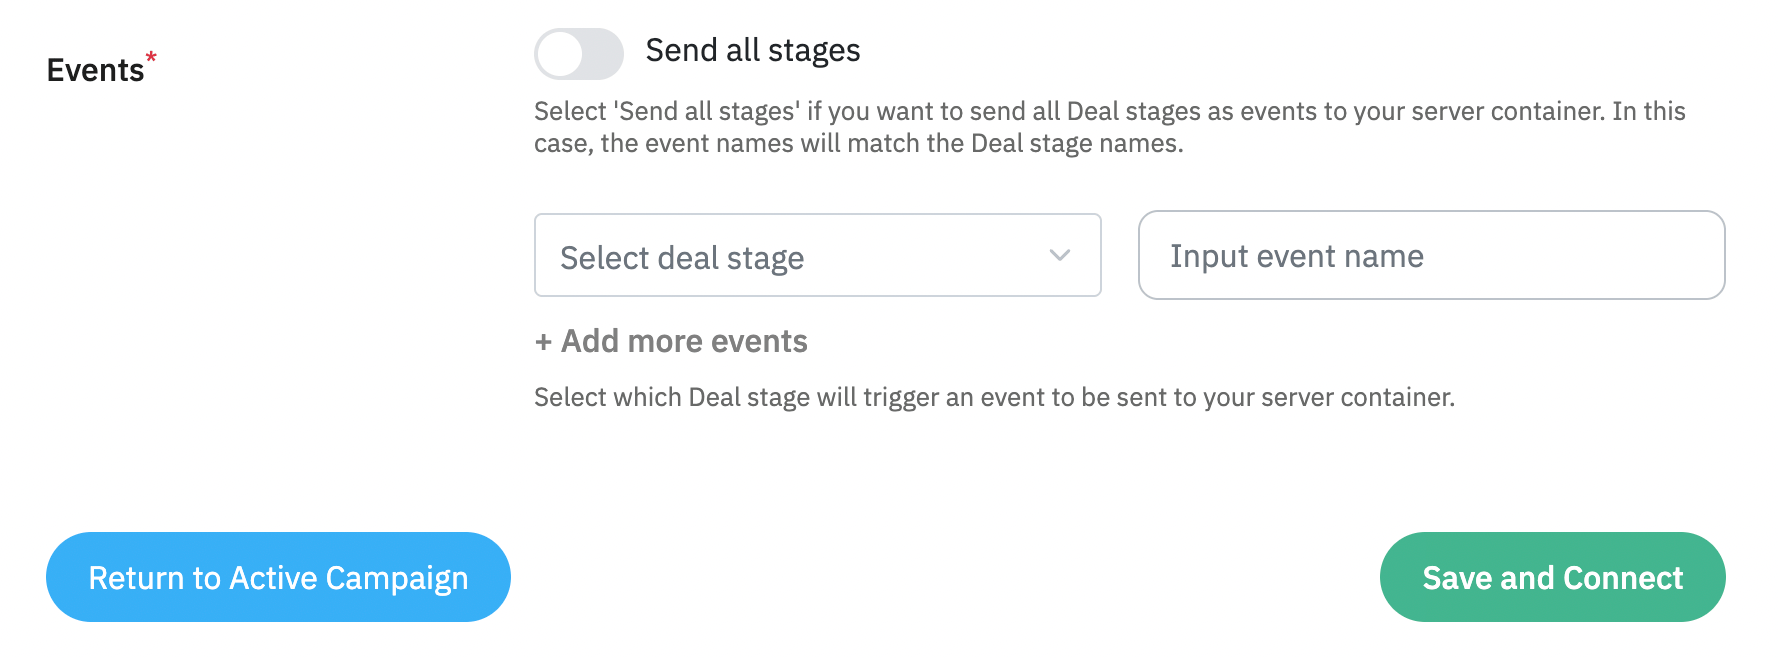
- Application sends conversion Events based on the statuses of your Deals; whenever a deal reaches a status you define, a corresponding event will be sent to your server GTM container. So we need to configure it by choosing one of two approaches:
- In the left-side dropdown, select a Contact stage to trigger an event; in a box to the right, type the event name you'd like to send to server GTM.
- Toggle the Send all statuses switch if you want to send all Contact stages as events to server GTM. Events are then named automatically and consist of a Contact status name. You can also select stages to ignore in this case.
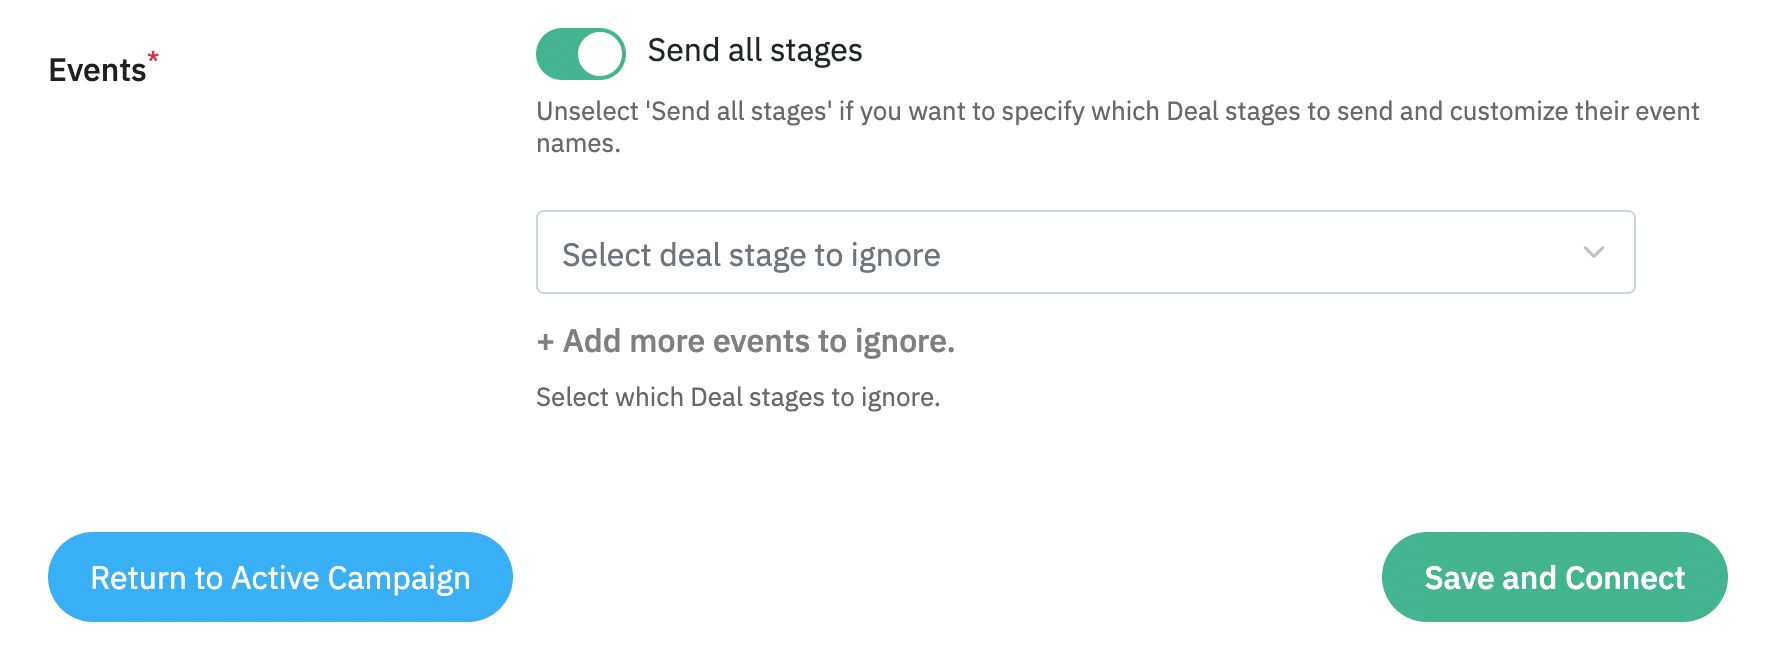
Once done, click Save and Connect. Once you see a success message, your installation is complete, and the application will send conversion events in the background based on your settings.
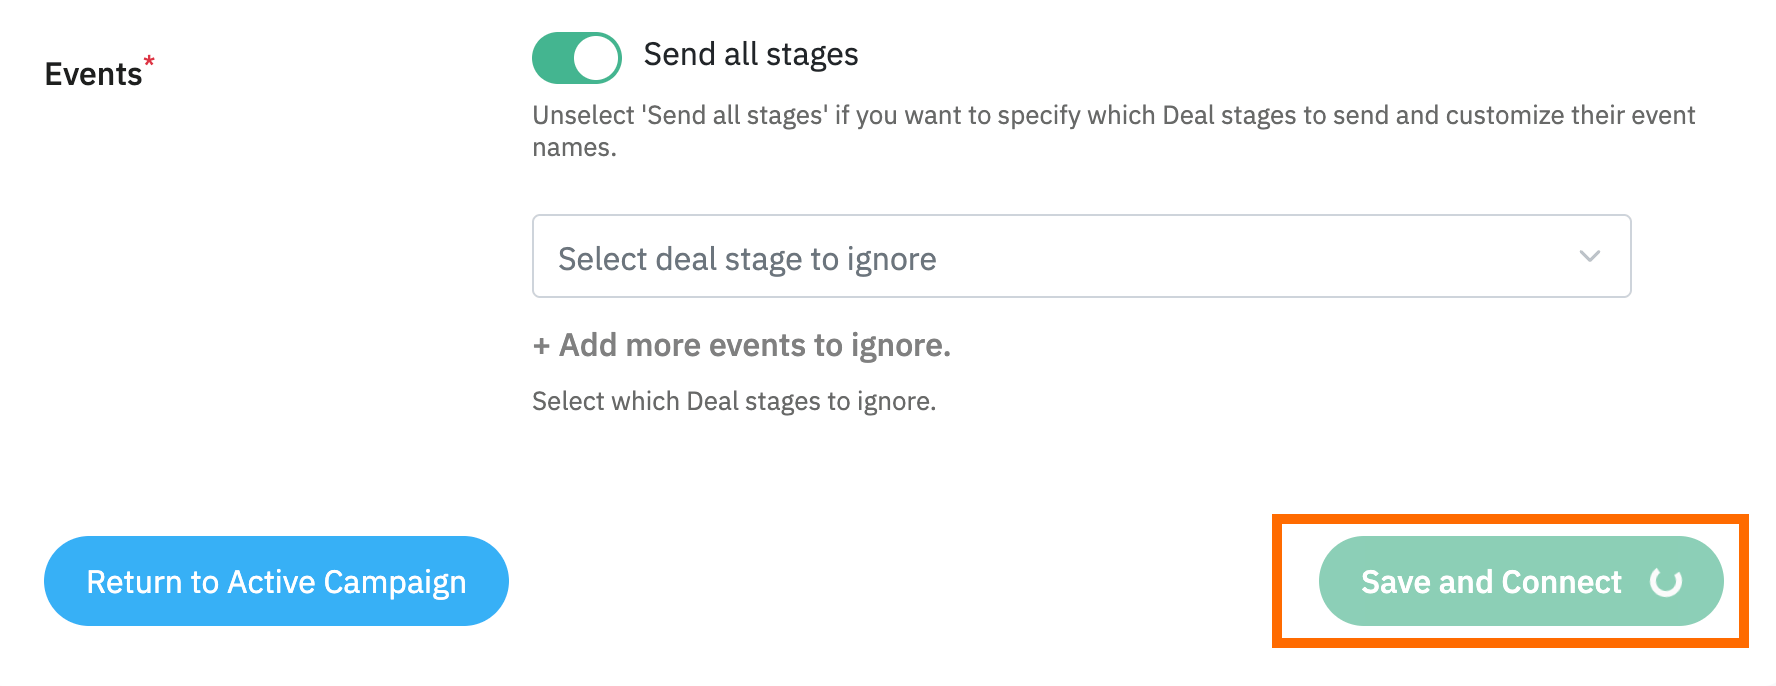
Configure sending data to the required platforms
With the current setup, the app will send events to your server GTM container, but to distribute them to platforms like Meta, TikTok, Google Ads, or any other, you need to configure the CAPI tags inside GTM to fire accordingly.
1. Configure the Data Client to claim the JSON requests sent from the CRM app. Go to the Templates → click New → upload the Data Client template you've previously downloaded from GitHub.
2. Go to the Clients section of your sGTM container → click New → select Data Client. That's basically it; your configuration will look like in the screenshot below. Click Save.
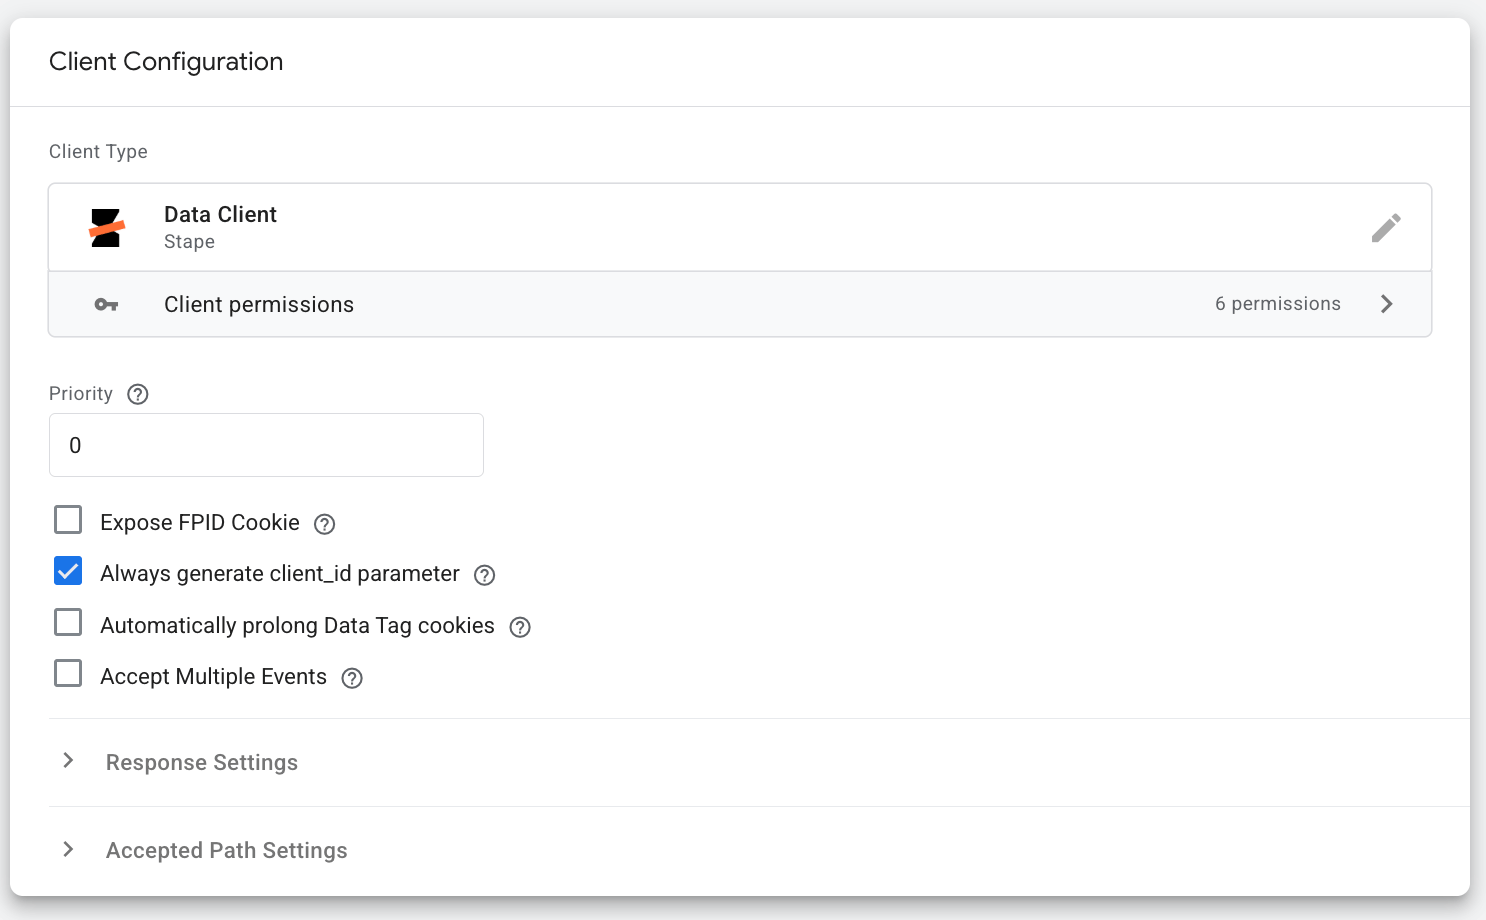
Select the platforms you need to send data to from sGTM. While setting up server-side tracking with sGTM, you might have already configured the CAPI tags for the required platforms, for example:
Or any other tags for platforms that support server-side tracking. You will need to use them to configure sending data from your CRM to the required platforms.
To give you an understanding of how to configure the tags this way, we will take the Facebook platform as an example. You should map the events according to the requirements of the platforms you use.
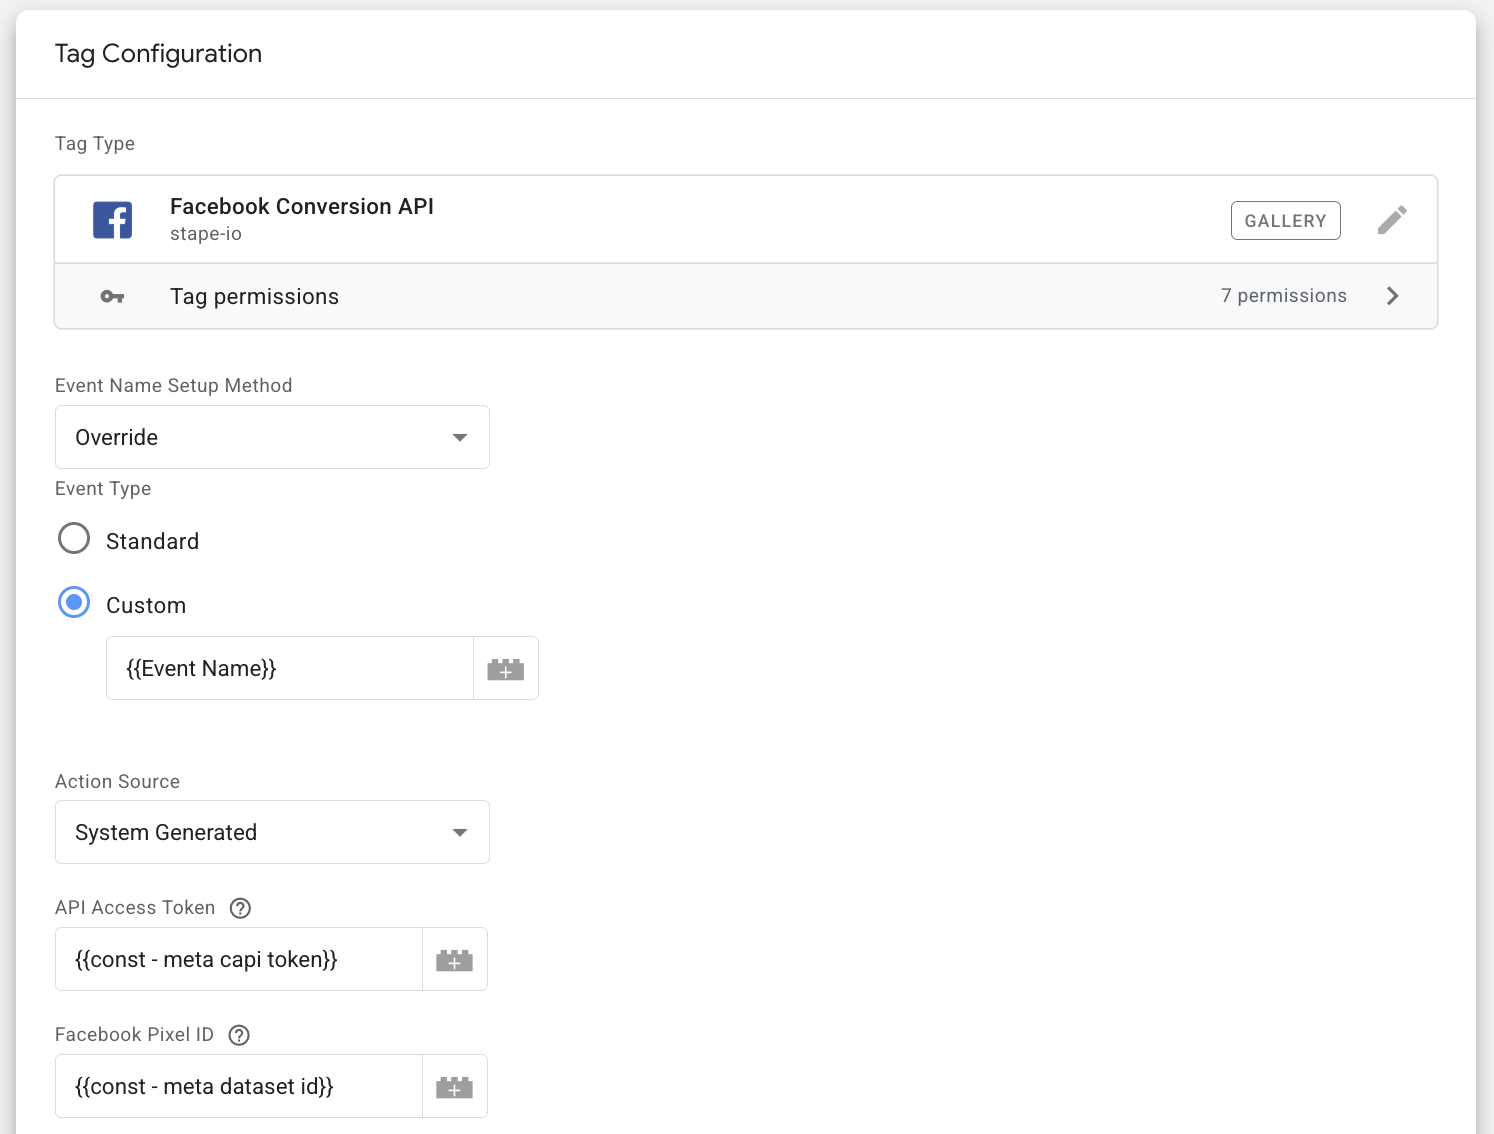
4. Create a new Facebook CAPI tag. Go to the Tags section in sGTM → add Facebook Conversion API as tag type.
5. Configure the tag.
Event Name Setup Method: Override
- Event Type: Custom. Select a built-in variable Event name.
- Action Source: System Generated.
- Add Pixel ID and generate API Access Token: for the detailed instructions on how to find these values, please refer to our guide on where to find Meta Pixel ID and API Token.
Here is an example of how your configuration will look at this point:
- User data section: select properties from the drop-down list - Lead ID, Browser ID, Click ID. These three are basic.
For each property, add a variable that will take the appropriate value from the request sent from the CRM app.
Create the following variable for Lead ID:
- Variable Type: Event Data
- Key Path: lead_id
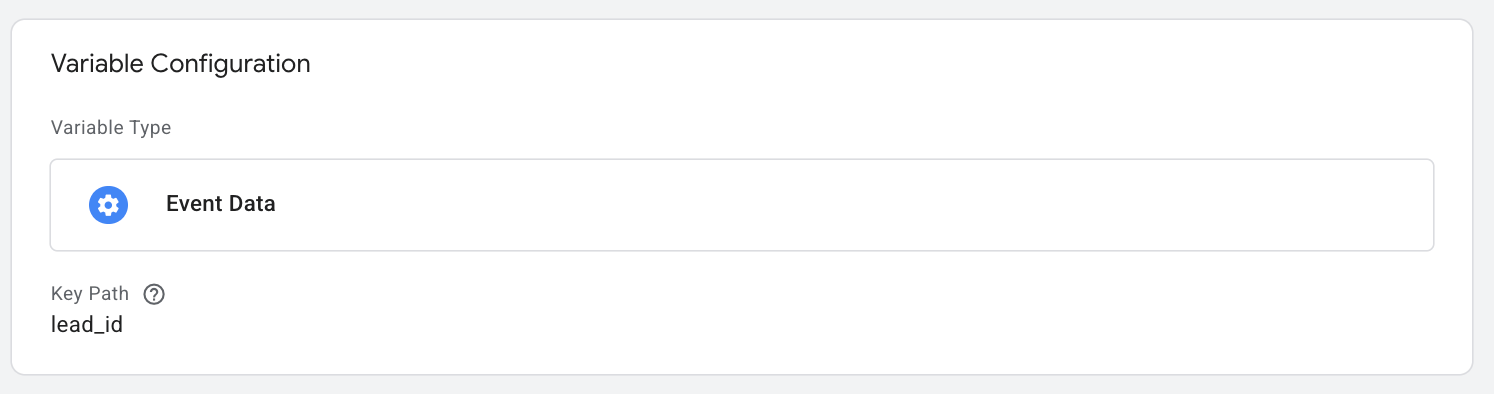
Create two different variables for Browser ID and Click ID:
- Variable Type: Event Data (for both), as the IDs will be retrieved from the event sent from CRM, not from the cookie.
- Cookie Name: fbp (for Browser ID variable) and fbc (for Click ID variable)
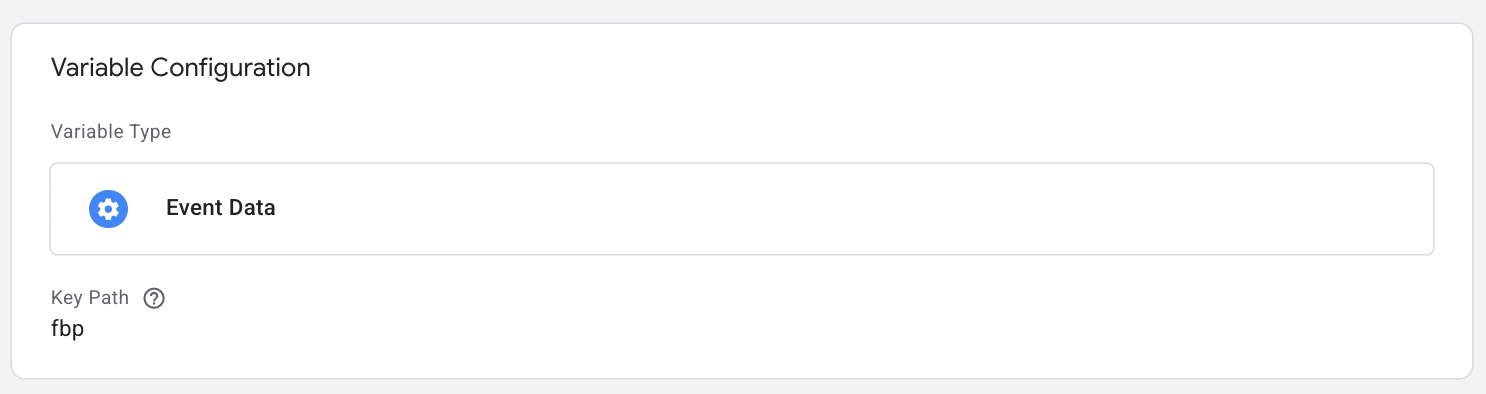
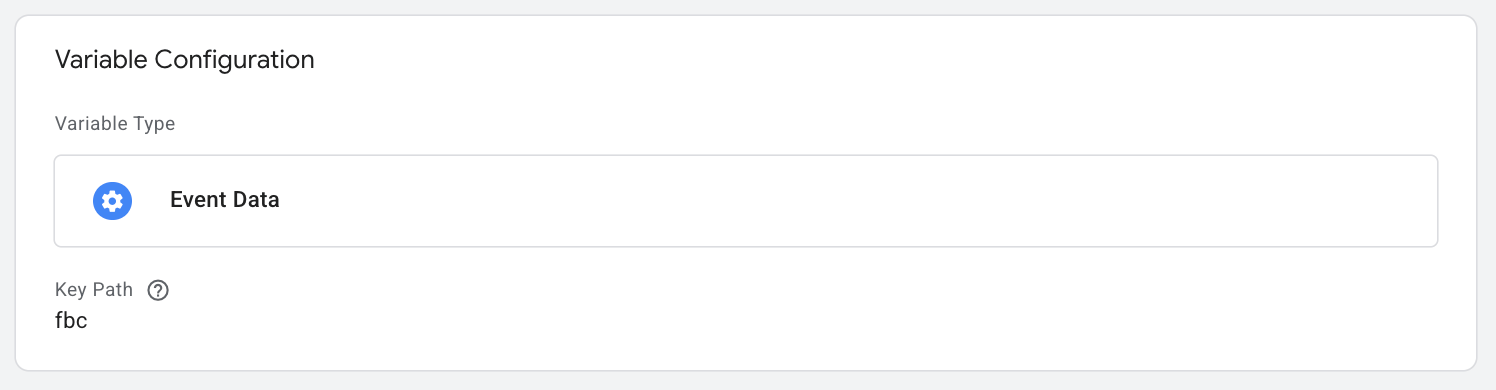
Here is an example of the user data section configuration:

- Custom data section: add a few custom fields to identify the source of the event.
Event_source property name with crm value.
lead_event_source - as property value, add a variable with the following configurations:
- Variable Type: Event Data
- Key Path: lead_event_source
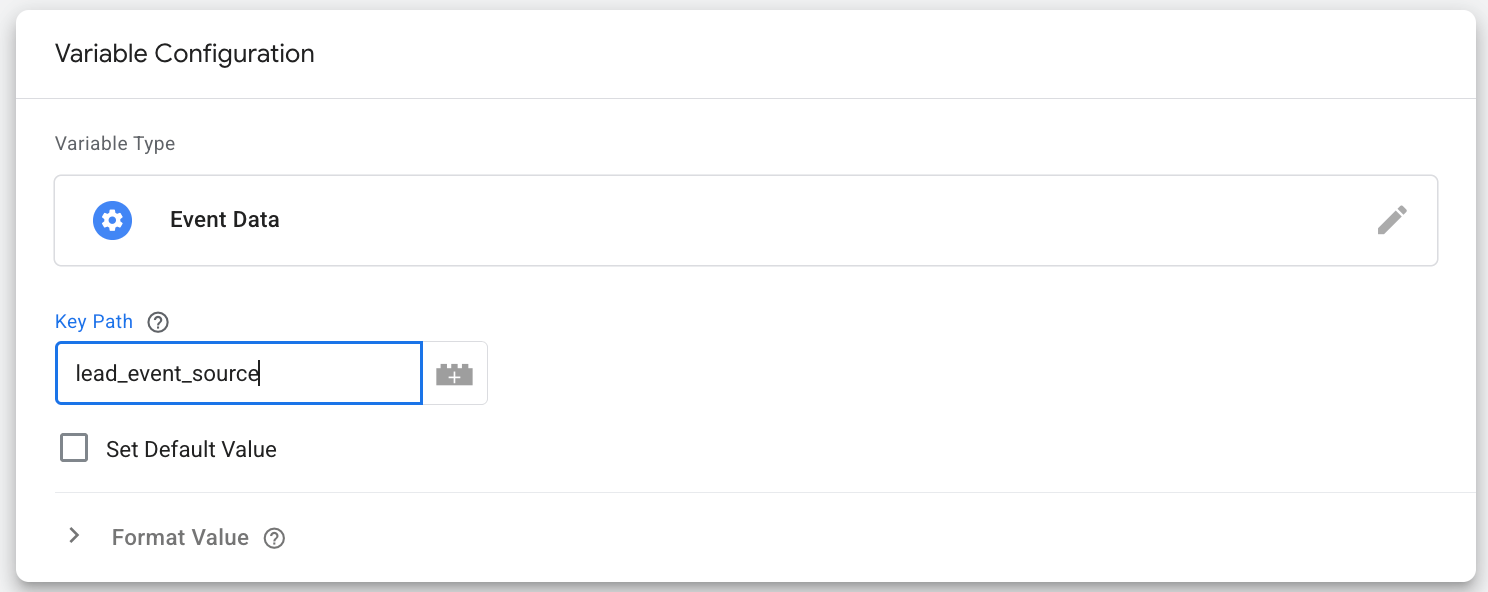
Here is how this configuration will look in the tag:
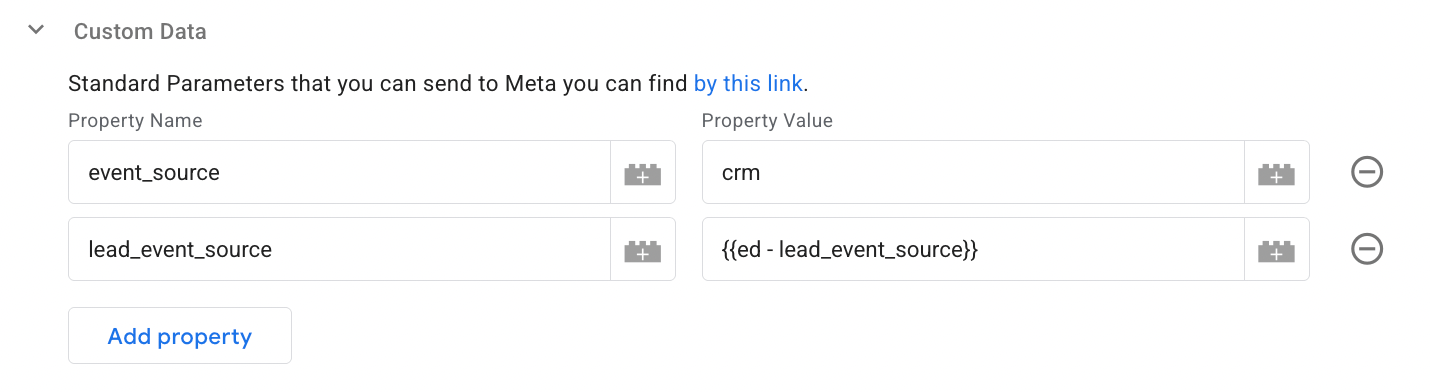
6. Add a trigger for a tag.
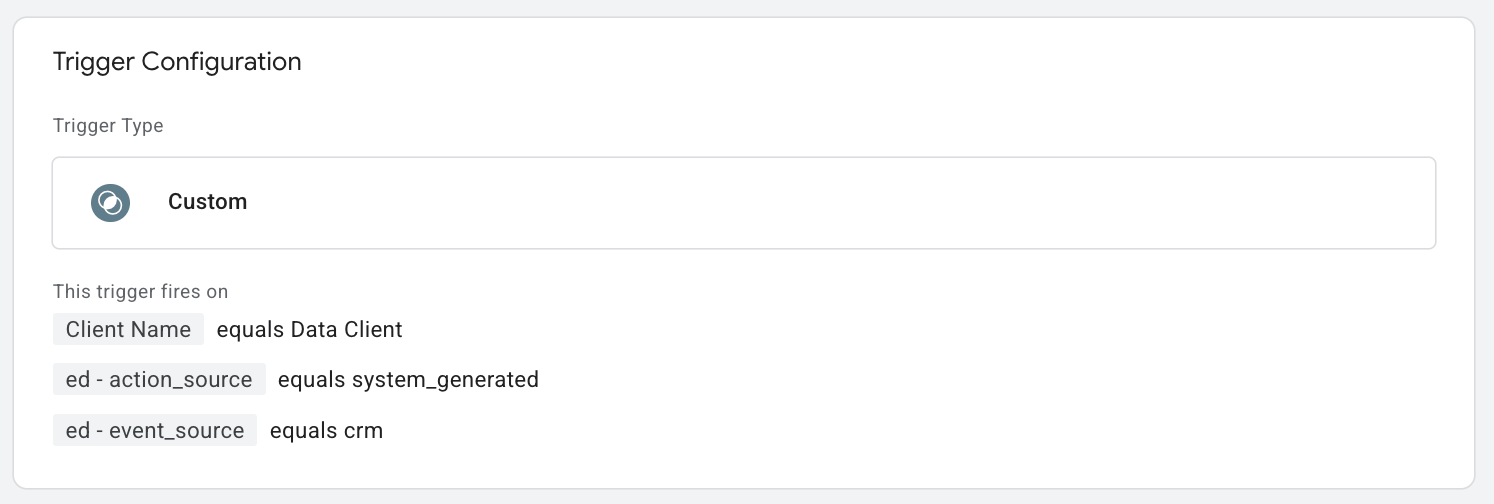
Use the following configurations:
- Trigger type: Custom
- This trigger fires on: Some events
Besides, add the following conditions for a tag to trigger:
- Client Name equals Data Client
- Action Source equals system_generated
The variable for action source must have configurations as on the screenshot below:
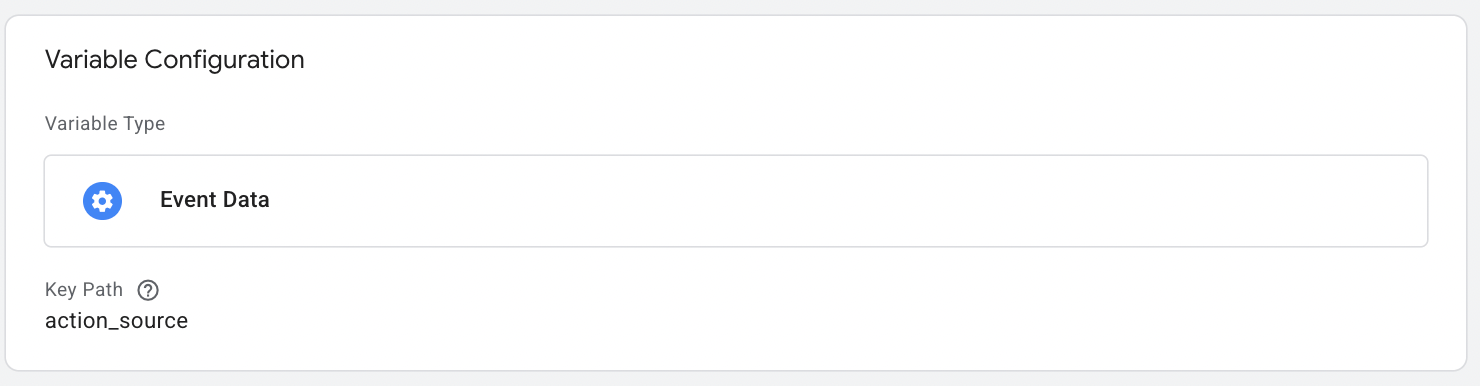
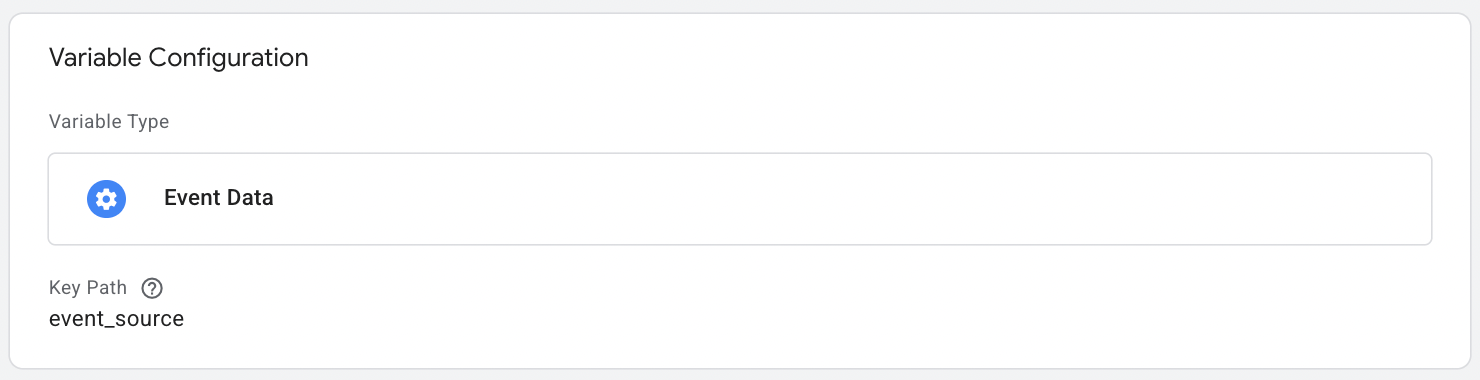
- Event Source equals crm
Configure the variable for the event source as shown in the screenshot:
As a result, your trigger will look similar to the example from the screenshot below:
7. Test the setup.
Since it is, in fact, a webhook that is sent from CRM to the server GTM, you can refer to the article on debugging incoming webhooks in server GTM for the detailed instructions.
If you are using Customer Match as a configuration method for the Stape Conversion Tracking ActiveCampaign app, once configured, a new Customer List will be created in Google Ads. Please note that only Customer Lists created automatically by the Stape connection are supported.
Manually created or pre-existing lists in Google Ads will not be populated. For more info on Customer Lists, please check our article.
Customer Match
Before you start
Make sure you have an active Stape account with a server GTM container hosted on Stape.
If you don't have an account on Stape, please create one or log in if you already have one. In the main menu, click sGTM → Create container on the top right.
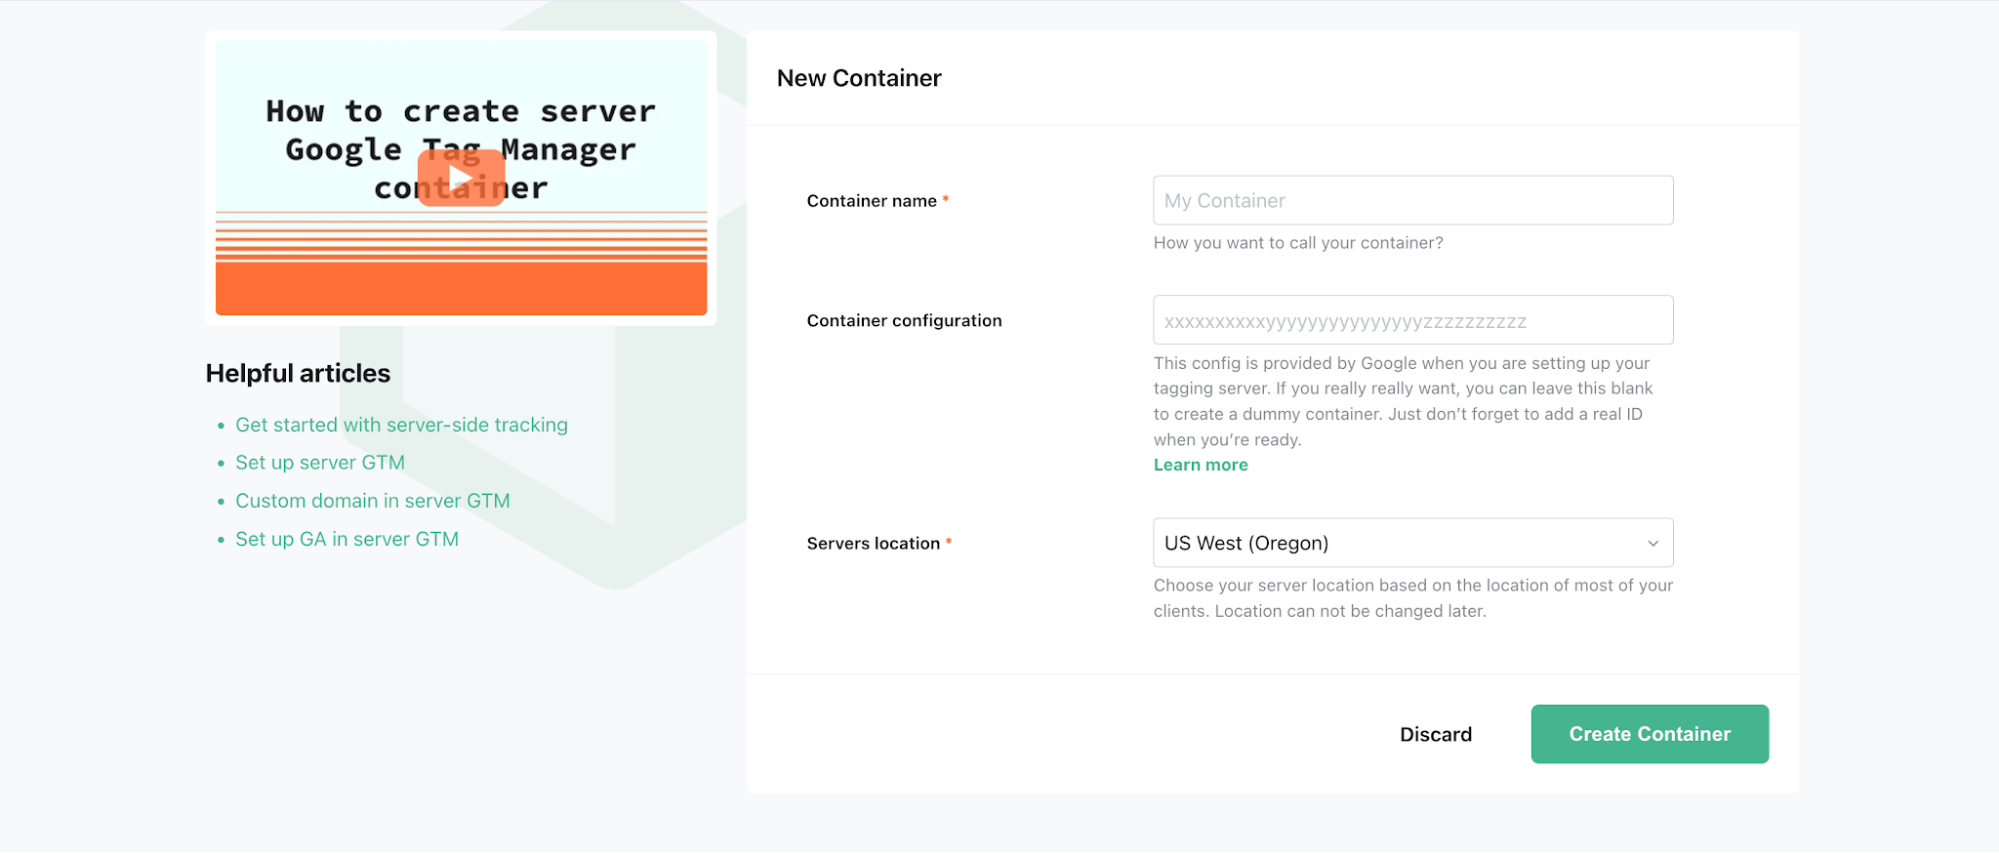
Add your container name, the Container Configuration that you copied from your Google Tag Manager Server Container, and select the server location. Click Create Container.
For more detailed instructions, check Stape's article on how to set up a Google Tag Manager server container.
App setup
The setup process can be divided into two parts:
- Stape and Google Ads account data
- ActiveCampaign CRM fields
Stape and Google Ads account data
You will need to fill in the following fields:
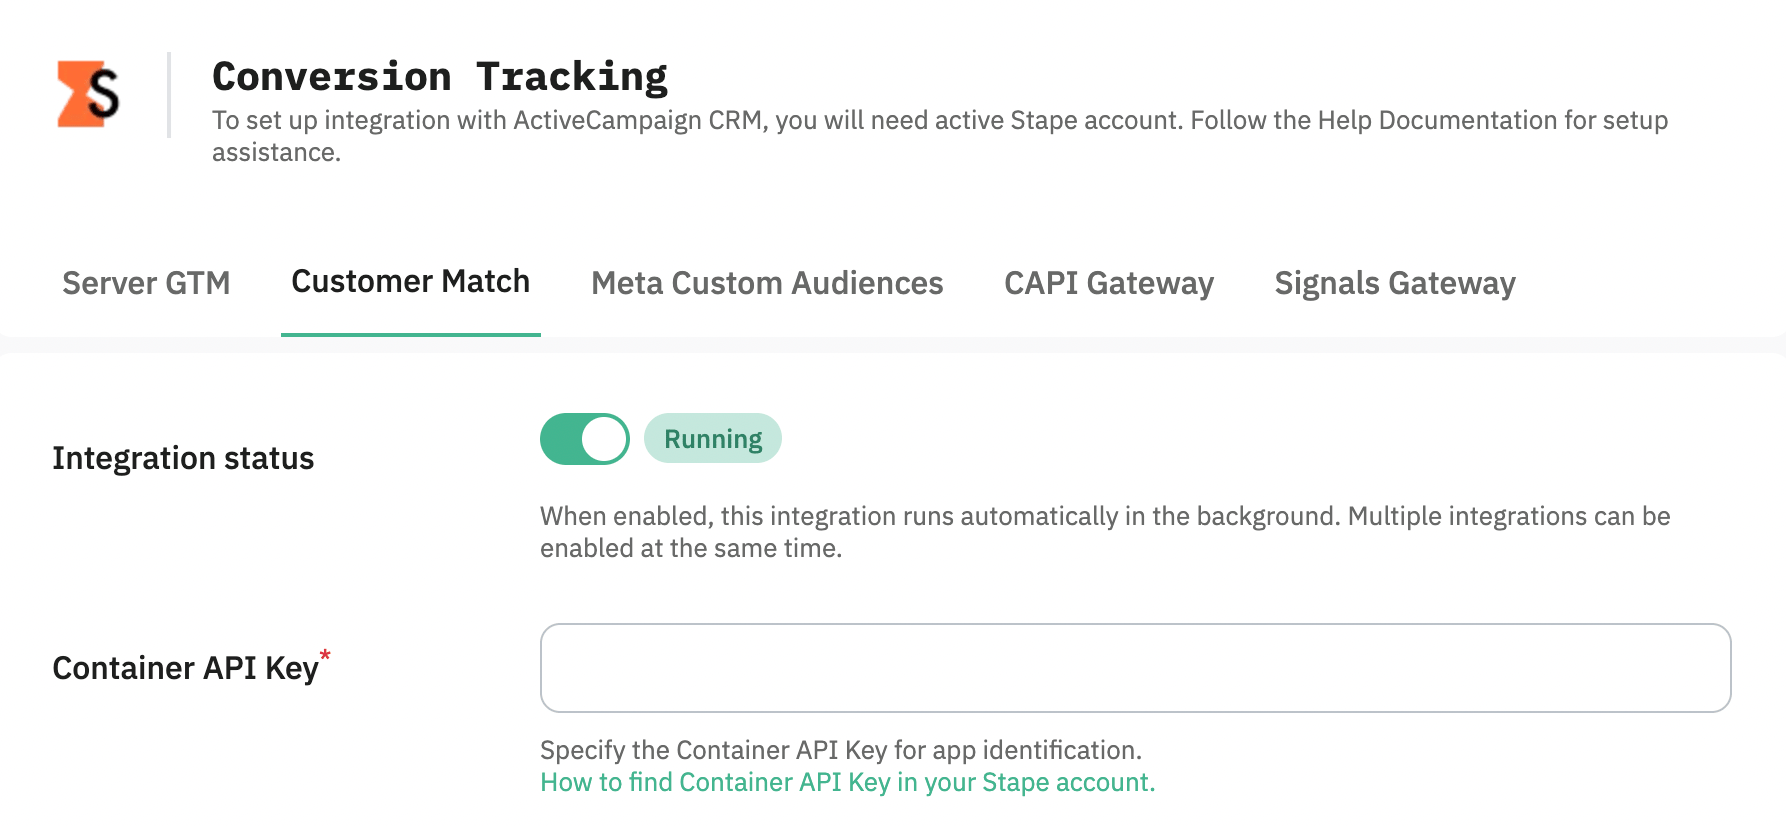
- Integration - switch the Activate toggle on to enable the current integration (tab) to run in the background.
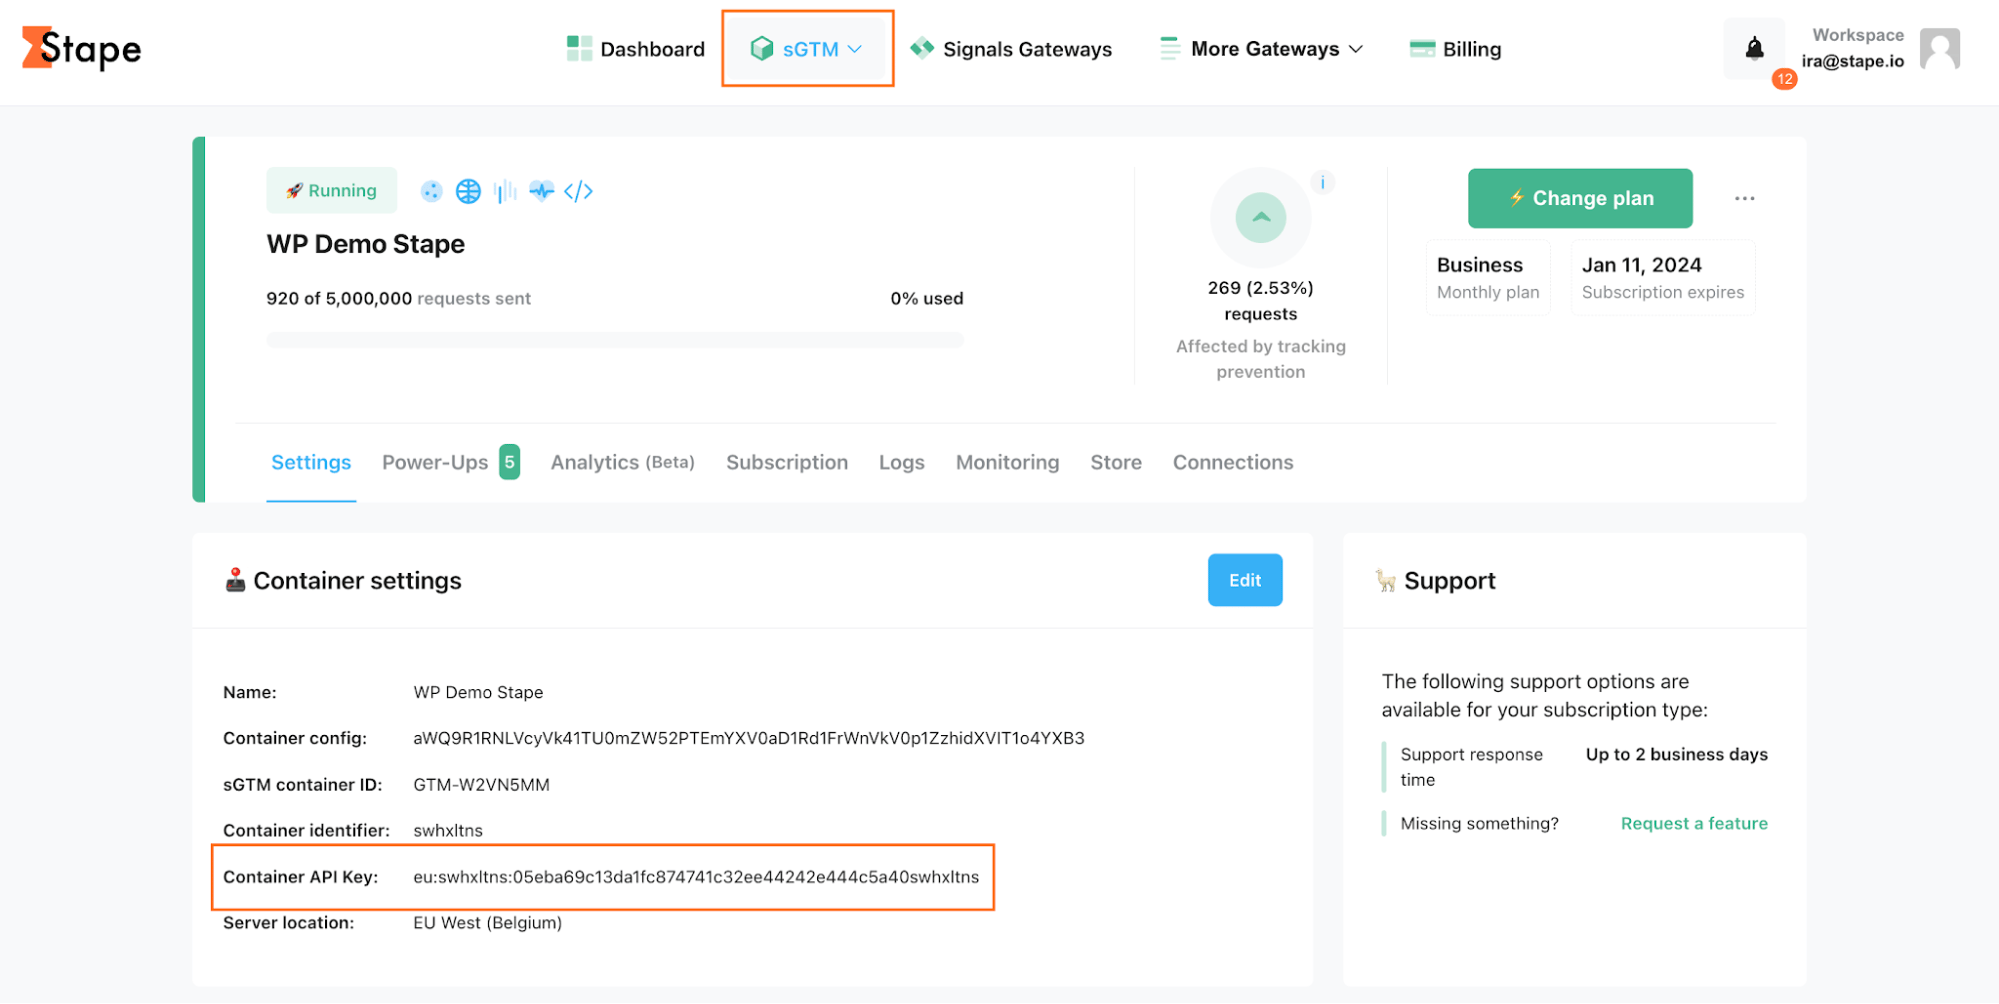
- Container API Key - a string used for app identification. Find the Container API Key in the Container settings section of your Stape account. See the detailed instructions on where to find the Container API Key.
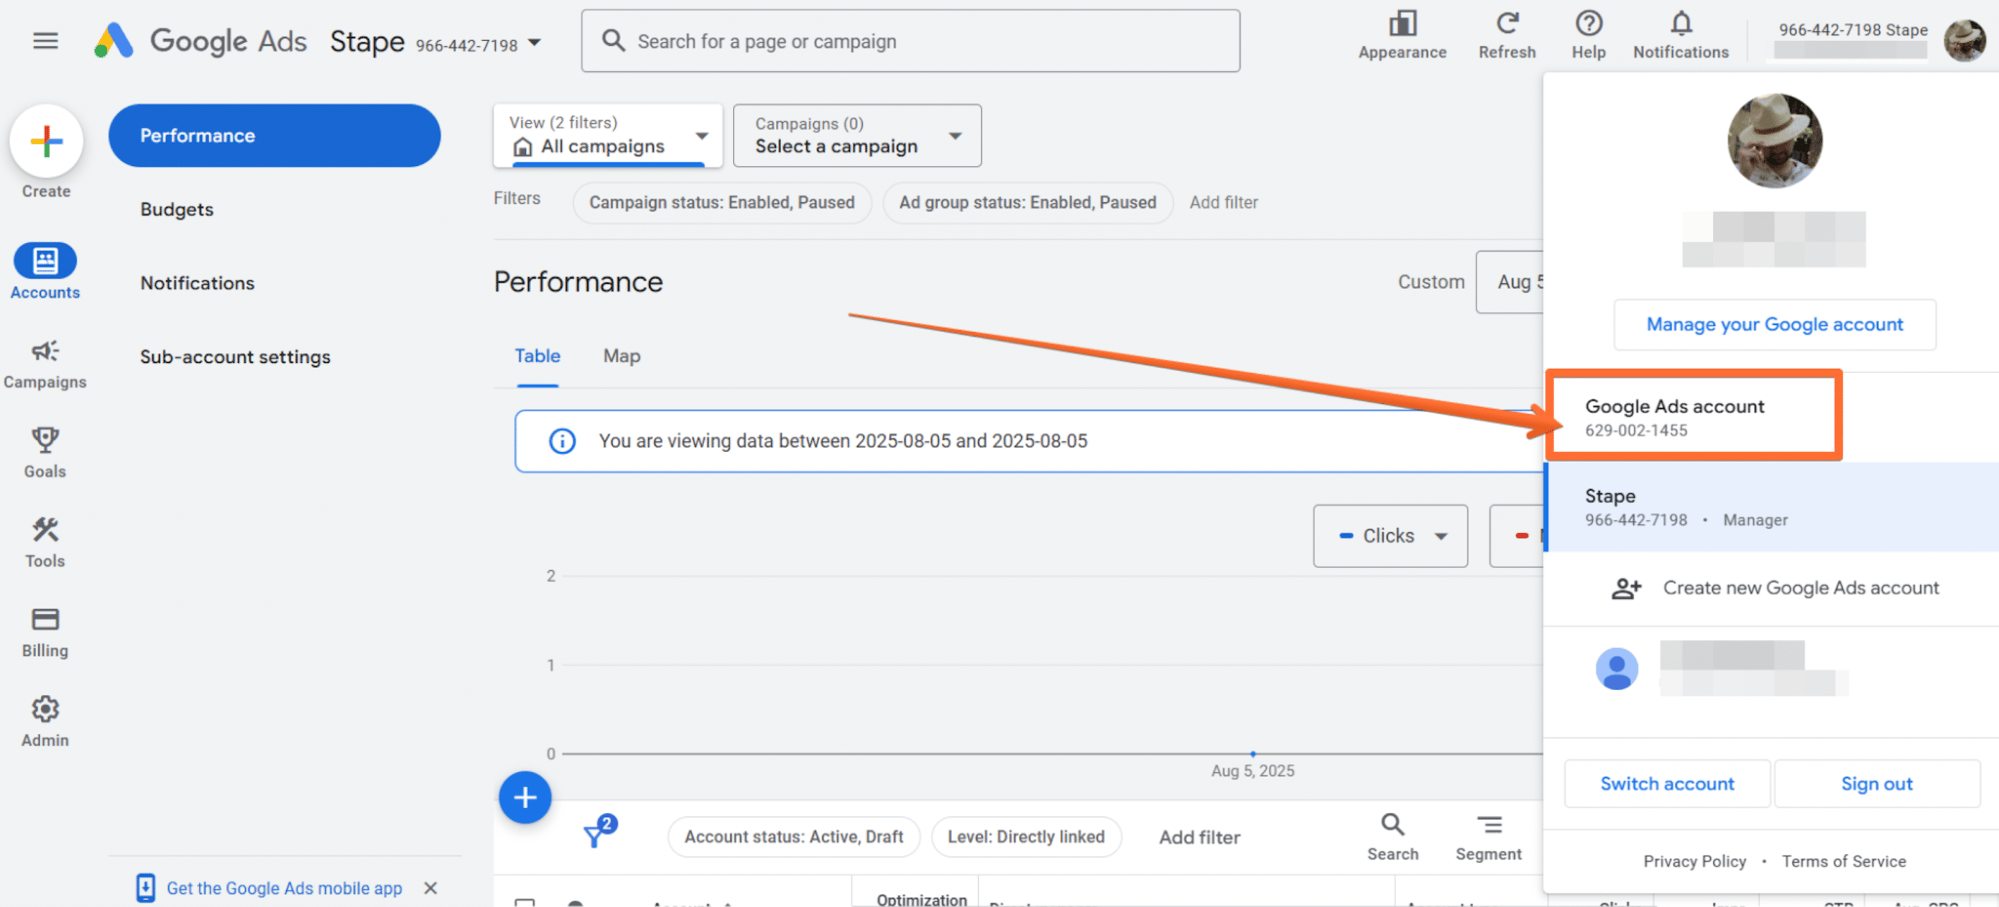
- Google Ads Operating customer ID - the ID of the Google Ads account where the Customer List will be created or updated. To get it, sign in to your Google Ads account → in the top right corner, click on your picture → copy the value.
Please make sure to remove hyphens before using the string as the Operating customer ID.
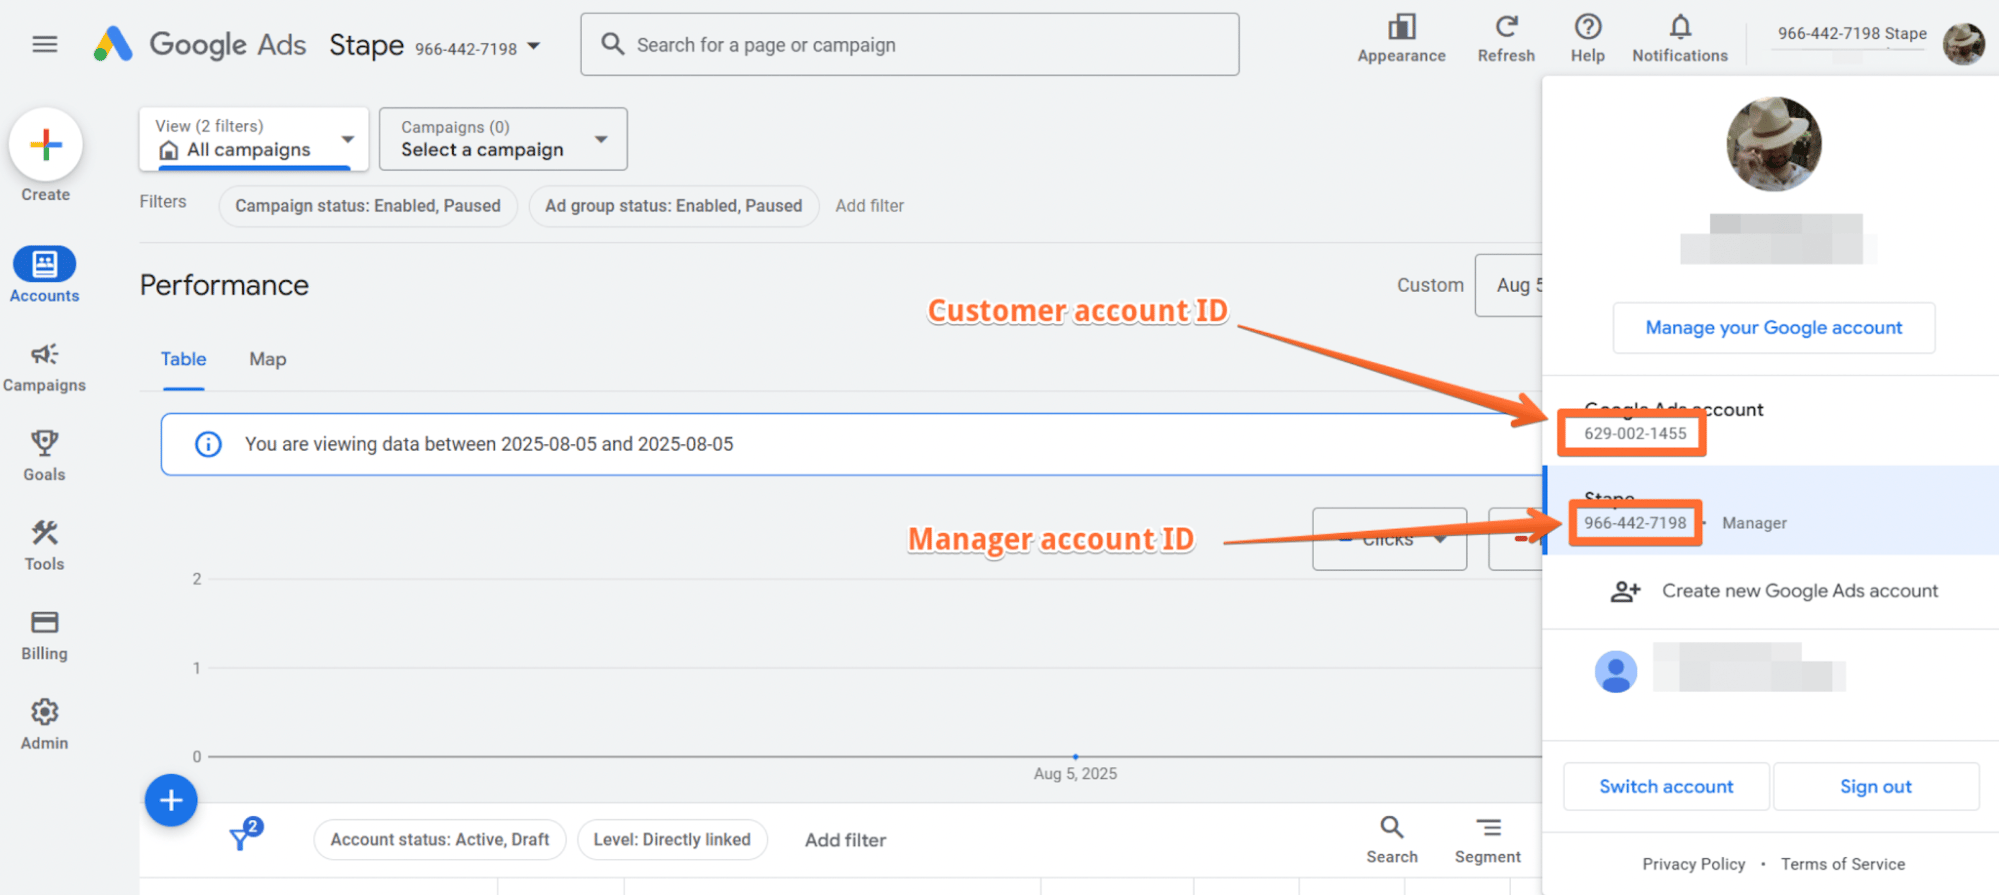
- Google Ads customer ID - stands for the ID of the account that you're using for authorization. Based on the type of account, you should copy the following values.
- If you're using your customer account, use the customer account ID.
- If you access the customer account through a manager account, use the manager account ID.
Please make sure to remove hyphens before using the string as the customer ID.
ActiveCamapaign CRM fields
Next, you need to map your CRM fields to audience member identifiers.
- User data - choose the data you want to fill the Customer List in Google Ads with, and specify user and ads data consent status from the drop-down list.
Please note: Address data will be included only if all four fields (First Name, Last Name, Region, Postal Code) have values.
- Actions & triggers - choose Action, Contact Status, and name a Customer List to be synced to. After configuring Customer Match in the Klaviyo app, a Customer List will be created in Google Ads.
Please note: stape_ is always appended, and the name of the list must always start with "stape_," e.g., stape_klaviyo_purchasers.
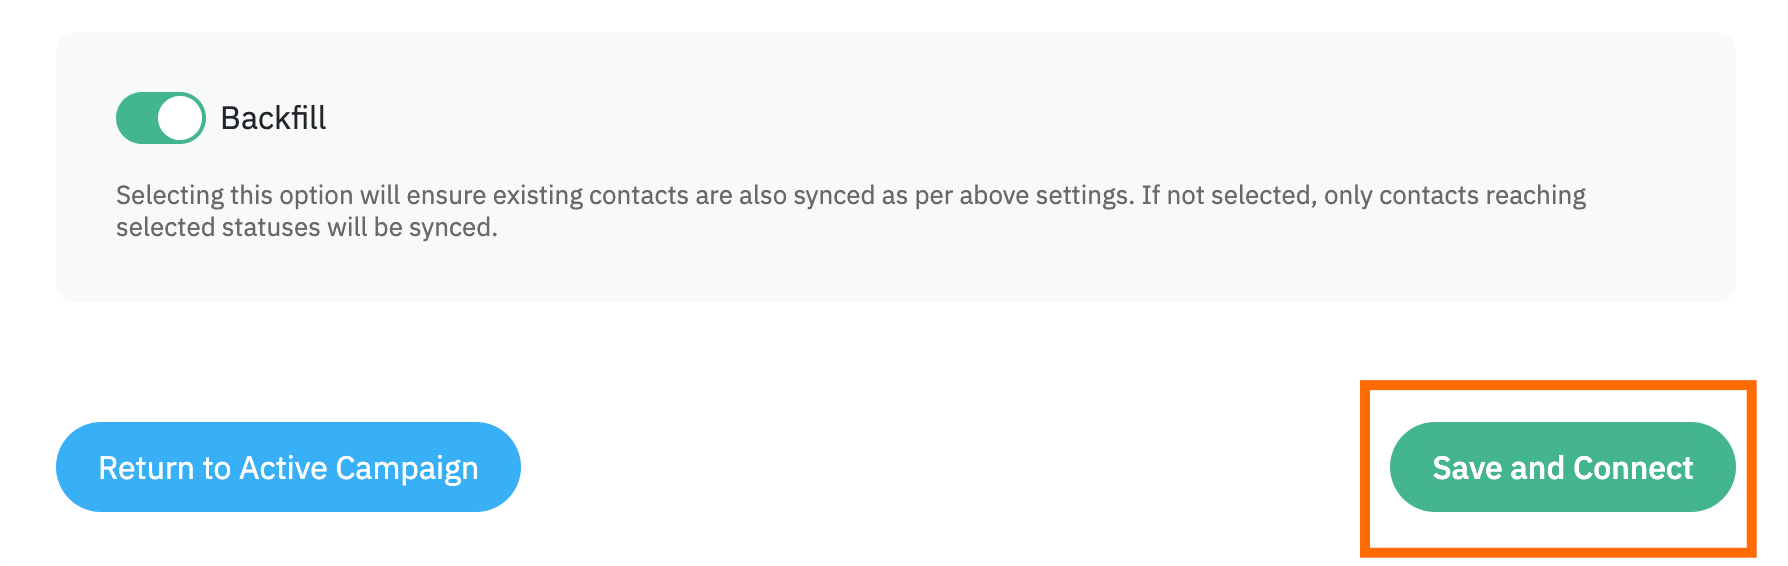
- Backfill - if you check this box, the app will sync existing Deals using the settings in the app above. When the unchecked box is selected, it will sync only new Deals that reach the configured statuses. Unchecking later doesn’t remove Deals already synced.
Once done, click Save and Connect. Once you see a success message, your installation is complete, and the application will send conversion events in the background based on your settings.
Meta Custom Audiences
If you are using Meta Custom Audiences as a configuration method for the Stape Conversions Tracking ActiveCampaign CRM app, once configured, you will send data on users who have already interacted with your website to Meta. The platform will use the data to target users based on their specific stage in the customer journey.
Before you start
1. Make sure you have an active Stape account with a server GTM container hosted on Stape.
If you don't have an account on Stape, please create one or log in if you already have one. In the main menu, click sGTM → Create container on the top right.
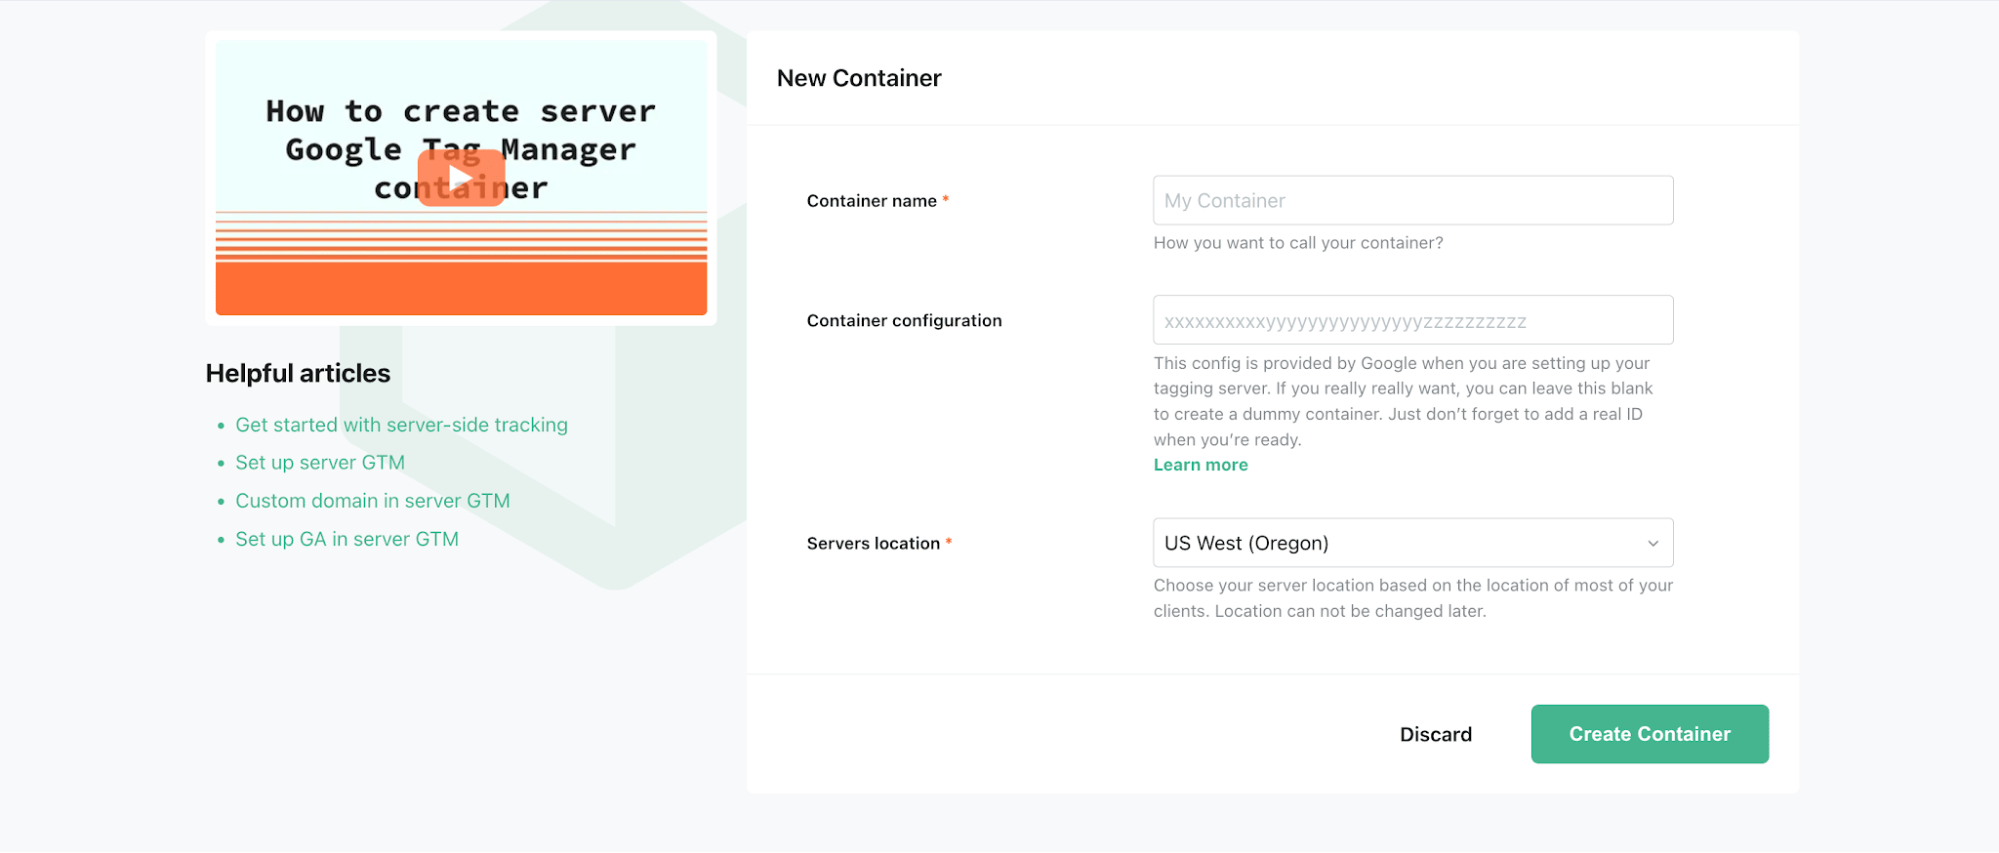
Add your container name, the Container configuration that you copied from your Google Tag Manager Server Container, and select the server location. Click Create Container.
For more detailed instructions, check Stape's article on how to set up a Google Tag Manager server container.
2. Create a custom audience in Meta.
We show how to do it in detail in our guide on Meta Custom Audiences in step 1.
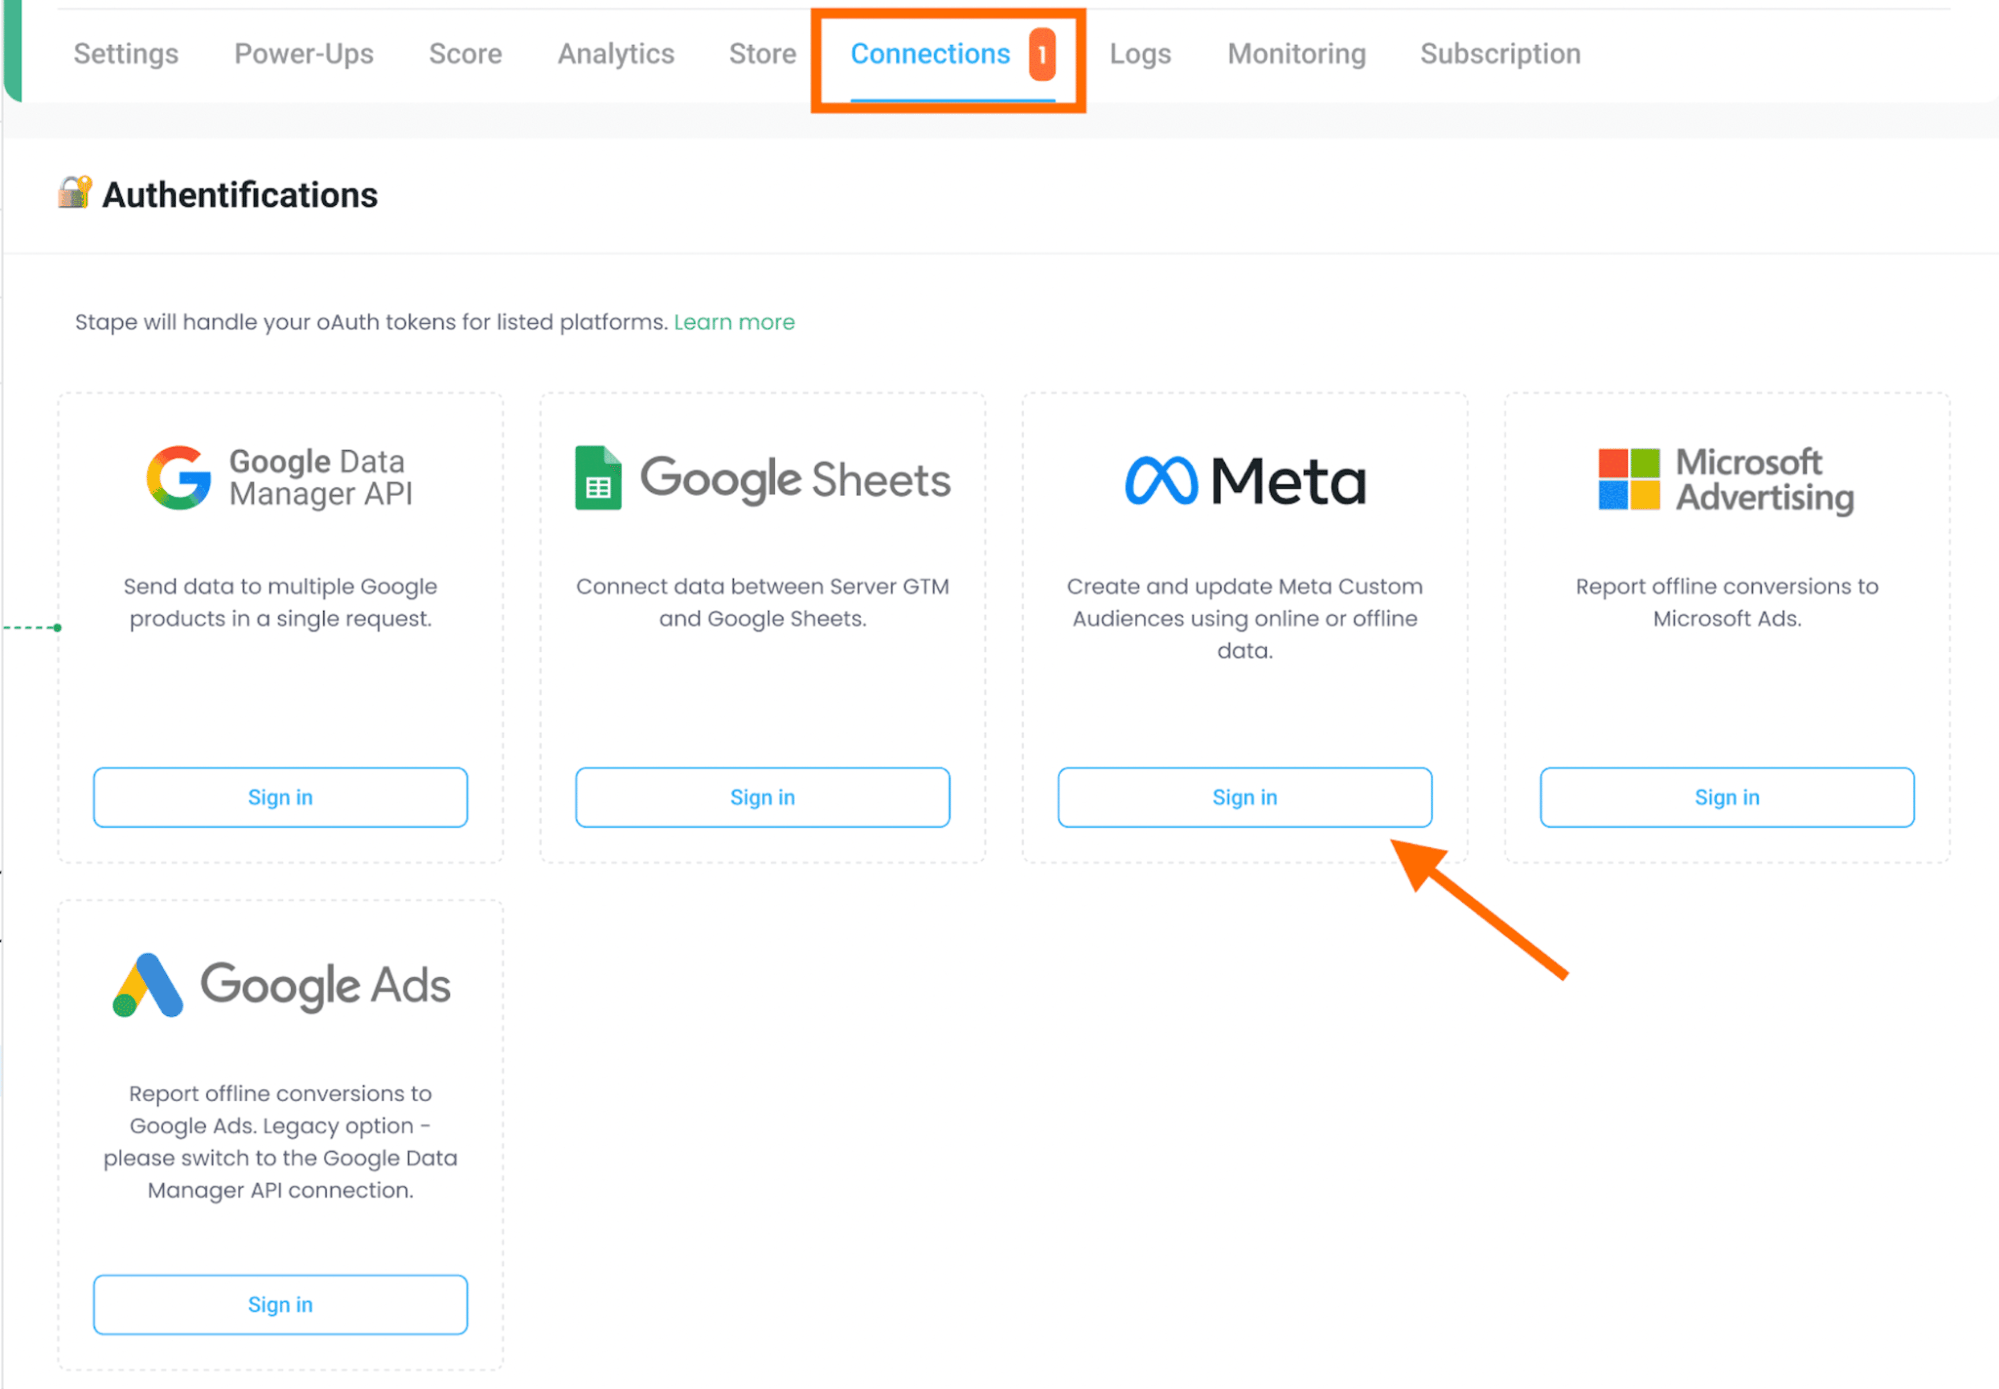
3. Enable the Meta Connection in your Stape admin account.
Open the required container, go to the Connections tab, and click Sign in next to Meta. Use an account that has access to the Meta Ads where you need to update the custom audience.
App setup
The setup process can be divided into two parts:
- Stape account data
- ActiveCampaign CRM fields
Stape account data
You will need to fill in the following fields:
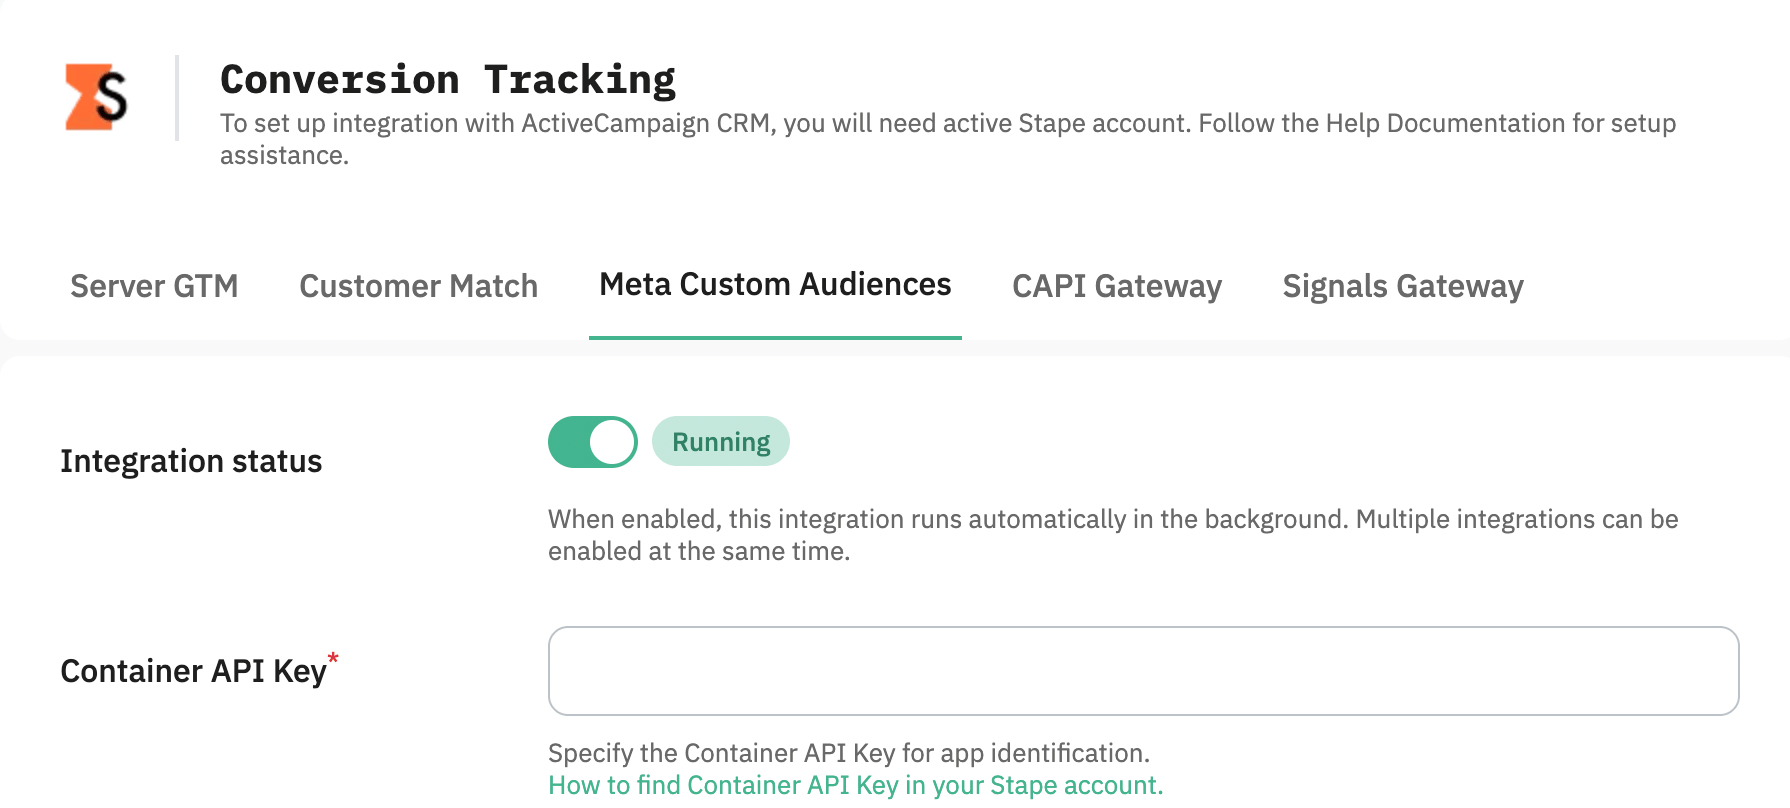
- Integration - switch the Activate toggle on to enable the current integration (tab) to run in the background.
- Container API Key - a string used for app identification. Find Container API Key in the Container settings section of your Stape account. See the detailed instructions on where to find the Container API Key.
ActiveCampaign CRM fields
Next, you need to map your CRM fields to audience member identifiers.
- User data - choose the data you want to fill the Custom Audience in Meta with, and specify user and ads data consent status from the drop-down list.
- Triggers & actions - choose Action, Profile Status, and Audience ID to be synced to (the custom audience you’ve created in Meta).
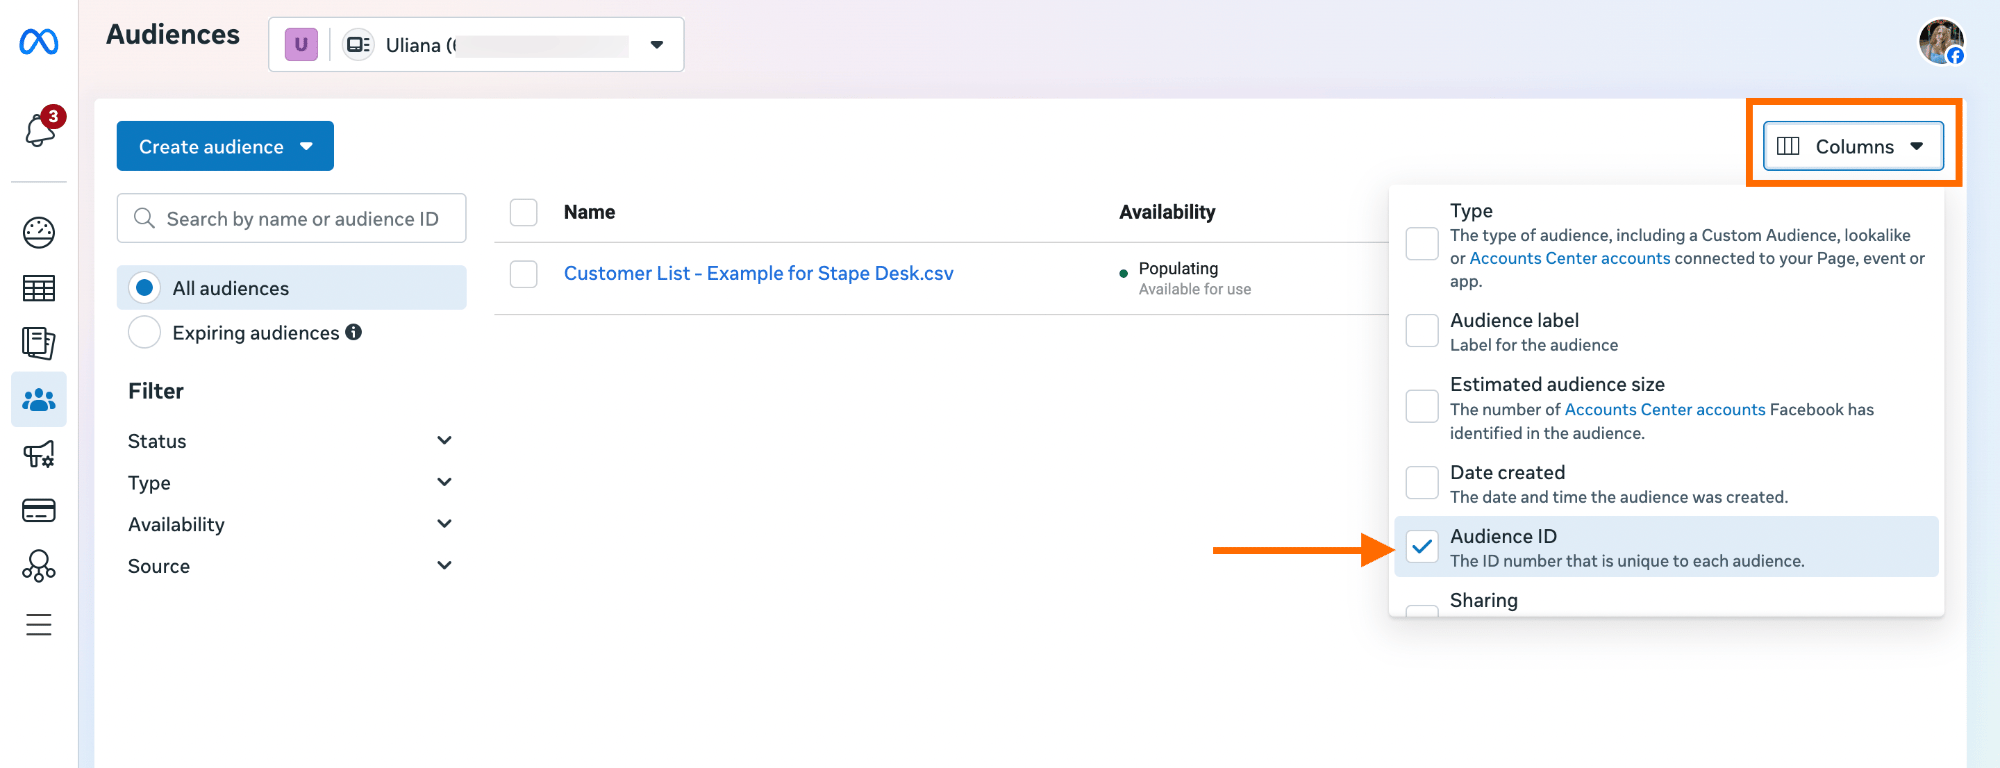
To find Audience ID - go to the Audiences section in Meta Ads, click Columns, enable Audience ID, then copy the ID of the required custom audience once the column appears.
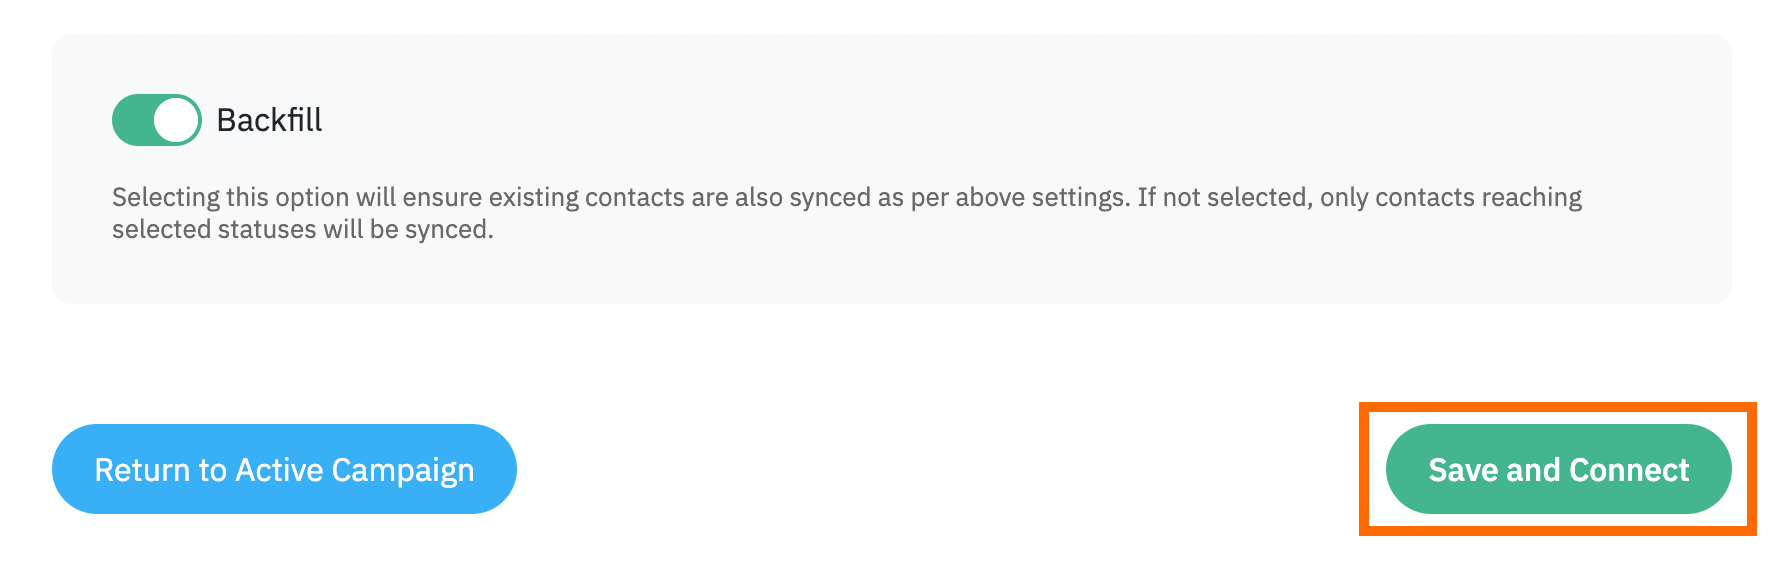
- Backfill - if you check this box, the app will sync existing Deals using the settings in the app above. When the unchecked box is selected, it will sync only new Deals that reach the configured statuses. Unchecking later doesn't remove Deals already synced.
Once done, click Save and Connect. Once you see a success message, your installation is complete, and the application will sync audience members to your Meta custom audience in the background based on your settings.
CAPI Gateway
Before you start
Make sure you have an active Stape account with Meta Conversions API Gateway.
Log in to your Stape account → in the main menu, click More Gateways → Meta CAPIG → Create CAPIG in the top right.
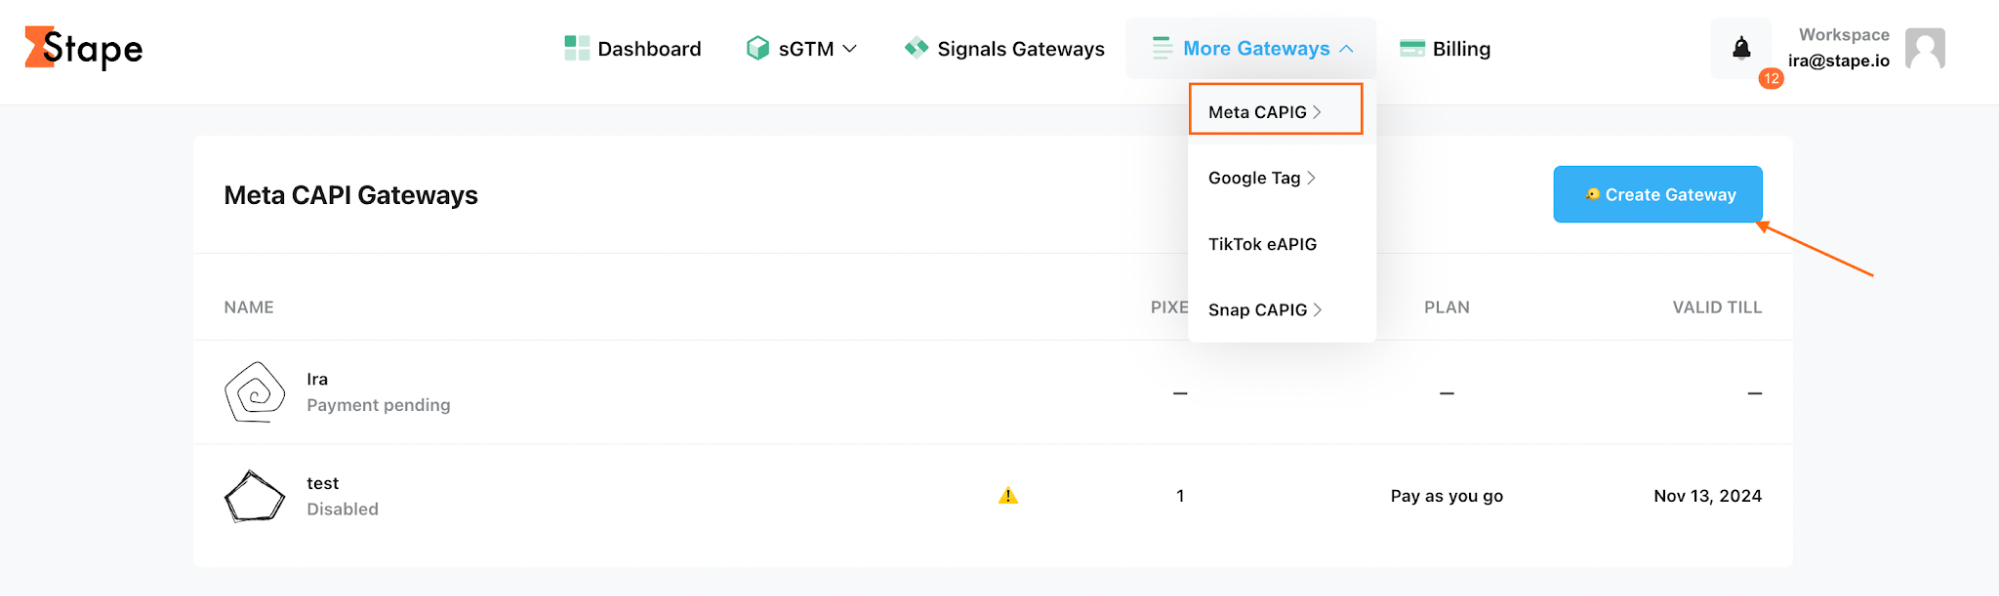
Add name, email, and server location for new CAPIG. Then, choose the subscription plan and add billing details.
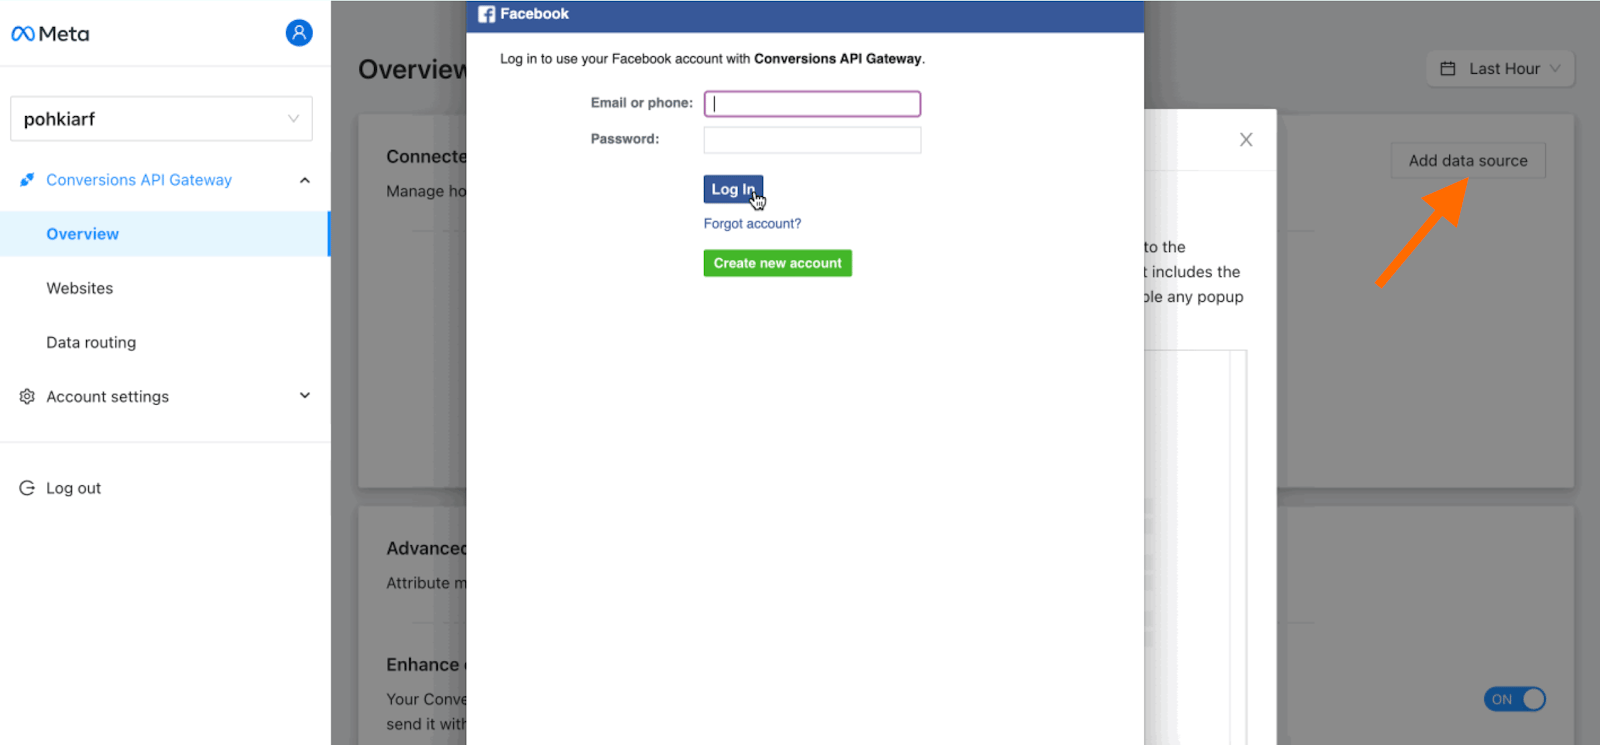
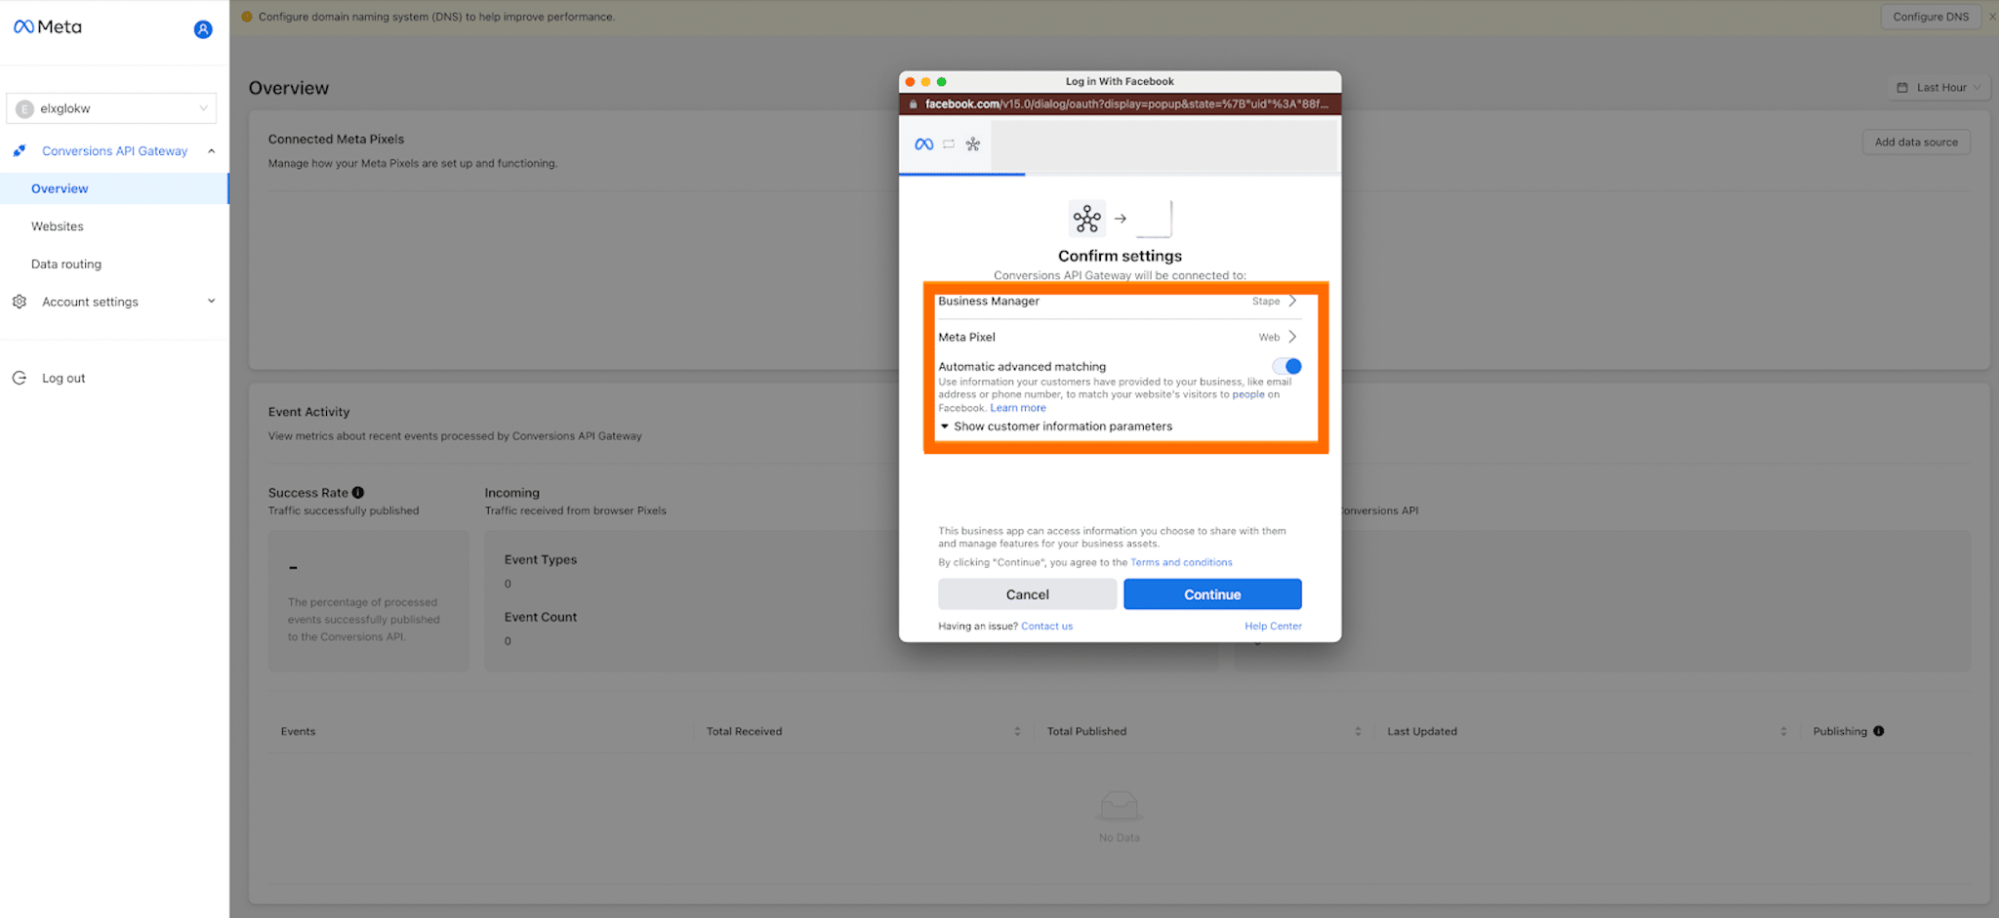
After creating Meta Conversions API Gateway in your Stape account, connect your Meta Dataset (Pixel) - just click Add data source → authorize in Meta → select the Business Manager and Dataset (Pixel) you want to connect.
To increase the events match quality, please enable Automatic advanced matching.
For more detailed instructions, check Stape's article on how to set up Meta Conversions API Gateway.
App setup
The setup process can be divided into two parts:
- Meta and Stape accounts data
- ActiveCampaign CRM fields
Meta and Stape accounts data
You will need to fill in the following fields:
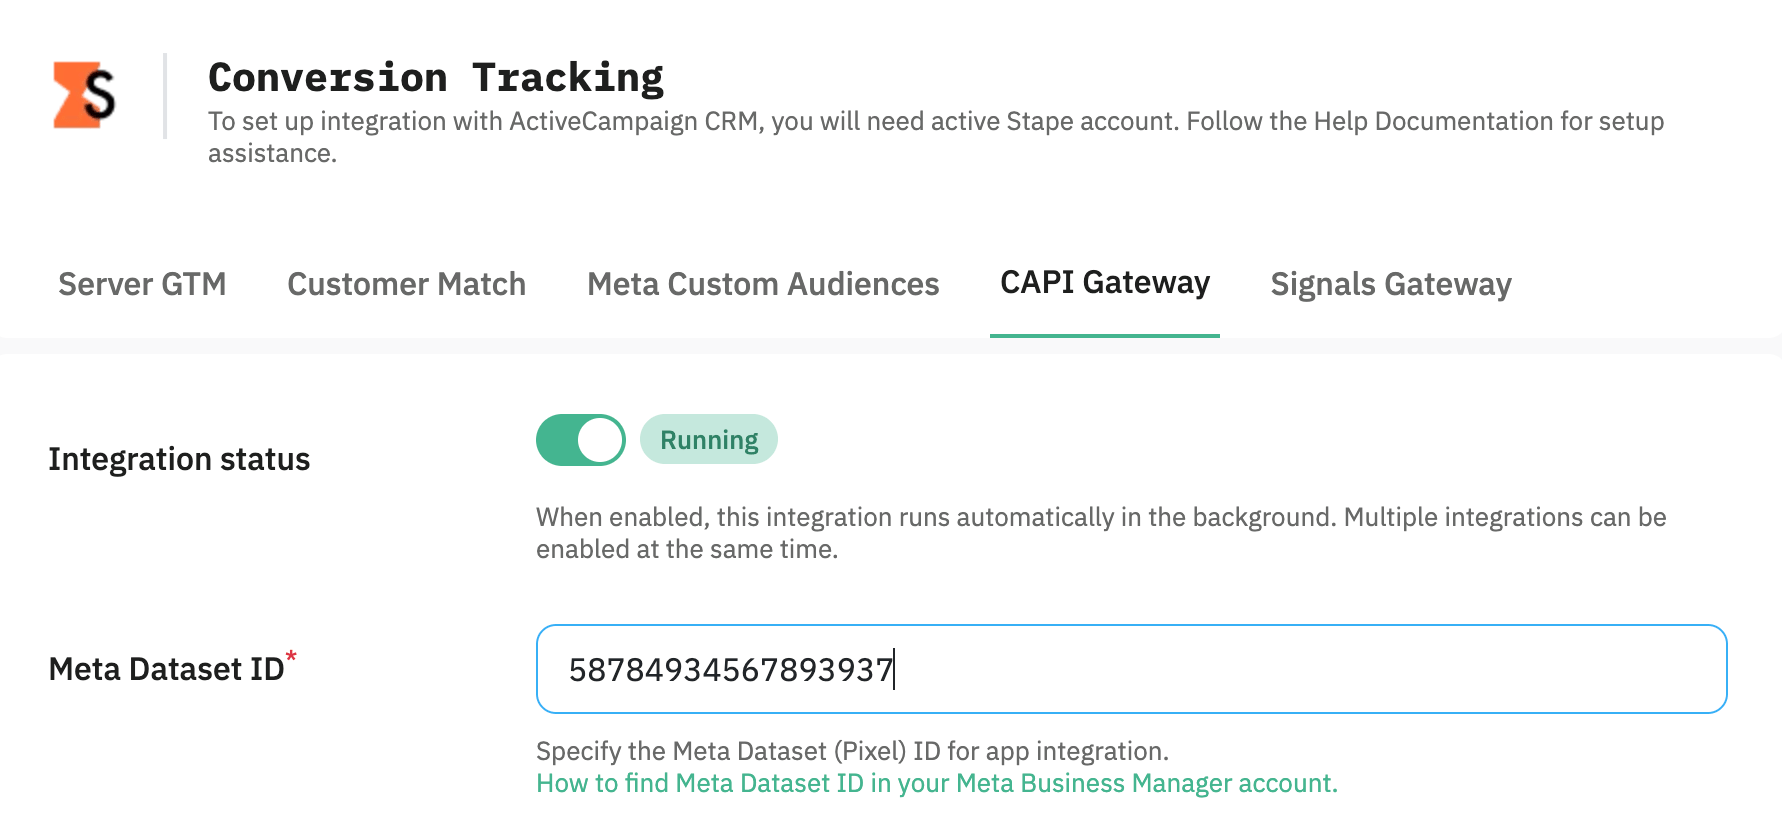
- Integration - switch the Activate toggle on to enable the current integration (tab) to run in the background.
- Meta Dataset (Pixel) ID - a unique identifier that is used to configure integrations and view events in Events Manager. You can find it in your Meta account in the Data Sources' Settings tab. See the detailed instructions on how to find the Meta Dataset (Pixel) ID.
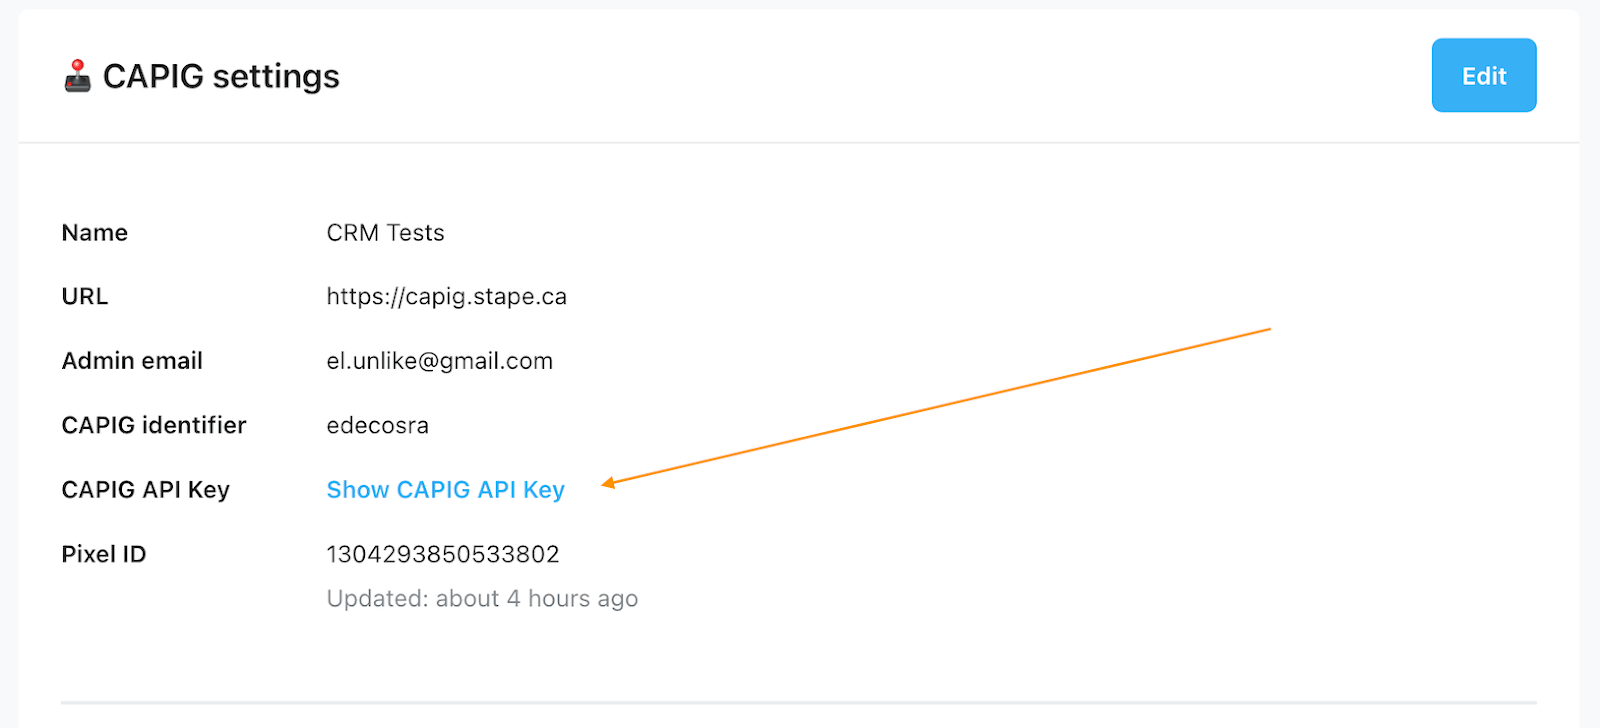
- CAPIG API Key - an alphanumeric string value that is needed for app identification. Find the CAPIG API Key in the CAPIG settings section of your Stape account. See the detailed instructions on where to find the CAPIG API Key.
ActiveCampaign CRM fields
Next, you need to map your CRM fields to conversion event parameters.
- (Optional) Pick a field where Meta Lead ID is stored.
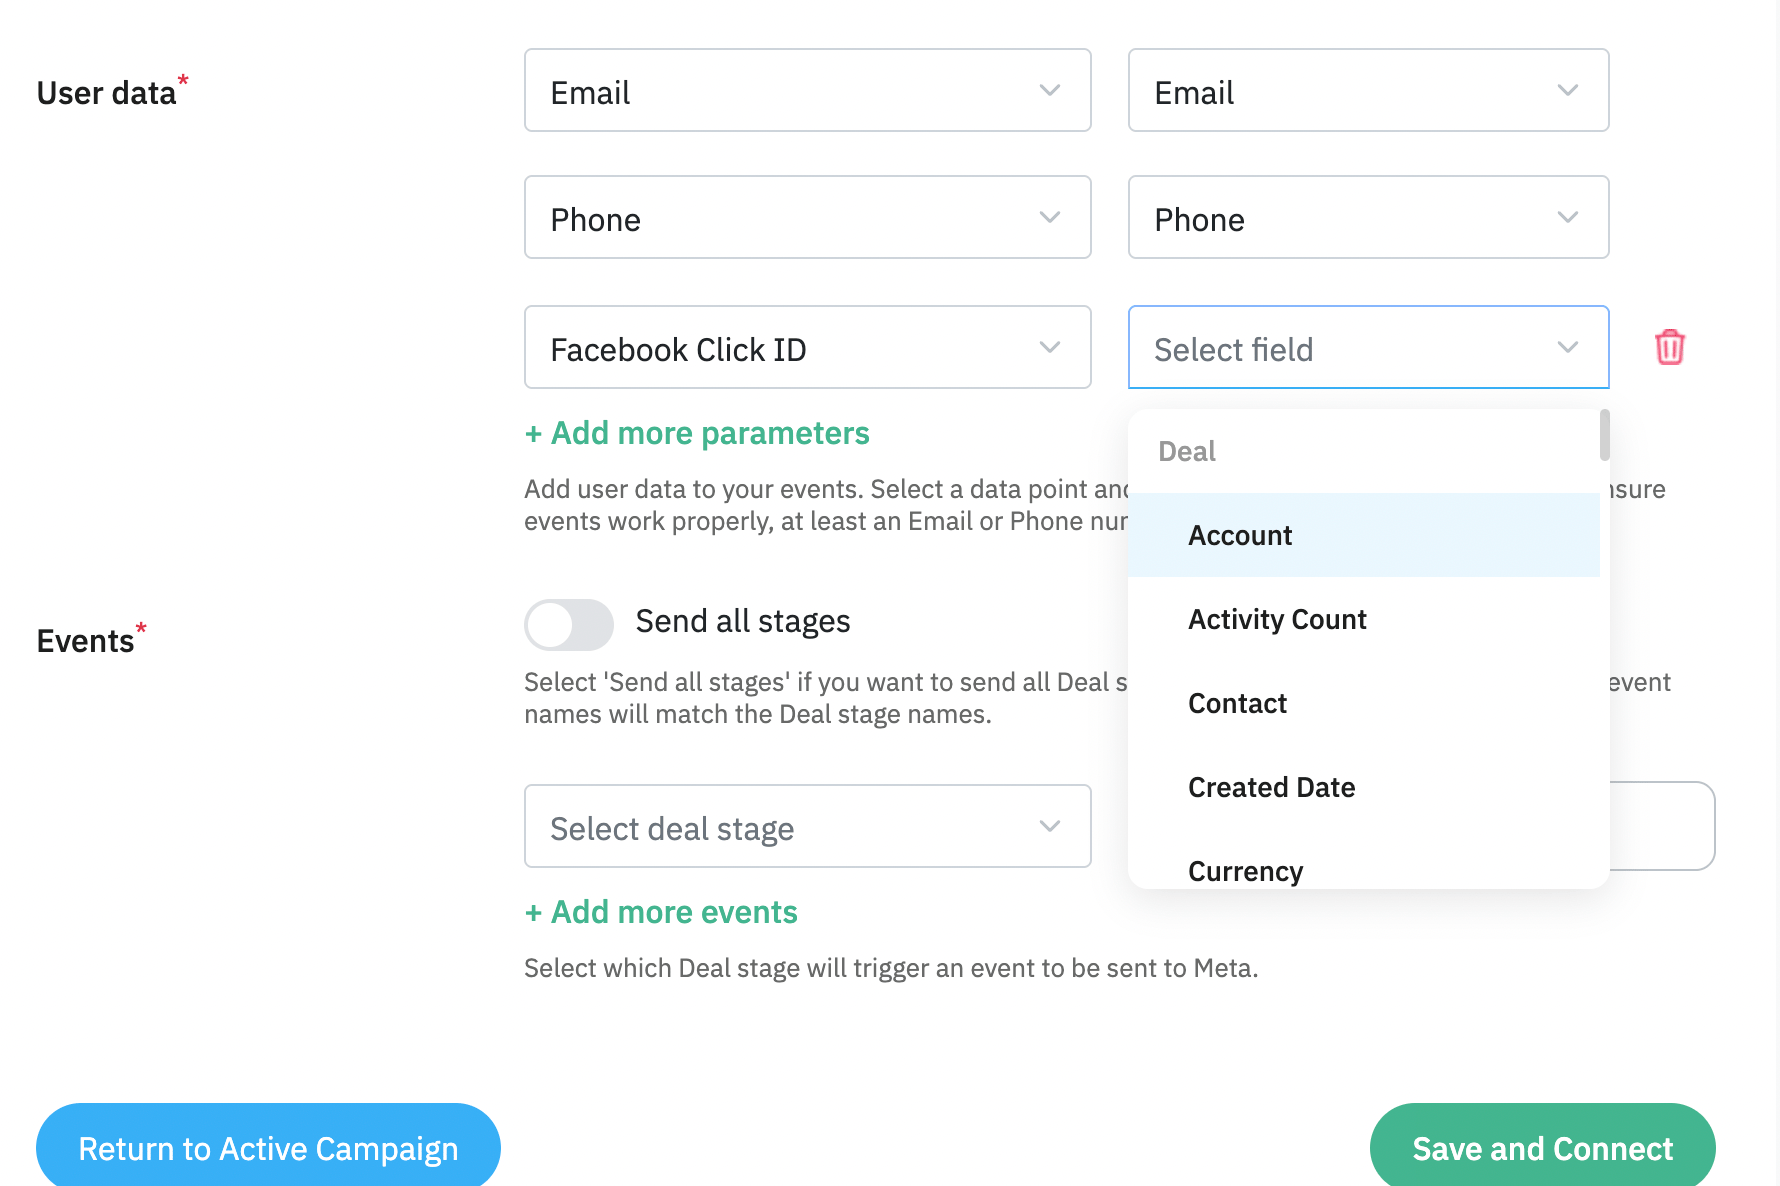
- Configure additional User data you'd like to send to Meta by choosing a parameter in the left dropdown and selecting an appropriate field in the right-side one.
- Application sends conversion Events based on the statuses of your Deals; whenever a deal reaches a status you define, a corresponding event will be sent towards your Meta Dataset (Facebook Pixel). So we need to configure it by choosing one of two approaches:
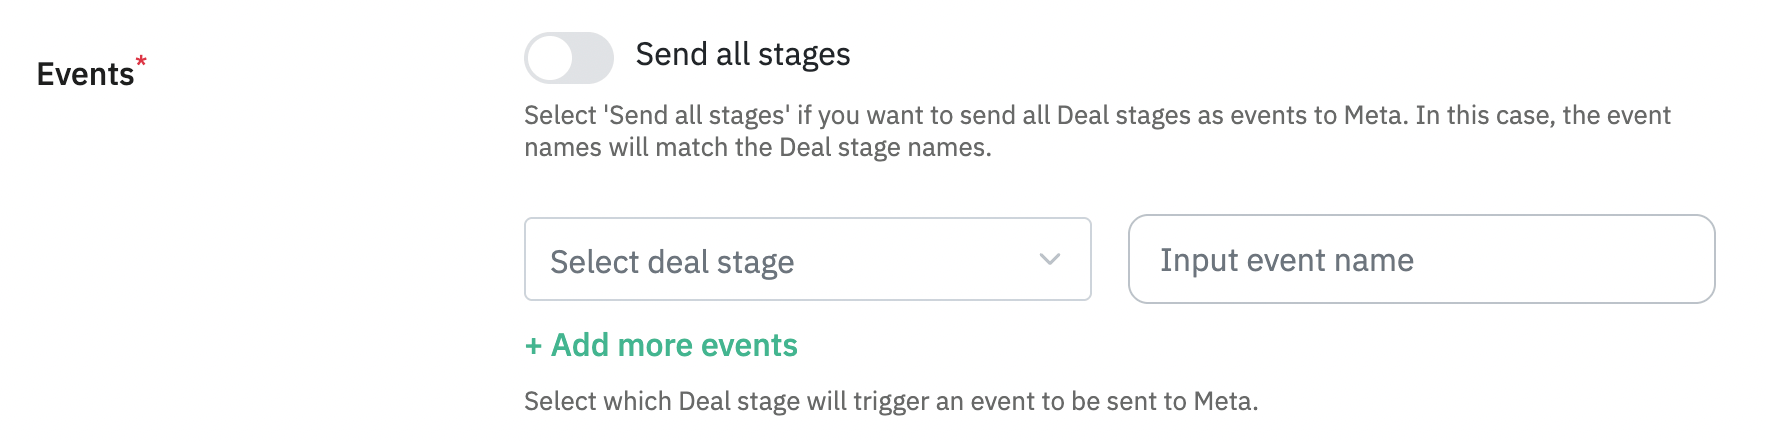
- In the left-side dropdown, select a Contact stage to trigger an event; in a box to the right, type the event name you'd like to send to Meta.
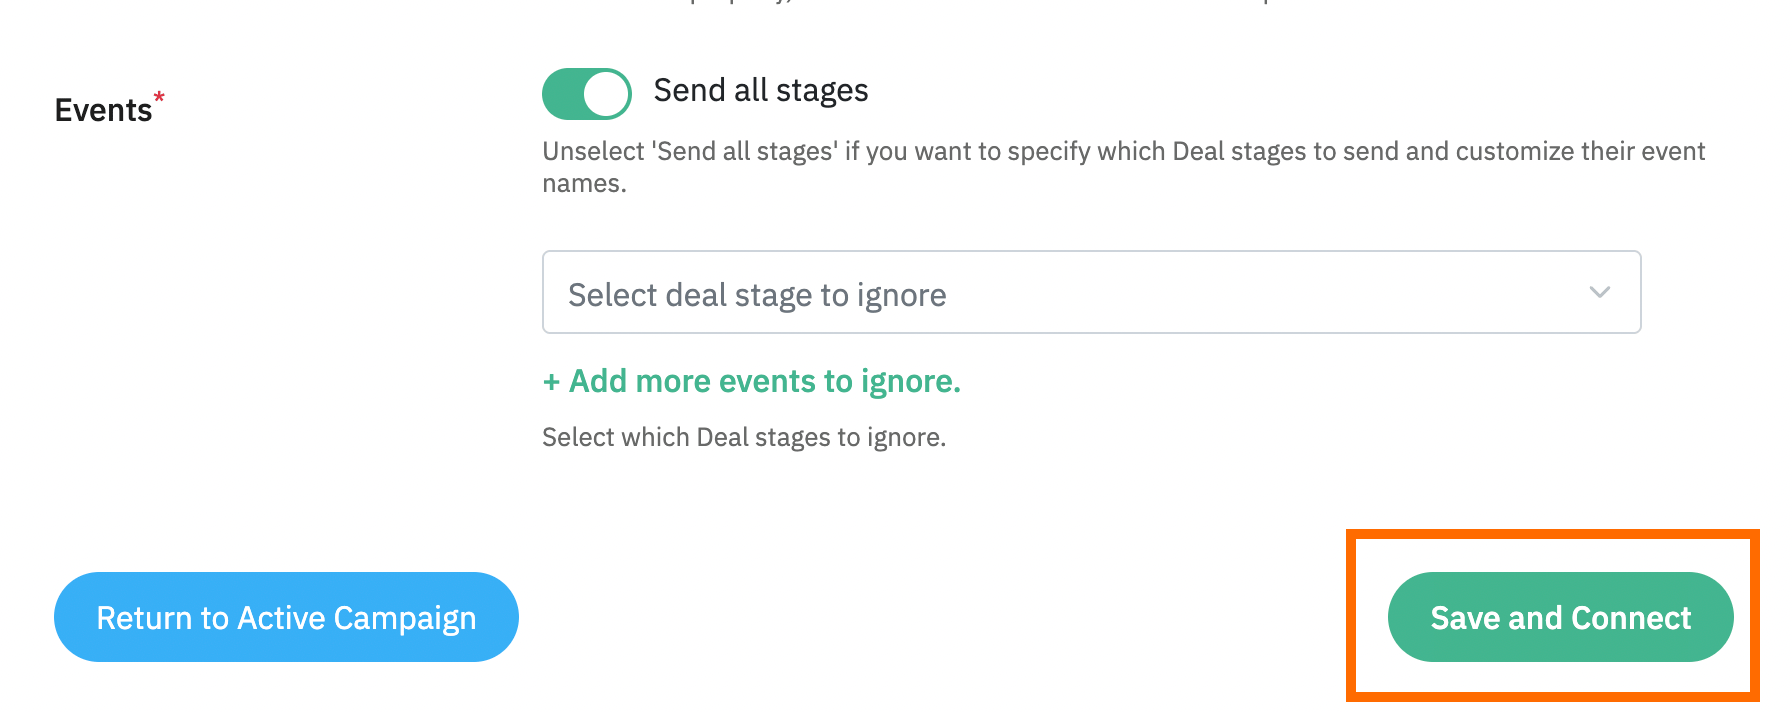
- Toggle the Send all statuses switch if you want to send all Contact stages as events to Meta. Events are then named automatically and consist of a Contact status name. You can also select stages to ignore in this case.
Once done, click Save and Connect. Once you see a success message, your installation is complete, and the application will send conversion events in the background based on your settings.
Signals Gateway
Before you start
Make sure you have an active Stape account with Signals Gateway.
Log in to your Stape account → in the main menu, click Signals Gateway → Create Signals Gateway in the top right.

Add a name, email, and server location for the new Signals Gateway. Then, choose the subscription plan.
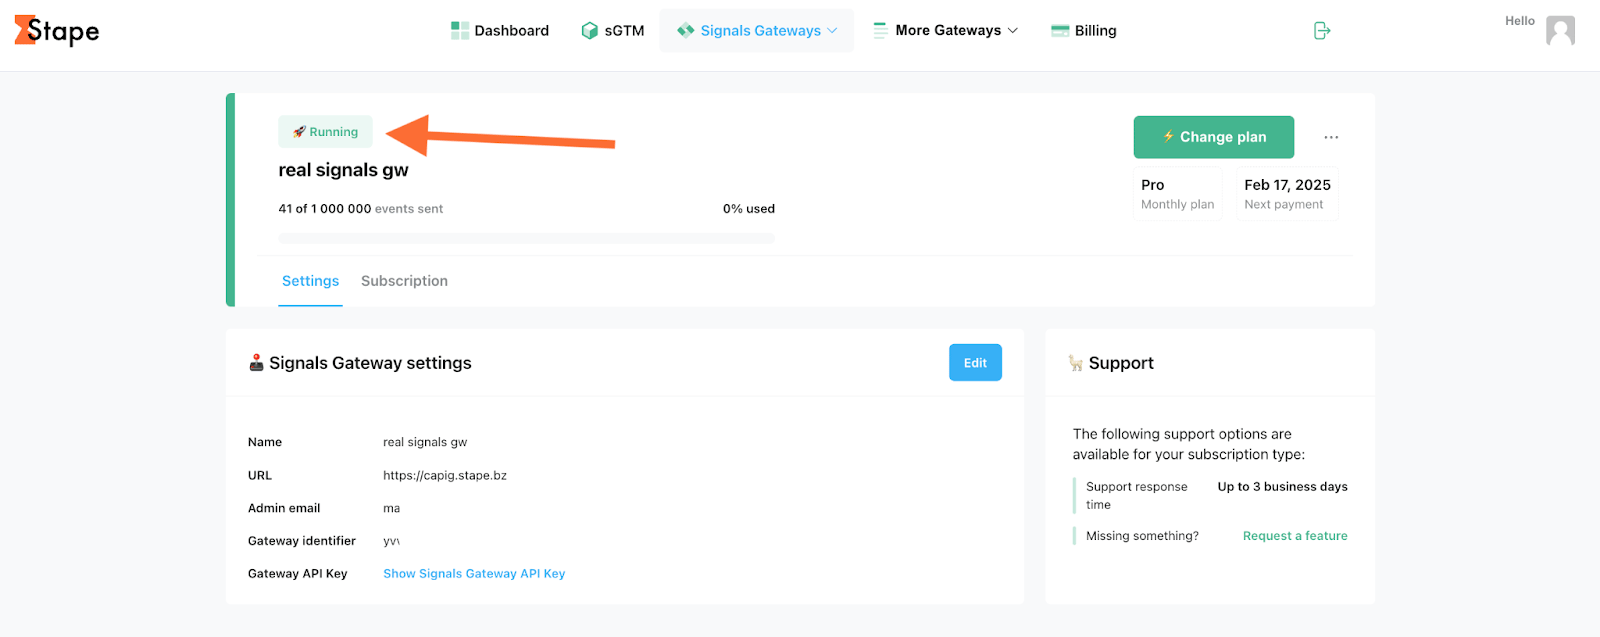
For more detailed instructions, check Stape's article on how to configure Signals Gateway.
App setup
The setup process can be divided into two parts:
- Signals and Stape accounts data
- ActiveCampaign CRM fields
Signals and Stape accounts data
You will need to fill in the following fields:
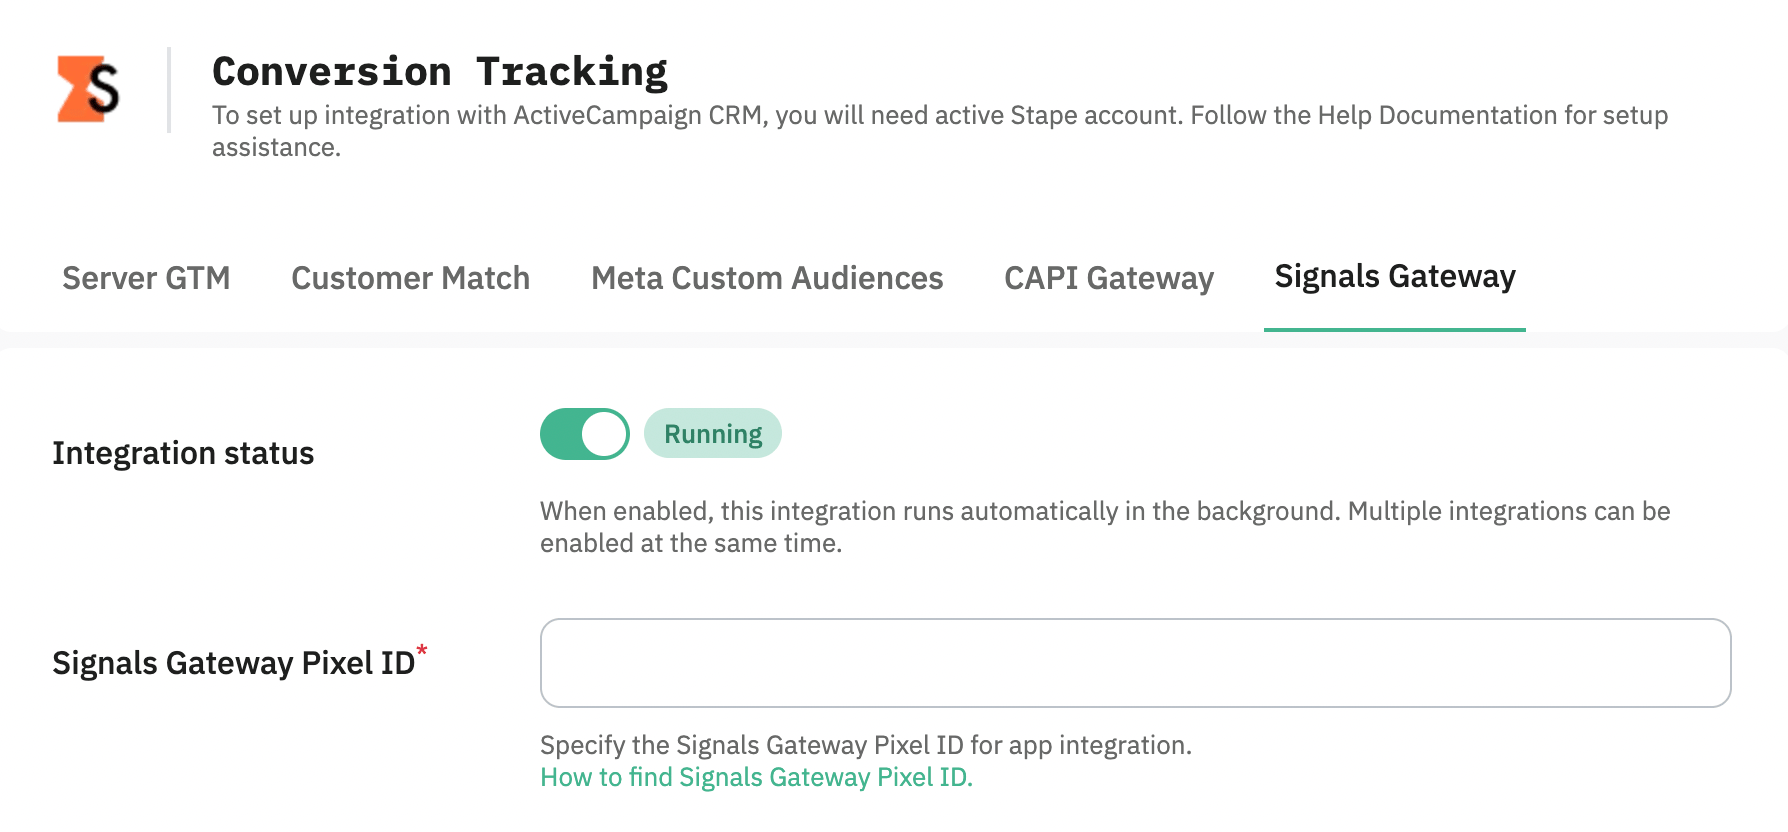
- Integration status - turn on the Activate toggle to allow the current integration (tab) to run in the background.
- Signals Gateway Pixel - a unique identifier that is used to configure integrations and view events in Signals Gateway. You can find it in your Signals Gateway account in the Data Sources tab. See the detailed instructions on how to find the Signals Gateway Pixel ID.
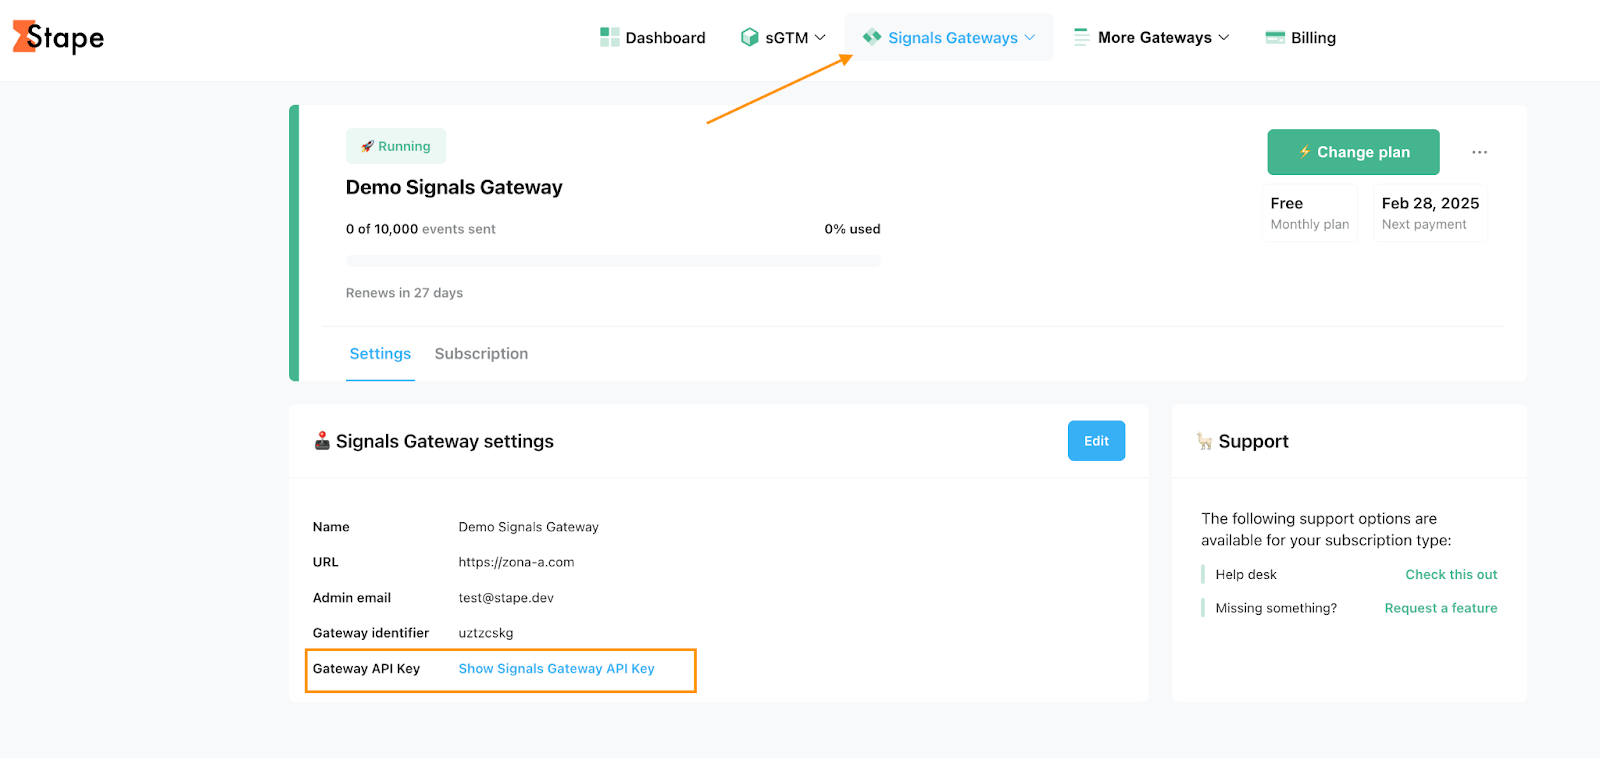
- Signals Gateway API Key - an alphanumeric string value that is needed for app identification. Find Signals Gateway API Key in the Gateway settings section of your Stape account. See the detailed instructions on where to find the Signals Gateway API Key.
ActiveCampaign CRM fields
Next, you need to map your CRM fields to conversion event parameters.
- (Optional) Pick a field where Meta Lead ID is stored.
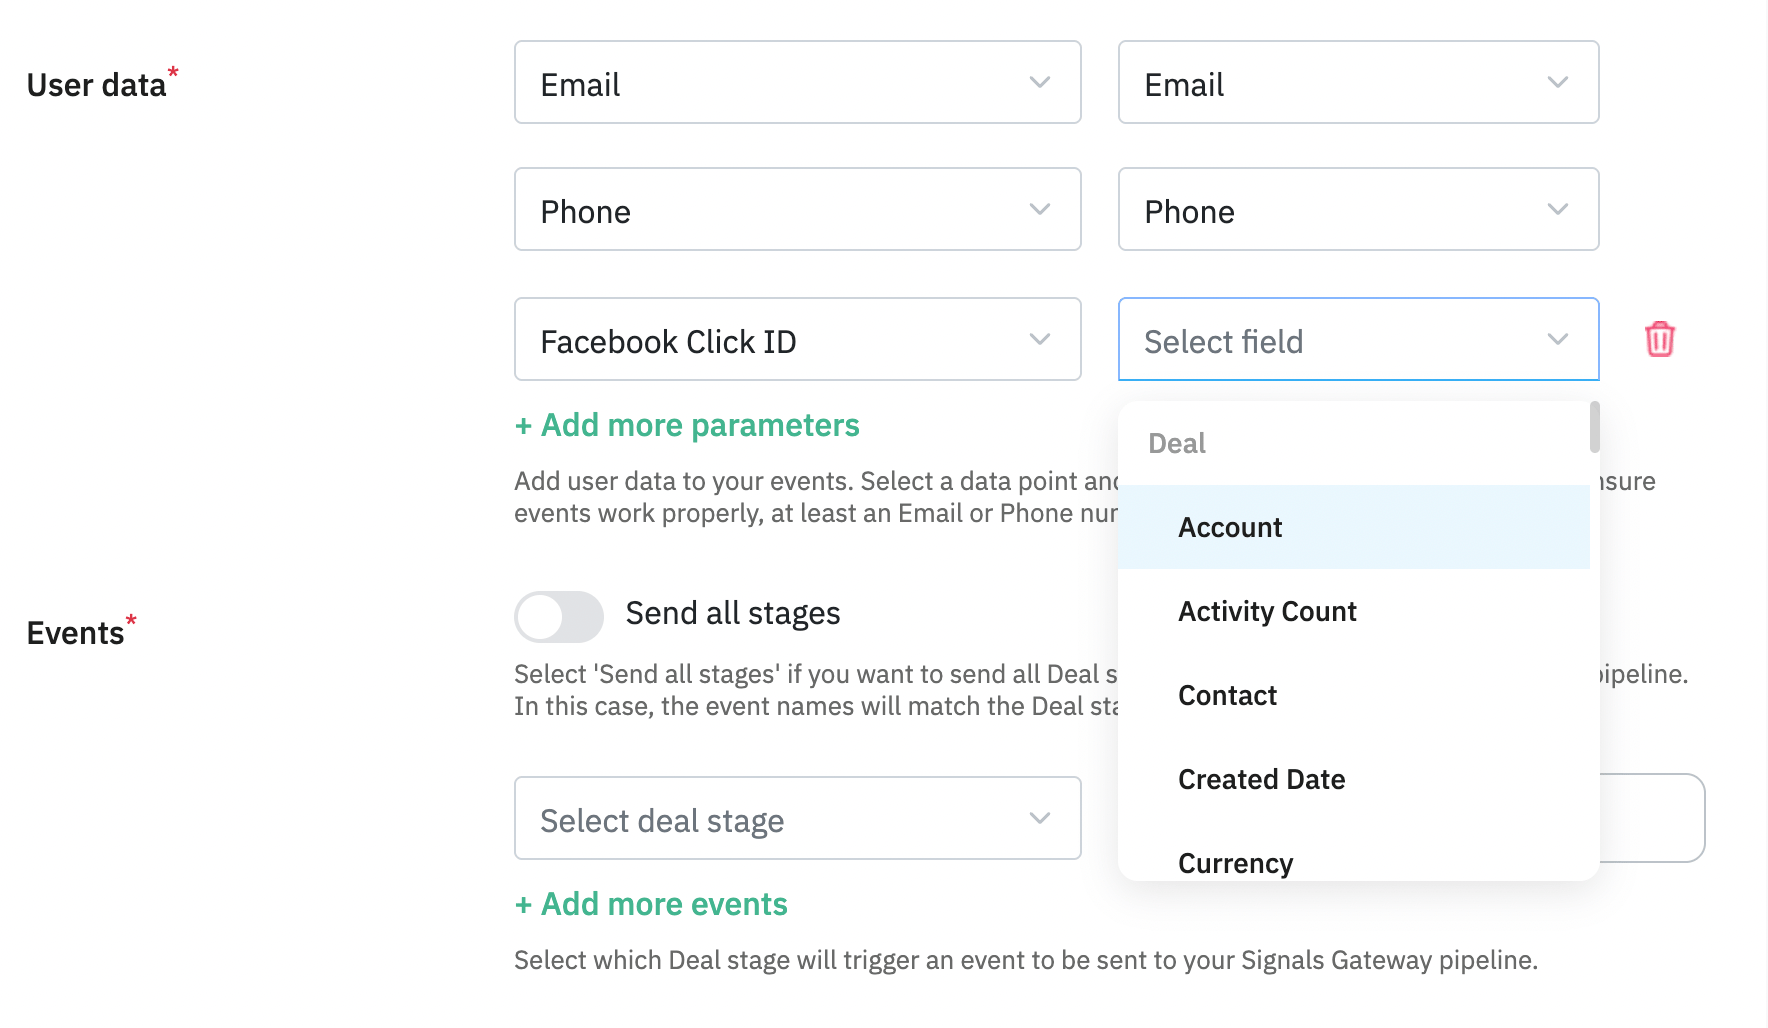
- Configure additional User data you'd like to send to Signals Gateway by choosing a parameter in the left dropdown and selecting an appropriate field in the right-side one.
- Application sends conversion Events based on statuses of your Deals; whenever a deal reaches a status you define, a corresponding event will be sent towards your Signals Gateway Pixel. So we need to configure it by choosing one of two approaches:
- In the left-side dropdown, select a Contact stage to trigger an event; in a box to the right, type the event name you'd like to send to the Signals Gateway pipeline.
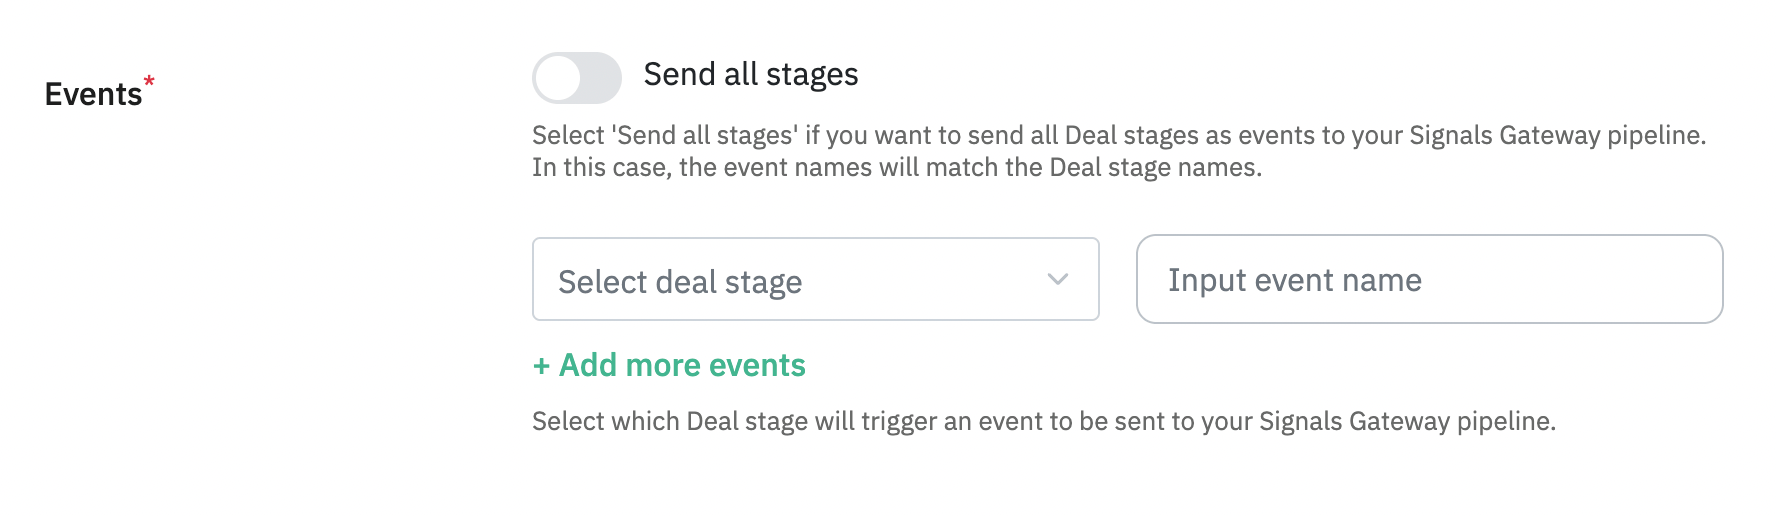
- Toggle the Send all statuses switch if you want to send all Contact stages as events to the Signals Gateway pipeline. Events are then named automatically and consist of a Contact status name. You can also select stages to ignore in this case.
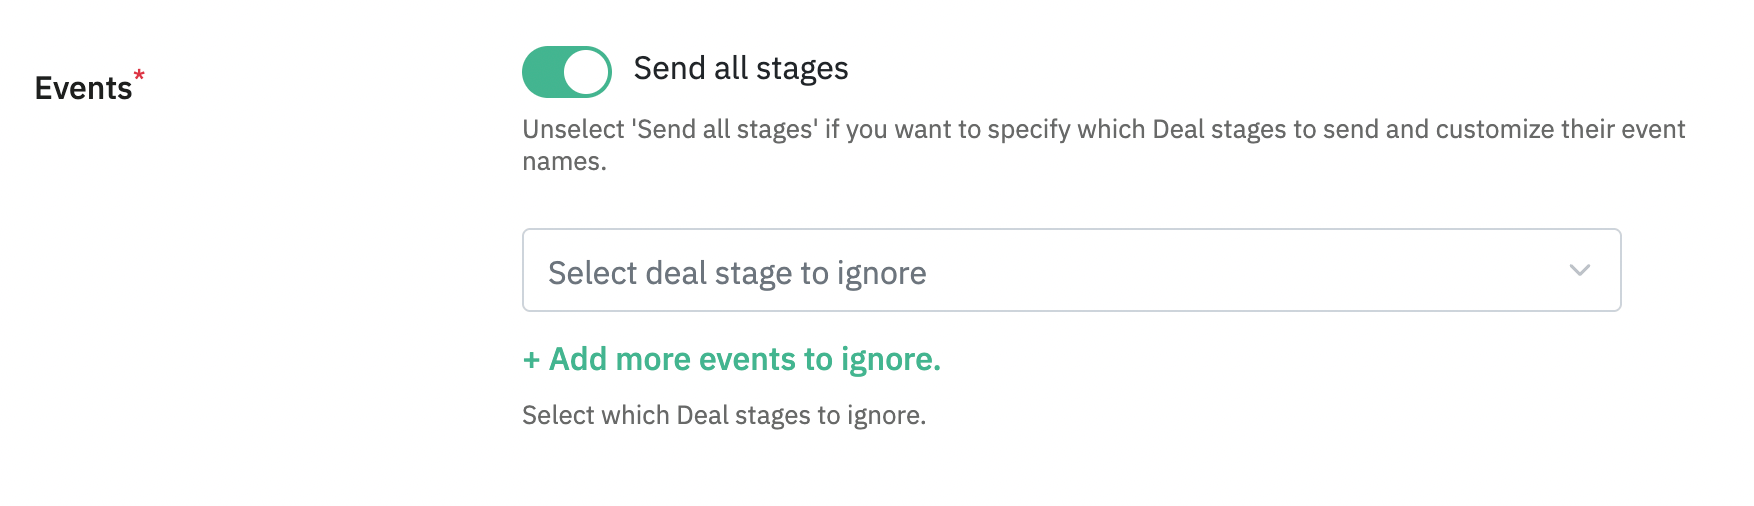
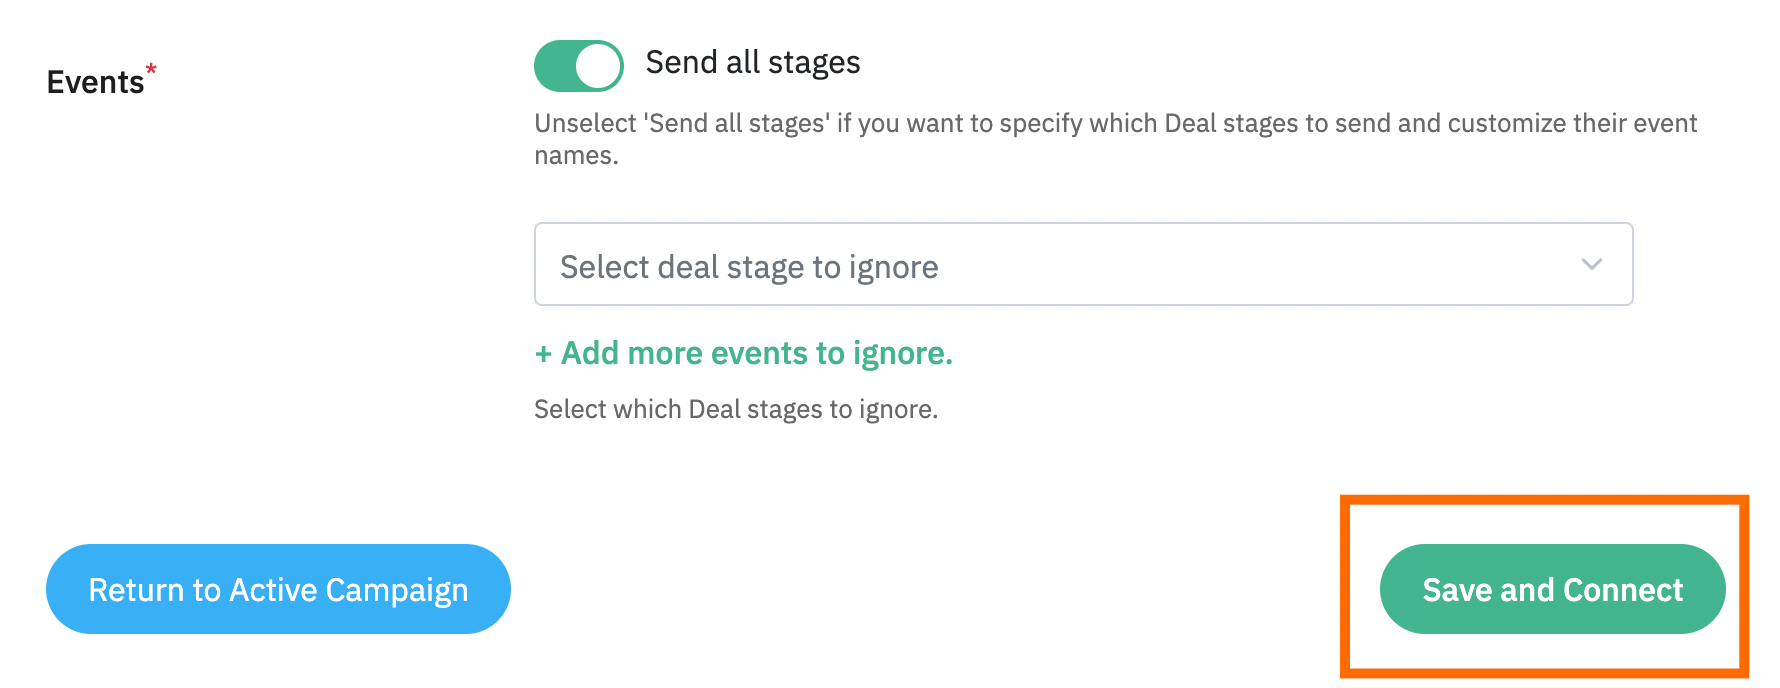
Once done, click Save and Connect. Once you see a success message, your setup is complete, and the application will send conversion events in the background based on your settings.
Settings editing
If you have some changes in the funnel or you want to change the events sent to your CAPI Gateway, server GTM container, Signals Gateway, Meta Custom Audiences, or Google Ads Customer Match List, you can always edit your app configuration.
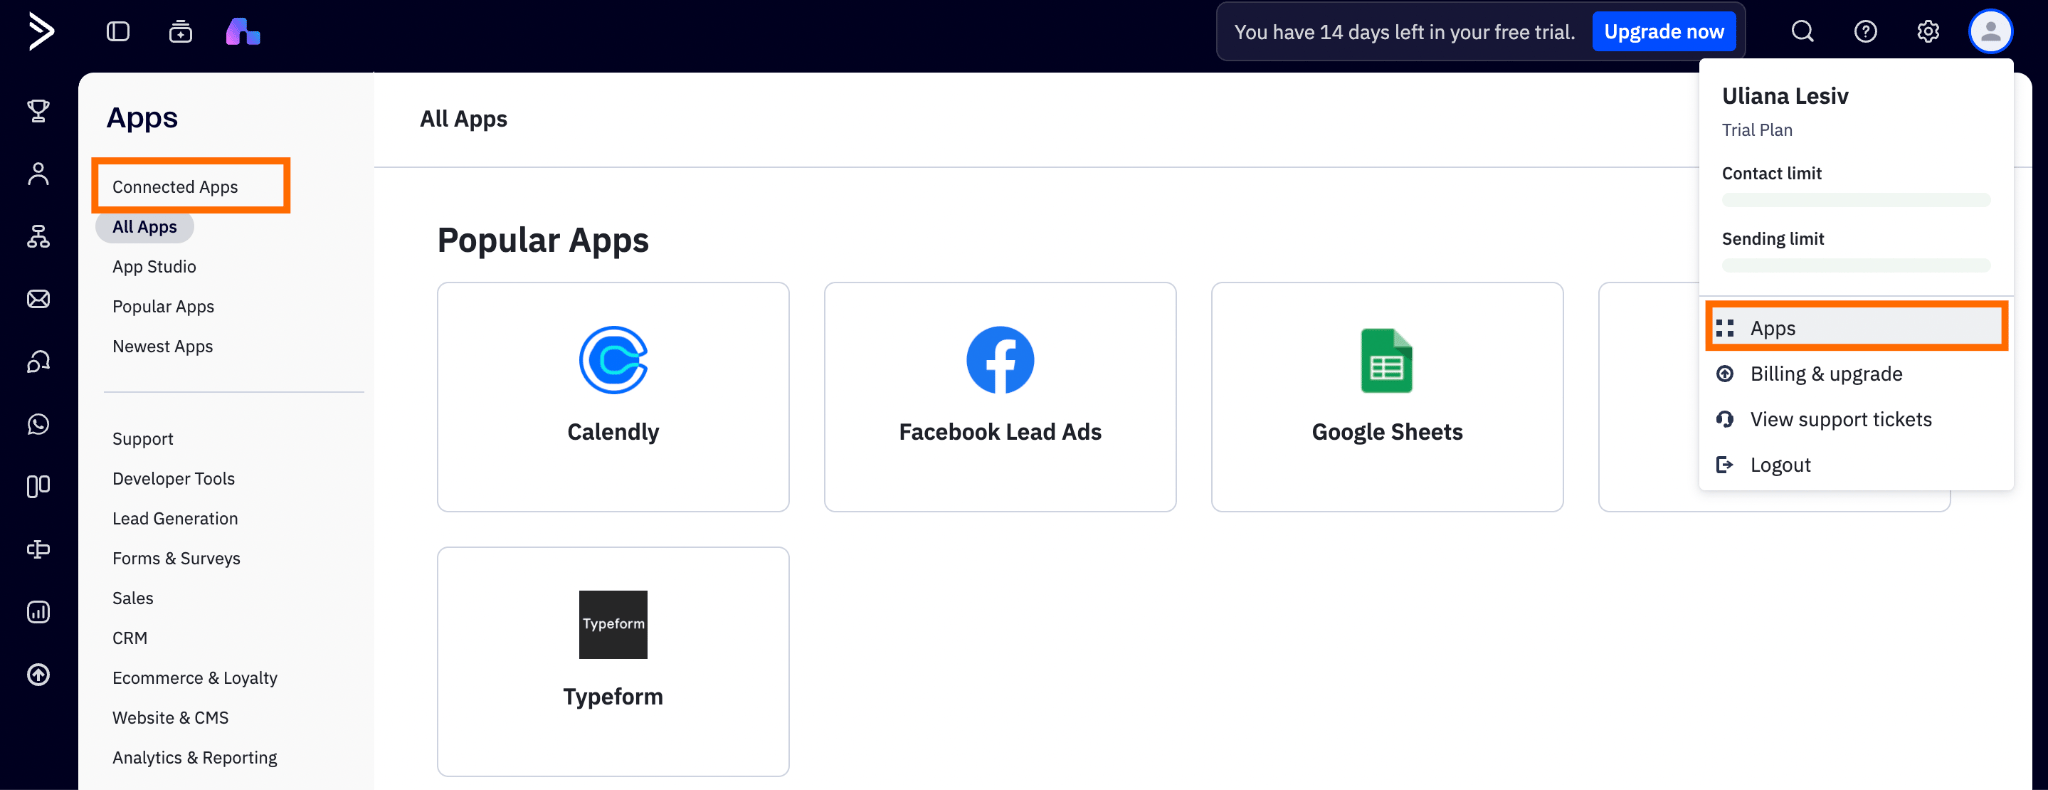
To do it, go to your ActiveCampaign account → click on your profile icon → Apps → Connected Apps → locate the Stape app and edit it as required.
Was this article helpful?
Comments