How to populate Data Store manually
Updated Oct 12, 2026
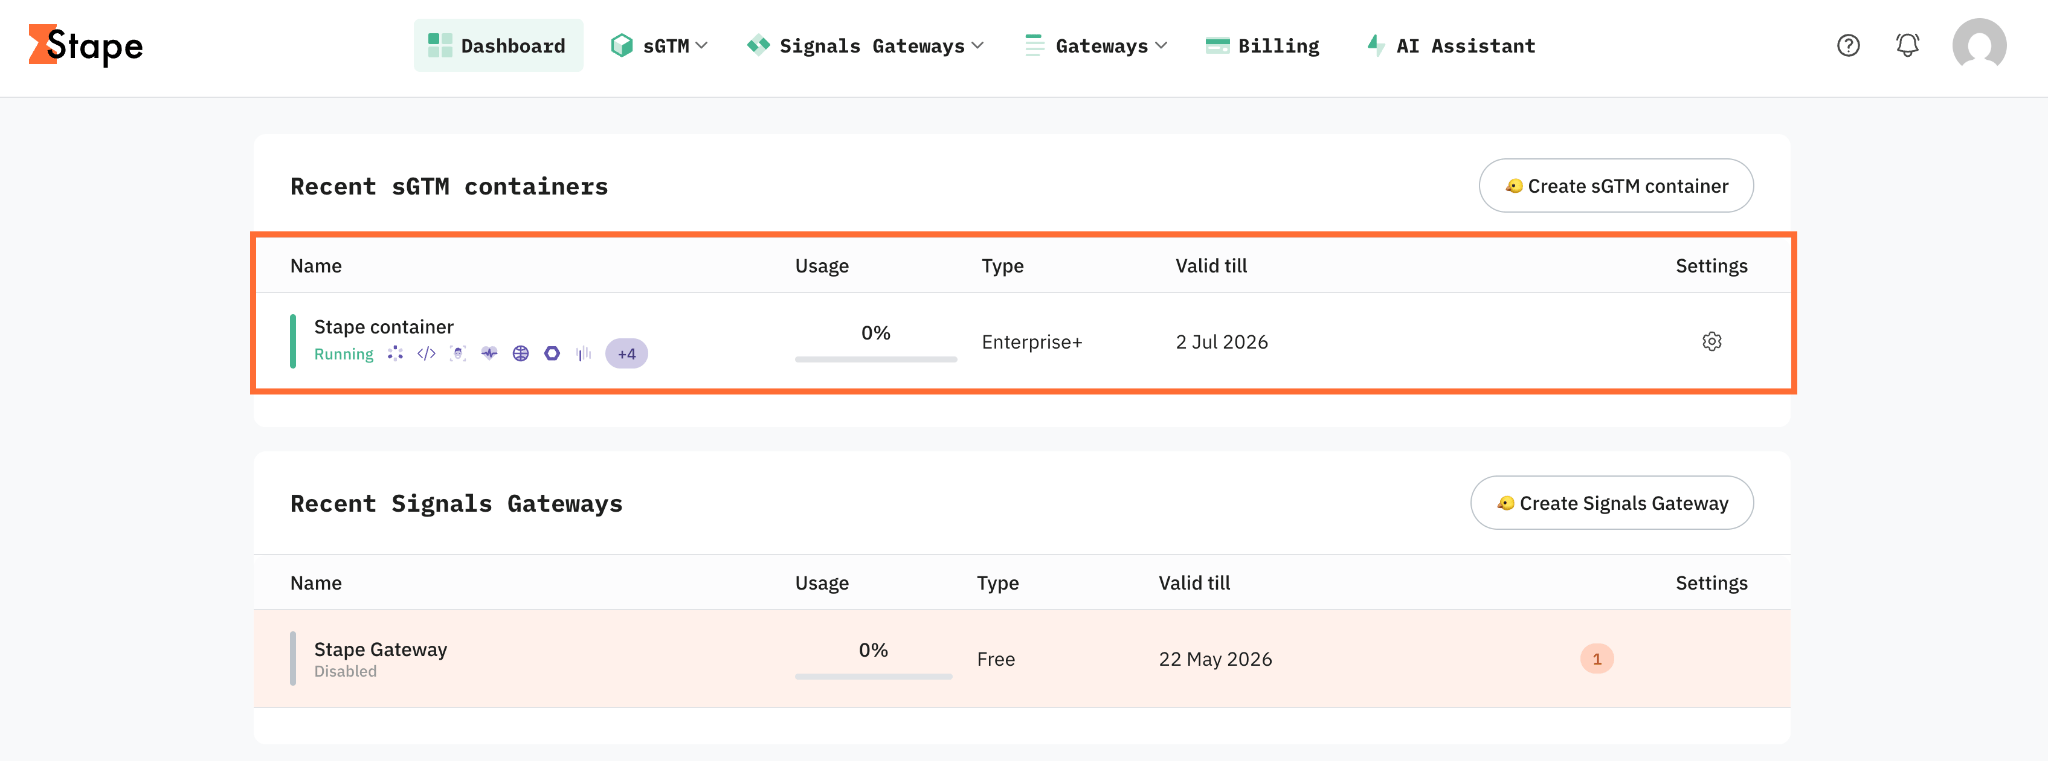
1. Log in to your Stape account and select your sGTM container from the dashboard.
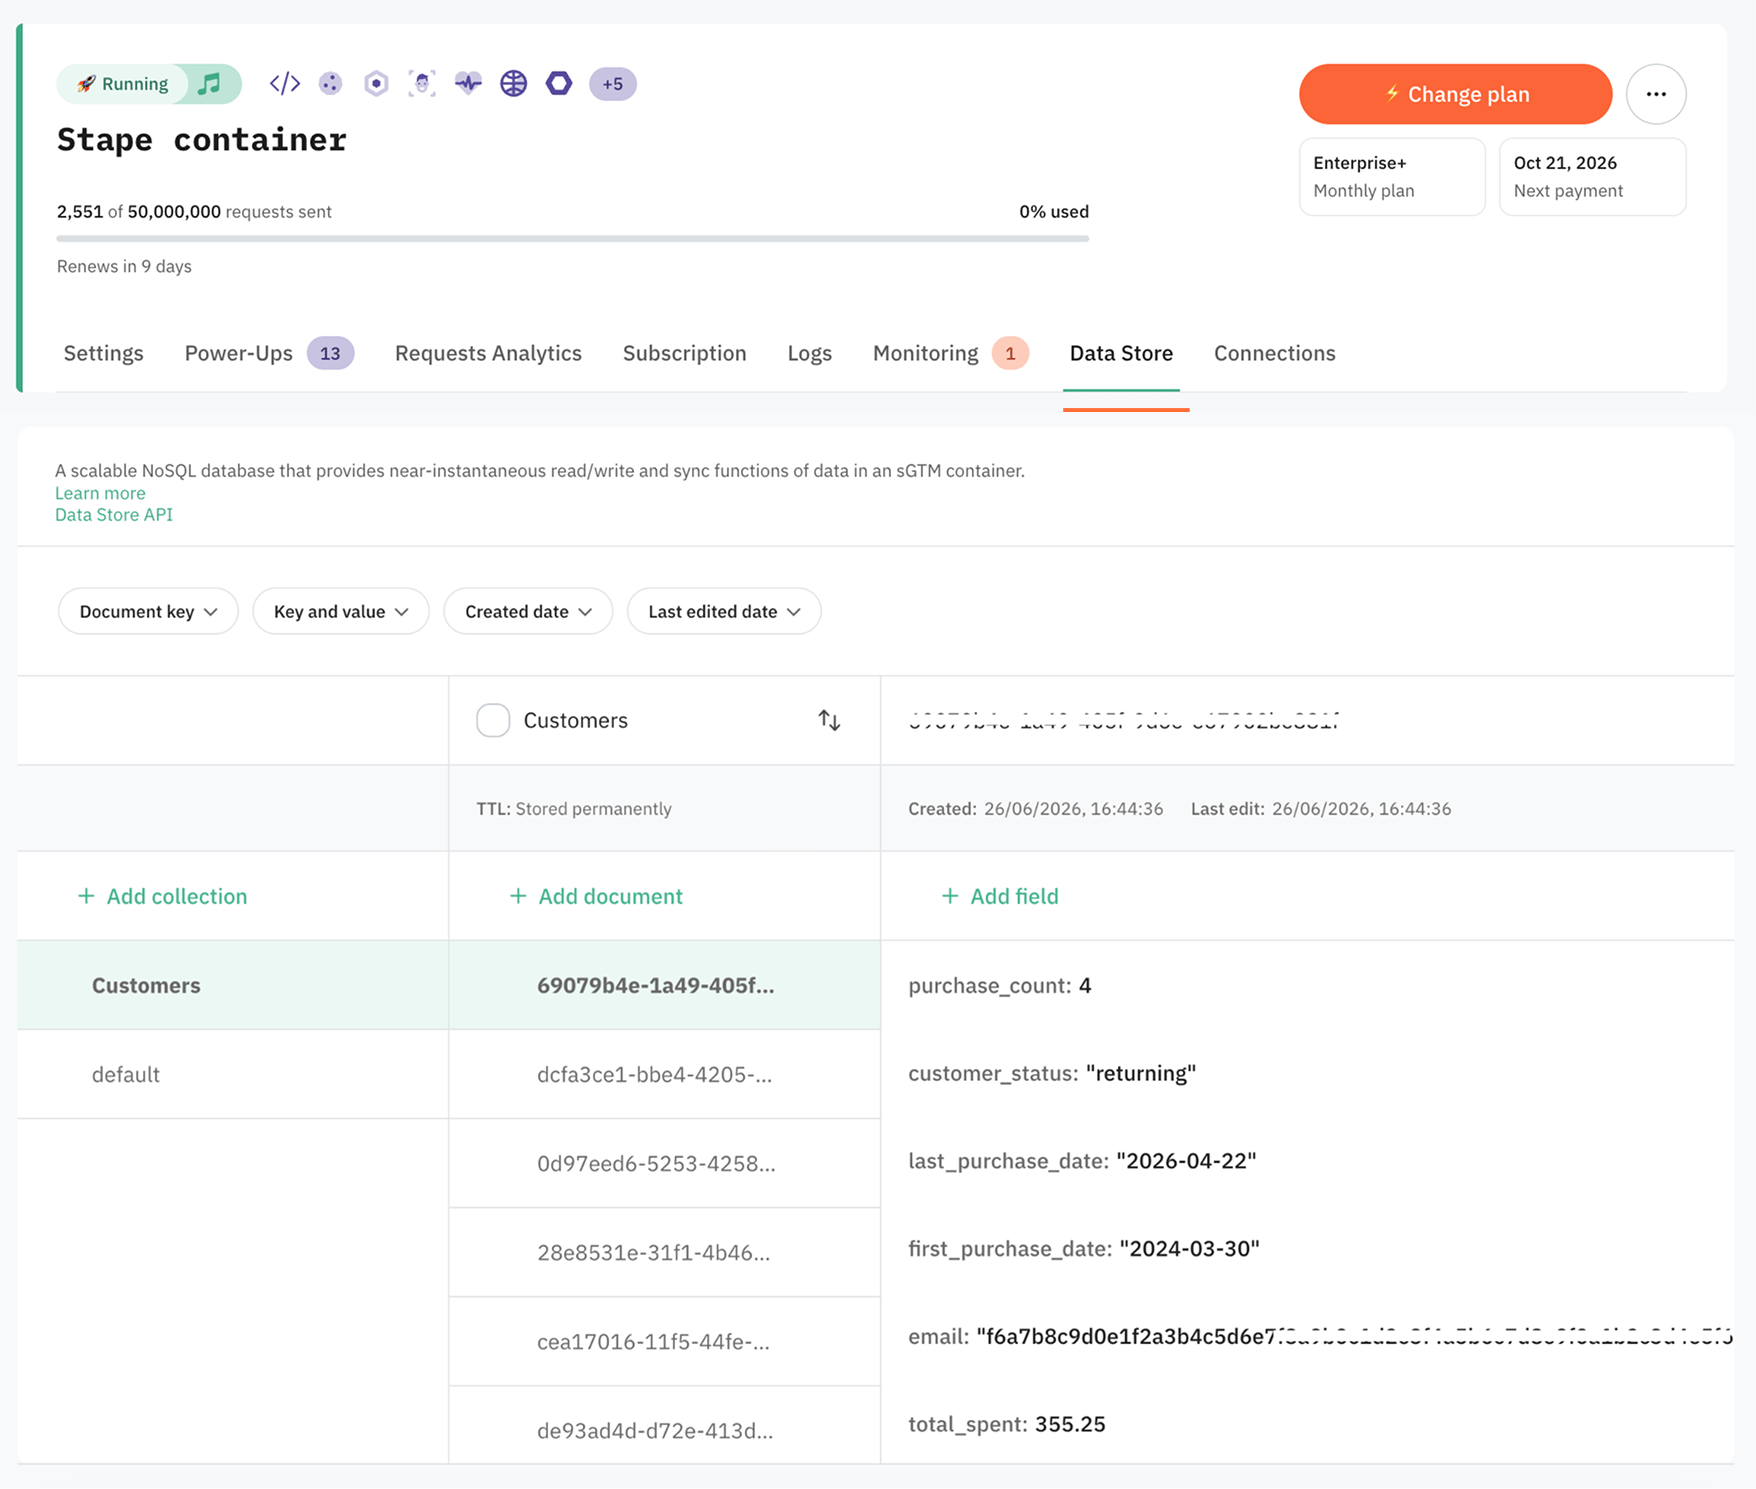
2. Click the Data Store tab.
How to add a collection
You can start a collection manually, or upload a CSV file.
Start manually
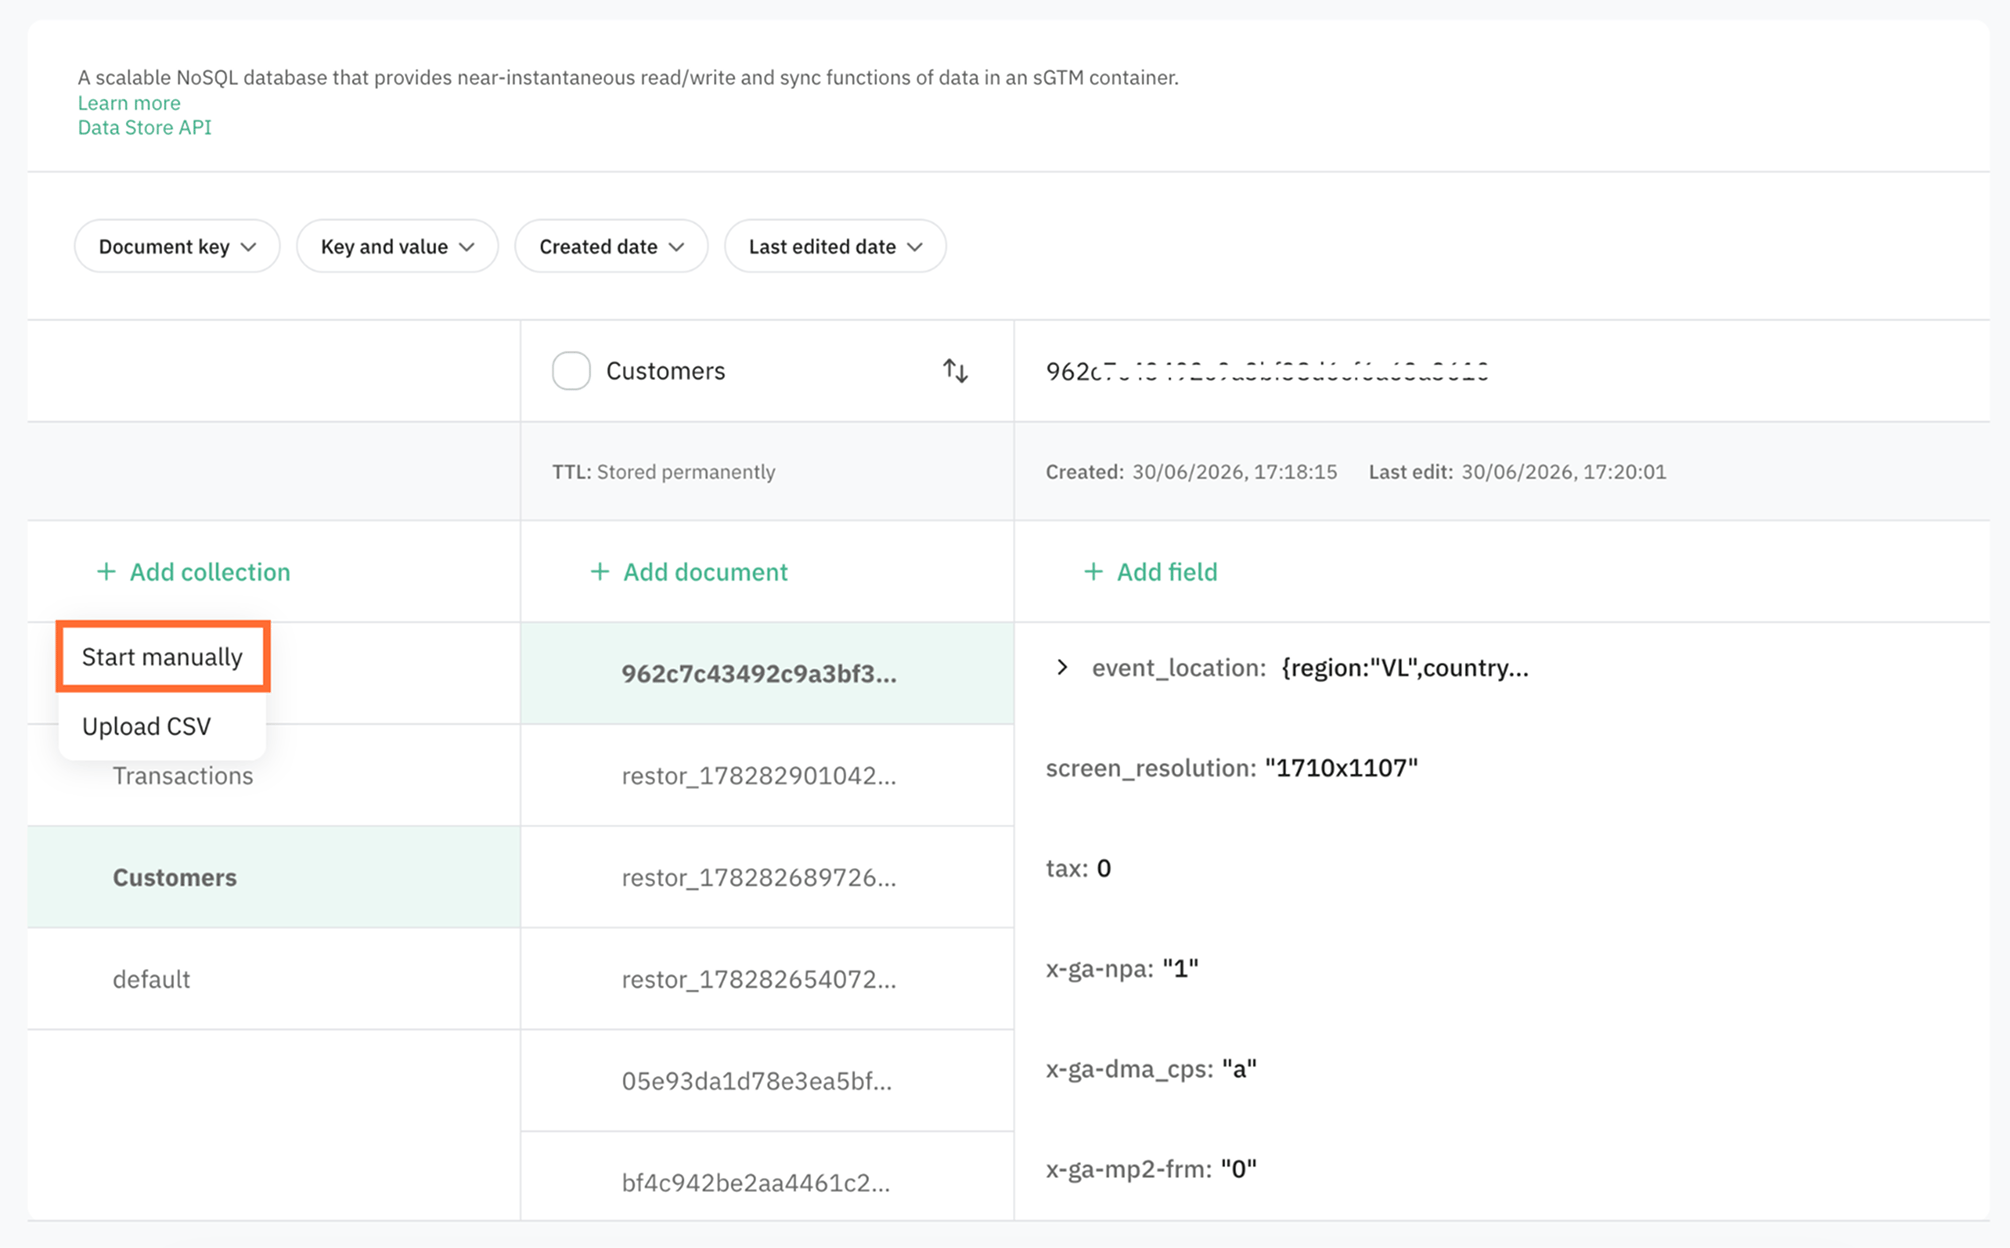
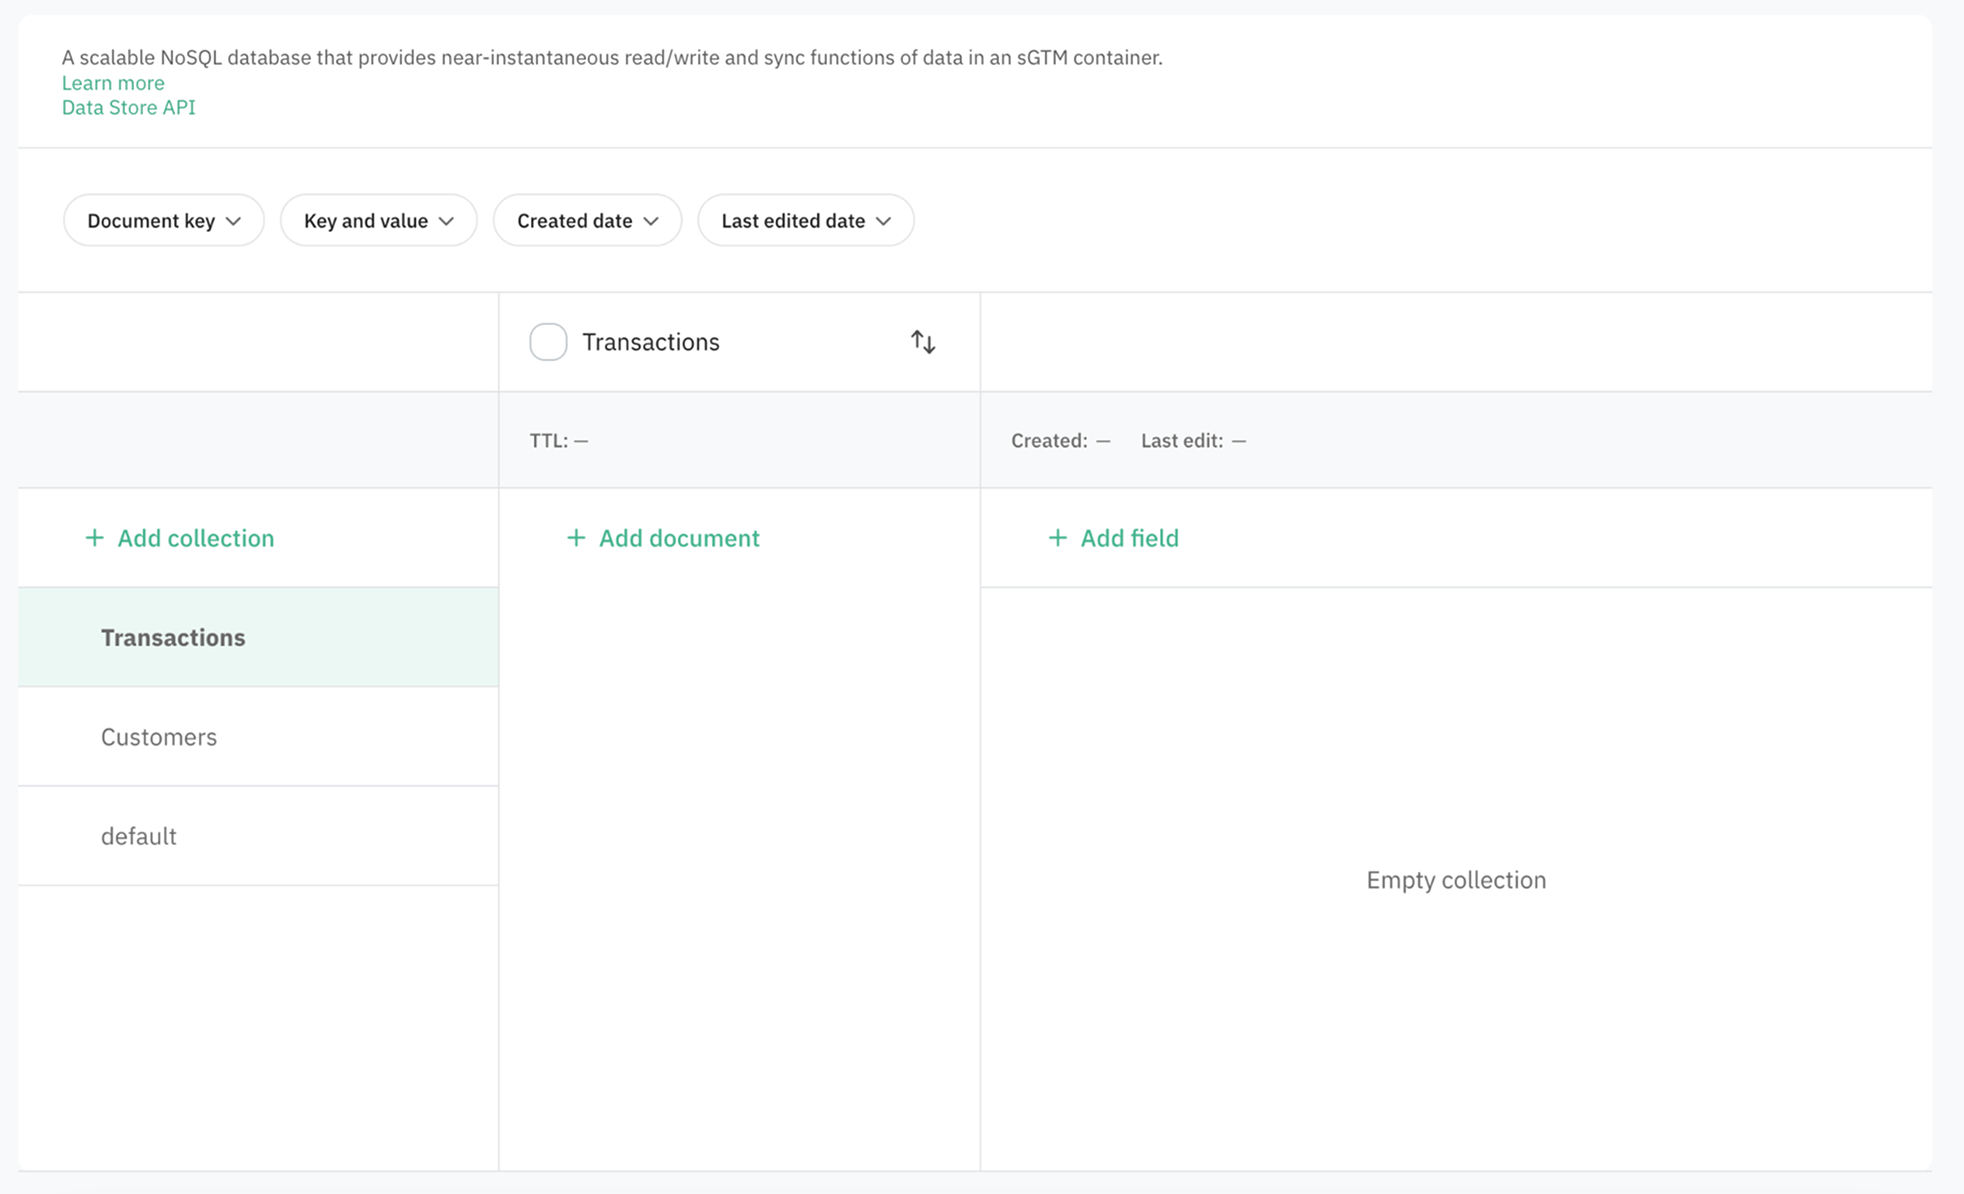
1. Click + Add collection and select Start manually.
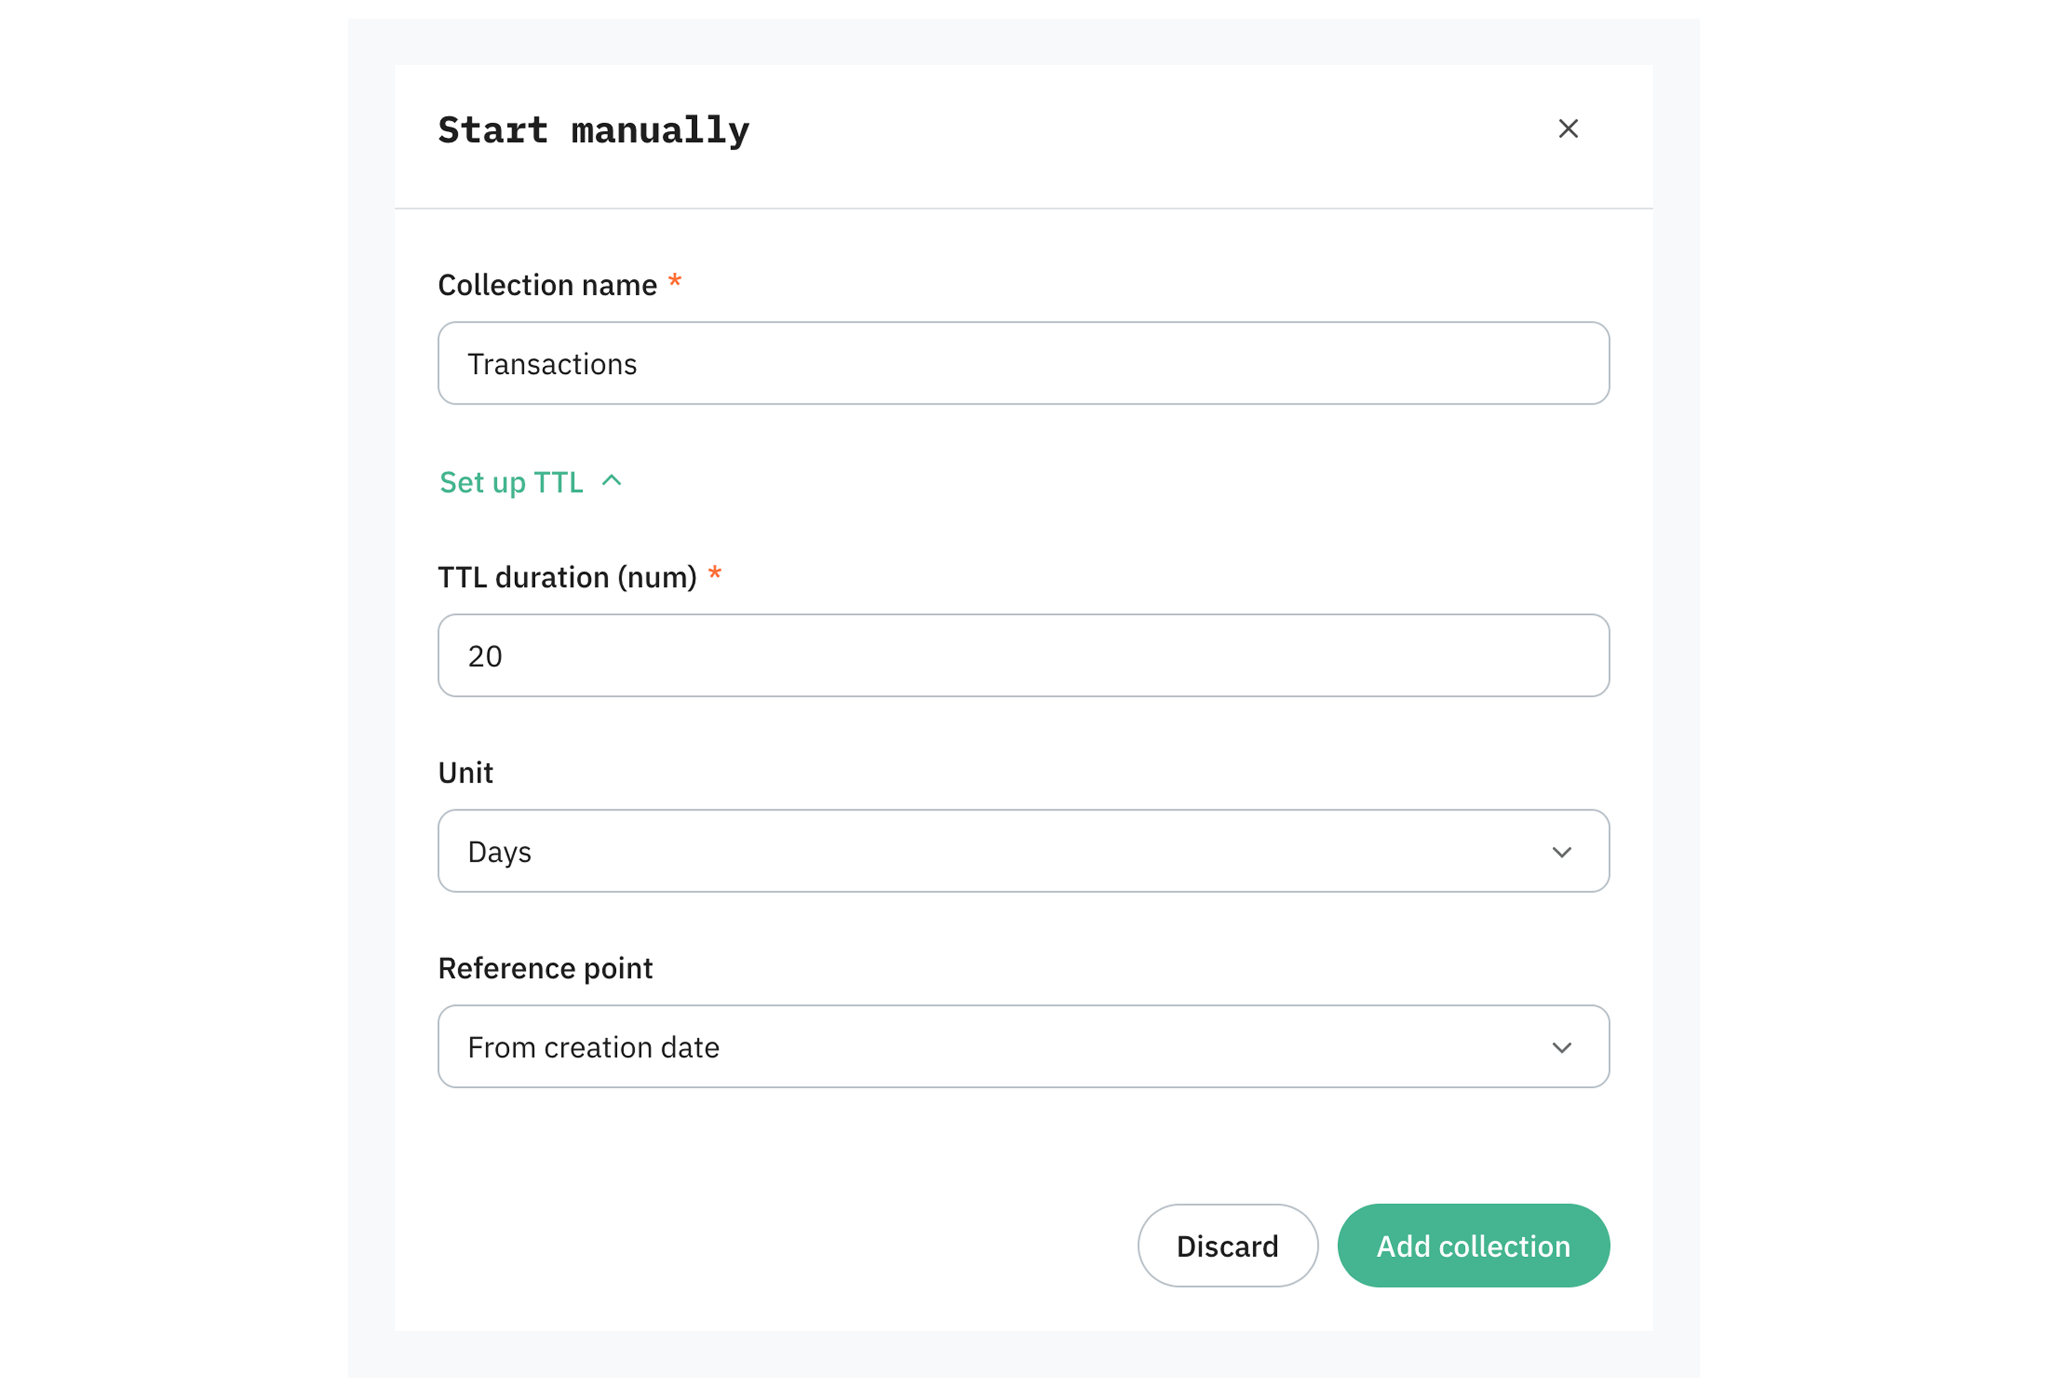
2. In the pop-up enter the Collection name. If you wish to set up the TTL as well, click Set up TTL and enter the following values:
- TTL duration (num) – enter the number of duration.
- Unit – select whether the duration will be measured in hours or days.
- Reference point – define when the countdown starts:
- From creation date – the countdown begins from the exact date/time the document was first created.
- From last edit – the countdown begins from the exact date/time the document was first updated.
3. Click Add collection.
You'll get an empty collection which can be populated with documents.
Tip:
You can always set up the TTL later by clicking the three dots on the collection and selecting Set TTL.
Import CSV
You can import a CSV file where each sheet line becomes a separate document.
Note:
Your CSV file should include either a comma (,) or semicolon (;) as a delimiter.
To import a CSV file:
1. Click + Add collection and select Import CSV.
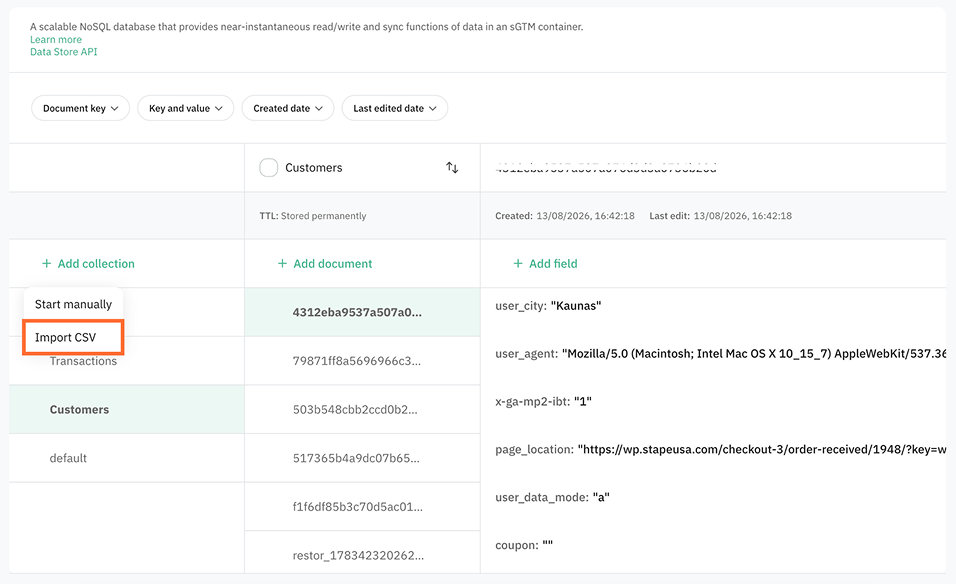
2. In the pop-up, from the Select collection dropdown, select whether to populate an already existing collection, or upload the file as an entirely new one.
3. Enter the Collection name.
4. Import a CSV file from your computer.
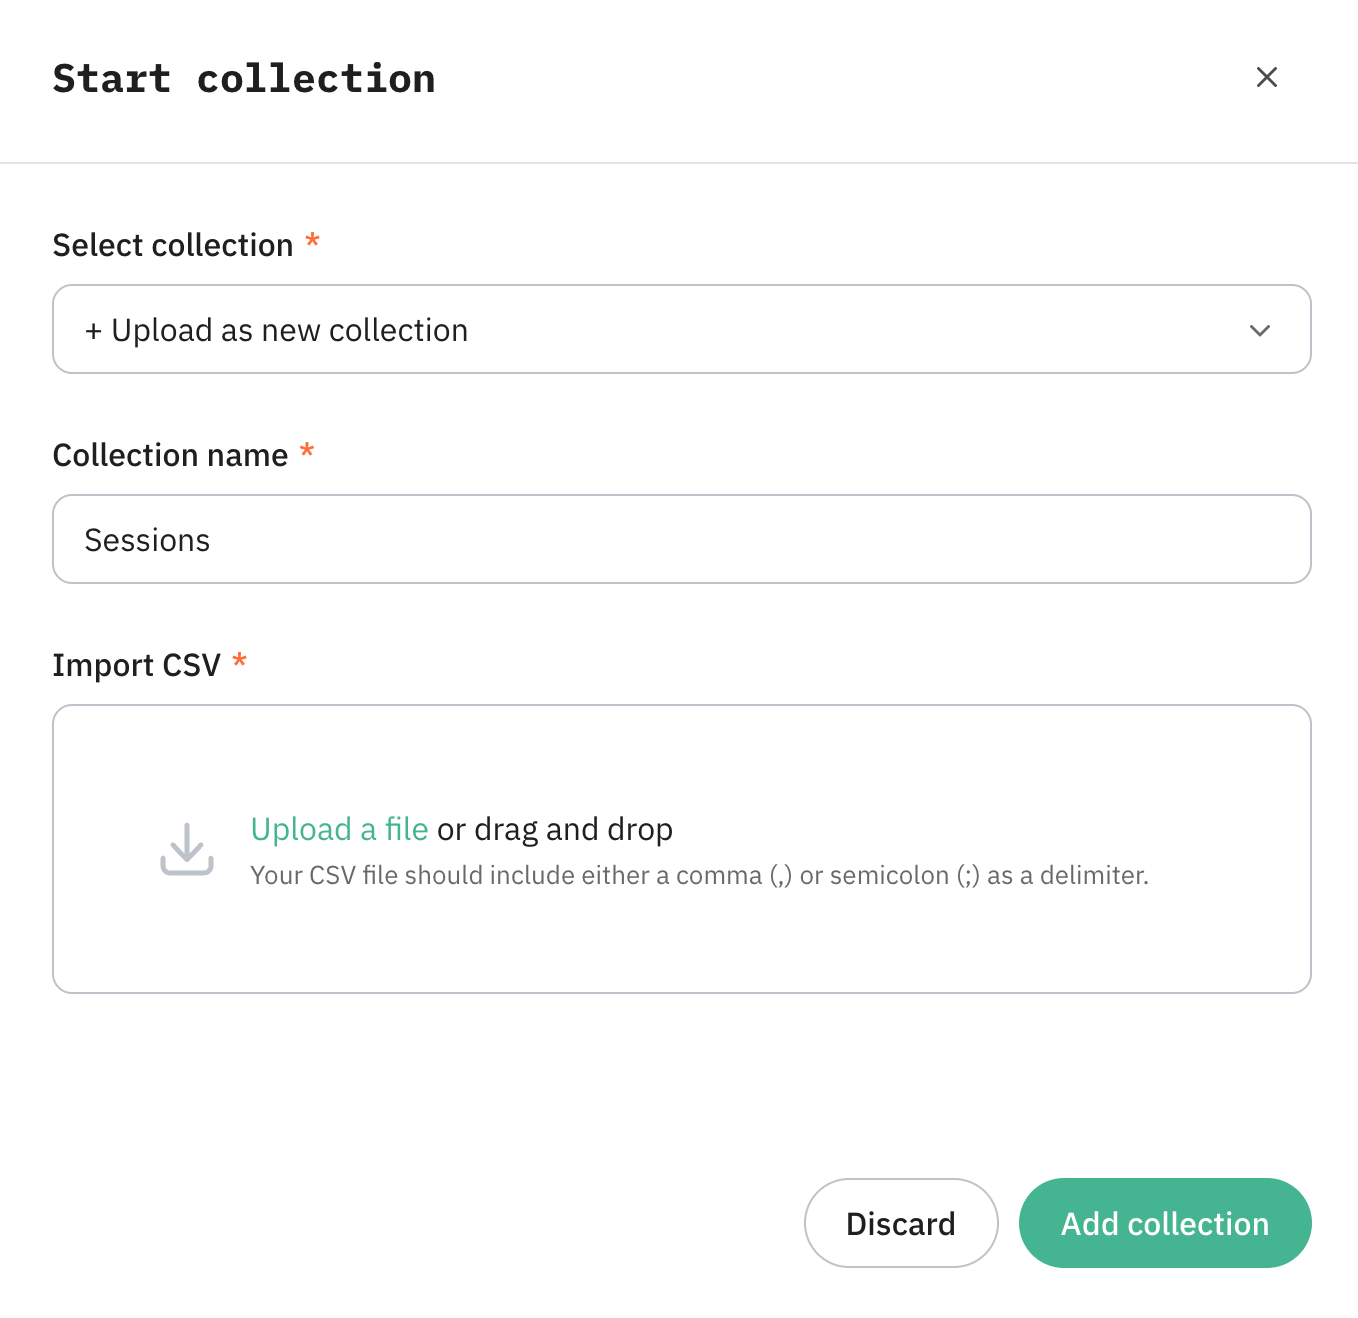
5. After importing the CSV file, you'll be asked to define the CSV delimiter and Select a column for document names. The CSV parser analyzes your file's header row and offers two ways to handle document keys:
- Autogenerated – Data Store automatically assigns a random, unique identifier to each imported row.
- Custom column – you can map a specific column from your CSV file to serve as the document key. In this case, the values in that column become the unique identifiers for the corresponding documents.
Important:
- If you select a custom CSV column for your document keys, ensure the values in that column are unique. If multiple rows share the same key value, they will overwrite each other during the import process.
- If you have several columns with the same name, only the last one will be used.
6. Click Add collection.
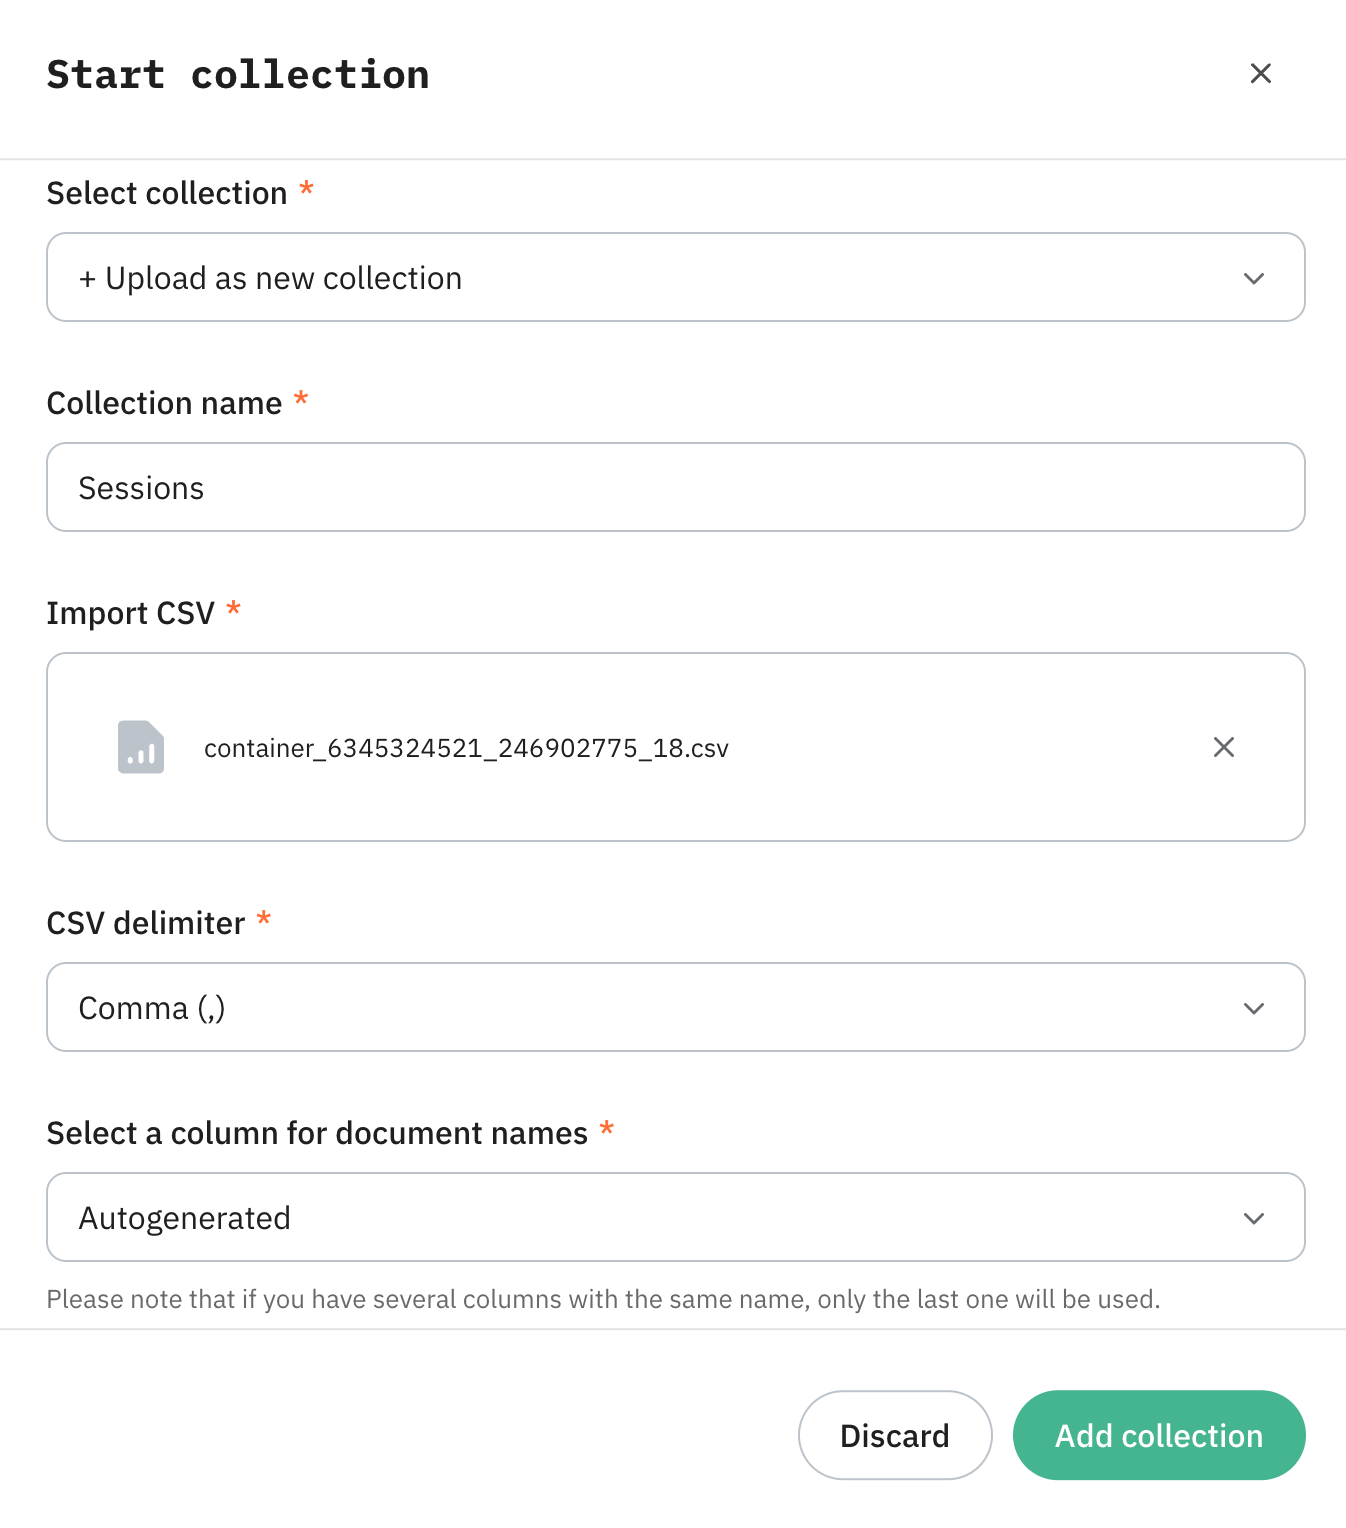
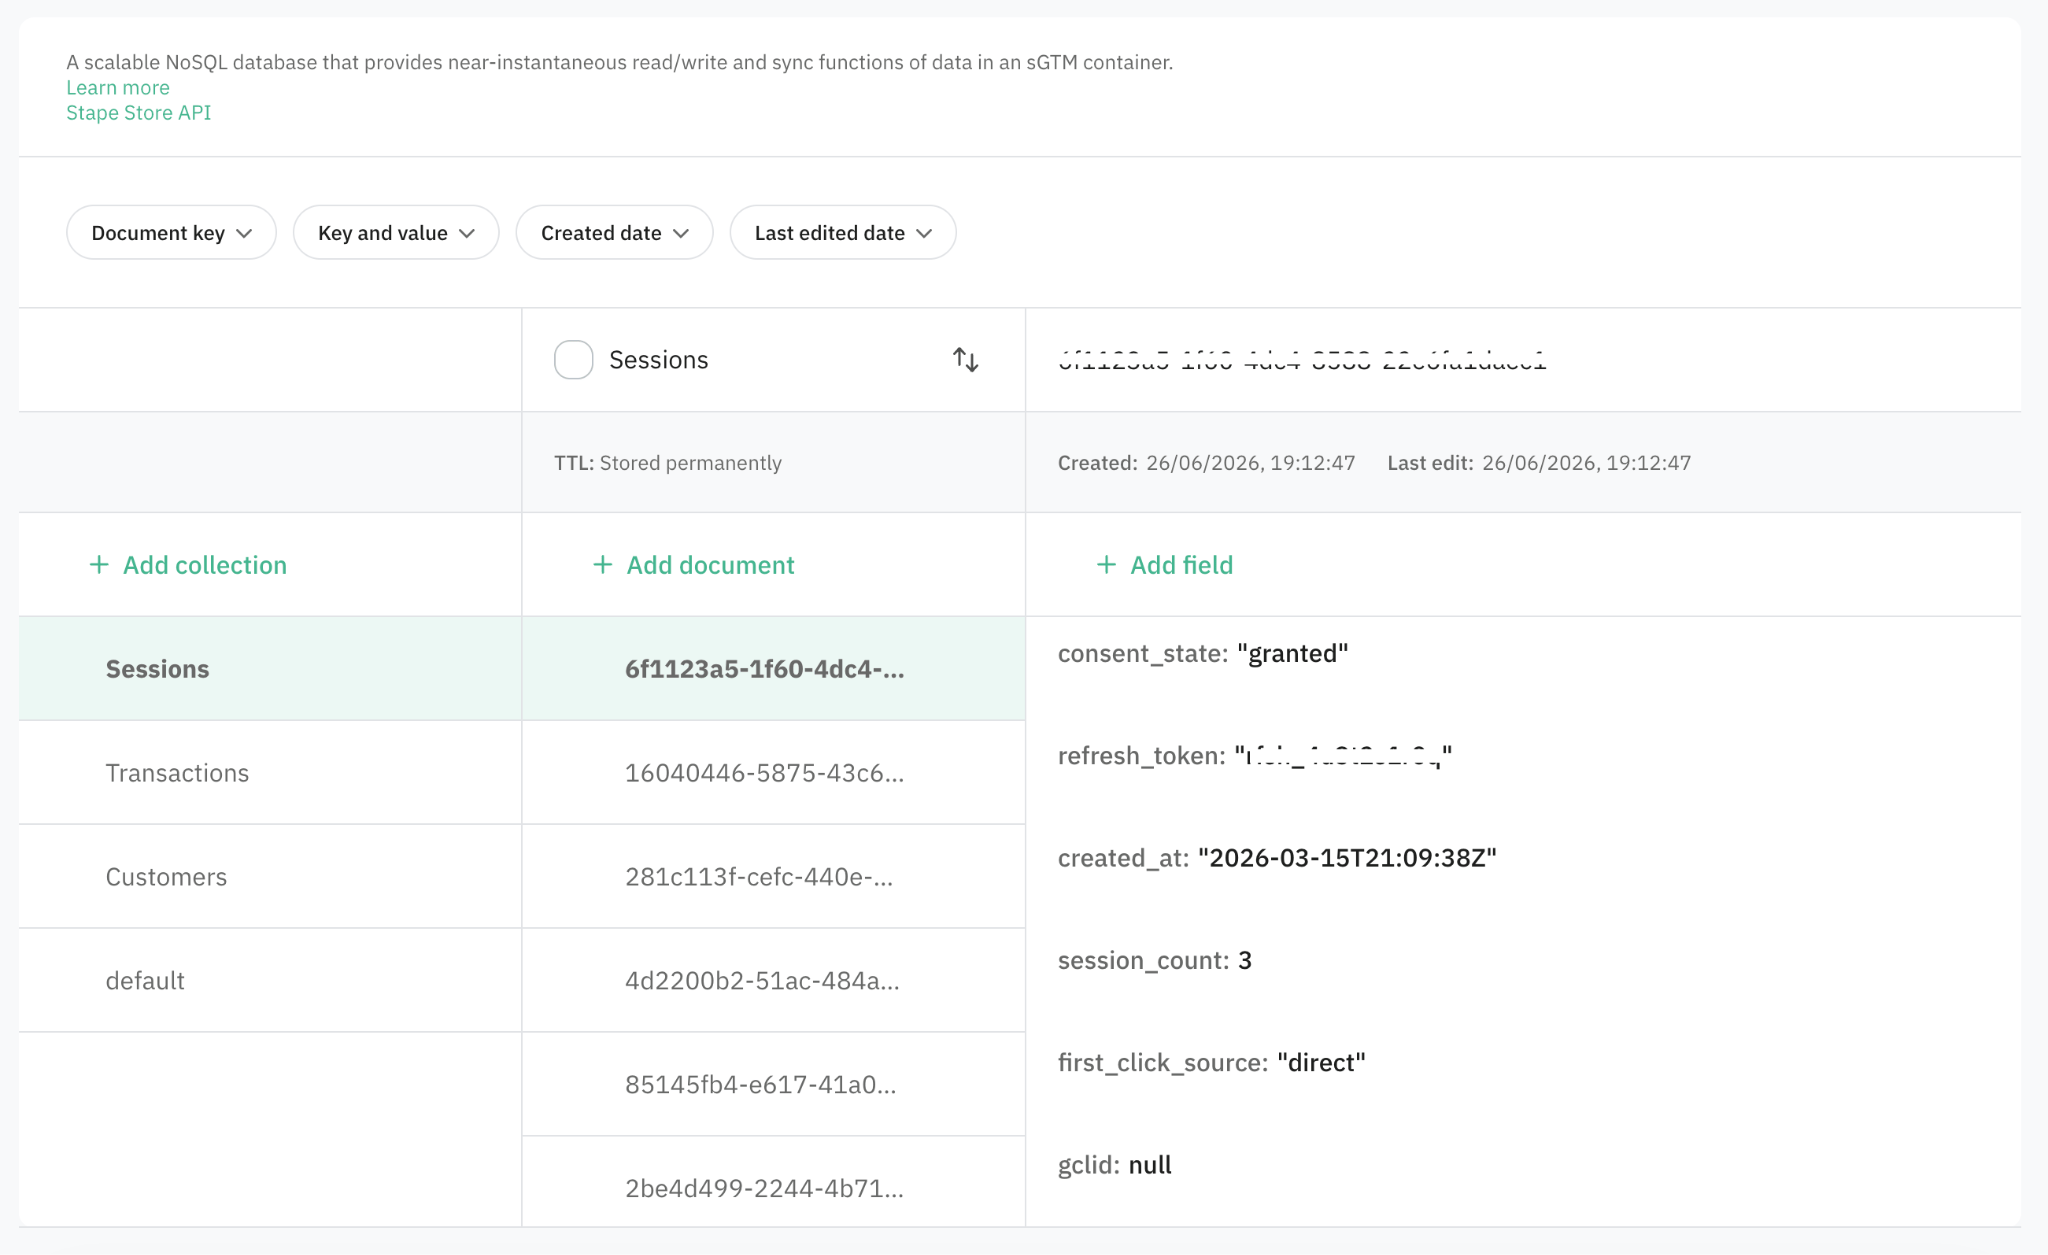
You'll get a fully populated collection.
Tip:
You can always upload CSV to the existing collection by clicking the three dots on the collection and selecting Import CSV.
How to add a document
1. Click on the desired collection and click + Add document.
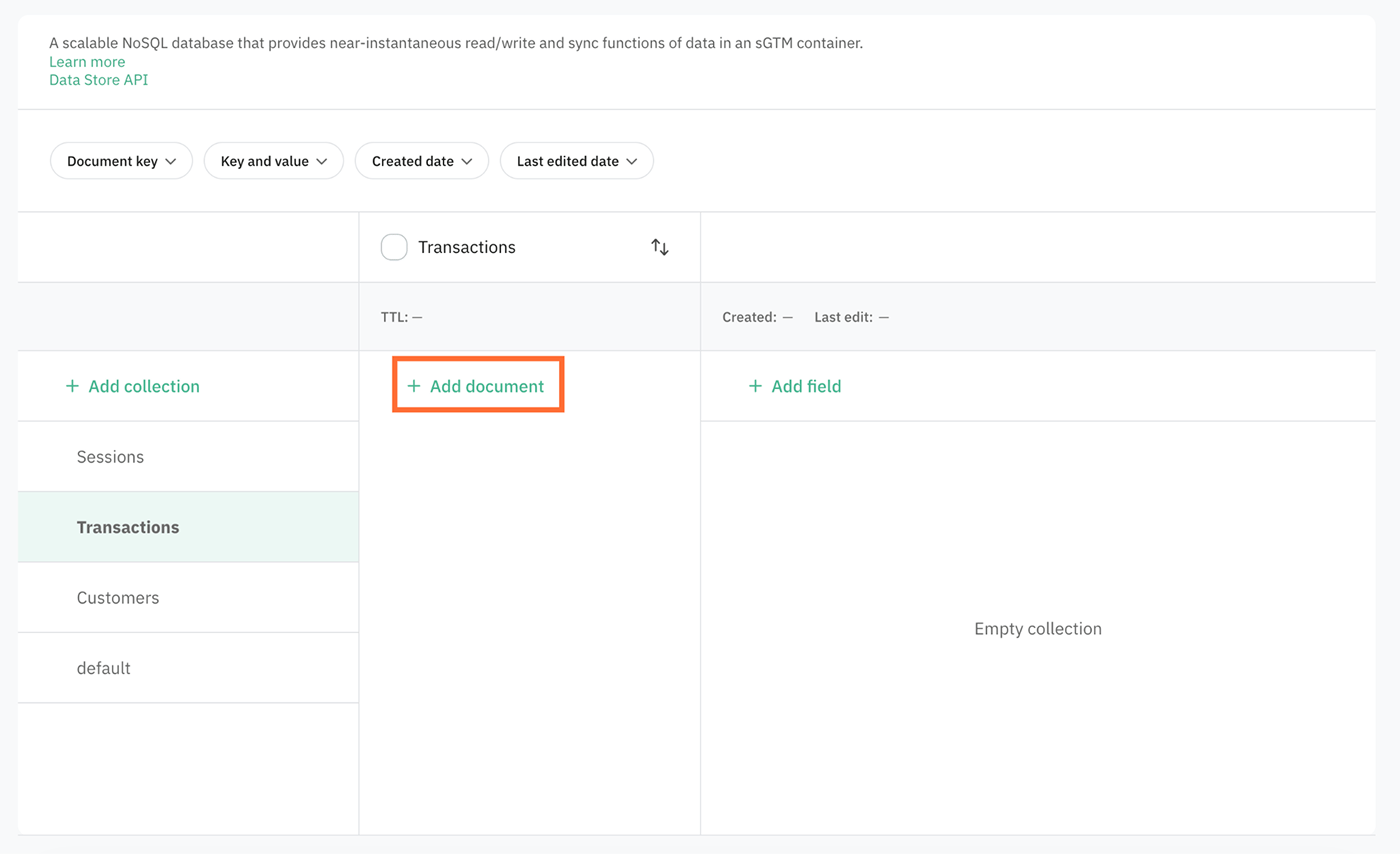
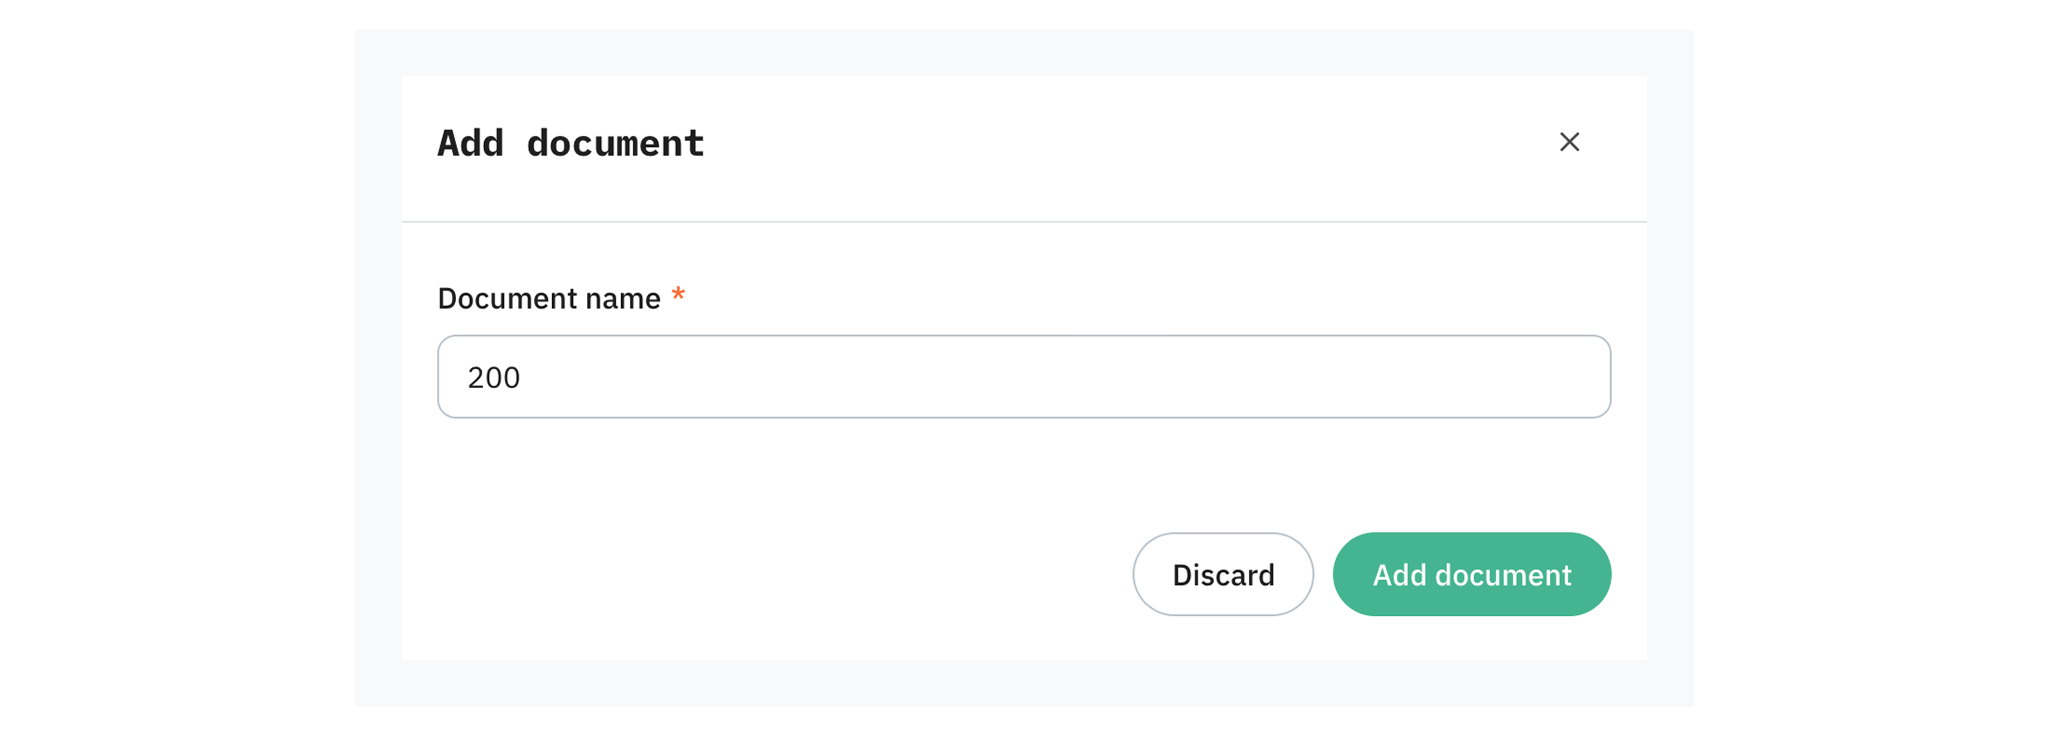
2. In the pop-up enter Document name. Here you're defining a document key.
3. Click Add document.
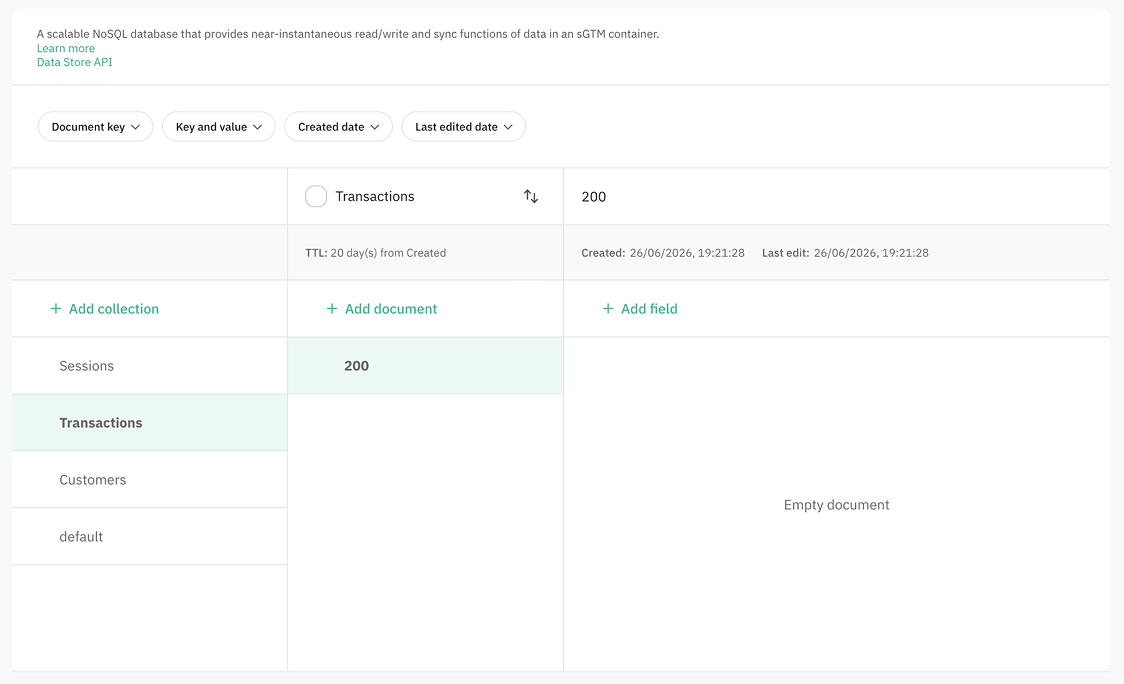
You'll get an empty document inside of the collection.
How to add a field
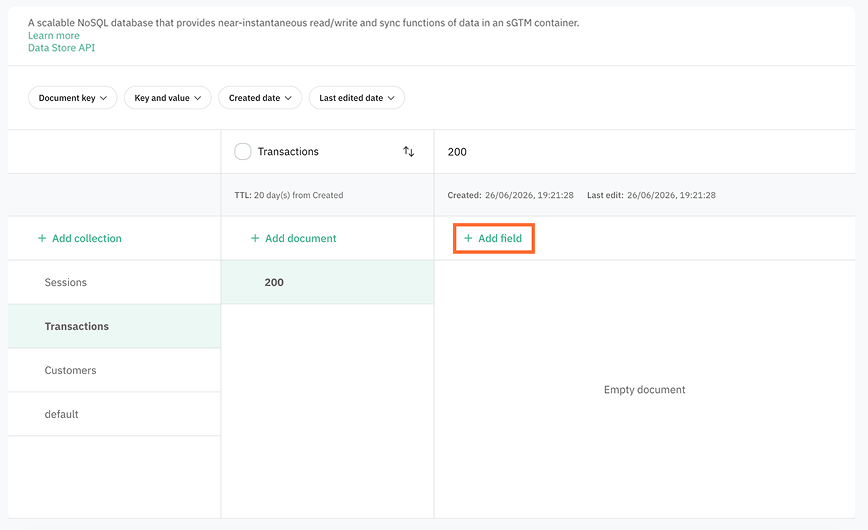
1. Click on the desired document and click + Add field.
2. Enter the field Key and Value, and select Type.
3. Click Add.
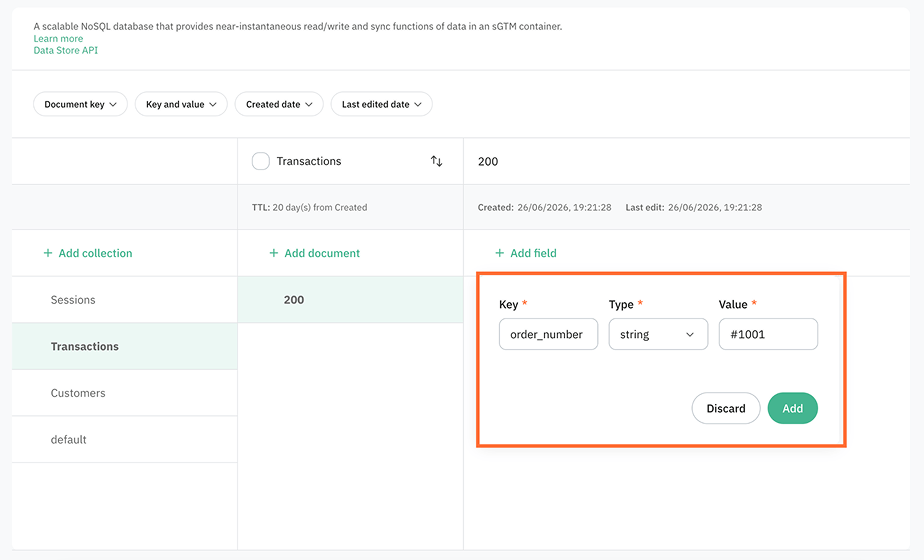
You'll get a new field inside of a document.
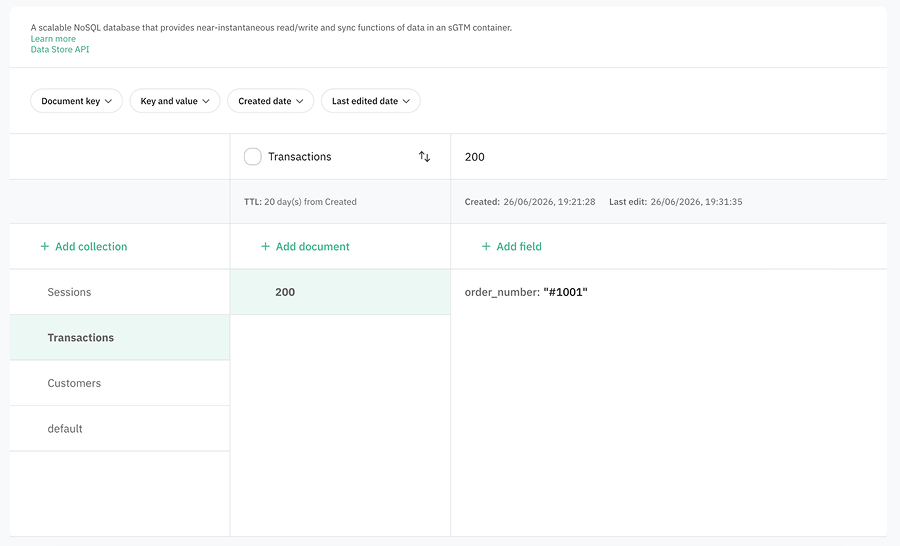
Note:
You can't edit the field's key. You can edit only the type and value.
How to export a collection
You can export selected fields from a collection to a CSV file for analysis in a third-party tool (for example, Google Sheets or Excel). Stape prepares the file and emails you a download link. You can export up to 50 different fields (document keys).
- 1.Hover over the collection name, click on the three dots, and select Export CSV.
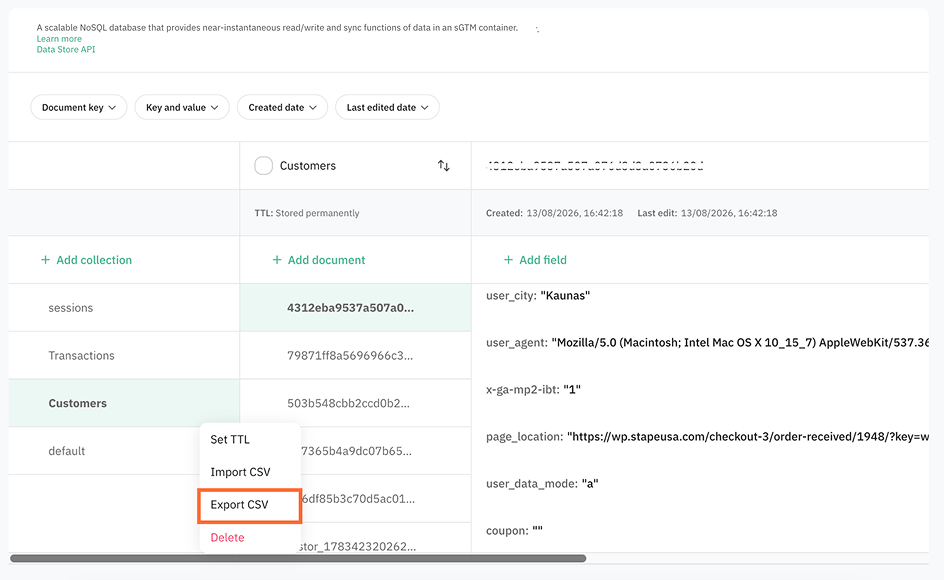
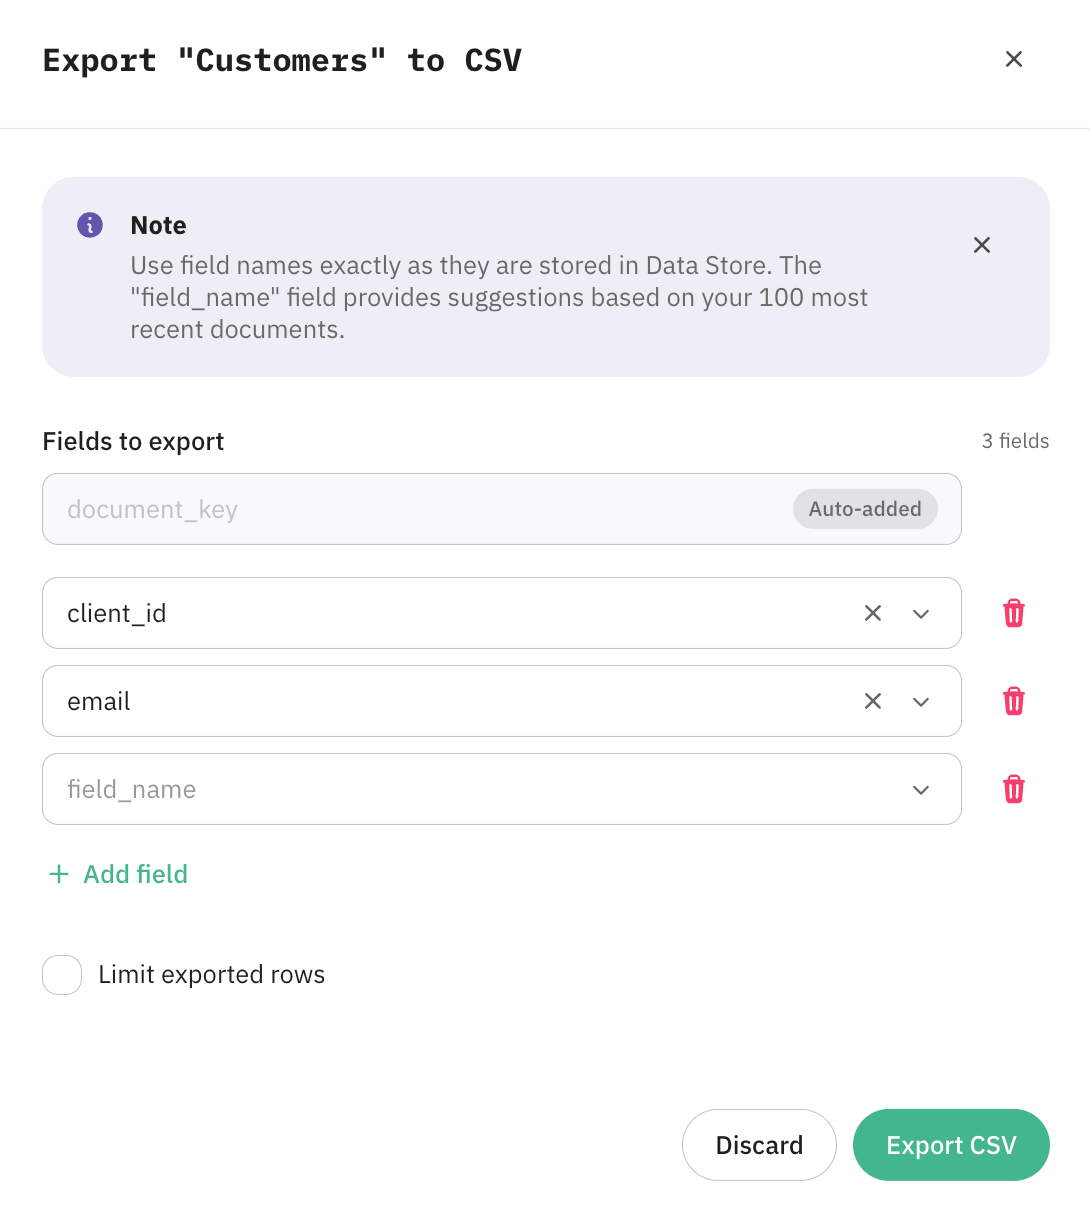
2. In the pop-up, choose which fields to export. Enter the field names exactly as they are stored in Data Store. Field names are case-sensitive. As you type, the field suggests names based on your 100 most recent documents. If the field you need isn’t in the list of suggestions, but you’re sure it exists, you can specify it.
3. Optionally, check Limit exported rows and enter the maximum number of rows to include. If you leave it unchecked, the export includes all documents in the collection.
4. Click Export CSV.
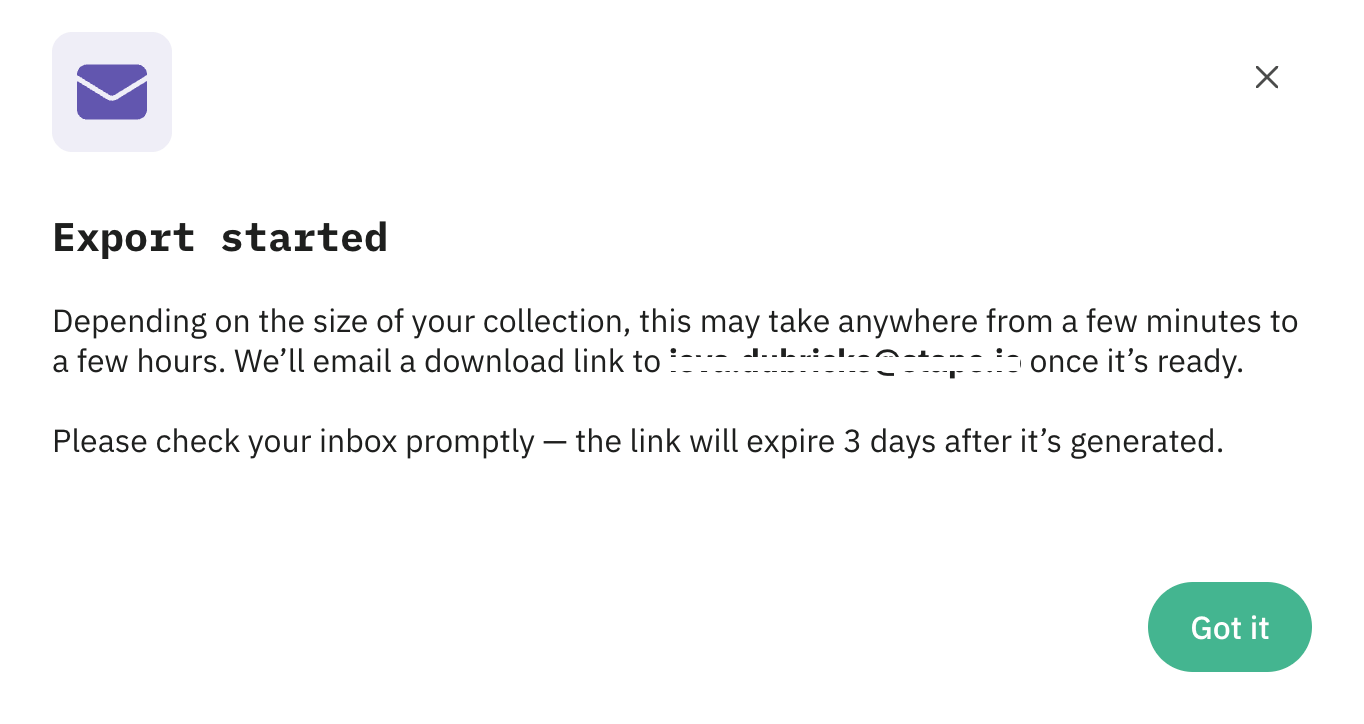
5. You’ll see a message that the export has started. Stape prepares the CSV in the background and emails a download link to your account email. The download link is valid for 72 hours. After that, the file is removed and you’ll need to run the export again.
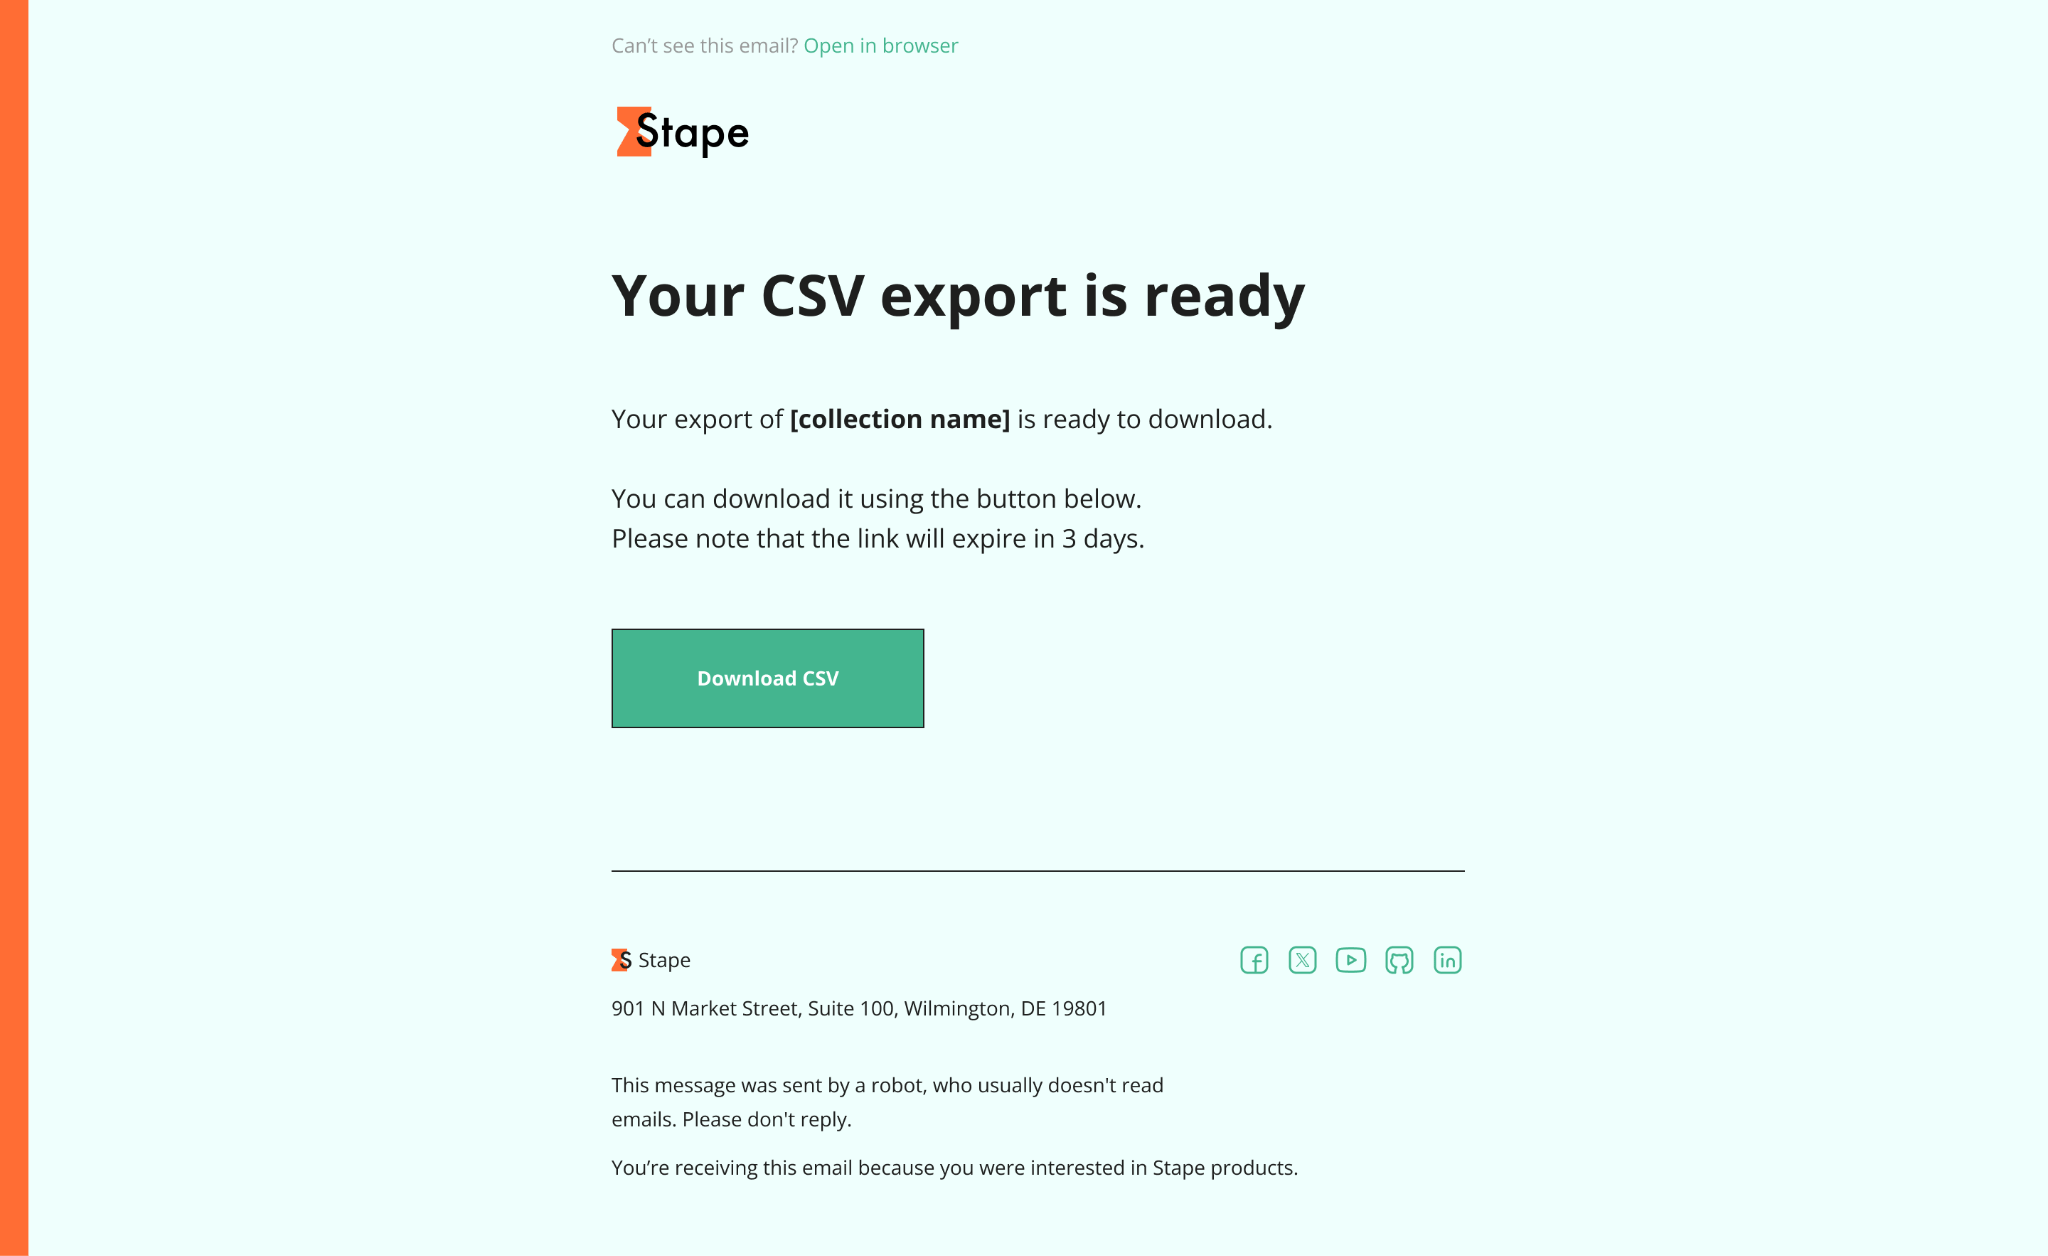
6. If the export succeeds, you’ll get an email with the download link. If it fails, you’ll get an email that the export couldn't be completed.
7. Click Download CSV.
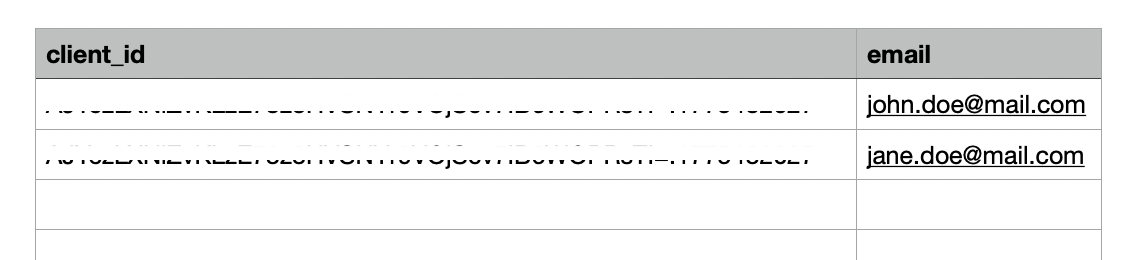
8. You’ll get your list of fields.
Notes:
- If a field value is a nested JSON object or array, it’s exported as a string.
- You can start only one export per collection at a time. You also can’t delete the collection until the export finishes.
- Missing field in a document is exported as an empty cell.
How to delete a collection/document/field
Warning:
Once you delete a record, you won't be able to recover it.
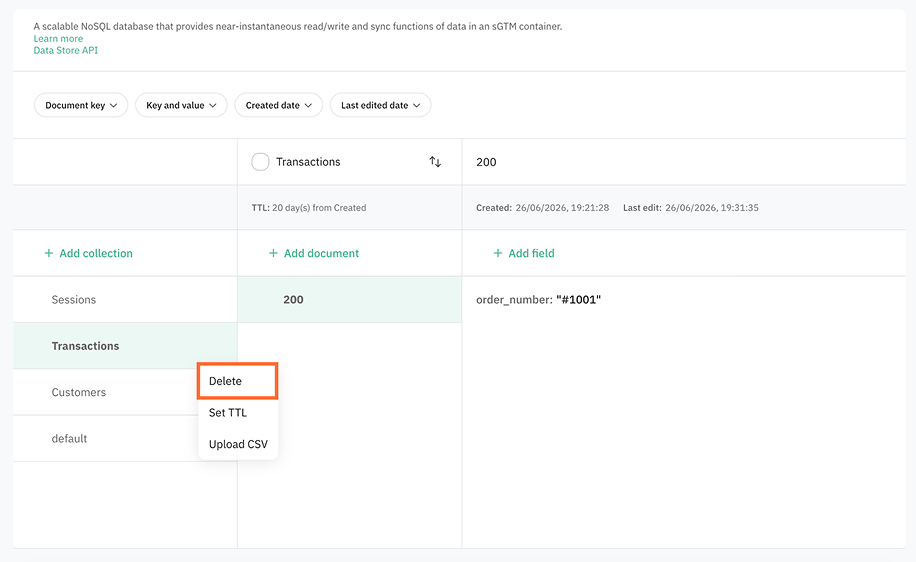
To delete a collection:
1. Hover over the collection name, click on the three dots, and select Delete.
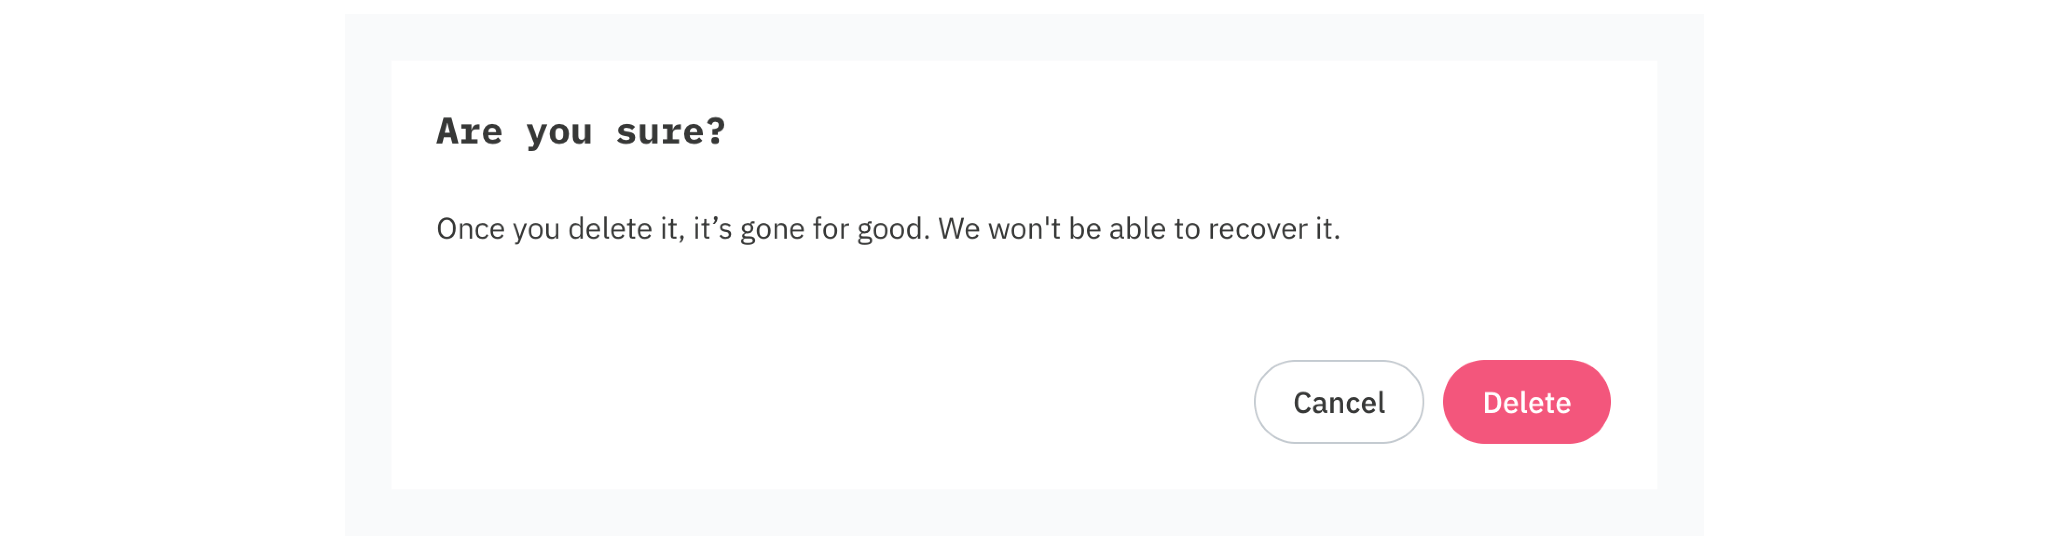
2. Confirm in the pop-up.
To delete a document:
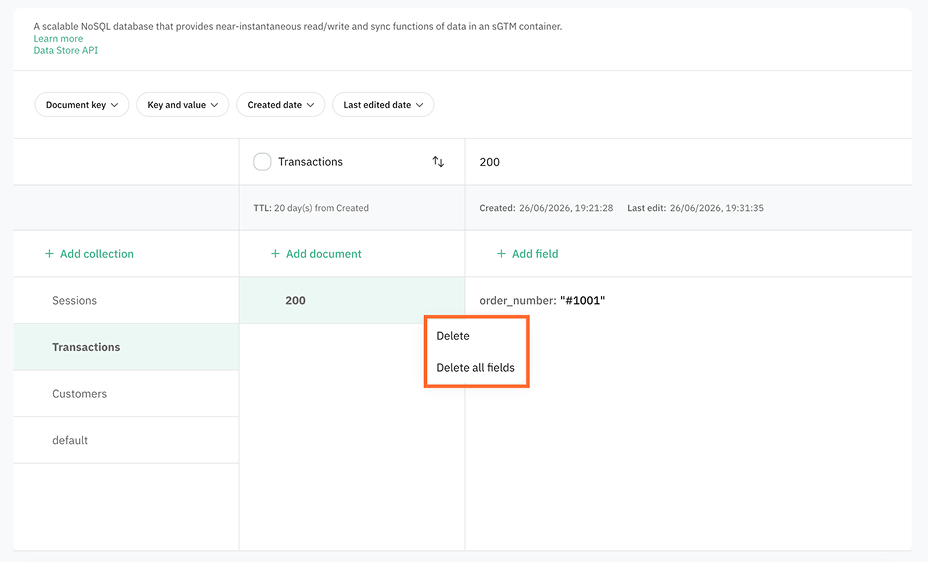
1. Hover over the document name, click on the three dots, and select Delete or Delete all fields. Delete deletes the entire document, and Delete all fields empties the document.
2. Confirm in the pop-up.
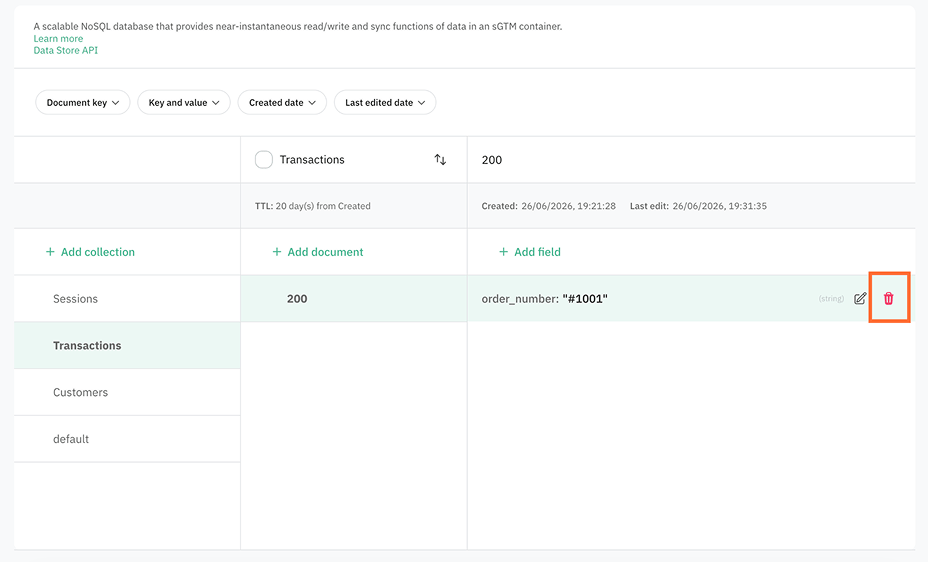
To delete a field hover over the field name, click on the three dots, and click on the trash icon. The field is deleted immediately.
Was this article helpful?
🍽 Table of content:
Comments